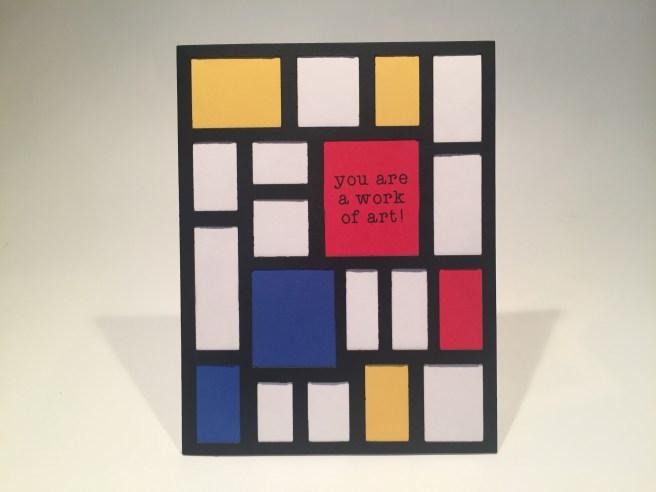
Hello Folks!! Scott here with my 10 Cards 1 Kit post featuring the My Monthly Hero December 2019 Kit. Sorry this is a little tardy this month… holidays, you know!  Hero Arts is celebrating the diversity of our beloved (yet stressed) planet Earth this month with this lovely 6″ x 8″ stamp set with a stunning (and large) “Earth Goddess” stamp. I think this must be the largest image stamp I’ve seen in a MMH kit in the couple years I’ve been a subscriber. Really beautiful! She is complimented with an earth, a tree, a pair of fish, a peace sign and a few sentiments sized to fit in the crook of her arm. There’s also a pair of hands, some birds, flowers and clouds to round things out.
We do get 18 coordinating frame cuts to die-cut all the images, a new Earth Palette Reactive Ink pad (LOVE IT!) and a pack of Green Biodegradable Glitter. VERY interesting! I’m tempted to toss some in a glass of water and see what happens!! Finally we are treated to five little mini brushes – I find these most useful for super small glue or paste or more permanent media details since they aren’t much good after a single use or two. Though I’m not overly thrilled with all the sentiments here, I do think this is one of the most interesting and unique kit I’ve ever received from Hero Arts!
So, of course, I just couldn’t resist grabbing that big Goddess stamp and plunging right in!
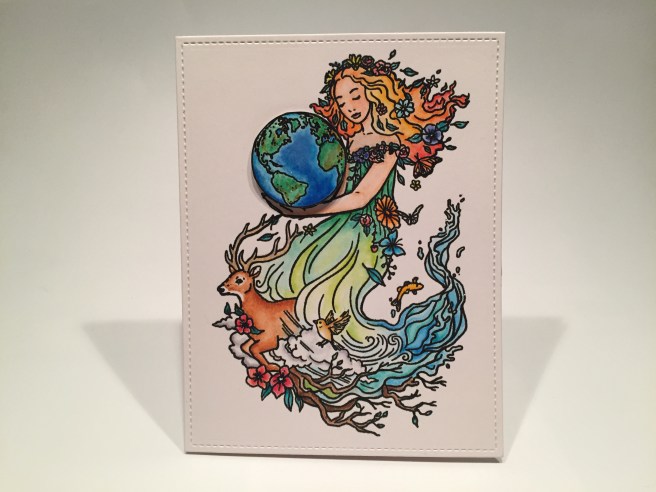
I stamped this (and all the other cards this month) on Bristol smooth card stock using VersaFine Onyx Black ink and I embossed this stamp with clear embossing powder. I rarely emboss stamps I’m going to color, but for some reason I thought it was very appropriate for this stamp. WOW! I LOVE the shine that gives to this entire image! I don’t know why I don’t do that more often! I reached for my Stabilo pens to color this whole image and just worked my way around from the ‘water’ to the ‘fire’. I really like how vivid those Stabilo markers are, and, with a little water, they move on the Bristol smooth card stock super easily!
I wasn’t sure what image I wanted to put in her arms, so I went ahead and stamped, embossed and colored the earth, the fish, the tree, and the peace sign in the exact same way. Of course, the earth won out..! I cut out my stamped panel with a Lawn Fawn Stitched Rectangle die and glued that to a white card base. I fussy cut the Earth (the die in the kit leaves a small border around that stamp), added a little Spectrum Noir Sparkle pen to the oceans, and mounted that in her arms with some foam tape.
Wow WOw WOW! LOVE this so very much! The shine from the embossing makes her feel very ethereal, and I love the buck and deep blue oceans on the earth..! I couldn’t bring myself to add a sentiment to the front of this card, and I was in a bit of a celebratory  mood after making this, so I turned to my Silhouette Software to create the sentiment on the inside. “You GO Gaia” is printed on a scrap of card stock using the Typewriter Hand font and die-cut with my smallest LFSRD. In Greek mythology, Gaia, is the personification of the Earth and one of the Greek primordial deities. Gaia is the ancestral mother of all life: the primal Mother Earth goddess. This does echo the classic “you go girl!” which made it seem all the more appropriate for this card! I LOVE THIS!
Bit of a side-bar here… After much consternation and debate over prices, I treated myself to a ream of Neenah Classic Crest Solar White 110# card stock. I have experimented with MANY heavy-weight card stocks over the last few years, and ALL were much cheaper than the Neenah… but I have to admit you get what you pay for. This Neenah card stock is smooth as butter, bright white, scores and folds beautifully, goes through my printer with no problem and it is luxuriously thick. A ream of 250 sheets stands about 3.75″ tall! All my white card bases this month (and for the foreseeable future) are Neenah!
Though I kind of felt like I had “Mastered this Kit with a Single Card”, I do have a few other ideas, and I did have three more of the round images already colored…
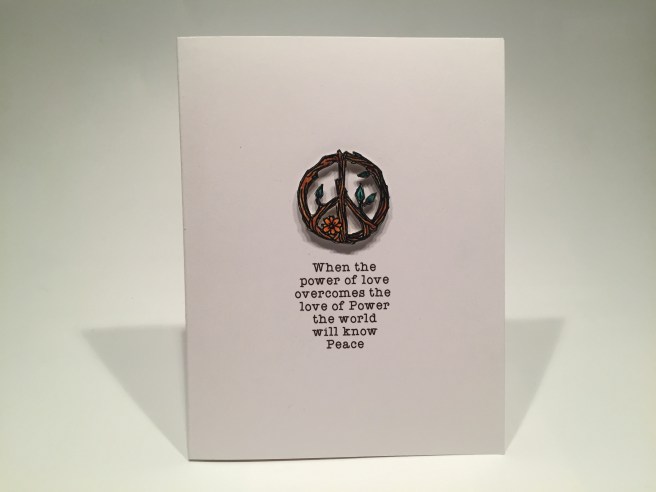
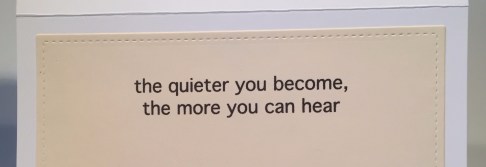
One of my favorite “peace” quotes of all time! I printed this sentiment on a Neenah card base using my Silhouette Software and the Typewriter Hand font again. I was very pleased that the 110# Neenah would go through my printer using my ‘piggy-back’ printing method! You can review my technique for Printing Unique Sentiments for your cards here: https://cardcutups.com/2017/07/18/printing-sentiments-for-cards/.
I fussy cut the (stamped, colored and embossed) peace sign (very carefully) with a craft knife, and mounted it to the card front with thin foam pieces. I thought this unique stamp was cool enough to hold it’s own on the front of a card – and is very appropriate with this quote that I do attribute on the inside of the card. Plain yet powerful!
The fish stamp seemed very “Yin/Yang” to me – whether it was intended to or not, so I did color that stamp as if it was a Yin/Yang symbol – basically just reversing the colors from one fish to the other. I added a touch of light blue in the background, and die-cut them using the circle die in the kit.
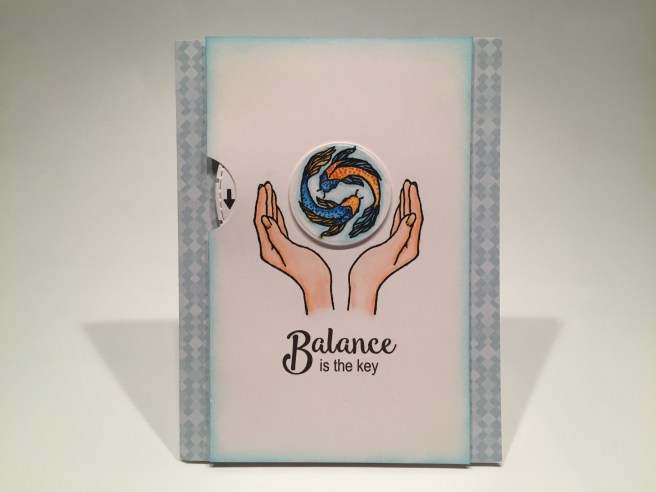
Now, I have seen LOTS of spinner cards and rotating cards and window cards using this set coming from a lot of the HA design team – obviously, this kit lends itself to those type of interactive cards, but I wanted to try something just a little bit different. I stamped the hands on a piece of Bristol smooth card stock cut to 3.5″ x 5.5″ and printed this sentiment using my Silhouette Software and the Smoothie Shoppe and Arial fonts. A simple hole punched in the middle to connect the spinning wheel to the fish. I used a stitched circle die to cut the spinner and stamped the arrows using the MFT Interactive Labels stamp set, and punched a finger-notch on the left side right in line with my center hole.
I ink blended the edges of that panel with Hero Arts Splash Reactive ink and a mini ink blending tool, and added a couple strips of pattern paper (from the Sizzix Geometrics 6″ x 12″ Cardstock Pad) down the two sides of my white card base. I attached the spinner to the fish with a brad through the center hole, and used foam tape to attach the panel to the card front leaving room for the spinner to rotate. I think these fish were just begging to ‘swim around’ (pun intended!) and this is a fairly surprising and unique interactive card with a poignant and useful sentiment!
I still have that tree stamp colored, embossed and die-cut that I haven’t used yet …
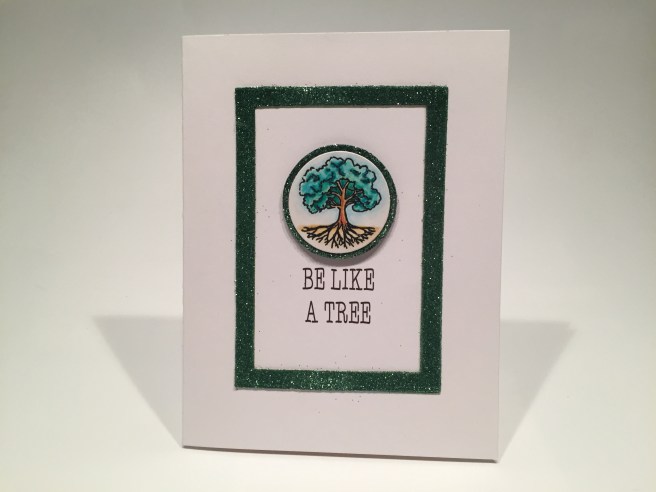
And here we break into that Biodegradable Glitter! I cut a frame from some adhesive backed card stock using two LFSRDs and covered the adhesive with glitter. I burnished it down quite vigorously, but this glitter is super fine and still sheds a little bit..! I also die cut a slightly larger circle than the tree and covered that with glitter before gluing it behind my tree die-cut for a matching mat. I did print this sentiment on a Neenah card base using the Typewriter hand font and glued the frame to the card front and added the matted tree with some foam tape. Of course there is more to this sentiment than just “Be a Tree”… I printed the rest of this sentiment on the inside of the card using my Silhouette software and the same font. Very good advice for most anybody at most anytime! And I think this is particularly appropriate with this stamp that shows the roots of the tree!
We also had nine little flower, leaf and stick stamps in this kit, and I kept thinking…

I really like the hand stamps in this kit – pretty versatile – and any plant that blooms with three different flowers is damn precious!! I stamped everything using only a mask for the hand – I simply stamped all the foliage as close together as possible. I colored these with my Zig Clean Color Real Brush markers, stamped and clear embossed the sentiment (after I removed the “so take care!”) and die cut that panel with a LFSRD.
I swiped the Earth Palette reactive ink pad on a piece of Bristol smooth card stock and blended the colors together with a paintbrush and a little water – the brownish stripe behind the sentiment happened when the purple went over the light green – it matches the stick part of our ‘plant’ nicely so I let it be! I die cut the background with another LFSRD and glued it directly to a Neenah card base. I matted the image panel with a thin black mat and added that to the card front with foam tape.
Once this was all together, I felt it was still missing something, so I stamped the little bird on a scrap of Bristol smooth card stock, colored and die-cut it out. I did try to make the bird look like a Meadowlark. I like the sense of movement that comes from die-cutting the bird (when none of the other images are die cut) and I love the matching ombre background! Precious, indeed!
We also have dies for all those little incidental stamps (and hands!) in this month’s kit…
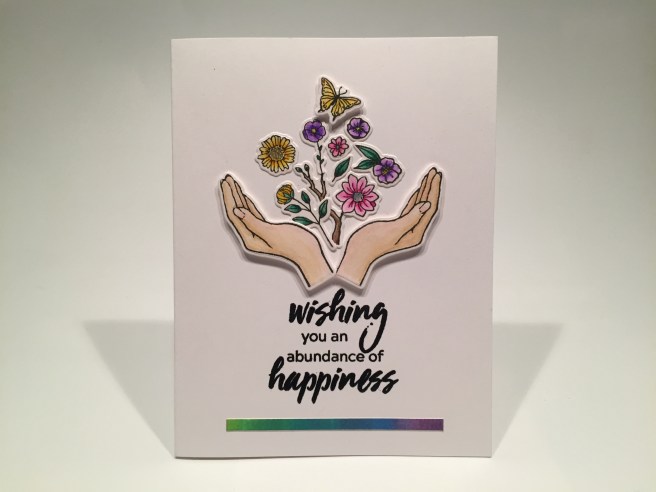
I stamped everything on Bristol smooth card stock, colored all with my Zig markers, and die cut everything with the matching dies. I stamped and clear embossed the sentiment on a Neenah card base and arranged all my die cuts on top. The foliage is glued directly to the card front and the hands and butterfly are mounted with foam tape. A thin strip cut from the scraps of my ombre background adds a final touch of color to our abundant cornucopia of nature being offered up. Fun and colorful, this is a great way to use all the little incidental stamps included with this kit. And those hands are really versatile!
Speaking of versatile, I had another interactive card idea to go along with a bit of a pun…

I stamped the hands together masking the right one before stamping the left, colored them with my Zig markers and die cut those with a plain circle die. I swiped the Earth Palette reactive ink pad on a scrap of watercolor paper and blended them out with more water – that gave me more of a ‘brush’ texture on the watercolor paper versus the smooth blending on the Bristol smooth card stock. I cut that down to a 3″ square and used my corner choppers to round the corners. Again, I poked a hole in the center of a Neenah card base, die cut a 4.25″ circle for the spinner, stamped the arrows and attached the spinner to the watercolor background through the center hole. I added the hands to the watercolor piece with foam tape, and took some thin heart washi tape from my stash to run across the top and bottom of this card front. I added a finger notch to the right side this time and attached the front panel to a Neenah card base using foam tape.
There’s the pun! (I couldn’t resist!) LOL! I printed the inside sentiment using my Silhouette software and the Henny Penny font. The Neenah card stock takes the print so well… nice and clean and very sharp. I’m extra thrilled with this card stock knowing that I can print on it! And I really like that the whole ‘square’ rotates and I think that’s a little bit of a surprise. A great interactive congratulations card! Makes me laugh!
I can’t do 10 cards with this kit and NOT do one more Earth Goddess stamp…! Let’s try her on some Kraft card stock and break out the colored pencils!
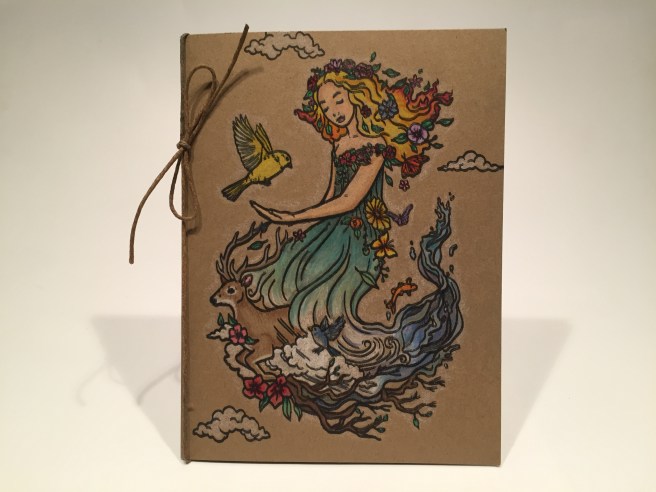
I hadn’t used the large bird stamp or the clouds yet, so I added them to this card front using VersaFine Onyx Black ink and colored everything with my Prismacolor Colored Pencils. A little more subdued than the first card, but I think every bit as beautiful! I colored the bird in a bit of a parakeet motif and even added some of the twine along the spine tied in a simple bow.  Again, no sentiment on the front, so you know I’m going to have something to say on the inside. I love this “Unleash your inner Goddess” sentiment! I printed that on a scrap of ivory card stock using the Brushgyo and Arial fonts, die cut that panel with a LFSRD and added it to the inside of the card. Another fun, colorful encouragement card for all the “Goddesses” in your life! I know there has to be a few! Though it does takes some time to color, I really love that stamp!
A lot of the ‘environmental’ sentiments in this kit didn’t particularly catch my eye – I had a hard time figuring out who I would send a card to that says “One world is enough for all of us” – a feuding neighbor? An estranged relative? A mortal enemy? Might as well try to laugh it up a little bit!

I stamped the four images and the sentiment on Bristol smooth card stock and colored them with my Zig markers and die-cut them all with the matching circle die. I did fussy-cut the earth and glued it to a thin velum mat. I used a 1″ and 1/2″ paper punch to punch out the blue and green dots using the HA Neon card stock from the October 2019 Kit. The punched dots are glued to a Neenah card base, the sentiment, tree, fish and bird are mounted with foam tape, and the earth is mounted with a double layer of foam tape. Though I didn’t realize it at the time, this was the perfect card to add some of the blue and green ‘droplet’ embellishments we got in our MMH March 2019 kit.  Perfect match! But what’s the joke you may be asking? You have to open the card to see, silly! “Mulch this card” makes me giggle every time I say it! I printed this on the inside of the card base using the Marguaritas font and the Calibri font. I thought about “Recycle this card” but I think Mulch is a much funnier word! AND it also implies that we’re returning something to the Earth! Protect the Earth!
I have used all the image stamps in this kit (many of them twice!) but there is one more sentiment stamp that I wanted to use, and I’m going to go outside the stamp set (but staying with Hero Arts) for the image on my last card.
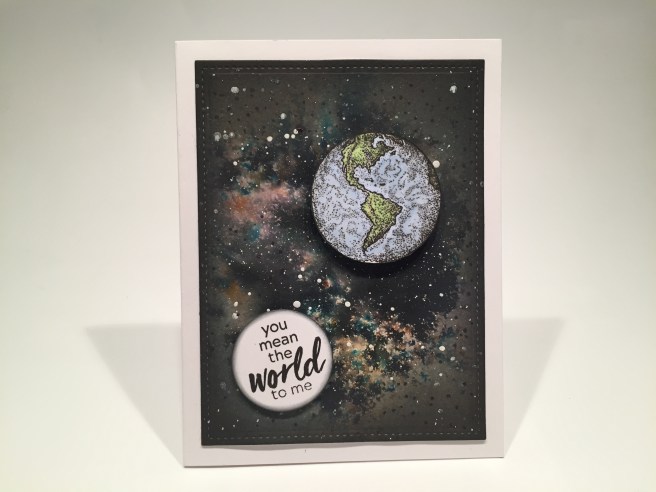
This is the Hero Arts From the Vault Earth stamp that I was so happy to receive for Christmas this year! That is one of my favorite “From the Vault” stamps that Hero Arts has re-released in honor of their 45th anniversary. (I asked Santa for this stamp long before I knew that this kit would have an earth stamp too!) I love the size of this stamp and the vintage dot patterns swirling through the oceans and land masses. This stamp is so detailed that it only needs a little bit of color to bring it to life! I stamped that on some of my Neenah 110# card stock and colored it with my Spectrum Noir markers before fussy-cutting it out. I did trace the cut edges with my Memento Tuxedo Black Dual Marker and added some thick foam dots on the back. I stamped the sentiment on the same paper and die-cut it with the coordinating die, and inked the edges with a little Black Soot Distress Ink, and added thin foam dots behind that piece.
On watercolor paper, I created my “galaxy” using Brusho Black powdered pigments with some water, and let that dry thoroughly before ink blending in some Hero Arts Creamsicle, Blue Raspberry, and Taffy reactive inks. When that dried, I ink blended more of the Black Soot Distress ink all the way around the painted “galaxy”, and then spattered some Permanent White Gouache for the stars and then spattered some of my Spectrum Noir Sparkle pen for a little touch of glitter. I die cut the galaxy with a LFSRD and glued that to a Neenah card base, and mounted the two circles with foam tape. Now there’s a truly useful sentiment from this kit! A Valentine for your favorite astronomer, maybe? I really like this card and I love that Earth stamp from the vaults at Hero Arts!
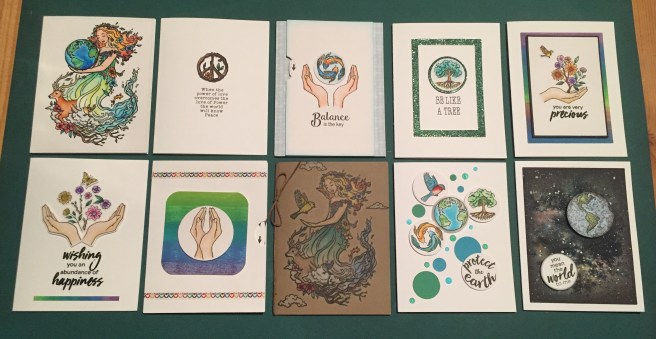
That’s my 10 cards using the My Monthly Hero December 2019 Kit. I was tempted to throw in the towel after just five cards, but I soldiered on and am very pleased with the nice variety of cards I achieved. A sweet batch of encouragement cards with a Valentine or two thrown in for good measure! I am still impressed with that Earth Goddess stamp, and am particularly pleased with how colorful all these cards came out.
This kit is still available at Hero Arts! http://shrsl.com/21ba3 If I have managed to ignite your imagination or inspire an idea or two from you, please use my links when you go shopping at Hero Arts. It is always greatly appreciated! Thank you so much for sharing your time with me here… your support and encouragement is what keeps me inspired!
I have now actually completed a full year of MMH kits! WOO-HOO! (PHEW!) I am still enjoying my subscription, and I really love getting feedback and hearing from all the Hero Arts fans out there! Please remember to Like me, List me, Pin me, Post me, share me with all your friends (and enemies!), and remember… Its not nice to fool Mother Nature! I am sending you and yours all my best for a Happy, Healthy, and Prosperous New Year! Happy Crafting, and see you in 2020!


 Of course, Lizi has all sorts of add ons and new releases to go along with this card kit. I did manage to get the


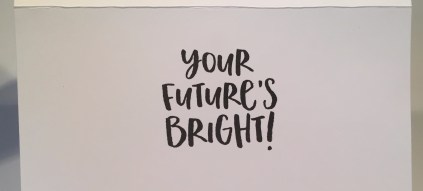 There just happened to be a complimentary sentiment stamp in that Sunshine Turnabout stamp set, so I added that to the inside of this card, making this useful for graduations, sweet 16s, and many different occasions. I have to admit it was a nice diversion to punch up the colors with this card.


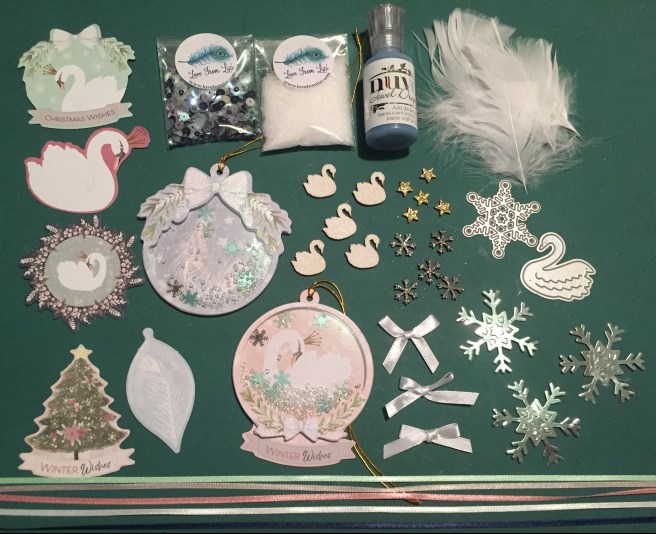
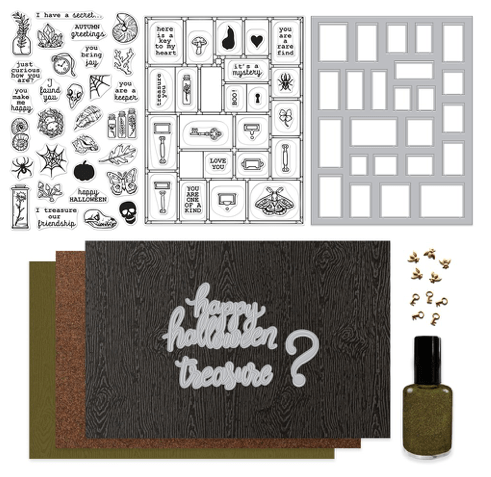
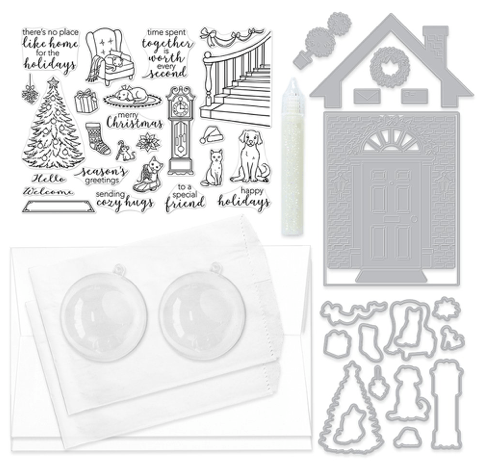 stamp. Of course we also get 13 coordinating frame cuts for all the stamped images. And here’s where the fun begins… we get a Doorway Fancy die and five more shaped fancy dies. That doorway die is very intricate, and is complimented perfectly with the wreath, topiary, letters and roof die. Since the Doorway Fancy die is a full 4.25″ x 5.5″ the rooftop fancy die is included to act as a handle for creating treat bags! Very interesting! If that wasn’t enough we also get two round plastic ornaments, 6 glassine (treat) bags, a Glitter Lacquer pen and six A10 envelopes – those are BIG (6″ x 9 1/2″ – fits cards 5 7/8″ x 9 1/4″)… Don’t know if I’ll be making any giant cards this month… but I’ll at least tackle an ornament and a treat bag!
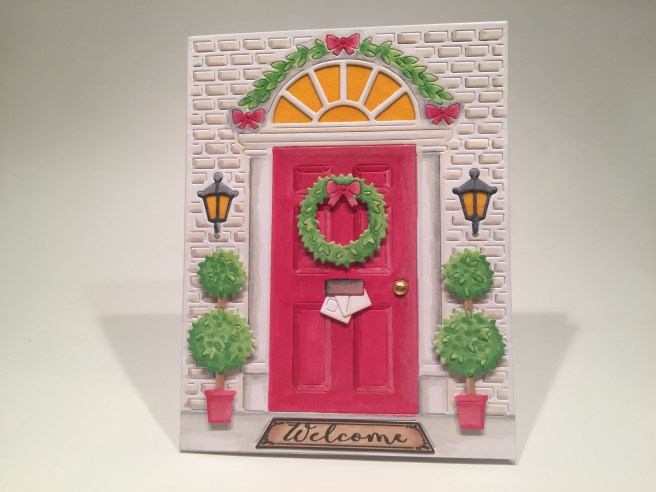
 These are the perfect dies to take advantage of my obsessive compulsive nature… yes… I colored every last little brick on this card! I think I was most interested in creating a white house with a red door, and I’m very pleased with the dimension I got (especially the panels) on that door. Here’s a shot of the markers I used to color this card front.
 (I like the glossy finish on that paper), tucked a couple of the letters in the mail slot, added a mini gold brad for the doorknob, and glued the whole card front to a white card base. I did stamp the “there’s no place like home for the holidays” sentiment on the inside to finish out this first card! (I recently got a new
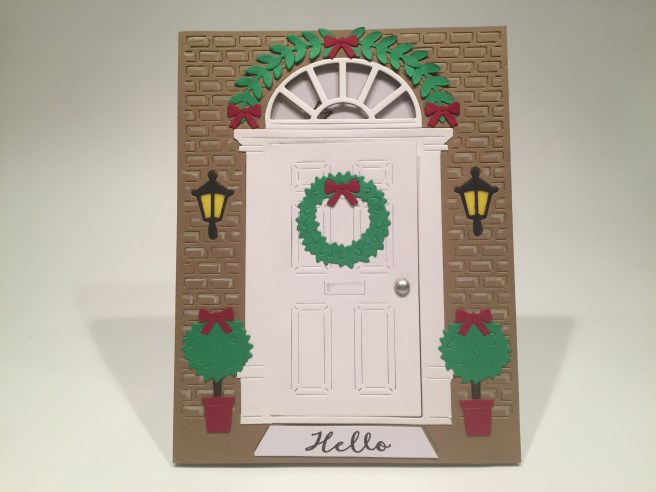
 Using my

 I found this background patter paper in my image files and printed that with the sentiment using my
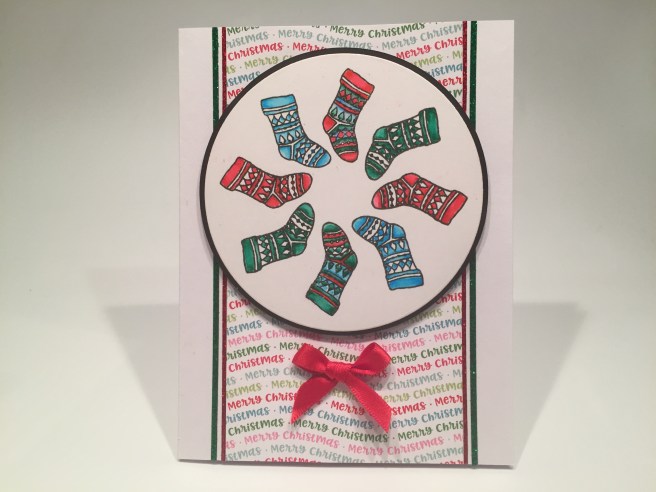
 I added some
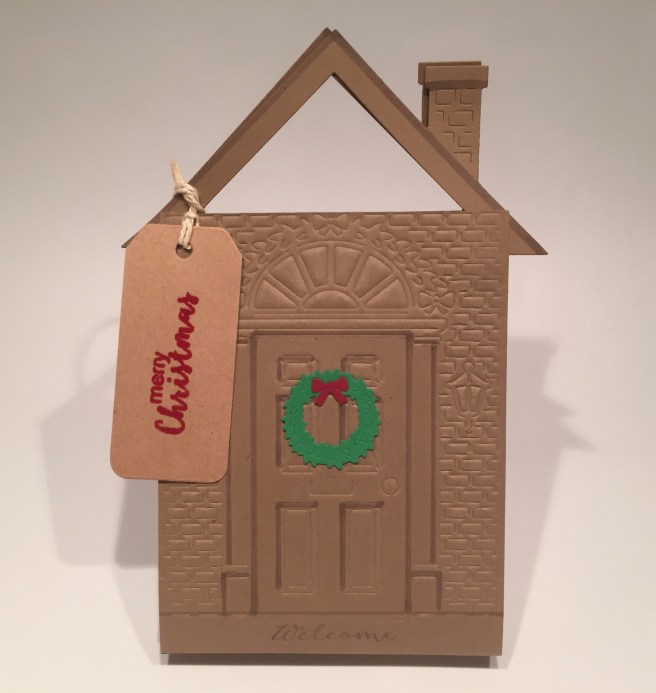
 the
the  This ‘floating’ snowflake is actually 10 layers! I LOVE THAT SNOWFLAKE! It certainly deserves to be preserved behind glass (or plastic as the case may be!!). Of course you can see the snowflake from both sides of the ornament, and there is a little bit of movement in there as well.
 I liked that so much I decided to go ahead and make the second ornament. This time I eliminated the first (largest) white layer and just used the remaining four layers. That makes the snowflake just a touch smaller so the movement on this ornament is a little freer than the first, and I think a little bit more ethereal without the bold white center.


 Those allow the recipient to remove the shaker tag and use it as an ornament or as – dare I say… a TAG! I elaborate my ‘Christmas Wish’ inside the card with the ‘New Year’ sentiment stamped (
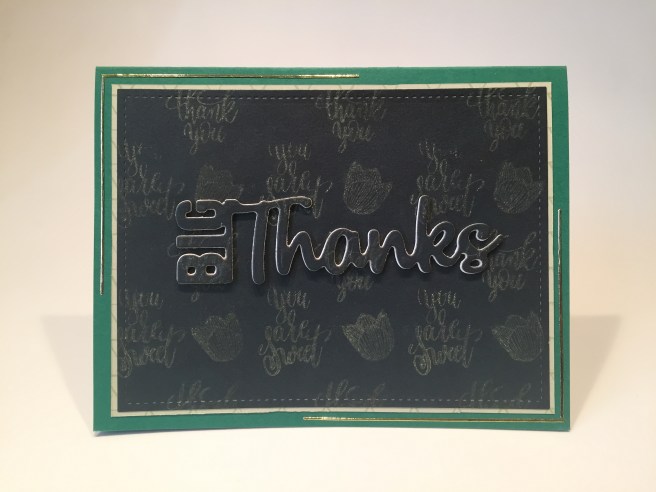
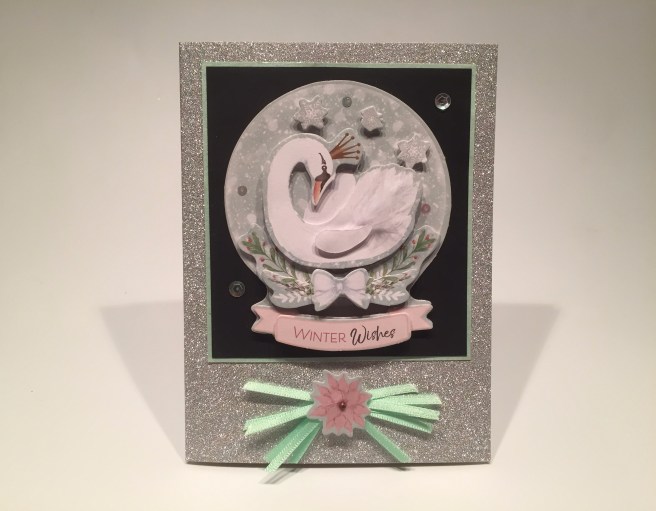
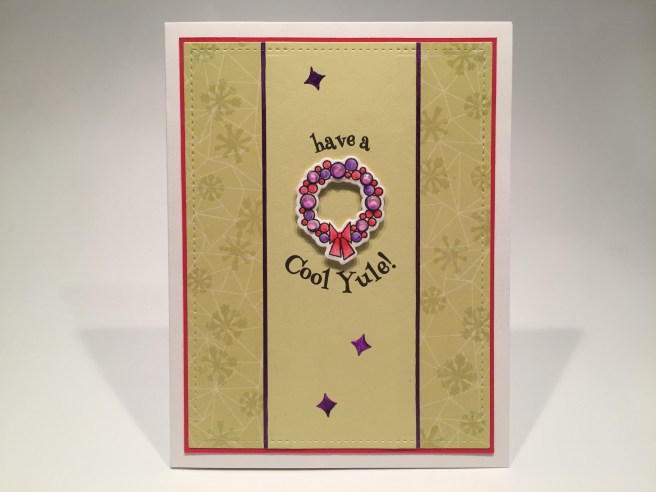
 That panel is glued to the card front at a jaunty angle, and the layered die cut is foam taped to the top of that. I thought the seasonal sentiment on this die lent itself to another sentiment stamp from this kit, so I stamped the “Sweet Season” sentiment on the inside of the card. I really like the soft muted colors here! The glitter and pearlescent pieces add a really nice sparkle.
 Since there’s a little bit of ‘magic’ in every shaker card I decided to add this sentiment from our stamp set to the inside of this card. I think it really completes the “Deck the Halls” sentiment on the front! More sequins scattered around for a final splash of sparkle and we have another interactive Christmas Card done up in a non-traditional color scheme!
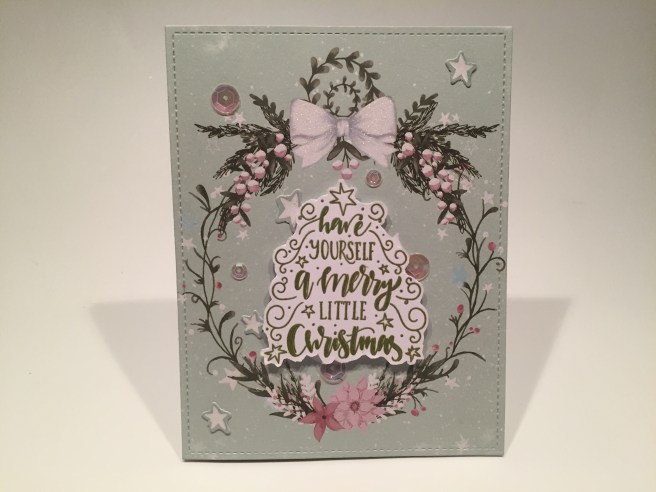
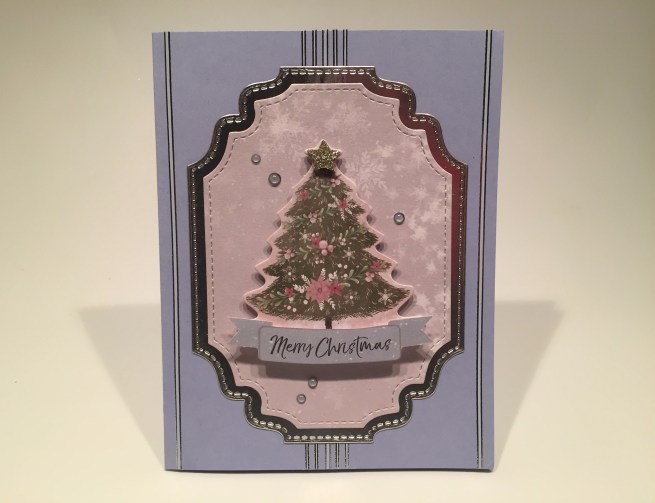
 and added some small dots of our Steel Blue Jewel Drops for a little more shine and dimension. One more sentiment stamped on the inside of this card and we have another thoughtful holiday expression for loved ones or any one dear to you. And you hardly notice that tree is on a pink background..!!
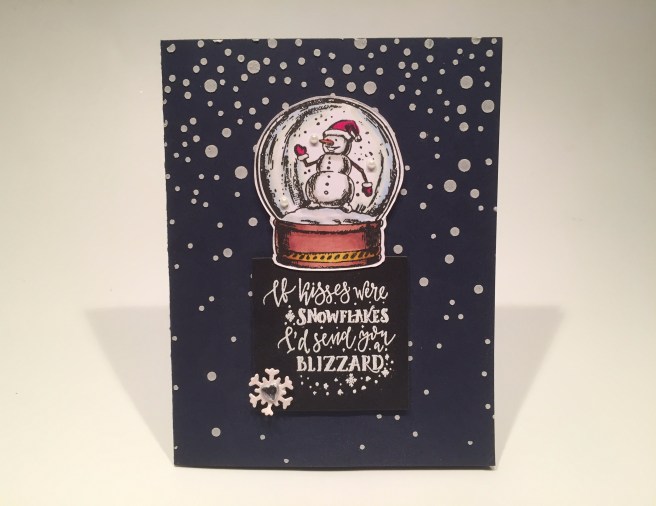
 and embellished this card with a few white pearl dots from my stash (inside the snow globe) and a white glitter snowflake cut from the Let It Snow die with a heart gem (from the LFL October 2019 kit) on the bottom of the sentiment. I did wrap up this card with the “Merry Christmas” sentiment stamped on the inside writing surface. Very cute…!
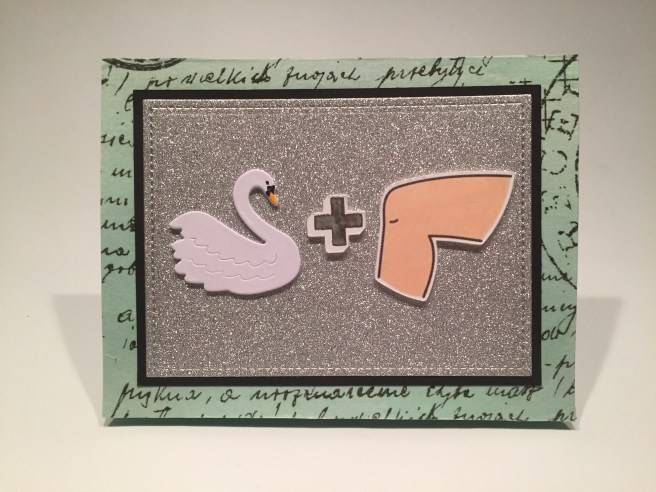


 I added a bunch of the clay snowflake embellishments in the sky and I simply had to use another sentiment from the kit on the inside of the card.
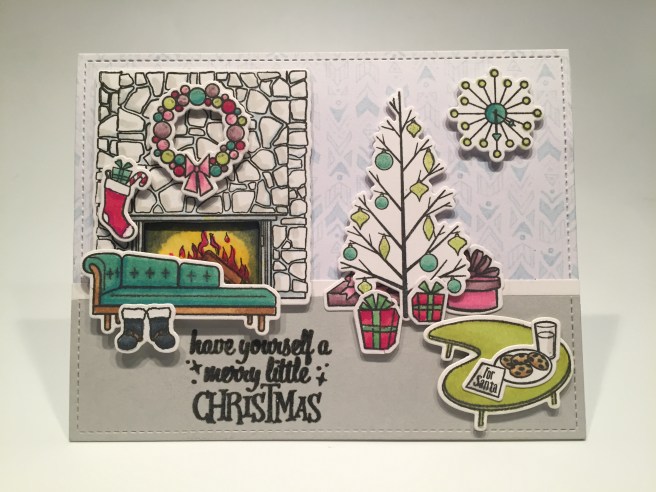


 These are the markers I used on this car. I die-cut another pattern paper with a LFSRD, and added a thin silver mat using the chrome card stock from the kit, and glued that to a white card base.

 Of course there is more on the inside – that’s where this pun-y sentiment really pays off! I printed the “Wanna ride?” on the inside of the card base again using the Henny Penny font and my Silhouette software. Totally innocent, I’m telling you! This makes me laugh out loud… a very unique love card in perfect step with the retro theme of this kit!
 Perfect time frame for this scene, and a little bit more than a simple Christmas card! Of course I do have to explain myself on the inside of the card. I printed the inside sentiment (Silhouette software and the Henny Penny font) on a piece of my light blue card stock, die cut that with a LFSRD and added that piece to the inside of this blue card base.


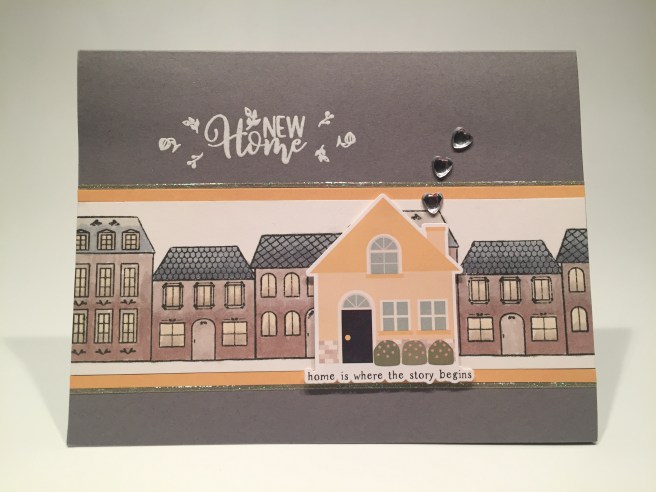
 “Home Sweet Home” sentiment on the white writing surface, and adding this small strip sentiment (glued to a thin black mat) from the add-on sticker pack. I think all four of these sentiments go really well together, and make for a very sweet “welcome to your new home” card! I was going to use one of the larger ephemera houses but when I saw the “home is where the story begins” on the bottom of this sticker, I knew this was the perfect house to use on this card. A little “Happily Ever After” to everyone!
 to the tag for a touch more sparkle. I used some
 Remastered
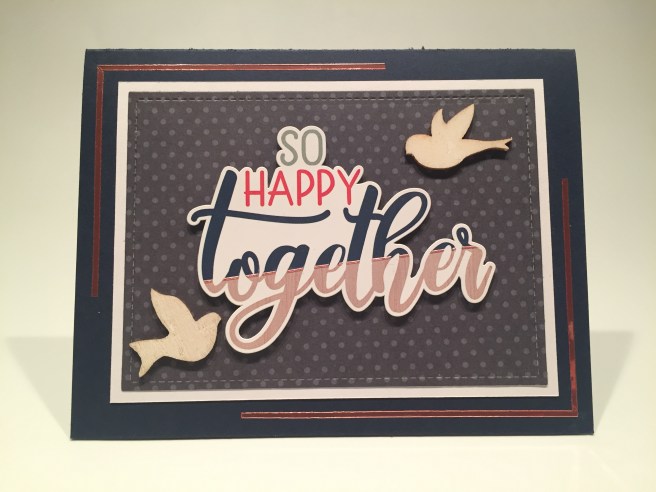


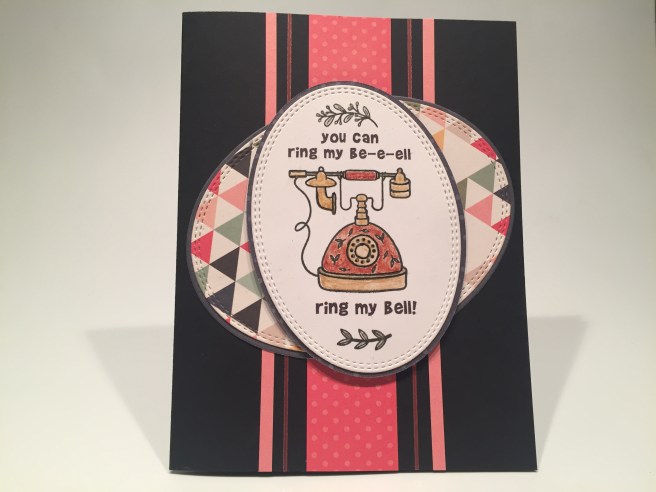
 Wacky! This almost feels like one of those retro atom ovals kicked off-kilter like this. Of course I had to use the “Let’s chat” and “it’s been too long” stamps on the inside writing surface. I think everyone in the world knows this song and wouldn’t be able to keep themselves from singing this sentiment on the front!


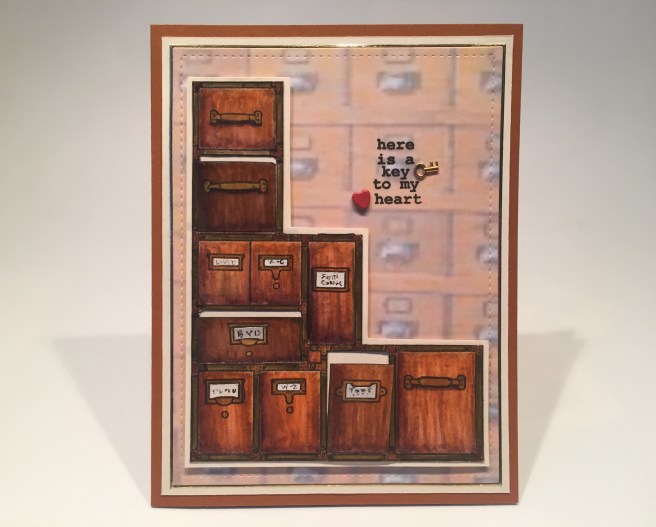
 and stamped the keyhole, key and heart (using MMH Red Reactive ink) on that mat before
 around the card using the
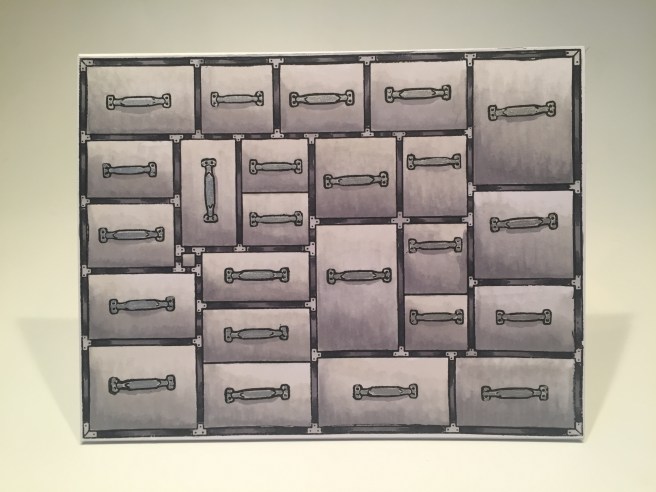
 I printed this sentiment on the inside of a white card base using my Silhouette software and the
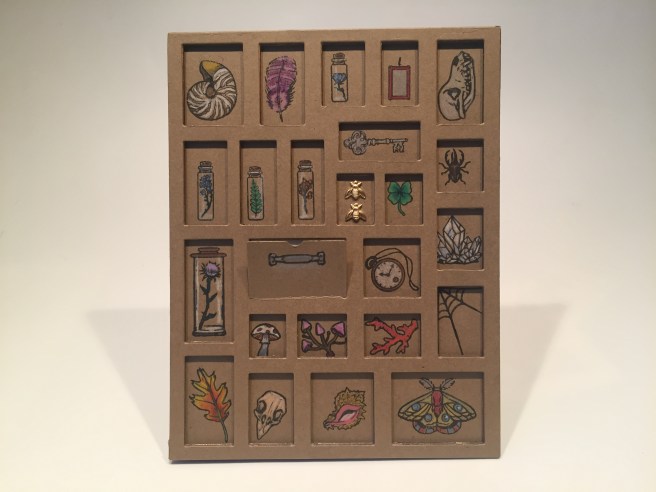


 in an effort to shift the focus of this sentiment a little bit, I stamped “I treasure you” on the inside of this card. I did steal that “I” from the “I treasure our friendship” stamp. I think that transforms this slightly preachy sentiment into a masculine declaration of love!