
DISCLOSURE: This site contains some affiliate links to products. I may receive a commission for purchases made through these links (at no cost to you). As an Amazon Associate I earn from qualifying purchases. Thank you!
Hello Folks! Scott here with another 10 Cards 1 Kit post using the new Love From Lizi December 2019 Card Kit. Lizi calls this the “Simple Pleasures” kit and it’s chock full of a spring-time array of pattern papers, stickers, ephemera and embellishments sporting lots of rose-gold foil highlights throughout. I think the holidays are behind us now..!

As usual, I started by making 10 card bases from the included card stock (I did swap out a plain White from my stash for the alcohol-marker friendly White in the kit). I was really drawn to the ephemera pieces, stickers and pattern papers this month, so I started this batch with a card that almost seemed like a no-brainer to me.

That great oval ephemera piece features that rose-gold foiling on the frame as well as on the sentiment. I loved that it matches the bottom half of this piece of pattern paper in a smaller scale. So I die-cut that panel with a Lawn Fawn Stitched Rectangle die and glued it to one of the Ivory card bases. I mounted the ephemera piece to the center with some thick foam squares and framed the panel with LFL Rose-Gold mirror pin stripe peel offs. 
I didn’t think this was an ideal sentiment all by itself, so I borrowed one of my favorite sentiments from this kit and printed that on the inside writing surface using my Silhouette software and the Rockwell (italic) font. Now, “Take time to make your soul happy” is a lovely sentiment that I can think of many uses for… I think it finishes off the “replenish” sentiment on the front very nicely! What else needs be said?
You know I’m not a big butterfly fan, but this kit included some really great butterflies!

This is a BIG butterfly ephemera piece – nearly 3″ across – and I loved that fact that it didn’t have a white border..! I also loved this ephemera sentiment from Laura Ingalls Wilder (Little House on the Prairie!). I matted that on a piece of the dark green side of our cut apart sheet, glued it to the Yellow card front, and made a frame using the Grass Green with Gold outline peel off stickers from the kit. I glued (just the body) of the butterfly to the card base and added three Dirty Bronze Nuvo Drops (I really like those!) for a little more dimension and shine. I think I like the “old-fashioned” theme of this sentiment and can think of various uses for a card like this. And that butterfly almost seems real!
We received two large sentiment dies in our kit this month – let’s try one next!
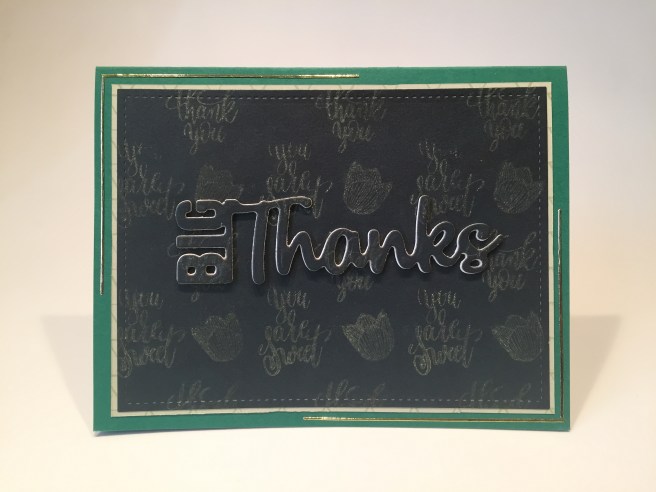
“Big Thanks” eclipse card! I die-cut another piece of the dark green cut apart sheet (LFSRD) and stamped a simple pattern on that with the “thank you”, “you are sweet”, and one of the flower buds using Peeled Paint Distress Oxide ink. I die cut the sentiment from the center of that background, and matted the background on a piece of the light green pattern paper before gluing it to one of the Green card bases. I added partial frames around the background on the top left and bottom right using the kit peel offs for a little sparkle. I die cut the sentiment four times from plain white card stock, and used my Multi Media Matte glue to stack them on top of each other with the die-cut pattern paper sentiment glued on top. Then it’s easy to glue that nice thick sentiment back into the die cut opening on the card front. Very pleased with how well that sentiment reads! I like the subtle, yet apparent background, and I love that this is a very masculine Thank You card!
Back to those ephemera pieces… I can’t seem to ignore them this month!

Another groovy oval ephemera piece – though (alas) this one doesn’t have any foiling. I cut a 2″ strip of that brownish-yellow pattern paper, and two strips of the “half-dandelion” pattern paper for the top and bottom, and glued them together for the background. I ink-blended some Fossilized Amber Distress Oxide ink on the top and bottom edges of a White card base, and glued the background down in the center. I used my thick foam squares to add the oval sentiment in the middle and my thin foam squares to mount the two flower stickers on the sides (I do neutralize the sticky on the back with my powder tool). Three of those cool wooden embellishment dots adds just the right accent on this card front.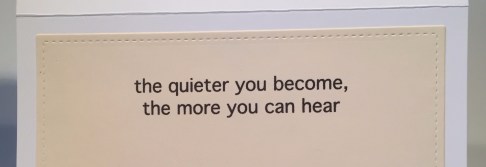
Again, I thought the “Be Still” sentiment could use a little extra something, so I printed “the quieter you become, the more you can hear” sentiment on the inside writing surface using my Silhouette software and the plain Geneva font. I LOVE that addition – though patently obvious, I think it’s a nice thing to be reminded of from time to time! Once more, a very masculine card that seems quite useful to me (especially these days..)!
There was one sentiment panel on our cut apart sheet and a smaller version of the same on the pattern paper cut apart that had the rose-gold foiling – the small one wins out!

I cut out that panel and matted it on a piece of the foiled polka-dot pattern paper, and matted those to a plain white mat and then glued all three to a Burgundy card base. I neutralized the sticky on these two matching flower stickers and added them to the front with thin foam squares. With the foiled dots and sentiment, there’s plenty of sparkle here, and I think this is about as pink as I get with these 10 cards! I think this sentiment would work especially well for an anniversary or intimate valentine card!
Now I’m itching for something bolder, and that “Hello Sunshine” die is just the ticket!

Ahhhhh… much better! I began this card by tracing the “Hello Sunshine” die on a piece of masking paper and fussy cutting that out to mask out the ‘shadow’ of the die cut in the center of a piece of plain white card stock die-cut with a LFSRD. I ink blended the background using the Hero Hues inks in Lemon Drop, Creamsicle, and Fruit Punch. Then I reached for the Concord and 9th Sunshine Turnabout stamp set and embossed the rays using VersaMark ink and white embossing powder. Before removing the masking, I sprayed the background with Sheer Shimmer Mist for some all-over sparkle. Then I removed the mask to reveal the crisp white ‘shadow’ in the center.
I matted the background to a thin dark green mat (from the cut apart sheet) and glued both to a white card base. I die-cut the sentiment three times from white card stock and once from the same dark green pattern paper. I inlaid the green die cuts in the speech bubble and glued all four layers together for this chunky sentiment. I did cover the ‘Sunshine’ part of the sentiment with a Spectrum Noir sparkle pen, and glued that in the center of the ‘shadow’ on the card front. Some silver and clear gems from my stash add even more sparkle to this card front. 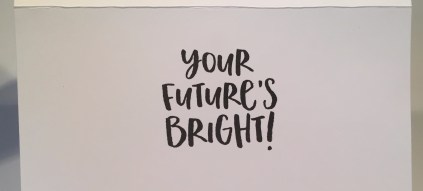 There just happened to be a complimentary sentiment stamp in that Sunshine Turnabout stamp set, so I added that to the inside of this card, making this useful for graduations, sweet 16s, and many different occasions. I have to admit it was a nice diversion to punch up the colors with this card.
I did have one simple pun I was eager to use this month.

I cut a piece of the hexagonal foil pattern paper to 1 7/8″ and matted that to a 2 1/4″ piece of the Burgundy pattern paper, and glued those to the Burgundy card base. I added strips of the LFL Rose Gold Mirror peel off stickers across the top and bottom. I mounted the potted plant ephemera piece – at almost 3.5″, that’s a big ephemera piece too – with my thick foam squares. I printed the sentiment on a scrap of white card stock using my Silhouette software and the Rockwell (italic) font, and die-cut that with a Spellbinder deckled edge rectangle die and ink blended a light touch of the Peeled Paint ink on the edges. The sentiment piece is mounted to the card front with thin foam squares and I added some sequins from our sequin mix and one tiny crystal gem from my stash for the final touch of bling. A fun pun and a great encouragement card! Pretty masculine too!
Now I get back to my favorite ‘take time to make your soul happy’ sentiment.

I fiddled around with this card a lot. I knew I wanted to pair this sticker sentiment with the foiled sentiment pattern paper, and I tried various combinations of flowers, plants, pattern papers and embellishments – but I wanted to see as many words as possible on the background pattern paper, so that finally dictated a simple approach. I die-cut the pattern paper with a LFSRD, glued it to a Green card base, and framed it with the kit peel off stickers. I die-cut a piece of 140# vellum with a stitched circle die, and glued the sentiment sticker to the that and mounted both to the card front with thin foam squares. This is my favorite sentiment in this whole kit! And that Rose-Gold foiling adds a lot of shine here – no sequins needed!
I played around with the Lotus flower stamps in our stamp set for a while and tried coloring those stamps with a couple different mediums… but finally settled on this.

I die-cut more of that Burgundy pattern paper with a smaller LF Stitched Rectangle die, and embossed this arrangement of flowers using masking paper, VersaMark ink and the Love From Lizi Copper Rose embossing powder. I matted that on a piece of white card stock and glued both down to an Ivory card base. On one of the ephemera ‘labels’ I stamped and embossed the “good luck” stamp using the Copper Rose embossing powder, and glued that to a fussy cut mat embossed with the same powder. I mounted the sentiment with thick foam squares, added a bunch of Dirty Bronze Nuvo Drops, and added another ‘partial’ frame with the Rose Gold peel off stickers. I am in love with that teeny tiny Nuvo drop above the ‘g’ – I didn’t think I could make one that small!! I love the texture and the subtle shine of the embossed flowers. Still sticking with a masculine theme here!
I think the little wooden embellishment dots are the most unique item in this kit!

They make perfectly nice very dimensional and graphic flowers for this card! I die-cut the floral pattern paper with a LFSRD, and glued that directly to my last Yellow card base. I fussy cut the notebook paper from one of the cut apart panels, and inked the edges with a little Vintage Photo Distress Oxide ink. I stamped the “thank you” stamp on that using VersaFine Onyx Black ink. I colored one of each size of those wooden dots with a TN3 Spectrum Noir Alcohol Marker and assembled the three flowers on the stamped and inked paper. I die-cut the doily die from a scrap of that dark green pattern paper on the back of our cut apart sheet and used the cut outs for the leaves on the flowers. Kind of perfect! I attached the notebook paper to the card front with thin foam squares, added a sprinkling of Dirty Bronze Nuvo Drops ( I love saying Dirty Bronze..!! ) and another partial frame using the kit peel offs. Even with the flowers I think this Thank You card is actually pretty masculine, and I LOVE those wood dot flowers!
So that’s my 10 cards using the Love From Lizi December 2019 “Simple Pleasures” Card Kit. I don’t think I’ve ever made so many landscape cards with one kit!

Though I didn’t originally set out to avoid all the pink this month, it turns out that I did skip over most of the pinks featured in this kit. That ultimately gave me a nice collection of rather masculine cards with a good assortment of sentiments and plenty of shine!
I did use a lot of the pattern papers, stickers, and ephemera pieces from this kit, and a hefty sprinkling of the embellishments. I didn’t get to the wood-veneer hearts, the pearl flower buttons, the tiny keys, or the burlap flowers, but I think the wood dot flowers more than makes up for that! I used all the flower stamps in our stamp set but didn’t come close to using all the sentiments. I did use all three dies in the kit, and I really like those Dirty Bronze Nuvo Drops. As is always the case, I have plenty of left-over goodies to add to my stash this month!
As of posting, this kit is still available at LoveFrom Lizi.com. If you’re itching for a little bit of spring to brighten up your mid-winter blahs, or if I managed to ignite your imagination, Please use my links when you go shopping with Lizi. It is always greatly appreciated! LFL December 2019 Card Kit
Thanks so much for sharing your time with me here… It means more to me than you will every know! I wish you and yours a happy and hearty Holiday Season, and a healthy and prosperous New Year! God bless us everyone! Happy Crafting!
