
Hello Folks! Scott here with my ten cards from the Love From Lizi September 2019 Card Kit! Lizi is calling this the Home Sweet Home kit and she has certainly given us some lovely and unique supplies in our kits this month!
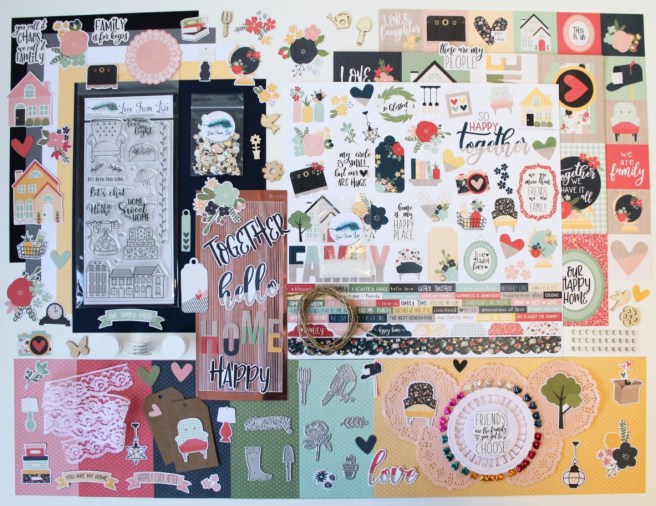
At first, I thought this kit was more useful for scrap-booking and layouts rather than card-making, but after playing around with all these ingredients, and challenging myself to use every stamp in this stamp set, I discovered lots of useful cards to be had! I did take the five sheets of card stock in our kit and (after substituting the super-smooth alcohol-marker friendly card stock from the kit with a normal piece of white card stock from my stash) cut them in half to use as card bases.
The lamp stamp and “sending love and light” sentiment caught my eye first and I had to channel my inner Sandy Allnock to create this first card.

I cut a piece of Lizi’s super-smooth alcohol-friendly white card stock with a Lawn Fawn Stitched Rectangle die and broke out my Spectrum Noir Alcohol markers to color this vignette. I stamped the lamp with VersaFine Onyx Black ink, and drew in the table with a Pigma Micron Pen. I used the Light Yellow (LY1,2,3) markers to color the ‘wallpaper’ and Burnt Orange (BO2,3,4) markers to color the lamp shade and Tan markers to color the table. Finally, I colored the lamp base and finial with Hero Arts Gold Glimmer ink. Coloring over the background three or four times allowed me to keep the “light” under the lampshade. Once I was happy with the coloring, I did grab a white colored pencil and lightened up the lamplight with a soft layer of white pencil. Lovely!
I stamped the sentiment with Onyx Black ink and embossed that with some clear embossing powder. I matted that panel on a thin black mat, die cut some of the green pattern paper with a LFSRD and glued that to another thin black mat. All layers are glued flat to the Maize card base and I embellished this card with one of the pearl heart pin tops in yellow – I just snipped away the pin. I’m very pleased with this little vignette! It’s always fun to play with my alcohol markers… constantly a new learning experience!
Let’s play with that row of houses stamp using my Spectrum Noir markers again!
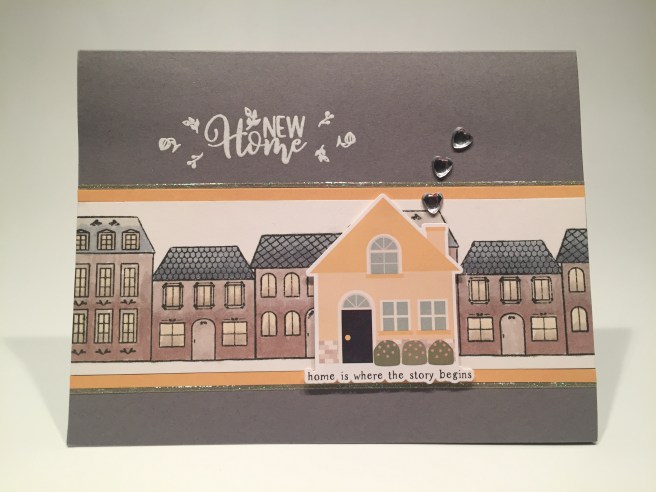
I stamped the houses (two times) on more LFL white card stock and colored the houses with my Brown Grey (BRG) and Blue Grey (BG) alcohol markers. I trimmed the house panel down and glued that to a yellow pattern paper mat and then down to one of the mid-grey card bases. I stamped the sentiment (and the three small floral stamps) with VersaMark ink and embossed that with some white embossing powder. I neutralized the glue on the yellow house sticker with my powder tool and added that over the row houses with some foam tape. A few of the silver heart gems coming out of the chimney and a couple Lemon Glitter peel offs adds a nice touch of sparkle to this card front.
I did complete this (these) sentiment(s) on the inside of the card, stamping the “Home Sweet Home” sentiment on the white writing surface, and adding this small strip sentiment (glued to a thin black mat) from the add-on sticker pack. I think all four of these sentiments go really well together, and make for a very sweet “welcome to your new home” card! I was going to use one of the larger ephemera houses but when I saw the “home is where the story begins” on the bottom of this sticker, I knew this was the perfect house to use on this card. A little “Happily Ever After” to everyone!
Between our sticker sheet, ephemera pieces and the add-on sticker pack, there were a lot of hearts just begging to be gathered together and used on a card.

On one of the black card bases, I added the ‘box of hearts’ ephemera piece with some foam tape and added the other sticker and ephemera hearts with more foam tape. I printed the “Sending lots of Love” sentiment on this ephemera tag using my Silhouette software and the Smoothie Shoppe font. I realized that the envelope stamp was close to the same size as this tag, so I stamped that on a scrap of Bristol Smooth card stock and colored it with my Zig Clean Color real brush markers before fussy cutting it out and adding it to the bottom of the tag with more foam tape.
I added a bow to the tag using the twine from the kit, and added another crystal heart  to the tag for a touch more sparkle. I used some white pan pastel for a little ‘grounding’ under the box, and couldn’t resist adding this little heart strip (from the add-on sticker pack) to the inside writing surface. Love all those colorful hearts on the stark black background!
I was eager to use those large ephemera houses and thought this would be a fun pun.

I die cut a piece of the blue pattern paper with a full-card-size LFSRD and did the same with a piece of the green pattern paper trimming that one down with a stitched hillside die. I glued those pieces together and to the front of a white card base. I glued the tree ephemera piece to the card front and added the two houses with foam tape. They felt a little ‘float-y’ to me, so I added the thin strips of yellow pattern paper at their bases, and finished up the scene with a little yellow sun die-cut with a stitched circle die.
I grabbed my square Darice die-cut quote bubbles die and did some partial die-cutting on the top and then the bottom to get this smaller rectangular speech bubble. I created the “House By You” sentiment using my Silhouette software and the Brady Bunch  Remastered font. I was able to print that in the right place by attaching the negative of the bubble die to right place on the printer paper and taping in the die-cut piece before printing. The pun AND the double entendre make me smile, and I had to add the “it’s been too long” sentiment from our stamp set on the inside writing surface. A silly pun but a useful card!!
This kit included a lot of large sentiment stickers and ephemera pieces that were ‘split’ in two using contrasting colors (usually a wood-grain on the bottom of the letters).
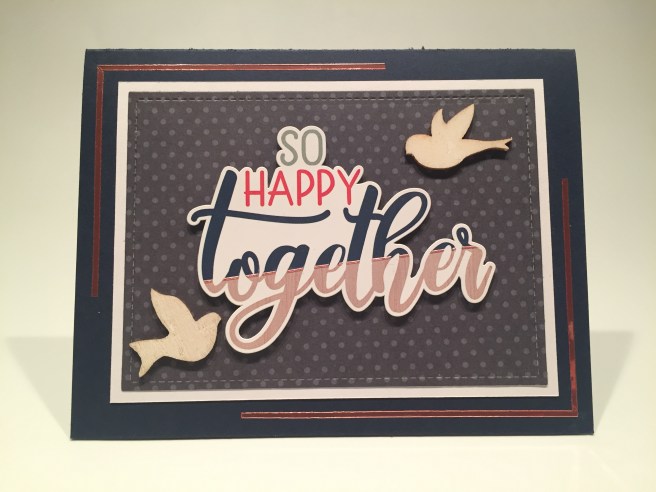
I wanted to use this sticker sentiment just because it’s a song lyric! LOL! First I took one of the thin Rose Gold peel offs from our kit and ran that along the dividing line of this text. I think that makes these two-tone text pieces work quite well! A little shine on the dividing line…! I die-cut a piece of the dark grey pattern paper with a LFSRD, glued that to a white mat, and glued those to the Navy blue card base. I added a partial frame around that with the wide peel offs, mounted the sticker with foam tape and added the two bird wood-veneer die cuts for the final touch.  I did find one more sticker in the add-on sticker pack that went with this card perfectly, so I added that to the writing surface on the inside of this card. Imagine me and you, I do I think about you day and night, it’s only right to think about the girl you love and hold her tight So Happy Together…!! I can’t see me lovin’ nobody but you for all my life! Great song by The Turtles and a terrific, masculine valentine card!
I was at a bit of a loss as to what to do with the stack of luggage stamp… not really many travel related items in this kit… but pair that stamp up with a globe and a luggage tag….

Here we have an encouragement card that plays on a couple different levels! I stamped the suitcases on a scrap of Bristol Smooth card stock and colored them with my Zig markers. I created the sentiment using my Silhouette software (Brady Bunch font) and printed that on the suitcase stamp card stock and fussy cut the suitcases and the sentiment together. I glued that to Kraft card stock and fussy cut that into a mat.
I had an old luggage tag pic in my stash, so I sized it to match the Kraft tags we got in the kit and printed on top of the Kraft tag for the light suggestion of a travel tag – I like the reddish hole reinforcement…! I tied a bow through the hole with our twine, and added the globe ephemera piece with foam tape.
I die-cut the yellow pattern paper with a LFSRD and added 5 peel offs across the middle. That is glued to a thin white mat which is glued to a thin Kraft mat and then down to the Maize card base. The tag with globe is glued directly to the card front, and the luggage piece is attached with foam tape. Three sequins from our sequin pack add a spot of shine and here’s a bright and cheerful card useful for many situations!
If you’ve followed me at all, you know I’m pretty symmetry when creating cards, so this was a surprise exercise in asymmetry as this card came together.
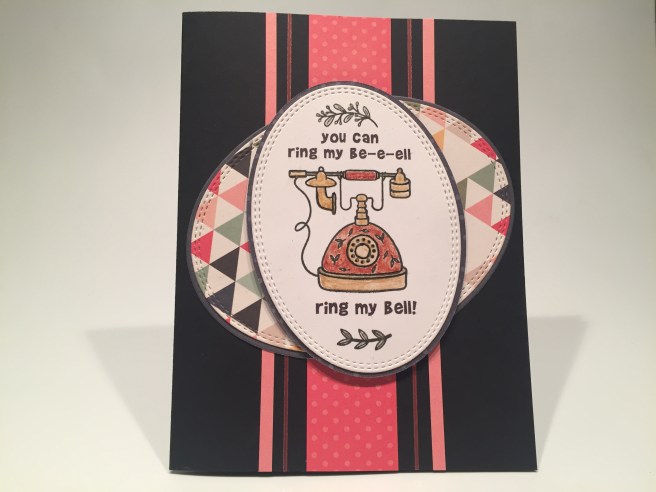
I couldn’t resist one more song lyric this month! And a retro phone like this would have definitely had a bell and a clapper as the ringer! I stamped the phone on Bristol Smooth card stock and painted it with my (incredibly inexpensive) Yasutomo Pearlescent Watercolors – I think this is the first time I’ve used these and I thought they gave me a really nice shine and an almost metallic feel!
Now… When I started working on this sentiment (Silhouette software, Brady Bunch font) I realized that the top and bottom of his phone are actually different in widths. The sentiment placement looked weird if the two lines were centered with each other – the bottom line would stick out beyond the bottom of the phone on the left side. After fiddling around for a bit, I decided to print each line centered over the top and bottom of the stamp itself. Because of the asymmetrical sentiment, the Gina K. designs oval die seemed wrong when it was straight up and down, so I tilted the die to the left so it matched the tilt of the sentiment. I stamped the laurel accents top and bottom after die-cutting the oval. I used the larger dies in the GK Ovals set to cut a piece of the triangle pattern paper and mats for both from the dark grey pattern paper.
On the black card base, I added a 1″ strip of the red pattern paper right down the center (can’t kill my love for symmetry that easily!) added two strips of peel-offs to the sides of that, and two 1/8″ strips of the pink pattern paper to the sides of those. I glued the large oval to the card base and (taking care to keep the sentiments and the phone straight) added the top oval with foam tape.  Wacky! This almost feels like one of those retro atom ovals kicked off-kilter like this. Of course I had to use the “Let’s chat” and “it’s been too long” stamps on the inside writing surface. I think everyone in the world knows this song and wouldn’t be able to keep themselves from singing this sentiment on the front!
Now it’s time to tackle that chair stamp. Hmm… what does an empty chair say to you?

I stamped two of the chairs on some watercolor paper and reached for my Daniel Smith Watercolor dot card (thanks Pat!) to color this simple vignette. Cobalt Blue for the left chair and Organic Vermillion with a touch of Pyrol Orange for the chair on the right. Indian Yellow, Quinacridone Sienna, and Hansa Yellow Medium for the floor, baseboard and wall. I die cut the painting with a LFSRD, added a thin black mat and a larger die-cut mat of the red pattern paper before gluing all down to a white card base.
Cute vignette, but the empty chairs seem incredibly lonely to me! That’s when I decided to use this “miss you” sentiment for this card. This is from the Hero Arts Many Everyday Messages stamp set and is stamped on 40# vellum using VersaFine Onyx Black ink and clear embossing powder. I die-cut the vellum sentiment with a Lawn Fawn Everyday Sentiment Banner die, ran it through my Xyron Sticker maker and attached it to the front. I trimmed down the love picture from the add-on sticker pack, added a super thin black mat and ‘hung’ that on the wall between the chairs… but something was missing… chair doilies!! I cut a couple scallops away from our lace ribbon and fashioned ‘doilies’ to go over the tops of the chairs. That’s just the finishing touch this card needed! Love it!!
I haven’t played with any of our dies from this kit – again, I was at a bit of a loss on how to use some of the gardening images included in this kit on a card…

Just add a pun and anything will work!! I die-cut two boots and three flowers from Bristol Smooth card stock colored them with my Zig markers and pieced everything back together just using tape on the back. I die cut a piece of grey card stock from my stash with a LFSRD, and printed the sentiment on that using the Typewriter Hand font. I glued a thin mat of the grey pattern paper to the back of the sentiment panel, die-cut a piece of the green pattern paper with a LFSRD, and added another thin mat of the yellow pattern paper.
I stamped the vine stamp on either side of the mid-Grey card base using Hero Arts Reactive Green Apple ink, and glued the two matted panels directly to the card front. The boot in the back with two flowers is glued to the card front and the front boot and flower are attached with foam tape. Great dimension here, and those blue and orange flowers (and those boots!) really pop on this neutral background! A fun Mother’s Day card!
I had this idea for my last card when I first saw this stamp set, but I prevaricated quite a bit thinking that the lamp stamp was just too small… but I’m always up for a challenge!
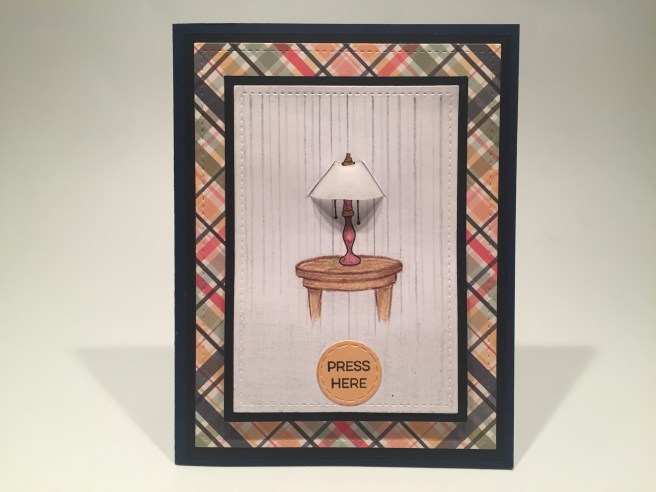
Just our lamp stamp outfitted with a vellum shade on a simple table with a “press here” button below…
So much fun, I simply could not resist! First, I stamped the lamp on some white card stock masking off the shade (don’t forget the finial!) and sketched an oval side table for our lamp to stand on. I colored everything with my Prismacolor colored pencils including the light suggestion of wallpaper. I matted the colored panel to a thin black mat and cut a small ‘light bulb’ hole through both layers in the middle of the shade opening. I die-cut the plaid pattern paper with a LFSRD, glued that to a thin black mat and glued that down to my last Navy Blue card base. I wired the Chibitronic light on top of the plaid pattern paper, making sure to line up the LED with the ‘light bulb’ hole on the front panel – very simple, fairly straight-forward wiring for this card!
I traced the shape of the shade on a piece of doubled up vellum, making the sides of the shade straight and the height of the shade the same as the stamp. I added about 1/32″ to both sides (to allow the shade to curve) and some tabs on the sides. Then I cut out the shade and folded the tabs forward. In order to disguise the tabs, I decided the easiest way to attach the shade was through a couple of slits cut in the card front. The slits are the same width apart as the original stamp shade. Sure enough, once the tabs went through the slits it gave us a perfectly curved lamp shade! SUCCESS! I attached the front panel to the card base using foam tape on the bottom (to allow room for the battery/switch) and glued the top half directly to the card base (so the LED would be at the same level as the card stock – so it would light up the shade as completely as possible). LOVE IT!
I printed the “You Turn Me On” sentiment on the inside writing surface using the Brady Bunch font and trimmed that piece down with a LFSRD before gluing it inside the card. Surprisingly, this turned out better than I expected! It actually looks like there is a light bulb under the shade, and the light not only illuminated the vellum shade, but actually spills out the bottom of the shade just like a real lamp! I couldn’t be more pleased!
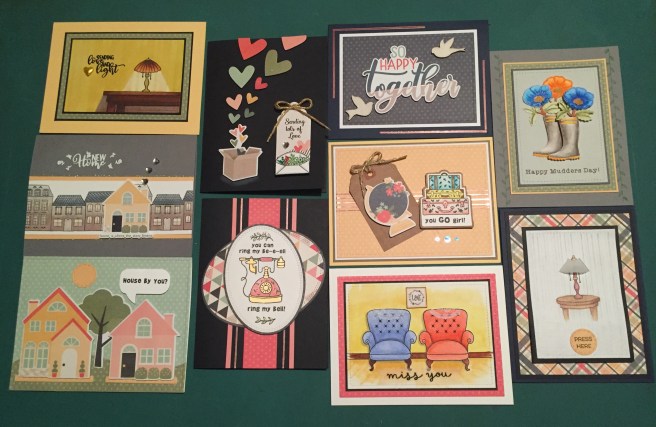
That’s my 10 cards created from the Love From Lizi October 2019 Card Kit. I did manage to use all the stamps in our stamp set, I used all six of our pattern papers, some of the two cut-apart sheets, some of our stickers, a good amount of our peel-offs and ephemera pieces, and quite a bit of our embellishments. I think the only embellishments I didn’t use were the paper doilies, the metal springs and the glitter. Of course I have gobs of left-overs which will all find loving homes in my stash!
This is a really nice collection of truly useful cards – a few valentines and friendship cards, a new home card, a miss you card, an encouragement card and a couple of hello cards. I managed a few puns (and song lyrics!) this month and even a light-up interactive card. A great variety of cards considering the scrapbook nature of this kit!
Naturally, this kit has sold out already, although there are a few add-ons and new releases still available. I think Lizi’s Kits manage to sell out every month… If you’d like to get in on the adventure of one of the most unique Card Kits on the market, I highly suggest subscribing so you never miss out! If you do go shopping at Love From Lizi, please use my link: http://bit.ly/LFLlink
I truly appreciate you sharing your time with me here… please remember to Like Me, List Me, Pin Me, Post Me, share this post with all of your friends, don’t forget to turn out the lights when you leave the room, and, as always, Happy Crafting!
DISCLOSURE: This site contains some affiliate links to products. We may receive a commission for purchases made through these links. Thank you!

I found this LFL kit to be uninspiring. I just look at and can’t get started. Thanks for some inspiration.
LikeLike
Always my pleasure Lezlee…! (I know what you mean, though!)
LikeLike
inspiring good
LikeLike