
DISCLOSURE: This site contains some affiliate links to products. I may receive a commission for purchases made through these links (at no cost to you). As an Amazon Associate I earn from qualifying purchases. Thank you!
Hello Folks! Scott here with my 10 Cards 1 Kit post showcasing the My Monthly Hero November 2019 Kit. This month we’re going Home for the Holidays with a heartwarming stamp set and an amazing batch of fancy dies. Our 6″ x 8″ clear stamp set includes some holiday images and furniture with a few family pets and a very interesting staircase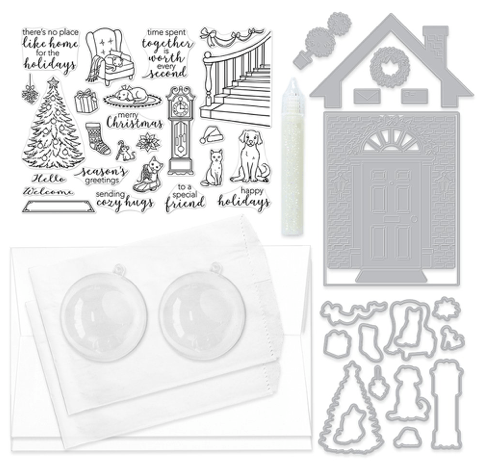 stamp. Of course we also get 13 coordinating frame cuts for all the stamped images. And here’s where the fun begins… we get a Doorway Fancy die and five more shaped fancy dies. That doorway die is very intricate, and is complimented perfectly with the wreath, topiary, letters and roof die. Since the Doorway Fancy die is a full 4.25″ x 5.5″ the rooftop fancy die is included to act as a handle for creating treat bags! Very interesting! If that wasn’t enough we also get two round plastic ornaments, 6 glassine (treat) bags, a Glitter Lacquer pen and six A10 envelopes – those are BIG (6″ x 9 1/2″ – fits cards 5 7/8″ x 9 1/4″)… Don’t know if I’ll be making any giant cards this month… but I’ll at least tackle an ornament and a treat bag!
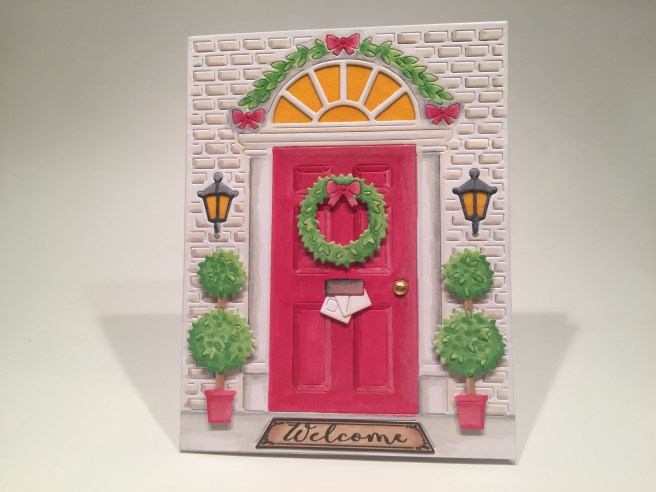
Naturally, I had to start my cards this month using the Doorway Fancy die. I die cut the doorway, the wreath, the topiaries and letters from some alcohol-friendly white card stock and grabbed my Spectrum Noir alcohol markers to color everything.  These are the perfect dies to take advantage of my obsessive compulsive nature… yes… I colored every last little brick on this card! I think I was most interested in creating a white house with a red door, and I’m very pleased with the dimension I got (especially the panels) on that door. Here’s a shot of the markers I used to color this card front.
I did stamp the welcome mat on another piece of alcohol card stock and fussy cut that and glued it to the corresponding space in front of the door. I colored the wreath and topiary with the same markers and added them to the card front using foam tape. I glued some orange-y glassine (kite-paper) behind the sconces and the skylight over the door  (I like the glossy finish on that paper), tucked a couple of the letters in the mail slot, added a mini gold brad for the doorknob, and glued the whole card front to a white card base. I did stamp the “there’s no place like home for the holidays” sentiment on the inside to finish out this first card! (I recently got a new Gina K Designs Jet Black Amalgam Ink pad so I put it to the test and used it for all my black stamping on these cards) I love this card a lot, but it took me a little too much time to think about making duplicates…!
What if I tried paper-piecing this doorway die? That shouldn’t take quite as much time…!
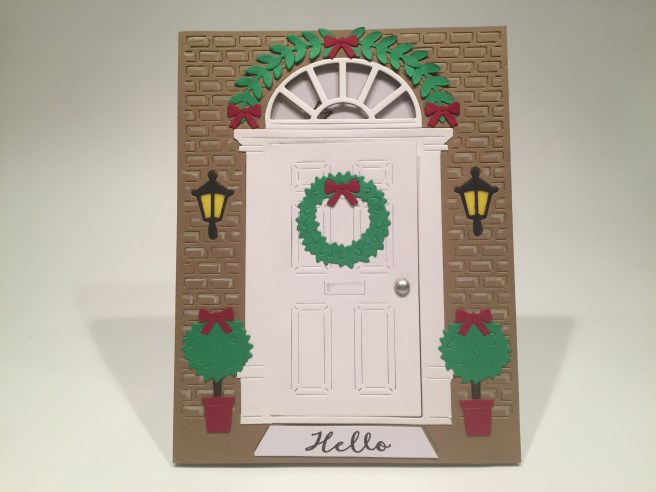
I die-cut the doorway die from Kraft card stock, and trimmed off the door at the hinge. I couldn’t resist my anal retentive nature and colored some highlights on all the bricks with a white colored pencil. Then I die cut the Doorway Fancy die from some 100# card stock and trimmed off the door, the door frame, the transom window and the mat and glued those on top of the Kraft base. I die cut the topiary and wreath from some green card stock along with four laurel branches using a die from the Love From Lizi October ’19 card kit. I used some dark red card stock from my stash to die cut the six bows (from the wreath) and the two pots, then trimmed them out and glued everything together.
I stamped the “Hello” sentiment on the mat, colored in the topiary trunks and the sconces with markers, and added a mini silver brad to be the doorknob. I glued yellow glassine (kite-paper) behind the sconces and some plain acetate behind the transom window.  Using my masking paper to mask off the dog, I stamped the Christmas tree and the Cocker Spaniel / rug stamp on some more alcohol friendly white card stock, and colored them with the same Spectrum Noir markers I used on the door (adding GB1 and GB4 for the dog) I added some colorful confetti sequins and a star gem from my stash to the decorations on the tree. I glued the stamped panel to the front of a white card base and added the house panel on top of that with some foam tape. I like that you can just see the top of the tree through the arched window! That Doorway die is really terrific, though I’m not really sure if this card didn’t take just as much time as the first one! Trust me… I truly contemplated wiring up those sconces with some Chibi lights! Love all of these Fancy Dies in our kit this month!!
But let’s get to stamping…!! You know I like trying to use all the stamps in my stamp set and we have seven distinct sentiments in this kit. Two down… five to go!!
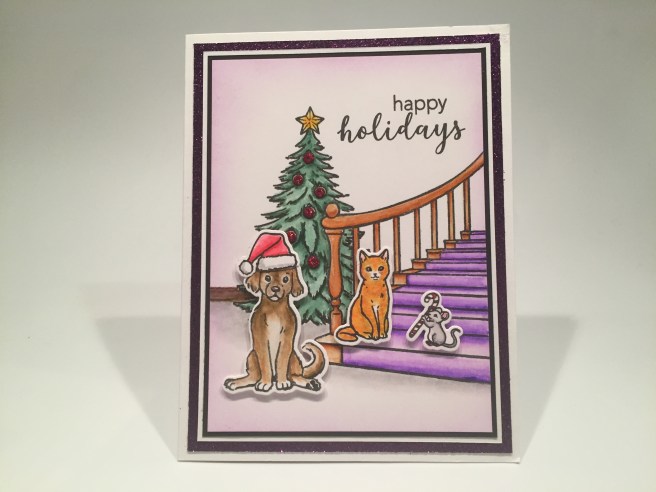
I originally contemplated masking all of the stamps in this scene in order to color a one layer card, but decided that some die-cutting would add nice dimension without a lot of extra headache! I did cut a mask for the staircase stamp, and stamped that and the tree on a panel of Bristol Smooth Card stock and colored them with my Zig Clean Color Real Brush Markers. I did add the suggestion of some baseboard to the left of the tree, and I used some Xmas Red Stickles for all the ornaments. I stamped and colored the dog, the hat, the cat and the mouse using the same supplies, and die cut them all out.
I trimmed that staircase and tree panel down to 3.5″ x 4.75″, stamped the sentiment, and ink blended some Wilted Violet Distress Oxide ink around the edges. I matted that on a thin black mat, then a thin white mat, and then a thicker violet glitter mat, then glued down to a white card base. I trimmed the bottom white border off the Santa hat die-cut and glued that to the dog, then mounted all the animals to the front using foam tape. So stinkin’ cute! I actually stamped, colored and die-cut the bunting/bows for the staircase, but it’s a little short if you use the entire staircase stamp..! Love the little mouse offering the candy to the cat… and I tried to make it look like she was watching him…! I like all the sparkle on this card and it’s really nice to have some characters (animals) to populate our scenes this month!
I do like the fact that we have some non-Christmas sentiments in this stamp set too!
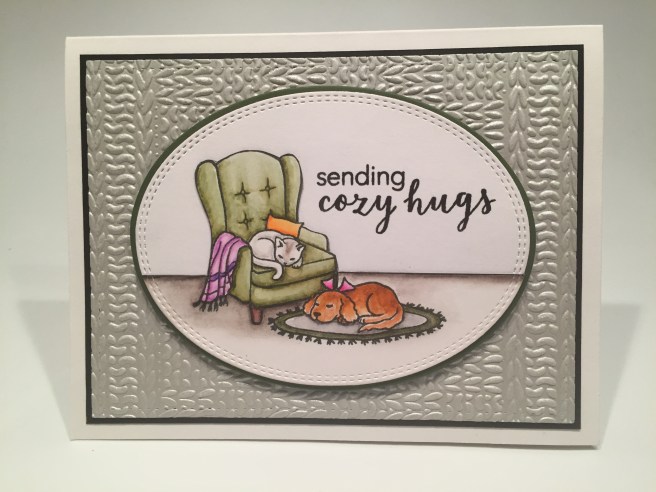
This card makes me want to take a nap! Using the dog/rug mask I cut for card #2, I stamped these two images on some Bristol smooth card stock and colored them with my Zig markers. I stamped the sentiment and die cut that panel using the Therm-o-web/Gina K double stitched Oval die and matted that on a black mat cut with the Large single-stitched Oval die. I die-cut a piece of silver matte card stock with my Lawn Fawn Stitched Rectangle die, and dry embossed that panel with the LFL knitted embossing folder (very cozy)! I matted that on some black card stock and glued that down to a white card base. I mounted the oval piece using foam tape and VIOLA! Our first non-holiday card using this kit. VERY COZY!
Let’s get back to that staircase and the bunting! And more masking!
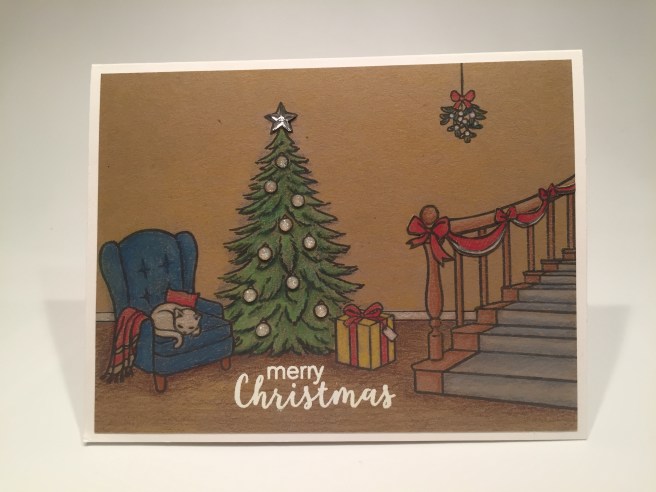
I cut a mask for the armchair and the present and stamped all on Kraft card stock, and colored this scene using my Prismacolor Colored Pencils. It is easy to sketch in a baseboard to separate the floor from the wall, and I did stamp and color the bunting on a scrap of kraft card stock, and fussy cut that out before gluing it to the railing. I kept thinking of this as my ‘sepia-toned’ Christmas scene, and used white as a unifying highlight color. I stamped the sentiment using VersaMark ink and embossed that with white embossing powder. I glued the colored panel directly to a white card base, added a crystal star from my stash to the tree top and used the Glitter Lacquer pen included in our kit on top of the white ornaments. I think the mistletoe adds some nice height and balance to this scene, and encourages everyone using the stairs to share a kiss!
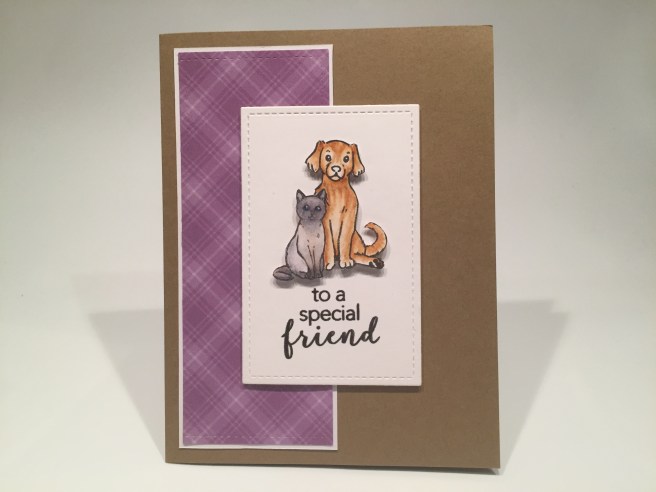
Here’s another non-holiday sentiment from our stamp set. I stamped the cat on Bristol smooth card stock, masked off the cat, then stamped the dog and colored both with my Zig markers, and fussy cut them out. This is my attempt at a Siamese cat and a Golden Retriever…! I stamped the sentiment on plain white card stock, and die-cut that with another LFSRD. I dug around in my paper stash and found this purple plaid pattern paper (from the SSS April 2017 card kit (Lawn Fawn Perfectly Plaid Rainbow pattern paper)) that I trimmed down using a larger LFSRD and some partial die-cutting. That piece is 5″ x 2″. I matted that with a thin white mat, and glued those to a Kraft card base. I added the sentiment panel to the card base with foam tape, and mounted our the animals to that panel with more foam tape. I really like this simple, heartfelt “special friend” card… no holiday here!
I think this was my least favorite sentiment in our stamp set, It felt a little forced to me… but that won’t stop me from trying to use it! I also thought the grandfather clock stamp was so big, that it pulled a little focus from the cats… I think “together” is more important than “second” with this sentiment!
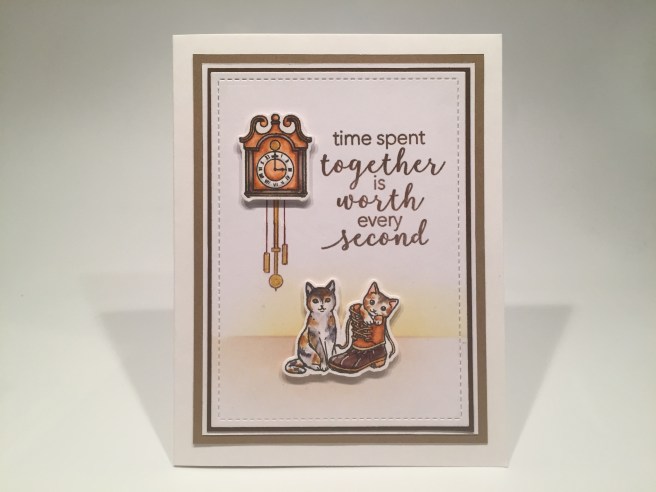
I stamped the kitten/boot stamp on a scrap of Bristol smooth card stock, masked that off and stamped the big cat and colored them with my Zig markers – I’m shooting for Calico cats this time! I actually used their coordinating dies to cut them out – some partial die cutting was all that was needed on the left of the boot die and the right of the cat die. I simply connected the die cuts in the center with my craft knife.
I masked off the bottom of the grandfather clock with a post-it note and stamped the top on more Bristol smooth card stock and colored that with my Zig markers before using the coordinating die to cut that out. I masked the clock stamp off around the pendulum and weights (post-its!) and stamped those on a plain white card panel using Walnut Stain Distress Oxide ink, and added to their length using a brown Pigma Micron Pen. I did color the pendulum and weights using the Gold Glimmer ink from the MMH August 2019 Kit. I stamped the sentiment with the Walnut Stain ink and embossed that with clear embossing powder, and die cut that panel with a LFSRD.
I used Vintage Photo and Fossilized Amber Distress Oxide ink to blend a little bit of a floor and wall on the main panel (post-its to mask!) and glued that to a thin black mat, a thin white mat, and a thicker Kraft mat and then down to a white card base. The clock is mounted over the pendulum and weights using foam tape and the cats are mounted to the card front in the same way. Very cute! These two cats do look like they’re related!
This next card was an ‘early morning’ inspiration, and a stamp masking triumph!
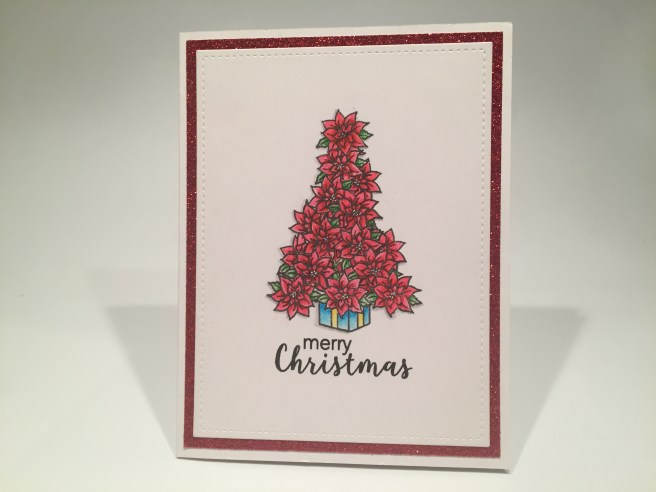
That is 15 poinsettia stamps to form that tree! (did someone say I was anal-retentive?) I actually only had to fussy cut three poinsettia masks to stamp this tree! And yes… that is the present stamp underneath standing in for the base of the tree! This is stamped with the Gina K. Amalgam ink on Bristol Smooth card stock and colored with my Zig markers. I stamped the sentiment as well and added some clear embossing powder to add a little shine to that sentiment.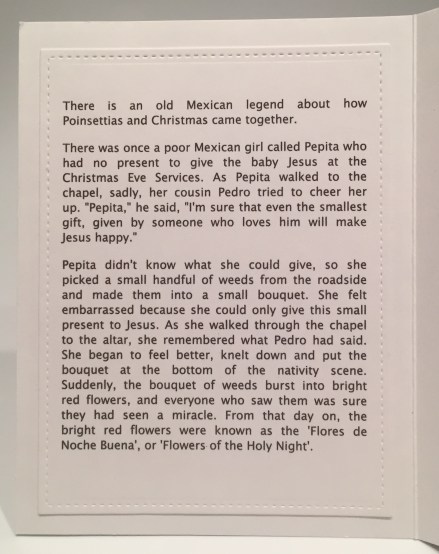
That Amalgam ink dries quicker than VersaFine Onyx Black ink so it doesn’t hold on to embossing powder quite as well as the VersaFine does. Otherwise that ink worked extremely well for coloring with alcohol markers and watercolor markers.
I die cut the colored panel with a LFSRD and added a simple red glitter mat before gluing all down to a white card base.
I did do a little research to see why poinsettias are considered a Christmas flower and came across this lovely legend I included on the inside of this card. The flowers are indigenous to Mexico, and I think this was endearing enough to include. Some little dots of white gel pen in the centers of the flowers for a final highlight and I have to say that I LOVE this card!
I had an idea of how to use the whole grandfather clock for a birthday card…
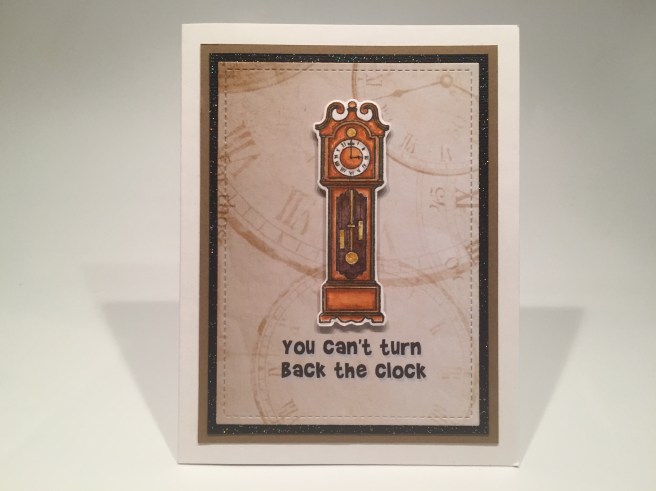
The grandfather clock is stamped on Bristol smooth card stock (still using the Amalagam ink) and colored with Zig markers and the Hero Arts Gold glimmer ink, and die cut with the coordinating die.  I found this background patter paper in my image files and printed that with the sentiment using my Silhouette software and the Brady Bunch Remastered font. I die-cut that panel with a LFSRD, added a mat of Black Tie glitter card stock and a mat of kraft card stock before gluing everything to a white card base. I mounted the clock to the front using foam tape and completed the sentiment on the inside of the card. This is one of my all time favorite birthday sentiments for “people of a certain age”!
The only stamp I haven’t used yet is the stocking. It seemed a little large compared with the other stamps in the set, so I felt like it deserved to be highlighted by itself!
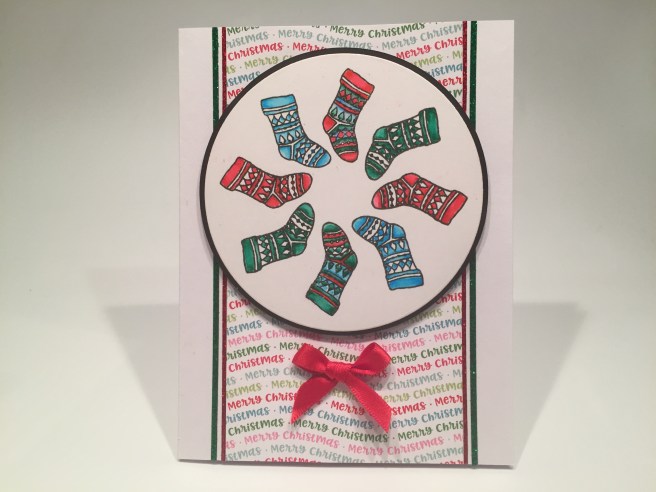
I used my homemade wreath builder template to stamp this stocking wreath… same paper, ink and Zig markers used to color. Boy! Those designs get pretty tiny on these socks! I die cut the stockings with a Darice nesting circles die, and used my EK Success Circle Scissor to cut the black mat. I dug through my pattern paper stash and found this perfect background paper from the SSS December ’17 Kit (Doodlebug Milk and Cookies 6″ x 6″ paper pad), trimmed that to 3″ wide and glued it directly to the center of my white card base. I added some Love From Lizi Green and Red glitter Peel Offs to the sides of the pattern paper and mounted the matted circle with foam tape. I tied a little red satin bow and glued that to the card front for a final splash of color and texture. Of course, I can’t leave well enough alone, and though you might not consider this a pun, I do! I printed this sentiment on the inside of my card base using my Silhouette software and the Smoothie Shoppe font. Makes me giggle!!
One of our fancy dies this month is a ‘rooftop’ die – apparently for adding a ‘roof/handle’ to the Doorway Fancy die, and, along with the glassine bags included in the kit, make a sort of a gift/treat bag. That’s interesting… I’m game!
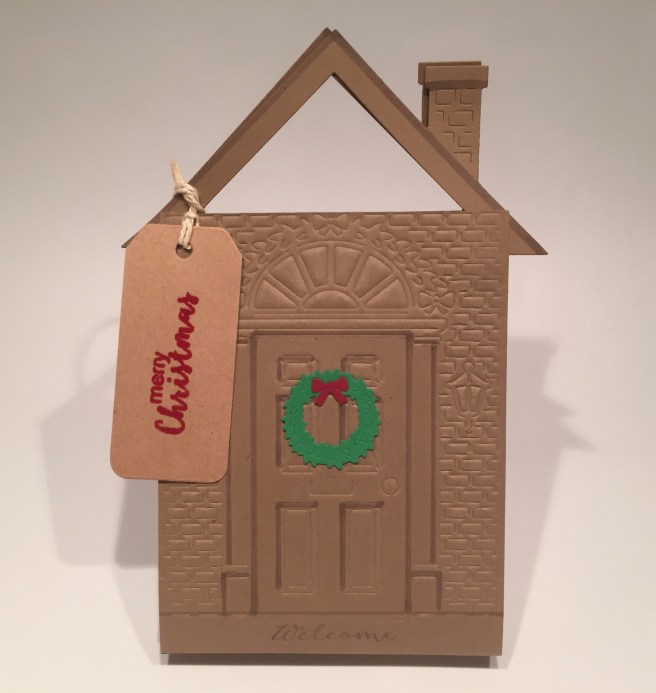
I dry embossed the Doorway die on two pieces of 4.25″ x 5.5″ kraft card stock and added a few definition lines to the front doorway with a BG4 Spectrum Noir marker. I die cut another paper-pieced wreath for the door, and stamped the ‘Welcome” on the mat with Walnut Stain Distress Oxide ink. I die-cut two rooftops, added a definition line of marker and glued those to the top of the Doorway pieces. I cut a 2″ x 4.25″ piece of kraft card stock and scored the two long edges at 1/4″ to fold and attach to the doorways. I found that you want about an inch and a half of a base if you want the ‘bag’ to stand up on its own. I embossed the “merry Christmas” sentiment on a kraft tag from my stash using the HA Embossing & Watermark ink and the HA Red embossing powder. Nice pop of red to match the bow on the wreath! Very Cute! By avoiding actually die-cutting the Doorway die, this was a pretty quick and simple assembly! I’ll have to think hard about some other options for that roof die…!!
I turned my attention to the two round ornaments in the kit. I originally thought I’d be creating a little dog and cat scene inside these globes, but I was a little colored-out by this point, and I remembered I had a new die set I got last year but haven’t used yet. Here’s my Christmas ornament featuring  the Altenew Layered Snowflakes die set. Those snowflake dies fit inside this ornament perfectly!! I dug around in my stash for some glitter card stock and found an old piece of sparsely glittered white card stock and some silver glitter card stock that I then colored with an alcohol marker (TB4) to get the blue glitter piece. I interspersed the glitter card with some 40# vellum die cuts and glued all the layers together (on both sides with a piece of invisible thread between the large center die cut.
  This ‘floating’ snowflake is actually 10 layers! I LOVE THAT SNOWFLAKE! It certainly deserves to be preserved behind glass (or plastic as the case may be!!). Of course you can see the snowflake from both sides of the ornament, and there is a little bit of movement in there as well.
This is a pic of my 10 layers all die-cut and ready to assemble. I did glue a piece of invisible thread between the two center white pieces and let that dry very well before assembling the other layers on both sides.
Once everything was good and dry, I added small strips of 1/8″ Scor-tape at the top and bottom of one of the ornament halves, and affixed the thread to the tape adding another piece of tape on top of the thread. I used my Multi Medium Matte to glue the two halves together, and the scor-tape helps as well!
Once dry, I covered the seam with 1/8″ white satin ribbon run through my zyron sticker maker and created a loop at the top for hanging. I tied a double bow with some white and silver ribbon from my stash and glued that to the top of the ornament with E6000 heavy duty glue. I liked that so much I decided to go ahead and make the second ornament. This time I eliminated the first (largest) white layer and just used the remaining four layers. That makes the snowflake just a touch smaller so the movement on this ornament is a little freer than the first, and I think a little bit more ethereal without the bold white center.
I never thought I’d get around to these ornaments in our kits, but inspiration took hold of me, and I am so pleased with both of these! I have a couple of people in mind who would really appreciate these ornaments as a gift this year! BONUS!
Thats my ten cards, two ornaments and one treat bag created with the My Monthly Hero November 2019 Kit. I used every stamp in this stamp set, all of the fancy dies and quite a few of the frame dies. The only thing in this month’s kit that I didn’t use, was any of the A10 envelopes. Truthfully, the thought of making a card that big gave me palpitations!
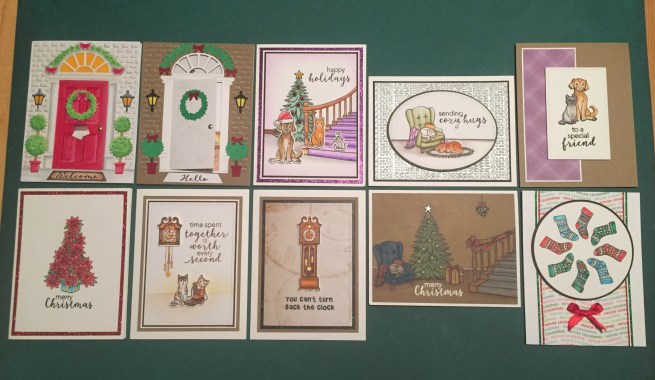
Six Christmas cards, a birthday card, and a few friendship cards makes for a nice attractive group of cards this month. I think that Doorway Fancy die is truly something special… the staircase stamp is unique as is that grandfather clock stamp. I think all the animal stamps are pretty adorable and will prove handy in the years to come, and I do like the non-holiday sentiments as well! I had a great time creating these cards (and extras) with this kit – enough to forgive Hero Arts for giving us two Christmas themed kits in a row this year! LOL!
As of posting, this kit is still available at heroarts.com. If you do go shopping with Hero Arts, please use my links throughout this post and my link to the Hero Arts shop directly: http://shrsl.com/1f7qx THANK YOU SO MUCH! That truly helps support this page and is graciously appreciated!
Thank you so much for sharing your time with me here… I am sending you and yours best wishes for a happy, healthy, and hearty Thanksgiving Holiday! Please remember to Like me, List me, Pin me, Post me, Share me with all of your friends, Don’t forget to warm the dinner rolls… and HAPPY CRAFTING!

Another one out of the park!! Wonderful inspiration. Thanks for generously sharing.
LikeLike
Thank YOU, Nan! Always appreciated, and truly my pleasure! Spread the Cheer!
LikeLike
What company makes the doorway die? I want that die!
LikeLike
Christine –
That doorway die came from Hero Arts in the My Monthly Hero Kit last November… The kit has sold out and I don’t believe they manufacture that die anymore!
So sorry…!
Scott
LikeLike