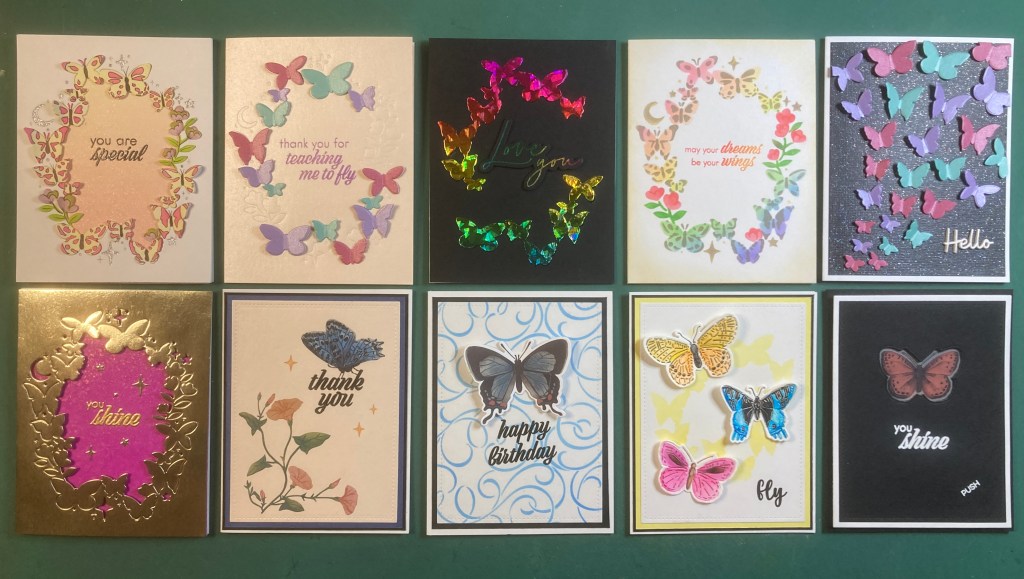
Hello Folks!! Scott here with my 10 cards inspired by the My Monthly Hero May 2023 Classic and Premium Kits. Hero Arts claims this kit is celebrating the freedom and joy of childhood with two color layering bicycle stamps and all the elements needed to decorate them. There’s a fun Pop-Art flower stencil and some Pigment ink cubes as well!

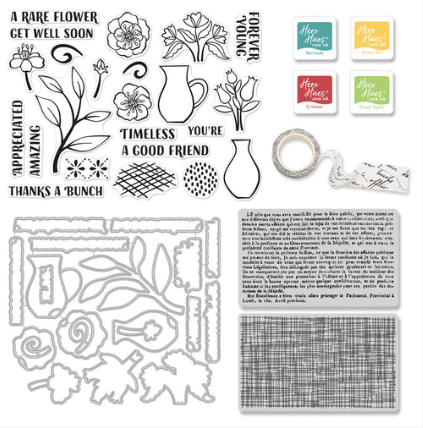
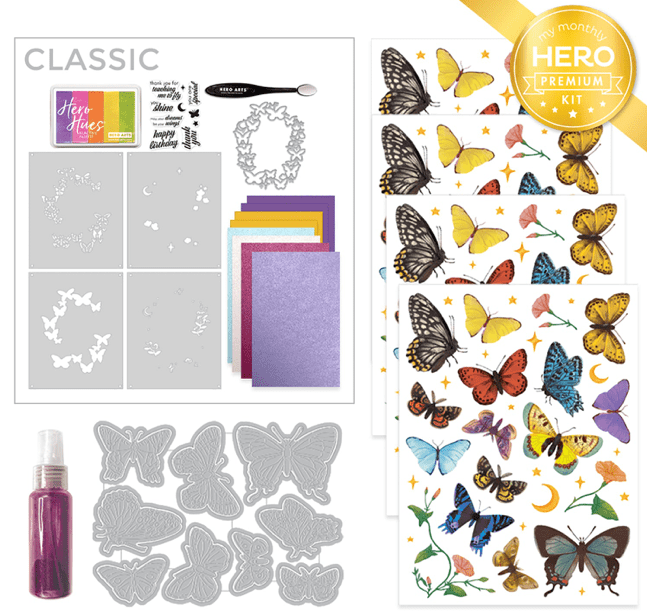
CLASSIC KIT INCLUDES:
• Clear Stamp Set, 6” x 8”
• 20 Coordinating Dies
• Flower Stencil, 6” x 6”
• 3 Sheets each of Glitter Paper in Rose Gold and Aqua, 5.5” x 8.5”
• 3 Pigment Ink Cubes (Teal, Pink, and Yellow)
• Clear Embossing Powder, 0.5 oz
PREMIUM KIT INCLUDES:
• Everything in the Classic Kit AND…
• Tri-Fold Fancy Dies
• 4 Sheets of Bicycle Hero Transfers
• 2 Sheets of Holographic Paper, 5.5” x 8.5”

Lot of pink bicycles on that transfer sheet…! In fact, there’s lots of pink in this kit…! Not sure about all the glitter and holographic card stocks included… as a youngster, most of my bikes were pretty plain and rarely sported more than a clothespin holding a baseball card between the spokes…! Once again, I’ll try to make my first five cards using only the supplies in the Classic Kit! Let’s see how these color layering bicycles stamp…!

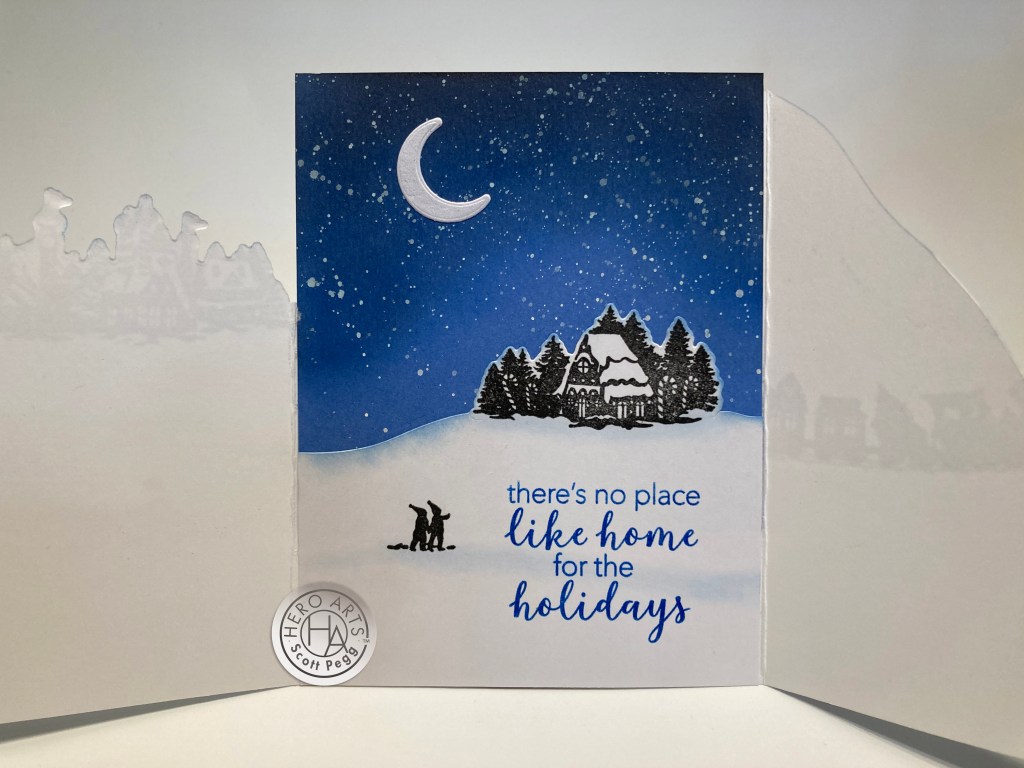
Very easy to line up this bicycle stamp! I started with the bike body stamped in the Teal Pigment ink included with the kit, then I stamped the wheels/seat/hand grips with HA Charcoal Core ink and the spokes with HA Granite Core ink. I die-cut the bike with the included die, and decided I wanted a different color for my handlebar basket. I stamped the basket portion lightly on a scrap of Ivory card stock with Frayed Burlap Distress oxide ink, fussy cut the basket out, and glued it over the teal basket on the bike…
I stamped and die-cut the grass on a piece of HA Kiwi card stock using Green Apple Reactive ink, and added another grassy border behind that using a LF Grassy Border die and more Kiwi card stock. I die-cut a piece of blue watercolor pattern paper with a Lawn Fawn Stitched rectangle die and stamped the sentiment using HA Intense Black ink and embossed that with some of the clear embossing powder. I added a thin blue glitter mat behind that, trimmed my grass pieces to size using the Stitched Rectangle die and glued them all down to a White A2 card base.
The true fun of this card is achieved by attaching the bike to the card front with a Mini Action Wobbler (on the back wheel) for some bouncy “wheelie” action. Offsetting the wobbler on the back wheel adds a great deal of action to the bike without even having to flick the bike by hand…!
There’s one more color layering bike in this set… only two stamps so a little bit easier than the profile bike!
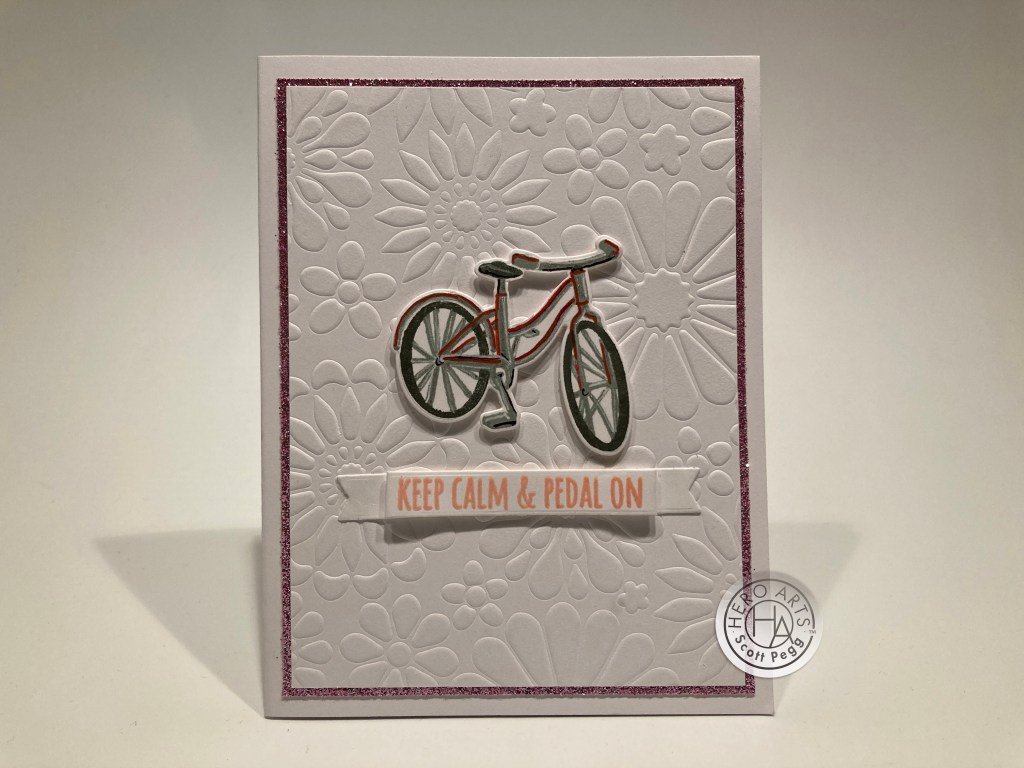
I do like the perspective on this bike stamp! I stamped this bike on White card stock with the HA Charcoal and Granite Core inks and then added some details with a Red and Black Pigma Micron pen and some touches of a White gel pen as well. This feels very metallic to me…!
I cut a piece of 110# White card stock to 5″ x 3.75″ and dry embossed the stencil on that. Dry embossing a stencil is a great way to stretch the usage of your stencils and I think it works beautifully for this background. I added a thin mat of the Pink Glitter card stock behind the embossed piece and glued both to a white A2 card base.
I stamped the sentiment on a scrap of White card stock using the Pink Pigment Ink cube from the kit and embossed it with the clear embossing powder. I die-cut the stamped sentiment with a Lawn Fawn Everyday Sentiment Banners die, folded the flag ends before mounting to the card front with foam tape. The bike is mounted with foam tape as well, and this whole card feels very spring-like and quite comforting!
Fortunately, there are a few stamps in this set that don’t necessarily have anything to do with bicycles…!

Straightforward, simple, colorful and perfectly appropriate for a Birthday! I stamped the round and heart balloons using my MISTI Stamping tool and the Fruit Punch, Creamsicle, Lemon Drop, Green Apple, Splash and Grape Slush Reactive inks. I masked off the strings to stamp the balloons and masked off the balloons to stamp the strings with Granite Core ink. I die-cut the stamped panel with a LFSRdie, added a thin red mat and glued both to a White card base.
The sentiment is stamped with the Fruit Punch Reactive ink and embossed with the Clear embossing powder. For a little touch of bling, I die-cut a scrap of metallic red card stock with the smallest heart die in the kit and glued that next to the sentiment. I did add some highlights to the balloons with a White gel pen and we have an all-purpose Birthday Card! Sorry… no bike this year!!
I was convinced that I could turn the profile bike stamp(s) into a Tandem Bike… it took a couple of tries (I even did one where there were THREE wheels… OOPS!) but I think this works pretty well…!

I stamped the main bike stamp (Splash Reactive ink) twice on some masking paper and trimmed away the front on one and the back on the other to join the two together to make this Tandem bike… It was a little bit fussy trying to keep the handlebars on the back from encroaching on the seat of the front bike but this feels pretty good! I extended the chain guard on the front bike with masking and a blending brush, and created the extra center support (behind the center white flower) with more masking and ink blending.
I stamped the seats and hand grips with Fruit Punch Reactive ink and the wheels with Charcoal and Granite Core inks, and the Streamers with the Yellow Pigment ink from the kit. Finally, I used a Blue, Red and Brown Pigma Micron pen for some details on the bikes, and added a portion of the box stamp to the back with the bundle of food and wine using Frayed Burlap Distress Oxide ink. I die-cut the stamped panel with a LFSRdie, added a thicker blue glitter mat and glued those to a white card base.
I used the grass die (and the LFSRdie) to cut a piece of Green card stock and ink blended the negative of the Lawn Fawn grass die (card 1) on top with Green Apple Reactive ink before gluing that in place. The sentiment is stamped with Splash Reactive ink and embossed with Clear embossing powder.
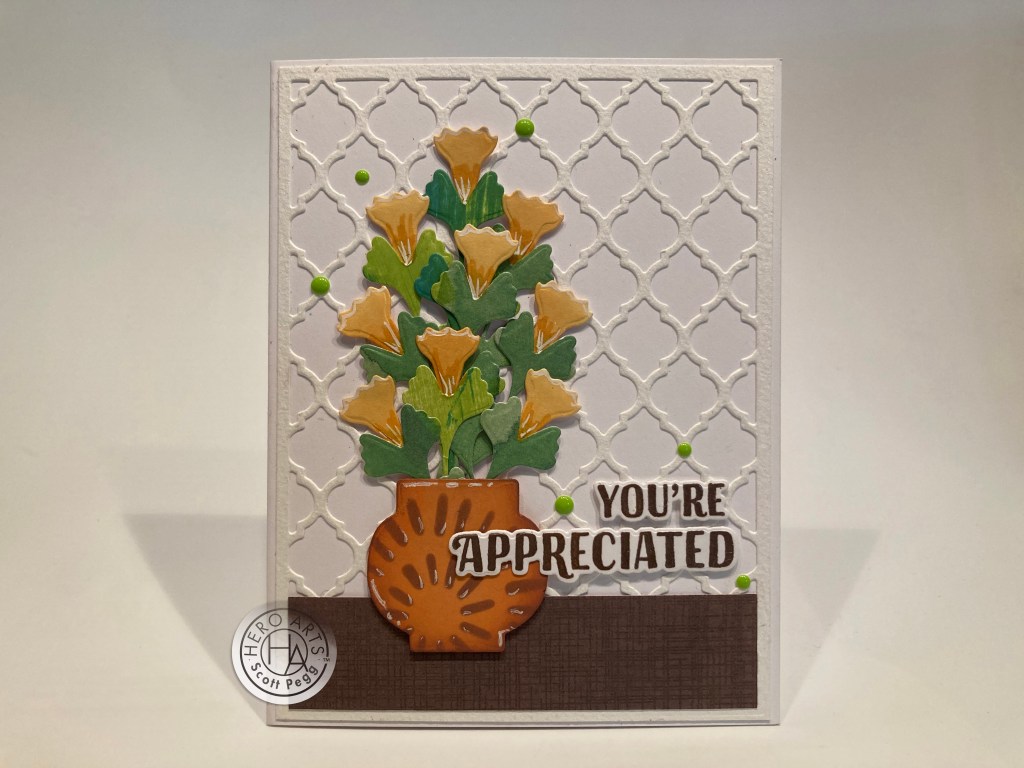
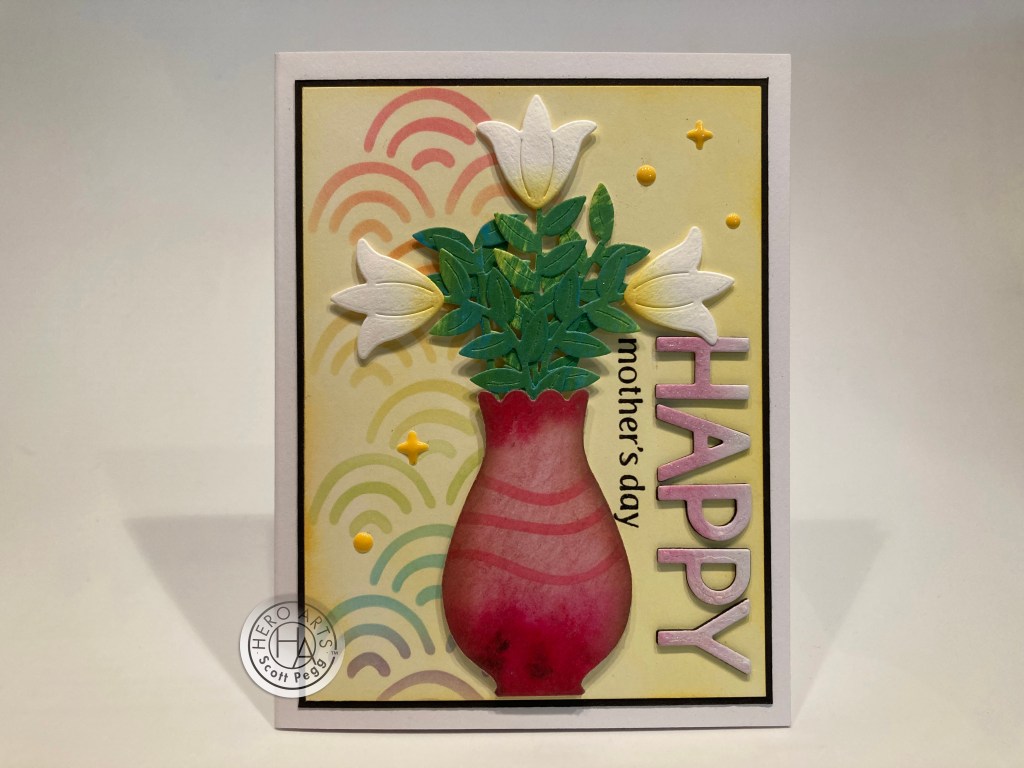
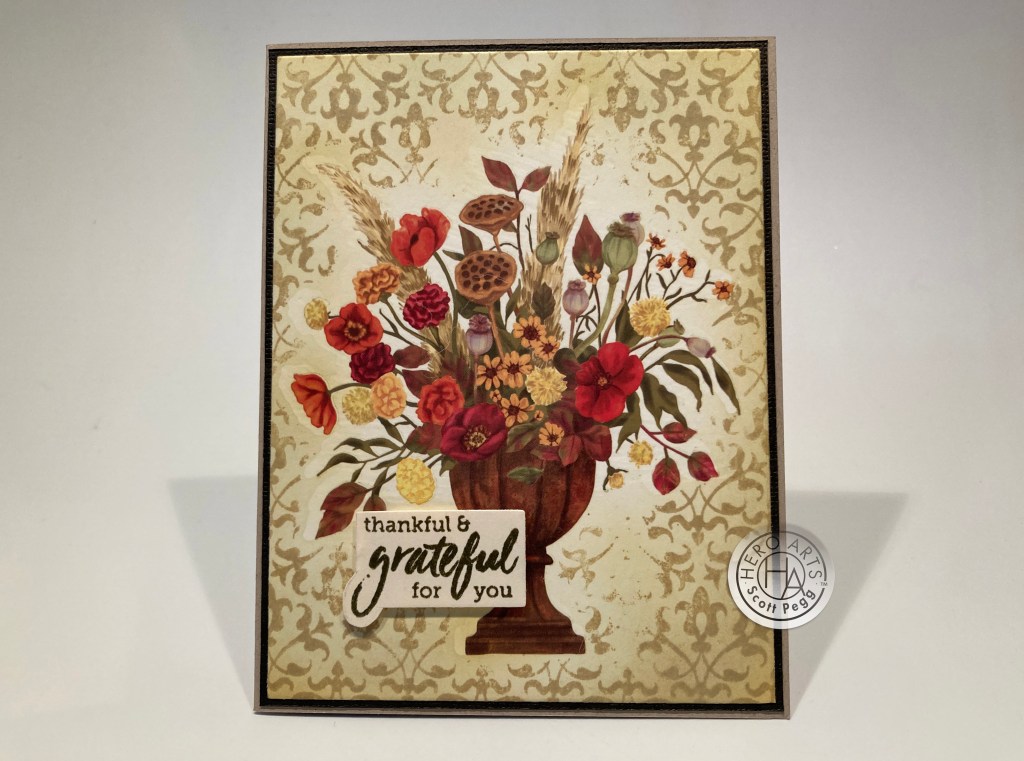
I die-cut the two clouds from White card stock three time each, glued them together for some extra dimension and ink blended a little Splash ink on their bottom edges before gluing them to the card front. I die-cut a bunch of yellow and white flowers using the dies in our kit, added little inked centers, gave them a little bit of shaping and glued them to the card front. I did stamp the basket flowers in the yellow Pigment ink in the basket but they were a little too blobby to tell what they were so I just glued a couple of die cut flowers on the basket. This would make a great anniversary card!!
I did take some red glitter paste and used that with the Flower Stencil for a bright, graphic and sparkly background.

I stamped the perspective bike with Embossing and Watermark ink and embossed it with HA Red embossing Powder. I stamped the seat/wheels with Intense Black ink and embossed those with the Clear embossing powder, and die-cut it out. I stamped and embossed the flag exactly the same, and die-cut that as well.
I die-cut a panel of White card stock with a LFSRdie, stamped the sentiment with intense black ink and embossed that with Clear embossing powder. I added a mat of Black glitter card stock and glued those to a White A2 card base. I trimmed the glitter stencil piece to fit inside the stitched lines of the back panel and glued that flat to the card front.
I tried flipping the glitter stencil piece around to the right so I could put the flag on the back of the bike, but it just didn’t feel right, so I put the flag on the front fork instead… not very practical, but it looks good with this arrangement. I like this ‘monochrome’ card a lot though I wish my reds were a little closer in color… c’est la vie…!
So that’s my five cards only using the materials in the Classic Kit. Now we can dig into the Premium supplies which feature the three piece tri-fold fancy dies. Let’s see what happens if we connect them all together…!
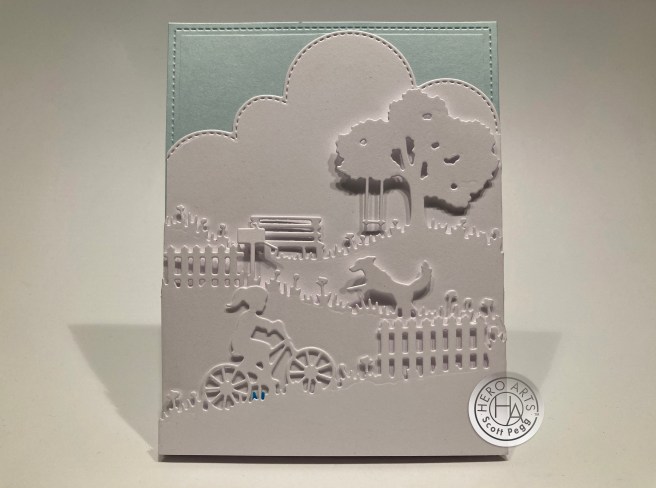


Now that’s a tri-fold card! I managed to die-cut these four panels so there was only one hinge… That means die-cutting the first panel on the back of an A2 card base, the second panel on the inside front panel of the same card base, the third panel on the back of an A2 card base and the Stitched Clouds (from my stash) on the inside front panel of the same card base. So the only added hinge is on the left between layer 2 and 3. That was fun!
I masked and stamped the sentiment(s) using the Teal Pigment ink and embossed all with Clear embossing powder. I die-cut a piece of HA Arctic card stock with a LFSRdie and glued it behind the cloud to complete the card. These die-cuts are so detailed, I didn’t think they needed any embellishments or color… really sharp done up in White! Naturally, this card stands on its own, and I love the dimension you get when the layers are relaxed and opened up a little!

You can use those dies all together like this or individually as you like… I suppose you could even cut the ponytail off the rider and turn “her” into a “he”… the possibilities are almost endless…!
When I was trying to think of things to do with the glitter card stock in our kit, I realized that our pigment inks should work on top of the glitter card stock…!

I did one glitter panel with the Pink and Yellow pigment inks and they were a little light in color, so I figured I could use Unicorn White pigment ink as a base for the colors to brighten them up! That worked extremely well, but the pink pigment faded out to white fairly quickly. But the yellow pigment ink is something else all together…! very juicy and quite vibrant!
Might be the brightest yellow ink in my stash!! I reapplied the Yellow ink over the faded out pink ink for this great glitter background.
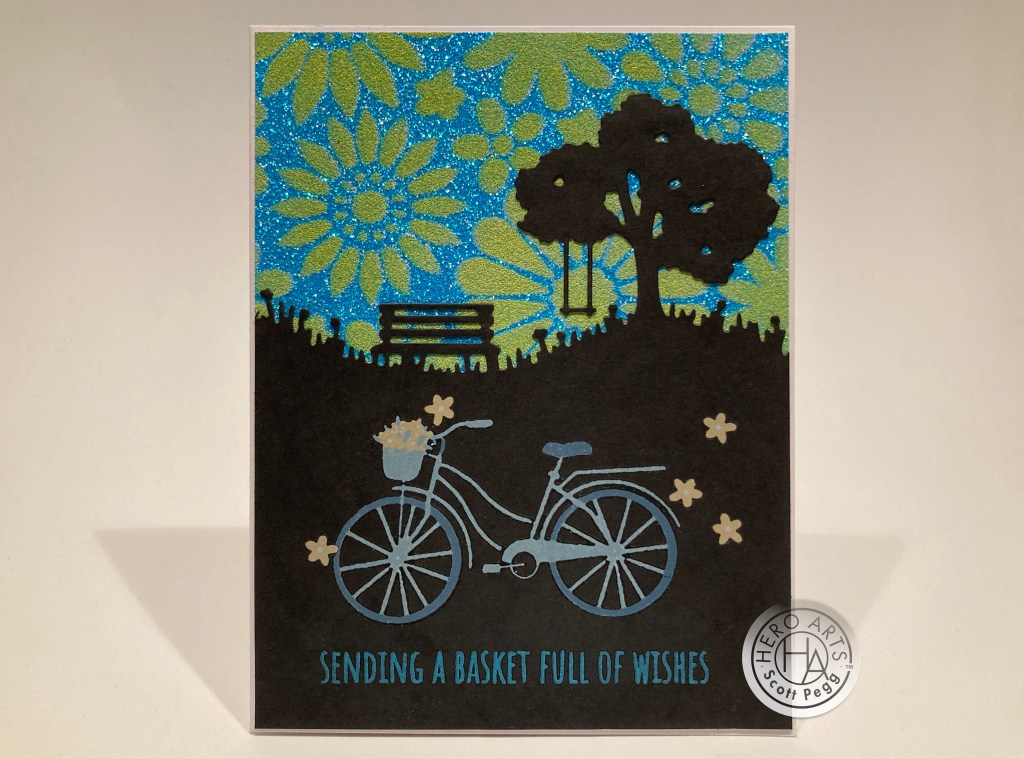
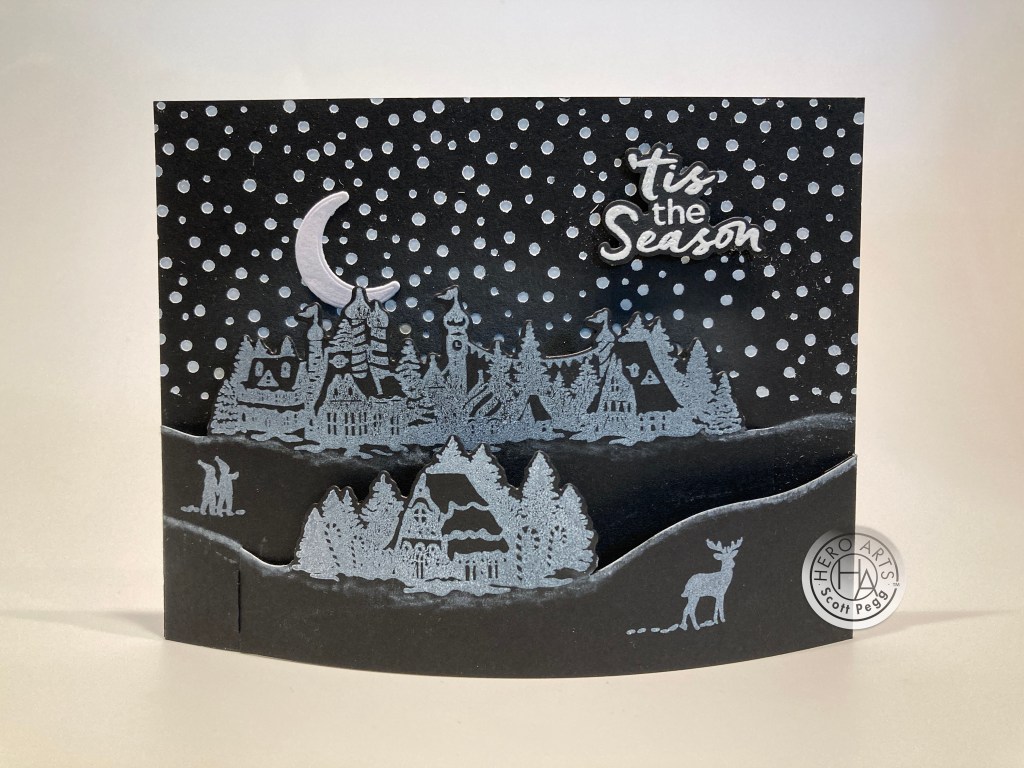
I die-cut the third tri fold die from some HA Pitch Black card stock and added a rub-on blue bike on the top… those rub-ons work very well on black! I added some of the yellow flower rub-ons as well! I stamped the sentiment with Splash reactive ink and embossed it with the Clear embossing powder. I glued the black panel to the stenciled glitter background, trimmed them to 4 1/8″ x 5 3/8″ and glued all to a White card base. I am loving that stenciled glitter sky!
That was a fun use for the glitter card stock… how about the holographic card stock in the Premium Kit?

Here’s a good pun for this month! I printed this sentiment on a piece of White card stock using my Silhouette software and the Courier font. After figuring out the placement of everything, I die-cut the printed panel with a LFSRdie and added another rub-on blue bike to the left side of the panel. I cut the “broken” holographic card stock in small strips and added them as little motion lines to our bike. I glued that panel to a smooth holographic mat and then down to a White card base. My piano tuner at work is an avid bicyclist (summer or winter, rain or shine) and not only does he hold his bike in the highest regard, but he does claim that bicycling is the best therapy he has ever experienced…!
Of course, when I was learning to ride a bike, I was constantly told to keep pedaling… keep pedaling… keep pedaling…

And that feels like a perfectly appropriate sentiment for anyone… at any age…! I did another rub-on bike on a piece of 40# vellum and die cut that with a HA Nesting Circle Infinity die. I created this sentiment using my Silhouette Software again with the Courier font, and printed that directly on a White A2 card base. I attached the vellum with little dots of glue behind the bicycle. Great encouragement card!
My last card was actually inspired by Pocono Pam and the card she created for Day 2 of this kit’s sneak peeks!

I had to up the ante a little bit with this one, and made an interactive card with the bicyclist riding around the circle!
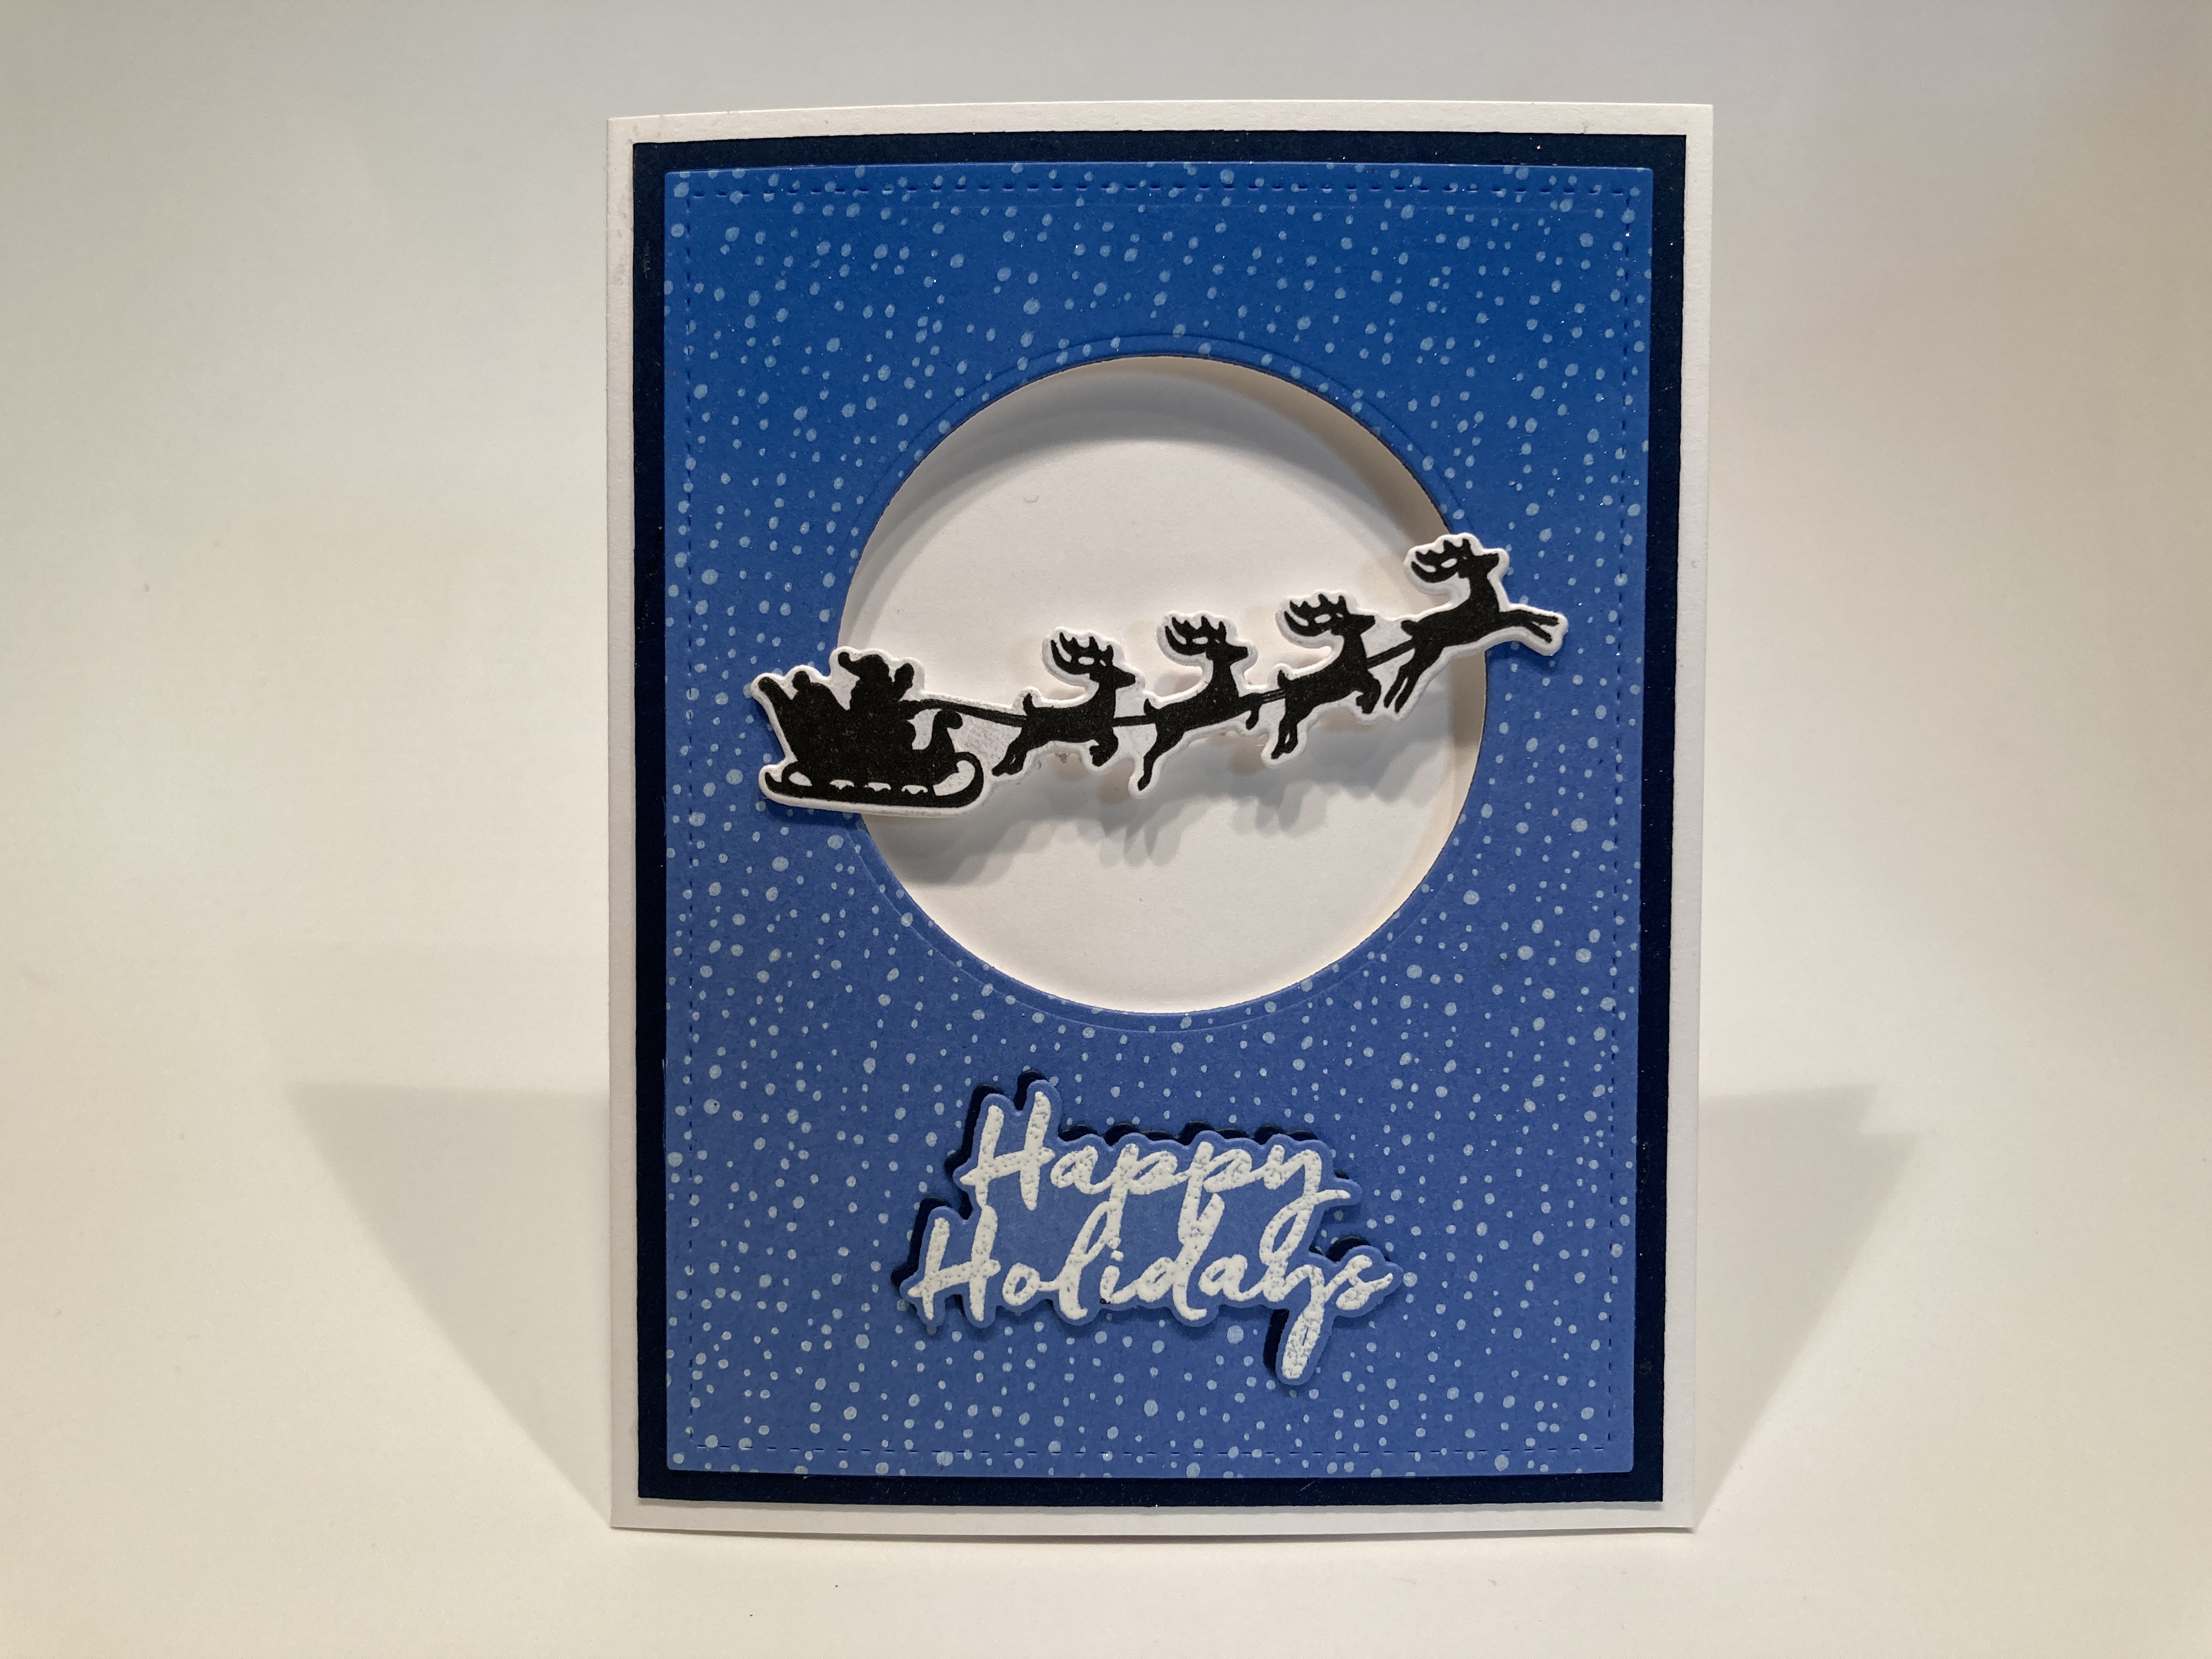
I started with two LFSRdie cut panels and my HA Nesting Circles Infinity dies. I die-cut the circular opening (3″) in one of the die cut panels and used the Yellow pigment ink to lightly stencil the flowers on that panel. I die-cut a larger circle and colored that with the Yellow Pigment ink. I die cut another even larger circle to be our “spinner” and stamped little arrows (MFT Interactive labels) with Charcoal Core ink, and punched little notches around the edge to help grip the spinner. I attached the spinner to the other die-cut panel with a brad, and centered it to the left side of the card.
I die-cut the bicyclist from Pitch Black card stock, die-cut the bottom edge of that with the matching circle die and glued that to my yellow circle. I temporarily taped the rectangular die-cut panels together and figured out where to attach the yellow circle to the spinner circle (don’t glue too close to the brad!). I stamped the sentiment on the front panel with Intense Black ink and embossed it with the Clear embossing powder. I used thin foam tape to attach the rectangular panels together.
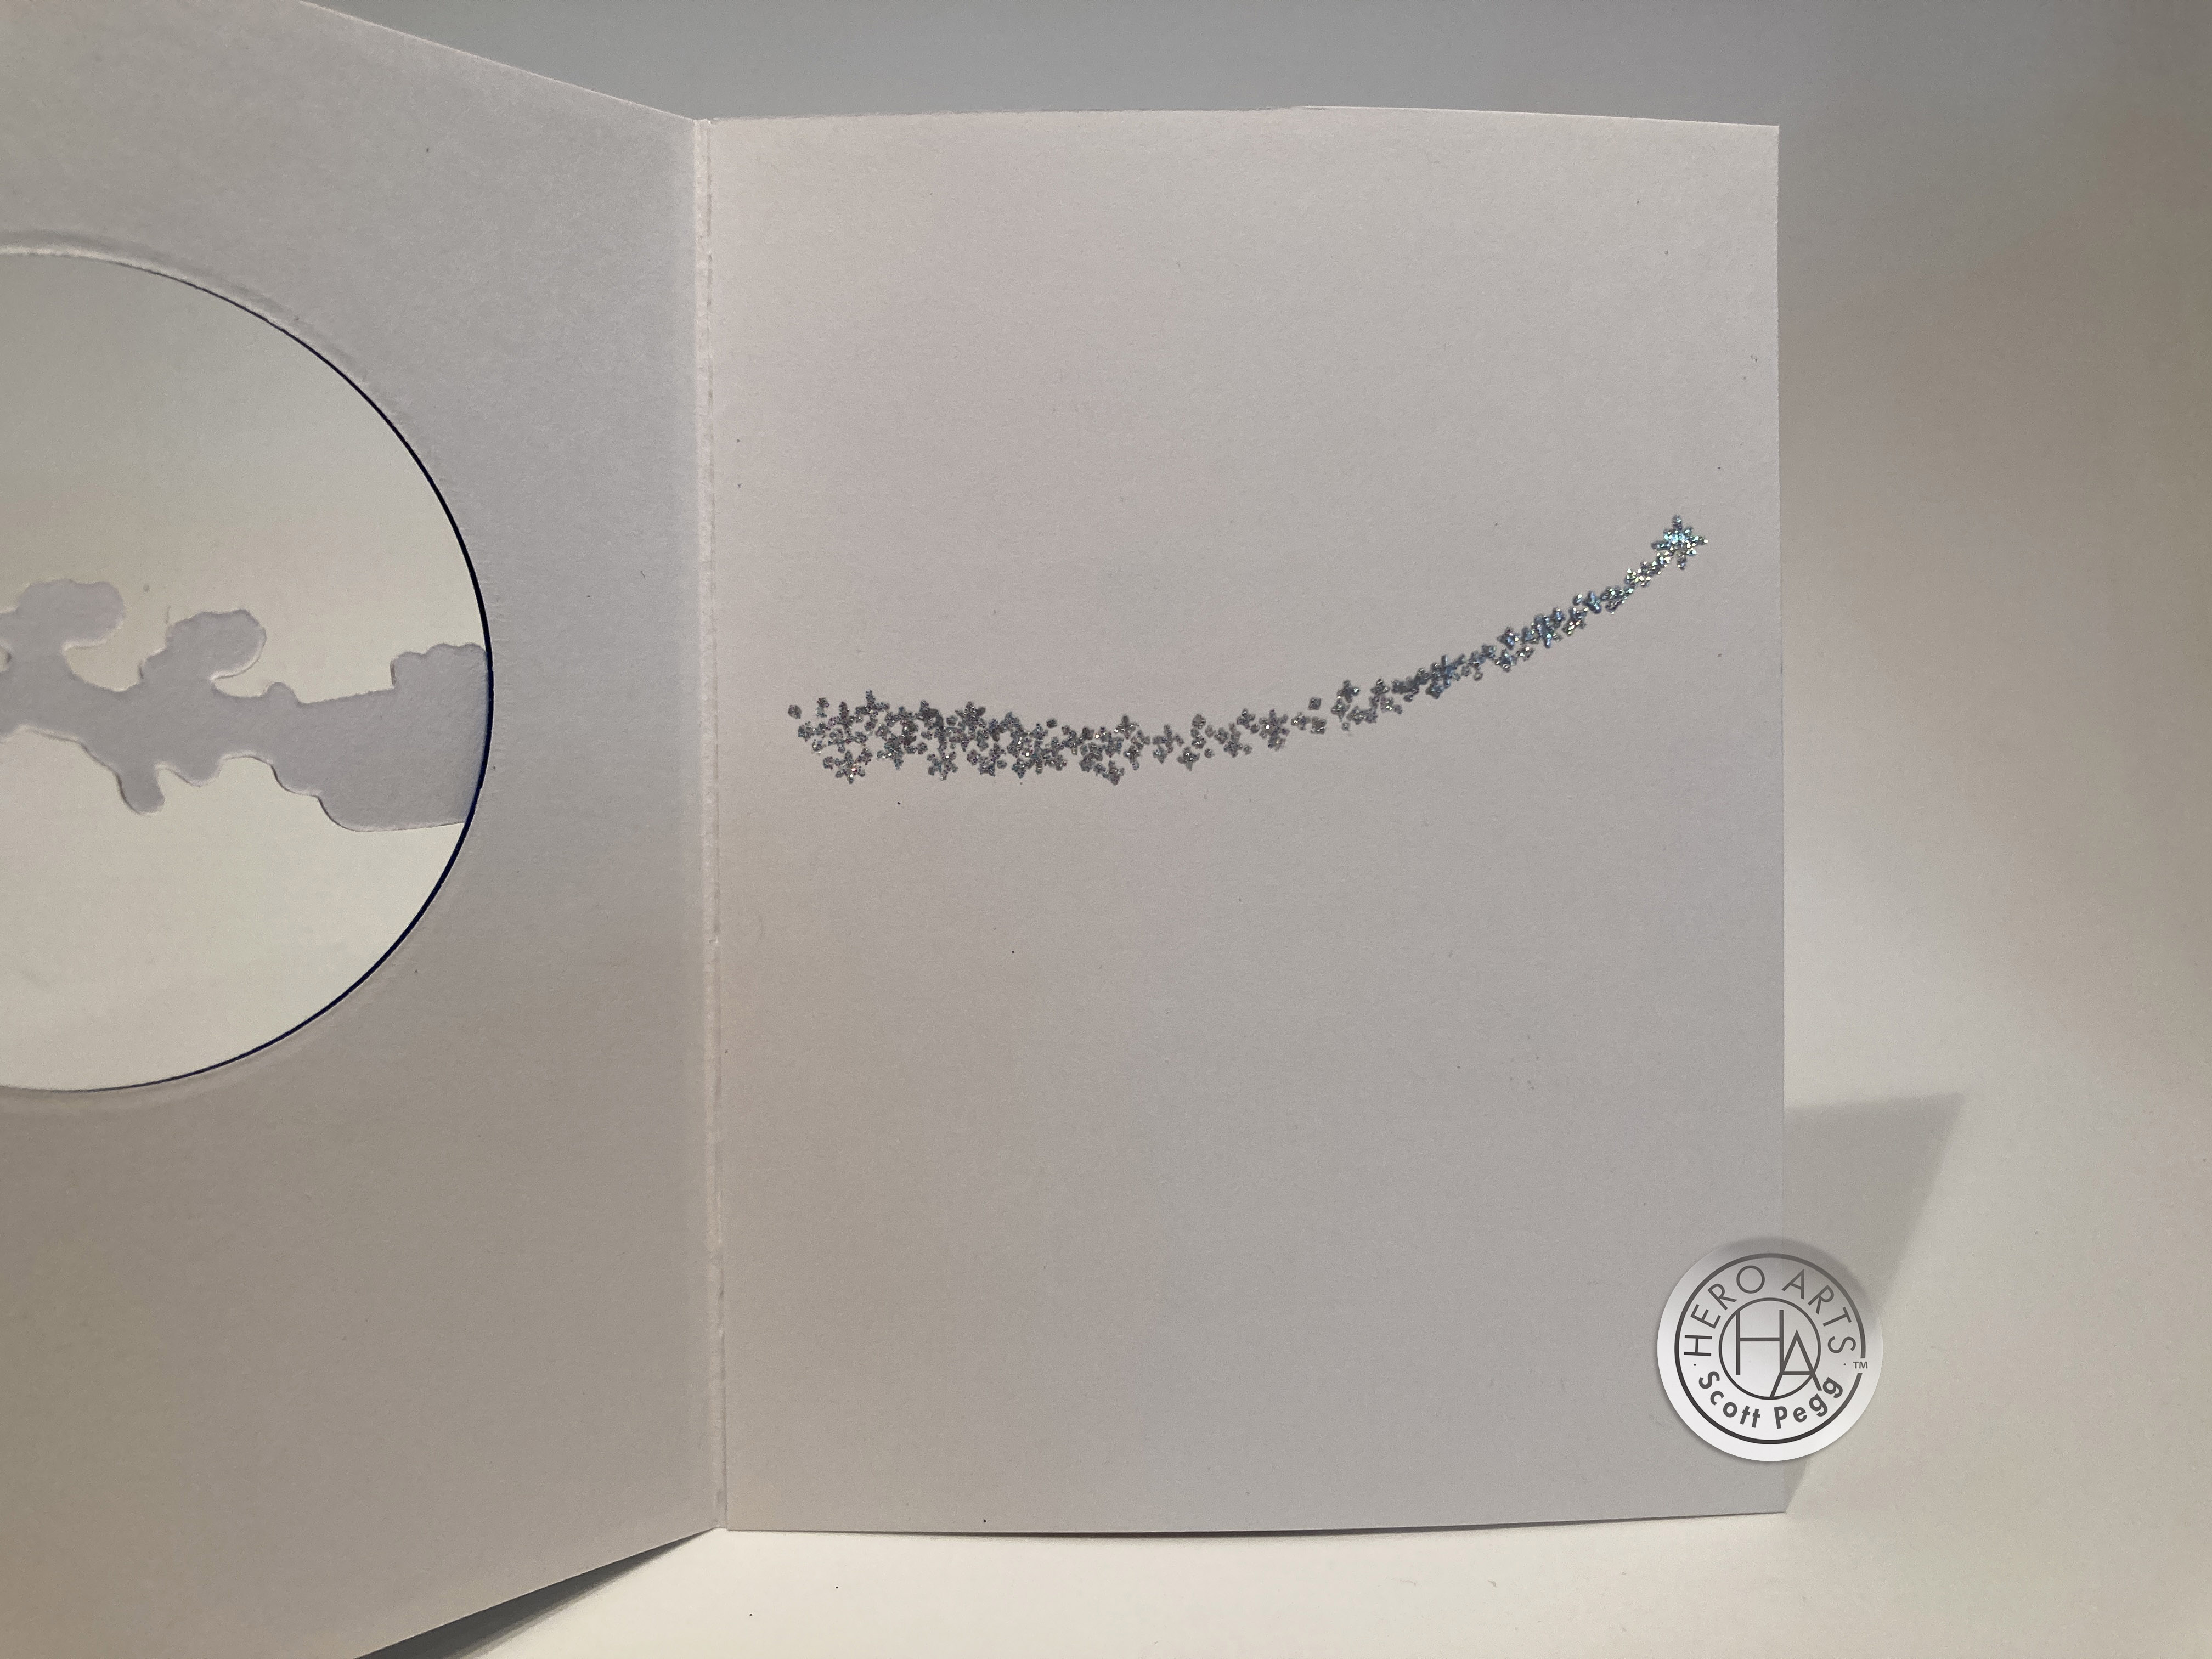
I cut a piece of Pitch Black card stock to 4″ x 5.25″ and glued that to the front of a White A2 card base. I then used some normal thickness foam tape to attach the action panel(s) on top of the black mat. I wasn’t going to use this sentiment to begin with… I thought it was a little odd… but it works quite well on an interactive card like this! I guess you might equate this to a hamster wheel, but I prefer to think of it as a Globe of Death circus and carnival stunt – the one with motorcycles spinning around inside a steel mesh globe…! Needless to say, this ride could just go on forever and ever…! Or at least until the wheels fall off!
And that’s our springtime bicycle adventure! Despite there being nine card with bicycles, I think we have a pretty decent variety of looks and styles here… and even a couple of interactive cards as well!

I managed to use most (but not all) of the stamps in our stamp set… the animal silhouettes and fence and decorative flowers and hearts went unused though I did use the flower and small heart dies. We used the flower stencil on four cards, the glitter card stock on four cards and, of course, the Clear Embossing Powder.
This embossing powder could not have come at a better time… I was on the last dregs of my Clear embossing powder, and the final bits had become adulterated with specks and spots of foreign materials, so I simply dumped out the old and refilled my container with this new batch of Clear Embossing powder – filled up my pot almost half-way! Thank you!
I did use all of the tri fold fancy dies, a number of the rub-ons and even some of the holographic card stocks! I think I gave this kit a pretty good run for the money even if I didn’t use all the stamps!
This Classic Kit is still available at Hero Arts, though the Premium Kit has sold out (don’t ask me…!?). If you’re ready to break your bike out of cold storage and venture forth in this glorious springtime, grab a kit for yourself before it sells out too! If you do go shopping at Hero Arts, please use my links listed below. It is dearly appreciated and actually helps support this page (at no cost to you!). Thank you, Thank you!
My Monthly Hero May 2023 Classic Kit: http://shrsl.com/42o88
My Monthly Hero May 2023 Collection: http://shrsl.com/42o8d
Thank you so very much for sharing your time with me here today. Let me know what you think of this kit and what card(s) are your favorites. I always appreciate hearing from you and am thrilled to be a part of your crafting adventures! Please remember to Like me, List me, Pin me, Post me, Share me with all your friends… Don’t run with scissors…! and I’m sending you and yours all my Love, Light, and Happy Crafting!
DISCLOSURE: This site contains some affiliate links to products. I may receive a commission for purchases made through these links (at no cost to you). As an Amazon Associate I earn from qualifying purchases. Thank you!