
Hello Folks! Scott here with my ten cards created with the My Monthly Hero April 2023 Classic and Premium Kits. This month we are treated to an interesting mix of florals, vases, and all sorts of “multi-media’ elements. There is SO MUCH STUFF in this kit!! And to top it off… all the sentiment stamps have dies to cut them out!
CLASSIC KIT INCLUDES:
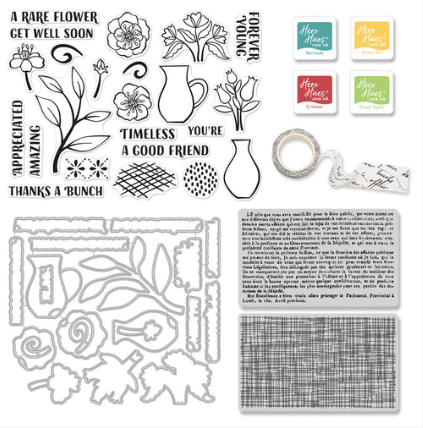
• Clear Stamp Set, 6″ x 8″
• 20 Coordinating Dies
• 2 Background Texture Cling Stamps, 2.25″ x 3″ each
• 4 Ink Cubes (Bermuda, Butter Bar, Green Apple, Crimson Core Ink)
• Fancy Script Washi Tape
PREMIUM KIT INCLUDES EVERYTHING IN THE CLASSIC KIT PLUS:
• 20 Flowers and Vases Fancy Dies
• Doodles Stencil, 6″ x 6″
• Enamel Stickers

Between the Classic and the Premium, we get 40 dies in this kit!! Amazing! As usual, I’ll create my first five cards using only the elements in the Classic Kit. I started out fairly simple…

I do love those background texture cling stamps – so handy for creating backgrounds and extra textures on your cards. I stamped the texture weave cling stamp in the center of a White A2 card base using Hero Hues Granite Core ink. I did wipe down the edges of that cling stamp to soften them a bit. Then I stamped the hashtag pattern stamp on top using Hero Hues Charcoal Core ink.
I stamped the vase and flower bundle using HA Intense Black Ink on some Bristol Smooth card stock, and colored the flowers with my Zig Clean Color Real Brush watercolor markers. I actually used the Bermuda ink cube to watercolor the vase, but the Core ink cube didn’t quite behave as a simple watercolor – I should stick to the Reactive inks if I want to use inks to watercolor! But I was able to get a decent blend on the vase, and after that dried, I fussy-cut a negative mask of that vase from some ThermOweb Masking paper, and stamped the circular texture stamp on the vase using the Bermuda ink cube.
Once dry, I die-cut the flowers and vase with their matching dies, glued them together, and mounted them to the card front with foam tape. I stamped the sentiment on some 110# card stock using the Bermuda ink, and die-cut the sentiment. I attached the sentiment with more foam tape and we have our first card for the month. That’s a decent little pun there, and the colors really pop on that simple two-tone grey background!
All of the online descriptions of this kit really played up the multi-media aspects…. Okay… I can go there…!
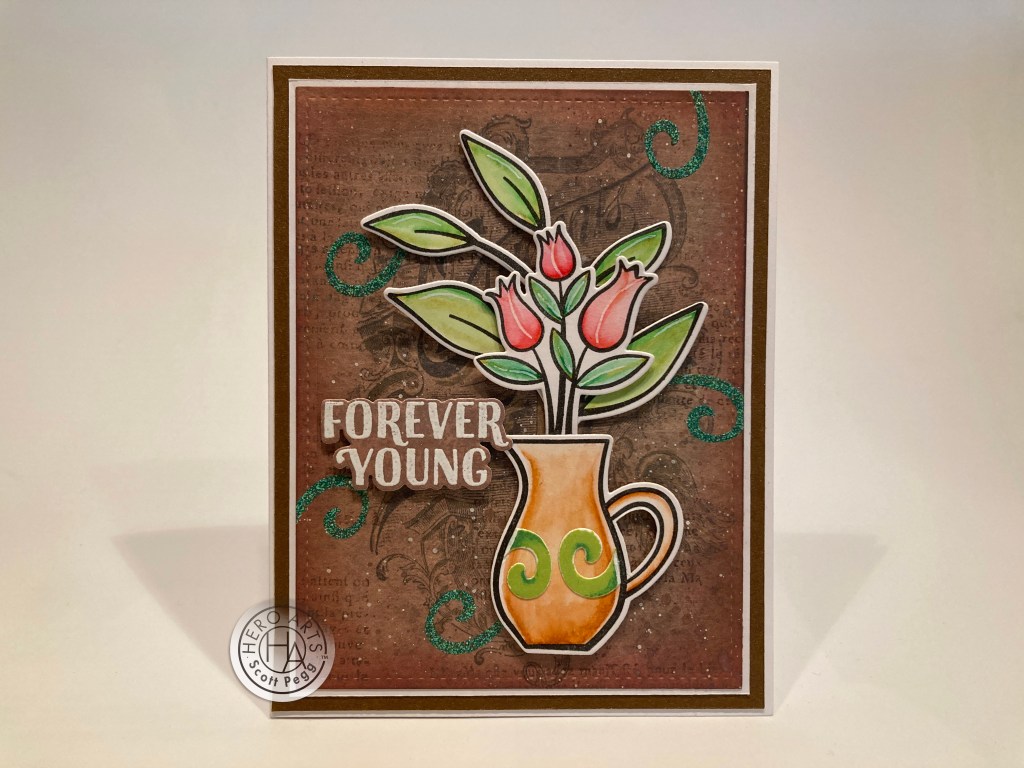
I often reach for my Tim Holtz pattern papers when creating a multi-media card and this background (Collage Mini Stash) felt kind of perfect. I embellished the background with the text pattern cling stamp using Charcoal ink, and added some white ink splatters as well. I stamped the flowers, leaves and pitcher on Bristol Smooth card stock with Intense Black ink, colored them with my Zig markers, and die-cut them out. The sentiment is stamped on matching Tim Holtz pattern paper with VersaMark ink, embossed with White embossing powder, and die-cut with the matching die. I added the swirls on the pitcher using the smaller swirl die colored with the Green Apple and Bermuda ink cubes, trimmed down and then glued to the pitcher. A White gel pen adds some highlights to the stamped and colored images.
I laid out my arrangement on the background and planned out the green swirl stamps – notice how you don’t see the tail end of any of them! I stamped them with VersaMark ink and embossed them with some Love From Lizi Atlantis Green embossing powder. I die-cut the background panel with a Lawn Fawn Stitched Rectangle die, and ink blended some Walnut Stain Distress Oxide ink around the edges. I glued that to a thin white mat and then to a thicker Auburn Pearl mat and then down to a white A2 card base.
I attached the pitcher, leaves, flowers and sentiment to the card front with foam tape, and added the Happy Birthday sentiment to the inside of the card. This stamp is from the HA Many Everyday Messages stamp set and compliments the cover sentiment perfectly. This one’s a little more multi-media for you!

I have to admit that I am not well versed on the art of flower arranging… I’ve used the two pre-arranged stamps in the kit and now I have to turn my attention to the single bloom stamps! When I realized that the large bloom stamp had two six-petal layers, and we have that “rare flower” sentiment, I knew what I had to do…

A black and white card certainly makes this rainbow bloom stand out! I covered a plain Panel of White card stock with our Washi tape, lining up the text between strips and then die-cut that panel with a LFSRdie. I completed the cut on the Washi tape at the stitched lines, and removed the excess giving me a nice white frame around the washi background. The seams between the washi tape were starting to bother me a little, so I added some thin black peel-off stickers on the seams and just made it part of the pattern. I added a black mat to the washi background and glued both down to a White card base.
I stamped, colored and cut the bloom and the sentiment(s) just like the first two cards, and die-cut the leaves from some 110# card stock. I did use a small stylus to add a simple vein on each leaf… that adds a lot of detail to the otherwise plain die cut! All the die cuts are attached to the card front with foam tape. I really like that Washi tape background, and I can’t imagine a more Rare Flower…!!
I do believe I can embrace the multi-media aspect of this kit a little more vigorously…!

This card actually started with the center panel – a 2.25″ x 3.5″ scrap of white card stock directly inked with squares of the Butter Bar, Green Apple, and Crimson Core ink in a simple 2 by 3 rectangle (2 of each)… the Butter Bar ink cube was SO juicy that I grabbed a blending brush and just blended everything together… but you can still make out the squares of color. When that panel dried (took a LONG time) I stamped the texture weave cling stamp with Intense Black ink and embossed the text cling stamp in White.
I stamped the flower on a scrap of card stock with VersaMark ink, lengthened the stem with a VersaMarker Pen and embossed that with HA Gold Embossing powder, colored it with my Zig markers and die-cut the bloom and just the beginning of the stem, and then fussy-cut the rest of the stem. The sentiment is stamped, embossed with Gold, and die-cut the same.
I have this old 8″ x 8″ DCWV paper pack called the Fiber Stack with this interesting textured card stock – the orange mat and red strip are torn to size (using a metal ruler) and glued to the card front (red) and behind the stamped panel (orange). I added some more gold embossing next to the red strip using the “tile” stamp, added a piece of lace and then a thin pin-stripe peel-off sticker. The white textured “rope” on the left is paper string unwound a little bit.
I added some white speckles on the inked background, mounted the flower and sentiment with foam tape and added the whole matted piece to the center with more foam tape. How’s that for multi-media! I do love the look of this card!
I have a few more image stamps to use in this stamp set… this happened by just fooling around with the unused stamps!

Nothing planned… totally random stamping here, but I love it! These blooms and buds are colored with Prismacolor colored pencils, and I did add the small swirls (for filler) embossed with Love From Lizi Pastel Purple Party embossing powder – very sparkly IRL! I cut the stamped and colored panel to 5″ x 1.75″, glued that to a thin black mat and a thicker metallic purple mat and then down to the center of a White A2 card base. The sentiment is stamped with Grape Slush Reactive ink and embossed with Clear Embossing powder. For some reason, I am totally taken with this card… must be the thrill of ignoring my obsessive anal-retentive control issues and just going with the flow… if only for a while!!
That’s five cards from the Classic kit! I even managed to use all the image stamps in the stamp set… more sentiments to go of course… and now we get to play with the Premium parts too! You give me 20 flower, foliage, and vase dies and my mind is going to automatically go graphic!
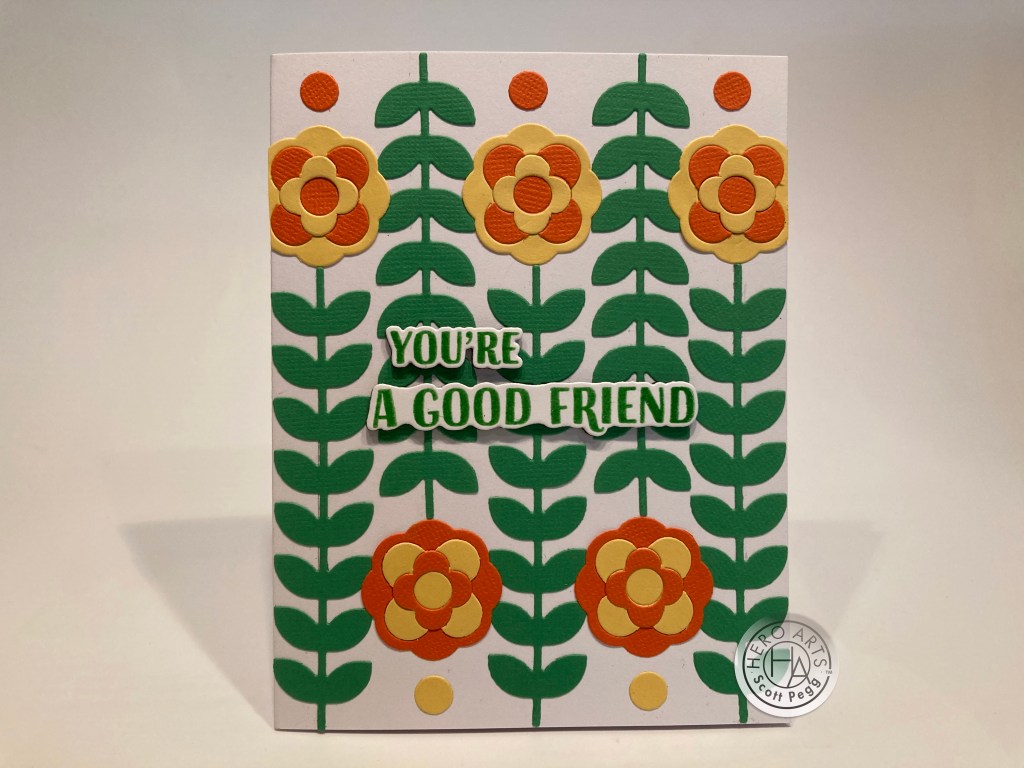
I think I was struck by the large size of this leaf die…! These are all die-cut from some simple textured green, yellow and orange card stock (the yellow is cut on the non-textured side) and the flowers aren’t inlaid, they are layered. I spaced out the leaf die cuts on the front of a White A2 card base, trying to keep them as straight as possible, and glued the flowers down at the ends. Some extra dots from the center of the flowers fills in the white spaces above the flowers.
The sentiment(s) is stamped with Green Apple Reactive ink, embossed with Clear Embossing powder, and die-cut with the matching dies. I added those to the center of the card using foam tape. I really like the bold graphic here!!
It seemed to me that the flower dies had obviously corresponding stem/leaf dies for each of them. Like these…
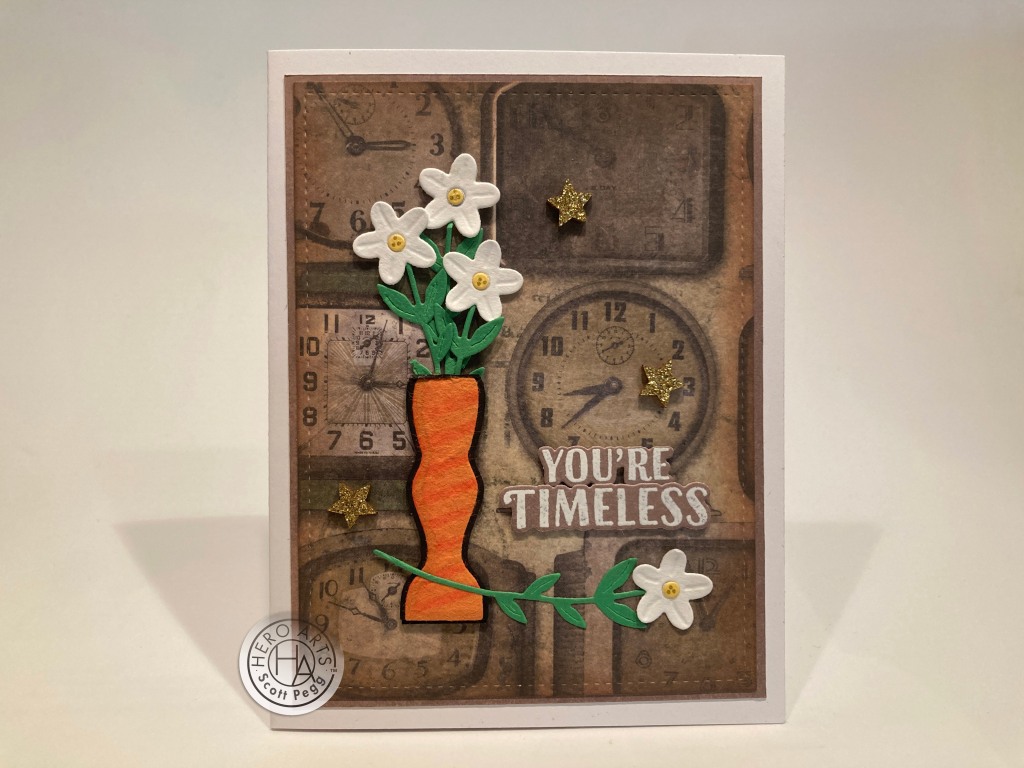
I couldn’t resist going back to that Tim Holtz pattern paper for this card. A little touch of perfect with a sentiment like that! I die-cut that pattern paper with a LFSRdie and ink blended some Walnut Stain Distress Oxide ink around the edges, and glued it to a matching Tim Holtz pattern paper mat and then down to a white card base.
The vase is die-cut from more of that Fiber card stock and stenciled with the straight doodle stencil and Creamsicle Reactive ink. I added a ‘mat’ around the vase by die-cutting a second vase in black, splitting it down the center and gluing it to the back of the orange vase. Little strips of black card stock finish out the top and bottom of the ‘mat’. I think that highlights the vase beautifully!
The stems/leaves are die-cut from the same textured Green card stock and I did add simple veins with a stylus. The flowers are die-cut from watercolor card stock and some petal texture is added with a stylus. The centers are cut from yellow card stock and layered on top of the white flower. I glued the flowers to the stems and arranged three in the vase and attached those to the card front with foam tape. The flower on the ground is glued directly to the card front. The nice thing about these dainty, thin stems is that you can give them a little curve quite easily!
The sentiment(s) is stamped on matching pattern paper with VersaMark ink and embossed in white, die-cut with the matching dies and mounted with foam tape. For a final touch, I found these gold glitter wooden stars in my stash and glued them to the card front. I added little spots of Gold gel pen in the flower centers to match up with the stars. This would make a great Birthday card but could also be fun for other occasions!
Again… I thought these flowers and leaf dies were meant to go together…
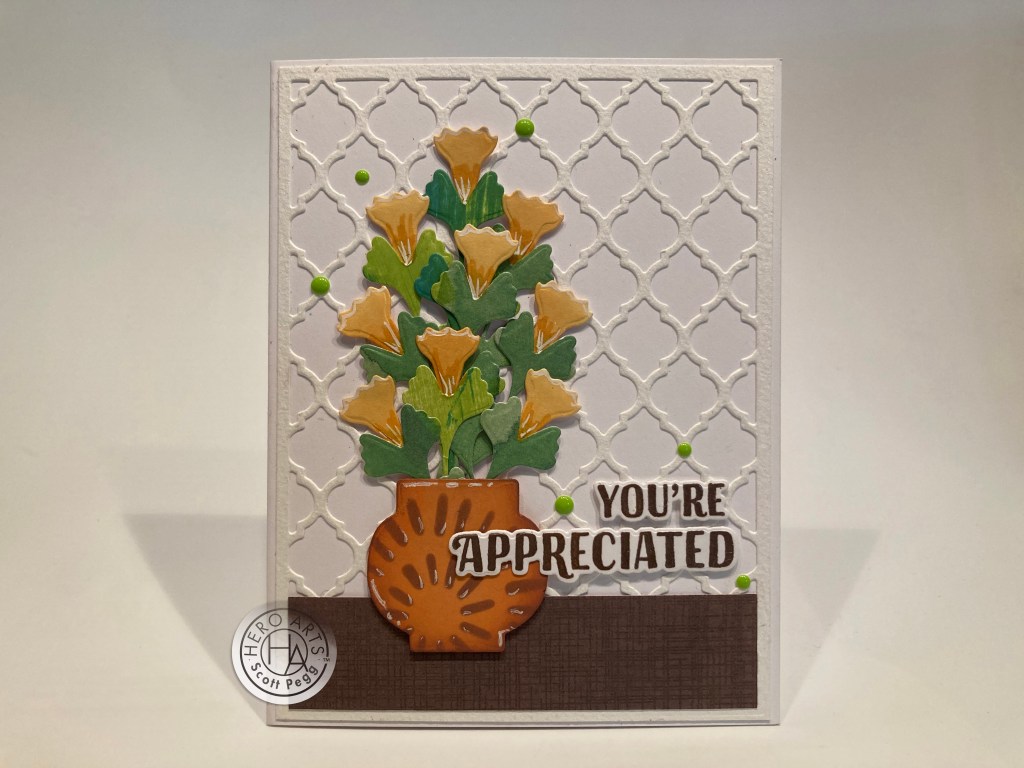
The background is an old Darice Moroccan Geometric background die cut from watercolor card stock and glued to a White card base. I stamped the texture weave cling stamp on more Tim Holtz pattern paper using Walnut Stain Distress Oxide ink, trimmed that down to size and glued that to the bottom of the die cut on the card front.
I did ink up some white card stock using the included Core inks and overlapped the Green Apple and Bermuda inks together to give us a new green! I die-cut the stems from the green inking and the blooms from the Butter Bar inking. (I did supplement the stems with some cut from watercolor pattern paper from my stash). I added a little shading to the blooms with alcohol markers and some highlights with a White gel pen. I cut off a couple of the top leaves from the shorter flowers and then glued the flowers and stems together.
I die-cut the vase from some Orange card stock, did some ink blending and stenciling with Walnut Stain Distress Oxide ink and added highlights with a White gel pen. Looks very much like a clay pot! I glued the flowers on the vase and added all to the card front with foam tape on the vase and on each bloom.
I actually wasn’t going to use this sentiment (I thought it was too similar to the Thank You sentiment) but my sister called me this week and while we were catching up, she actually said that I was appreciated! Well, that was enough for me! The sentiment(s) are stamped on 110# white card stock using Walnut Stain Distress Oxide ink and embossed with Clear embossing powder. I die-cut those and added them to the card front with foam tape. I’ve actually used every stamp in our stamp set now! Some green Enamel Stickers adds a little bling to this card, and I may just have to send this one off to the sister and let her know how much she inspires me!
Of course, it is that time of year again… when thoughts turn to Mom and we reach for new ways to show our affections…
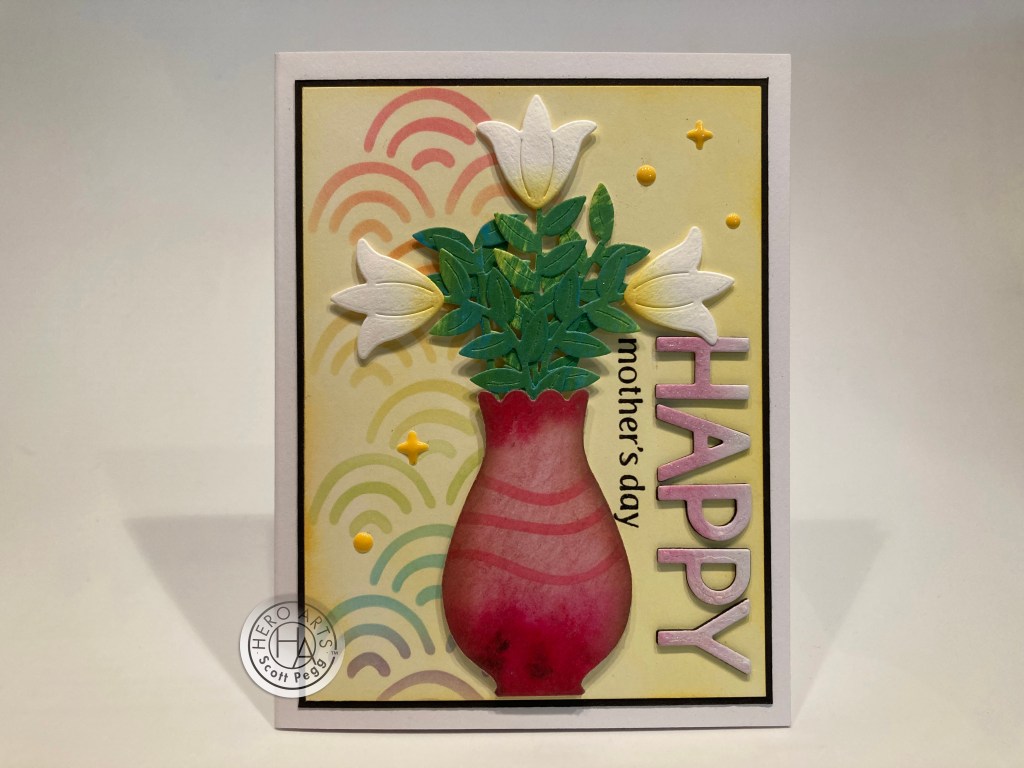
Those look like Lilies to me! The background sports the triple rainbow stencil all along the left side. I stenciled that with Grape Slush, Splash, Key Lime Fizz, Lemon Drop, Creamsicle, and Fruit Punch Reactive inks and blended more Lemon Drop ink over the whole panel. I trimmed that to 5″ x 3.75″, added a thin black mat and glued those to a white card base.
The leafy stems are die-cut from my inked up panel (with simple veins added to the leaves), and the flowers are die-cut from watercolor card stock, and a little Butter Bar ink is blended on their bases. I glued the flowers to the stems, arranged the flowers together, and added the extra greenery (trimmed from the bottom of the flower stems) to fill in the arrangement. The vase is die-cut from more watercolor pattern paper from my stash, and the curvy stripes are stenciled on with Crimson Core ink. I wanted more of a glass or ceramic effect for this vase, so I covered the whole thing with clear packing tape and trimmed the edges to match. That works GREAT! AND you don’t have to wait forever for the Glossy accents to dry! I glued the assembled flowers onto the vase.
I have a couple of Happy Mother’s Day stamps in my stash, but nothing would really fit effectively on this card – I didn’t want to cover up the stenciling, and those flowers take up a lot of real estate…! After fiddling with a number of options, I came up with this vertical sentiment. I die-cut the HAPPY (old Alpha Dies in my stash) from some of the watercolor pattern paper (matching the vase) and then twice from thick black card stock. I glued all three layers together to make this chunky “shadowed” sentiment and gave all the letters some shine with a Spectrum Noir Sparkle pen.
The stamp is from last year’s MMH April ’22 kit that I stamped directly on the card front using Intense Black ink and embossed that with Clear embossing powder. I glued the “HAPPY” directly to the card and added the vase and flowers using foam tape, and added some of the yellow Enamel Stickers for a little more shine. I so very rarely do a sideways sentiment – I’m a little surprised at how terrific this looks and you can bet that this is the card I’ll be sending out for Mother’s Day this year!
Looks like I’m not going to get to ALL those vase dies in the Premium kit… I did have plans to do a “vases only” card with some pun-y sentiment like “Kiss My Vase” or “I never forget a Vase!” or even “The Seven Vases of Dr Lao:” but decided to use this pun instead!
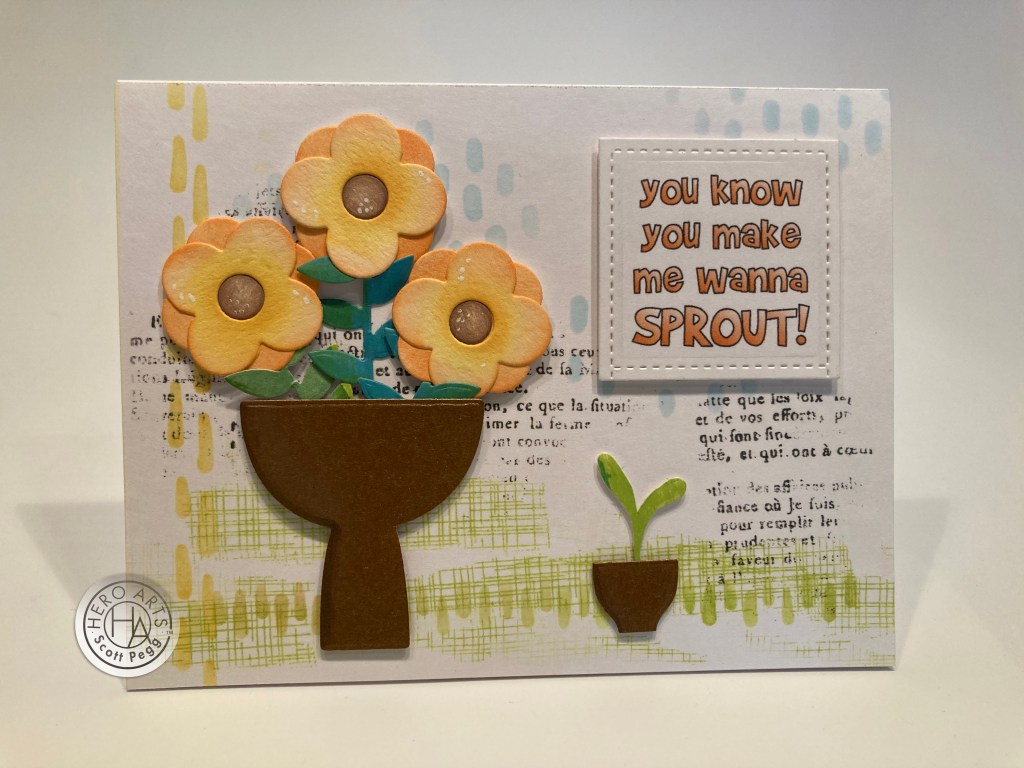
This card makes me giggle, and uses the last three “drops” stencils as well! On a 4.25″ x 5.5″ panel of White card stock, I stamped the texture weave cling stamp with the Green Apple Core ink, and the text cling stamp with Intense Black ink, and stenciled the three “drops” patterns using Green Apple (horizontal), and Butter Bar (vertical) Core inks and Splash Reactive inks for the blue.
The leaves and stems are die-cut from the last scraps of my inked up card stock, and the flowers are die-cut from watercolor card stock and ink blended with Lemon Drop and Creamsicle Reactive inks, and Walnut Stain Distress Oxide ink for the centers. I layered them together, added some white gel pen highlights, and glued them to their stems.
The vases are die-cut from Auburn Pearl card stock – nice touch of shine there – the small “vase” is trimmed off the bottom (or top depending how you look at it!) of the small vase die. I added a little shadow to both vases with an alcohol marker and glued the flowers into the large vase. I fussy-cut the “sprout” from one of the excised leaves from Card #8 and glued that to the small vase and added both to the card front using foam tape.
I printed the sentiment on a scrap of white card stock using my Silhouette Software and my favorite Brady Bunch Remastered font, did some partial die-cutting with a LFSRdie to size it properly, and added it to the card front with foam tape. I really like the multi-media effect achieved here by just using the stamps and stencils, and that pedestal vase is probably my favorite vase die, and, of course, I love the pun and that adorable little “sprout”!
Ten cards just like that! There is certainly a huge amount of product to play with this month, and you can explore the multi-media aspects of this kit or just keep it simple and graphic! And flowery!

So… I used ALL the stamps in this kit, but I didn’t get to every die… (there are 40 of them!) I used all of the ink cubes and some of the Washi tape and all the Doodle Stencils and even a few Enamel Stickers! That’s LOTS and LOTS of flowers this month, but I do think I was able to come up with a good variety of looks and designs for a lovely batch of cards!
This kit is still available (Classic AND Premium) at Hero Arts! If I’ve managed to fertilize your spring flower bug, or planted some new ideas in your head and you’d like to grab this kit before it sells out, please use my links below when you go shopping at Hero Arts! I am always grateful when you do, and it really does help support this page!
My Monthly Hero April 2023 Classic Kit: http://shrsl.com/416nt
My Monthly Hero April 2023 Premium Kit: http://shrsl.com/416nw
Hero Arts April 2023 Release: http://shrsl.com/416oe
Thank you so very much for sharing some of your time with me here today! Let me know which card(s) is your favorite and if you have any questions! I am continually honored with your attention and always inspired to make your time here as pleasant as possible! Please remember to Like me, List me, Pin me, Post me, Share me with everyone you know(!) Don’t run with gardening shears… and, as always, I send you and yours Love and Light and Happy Crafting!!
DISCLOSURE: This site contains some affiliate links to products. I may receive a commission for purchases made through these links (at no cost to you). As an Amazon Associate I earn from qualifying purchases. Thank you!

Love your Springy cards! My favorites include the Mother’s Day and You’re Appreciated cards. Also love the composition with the patterned paper of the Timeless card, with the separate bloom laying under the sentiment. Love how the black and white of the Rare Flower card shows off the rainbow flower. Very clever, using packing tape on the vase of the Mother’s Day card. Cheers!
LikeLiked by 1 person
I love how you use every bit of material you have been given. Yet, it is the UNIQUE card, every card so unique that makes you and your cards so refreshing and noticeable, yet inspiring for self thought and creativity. THANK YOU!
LikeLiked by 1 person