
Hello folks! Scott here with my 10 cards from the March ’18 Love From Lizi Card Kit. I am so sorry to be so late with this posting but I got hit by a nasty bug that laid me out for a couple of weeks. OUCH! Feeling better and better every day now..! I am so late that this kit has already sold out, so this is for all the folks out there who got their hands on this kit and are looking for a little inspiration and maybe a new idea or two! Let’s get rolling!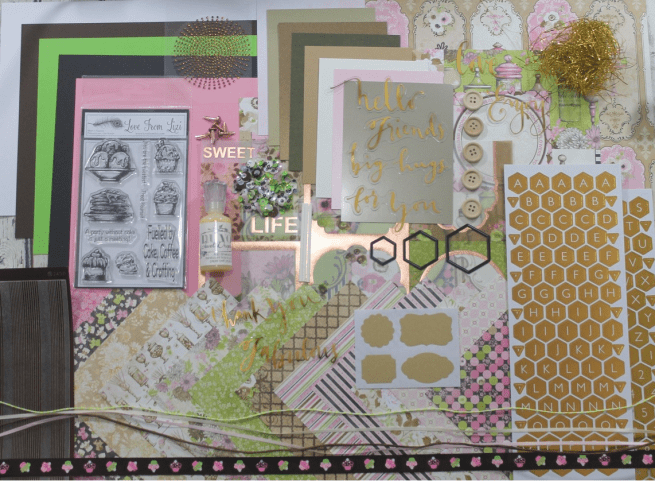 Now I don’t usually get any of the matching ‘add-ons’ that Lizi offers along with her card


kits, but the chipboard stickers caught my eye this month, so I did get the chipboard stickers and I the layered chipboard stickers as well! Not that there aren’t enough supplies in these kits as it is, but I know lots of folks who do like the chipboard add-ons and I wanted to see how they might inspire me. Uniquely, a lot of the images and icons in this kit were quite large, both on the cut-apart sheets and you can see that some of the chipboard stickers are over sized as well. The large jar with candy and the white top in the center of the chipboard sticker sheet is actually 5 and 5/8″ tall. And those lovely filigree labels / tags with the treats and cakes from one of the cut-apart sheets are 6″ long. Hmmmmmmm… I may have to work on making some 5″ x 7″ cards this month!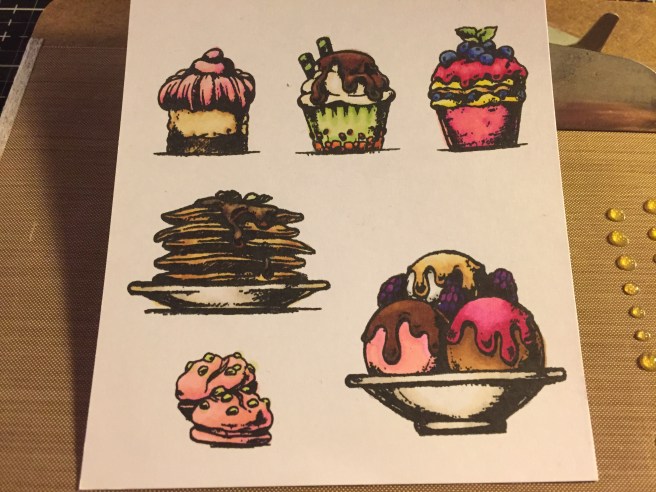 As usual, I did stamp all the images from the stamp set (with SSS Intense Black Ink) on the smooth white card-stock included in the kit. Lizi said this card stock was ‘Copic friendly’, so I colored this batch of stamps with my Spectrum Noir alcohol markers. True to her word, this is excellent card stock for coloring with alcohol markers. Of course I do try to stay within the pink/green/brown color pallet that is featured in this kit. You can also see some of the kit’s Nuvo Jewel Drops in Limoncello to the right – I’ll often dab out some drops on my craft mat to dry and be ready for use on cards. I also took the other four pieces of colored card stock from the kit and made eight 4.25″ x 5.5″ card bases.
Right out of the gate I decide to go ahead and do a 5×7 card – at least I do have some envelops that will fit! I really liked the filigree labels and the candy jar chipboard piece.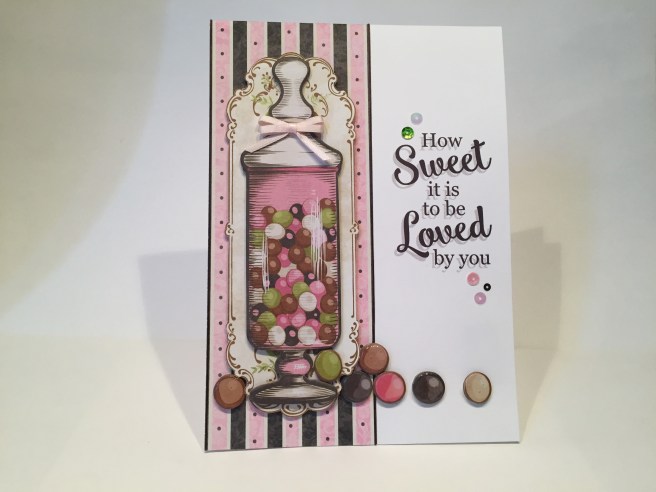 I made a 5′ x 7″ white card base using some 120# card stock from my stash, and created this sentiment with my Silhouette Portrait – I felt like this large of a card needed a large sentiment – and printed that directly to the card base. The block print is GEORGIA font, and the script words are in SMOOTHIE SHOPPE font (my, how appropriate!). I cut out a 2 and 5/8″ strip (7″ long) from the large striped pattern paper from the back of one of the 12×12 cut-apart sheets and glued that down to the left side of the card base, and ran some of the medium Chocolate Mirror peel off stickers along both sides. I fussy cut one of the filigree labels from another cut-apart sheet and mounted that up with some foam tape on the stripes. That chipboard candy jar sticker fit perfectly within that frame and I also covered a bunch of the chipboard candies with Glossy Accents to scatter around the bottom. A double-bow from the pale pink ribbon in the kit highlights the jar lid and a few sequins from the ‘Sweet Treats’ sequin mix finishes this card out nicely! This all looks great on a larger card format! I’ll have to remember that I do have that option! And there’s a sentiment that truly makes me want to sing…!
 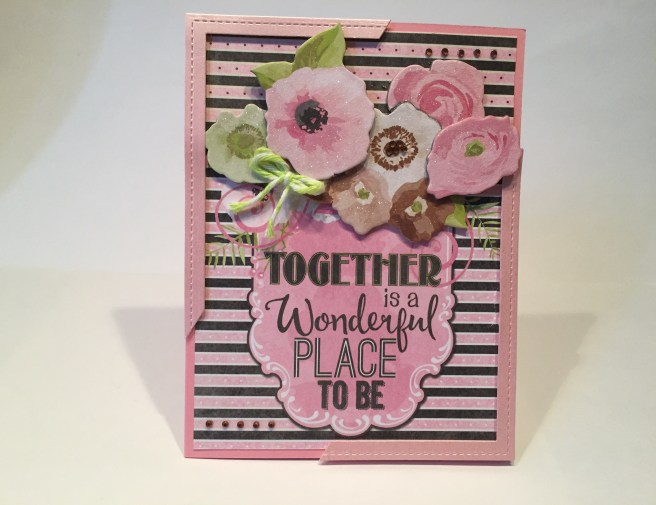 This cut-apart sentiment caught my eye, but it was only 4″ square on the sheet, so I paired it up with the striped pattern paper from the kit and used the chipboard flower stickers to hide the seam. Look closely, and you can see the dots on the pink stripes above the flowers are black, and below the flowers they are white… So, together that piece is 4″ x 5.25″ and mounted directly to the pink card base. I wanted to frame this image so I cut a frame from the soft pink pearl specialty card stock with my Lawn Fawn Stitched Rectangle dies, but I didn’t want to lose the pink card base completely, so I cut the corners off the frame (about 1.75″ from each corner) and mounted the remaining pieces to the top left and bottom right corners with foam tape. I did cover all the flowers with my Spectrum Noir Sparkle pen, added a double bow from the green and white bakers twine, and added 5 mini copper gems to the center of the white flower, and on top of the pattern paper dots on the bottom left and top right! That balances everything nicely. This is about as pink as I could get with this kit, and I do love the sentiment expressed here. Let me see what I can do with some of those Layered Chipboard Sticker add-ons!
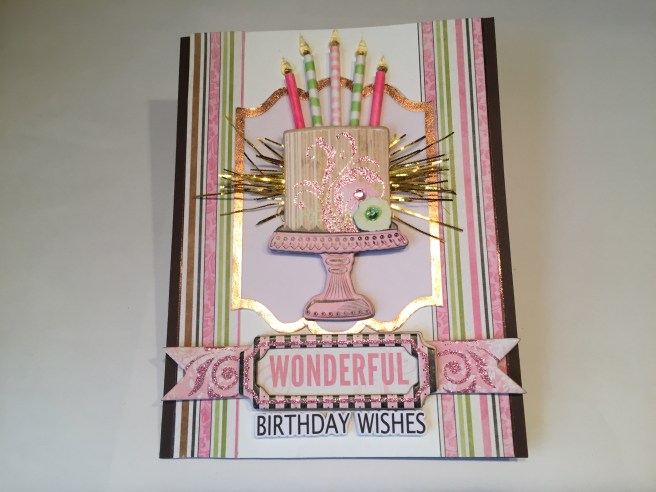 On the Chocolate Brown card base, I mounted the off-white embossed specialty card stock trimmed down to 3.75″ wide and added 3/4″ strips of the pick and green striped pattern paper to the two edges of that, as well as the skinny peel off stickers on the sides. I took one of the vellum pieces, and, after gluing that to some plain white card stock with the Xyron Sticker Maker, I cut away the copper foil frame and attached that directly to the card base. The cake is one of the layered chipboard extras and I just HAD to use the candy sticks from the kit to make candles! I cut the sticks down to various heights and colored them with my alcohol markers, and tucked them behind the top of the cake sticker. To make the candle flames, I used the Nuvo drops to make some flame shapes on my craft mat and let them dry completely, and added the mini copper gems to the card base just above the candle tops. Once the Nuvo flame shapes dried, I used some Ranger Multi Medium Matte to glue the Nuvo flames on top of the mini gems. The gems add just enough color to highlight the translucent Nuvo drop flames. I did get a bit obsessive with the gold tinsel from the embellishments bag, and attached a bunch to the back of the cake sticker and trimmed them down into a bit of a starburst coming out of the sides of the cake. The whole cake piece and the WONDERFUL layered chipboard sticker attach to the card base with a touch of foam tape here and there, and I felt the need to add BIRTHDAY WISHES to complete the sentiment. I did print and cut that with my Silhouette using the LUCIDA GRANDE font and foam taped that to the card base under the WONDERFUL banner. WOW! This card has a little bit of everything! I do like how the candles and tinsel break the boundaries of the copper foil frame, and with all the glitter on the chipboard pieces, and the gems and Nuvo drops, there’s plenty of sparkle here! There are more chipboard pieces I like, so let’s see if I can use any on an A2 card!
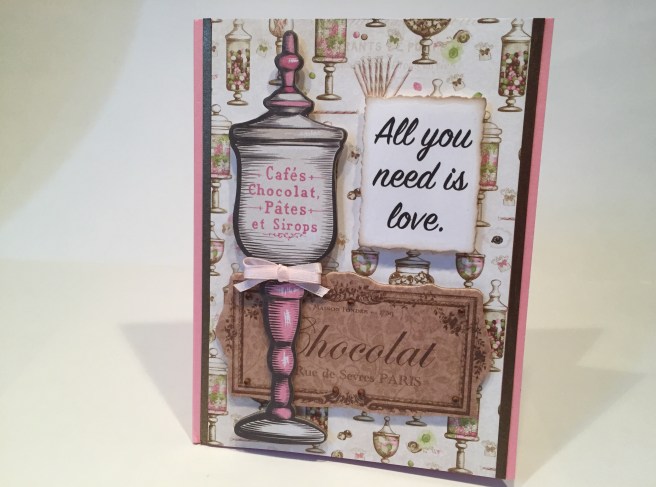 Back to the second pink card base, I cut a 3.75″ strip of the candy jar pattern paper for my background, and added two 1/8″ strips of the Bronze pearl specialty card stock on the two sides. I layered the two ‘chocolate’ chipboard stickers together and added a double pink bow to the jar.
 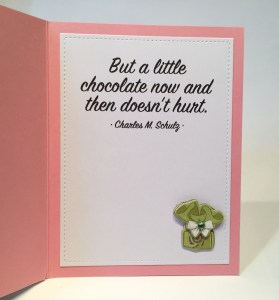 Here’s another sentiment of mine created on my Silhouette in the SIGN PAINTER font and cut out with a Spellbinder Deckle Rectangle die and a little distress oxide Walnut Stain ink on the edges. “All you need is love.” on the front, and “But a little chocolate now and then doesn’t hurt.” on the inside (cut with a LF stitched rectangle die). Who knew that the creator of PEANUTS was into chocolate!? I did add the layered chipboard sticker of the treat package on the inside of the card, and added some of the mini Copper Gems to highlight the Chocolate sign on the front. I like this card a lot and, though it is on a pick card base, I think it has more of a vintage feel than a pink feel. But that’s four rather pink cards right off the bat, and, though I know I can’t avoid it, let’s call the pink conquered for now and see what we can do with the stamps and other items left to use.
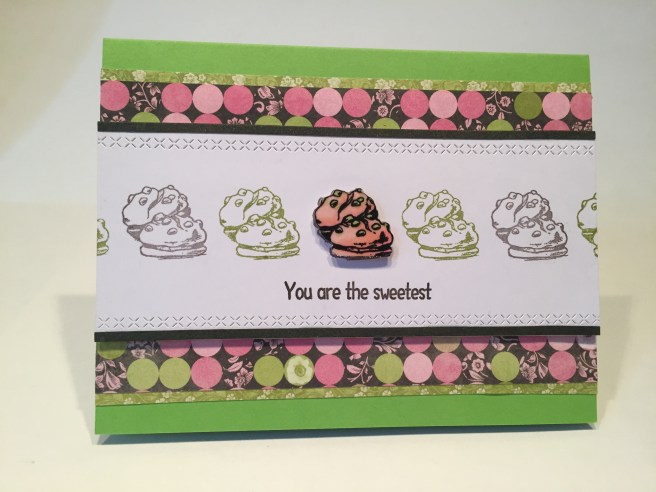 I did have to dig around in my ink pads to find colors that matched this dotted pattern paper, and found that my Stampin’ Up Early Espresso and Pear Pizzazz inks matched very well. I stamped the cookie stamp in a straight row across some of the white card stock from the kit alternating between the Espresso and the Pear. I then fussy cut my colored cookie stamp, embossed the whole stamp with clear embossing powder and foam taped that over the center cookie. I trimmed the stamped piece to 2 and 3/8″ (x 5.5″) and I added two 1/8″ strips of the Dark Green / Gold specialty paper to the edges of that and then used my Ellen Hutson Stitching Lines border dies to add the cross stitch detail on the edges. On the Apple Green card stock, I mounted a 3.25″ strip of the dotted pattern paper and added 1/8″ strips of the green pattern paper to the top and bottom. The sentiment is stamped with the Early Espresso ink, and the stamped piece is attached to the card base with foam tape. Though there is still plenty of pink here, I think the green is a nice counterpoint, and I like highlighting this cute cookie stamp all by itself!
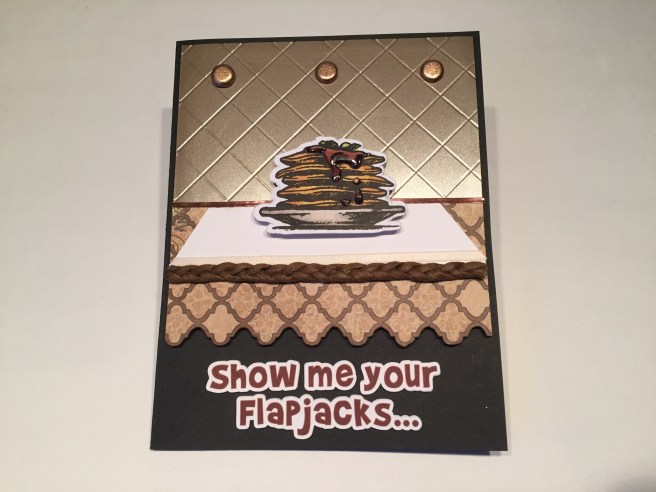 And now to the pancakes!! Here’s another card that uses a lot of the goodies from this kit! I fussy cut the Moroccan pattern paper with a decorative edge, and used my scoring board to emboss the tile pattern on the Taupe gloss specialty card stock. The Taupe piece is 2 and 3/8″ x 4″, and the pattern paper is about 1 and 7/8″ x 4″ and they are both mounted to the Black card base with foam tape. I cut a simple trapezoid ‘tabletop’ from a scrap of white card stock and trimmed that with a piece of the thin white satin ribbon from the kit. I took the paper covered wire from the kit and braided it together to make this chunky trim that frames the edge of the table. I did use tiny bits of the Nuvo drops on the ends of the braid to cover the cut wire. Three of the textured copper brads and a strip of the Chocolate Mirror peel offs between the ‘table’ and the ‘wall’ finishes out this scene very nicely.
 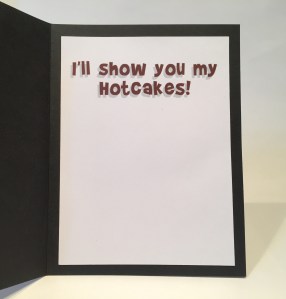 I fussy cut the colored pancake stamp, added Glossy Accents to the syrup (yum!), and foam mounted that on the ‘table’. I added my own sentiment (a little more pancake oriented) using my favorite BRADY BUNCH REMASTERED font on my Silhouette – cut four times and layered together for some extra chunky dimension on the front. A decidedly playful card that works beautifully with a pancake stamp! There are SO many ice cream, pancake, and cupcake puns out there that it was a little hard deciding which sentiment would work best on this card. I do like the result!
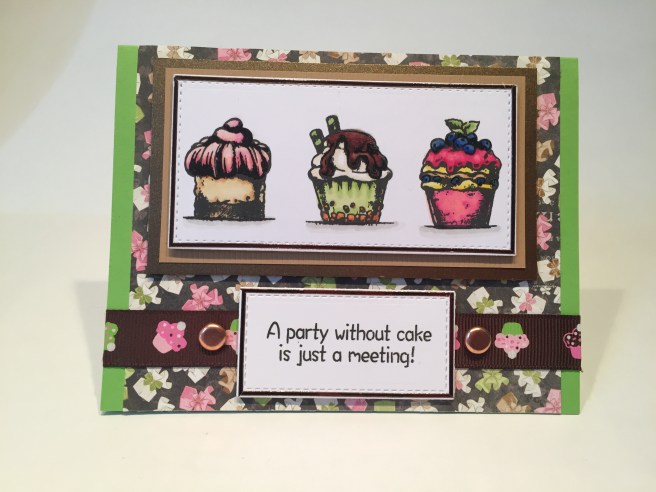 Those lovely cupcake stamps! I cut my colored cupcake stamps with a LF Stitched Rectangle die and outlined the edges with the Chocolate mirror peel offs and mounted that to a mat of the brown embossed specialty paper with foam tape. That assembly is glued directly to a mat of the Bronze Pearl specialty paper and that is foam taped to the background pattern paper (5′ x 4.25″) attached directly to the Apple Green card base. I glued a length of the brown cupcake grograin ribbon (with 2 smooth copper brads) across the bottom portion of the card and stamped the sentiment in SSS Intense Black Ink on more of the white card stock from the kit. I cut the sentiment out with another LF Stitched Rectangle die and outlined the edges of that piece with the Chocolate Mirror peel offs as well. The sentiment is attached with some foam tape for some added dimension, and, though you can’t really tell from the photo, I used my Renger Embossing pen to add some clear embossing powder to the cupcake toppings – nice shine but not quite as shiny as glossy accents. I like this sentiment a great deal and I like how the cupcakes kind of look like a framed art piece, but most of all, this card hardly feels pink to me at all! LOL!
 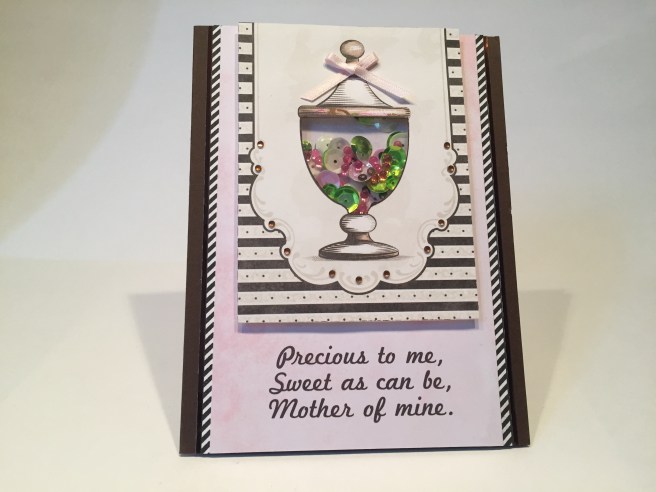 I haven’t done a shaker card in a while, and some of the candy jars on the cut-apart sheets were just begging to be shakers so I came up with this nice Mother’s Day card. On the Chocolate Brown card base, I mounted a 3.5″ x 5.5″ piece of the Pale Pink Marble specialty paper and added two 1/8″ strips of black and white diagonal stripes from my stash and more of the peel offs on the edges. The candy jar is from one of the cut-apart sheets – I simply cut out the inside of the jar to make a window for my shaker bits. I did pack the shaker window quite full with the sequin mix (I avoided the large brown sequins) and added in some Queen & Co. Tiny Bubbles Toppings to the mix, and added a simple pink bow to the top of the lid.
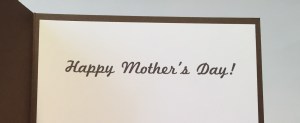 The sentiment is mine, created on my Silhouette in MARKETING SCRIPT font and printed directly on the marble card stock. Inside, of course, is the ‘Happy Mother’s Day’ greeting, and with the addition of some mini copper gems at strategic points along the filigree, we have a very nice, very PALE, pink card ready for Mom!
 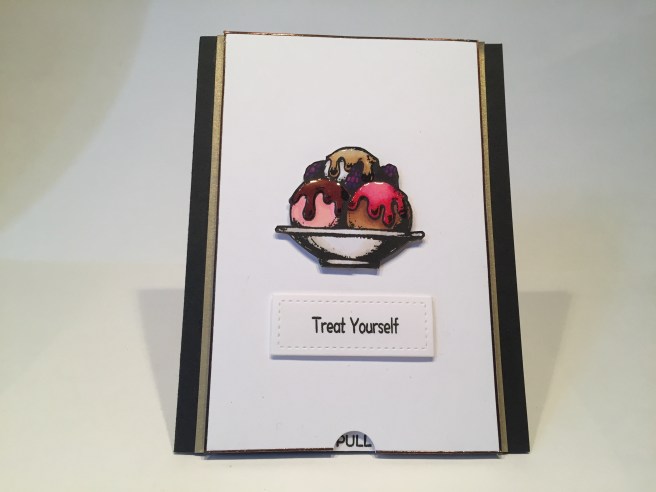 OKAY, SO SUE ME! I COULDN’T RESIST!! If three scoops of ice cream is a treat, then wouldn’t four scoops be an even better treat!? Just pull on the tab at the bottom…!
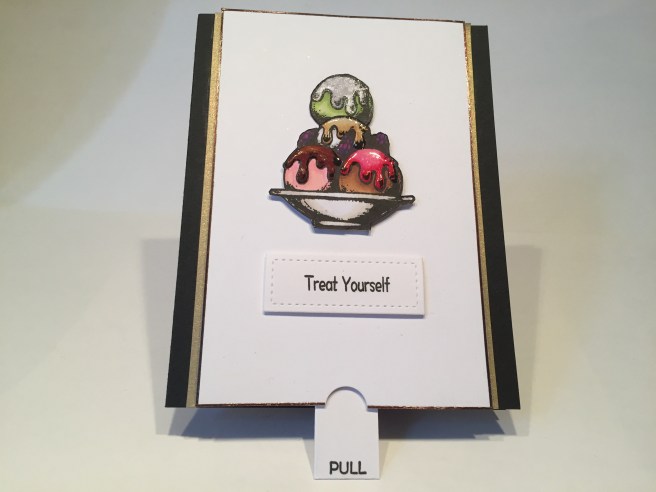 Yes… another double slider pull-tab card from me this month! My big accomplishment with this card was being able to hide the slider slit completely behind the sundae! This is a fairly simple card, as I wanted all the focus to be on the ice cream. I used the last of the smooth white card stock from the kit for my slider base, outlined that with the thin Chocolate Mirror peel offs, and added a couple of 1/8″ strips of the Antique Gold Pearl specialty paper to the edges. All is mounted to the last Black card base. I fussy cut the colored sundae stamp and used Glossy Accents on all the toppings (BIG YUM!) and then stamped the sundae again and just cut out the lower right scoop to be my added treat. I used some clear glitter on the topping of the added scoop for a little razzle-dazzle with the surprise, and stamped the sentiment with SSS Intense Black Ink and cut that out with a LF stitched Rectangle die before mounting it to the card base with foam tape. I recently posted a How-To video that shows how to make your own double slider pull-tab cards. But wait, you say, that’s only 9 cards – what could I be saving as card #10 this month? I haven’t used the hexagonal dies or the copper foiled acetate pieces yet… What’s up!?
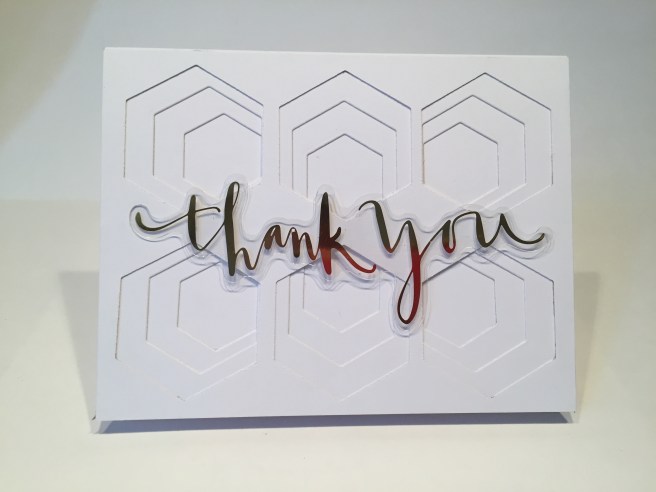 This is what’s up! Now this is much easier that it may seem, and the hexagonal dies included in this kit work perfectly on an A2 card! It will take a little time as you have to run this through your die cutter 18 times, but I simply cut three pieces of 120# white card stock (from my stash) to 4.25″ x 5.5″ and a white card base as well. The large hexagonal die spaces out perfectly – just bisect your card front down the middle in both directions – the center line is where your center hexagons line up. Add a line 1″ away from both short ends of the card. This is the center line for your other hexagons.
 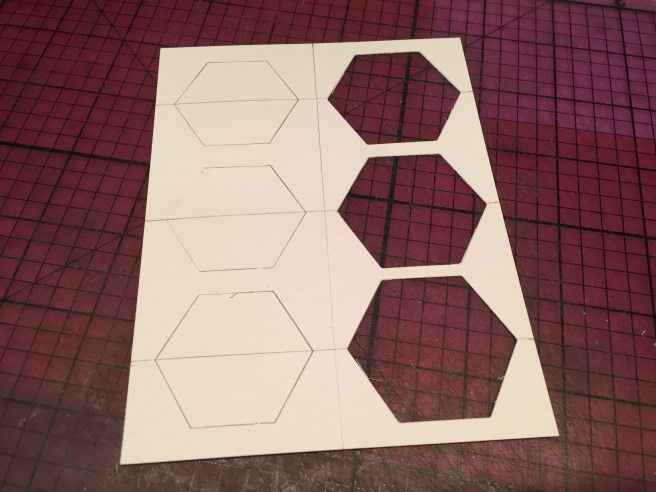 After cutting all six hexagons, use that top piece as a pattern for the placement of the next smaller hexagon on the next layer of card stock.
I did use my mini MISTI to keep the layers lined up accurately. Just line up the cutting edge of the smaller die to the previously cut edge and tape it down before removing the top pattern piece and running it through your die cutter. Then after you have the second layer cut, use that piece as a pattern for where to cut the third layer with the smallest hexagonal die – lining up the cut edges through all three layers. Glue all the layers together and add to a card base and TADA! This looks like some of those new layering dies out there that are beautiful, but cost a fortune (so much metal)! You could, of course, use different colors of card stock for the different layers but I thought white would work especially well with the acetate sentiment. I did trim some small slivers of foam tape to mount the sentiment, but, since the acetate is so thick, you don’t need a lot of foam tape to add a little bit more dimension. 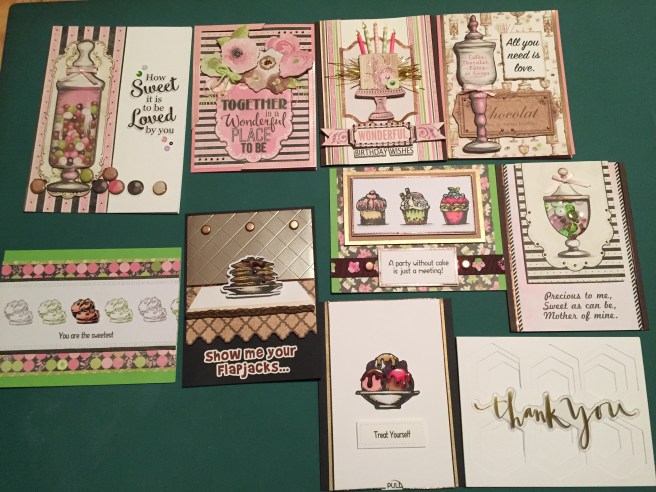 There we go! 10 cards from the Love From Lizi March 2018 card kit – a nice variety of cards and not too much pink! I managed to use all the image stamps from the stamp set, some of the ‘add-on’ chipboard stickers, but I didn’t get to the “Fueled by Cake, Coffee and Crafting” sentiment as it seems that I don’t have a single coffee themed stamp set. Not even tea! As usual, I have tons of extras from the kit – I used a little bit of everything, but I didn’t use any of the alphabet stickers, the craft labels or the buttons – and I only added a couple sheets of white card stock from my stash. I really like the stamp set in this kit – it will probably come available next month at lovefromlizi.com – the images are nicely shaded so you can color them very simply or as complex as you like and they will always look good! Thank you so much for sharing your time with me here – it is truly and dearly appreciated! Remember, don’t run with scissors, and, Happy Crafting!
 This kit is full of sweet treats, a terrific stamp set created by Laura at Crafty Not Shifty, and as usual, a huge assortment of interesting card stocks, papers and embellishments!
 We get five sheets of 8.5″ x 11″ card stock in Pink, Black, Apple Green, Chocolate Brown and a smooth White alcohol-marker-friendly card stock.
 Twelve sheets of 6″ x 6″ pattern papers comes next – some floral patterns, some sweet treats, stripes, polka-dots, and a few lovely monochromatic papers are included.
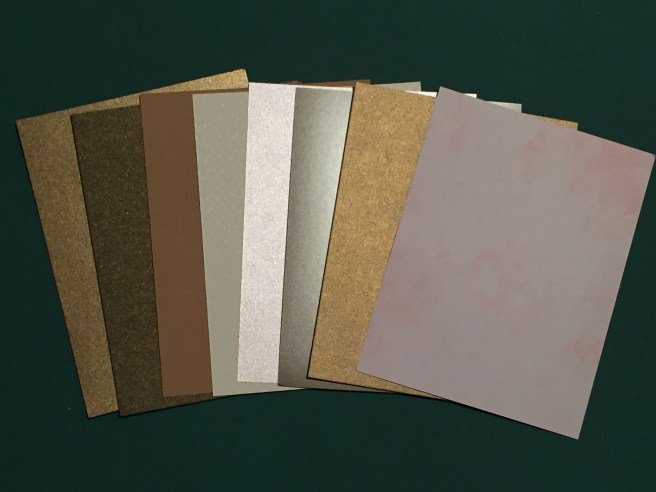 Our Specialty Card Stock for this month is eight sheets of 4.25″ x 5.5″ card stocks in Pearlized Bronze, Dark Green/Gold Pearlized, Embossed pin-stripe Brown, Off-White embossed, Soft Pink Pearl, Taupe Gloss, Antique Gold Pearl and Pale Pink Marble.
 Chocolate Mirror peel Off stickers for this month are complimented with a large sticker alphabet done in a copper foil and featuring hexagonal shapes – numbers too! I love Lizi’s Peel Offs and truly adore the ‘mirror’ type especially when it comes in a color!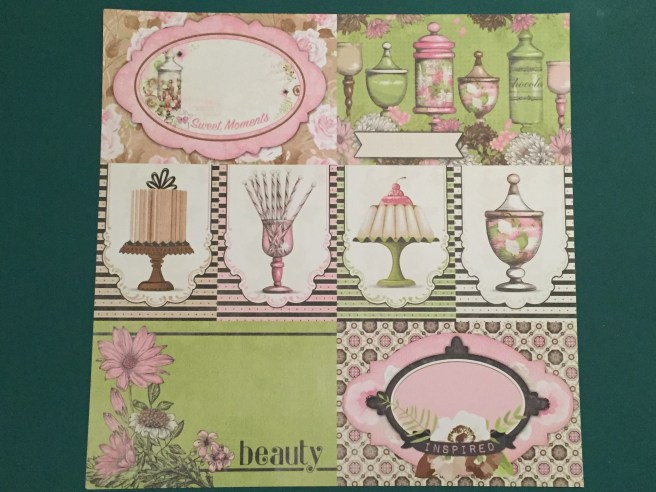
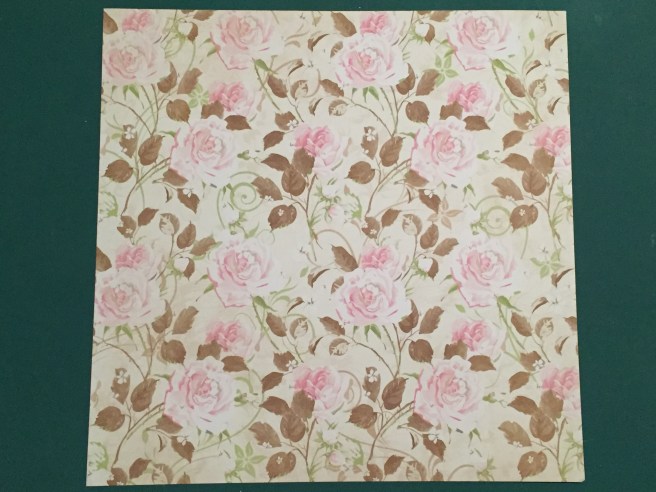 The back of the first sheet features the same tea roses as the pattern papers only larger.
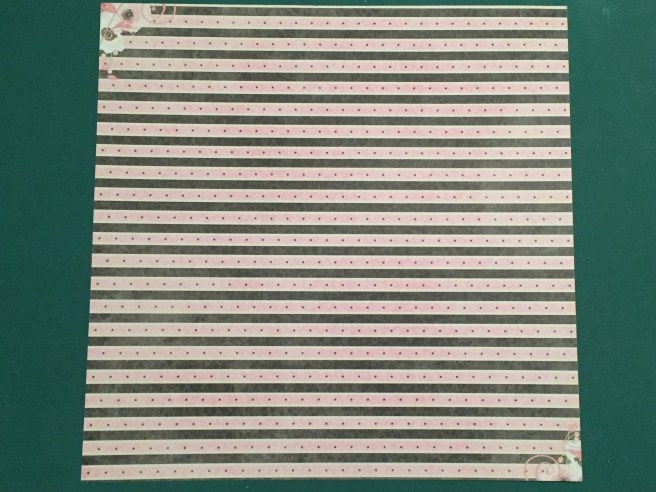 The second sheet has some terrific sentiments and is backed by this terrific stripe.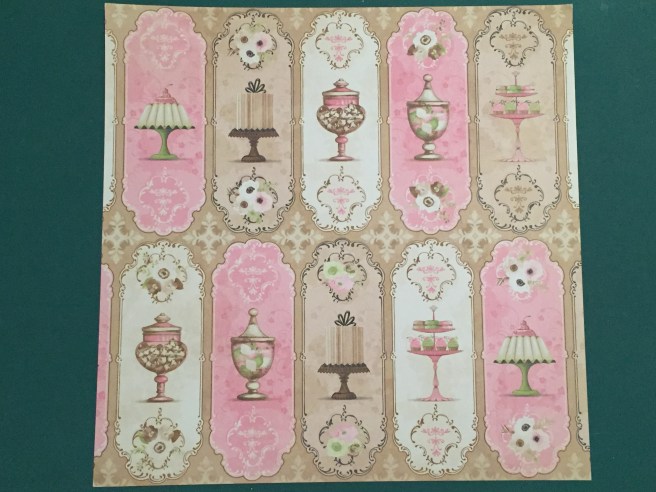
 The last sheet has these gorgeous ‘sweet shoppe labels’ backed with a nice tonal floral.
 We are also treated to another 12″ x 12″ sheet of vellum pieces foiled with copper – I love the vellum sheets Lizi includes with her kits – and these should spark some fun designs!
 An ice cream sundae, a stack of pancakes, three cupcakes, little sandwich cookies and some fun sentiments – my favorite is “A party without cake is just a meeting!” Love it!!!
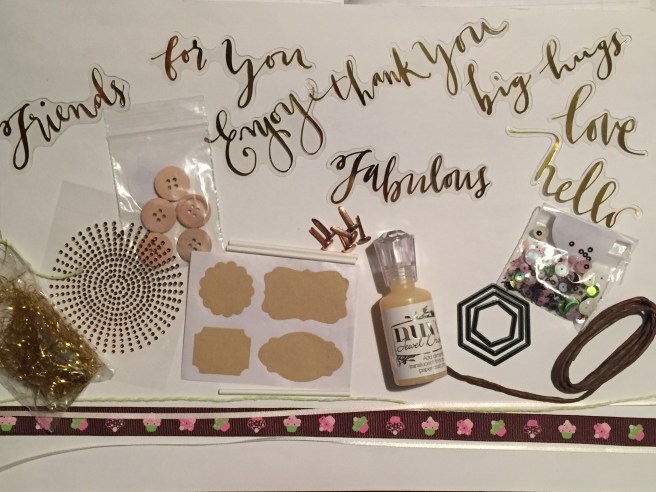 Starting from the bottom, we get a meter each of four trims – thin Ivory Satin ribbon, thin Pale Pink Satin ribbon, a 5/8″ wide Brown Grosgrain ribbon with cupcakes on it, and a piece of Green and White bakers twine. Above the ribbons, from the left, we get a bag of gold tinsel (not sure what to do with that yet), a sunburst of mini Copper Gems (tons of gems here), five wooden buttons, four kraft sticker labels, three lollipop sticks, six copper brads (fairly large), our monthly Nuvo Drops bottle – Limoncello Jewel Drops this month, three nesting hexagonal dies, a sample bag of Lizi’s Sweet Treats sequin mix, and a meter of brown paper wrapped wire – nice thick wire..! The really interesting item in the embellishments bag this month were these copper foiled sentiments printed on thick acetate – eight different sentiments to wrap our crafty minds around..!
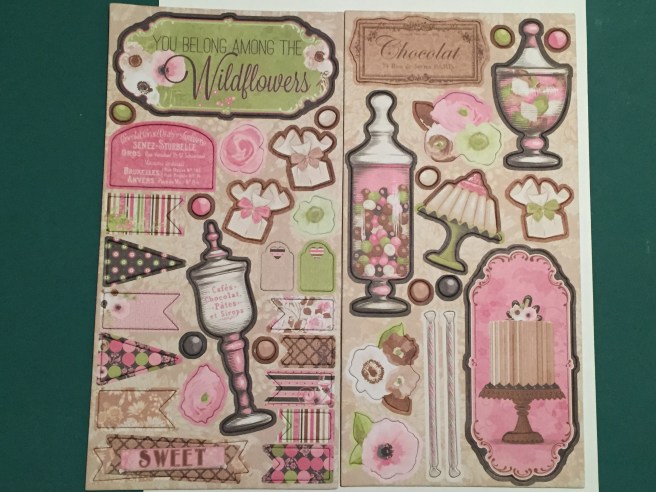 Some of these are very large, so I will have to brainstorm a bit on how to use them! I also
 went for the layered chip board stickers this month as well – these are REALLY pretty – some of them have at least three layers and they are all well sized for use on A2 cards. That’s everything in the Love From Lizi March 2018 Card Kit (with a couple of extras!) and I can’t wait to dig in and start coloring those stamps and figuring out how to use this plethora of goodies. If you want to join me for the fun, this kit is still available for purchase – please use my link to shop at
  The Balloon Card, The Moon Card and the Dream Card – Yes, those of you paying close attention, I added the blue and purple balloons after I had posted my video – those extra balloons fill up this card front nicely.
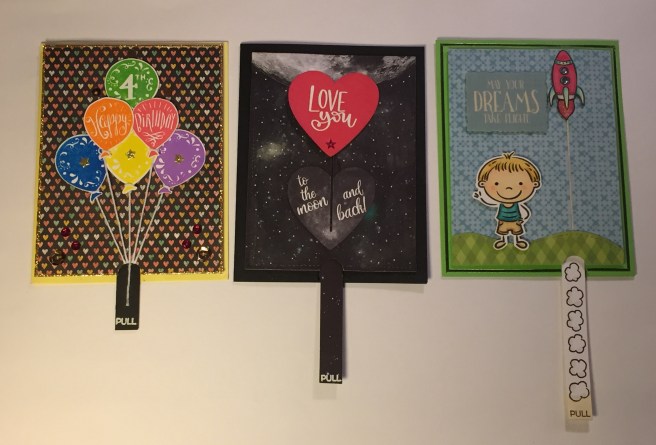 These are all based on the “double slider card” that has been around for a while – you can find bunches of instructional videos on YouTube for a variety of these –

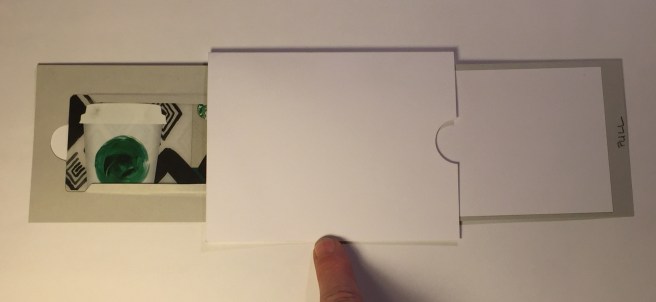 – it’s basically just a track with a plastic conveyor belt in the middle (plastic shopping bag) with the moving pieces attached to both the front and the back.
 This is a little too big for these cards, so I just needed to shrink the mechanism down a little bit – this is all there really is to the action – a track piece with a plastic conveyor belt that has the pull-tab attached on one side and the moving piece on the other.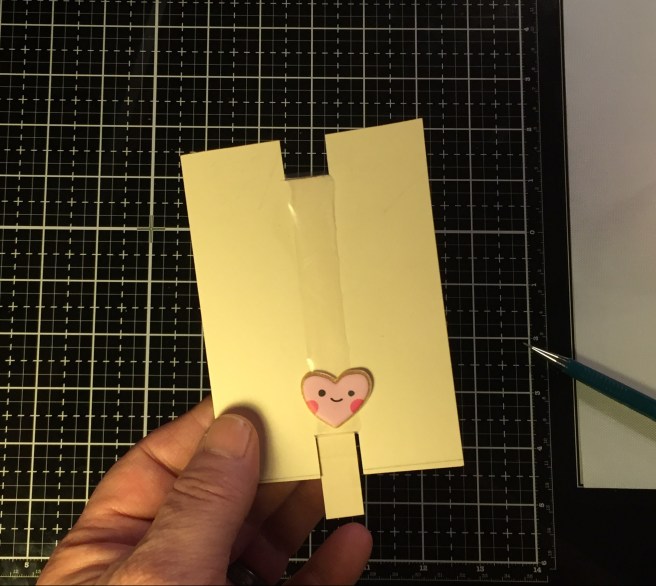

 Let’s make a mock-up first. We have a card base (4.25”x 5.5”), the card front (4”x 5.25”), the track piece (with a partner)(just under 4”x 5.25”) the pull tab (1”x 5.5”) the moving
 piece, the plastic conveyor, and we’ll need to make the paper hinge that attaches the moving piece to the belt.
  So let’s cut an inch off of the pull tab to use for our hinge – we’ll get back to that later.
 I have stepped up from shopping bags to zip lock bags but any reliably strong plastic sheeting could be used for the conveyor belt.


 – be careful not to pull your conveyor too tight – it needs to be able to slide easily.
 I’ll take the partner piece and trim it down to fit on the front of the track piece on either side of the belt just to give the belt a little room to slide easily.


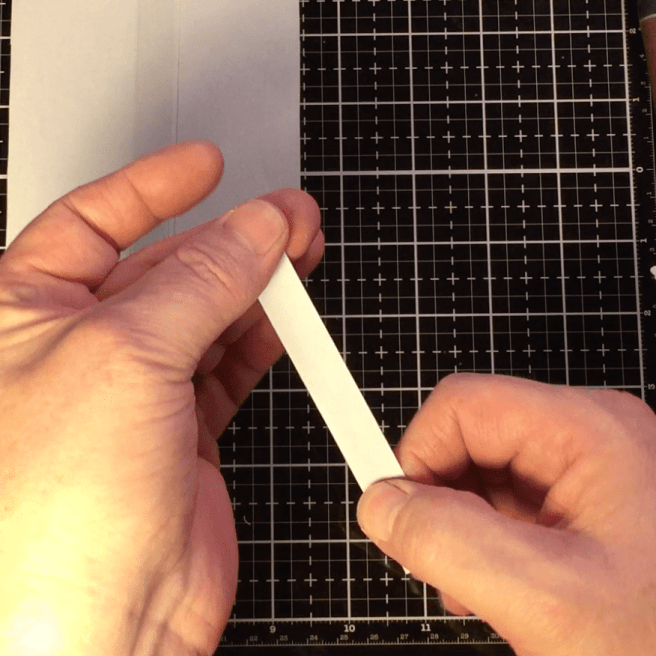 I arrange the seam of the plastic towards the top of the track piece (on the back side) and attach the pull-tab right on to the seam. Again, using a couple pieces of
 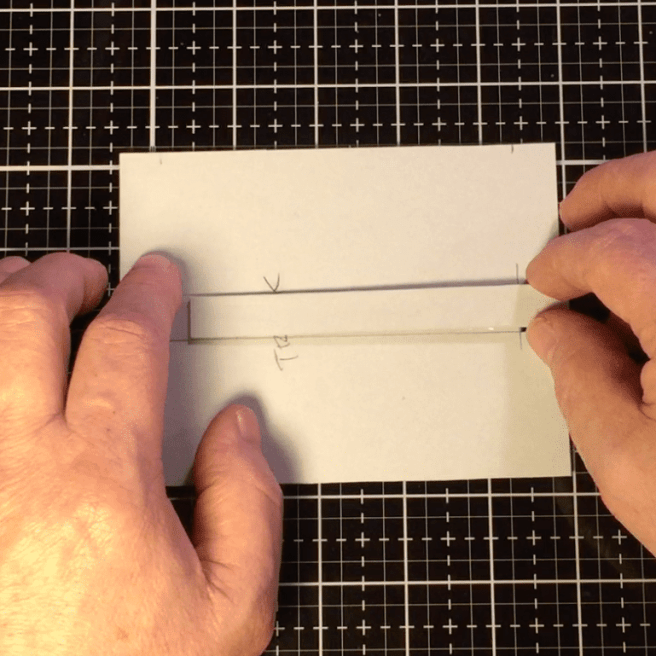 Remember, this is the back of the track piece, so make sure your pull-tab faces forward.


 where I started. I cut a ‘corner’ of cameras from the pattern paper and matched that up with the reverse side which was the dark wood-grain pattern. I actually tried adding Glossy Accents to all of the camera lenses, but there were so many that it started pulling focus from my veneer pieces, so instead, I fussy cut another batch of cameras and foam taped them directly over the the de-glossied cameras – that’s much nicer – nice dimension without pulling too much focus! (I did add some glitter from my
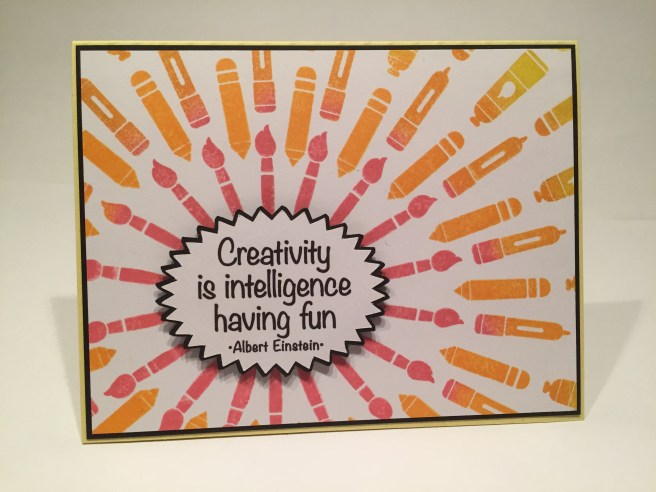
 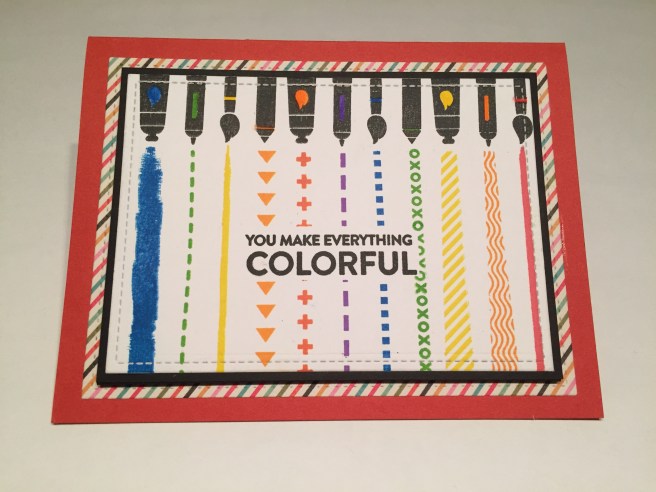 the stamp set. I stamped the brush, pencil, marker and paint tube across the top of a plain piece of white card stock with
 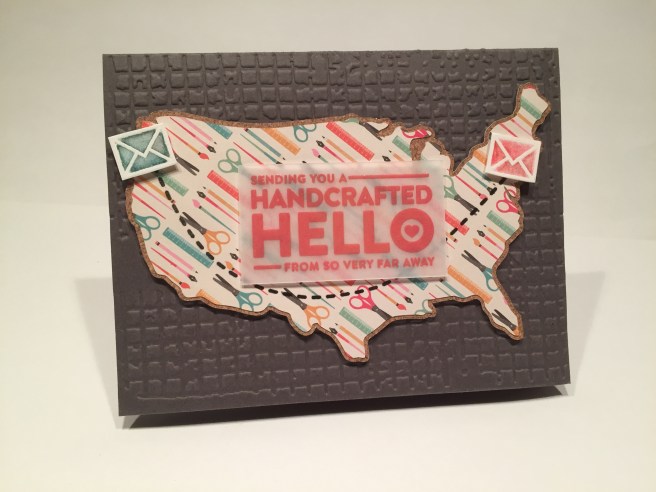 I stamped this sentiment on some vellum with the
 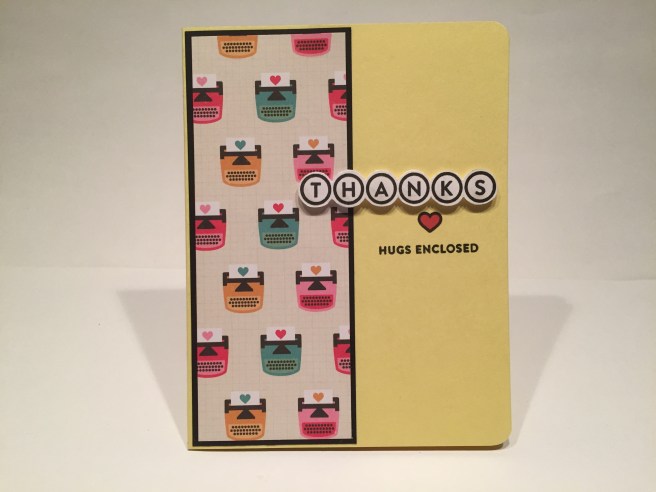 Very straightforward, simple Thank You card! I cut the typewriter pattern paper to 2″ x 5.1/4″ and matted that on black card stock (from my stash) cut at 2.1/8″ x 5.3/8″ and glued that all down to the left side of the Banana card base. I stamped the THANKS sentiment in SSS Intense Black Ink, fussy cut that out and mounted that with
  Here we have a fun Valentine card in the same typewriter vein. I cut a 2.5″ strip of the pattern paper for the center panel, cut the reverse down to two strips of 3/8″ and glued them down to the Slate card base that I had embossed with the Matrix embossing folder. I sized the ‘Circle Distressed Alphabet’ letters down to 3/8″, printed and cut them on my Silhouette, and used my
  Those are mounted to the card front with foam squares. I cut two thin strips of matte black card stock to cover the seams between the pattern papers, and added an old heart brad beneath the sentiment. I did continue the sentiment on the inside of the card, with ‘Happy Valentine’s Day’ in
  I stamped all the art implements with
  I happened to have some
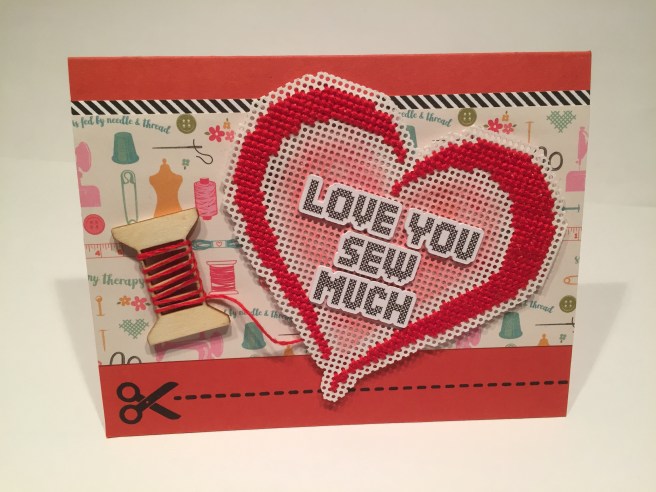
  This pattern sized down well for a standard card! I cut the sewing pattern paper to a 2.75″ strip, stamped the diagonal stripe border stamp with SSS Intense Black ink on some scrap white card stock, trimmed that down and glued it to the back of the pattern paper leaving a touch more than 1/8″ exposed on the top. I stamped the scissor and the the dashed line border along the bottom of the Burnt Orange card base (still using Intense Black ink), and glued the pattern papers directly to the card front. Naturally, I went to dafont.com to look for a cross-stitch font and found the
 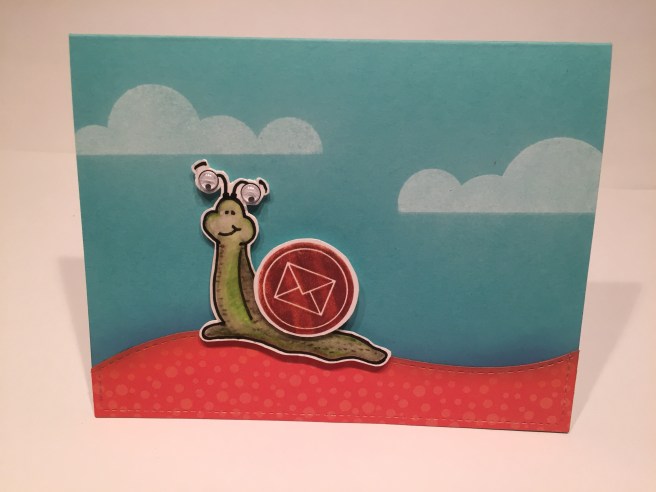 There’s some SNAIL MAIL for ya! LOL!! I think this little guy is so cute! (Of course the googly eyes help a lot!) I am just really taken with the kind of stark nature of this card and how it really pulls your eye to our little snail friend! Here we’re on the Audrey Blue card base sponged with a little
 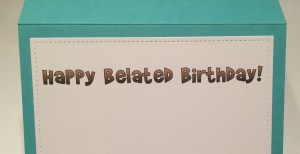 Of course, I rarely (if never) do a card without a sentiment on the front, so is there something inside? Of course there is! We all of us miss someone’s Birthday every now and then, so what better to blame a belated birthday greeting on than SNAIL MAIL! I created this sentiment with my Silhouette software using the Brady Bunch Remastered font and printed that up on some scrap white card stock and cut it out with a stitched rectangle die before gluing it down to the inside of the Audrey Blue card base I think ‘Sluggo’ is worthy of continued use!!
 I pulled out my
 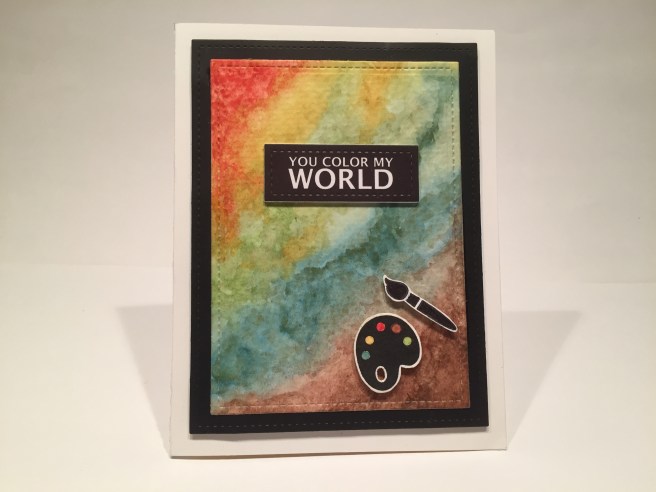 I LOVE IT! There are many layers of watercolor here – I completely used up the Pipestone and Serpentine paints from the palette, as well as most of the Gold and Green, but I was thrilled and very proud of the background I created here. Sometimes the secret is in knowing when to stop fussing with it! I cut the watercolor background and black mat with my Stitched Rectangle dies, glued them together and foam taped them to the last white card base. I stamped the artist palette and the brush in SSS Intense Black ink, colored the spots on the pallet with the DSmith watercolors, and fussy cut them both out. I tried to imitate the sentiments from the stamp set for the ‘You Color My World’ sentiment using the Lucida Grande font and I sized it to fit within my smallest Stitched Rectangle die. I did cut four of them (three from plain white) and glued them all together – I am becoming more enamored of this technique – it gives you great dimension without having to fuss with foam tape! And this may be the first sentiment I’ve created that imitates the ‘white embossing on black card stock’ look. I Like It! Needless to say, I love this card a lot and I feel like this sentiment is very useful. These DSmith watercolors are some of the best on the market and his dot palettes are a great way to experiment with his colors without breaking the bank!
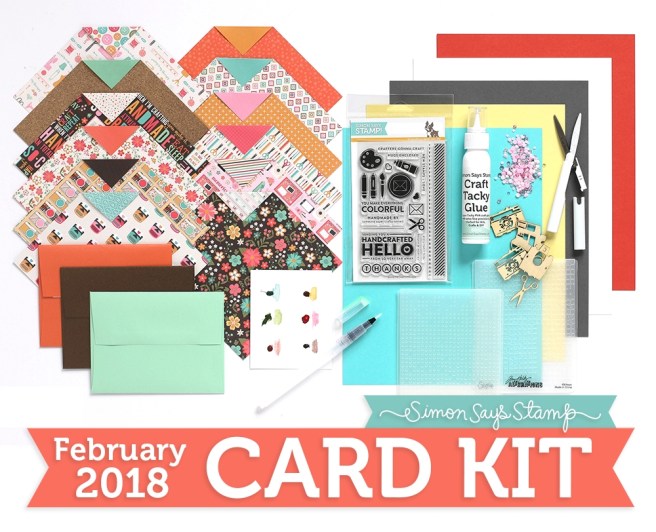
 That concludes my 10 Cards 1 Kit post for the Simon Says Stamp February 2018 ‘A Colorful Crafty Life’ card kit. A lovely batch of cards that are usable for many occasions.
 Here’s a summary of my thoughts (if I may!) on the Simon Says Stamp Card Kits. PROS: 1. First off, the quality of the products included in ALL of their kits is superlative – the SSS card stock is very high quality and their stamps sets are unimpeachable. Of course I didn’t LOVE every kit that came out this past year, but I was determined to take the good with the bad and see what I could create. As a subscriber, you can skip a month if you don’t care for the offerings, but that wasn’t an option for me in my exploration of available card kits out on the market. CONS: 1. I felt like the quantity of products included with the kits varied wildly month to month – the number of card stock papers fluctuated from 3 to 6, and some kits were overstuffed with product while others seemed rather light. 2. They appear to really like PINK over at Simon Says Stamp – if your kit doesn’t have any pink card stock, you can trust that there will be plenty of pink in the pattern papers and/or accessories. 3. Shipping is $6.99 per kit in America and you do not have the option of adding product from their store to be included with your monthly kit – thus avoiding additional shipping charges. 4. The monthly cost of the subscription kits went up this month by $5.00 with NO NOTICE given to their subscribers. After 11 months of being charged $31.94, I was surprised to find my charge for the February kit was $36.98. I sent a note to service@simonsaysstamp.com asking if the increase was only for this month (extra supplies) or was a permanent increase – I NEVER received a reply, and only after looking at the subscription prices on the website did I discover that it was indeed a price increase. This really irritated me and kind of soured my (otherwise fun) year with SSS. If I have given permission to charge my account a certain amount every month, I feel like it is only GOOD BUSINESS to alert me when that price goes up. I’m sure there is some fine print in their contract somewhere that says they are allowed to change their prices without notice, but that lack of notification felt a little underhanded to me. It’s not like they don’t have my email address! I’m sorry to end this post on a bit of a downer, but this really irked me. Thank you so much for sharing your time with me here – I hope I was able to provide you with a little inspiration and a couple of laughs! Stay tuned for the announcement of my next Card Kit subscription – I might take the month of March off, but will be continuing as part of the design team at Love From Lizi. Thank you so much for your encouragement and support and, Happy Crafting!!!
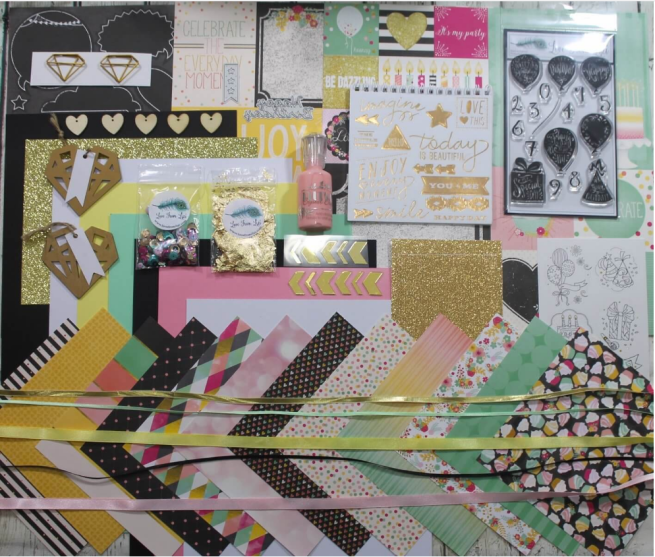 Hello folks! Scott here with my 10 cards from the

 Sometimes I think I’m a little too literal in my thinking, but when I’m looking for ideas, the stamps and sentiments in a kit will usually provide some inspiration. One of the balloon stamps had the sentiment ‘Flying by to say HI!” so, being faithful to that sentiment, here’s my flying balloon card…! On a piece of
 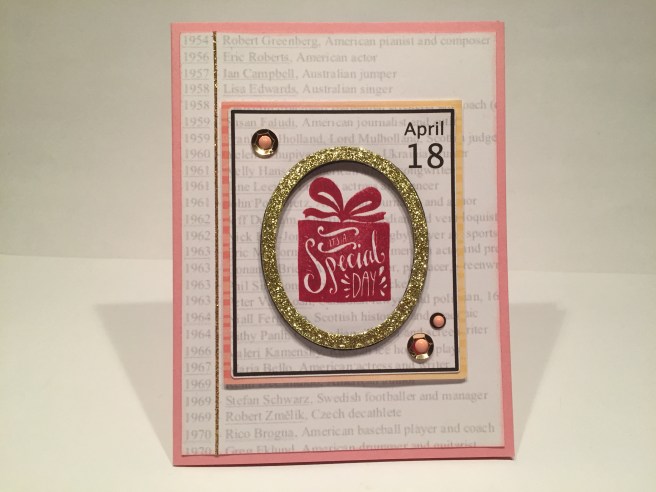 Here’s another example of my being literal! This ‘gift’ stamp has the sentiment ‘It’s a Special Day’ so I figured I could use that stamp to highlight a particular DAY for someone’s birthday! I fiddled around with some monthly calendars for a bit but came to the realization that all you need is a box and a date to specify someone’s actual birth day! And to make that day “special” why not show a list of famous people born on that very day! (If you Wikipedia a specific date, they will have a list of people who share that birthday!) On my Silhouette, I added the (partial) list of people born on April 18th, and added my calendar box and date (in Lucida Grande font) to the center of the list, and cut out the whole piece measuring 4″ x 5.25″. I also cut the date box away from the background as well, and mounted that on a small mat from the striped ombre pattern paper. I cut an oval frame using my
 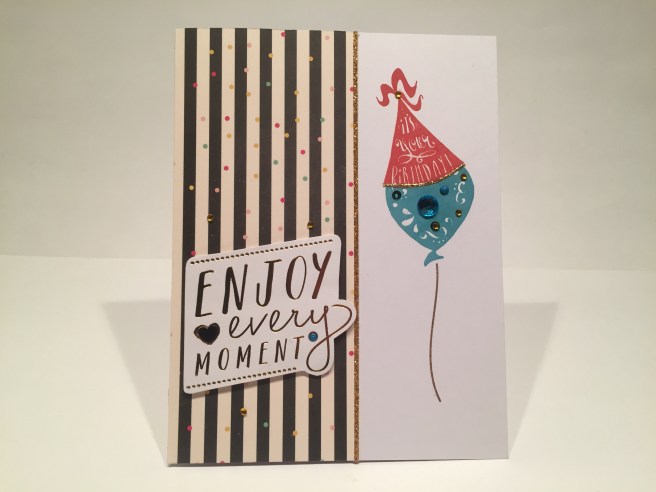 I’m still trying to use all the stamps in the kit, so let’s put the “It’s Your Birthday” hat stamp on one of the balloons! I also have that great stamp booklet to dig into as well, so I stamped the hat in Fired Brick Distress Oxide and the balloon in Broken China Distress Oxide (
 I really liked the “simply amazing’ sticker from the booklet, and decided to try a gold and white card. I stuck the sticker down to some of the black card stock from the kit, and fussy cut a mat around it. I cut apart the “YOU ARE” off of a different sticker, matted that on black and used that to complete this sentiment. Since the ‘amazing’ sticker had some chevrons on it, this was my opportunity to use the gold mirror chevron pieces from the kit. I added some of the ‘liquid gold’ ribbon on the left side of the card base, added some of the thin black satin ribbon to the center of the gold ribbon, and used a couple of peel off strips on either side of that. I did run the ribbon(s) through my
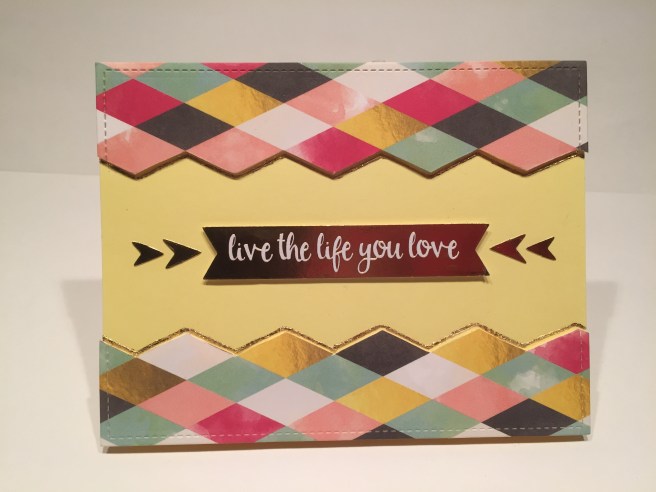 Some of the stickers from the sticker booklet didn’t have white borders on them at all, and I was drawn to this ‘live the life you love’ sticker. Since that sticker had fish-tail ends, I decided to use the harlequin diamonds pattern paper and fussy cut two pieces to frame out this card. I did cut the outside edges of the patter paper pieces with my LF Stitched Rectangle die, and to bring in a little extra gold to match the foil sticker, I used my Zigg 2-way glue pen to trace the fussy cut edges of the pattern paper onto the card and, once dried, used the gilding flakes to foil the glue lines. The pattern paper and the sentiment banner are foam tape mounted to the yellow card base and that brings this whole card together, especially when I added the gold foil arrow stickers to either side of the sentiment. I did add a die-cut Happy Birthday to the inside of the card using the glitter specialty paper, and we have a very unique, colorful Birthday card suitable for any guy on your list! The foiling on the stickers is really nice and provides all the glitz needed!
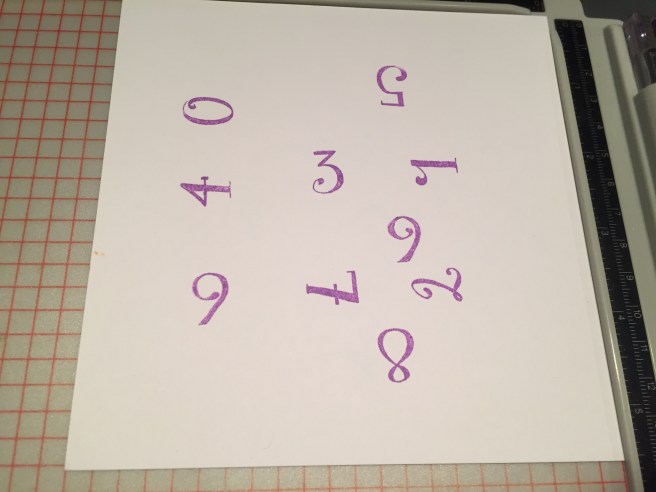 This is all done on a 5.5″ square piece of card stock and it uses all 10 of the number stamps! I stamped the first pass in Wilted Violet Distress Oxide ink, and turned the page 1/4 turn to the right (clockwise) to stamp the second pass in Fired Brick.
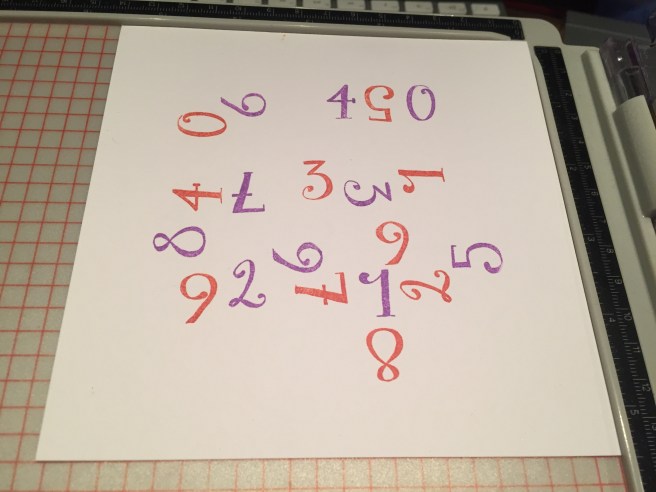 Another 1/4 turn clockwise for stamping the third pass in Cracked Pistachio.
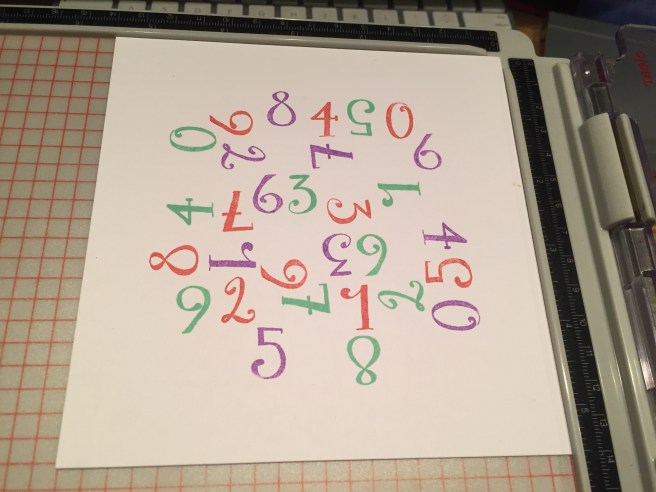 And the last 1/4 rotate clockwise for the final stamping in
 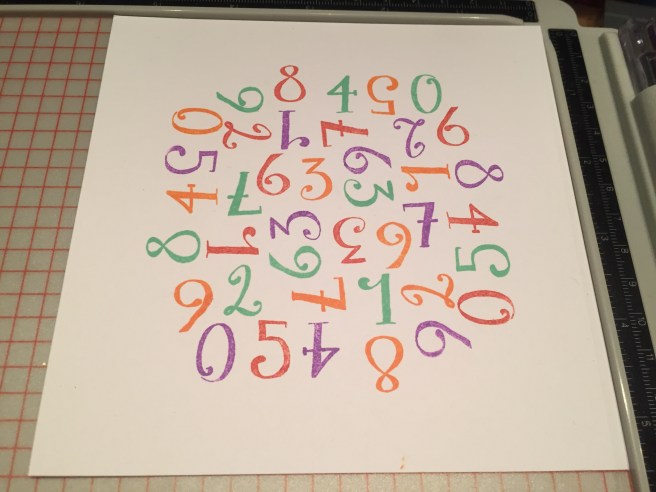 SUCCESS!! I am so jazzed that this came out so nicely!! This arrangement gives an apparently random look that is, nonetheless fairly regimented and reproducible! Though the complete pattern is only a touch over 4″ square (square cards anyone?!), I figure there are a lot of uses for a pattern like this. Like in this next card for instance..!
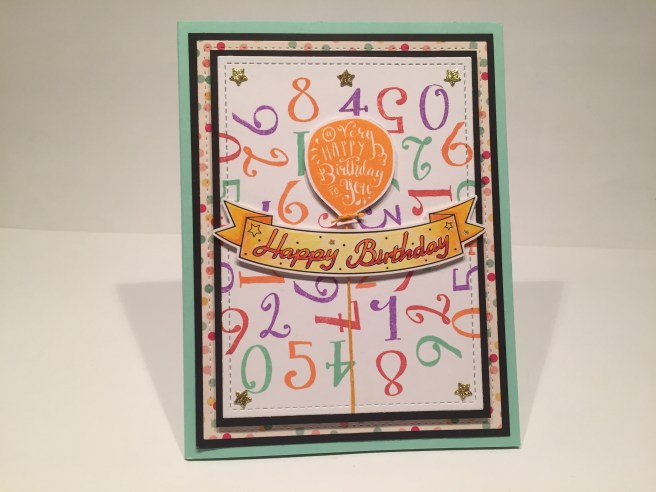 I used my ‘turnabout’ stamping as background paper for this Happy Birthday card. I paired that up with the polka dot pattern paper from the kit, the ‘A Very Happy Birthday to You’ balloon stamp and the Happy Birthday banner from the color-able sticker sheet. I stamped the balloon in
  Okay, enough with the color! Let’s go monochromatic!! In honor of all the chalkboard cut-aparts that came in the kit, I fount this great quote from Elizabeth Taylor. Perfect sentiment for one of the big wood-veneer gems in the kit!. Now, I don’t have glorious handwriting, so I usually turn to my Sillhouette for sentiments such as this, but I was a little concerned with matching up the sketch function of my Silhouette with one of the chalkboard pieces from the pattern paper, so I simply went ahead and created my own chalkboard label on the black card stock in the kit. I used my
 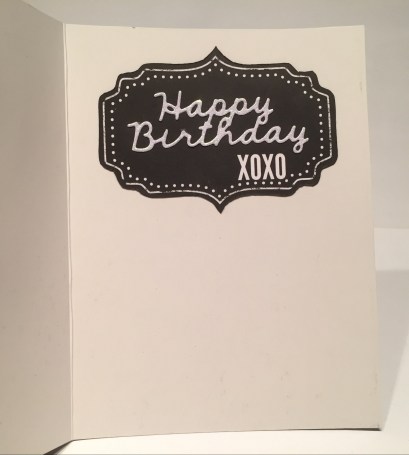 The diamond veneer piece is foam mounted to the card base as well, and simply covered with – get this – gold Stickles!! SO PERFECT!! A small bow made from the ‘liquid gold’ ribbon in the kit adorns the top of the label, and here’s a card I think most woman the world over would love! I do go on to complete the sentiment on the inside of the card, actually using one of the chalkboard cut-outs from the kit and the Happy Birthday die cut out of some white glitter card stock from my stash. A perfect little addition to complete this stunning card. I am very impressed with this Happy Birthday die – it is very accurate and cuts perfectly no matter what material I used. This one is for all the ladies out there!!
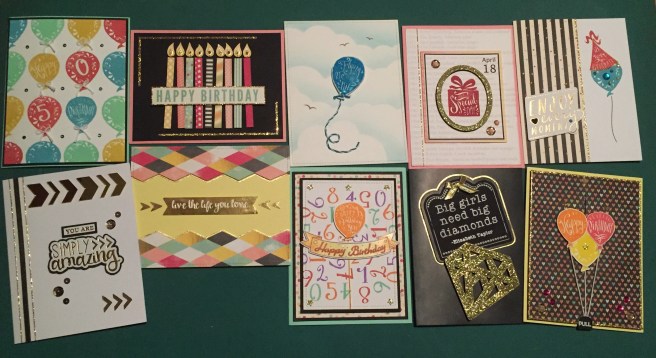 That’s my 10 Cards for the Love From Lizi February 2018 Card Kit… 9 Birthday Cards and 1 Flying Balloon card. A very colorful, clean, and eye-catching collection of cards! And, by golly, I used EVERY stamp in the stamp set! WOO-HOO!! LOL!!! Mission accomplished! Speaking of ‘every stamp’ – here’s a BONUS GIFT for all you folks that purchased this stamp kit – if you would like to receive my pattern for the homemade ‘turnabout’ numbers stamp grouping, go to the CONTACT page at the top of this post, and send me an email asking for the ‘turnabout stamp pattern’. If you are a follower of my blog and send me an email message, I will respond with a PDF file that shows the layout of the 10 number stamps so you can do your own turnabout stamping! SCORE!! And Remember! If you go shopping at Love From Lizi, please use my link:
  Card stock – 5 sheets of 8.5″ x 11″ in Matte Black, White (2), Soft Yellow, Pink (sigh), and Mint Green. I like that Lizi has gone to standard USA paper size for her kit card stocks.
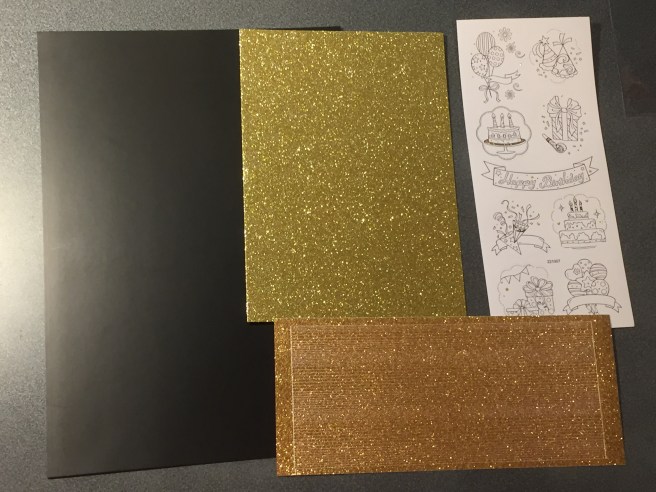 Our Specialty card stock this month is an A2 sheet of Matte Black mirror card stock (think chalk board) and a half sheet of gold glitter card stock – that glitter is truly a part of the paper and hardly sheds at all – which is also true of the Gold Glitter peel off stickers – I LOVE THESE (and ALL the LFL pin-stripe peel off stickers!!). We are also treated to a sheet of coloring stickers that have little gold glitter accents on each sticker.


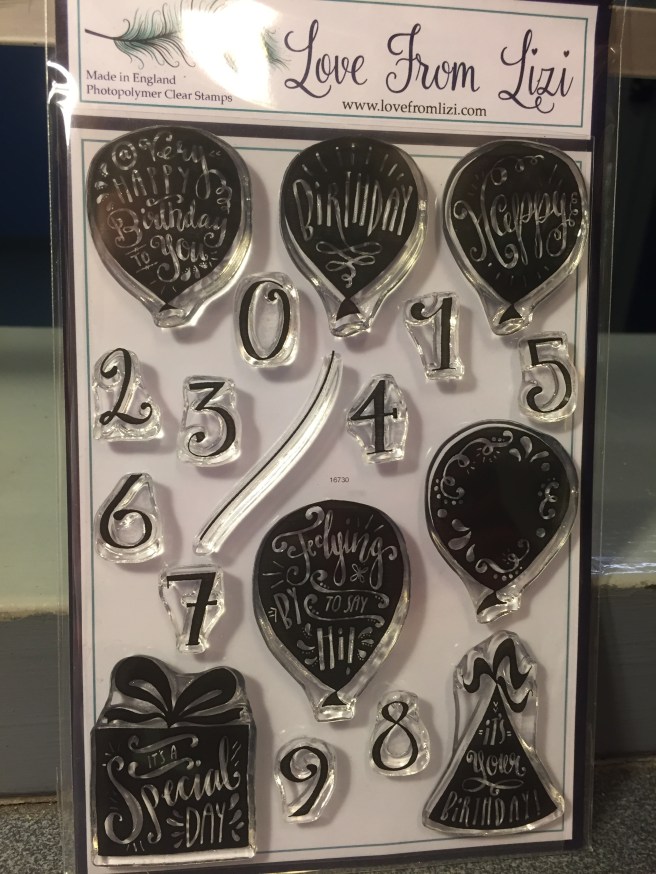 Now we come to the exclusive stamp set for this month – Balloons, party hat, gift box and 0-9 number stamps! Oh! and there’s a balloon string too for good measure! The one balloon that doesn’t have a sentiment is useful for stamping the numbers on! Not particularly a stamp set that lends itself to coloring, but perfect for all the birthdays in your life! Seems like I ALWAYS run out of Birthday cards!
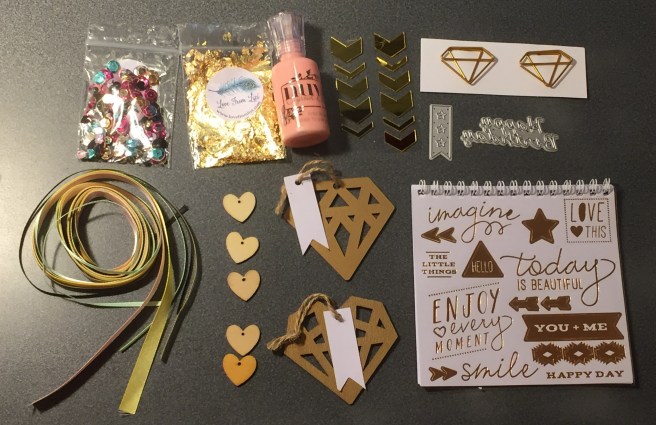 Now here’s the contents of our Embellishment bag this month – just about the best part of any LFL Card Kit!! Top row, left to right: LFL Sequin Mix with a couple of pinks, mint greens, gold and black heart sequins, some Nuvo Gilding flakes in Gold (these go a LONG way..!!), Nuvo Crystal Drops in Bubblegum Blush (more pink!) some self-adhesive gold mirror chevron pieces, two golden ‘diamond’ paper clips, and two wafer dies – a Happy Birthday die (nice detail!) and a small banner die that also has three star cut outs in the center. I think this is the first ‘banner’ die I own!! Bottom row, left to right: RIBBON! 1 meter of 5 different ribbons – a thin (1/8″) Mint satin and Black satin, a 1/4″ ‘liquid gold’ ribbon and a 3/8″ soft Yellow and light Pink ribbon. That’s a lot of ribbon! We get 5 wood veneer heart die-cuts (with a hole in the top) and 2 large golden veneer die cuts in a diamond and a heart shape with twine ties and little white banners. Very interesting! Now, Lizi usually includes a 12″ x 12″ sticker sheet with her card kits but this month she mentioned that she couldn’t get her hands on enough of those so we get this little sticker booklet instead. This booklet has 5 sheets of gold foiled stickers with a wide variety of sentiments and assorted accent pieces – I REALLY like these – looks like you could make 20 cards just using these stickers!
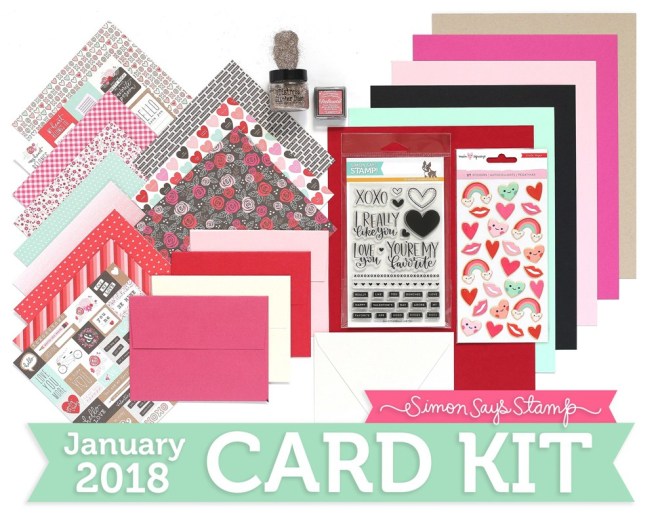 I would usually begin my 10 cards by coloring the images in a stamp set but, as you might be able to tell, besides a couple of heart stamps, there are no images to color. This is my 11th month as a subscriber with the Simon Says Stamp Card Kits and out of the last 11 months, only two stamp sets actually had NO hearts on them at all… LOL! I get it!! I get it! They really like hearts at SSS!! I did go ahead and make 10 card bases from the 5 sheets of SSS card stock. My goal with this kit, was to try my best to make some lovely Valentine’s Day cards that a guy wouldn’t be embarrassed to give to their sweetheart.
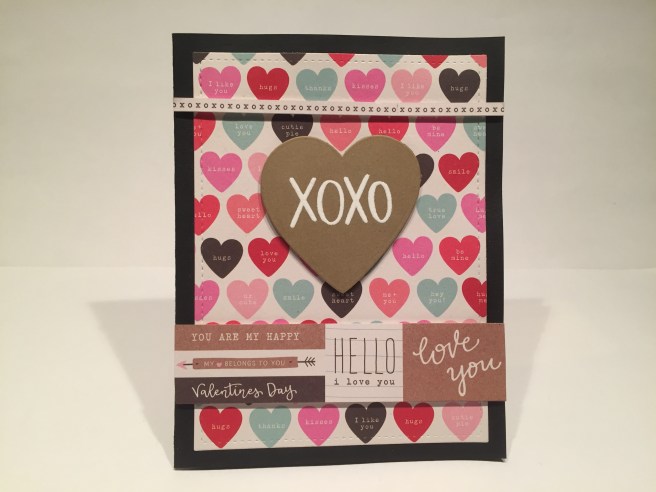 the pattern papers and pieced the strip together where the display hole was. I was going to use the Desert Storm card stock to die cut the heart, (with a
  I cut out a quarter of the sheet of Desert Storm card stock with the same stitched rectangle die, and stamped the ‘I Really like you’ sentiment in
 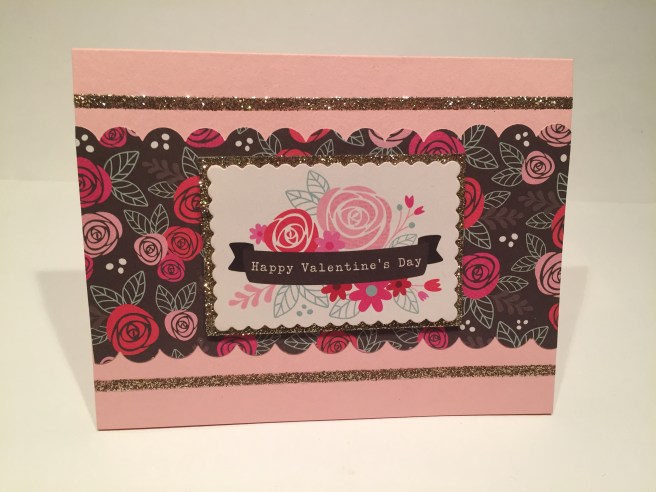 with the color flow! This Happy Valentine’s Day banner arrangement was one of the bigger images in the pattern papers, and when I discovered that I had a scalloped die that fit it perfectly, I decided to go ahead and use it. That scalloped die is one of the very first dies I ever owned, and I have no idea where it came from anymore… sorry! I paired that piece with the matching pattern paper (I like that the sentiment flowers are on white and the background flowers are on black – nice contrast while still matching!) and punched a scallop on the edges of that pattern paper with my
  that with the xoxo pattern paper. Again, the kraft color on the pattern papers matched my Recollections Kraft card stock better than the Desert Storm card stock, so I used that for a mat behind both pieces of the pattern paper, attaching the XOXO paper and mat directly to the card base, and the heart shape paper and mat with some foam tape. In my continuing efforts to use ALL of the stamps, I used the xoxo border stamp (I found both border stamps in this set a little short – neither would go clear across (horizontally OR vertically) an A2 card base – odd) stamped with VersaMark ink and embossed with my
  order to get it to spread enough to go through the stencil (that mousse dries out fairly quickly no matter how tight you screw the lid on..!) but I got some good coverage with the leftover mousse, and, after it was sufficiently dry, cut it out with my Stitched Rectangle die. I liked the color, the texture, and the pattern so much that I thought a simple sentiment was all this card needed. I did attach the stenciled piece to a black mat and attached those directly to the card base, then took that old scalloped rectangle die to cut another piece of black card stock from my stash for the sentiment. The ‘You’re My favorite” stamp is from the stamp set, and I stamped that (multiple times!) with the Delicatta Pink Shimmer ink cube using my stamping platform and attached that to the card with foam tape. I like the brightness of that ink on the black, but I don’t think the ‘pink’ particularly reads very well. However, the shimmer from the ink and the shine of the embellishment mousse are really very eye-catching and I think the pink and black work really well together without being too girly-girly… Do you think so?
 great striped pattern paper from the kit, and outlined that with some thin strips of gold directly on top of the card base. There are 4 layers of the pink printed card stock glued together, 3 layers of the red mat glued together, and a single gold mat on the bottom – that whole assembly is foam taped to the card base. I stamped all of the tiny heart stamps in
  On the Mint card base, I created three mats – the bottom is Recollections Kraft card stock (3″ wide), then the teal polka-dot pattern paper (2.75″ wide) and the xoxo pattern paper (2.375″ wide) on top. I cut the ampersand on my Sillhouette out of 3 layers of my kraft cardstock in the
 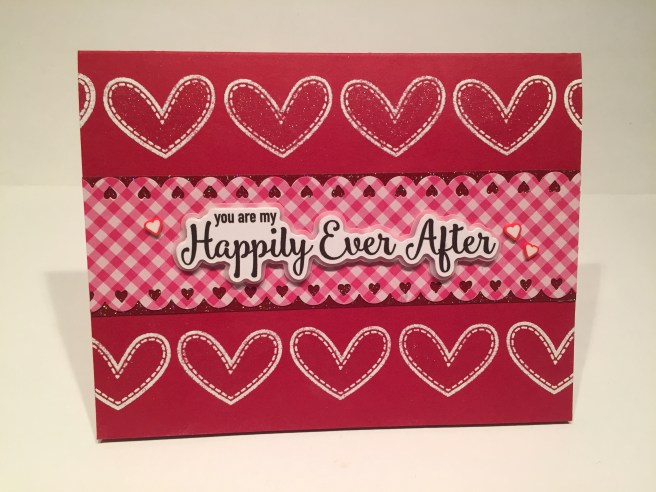 I used my stamp platform to stamp two rows of that stitched heart stamp along the top and bottom sides of the card base with VersaMark ink and embossed them with Ranger White super fine embossing powder. I cut a piece of
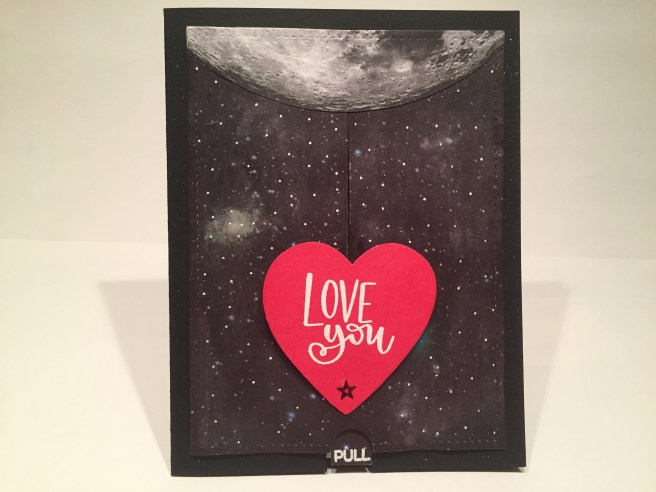
 This action is based on a
 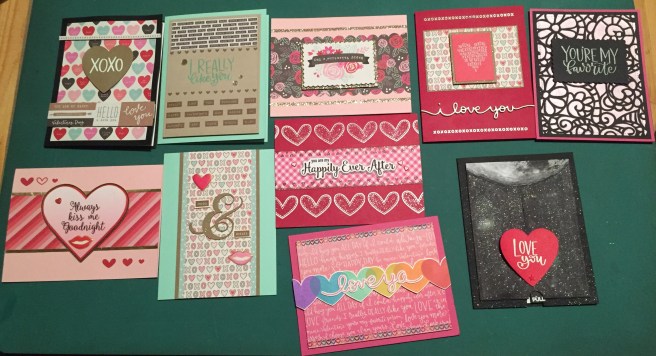 Here we have a very handsome set of Valentines that avoid the frill and frippery so often associated with the holiday, yet still feels artistic, sincere, clean and modern. I did have a fun time with this card kit, and am proud to say that I did use every single stamp in the stamp set, and I used a little bit of everything that came in this kit. Now THAT was the fun part! I do have plenty of ink and glitter left over and a few sheets of pattern paper and, of course, the ‘Really Like You’ stamp set will find a loving home in my stash! That about wraps up the SSS January 2018 card kit on this end! The last I looked, this kit was still available at
 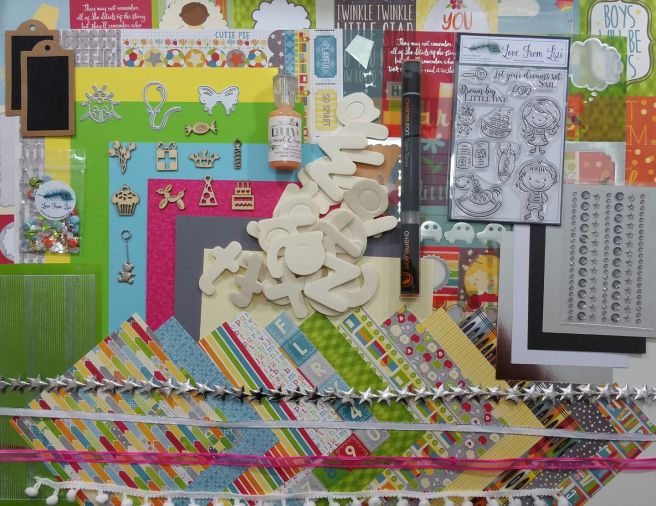 and surprises in bright beautiful colors starring a couple of youngsters and child-themed stamps and papers. Almost TOO many choices for someone like me! I habitually try to use as many kit supplies and stamps as possible with my 10 cards in an effort to show you as many options as possible. This kit HAS sold out – as do most of the Love From Lizi card kits, so, if you would like to get in on the fun, I highly recommend
  For my first card, I was drawn to the ladybug die that demonstrated the great amount of detail that is possible with a wafer die-cut. On the vanilla card base, I matted one of the cut-aparts (in red to match a ladybug) on a piece of the green harlequin pattern paper
 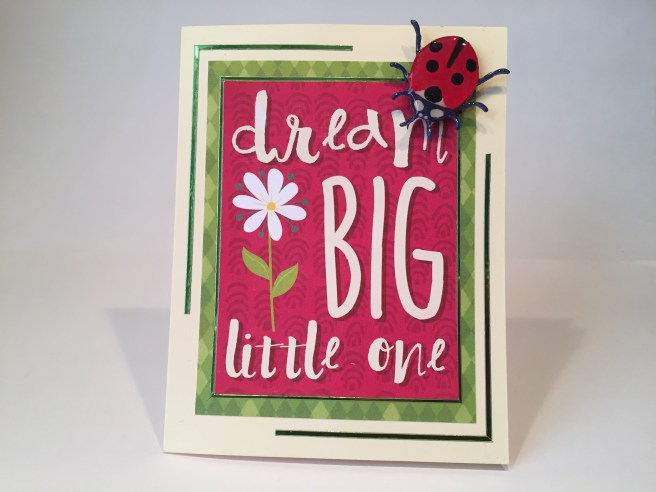 and mounted those directly to the card base. I did outline the cut-apart with the thin Grass Green Mirror peel-offs and created a partial frame around that with the wide peel-offs. I think this type of incomplete frame really pulls the eye in, while still keeping the overall card light and unencumbered. After researching ladybug images on the web, I die cut the ladybug in dark blue and red and fussy cut a black background for the body.
 I used my
  AHA! now my block structure can be multi-dimensional! I stamped the “Dream big LITTLE ONE” sentiment from the stamp set in
 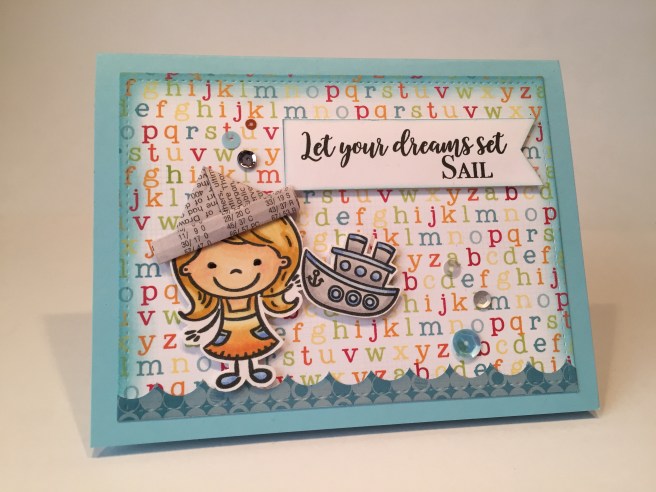 On the Sky Blue card base, I cut a background from the alphabet pattern paper with my Stitched Rectangle die and used some
 I took the vellum cut-apart that had the terrific “You Are Loved” sentiment in yellow with pink-ish flowers and green leaves, ran that through my
 My parents read to me as a child, and sparked a life-long joy of reading that continues to this day! This is a TERRIFIC sentiment and I can’t wait to give this card (along with a book!) to a deserving parent. On the Sky Blue card base, I attached a strip of the bookcase pattern paper along the left side (there was a strip down the center of the pattern paper that was devoid of the A B C’s so that’s what I used) and added a thin strip of the silver pearlescent specialty paper to finish off the ‘side of the bookcase’ on the right edge. I mounted the cut-apart on a mat of the same specialty paper and foam mounted that to the card base. I wanted to try adding a little ‘ethnicity’ to the boy and girl stamps, and was able to achieve a decent skin color that could be interpreted in many ways…! I fussy cut both of the kids’ heads and the book and created a little vignette towards the bottom of the card. A few sequins from the sequin mix, and a few spots of the Nuvo Jewel drops add a touch of shine. LOVE this sentiment!!
 Here’s a decent, very kid-friendly pun for this month! I used my Silhouette Portrait to design this sentiment in (drum roll, please…!!!)
  and outlined it with the thin green mirror peel-offs. A couple of strips of that great rainbow stripe pattern paper at the top and bottom fill out the rest of the card front. I did add a “Happy Birthday” to the writing surface on the inside of the card (in the same font) and here’s a simple single-layer card appropriate for young-uns!
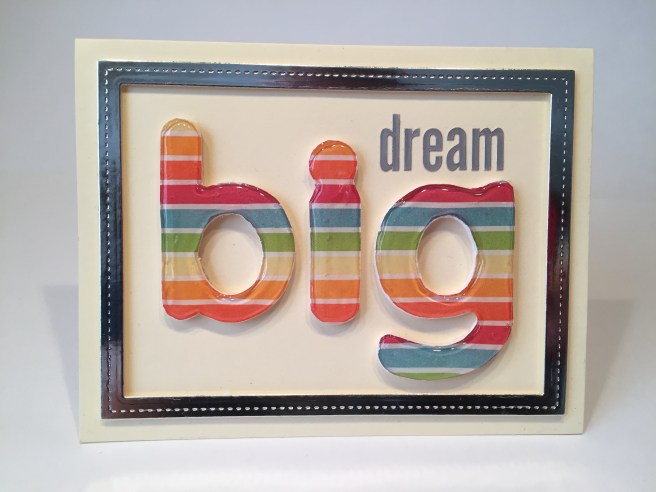 I covered the die cuts with the rainbow striped pattern paper taking care to line up the stripes across all three letters. I decided to use the Vanilla card base to make the rainbow pop, but found that the color of the alphabet stickers from the sticker sheet a little bit too light to show up on pale papers so I colored the sticker letters with a
  I fussy cut a strip of the colorful ‘arrow’ pattern paper to mimic a picket fence and attached that directly to the bottom of the Sunshine Yellow card base. I cut a strip of the green harlequin pattern paper with my NEW
  I cut the Graphite shimmer card with my stitched rectangle die and mounted that to the card base. I trimmed that with the scallop sticker border from the sticker sheet on the top and bottom, and tucked pom-poms between each scallop. The alphabet stickers worked great for this sentiment, and I underlined that with a thin Silver Glitter peel-off from Lizi’s September ’17 card kit. Love the grey/black tones here, but the best is on the inside:
 After way too much experimenting, I was able to take that concept and create a reversible pull-tab card. By cutting a small slit in the card front, I was able to make a small paper hinge that slides through the slit and is attached to the back of the rocket. So the rocket is attached to the front of the ‘trash bag’ conveyor and the pull-tab is attached to the back of the ‘conveyor belt’. OH BABY IT WORKS!! The boy and the sentiment are attached to the card with foam tape and I also left a little gap in the hillside to hide the rocket flame until the ship takes off…! I used the
 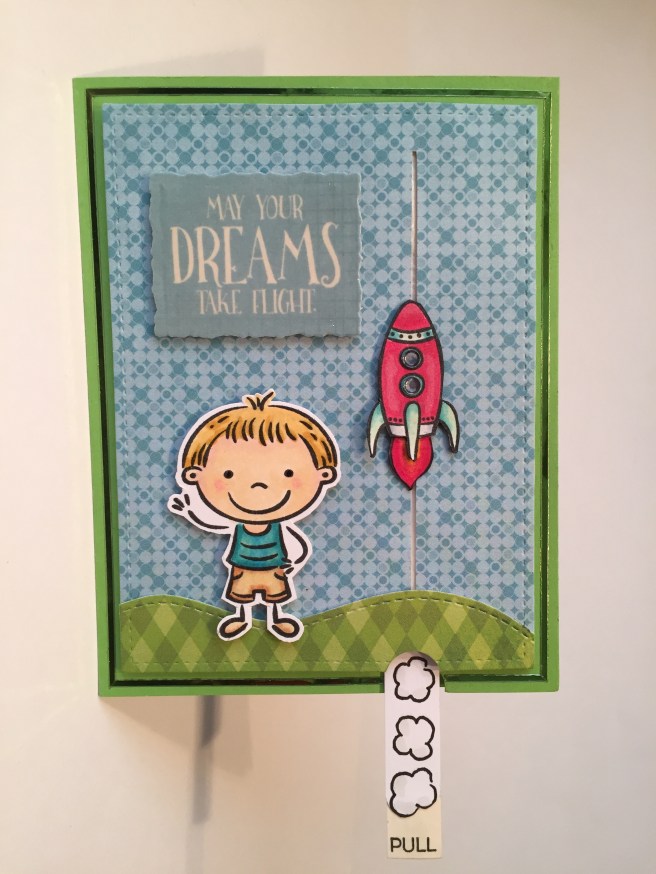 white card and trimmed that down to glue on top of the tab. PERFECT! I added some shine with a frame of the grass green mirror peel-offs around the card base and a couple of the gems on the ship’s windows. Oh my stars and garters! I am completely bowled over with this card! The rocket flies right to the top of the card and returns to the hillside with a simple push back on the tab. SO MUCH FUN!!! I don’t think I will ever be able to part with this card…! But now I know that you can adapt the magic slider mechanism to make something move on the front of a card… straight run penny-slider cards may be a thing of my past!!
 Again, Lizi has given us standard letter size card stocks at 8.5″ x 11″ and we are treated to an extra full-size specialty embossed paper in that mottled pink pattern. Our regular 5 card stocks this month are in Sunshine Yellow, Apple Green, Sky Blue, Vanilla and Slate Grey. High-quality card stocks and always enough to make (at least) 10 card bases.
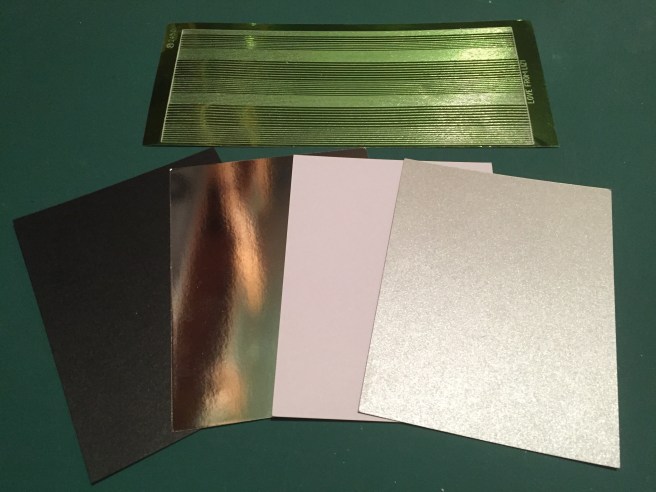 More specialty card stocks in 4.25″ x 5.5″ (A2 card) size in a shimmer Graphite, Silver Mirror, Copic-friendly smooth White and Silver Pearl. A regular item in Lizi’s kits are her peel-off stickers, this month – Grass Green mirror peel-offs. I LOVE LIZI’s PEEL-OFFs!!
 We get 12 single side, 6″ x 6″ pattern papers with this kit – very colorful with lots of stripes, patterns, crayons, stars, apples, books and blocks. Perfect accompaniment!


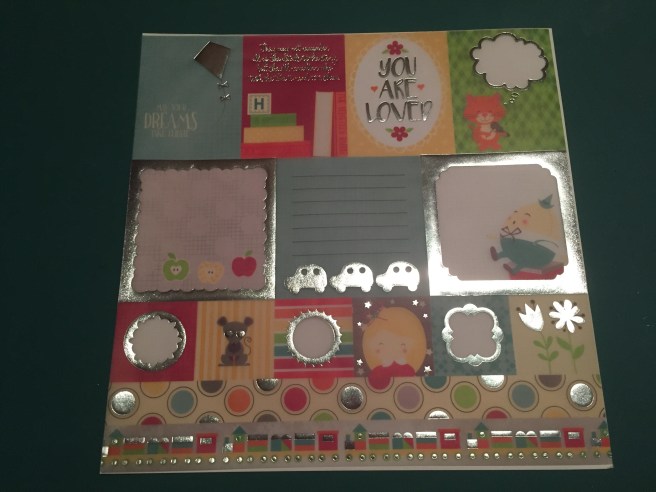 One of my favorite regular items in the Love From Lizi Kits are her vellum sheets – this 12″ x 12″ vellum sheet has brushed silver foil highlights on over a dozen images and a couple of border strips too. I love these vellum sheets and I rarely see them in other kits.
 And if that weren’t enough, we also get a 12″ x 12″ sheet of card stock stickers. A full alphabet, lots of images, borders, pennants and tags all in matching colors. WOO-HOO!
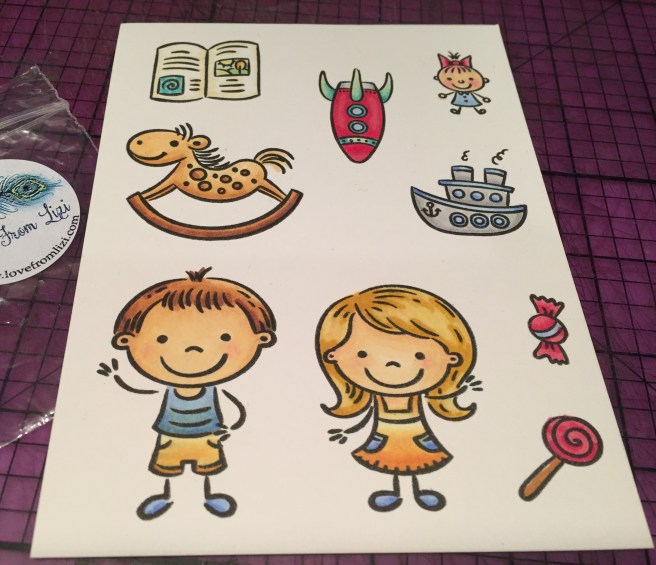
 That brings us to the Stamp set for this month. One of the cutest stamp sets I’ve seen in a long time and a big departure from Lizi’s usual stamp sets. I love the boy and girl stamps and all the toys and we even get a couple of age-appropriate sentiments. I can’t wait to start coloring all these images! This is the first stamp set I own with images of kids! FUN!
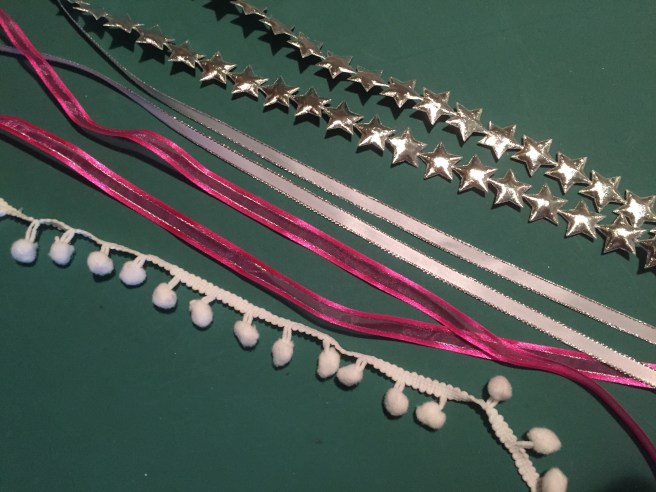 On to all the extras and the embellishments for this month – always one of the best parts to all of Lizi’s kits! 4 ribbons and trims with a meter each of white satin ribbon with silver trim, pink satin/organza ribbon with silver trim (In Lizi’s unboxing, she mentioned that she included the pink ribbon and pink specialty card stock because she knows how much I love pink! LOL!!) and silver puffy stars – this is the third month in a row now where we have gotten some extremely interesting shaped trims! ALSO a couple of feet of white pom-pom trim! How long has it been since I’ve seen pom-pom trimmings!? WOW!
 More to come! From the bottom left corner and clockwise – A silver teddy bear charm on a silver chain, 9 wood veneer die-cuts, our (almost) monthly Chameleon pen in OR3 – Tangerine, smoky grey self stick jewels in circle and star shapes, two ‘chalkboard’ tags, 3 wafer dies (a bow, ladybug and balloon) the New Beginnings sequin mix, and a full size bottle of Nuvo Jewel Drops in Orange Marmalade. I am looking forward to trying these Nuvo drops which are supposed to be translucent with just a tint of color. PRETTY!
 And finally, we get a full lower case alphabet of wood veneer die-cuts! These are large pieces averaging about 2″ square! I will have to do some brainstorming on how to use these pieces on a card, but that is one of the delights of the Love From Lizi Card Kits – we always get supplies that stretch your imagination and some out-of-the box thinking!
 came with the
  • As usual, I stamped a couple groups of images with
  first card. I used a white card base from my stash, and covered the front of that with the tiny polka-dot pattern paper and trimmed down the ‘living room’ paper to fit. I did add a couple of strips of the tiny red polka dot pattern paper to the sides of the image for a bit of extra framing, and added a touch of the larger red polka dot paper as a mat behind my sentiment. I used foam tape to mount the characters and sentiment to the front of the card, and now the characters are the focus of this scene instead of the living room. I used a
  Since that cut-apart sentiment was in the blue with candy-cane stripes, I decided to use the Tropical Tide glitter card stock for my background and the striped pattern paper for my focal image. I used my
  papers. I did use
  I stamped the Santa stamp on the Kraft card base (using SSS Intense Black ink), and colored him up with my colored pencils. I did put down a light layer of white pencil over the entire stamp before I colored it, and also cut some
  second set of characters with my
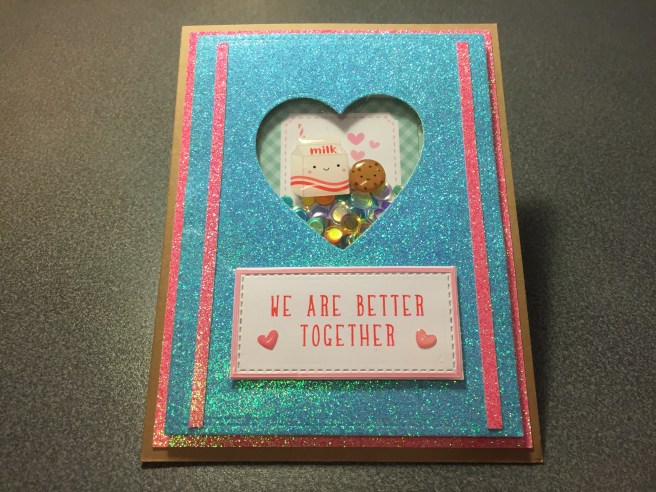 cover up the second cookie on the cut apart print. I liked the way the Tropical Tide and Candy Floss glitter card stock worked together, so I cut a mat of the pink glitter at 4″ x 5.25″, and the blue glitter at 3.75″ x 5″ and used a simple
 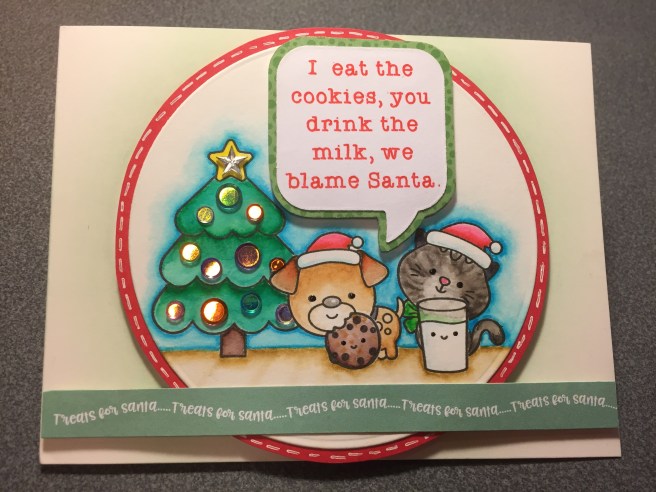 I wish the animals had more interesting expressions on their faces, but I figured they would do here. I ‘drew” the sentiment (love my Silhouette!) in the Typewriter Hand font with my red Pilot pen (again) on a scrap of white card stock and cut it out using a
 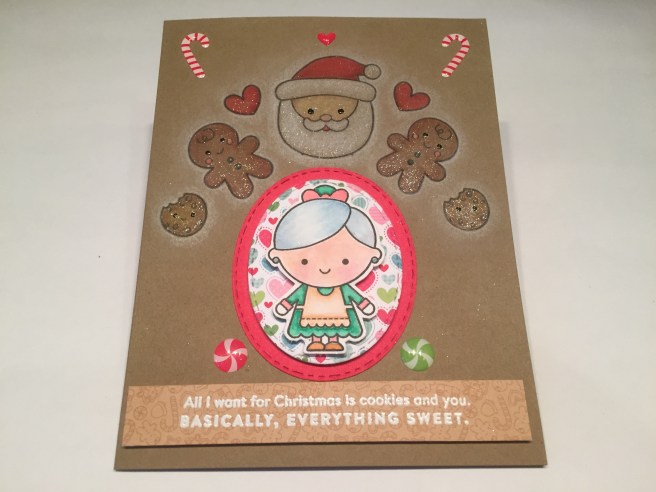 Christmas…” sentiment stamp from the kit. I masked and hand-stamped Santa’s head, the gingerbread cookies, the round cookies and the hearts directly on the card base and colored all the images with my colored pencils. This took a little bit of practice to get the stamping placed just right and I wasted a little bit of my Kraft card stock in the process, but I finally got the images where I wanted them. I also did a light white ‘halo’ around the images to help make it look like they were ‘in her thoughts’. Two stitched ovals from the pattern paper and my red card stock provide a mat for Mrs. Claus, and I stamped the sentiment in
  four of the gingerbread men and lightly colored them with my colored pencils and used both my glaze pens (on the outside two) and Nuvo drops (on the inside two) for their decorations. I foam mounted them with a couple of the gumdrop sprinkles to a double mat of pattern papers (hearts cut at 1.625″ x 5.5″ – brown pattern paper cut at 1.25″ x 5.5″) down the center of the card. I did add .125″ strips of the Silver Screen glitter paper to the edges of the pattern paper and and matted two of the cut-apart stripes to the glitter card stock as well for the top and bottom of the card front. The “have a sweet Christmas” sentiment is cut from the pattern papers and foam taped up on the bottom strip, and here we have an adorable Christmas card starring the Gingerbread Man Stamp! • Now it seems the only stamp I haven’t featured in a starring role is the Christmas Tree, and I am sorely in need of a little bit of a pun, so let’s remedy that right now! Let’s do some paper-piecing! I stamped the tree (in SSS Intense Black Ink) three times on the green polka dot pattern paper and fussy cut the three different layers and then stacked them up with a little foam tape at their bottom edges. I did fussy cut a trunk from the brown pattern paper and of course outlined all the cut edges with a black brush marker.
  I actually had this brick piece already cut because I was thinking of using that with the ‘Santa colored with pencils on Kraft’ card but the white on the pattern paper was too white when compared with the white on the kraft colored Santa, so I had this piece already ready already! I used a square of the merry Christmas pattern paper for the background behind the tree, and mounted the brick pattern paper to the red card base with foam tape. Back to my Silhouette and my Red Pilot pen for this pun-y sentiment that is perfect for this card! Again, I ‘sketched’ this sentiment with my Silhouette (Paprika font) on a scrap of white card stock and die cut it out with a
  • SO… that’s 8 Christmas Cards and 2 ‘love’ cards from this card kit. I know this took me a long time to get out, but I hope you enjoyed what I came up with this month. I did think this card kit was a little high on the ultra-cute scale but, as usual, once I got started working on my cards, ideas started flowing a little easier. Though I didn’t use the Delicata Rose Gold stamp pad, I did use some of the pink in the kit for highlights, and I think I was able to avoid any real pink overload!! And now I have a real honest-to-goodness Christmas stamp set with images in my stamp collection. All in all a very nice, almost retro, vintage-y feel with these holiday cards. I have plenty of extras left over from this kit and I am looking forward to making some valentines with the Simon Says Stamp January Card Kit. Now even I can deal with some pink in my Valentine’s Day cards! Thanks for joining me here today and sharing your time with me! Please like me, List me, Pin me, Post me, Follow me and by all means… Happy Crafting!!
