Hello Folks! Scott here with a special showcase of the Flavor of the Month Card Kit by Scrapping for Less for May 2018 – “In the Countryside”. Teresa Russell – the owner of Scrapping for Less – asked me if I would do a feature for her May Card Kit, and, since I had considered this subscription kit for my “A Year With…” series, I readily accepted! 
A unique feature of the FOTM kits is that they usually consist of four “collections” that are kind of like four little mini kits that comprise the ‘Double Dip Sundae’ level and an available extra collection of goodies that bumps you up to the ‘Banana Split’ level. Here’s a quick breakdown of all the supplies included in this kit:  Collection One: Six 6″ x 6″ ‘Country Kitchen’ pattern papers from Carta Bella; the Brutus Monroe stamp set: ‘Farm Emblems’; some Carta Bella Frames and Tags (ephemera); an alphabet sticker sheet (mine are pink!); and a small packet of matching Kennedy Grace Creations sequins. Collection Two: Six 6″ x 6″ ‘Down on the
  Farm’ pattern papers from Doodlebug; the ‘Miss Moo’ stamp set from Sunny Studio (exclusive for Scrapping for Less); Down on the Farm Chit Chat (ephemera) and Mini Icons (stickers); and another small pack of matching KG sequins. Collection Three: Six 6″ x 6″ ‘Tiny Checks’ pattern paper from My Favorite Things; the ‘Piggy Picnic’ stamp set from Scrapping for Less, about 12″ of Yellow
  Gingham Ribbon; Farm Animal Stickers from Pebbles; and more matching KG sequins. Collection Four: Six 6″ x 6″ ‘Farmhouse’ pattern papers by American Crafts, the ‘Barnyard’ stamp set from Avery Elle created exclusively for Scrapping for Less; about a foot or so of black and white twine, Farm Friends stickers (nice acetate stickers with glitter accents!); and another matching packet
  of KG sequins. In addition to the four ‘collections’, you also receive four envelopes and a great stack of letter-sized card stock (Scrapping for Less is now sending six sheets of colored card stock and two sheets of white in their card kits) – I believe all the colored card stock is from My Favorite Things – Wild Cherry, Sour Apple, Banana Split, Whip Cream, Kraft, and Black Licorice. And the two sheets of white card stock
  is Neenah 110# smooth white solar crest card stock. All the card stock is terrific! You get all of these collections at the Double Dip level and you can upgrade to the Banana Split level for even
 more goodness! This month, the Banana Split level treated us to one full-size bottle of Nuvo Jewel Drops in Strawberry Coulis, Orange Marmalade, or Sea Breeze (I got the orange); a Rooster, Hen and Chick die from Frantic Stampers; about 16″ of 2.5″ wide burlap ribbon; and the ‘Faith, Family, Farming’ rubber stamp from Technique Junkies. Since the pattern papers , ephemera, stickers and the like are divided up in these collections, you may not receive the exact same items as other people.
Another interesting feature of the Flavor of the Month Card Kits is the four Card Sketches that Teresa provides for every kit. I am familiar with card sketches, have seen them around and in the free craft magazines you get from scrapbook.com, but I don’t think I have ever actually used a sketch to make a card. Now, Teresa said I didn’t have to use the sketches for my showcase, but I figured I’d give them a whirl and see what inspiration they provide. Then, of course, to make the challenge a little more thorough, I decided I’d make the four sketch cards using only items from one ‘collection’ at a time. I didn’t plan on it originally, but I ended up using sketch #1 with Collection One, sketch #2 with Collection Two, etc… Once I get through 4 cards using the sketches (and one card from the extra ‘banana split’ supplies) then I’ll open up the rest of these cards to a free-for-all!
 Now, Collection One – ‘Country Kitchen’ didn’t have any sentiments in the stamp set, and the ephemera that I received only said ‘Home’, ‘From My Garden With Love’, ‘Homemade with Love’, and ‘Tomatoes’, so I decided to create my own sentiment using the alpha stickers included in the collection. I was inspired by the two chicken emblems from the stamp set, and the chicken outline pattern paper, and that great salmon plaid pattern paper (hey, the alpha stickers are pink!). So, on a Whip Cream card base I assembled my first card using the suggested Sketch #1 and a fun sticker-ed birthday greeting. This birthday card makes me giggle!!
 I did decide to use the black card stock (and some of the white) included in the kit for mats, accents and stamping instead of card bases, and I also used the second half of the Whip Cream card stock as the base for this sentiment and the round chicken stamp. I stamped the second chicken stamp on a strip of the background paper for my vertical stripe, then matted the sentiment with the chicken pattern paper and I am actually surprised at how closely this follows the card sketch. Other than my VersaFine Onyx Black ink, everything here is from Collection One.
 Moving on to Card 2, Collection Two (Down on the Farm), and card sketch #2, my second card is created using only the kit supplies. Okay, I did use a stitched circle die on that last card, and here I use a stitched oval die from my stash, and you know I cannot live without my Lawn Fawn Stitched Rectangle dies, but beyond my dies, inks, coloring mediums and one sheet of Bristol Smooth card stock, everything on all of these cards is straight from the kit itself. I stamped that cute cow stamp using VersaFine Onyx Black ink on a piece of the Neenah smooth white solar crest card stock, and colored her up with my Spectrum Noir Alcohol Markers before die cutting her out in a nice oval.
  That fun ‘cow on a blue field’ pattern paper and the cow hide pattern paper provided the stripes on the Sour Apple card base. I did stamp the little flower from the stamp set using SSS Key Lime hybrid ink along the right edge of the card base, and mounted everything up on some foam tape. You know I love me some puns, and this Sunny Studio Stamp set has three nice pun-y sentiments including this “Cow are you?” sentiment. Very cute card and, I was able to follow the card sketch pretty closely! Love that flower in her ear!
 Card 3, Collection Three (Tiny Checks), sketch #3, and we’ve moved into the piggy stamp set (with a ‘tiny check’ stamp)! And that MFT Tiny Check pattern paper, so I wanted to play with some patterns on this card. Again, my card is very faithful to the card sketch, but I managed one piece of interesting construction here. I cut the light blue check pattern paper on a diagonal with a stitched rectangle die, and then I attached that to the dark blue check pattern paper and matched the pattern and then cut the dark blue into an eighth-inch mat before matting that on some more Black Licorice card stock. It is almost unnoticeable, but you can see it if you’re looking – I do think that it really pulls your eye in to the center image.
 On the Banana Split card base, I glued down my background layers and then stamped the check ‘tablecloth’ stamp using the SSS Watermelon Hybrid ink on the Neenah card stock – fussy cut those rectangles out – and mounted them to the card front with foam tape. I stamped the two pigs in VersaFine black ink and colored them with my Zigg Clean Color real Brush Markers with a little blue halo from an alcohol marker. ‘Enjoy Life It’s Delicious’ was one of the fun sentiments from this stamp set, so I curved that to match one of my Darice Banner dies, and stamped that in black as well. I used one of my Darice Nesting Heart dies to cut out the pigs, and everything gets some thin foam dots before mounting to the card front. I really like the colorful sequins here and the pigs are so cute.
 Card number 4, ‘Farmhouse’ Collection 4, and sketch #4 bring the cute lambs out to play. I stamped and masked the lamb stamp to make a pyramid of sheep with VersaFine black ink on the Neenah card stock and colored the sheep with my alcohol markers. There was some really beautiful pattern paper in this collection, so I paired up the green leaf pattern with the little flowers pattern paper and matted those on the Black Licorice card stock before gluing them down to the Kraft card base. I trimmed the stamped piece down to size, matted that on some black and added that to the card front with some foam tape. The sentiment is
  stamped in black on the Neenah card stock, matted on the black card stock and foam taped to the card front. As I was finishing up this card, I thought I would use some black glaze pen to add some shine to the sheep’s eyes but my glaze pen was too big and all my little lambs started looking crazed. Big fail! So I stamped six new sheep heads, colored them the same, fussy cut them out and added them back to their bodies with some foam dots. WOW! That really made this card POP! I added a small bow to my black sheep using the black and white twine and I have to admit that this card actually thrills me! SO nice!! I did enjoy using the card sketches for these first cards and was truly surprised at how closely I adhered to them. I can see their usefulness in providing folks with inspiration!
The extra goodies in the Banana Split level has a large rubber stamp this month so I decided card five would focus on that stamp and the materials included with it. I did use some of my Bristol smooth card stock and stamped this image using my SSS Intense Black ink – this is such a finely detailed stamp that I needed to use my ‘least-juicy’ stamp pad to get all the small details. I colored this image with my Zigg markers in a little bit of a vignette style and used one of my stitched rectangle dies to cut the stamp out. On the Wild Cherry card base, I added a 3.75″ strip of the red check pattern paper from Collection Two, and trimmed that with a couple of thin strips of the Black Licorice card stock on the edges. I used some spray adhesive to mount the burlap ribbon down the center of the card front, and used the included dies to cut a chicken family from the licorice card stock to parade across the bottom of this card. I love this barn, but am at a bit of a loss as to the meaning of this sentiment… feels more like a scrapbook sentiment than a card sentiment: “Here we are when we helped the Johnson’s add a second hayloft to their barn!” I do like that barn though, and these colors, and all those cute little chicks!
Now that we have covered all the card sketches and all the ‘collections’ we can have a little more fun combining all the materials for the next group of cards. I was lucky enough to get this ADORABLE cow sticker with my Sticko ‘Farm Friends’ acetate stickers. I actually found the whole sheet of stickers available on Amazon if you’re interested!!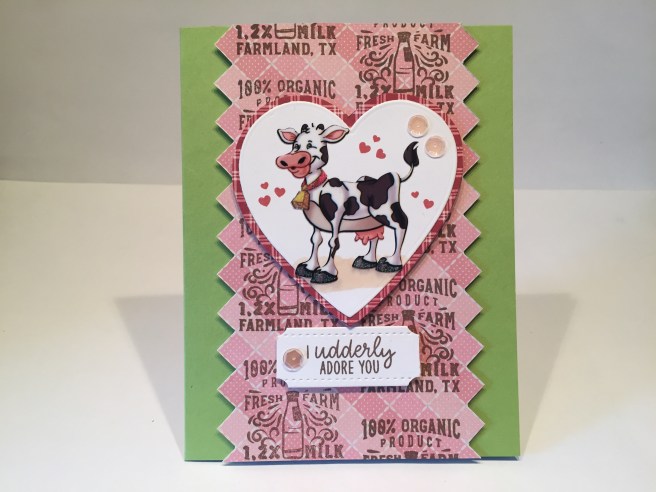 On the Sour Apple card base, I used a strip of the salmon check pattern paper (collection four) cut to 3.5″ wide and fussy cut along the long edges following the checked pattern. I don’t have any fancy scallop dies or straight decorative die cuts (really, my LF stitched rectangle dies are the only card-size dies I own) so I find it very effective to fussy cut pattern papers along the pattern lines. I stamped the ‘milk’ stamp from Collection One using Distress Oxide Walnut Stain ink in two rows on the pattern paper for a little more detail on the background. The cow sticker is attached to a piece of the Neenah card stock and cut with a heart nesting die, and then matted on a piece of the dark red check pattern paper from the same collection. The sentiment is from the ‘Miss Moo’ stamp set in Collection Two, stamped in Distress Oxide Walnut Stain ink on more of the Neenah card stock and die cut into my shaped sentiment. The heart shape and the sentiment are foam taped to the card front and I added a few heart stamps around the cow using a Paper Pumpkin stamp from the January 2017 kit stamped in Distress Oxide Fired Brick ink. That matches the dark checked mat perfectly! I added a little shadow under the cow with an alcohol marker and finished off this card with a few sequins. I think this cow sticker is SO cute and, though I am not a huge fan of stickers, I am tempted to buy some of the complete sticker sets from Amazon. Adorable card with a funny pun-y sentiment!
There is still one more pun-y sentiment from that Sunny Studio stamp set in Collection Two that I am eager to use, so that sentiment is what inspired my next card.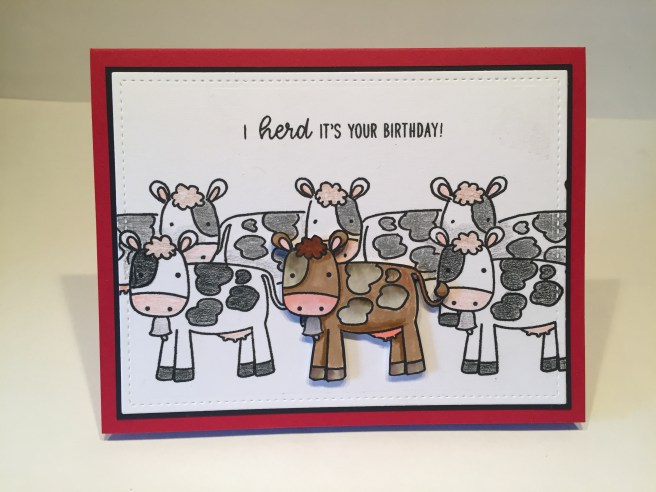 On a piece of the Neenah white card stock I stamped the cow from the ‘Barnyard’ stamp set in Collection Four six times. I actually stamped the back row on the BACK of the card stock so I could trace them on the front and have my ‘herd’ facing in different directions. So I really didn’t need any masks at all! I stamped one more cow on a scrap of card stock and colored her with my Zigg Markers and fussy-cut her out for my main image. To reinforce the pop of the brown cow, I colored all the other cows in black and white using colored pencils – nothing highly detailed, just enough to give them some color. I cut the card front with a stitched rectangle die, matted that on a thin piece of Black Licorice card stock and glued that all down to the Wild Cherry card base. The brown cow is attached with foam dots, so she’s the only real dimension on this card. I did add a touch of my Wink of Stella glitter pen to the bell on the brown cow, but that’s the only sparkle on this card. I really like the fact that this sentiment stamp came in two pieces so you could stamp a stacked or a straight sentiment as I did here with VersaFine Onyx Black ink. Such a fun birthday card that’s really pretty simple but packs a pun-y punch!
I really liked the barn stamp included with the Banana Split level extras but wanted to use a different sentiment with it, so I simply cut the ‘farming’ sentiment off of the stamp.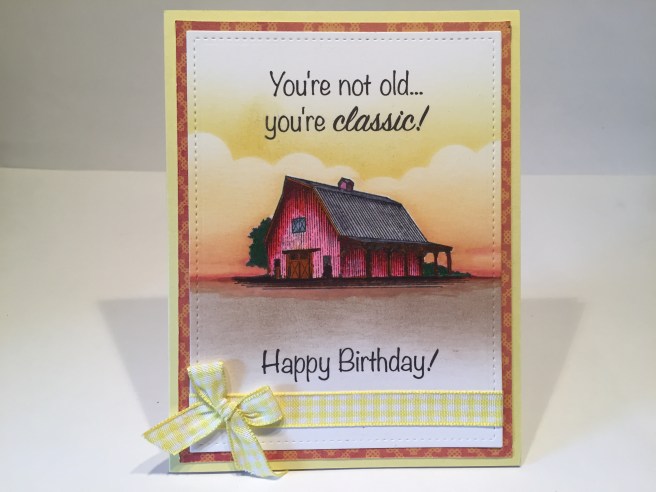 I stamped this barn using my SSS Intense Black ink (my least juicy black ink pad) on a piece of my Strathmore Bristol Smooth card stock. I did cut a mask for the barn and colored the background using my Distress Oxide inks in Walnut Stain, Fired Brick, Spiced Marmalade and Fossilized Amber using my Ink Duster brushes. I did use the My Favorite Things Mini Cloud Edges stencil for a touch of clouds above the barn. I colored the barn with my Zigg markers and turned to my printer and my Silhouette Software to create this fun birthday sentiment. This is printed directly on the card front with the Noteworthy font and the Sign Painter font for the cursive ‘classic’. I love being able to create my own sentiments on my cards, and I have a more in depth video explaining my printing process here: https://www.youtube.com/watch?v=V9YuZSqC9fo&t=1s. I wrapped the yellow gingham ribbon from Collection Three around the bottom of the card front and added a little bow to the bottom left (it is a birthday card after all!!). I matted the card front on a piece of the orange-y pattern paper from Collection Four and glued all down to the Banana Split card base. I love this background combined with the barn and, since we are ALL getting older, (or at least know people who ARE) I think this is a very fun and useful birthday sentiment. Again… I really LOVE that barn image!
I knew I wanted to use those cute ‘chick’ stamps from the Avery Elle ‘Barnyard’ stamp set in Collection Four, but (possibly because I am a guy) I felt that the ‘you are one of my favorite chicks’ was a touch misogynistic…! LOL!! So let’s do another printed sentiment!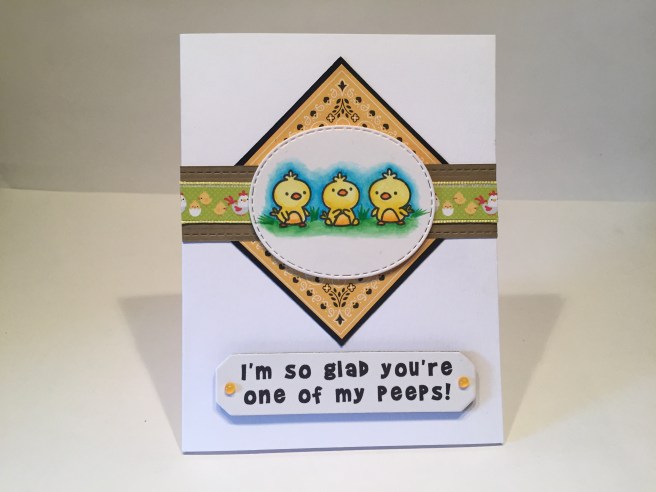 I stamped the three chick stamps on a small piece of Bristol Smooth card stock and colored them with my Zigg clean color markers, and die cut that out with one of my stitched oval dies. I cut the strip of hens and chicks from the stripes of pattern paper in Collection Two and used the yellow gingham ribbon (Collection Three) for a little trim on the edges of that strip. I cut a one inch strip of my own kraft card stock and used my Ellen Hutson Stitching Lines die to add the stitch lines on the top and bottom of that strip. I decided I needed something more on my focal image so I cut out the yellow bandanna square from the Doodlebug pattern paper in Collection Two, matted that on a thin black mat and cut that in half to go above and below my accent strip. I glued all the background pieces to a Neenah white card base, and mounted my chick vignette up on foam tape. Back to the printer and my Silhouette software for this fun sentiment printed in my favorite Brady Bunch Remastered font on some scrap white card stock and die cut with the Tim Holtz Compass Blueprint die. I cut three more of those shapes out of the Black Licorice card stock and glued them all together with the sentiment on top for a nice chunky chipboard-like sentiment. I added the sentiment to the card front with some thin foam dots and used my Orange Marmalade Nuvo Jewel drops for the two accent spots on either end of the sentiment. I like this ‘peep’ sentiment much more that the ‘chick’ sentiment and I adore these three little chick stamps! A very cheerful friendship card!
If you have followed me at all over the last couple of years, you know how much I love using puns and song lyrics as sentiments on my cards. Thus we have arrived at card #10.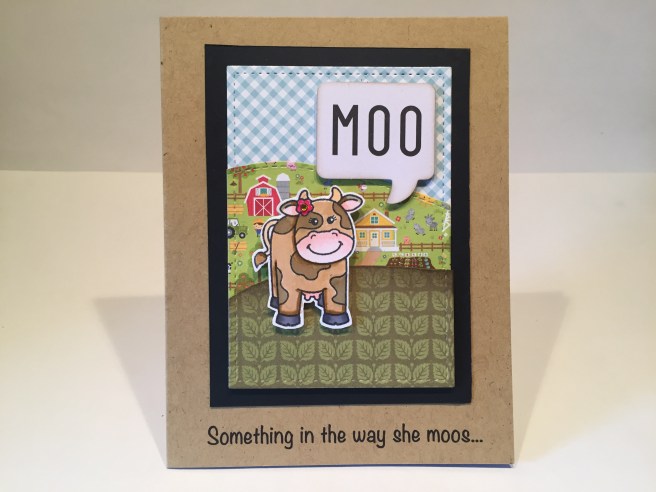 Go ahead… sing it to yourself… this is a GREAT pun for a cow card! I created this fun scene using a stitched hillside die and pattern papers from Collection Four (leaf pattern) Three (check pattern for sky) and Two (farm pattern). I did a little ink blending on the edge of the front hill with Distress Oxide Walnut Stain for a little added definition, and cut all three pattern papers out with a stitched rectangle die and matted those on a larger frame using some black card stock from my stash (not enough Black Licorice card stock for this last mat!). The front leaf hillside is mounted with some foam dots to intensify the perspective of this scene. I stamped the ‘Miss Moo’ cow from Collection Two on a scrap of Bristol Smooth card stock, colored her with my Zigg Markers and fussy cut her out leaving a small white border to help her pop. I mounted her and the ‘Down On The Farm Chit Chat’ “MOO” to the card front using foam squares and that completes this fun scene.
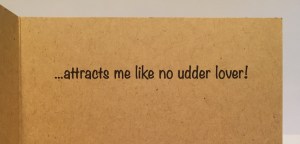 Back to my printer for this sentiment using the Noteworthy font again and I was able to print the sentiments directly on the last Kraft Card base. Of course the sentiment completes on the inside (I couldn’t resist a double-pun!) and I am laughing even as I write this! SO MUCH FUN!
 Though I have lived in New York City for almost 30 years now, I was raised in Kansas and still have those ‘countryside’ roots embedded in my psyche, so this was actually a fun kit for me – almost felt like a vacation! I have gobs of supplies left over, as well as those fun stamp sets! A big thanks goes out to Teresa Russell at Scrapping for Less for letting me experiment with her May Flavor of the Month card kit. I enjoyed the variety of supplies included in the kit and the great variety of stamps included as well. Most of the stamp sets here are exclusive to this specific card kit, so that’s something very special for subscribers. I do know that there are more “In the Countryside” Card Kits available in both the Double Dip and Banana Split levels, so if I have managed to pique your interest, head over to Scrapping For Less and get one for yourself – and if you like the huge variety Teresa includes in her Flavor of the Month Card Kits go ahead and subscribe!. Thank you so much for taking time out of your busy day to visit with me here, please share this post with all your friends, don’t run with scissors, and Happy Crafting!!
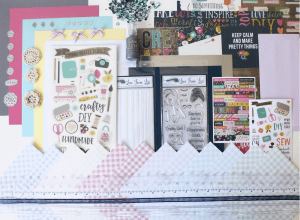 refers to this kit as the “Makers Gonna Make” card kit featuring lots of colorful papers, cut apart sheets, chipboard stickers and an exclusive ‘build-a-bust’ stamp set. Initially, I was a little intimidated by this kit because it is rather aggressively ‘girly’, but after a little bit of experimenting, I figured out some unique ways to use these supplies and was actually able to create some truly masculine cards.
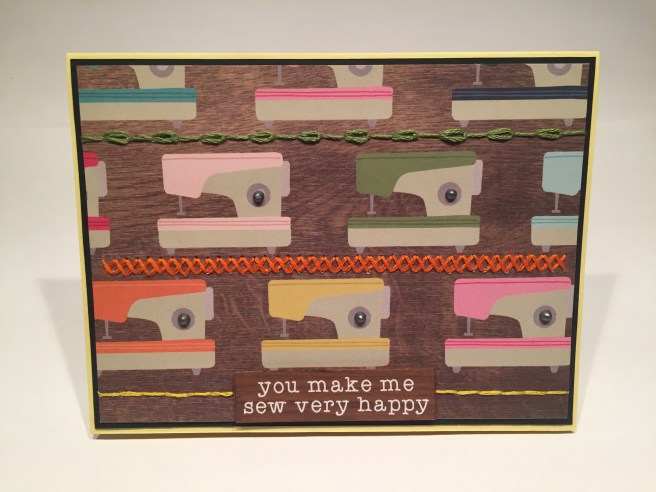 I broke out the embroidery floss and my
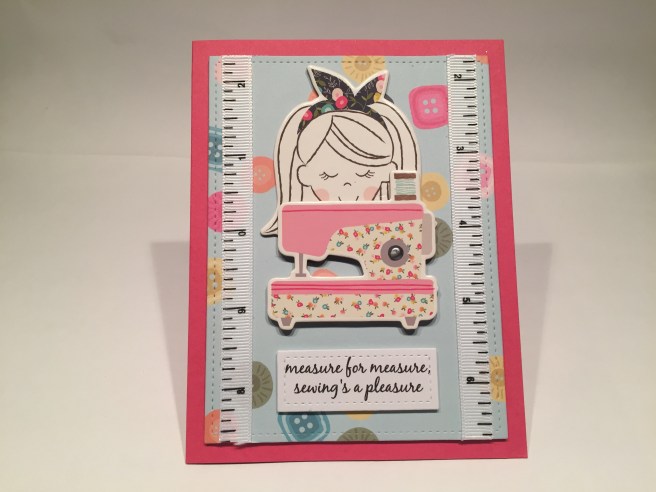
  I picked three colors of DMC floss (#3347-medium yellow green, #947-burnt orange, #973-bright canary) to match some of the sewing machines on the pattern paper and, with three strands of floss, I did a simple back stitch on the bottom, a cross stitch in the middle and a chain / straight stitch on the top. The sentiment on this cut apart was a simple ‘sew very happy’, so I went into my
 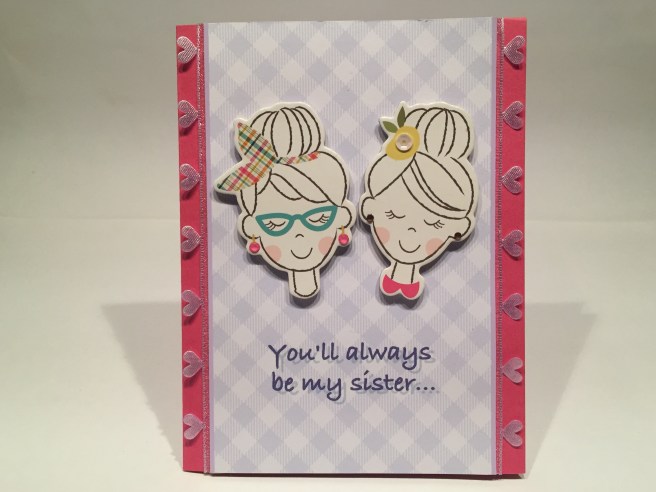 Lizi usually gives us the option of purchasing matching chipboard stickers with the add-on products offered along with the subscription kits, but this month she included them in the kit to begin with! Plus for Us! There were three lady chipboard stickers and I noticed that two of them looked very similar… almost like sisters… and that prompted this card. For the background, I trimmed a piece of the lilac plaid pattern paper down to three and a half inches wide and (after splitting the lilac heart shaped ribbon down the middle) added those ribbon pieces to the two sides and glued that down to the Cerise Pink card
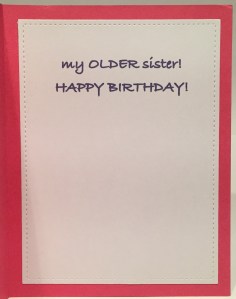 base. I went back to my Silhouette software for the sentiment on this card using the
 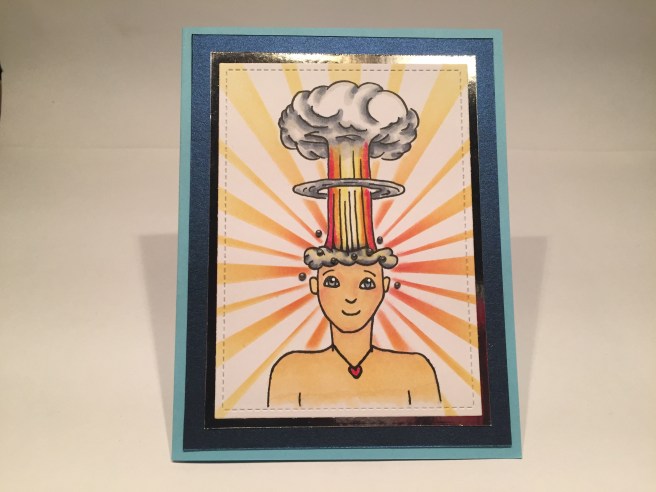 So I ended up creating this fun image. I did a quick search for ‘mushroom cloud cartoon’ and found this usable image that I was able to size correctly.
 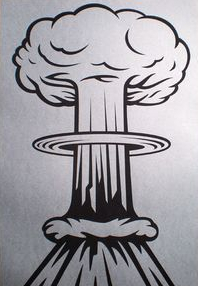 I did stamp the head with VersaFine Onyx Black ink on a piece of the ‘copic-friendly’ white card stock included in the kit, and simply traced the mushroom cloud on top of the stamped head with my
  stamp — there are no pupils in the eyes (so you can make the image ‘look’ in any direction) and there are no eyebrows on this face! I thought this face was a little alien looking when I first stamped it, and it took me a while before I realized that there were no eyebrows – so don’t forget to add eyebrows!! After coloring, I die cut it with my
  Why not take advantage of some of that great
 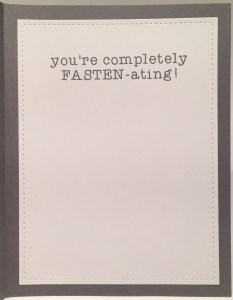 So whats
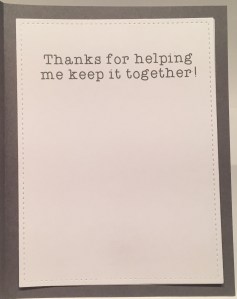 inside?? I had a bit of a dilemma with this sentiment so I just went ahead and created two sentiments that would work with a card like this. Of course, I ultimately went for the pun-y sentiment but I really like the thanks for helping sentiment too! Both of the sentiments I created using my Silhouette software and the Typewriter Hand font printed on some plain white card stock from my stash and die cut with my stitched rectangle dies. I love the grey gingham and the grey buttons and the ultimate simplicity of this card – not to mention that this is great for a guy! Very masculine!
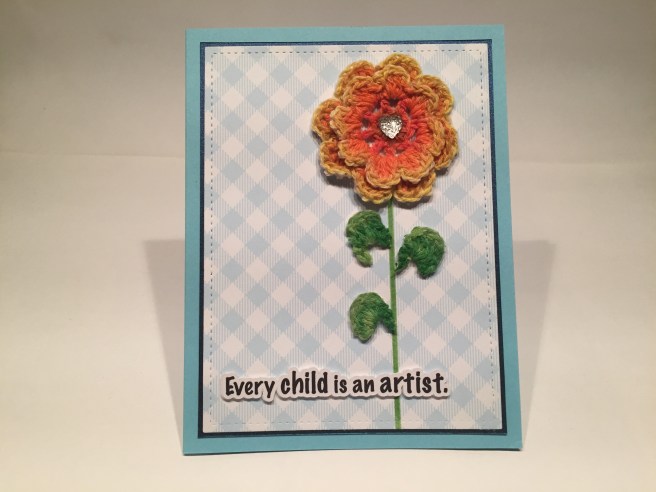 back of the small doily knowing that I was going to cut it apart to make leaves! Once dried, that small doily made perfect leaves! The texture and dimension that these pieces add to this card is so cool! I cut a piece of the blue gingham pattern paper with a stitched rectangle die and used the thinnest stripe on the “Pretty Plaid” stencil to ink in a
 stem with
  On the Cerise Pink card base, I used the button pattern paper from one of the cut apart sheets die cut with a stitched rectangle die, added that cool ribbon down both sides, and mounted that to the card base with
  I do like to run my ribbons through my
 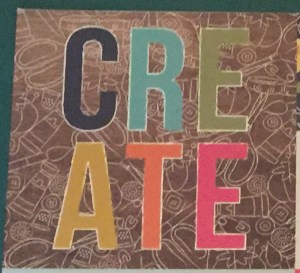 Since I made my first card from a 4″ x 6″ cut apart, I turned to the 4′ x 4″ cut apart sheet and chose the text that was the most graphic for my next card. I fussy cut all these letters away from their background to use on the front of my card – I did reinforce the white outlines once the letters were cut out with my
  I also added some nice sparkle to the background card stock with some
 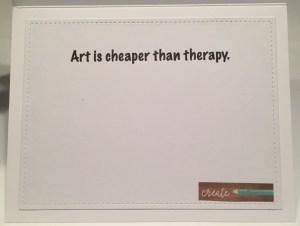 and glued that to a plain white card base. I did mount all of the letters to the card front with foam dots and added the paint pallet and brush chipboard stickers along the bottom. The real fun of this card comes when you open it. The “Art is cheaper than therapy” sentiment is printed in the Marker Felt font on a piece of scrap white card stock die cut with a stitched rectangle die. LOL!! Boy, ain’t that the truth!! LOL!! I did add a small ‘create’ sticker to the bottom right corner on the inside, and I love the dictum to ‘create’ coupled with a very good reason to do so! And this sentiment certainly applies to ALL!!
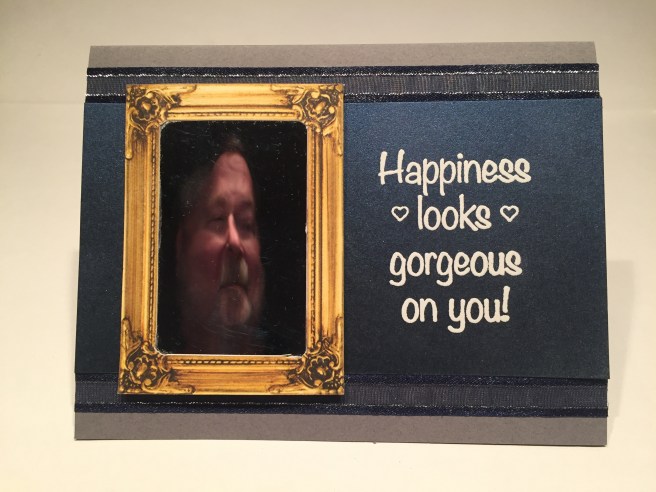 I couldn’t resist using this sentiment from the stamp set on a ‘mirror’ card! I have some old
  Despite the ‘gorgeous’ in the sentiment (rather feminine) I was determined to make this as gender neutral as possible, so I embossed the sentiment on the dark blue specialty paper using
 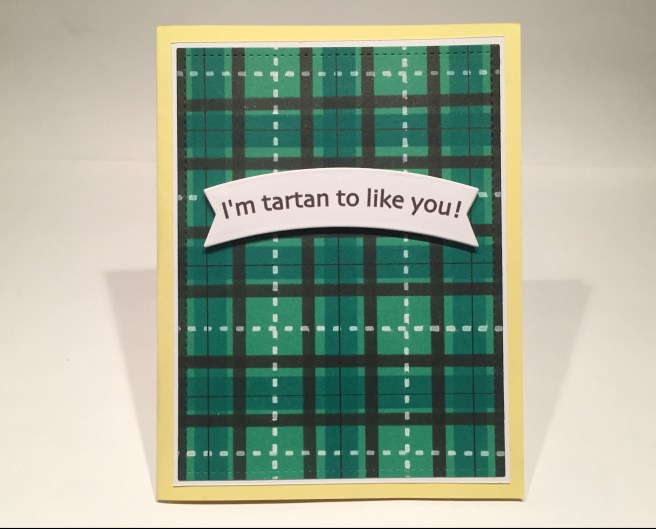 create as many masculine cards as possible, I thought I would use the stencil to create an actual ‘tartan’ plaid. Though not a completely accurate representation,
 I did base this plaid on the Scottish Lion tartan. On a piece of plain green card stock from my stash, I sponged the next to the widest stripe on the stencil with
 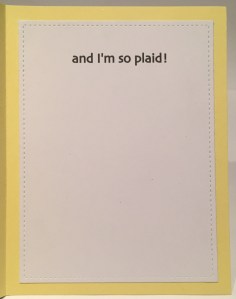 Of course I have to use a little pun for this card – “I’m tartan to like you” I find extremely funny and unique! I used the
  So that’s my 10 cards featuring the Love From Lizi June 2018 “Makers Gonna Make” card kit! I actually ended up having much more fun with this card kit that I originally thought I would! I think this is a very eclectic group of cards that highlights how many different directions you can go with this kit! Of course I have lots of leftovers but I did manage to use a little bit of most everything in the kit. As of the original date of this post, this kit is still available, so if you’s like to play along, please use my link to shop at lovefromlizi.com:
 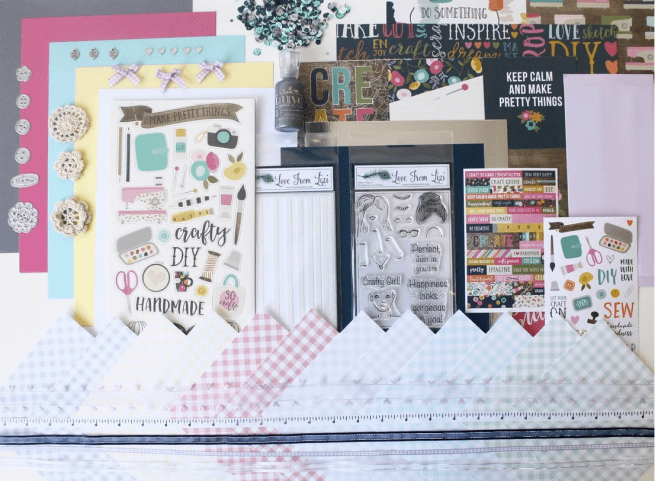 This kit is loaded with lots of soft summer colors to get us ready for the hot weather!
 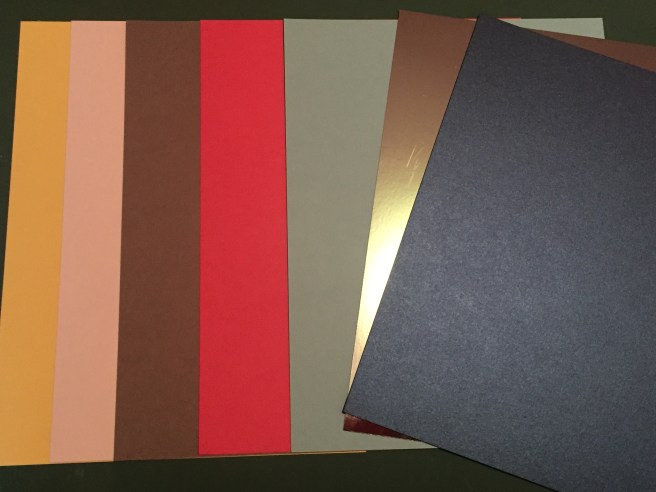 Sticking with the 8.5″ x 11″ standard letter size card stock this month, we get 5 card stocks in Sunshine Yellow, White (copic friendly), Medium Grey, Cerise Pink, Sky Blue, and two full sheets of specialty card stock in Silver Mirror and Dark Blue Pearlescent.
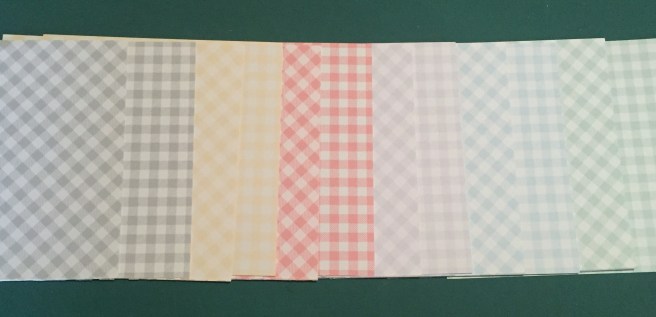 Our pattern paper this month is a selection from the Lawn Fawn “Gotta Have Gingham” collection. 12 sheets of 6″ x 6″ single-sided card stocks in soft tones of green, blue, lilac, red, yellow and grey gingham patterns in both straight and diagonal directions!
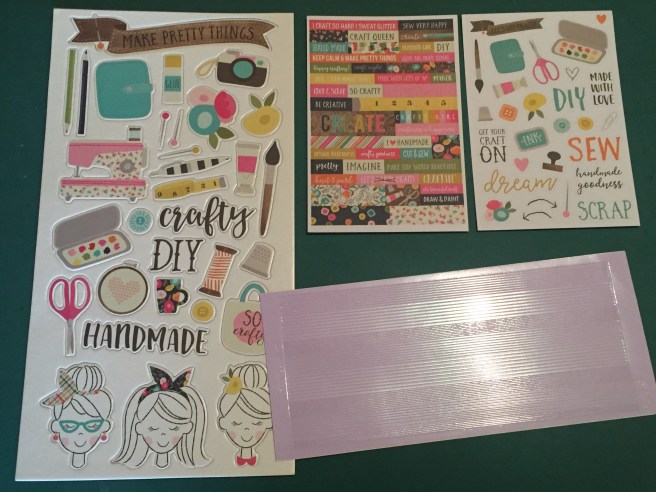 Usually reserved for available add-ons, this month we get a 6″ x 12″ sheet of chipboard stickers with all sorts of crafting and sewing images and sentiments, and two sheets of 4″ x 6″ regular stickers. These stickers are selected from a pack of 8 sheets, so the particular selection you receive may vary from mine. The whole pack of 8 sticker sheets is available with the add-ons this month if you’re interested! And we can’t forget the Love From Lizi peel-off stickers too! This month in a shiny soft lilac… lots of lilac this month!
 We get three 12″ x 12″ sheets of cut apart card stock this month. This one features nine 4″ x 4″ cut apart images matching all the images and sentiments from elsewhere in this kit – there’s that ‘makers gonna make’ panel here!
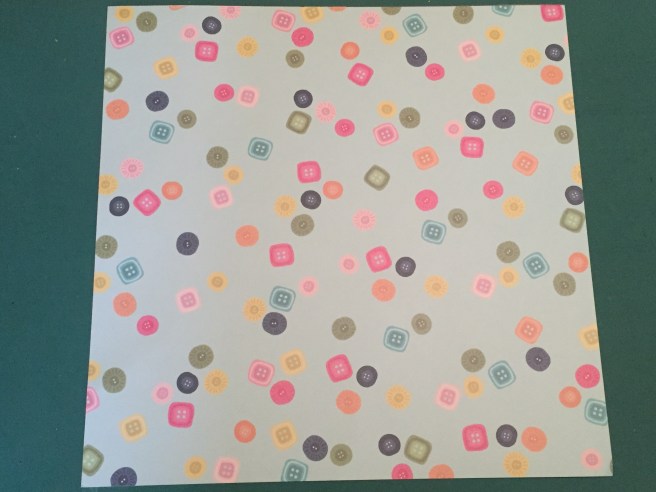 The back of that sheet features a light blue background with scattered button images.
 This sheet features bunches of crafty sentiments on a dark background – appropriate for using as pattern paper or for cutting individual sentiments out to use on your projects.
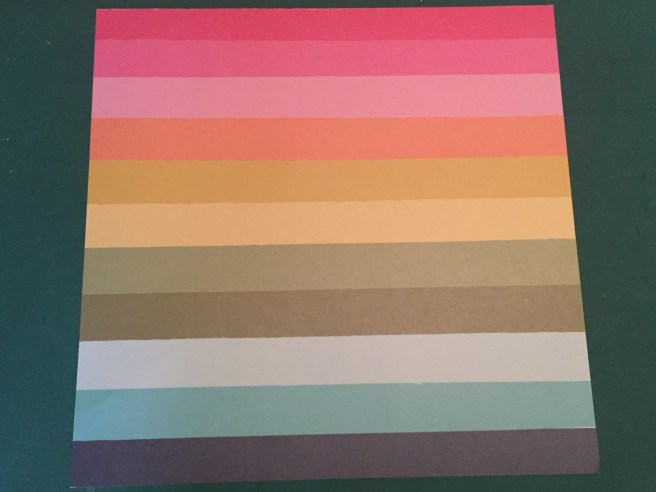 The reverse of that sheet is a nice summery collection of rainbow stripes – not too bright!
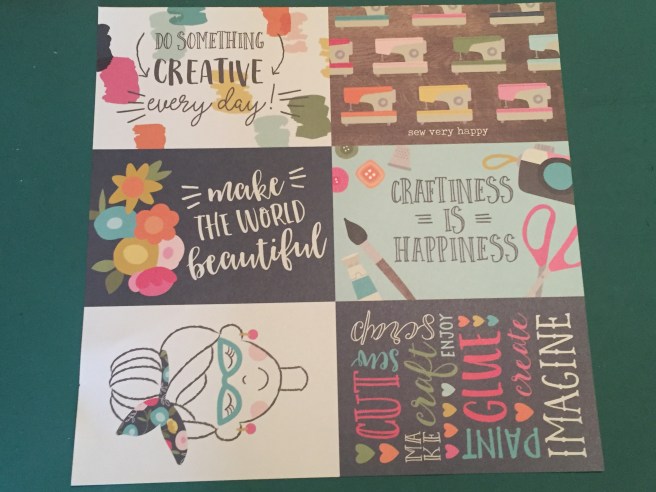 Our third cut apart card stock has six 4″ x 6″ panels just waiting to become card fronts!
 The back side of that last sheet features these color-coordinated ‘watercolor’ swatches.
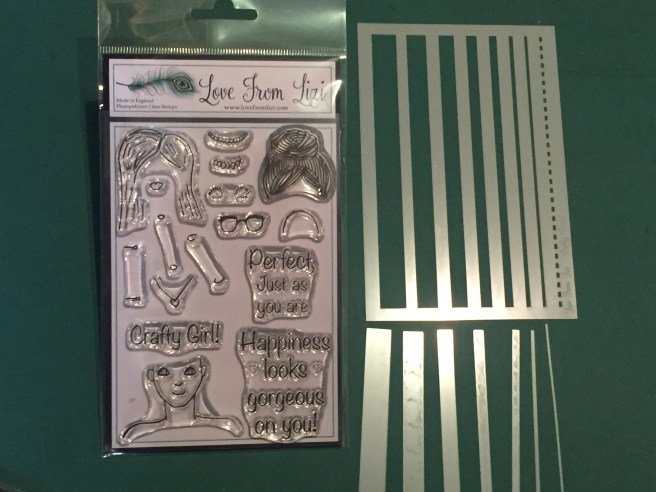 That bring us to the exclusive stamp set for the month – Lizi’s own ‘Makers Gonna Make’ stamp set featuring a ‘build-a-bust’ collection of images and three sentiments. This stamp set reminds me of that old ‘Beauty Shop Barbie’ toy that was all the rage when I was a kid. It had a bust of Barbie with hair that you could style and make-up that you could apply! LOL! We are also treated to another stencil with this kit! The ‘Pretty Plaid’ stencil with a variety of stripes and a dotted line for creating your own plaid patterns! Like last month’s stencil, Lizi has included the negative parts of the stencil for our use as well!
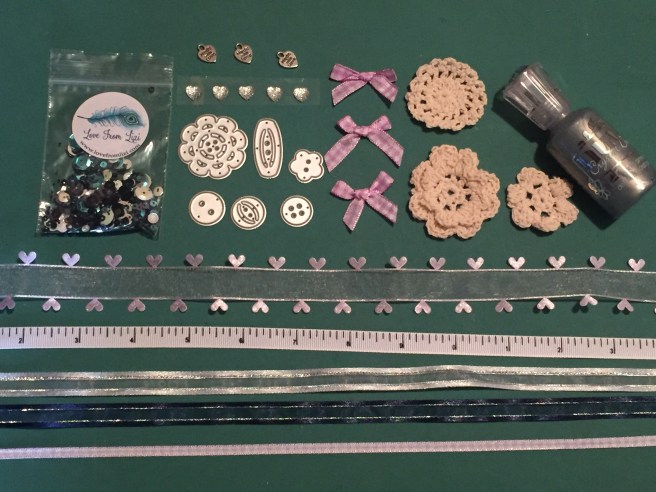 That brings us to the embellishments for this month! We get a meter’s length of five ribbons – 1/8″ grosgrain in a Lilac gingham, 1/4″ organza trimmed with satin and silver sparkle in Navy and White, 1/4″ grosgrain ‘measuring tape’ ribbon, and a 1/2″ organza ribbon with satin hearts on the edges in a soft lilac… VERY cute ribbon! Our sequin mix this month is the ‘Midnight Lagoon’ mix with multiple blues, whites, silvers and blacks. We get three small “Made with Love” silver charms, five faceted silver heart gems, three lilac gingham bows, three ivory crocheted mini-doilies, and our Nuvo Crystal Drops in Liquid Mercury. Last but not least, we get six button dies in a variety of shapes and sizes. This kit may prove to be a challenge for a gentleman crafter such as myself, but I will strive to create some imaginative way to use these products as I work on my 10 cards using this kit. I know as of this posting that there are still a few kits available, so if you want to join in on the fun, please use my link to shop at lovefromlizi.com:
  The May, 2018 My Monthly Hero kit (already sold out!) included this 6″ x 8″ Clear Stamp set featuring a bit of a ‘storybook’ theme with a large ‘build-able’ tree stamp and a great assortment of active kid silhouettes on swings and bikes and flying kites… this is a BIG stamp set with lots and lots of images and 6 sentiments. We also got 13 coordinating frame cut dies, 2 leaf dies and a ‘Window Fancy Die with Frame”. That’s a LOT of dies… and my very first ‘window fancy die’ that I think is pretty spectacular! We also received a roll of leaf patterned washi tape, 5 Ivory Skeleton Leaves, a 5.25″ x 6.5″ Tree Swirl Stencil and four 5″ x 7″ sheets of 100% Recycled Handmade Hot Press 140# Watercolor Paper. This is some really sexy, incredibly classy watercolor paper! The mounting card that the stamps and dies came on has some brief instructions for the ‘tree builder’ stamps and, of course, everything was tied together with this nice green satin ribbon. All of the card stocks I used for these cards was from my own stash and is most likely Recollections card stock from Michael’s (so I won’t be identifying every piece of paper here!) LET’S PLAY!
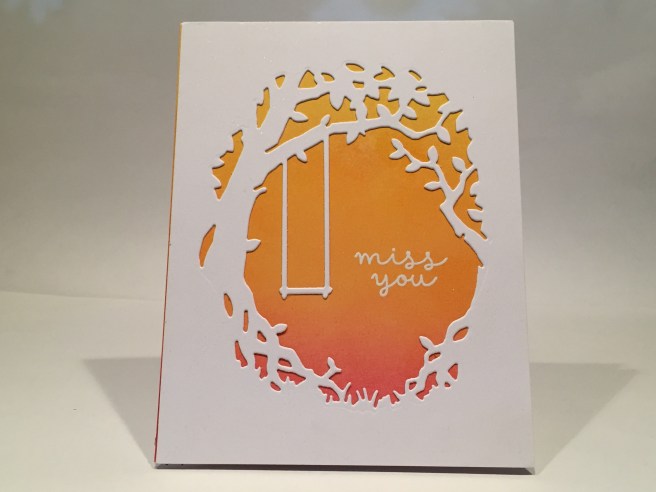 I reached for my
  Excellent! I brought in the oval frame for this die cut, and trimmed away the swing for this card. This is 3 layers of black card stock glued together for a little chunky dimension on a watercolor background. I used my
 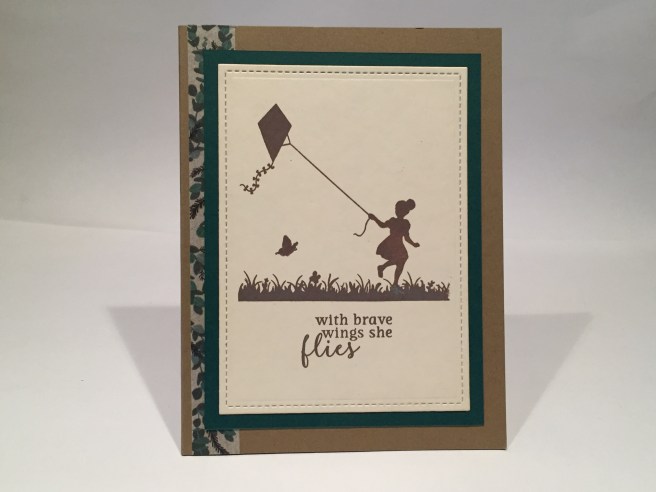 I stamped this little scene using
  With so many ‘swing’ stamps in the set, I thought I would pair a couple of them up for a bit of an ‘invitation’ card. I used a
  Now, someone had made a comment on one of my recent 10 card videos asking me if I would do a ‘pet sympathy’ card. I cut a plain white card stock oval with the frame die and ink blended the background with Distress Oxide inks in Broken China,
  I did use my
  I did use my
  and a thicker mat in Kraft provided a frame for the card front and all is glued down to a white card base. I did go back to my Hero Arts Many Everyday Messages stamp set for a simple ‘thanks!’ on the inside of the card which completes this sentiment very nicely. A touch of my
  I think my little dog card made me a little melancholy, so I thought a regular sympathy card would be appropriate (and a little out of the box for this set!) I wanted to play a little bit with the Tree Swirl Stencil, and, ignoring the tree trunk, embossed the left and right branches on the right and left sides of my black card stock with just a little overlap in the center. I used
  it’s actually a kind of food grade wax paper that is oil and water resistant, very shiny and is often used for sandwich bags or as homemade treat bags in crafting parlance. I had purchased a few rolls of assorted colors of glassine oh, so many years ago, when making some ‘Window Stars’ for Christmas one year. The glassine paper is very thin and makes a very strong crease when folded. Well… I think they make very fine leaves to add on to these build-a-tree stamps! I stamped this tree in my light and dark brown markers using the trunk
 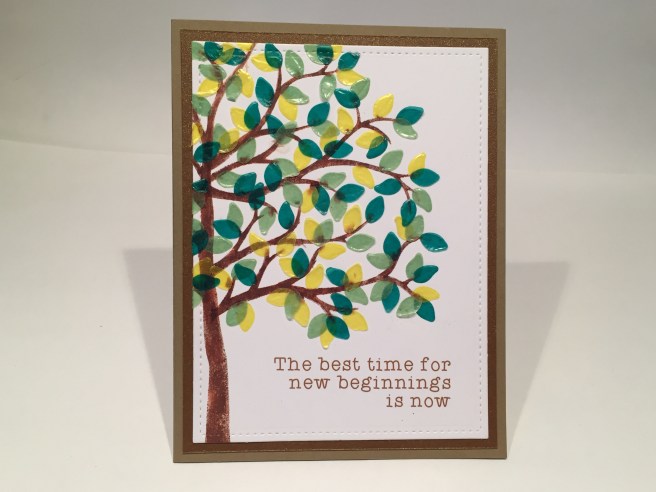 stamp and some of the branch stamps and avoided stamping the leaves at all. The glassine paper is so thin I was able to die-cut 6 layers at a time from dark green, light green and yellow, and with two leaf dies that makes a dozen leaves with each pass. I did use my Silhouette software again for this sentiment using the
  First I embossed the die into the watercolor paper – no cutting, just embossed using my silicone embossing mat. I then used a couple green and a couple brown Zigg markers to color in the trees and foliage. Then, with a medium misting of water over the paper, the colors start to move and soften into a lovely water colored rendering. I let that dry and then completely cut out the die with the oval frame. I thought the water colored die cut was really lovely but it took me a while to figure out what kind of background would work with it. I returned to my Distress Oxide inks in Broken China and Faded Jeans for this blended background. Once again using the Silhouette software, I created this sentiment with
 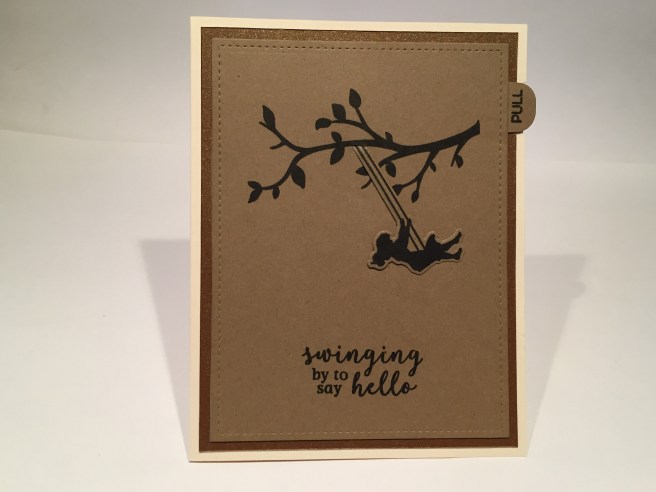 Oh, my heavens, this card makes me very, very happy!!! LOL! Everything is stamped in Versafine Onyx Black ink on my Kraft card stock (cut with a stitched rectangle die!) and I die cut the swinging girl without die cutting the top of her ropes. I extended her swing ropes through a slit at the edge of the branch and attached the swing to the pull tab.! VIOLA! NOW WE’RE REALLY SWINGING!! Another Auburn Pearl mat and an Ivory card base is all that’s needed (with a little help from the recipient!) to literally bring this card to life! Click on the short clip below to see this card in action! This card gives me great joy!! LOL!
 This time it’s all about the journey!! I did go to my
 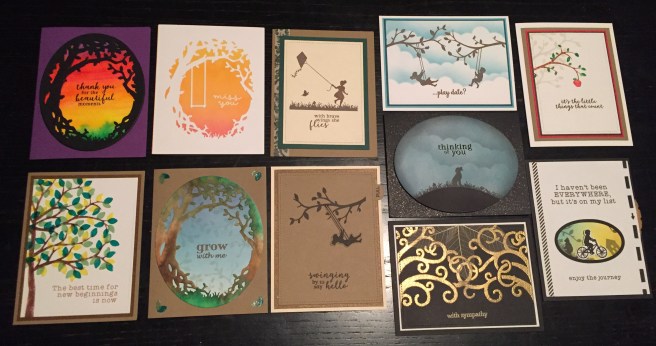 I also got the chance to work on some groovy backgrounds for a nice change of pace! I still have some of that sexy watercolor paper from the kit left over, and the washi tape and a couple of leaves and, naturally, this stamp and die set will find a loving and useful home in my stash! I hope you enjoyed these cards as much as I did, and will let me know which are your favorite. Thanks for sharing your time with me here – I’m sorry for being so long winded! I hope I was able to give you a giggle or two and maybe provide you with a touch of inspiration…! Please remember to like me, list me, pin me, post me, share this post will all your friends… don’t run with scissors..! and … HAPPY CRAFTING!
 I do tend to start on a new card kit by stamping and coloring all of the images in the stamp set. I stamped the flowers and leaves with my
  little bit of bleeding at the center of the hibiscus bloom (lots of ink used in the center!) but that big hibiscus stamp and the Monstera leaf stamp are large enough to fussy-cut without much fuss…!! As usual, I did make my 10 card bases from the colored card stocks included in the kit, and I dove into this kit with gusto!
 For my first card, I cut out the hibiscus and monstera leaf images and grabbed one of the Bright Red card bases. I matched up the hibiscus and white flower pattern paper (cut at a slight angle) with some of the dark green and gold shimmer specialty paper and, after attaching a length of the green and white striped ribbon behind the angled edge, used my
  I die-cut the toucan from some black and white card stock, and wanted to see if I could get a little bit of a color blend without using my alcohol markers. I reached for a tool that I have had for a while but have never used – the
  On the Warm Yellow card base, I cut the ‘spatter’ pattern paper with a
 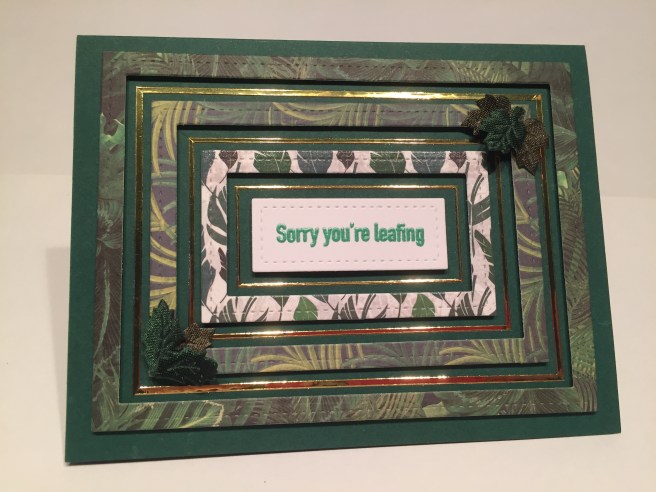 One of my goals with these card kits is to try and use every stamp in the stamp set on my 10 cards, and Lizi included a couple of pun-ny leaf sentiments in the stamp set this month, so I gathered up all the foliage pattern paper included in the kit and one of the Forest Green card bases to see if I could bring these leaf puns to life. Of the three pattern papers that featured
  I was very drawn to the diamond pattern paper that featured gold foil on a dark grey background, and noticed that the edges of the diamonds’ lines were continuous – so that’s where I cut a big ‘v’ in the pattern paper. I spread the cut apart about 5/8″ and trimmed the pattern paper to fit on the top of the Pale Grey card base. That gap was too big to use one of the stamp set sentiments, so I grabbed my
  Now I had the centers of all the frames I cut for card #3 staring me in the face, so I decided I needed to use all of them on the other leaf pun sentiment in the stamp set. Since these were full rectangles, I decided to cut mats from the gold mirror specialty paper – still using my LF Stitched Rectangle dies. I LOVE that stitched detail on the mirror card stock! Now I gotta have some dimension on this card so all three pattern papers are mounted on fun foam and the sentiment is up on some foam squares. As before, I stamped the Sentiment with VersaMark ink and embossed it with Lizi’s Emerald City embossing powder. I did outline the sentiment with some thin gold peel-off stickers for one more golden frame around our pun. A couple of the gold leaf sequins paired up with a regular gold sequin add a touch of texture and a little more bling! Considering that this card is very similar to the “leafing” card, I think both cards looks extremely different! And the dimension on this card is very cool – kind of comparable to a mini pyramid!
 The floral pattern papers in this kit got me thinking about doing an ‘Eclipse Card’ using the word ‘ALOHA’. Now I’ve never done one of these cards before, and this pattern paper might not have been the best choice to do this technique with, but I think I got very interesting results for my first time! I don’t have any alpha dies this size so I turned to my
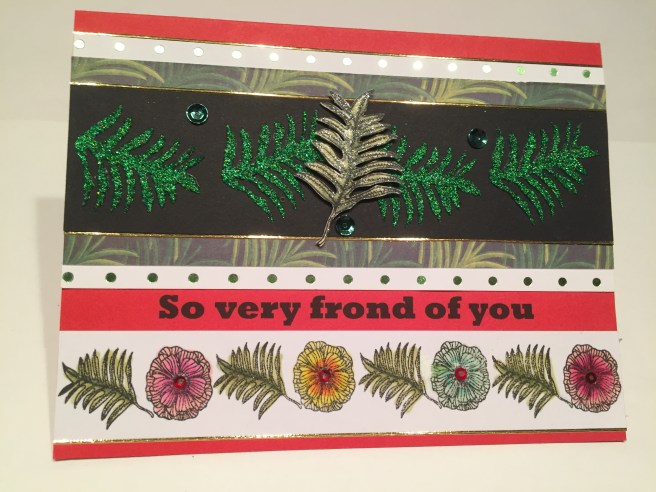
  That’s right, I couldn’t resist! LOL! I adore this card! First, I was able to use that Gold Punchinella piece included with the kit and one of the green pipe cleaners for the background! I simply wove the pipe cleaner through the holes on the top and bottom of the gold and attached them down to that pattern paper that had the hibiscus silhouettes and was cut to the same width as the Punchinella. All three pieces are then glued directly to a white card base. Second, I love this sentiment!! – I hope I don’t offend anyone! LOL!! I used my Silhouette software for this sentiment – in my favorite
  Now I haven’t used that sample of the
 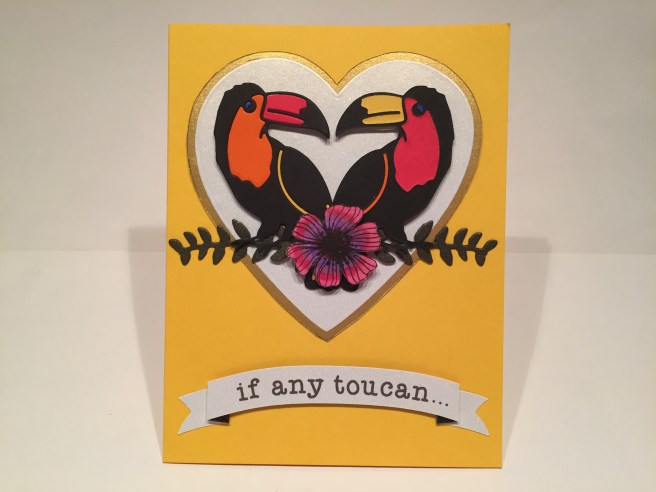 I couldn’t finish out these 10 cards without visiting that terrific toucan die once more. For this card, I did some simple paper piecing with the toucan die. I cut two from black card stock and one each from some plain red, yellow, orange and blue card stock from my stash. I flipped one toucan to the back side and pieced all the cut-outs together on some plain backing paper. When I saw that the toucans formed a heart shape when facing each other I knew exactly what to do to complete this card. I used my largest
  The center of the banner is mounted with foam tape and the ends are glued directly to the card front. Obviously there is more to this sentiment than what you see here, so I finished this little poem pun on the inside of the card using the same font on a piece of white card cut to size with my stitched rectangle dies. This turned out to be the brightest and most colorful card from this kit and I can only praise this toucan die and the myriad possibilities and endless options that it presents as well as bringing some terrific pops of color to my cards! I LOVE IT!
  I still have one more sentiment (‘Wild about you!’) to use from this stamp set and this is what my late-night addled mind came up with! This card went through many permutations before I arrived at this fun little interactive card. While perusing the pattern papers in this kit, I noticed that this piece of chevron paper had ‘fuzzy’ edges on the pattern instead of straight lines… well, that made me think of the pipe cleaners, so I bent the pipe cleaners into their own chevron shape to match the pattern paper, and glued them down. Originally, I was only going to use one of these pieces as a border for my card front, but when I cut it along the middle of the black chevron, I realized that this was starting to look like a mouth…
 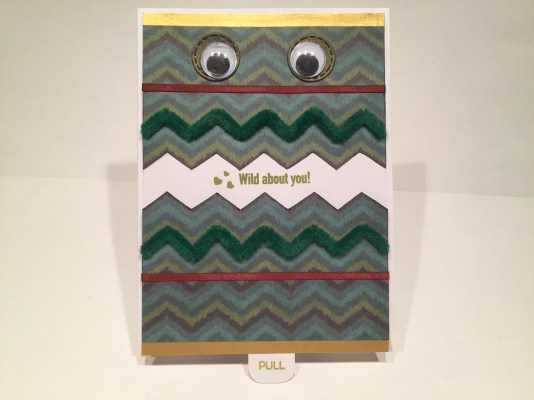 SO I decided I COULD make a little interactive card this month! I added strips of the brown satin ribbon for a little contrast and added a couple strips of the gold shimmer specialty paper to the top and bottom. I dug out these two large googly eyes from the LFL October 2017 Card Kit to add a little personality to this creature (you never know when you’re going to need some of those extra embellishments included with these kits so I tend to hang on to all my leftovers!) I did use my smallest stitched circle die to cut the green/gold specialty paper for behind the googly eyes, and stamped that final sentiment (and a few hearts from my stash – along with the
 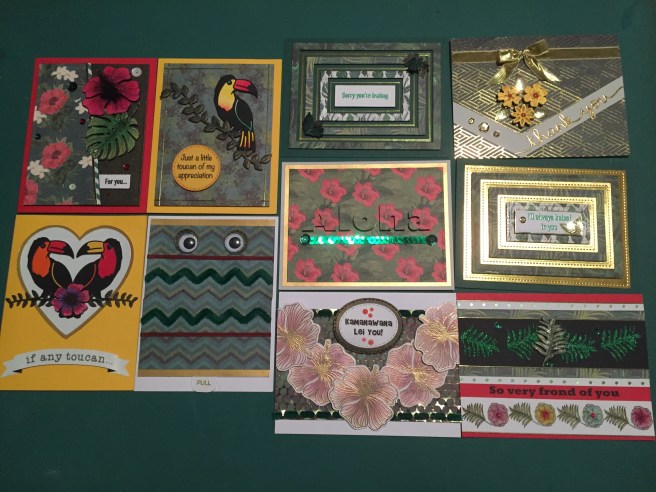 That completes my 10 cards for the Love From Lizi May 2018 ‘Totally Tropical’ card kit. At posting, Lizi still had a few of these kits available – if you want to join up, please use my link to shop at LFL.com:
  To begin with, we have a little more card stock this month than usual! Six sheets of 8.5″ x 11″ card stock in Bright Red, Warm Yellow, Forest Green, Pale Grey and Copic-friendly White. Lizi also included a thinner piece of copic-friendly White card stock – maybe 80# or 65# weight to use for layering and die-cutting and coloring. We also get an A4 sheet (8.3″ x 11.7″) of green foiled polka-dots on white – bright and LOVELY green foil on that!
 We get 16 sheets of pattern paper in the kit this month – these eight are all single sided but feature some specialty elements too. The top two on the left are shimmer paper, the top two on the right have spot gloss accents, and the bottom left pattern paper is gold foiling on a dark green background. The other three are lovely single-sided card stocks.
 The next eight pattern papers are all double-sided and continue the tropical theme with hibiscus flowers, butterflies and toucans and some unique patterns as well!
 The backs of those eight pages are a little more subtle with some stripes and Moroccan patterns as well as some animal prints and texture patterns. Not only are we Totally Tropical but it seems like we’re skirting the edge of rain forest tropical! LOL! A very interesting group of fairly dark colored pattern papers in this kit.
 We get 3 half-sheets (8.5″ x 5.5″) of specialty card stock in this kit – a sheet of glimmer gold, mirror gold, and that dark green with a gold shimmer on top – I think we got a quarter sheet of this same specialty paper in the March 2018 kit – but a bigger piece this time! Our Love From Lizi peel off stickers are in Gold Mirror this month – that’s a new color for Lizi’s shop and they are gorgeous! We also get a strip of Gold Punchinella – basically the left-overs from punching out sequins. This is pretty standard shiny material used in costumes frequently, and I’m already racking my brain to come up with some interesting ways to use this on my cards this month.
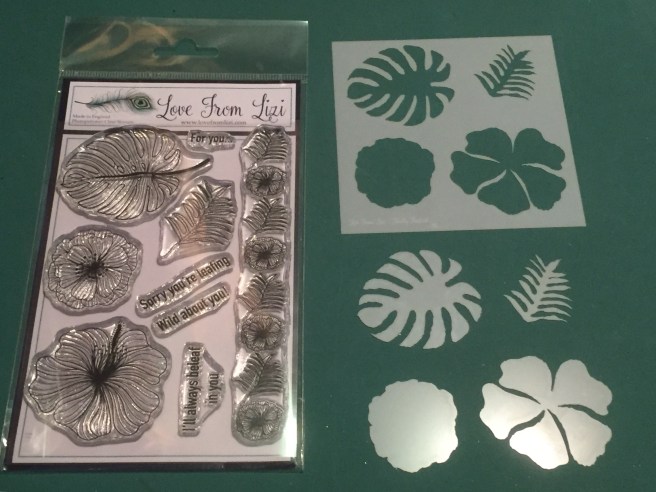 Now we get to the ‘Totally Tropical’ stamp set and… NEW THIS MONTH… Stencils! The stamp set features a couple of hibiscus flowers and a couple of leaf images and a border stamp with both flowers and leaves, and a few sentiments as well: ‘For you…’, ‘Sorry you’re leafing’, ‘Wild about you!’, and ‘I’ll always beleaf in you’. LOL! Always nice to see a couple of puns included in the sentiments!! New for Lizi this month is a stencil that matches the stamp set perfectly – the two hibiscus flowers and the two leaves – perfectly sized to match the stamps. AND Lizi also included the cut-outs from the stencils! These are great for masking or sponging… lots of options when you have both sides of a stencil!
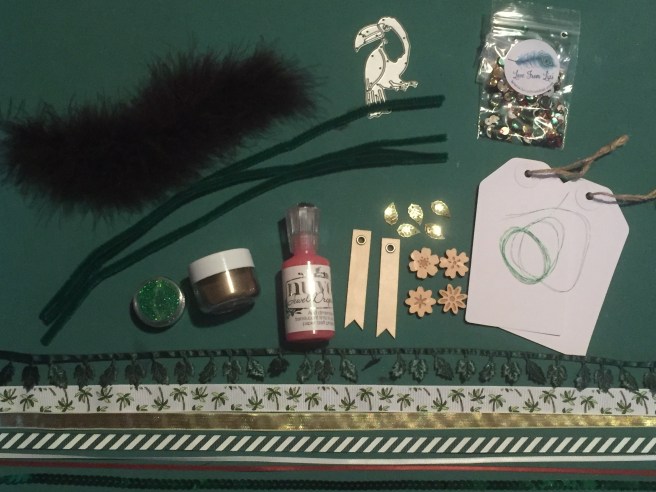 That brings us to the embellishments bag! As usual, this bag is over-stuffed with unique bits and pieces to challenge our creativity! Lots of ribbon and trim pieces – (from the bottom) a string of green sequins (can be removed from the string and used as single sequins too), 1/8″ brown and white satin ribbon, 1/2″ green and white stripe and ‘Liquid Gold” ribbons. The gold ribbon is very cool because both sides of the ribbon are exactly the same! A 3/4″ palm tree printed ribbon and a shaped leaf ribbon trim with embossed veins on the leaves! Continuing up from the bottom, left to right, we get 3 green pipe cleaners (I have no ideas for those..!!), a sample pot of Nuvo Glimmer Paste in Emerald Green (great to use with the stencils!), a full pot of NEW Love From Lizi embossing powder in ‘Golden Crown’, a regular sized bottle of Nuvo Jewel Drops in Strawberry Coulis, 2 wood-veneer banners with silver eyelets, 4 (double thick) wood veneer flowers (with etching), and 5 (or six) gold leaf sequins. We also get two white tags (2.5″ x 4.5″) with twine attached and on top of the tags is a piece of green metallic thread (I just know I’m going to lose that on my desk somewhere!! LOL!) On the top left we get a piece of Marabou feather boa (there’s a tricky piece!) and our die this month is a Toucan! A nice large die that might be my favorite piece of this whole kit! Can’t wait to play with that!! Last, but not least we get a sample bag of the ‘Totally Tropical’ sequin mix with dark greens, golds, whites and deep reds. This is going to be a very interesting kit to work on! So many new products to experiment with! As of posting, this kit is still available at lovefromlizi.com – if you want to join in on the fun, please use my link to shop at Lizi’s store:
  The Communicator itself is made from two layers of black chipboard so there’s room for the ‘bells and whistles’ under the flip top cover. The size is pretty accurate according to web research. The cover is cut from my old
  The recessed area was cut through both layers of the chipboard and filled with fairly accurate ‘inner workings’ of the original Star Trek Communicator! Some brushed silver card stock (the little speaker grid is hand-etched!) and two silver brads are attached to the bottom of the recess and three dots of
 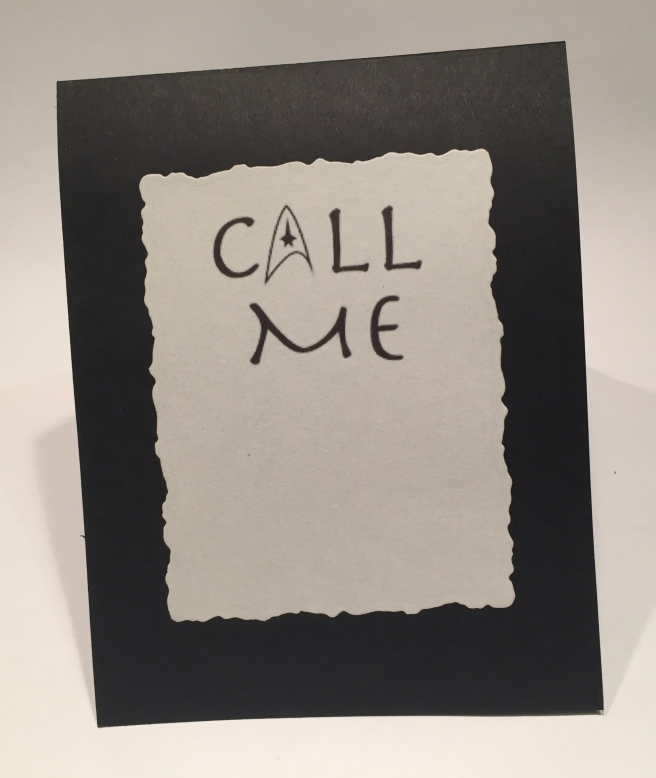 YUP! A little bit of a pun for you! LOL!! Kind of the perfect sentiment for a “Communicator’ Card! This was created on the computer using the Herculanum font and a copy of the Star Fleet Insignia for the ‘A’ and printed on my standard
 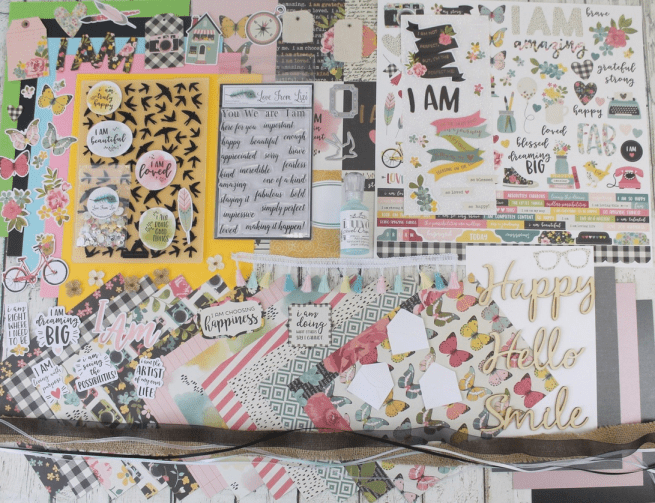 As usual, I did take the 5 sheets of colored card stock and made 10 card bases to begin. I do have a bit of an obsession with trying to use all the stamps in a stamp set for my 10 Card videos, and, sentiments or not, this kit was no exception, so I started experimenting with all the stamps and came upon this interesting ‘word cloud’ concept for my first card.
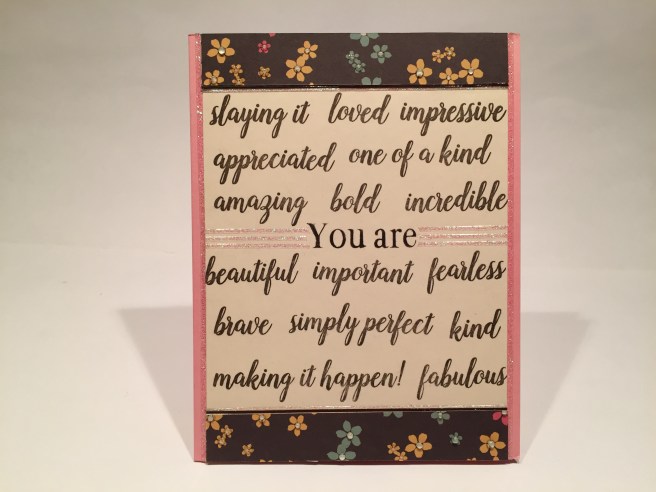 I managed to get 18 stamps on this one card! LOL! I stamped the ‘You are’ in the center with
 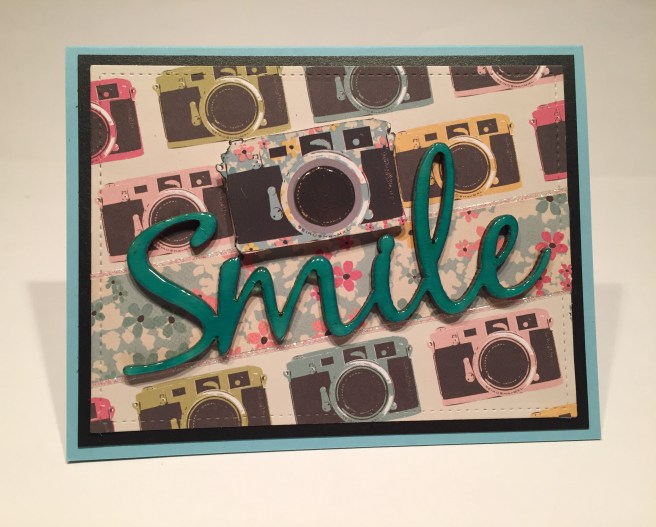 There were three large wood veneer die-cut sentiments included with this kit, and I couldn’t resist pairing up the ‘Smile’ sentiment with some of the camera images. I colored the sentiment with
 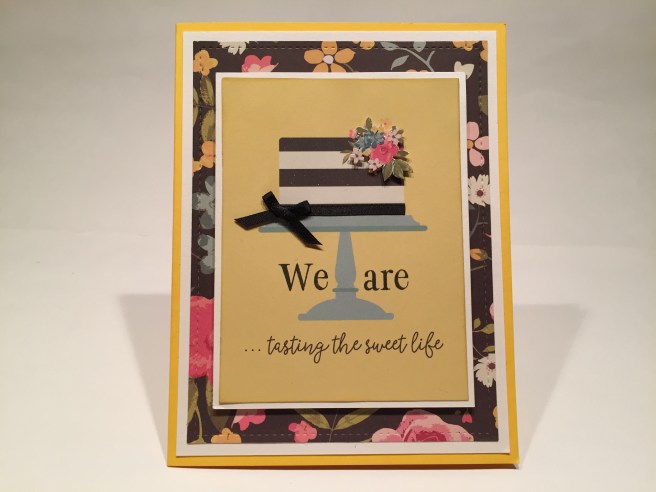 I was drawn to the cut-apart sheet that had the 3″ x 4″ images and wanted to pair this yellow cake cut apart with the ‘We are’ from the stamp set to make this lovely Anniversary card. On the Sunshine Yellow card base, I cut a mat from the Oyster White Pearl specialty card stock and die cut that beautiful flower pattern paper on the dark background with the same LFL Stitched Rectangle die, and glued those both directly to the card base. I stamped the ‘We are’ from the stamp set (SSS Intense Black ink) on either side of the cake stand to add to the printed sentiment, attached that cut-apart to a white mat cut from my stash, and foam taped that up on the card base.
 I covered the bottom black stripe on the cake with some of the black satin ribbon from the kit and added a small bow to the left side. The added dimension of that bow, made me want to add more dimension to the top of the cake, but none of the stickers or ephemera flowers matched the size of the flowers that were printed on the cake. I ultimately fussy cut the flowers from the middle of the notebook paper sticker (now that’s some REAL fussy cutting!) and foam taped those over the flowers on the top of the cake. That sticker piece is not the exact same flower grouping that was printed on the cut apart piece, but was close enough in size to work perfectly here. Any flowers poking out around it just add another layer to the bouquet! I did use my
 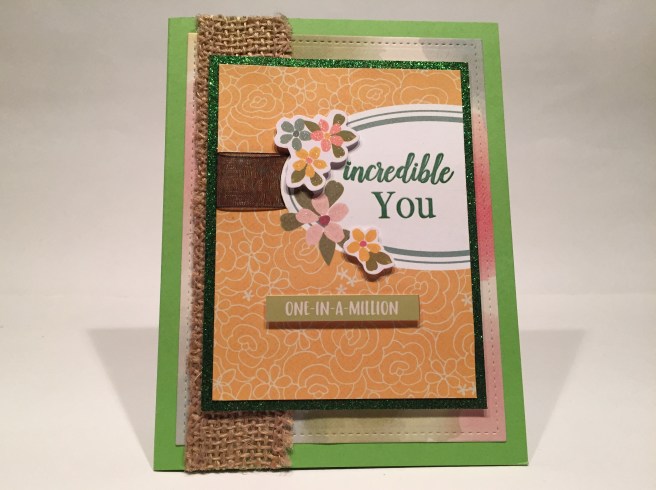 Suddenly, I realized that some of the sentiment stamps in the kit could be reversed – effectively ignoring the ‘are’ and the ‘am’ stamps for a short declarative sentiment – this would work with many of the adjective stamps in this set. This yellow piece with the oval and flowers was another of the 3″ x 4″ cut apart images. I used my craft knife to cut the left side of the oval and threaded a piece of the black organza ribbon behind the oval and around the side of the cut apart. I stamped the sentiment in the oval with my Stampin’ Up Mint Macaron ink pad (discontinued) and then stamped the sentiment in
 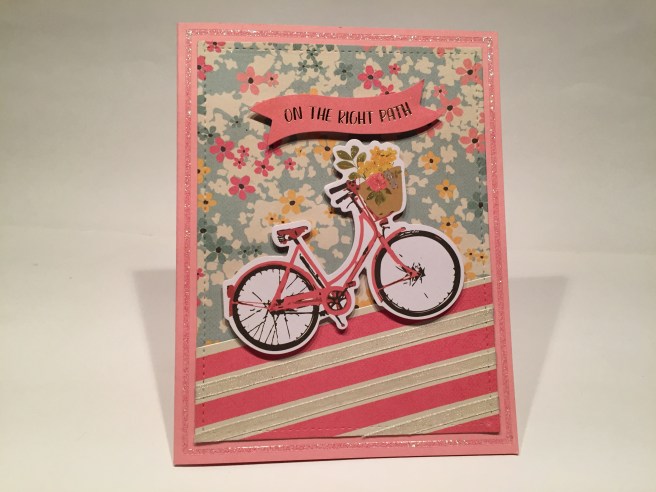 Once again, there was plenty of pink in this card kit, so I throw caution to the wind and had to go all out with the pink for this card! On the Rose Pink card base, I paired up the flower pattern paper with the pink candy stripe pattern paper (on an angle), cut them both with my stitched rectangle die, and glued them directly to the card base. I did take the thin white organza ribbon from the kit and highlighted the off-white stripes on the ‘road’ – that gave us some nice sparkle and a little texture! The bicycle and sentiment are ephemera pieces foam taped up on the card front. I did add a frame of the glitter peel-offs around the card base and added a touch of Spectrum Noir sparkle to the flowers. I thought the ‘on the right path’ sentiment was complete and didn’t need any modifiers! Considering the fact that this is VERY pink, I do like it quite a bit! Simple and sweet!
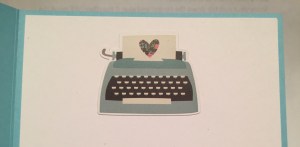
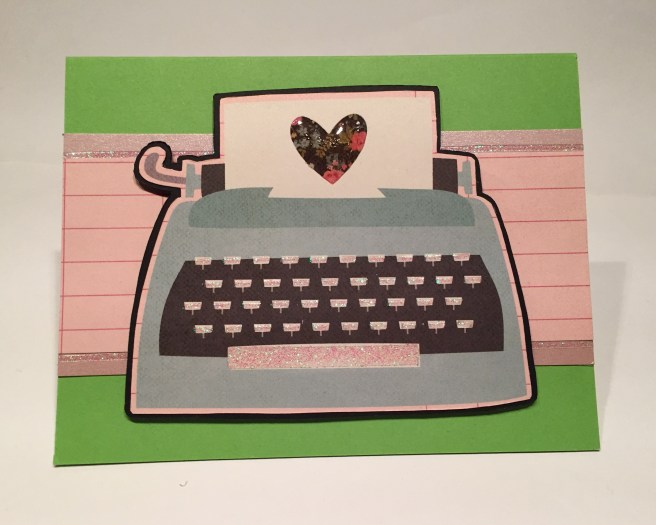 This is the large typewriter from one of the pattern papers – I fussy cut that out and glued it to a black fussy cut mat from my stash. On the Apple Green card base, I added a strip of the pink ledger pattern paper and added thin strips of the Dusty Rose Pearl specialty paper to the top and bottom. I added the glitter peel offs to the edges of the ledger paper and also used them to highlight the typewriter keys and space bar!
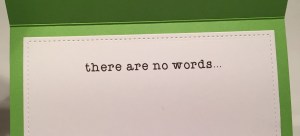 This is the first time I’ve actually used one of the edges of the peel off sheet but it fit perfectly on the space bar! I mounted the typewriter to the card front with foam tape, and I added
 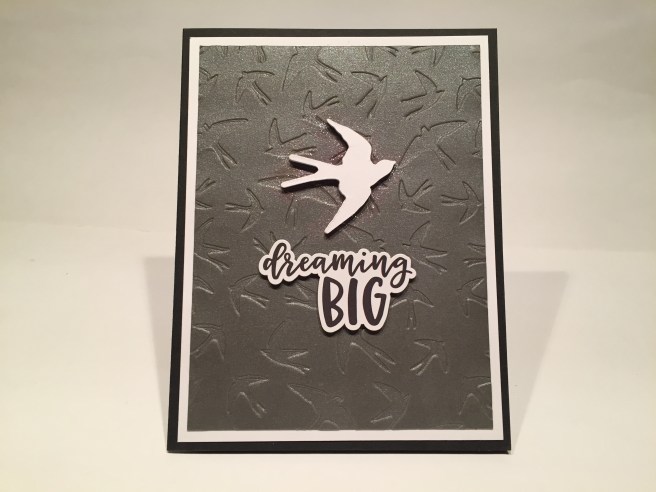 Though I am always jazzed to get new and useful products in my kits, this sparrow embossing folder and die didn’t really seem to go with anything else in this kit, so I decided to pair them up for a simple monochromatic card. On a black card base from my stash (I used both of the black card bases from the kit on the butterfly card) I added a white mat from my stash and embossed the Gunmetal Grey Pearl specialty paper with the embossing folder, and die-cut six sparrows from some scrap white card stock and one from the Oyster White Pearl specialty paper. I glued the embossed paper directly to the mat and glued all the sparrow die cuts together before adding them to the card front as well. The ‘dreaming big’ sticker from the sticker sheet went well with this simple design and I used some foam tape to attach it to the card front. I did use my Spectrum Noir Sparkle pen to add a bit of glitter on the card base around the bird. This card makes me think of Richard Bach’s Johnathon Livingston Seagull! Yes, I know, this isn’t a seagull, but it still evokes the spirit of that story! Am I dating myself here?? LOL!
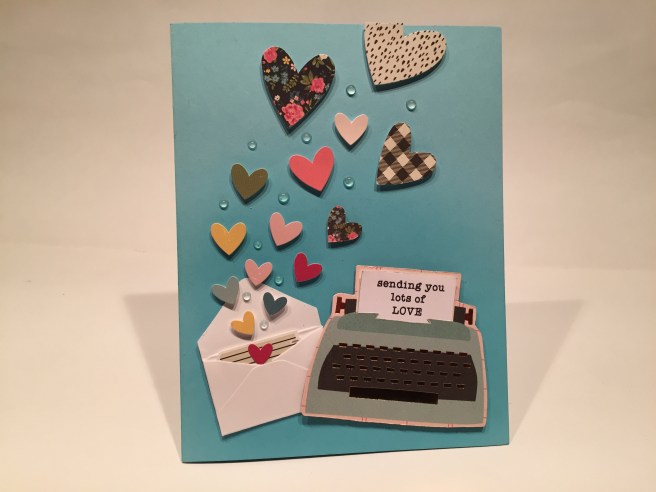 As I kept perusing all the images in this kit, I began to notice that there were a large number of hearts in assorted sizes on both the sticker sheet and with the ephemera. We also have those cute mini-envelopes in the kit, and there’s a smaller typewriter on one of the 3″ x 4″ cut apart images as well. Here’s the result! On the Sky Blue card base, I took some Broken China Distress Oxide ink and used my
  (also, the smaller flower pattern heart was fussy cut from the paper in the typewriter image – I knew I was going to cover that up anyway!). I actually used all of the hearts on this card except for the largest ephemera heart! Some dots of the Sea Breeze Jewel Drops adds some beautiful shine, and for the final finishing touch, I added the smallest typewriter (from the sticker sheet) to the writing surface inside the card. I thought the typewriter and envelope were a natural match, and I LOVE this card!
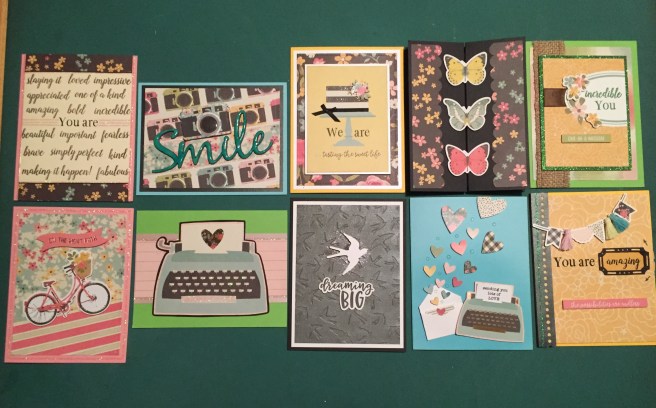 That’s my 10 Cards from the
  The British version of decoupage is more about layering and less about gluing, and I was interested in seeing what these decoupage kits are all about and if I would enjoy them!
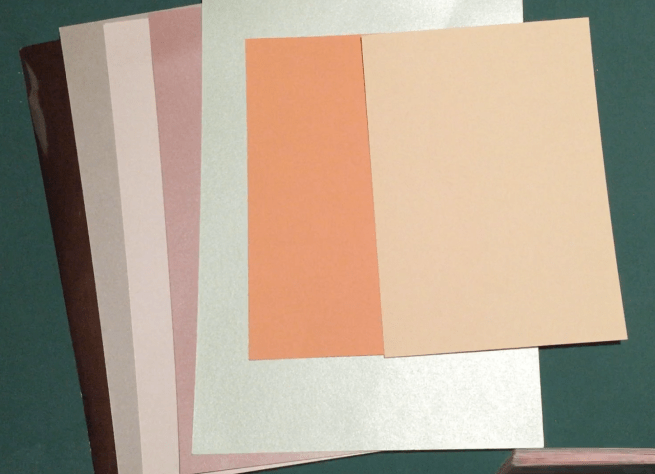 The kit came with 5 sheets of A4 (European) card stock in a Silver Mirror, Silver Pearl, White Pearl, Soft Pink Pearl, and Mint Pearl and two half sheets of A4 card stock in Soft Orange and Magnolia (a very soft mellow yellow).
 We get 32 sheets of pattern paper card stock in this kit! 8 single sided papers in 8″ x 8″ AND 6′ x 6″ (some sheets have spot gloss and some have glitter!), and 8 double sided papers in the same two sizes. A ton of pattern papers included in this kit and not all of them are strictly “baby” oriented.
  There is also a set of stickers in this kit – four pages of glitter stickers (one a full page of alphabet sticker ‘blocks’) that perfectly match all of the images and sentiments in the kit.
 A complete alphabet with ampersand and a scallop triangle banner! This is a great die set – the alphas are just 1/2″ tall and they are ‘stencil’ die cuts – meaning the inside cut-away parts of the A, B, D, O, P, etc. stay with the cut-outs! Terrific dies. And, of course, the alphas fit inside the little banner die too! I really like all of the colors in this kit and am thrilled that it’s not all “pink and blue”. The purples, yellows, oranges and greens are all a welcome addition and are nicely bright without being garish! Looks like there should be some options for us to make some cards that are not necessarily about babies..! I did go ahead and make card bases from all the colored card stock (the pearl card too) included in this kit. I did use
 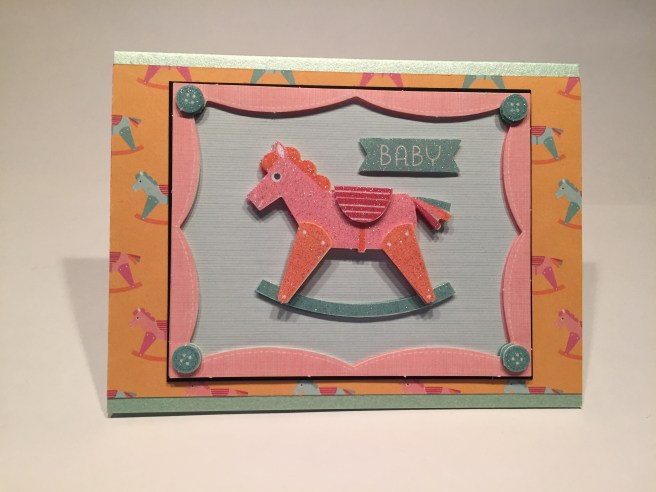 For my first card I dove into the rocking horse decoupage card. This is SO CUTE! You can see all the dimension on the frame and on the rocking horse itself! The decoupage aspect is very straight forward, and with such thin foam dots, it was easy to line up the layers. I used some of the rocking horse pattern paper (perfect match!) on one of the Mint Pearl card bases, and I added a thin black mat behind the decoupage piece to make it really pop. I always keep some really
  That added a nice touch of contrast to these great colors. I used the BABY banner sticker from the sticker sheets on the outside of the card (mounted up with foam dots!) and then I used the sentiment banner from the decoupage sheet on the inside writing surface. This is just an adorable card, and I think it would look terrific framed in a nursery!
 I liked the stacked elephant decoupage sheet and paired that up with one of the Soft Pink Pearl card bases. I did have to trim the sides of the decoupage base sheet down to fit on the card base, but I used the trimmed polka-dot pieces to line the writing surface on the inside. The ‘sentiments’ on this decoupage sheet were “to: from:” labels, so I went to the alphabet block stickers and stacked up this nice ‘Happy Birthday’ sentiment. I did mat the blocks with a thin black mat (look at that sentiment pop!) and I love the dimension that the decoupage layers give to the stacked elephants… and that little floating heart! SWEET!
 The hot air balloon caught my eye next – there’s more of those floating hearts! I paired up the decoupage base with the hot air balloon pattern paper, and mounted those directly to the Soft Orange card base.
 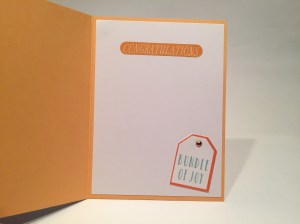 Once again, I created a thin black mat behind the 2nd decoupage layer to help highlight the focal image. All the rest of the decoupage is completed normally and I even used the sentiment included as it was intended! On the inside writing surface, I added a ‘Congratulations’ sticker (matches that card base perfectly) and one of the ‘Bundle of Joy’ tags from the bunch of balloons decoupage sheet highlighted with a
  I’m feeling a little more comfortable with these decoupage sheets now, so I throw caution to the wind and cut the “BABY” decoupage base into its individual blocks. I line the letters up in a row, and (yet again) put small black mats behind all the blocks. I think I did this radical rearrangement because I wanted to use the matching pattern paper on this card!
 Here I’m using the White Pearl card base with the pull-toy pattern paper and a couple of the LFL pink peel offs (from the LFL July 2017 Card Kit) along the edges for the background. There were not a lot of layers to this decoupage sheet, so I did mount the matted blocks up on some foam dots as well. I chose the “Hello Little One” sentiment from the sheet for the inside of the card and mounted that with some foam dots as well. Get a load of all that glitter on those decoupage layers. Certainly don’t need any sequins or other sparkly embellishments! I love this card so much – I think the matching pattern paper is perfect!
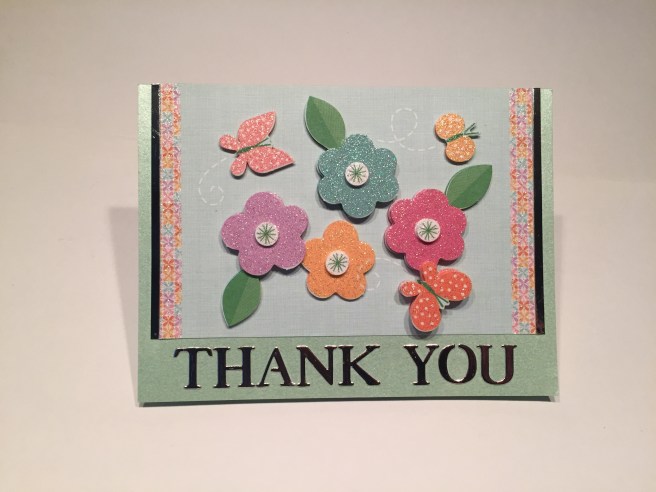 With the flower decoupage sheet I wanted to make another ‘non-baby’ card, so I trimmed the flower base down quite a bit to fit sideways on the Mint Pearl card base and grabbed the alpha dies and the Silver Mirror card stock.
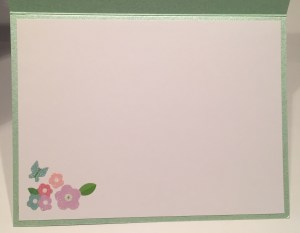 After die cutting the “Thank You” I cut a couple of 1/8″ strips of the mirror card to add to the sides of the decoupage flower base. I did use my
 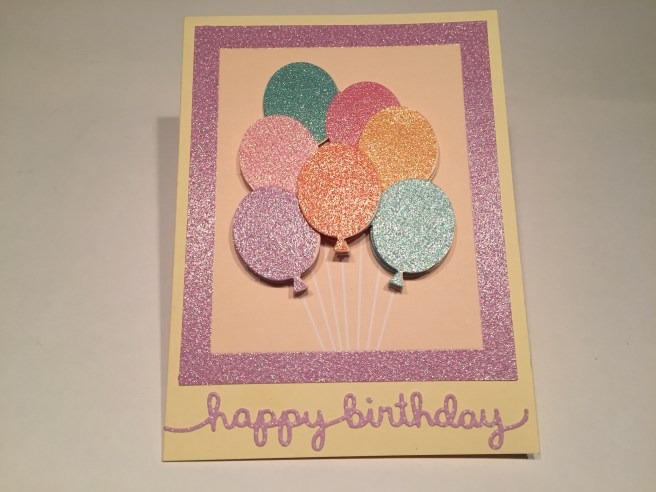 Obviously I think the bunch of balloons decoupage sheet would make a perfect Birthday card, so, on the Magnolia card base, I attached the first decoupage layer (no trimming
  needed) and layered up those terrific glittery balloons. I grabbed my
 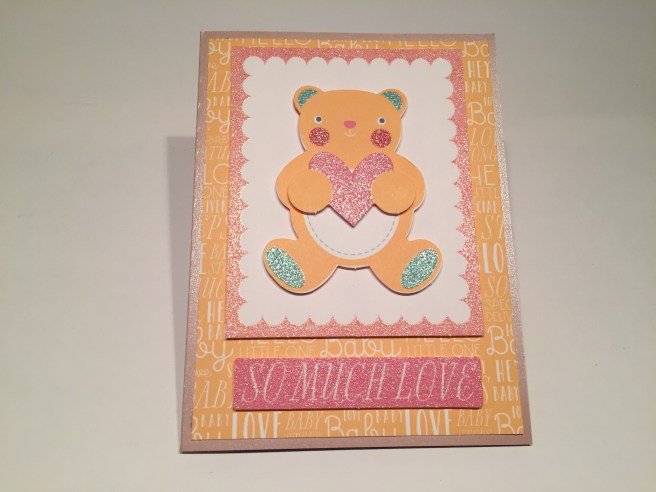 This teddy bear decoupage sheet had SIX layers, so I decided to split them up into two
  cards! On this Soft Pink Pearl card base, I used some of the orange text pattern paper for the background, and used only the decoupage layers 1, 3, and 5 for the teddy bear. Still, plenty of dimension to make that teddy bear stand out! I did use the sentiment included with this decoupage sheet on the front of this card and mounted that with some foam dots as well. Inside, I added two stickers – the “Hello Little One” sticker at the top and a matching teddy bear sticker to the bottom right corner. There were so many options with icons and sentiments and stickers that I ultimately added a little decoration on the inside of all 10 of my cards from this kit.
 Here is the second teddy bear card on the Silver Pearl card base that uses the decoupage
 layers 2, 4, and 6. Again, plenty of dimension on the teddy bear. I did help the depth perception on both of these cards by using foam dots to mount the bottom decoupage layers to the card bases – here on to that terrific glitter heart pattern paper. I grabbed the second ‘Bundle of Joy’ tag from the bunch of balloons decoupage sheet for the sentiment on the front of this card (with another colorful mini brad from my stash for more shine!) and added the balloons and ‘Hey Baby’ sentiment from the sticker sheet on the inside of the card. That’s two cards from one decoupage sheet. Thinking back, you could split the rocking horse, the hot air balloon, the flowers, and the bunch of balloons into two cards easily! That would give you 13 cards just using the decoupage sheets! I think there would still be plenty of dimension to these divided cards and only you and I would know your secret!
  For the last decoupage sheet, I decided to echo the star shape with a star shaped card! I did cut another thin black mat to back layer 1 of the star decoupage, and cut the card
  base from the banner pattern paper and some white card stock from my stash. The pattern paper, black mat, and first layer of the star decoupage are all glued together to make a nice sturdy card front, and I completed the decoupage layers as indicated on the sheet. This is some very intricate layering going on here, and I love the final result. On the inside, I used the ‘Congratulations’ sentiment from the flower decoupage sheet and added the large banner from the sticker sheet. Of course, this card does stand up on its own, and I truly adore this uniquely shaped card. “Hey Baby!”
 I’m all out of the decoupage sheets now, so, for my tenth card with this kit, I decided to play with the scallop banner die and the alpha dies. On the last Silver Pearl card base, I used the footprint pattern paper (spot gloss!) for the background, and mounted that to the card base with some foam tape (I’m addicted to dimension now!). I cut the banner die seven times out of the glittery polka-dot pattern paper, and I used some more of my
 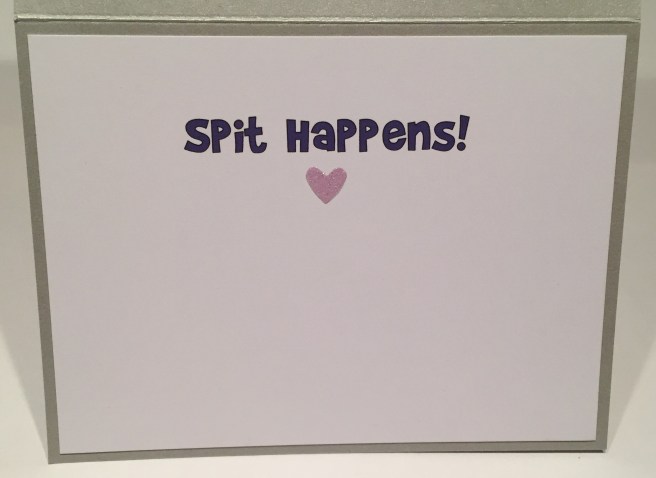 ‘Spit Happens’!! I LOVE that pun! It can be taken in SO MANY ways!! LOL!! This is, of course, printed on the writing surface with my favorite
 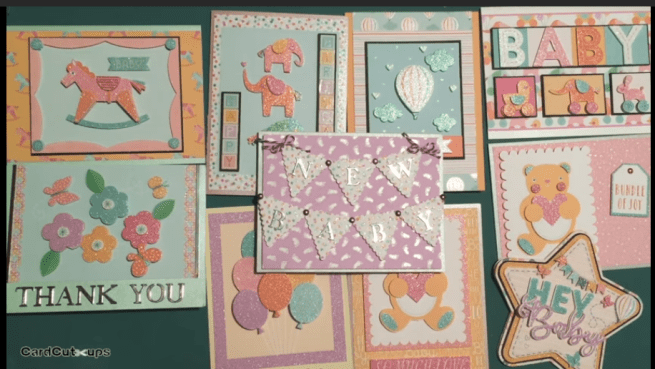 There’s my 10 cards from the
  This card kit is jam packed with Spring-y colors and images and a few surprises as well!
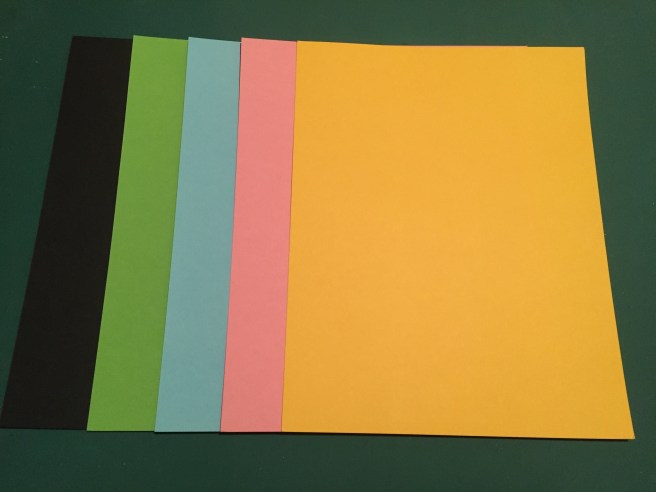 As usual, we get five sheets of standard American/Canadian card stock at 8.5″ x 11″ in Black, Apple Green, Sky Blue, Rose Pink, and Sunshine Yellow – Great Colors! I don’t even mind that pink..!!! (shocking!!) LOL!
 We are treated this month to 12 double sided pattern papers that are larger than normal at 6″ x 8″! I love these larger pattern papers – there’s always a little extra left over! The front side of these pattern papers features large images, icons and sentiments.
 The back side features smaller, all-over patterns – LOVE that flower and leaf pattern on the black background (second from left on the bottom row) and LOVE the size of these!
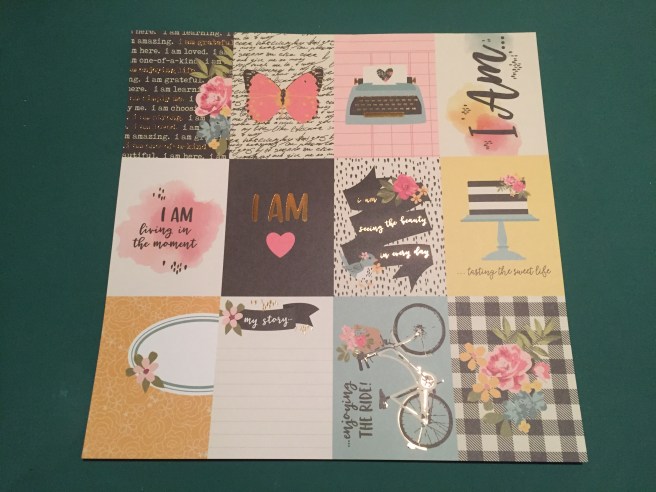 We do get two 12″ x 12″ cut apart sheets with the kit this month – the first one features 12 panels – 3″ x 4″ – with some rose gold foil embossed highlights and lots of images and sentiments. You could make 12 cards with these panels alone!
 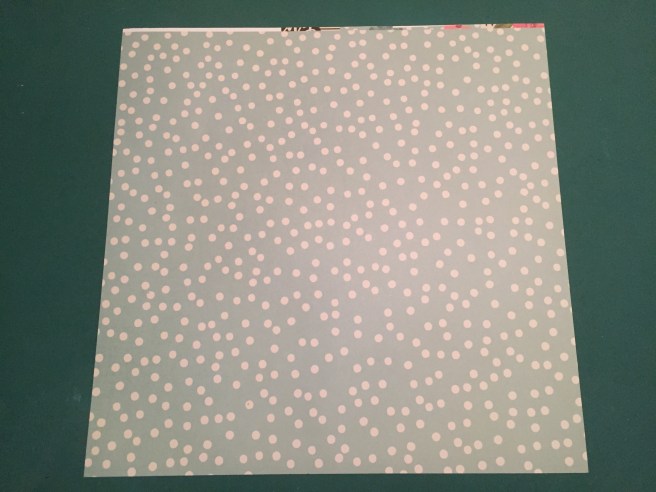 The cut apart pages are double sided and this is the back of our first sheet with pale pink polka dots on a dusty teal background – a little bit larger than the same pattern on the back of one of the pattern papers.
 Our second sheet of 12′ x 12″ cut-aparts has 4″ x 6″ panels with larger images and sentiments but no foil embossing.
 The back features the lovely red, pink, blue and yellow flowers on a black (or at least VERY dark brown) background. Again, just slightly larger than the same pattern on the back of the pattern papers. We also get one more 12″ x 12″ piece in this kit…!
 A sticker sheet! I always like the stickers Lizi (usually) includes in her kits, and this sheet is terrific! Tons of stickers from sentiments to icons to banners and borders and trinkets and tabs. A little bit of everything in perfectly matching colors!
 Of course we do get some specialty papers with this kit – four 8.5″ x 5.5″ shimmer card stocks in Gunmetal Gray, Dusty Rose, Oyster White and Graphite Black. You can cut these in half to make card fronts or fold them in half to make card bases. The pin stripe peel off stickers this month are SO COOL! You can’t really tell in this picture, but they are actually clear glitter peel offs. No color to them just glitter! Should be very interesting to see how these look on our projects! And here’s the first big surprise this month – an Embossing Folder – a LARGE (6″ x 8″) embossing folder covered with birds… they appear to be swallows (the split tail?) in assorted flying poses. This is a great addition for those of you into scrap-booking or Art Journals as well as for adding great texture to cards!
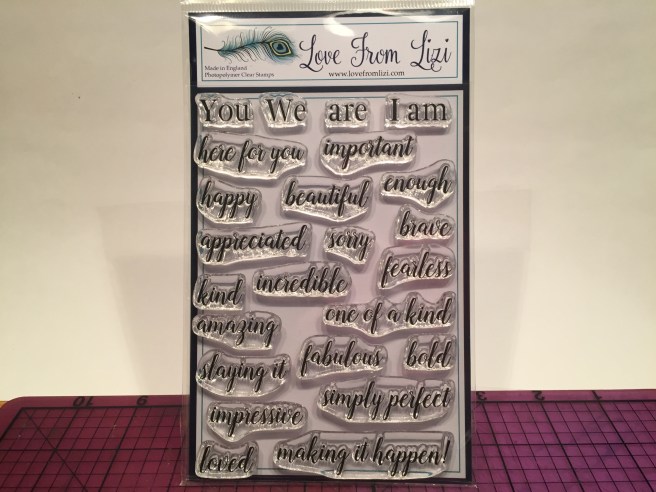 The Exclusive Love From Lizi stamp set this month is a sentiment builder set, with ‘You’, ‘We’, ‘are’, and ‘I am’ in block letters ready to pair up with all these phrases and adjectives. A good sentiment builder stamp set is always nice to have in your stash, and this set has a couple of very unique sentiments like ‘slaying it’ and ‘making it happen!’.
 Which brings us to the embellishment bag – WOO-HOO!! From bottom to top, left to right, we get six (1 meter) ribbons this month – a 1″ burlap ribbon (with sewn edges so no fraying!) a 3/4″ black organza ribbon, a 1/8″ white organza ribbon, and three 1/8″ satin ribbons in black, white, and pale blue. That’s more than 19.5 feet of ribbon!! There are two sizes of canvas tags with grommets, and five burlap flowers (three white and two natural) with a little bit of dimension on the petals and little wooden seed beads in their centers. Another surprise this month is this bit of tassel trim – about 10″ of this ADORABLE tassel trim that matches the colors of the kit perfectly! Can’t wait to figure out how to use this on a card! Of course, we get a sample bag of the sequin mix for the month along with three mini white envelopes, and our monthly bottle of Nuvo Drops is another Jewel Drop (lightly tinted translucent) in Sea Breeze. The dies included this month are a small decorative frame and a swallow die – obviously matching the embossing folder. I did die-cut both of those in black to show you how they looked. And take a look at those large wood-veneer die cuts at the top! ‘Hello’, ‘Smile’, and ‘Happy’ in a large, clean script. These would make great cards virtually all by themselves! Now, if that wasn’t enough (I don’t think Lizi knows the meaning of that word!) we have one more surprise waiting for us in the embellishment bag.
 Ephemera!!! More than 50 pieces of die cut sentiments, images, icons, banners, badges, tags, and words – many with that rose gold foiling on them. I don’t think we’ve ever gotten a bag like this in our LFL kits before, and these are amazing! I almost like them more than the cut apart sheets – as these are already cut apart!! A lovely surprise treat to finish out the Love From Lizi April 2018 Card Kit. As of this posting there are still a few kits available, so if you’d like to grab one for yourself just click here:
