
Hello Folks! HAPPY NEW YEAR! Scott here with my 10 cards featuring the Love From Lizi January 2018 ‘New Beginnings’ Card Kit. As usual, this kit was jam-packed with supplies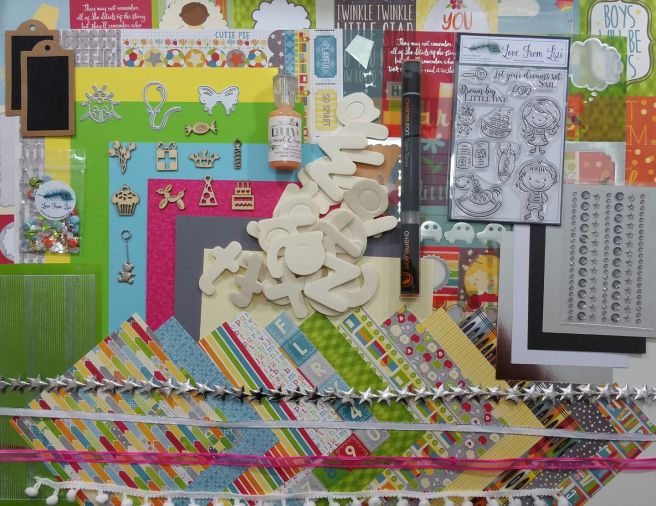 and surprises in bright beautiful colors starring a couple of youngsters and child-themed stamps and papers. Almost TOO many choices for someone like me! I habitually try to use as many kit supplies and stamps as possible with my 10 cards in an effort to show you as many options as possible. This kit HAS sold out – as do most of the Love From Lizi card kits, so, if you would like to get in on the fun, I highly recommend subscribing!
To begin, I did create ten 4.25″ x 5.5″ card bases from the 5 sheets of card stock in the kit, and I stamped all the image stamps on Bristol Smooth card stock with my SSS Intense Black Ink, and colored them up using the Tangerine Chameleon Pen from the kit (on the dress and shorts), and my Spectrum Noir alcohol markers. I did use my Sakura Black glaze pen to highlight the eyes of all the boy and girl stamps used on these cards.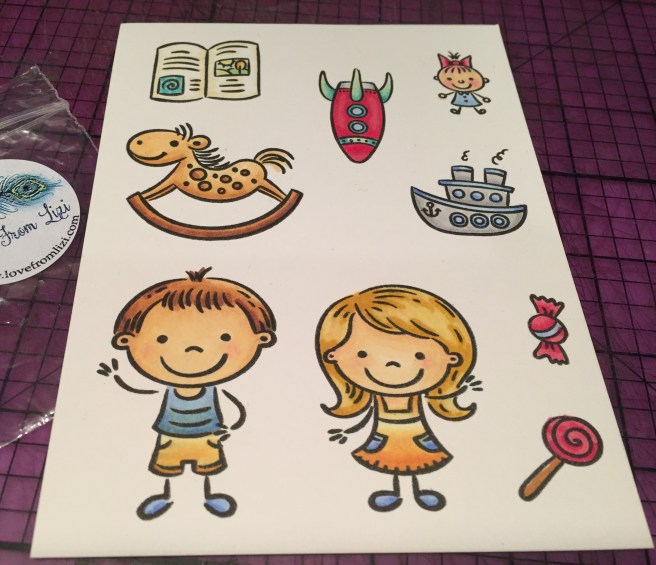 For my first card, I was drawn to the ladybug die that demonstrated the great amount of detail that is possible with a wafer die-cut. On the vanilla card base, I matted one of the cut-aparts (in red to match a ladybug) on a piece of the green harlequin pattern paper
 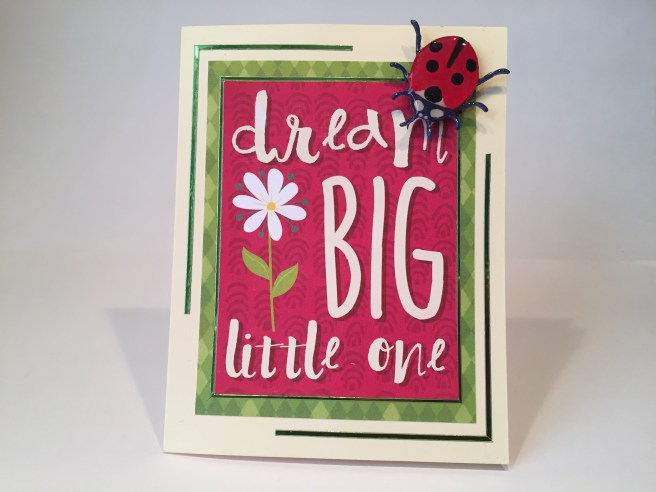 and mounted those directly to the card base. I did outline the cut-apart with the thin Grass Green Mirror peel-offs and created a partial frame around that with the wide peel-offs. I think this type of incomplete frame really pulls the eye in, while still keeping the overall card light and unencumbered. After researching ladybug images on the web, I die cut the ladybug in dark blue and red and fussy cut a black background for the body.
 I used my Ranger Enamel Accents in Classic White and Black Tie to fill in the spots and eyes on the body of the ladybug. I used a pin to get the white enamel spread around the big black spot behind the head, and then I covered the whole thing with two coats of Glossy Accents. Some foam tape provides a little dimension for attaching the bug to my card. I was thrilled at the accuracy I was able to achieve with this die-cut and I think the over-sized ladybug reinforces the ‘dream BIG’ sentiment from the cut-apart piece.
On the back of one of the cut-apart sheets was a bunch of building blocks that (maybe because I’m a guy..?) really caught my eye, so, intending to build a ‘bigger and better’ structure, I fussy cut a lot of the blocks out of the pattern paper and started looking for an appropriate pattern paper for the background. A lot of the 6″ x 6″ pattern papers were simply too busy to use as a background for my building blocks so I went back to the original cut-apart page and used my Lawn Fawn Stitched rectangle die to cut out a background that included the blocks –  AHA! now my block structure can be multi-dimensional! I stamped the “Dream big LITTLE ONE” sentiment from the stamp set in Fired Brick Distress Oxide ink and embossed that with my Ranger Clear Embossing powder before attaching it to the Slate Grey card base. I added my cut-out blocks on top of that with foam squares, fussy-cut the boy, and foam taped him standing on the blocks. I really like the disparate scale of the blocks and the boy and I love his satisfied look!
Now, for some equal time with the girl stamp. I thought it would be especially great if this card showcased the girl, while not pandering to gender-specific hopes and dreams, so I created this card featuring a little girl who wants to be the captain of a ship! 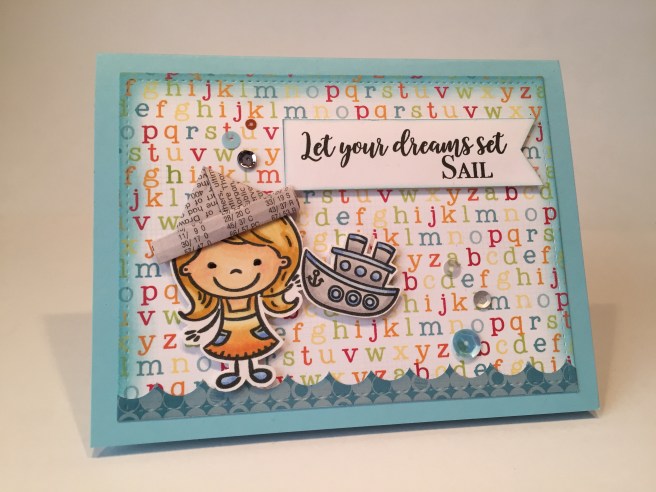 On the Sky Blue card base, I cut a background from the alphabet pattern paper with my Stitched Rectangle die and used some Broken China Distress Oxide ink to sponge around the edges. I added the blue patterned border sticker with waves cut on one edge (with a 1/2″ circle punch), and then added that directly to the bottom edge of the pattern paper. I stamped the “Let your dreams set Sail” sentiment from the stamp set with SSS intense Black ink on a scrap of white card stock, cut it into a simple banner shape, and lightly sponged the edges with the same Broken China ink. I fussy cut the girl and the ship stamps and added a little folded newspaper hat on the girl’s head. (This might be a little morbid, but the smallest print I could find in the New York Times was the obituaries / stock listings!) The girl in her hat, the ship and the banner were all attached with foam tape to the background paper and a few sequins from the kit added some sparkle. I adore the simple addition of the newspaper hat and LOVE the girl dreaming of the high seas!
Lizi mentioned in her un-boxing that she included some pink ribbon and specialty card stock in this kit because she knows how much I love pink…! So, let’s tackle the PINK!  I took the vellum cut-apart that had the terrific “You Are Loved” sentiment in yellow with pink-ish flowers and green leaves, ran that through my Xyron Sticker Maker and mounted it to a scrap piece of white card stock. I mounted that to a mat of the pink embossed specialty paper and outlined that with the thin peel-off stickers and foam taped the back of that assembly for attaching to the Apple Green card base. I took the pink ribbon from the kit and ran that through my Xyron Sticker Maker as well, and created a corner-ribbon trim on the top and left side of the card base. I mitered the corner of the ribbon at the top left, and added a simple bow to the corner. A few round gems from the kit at the bottom and a couple drops of the Nuvo Jewel Drops around the sentiment add a touch of elegance. I don’t think I would call this a ‘pink’ card, but the pink is a great accent color and totally appropriate for a card that is more in tune with Valentine’s Day than with kids and dream sentiments!
How about some equal time for the parents! Parents are the unsung heroes of child rearing and there was a cut-apart sentiment that spoke directly to them. My parents read to me as a child, and sparked a life-long joy of reading that continues to this day! This is a TERRIFIC sentiment and I can’t wait to give this card (along with a book!) to a deserving parent. On the Sky Blue card base, I attached a strip of the bookcase pattern paper along the left side (there was a strip down the center of the pattern paper that was devoid of the A B C’s so that’s what I used) and added a thin strip of the silver pearlescent specialty paper to finish off the ‘side of the bookcase’ on the right edge. I mounted the cut-apart on a mat of the same specialty paper and foam mounted that to the card base. I wanted to try adding a little ‘ethnicity’ to the boy and girl stamps, and was able to achieve a decent skin color that could be interpreted in many ways…! I fussy cut both of the kids’ heads and the book and created a little vignette towards the bottom of the card. A few sequins from the sequin mix, and a few spots of the Nuvo Jewel drops add a touch of shine. LOVE this sentiment!!
I often like to create my own sentiments on the vellum pieces usually included with Lizi’s kits – I print them with toner on my work printer and add deco-foil to them with my laminator. WELL – my printer was not in a very good mood and I ruined the vellum piece with the Humpty-Dumpty image… FORTUNATELY, there was the same image on one of the cut-apart pieces, so I used the home printer to add a sentiment to the card stock piece. I thought the cut-apart image looked better than the vellum piece after all..! Here’s a decent, very kid-friendly pun for this month! I used my Silhouette Portrait to design this sentiment in (drum roll, please…!!!) Brady Bunch Remastered font and printed it directly on the cut-apart with my home printer. I mounted this on the Sunshine Yellow card base
 and outlined it with the thin green mirror peel-offs. A couple of strips of that great rainbow stripe pattern paper at the top and bottom fill out the rest of the card front. I did add a “Happy Birthday” to the writing surface on the inside of the card (in the same font) and here’s a simple single-layer card appropriate for young-uns!
One of the ‘surprises’ in this month’s kit was a lower-case alphabet of large wood veneer die cuts… these almost threw me due to their size and lack of repeats, but after working with this kit for a while, a great idea finally presented itself to me – ‘dream BIG’ !!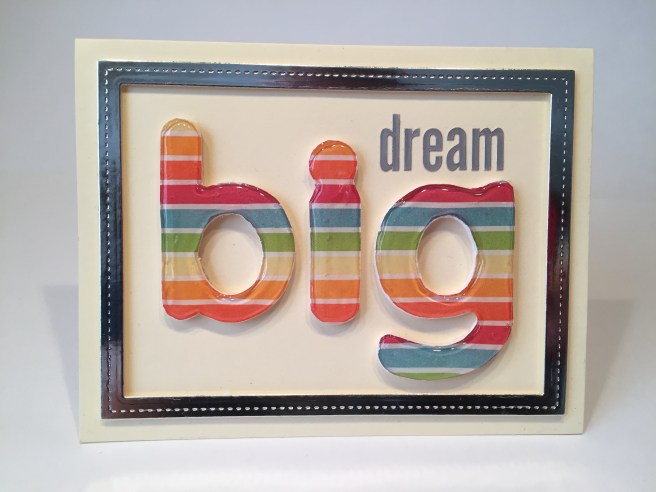 I covered the die cuts with the rainbow striped pattern paper taking care to line up the stripes across all three letters. I decided to use the Vanilla card base to make the rainbow pop, but found that the color of the alphabet stickers from the sticker sheet a little bit too light to show up on pale papers so I colored the sticker letters with a Silver Metallic Sharpie and they show up just fine with that added color. I used my Lawn Fawn Stitched Rectangle Dies to create a frame from the silver mirror specialty card, and covered the big letters with two heavy coats of Glossy Accents – I don’t think I have ever used as much Glossy Accents as I did with this card kit, but it was definitely worth it for the great enameled look – not the most perfect application wise, but I think photos tend to highlights the tiny imperfections that aren’t as noticeable in real life. This is perfectly in line with this kit (my seventh card and the third to feature ‘dream big’!) I LOVE this card!
This is the third month that Lizi has treated us to a meter of shaped puffy trim – this month is was silver stars – I kept seeing Mylar balloons, and since one of the dies included in the kit was a balloon die, I decided to throw a big birthday party! I fussy cut a strip of the colorful ‘arrow’ pattern paper to mimic a picket fence and attached that directly to the bottom of the Sunshine Yellow card base. I cut a strip of the green harlequin pattern paper with my NEW Lawn Fawn Grassy Border die and foam taped that up over the ‘picket fence’. I colored up another girl stamp (a red-head!) and fussy cut her out along with the rocking horse, the doll, the sucker and the candy, added the wood veneer die-cut present with a bow from the ribbon included in the kit, and the little metal teddy bear charm and tucked them all in with her behind the grass. (Almost lost the picket fence with all the bounty at this party!) I added the wood veneer party hat with a white pom-pom and the Nuvo Jewel Drops on top of the girl’s head. I stamped a Lawn Fawn ‘Happy Birthday’ stamp on a scrap of white card stock and cut that out with a Darice Banner die and ‘hung that in the air’ with four ‘Mylar Balloons’ using some plain white twine from my stash. I cut three balloons using the balloon die in the kit using different pieces of card from the cut-outs and pattern paper – more white twine puts those balloons in the girl’s hand and the party is ON! This is one special little girl!!! LOL!
Even I can get tired of the relentless march of bright colors presented in this kit, so let’s try something a little more monochrome – the alphabet stickers will work well with the Graphite shimmer specialty card stock, and I still have a Slate Grey card base so… I cut the Graphite shimmer card with my stitched rectangle die and mounted that to the card base. I trimmed that with the scallop sticker border from the sticker sheet on the top and bottom, and tucked pom-poms between each scallop. The alphabet stickers worked great for this sentiment, and I underlined that with a thin Silver Glitter peel-off from Lizi’s September ’17 card kit. Love the grey/black tones here, but the best is on the inside:
This makes me laugh every time I read it! And this card definitely skews a little older too!
Now the only stamp I haven’t used is the rocket stamp – and I have a little inter-active something special planned for this one! I stamped and colored one more boy, and have the Apple Green card base left, so let’s see if we can launch this rocket – One of the vellum pieces (with a kite) had the”May your dreams take flight” sentiment so I mounted the vellum to some white card stock with the Xyron Sticker Maker and die cut the sentiment with a Spellbinders Deckled Rectangle die. I trimmed a strip of the green pattern paper down with a stitched hillside die, temporarily attached that to the blue pattern paper and die cut them both with a stitched rectangle die. Now, I’m sure most of us have seen ‘magic slider’ cards where you pull one side of the card and a matching piece comes out of the opposite side… I think they make a great platform for gift cards. After way too much experimenting, I was able to take that concept and create a reversible pull-tab card. By cutting a small slit in the card front, I was able to make a small paper hinge that slides through the slit and is attached to the back of the rocket. So the rocket is attached to the front of the ‘trash bag’ conveyor and the pull-tab is attached to the back of the ‘conveyor belt’. OH BABY IT WORKS!! The boy and the sentiment are attached to the card with foam tape and I also left a little gap in the hillside to hide the rocket flame until the ship takes off…! I used the My Favorite Things ‘Interactive Labels’ to stamp the ‘PULL’ on the end of the tab, and, of course, I had to decorate the pull strip because it reveals itself as it is pulled – I simply drew some ‘puffs of smoke’ on some
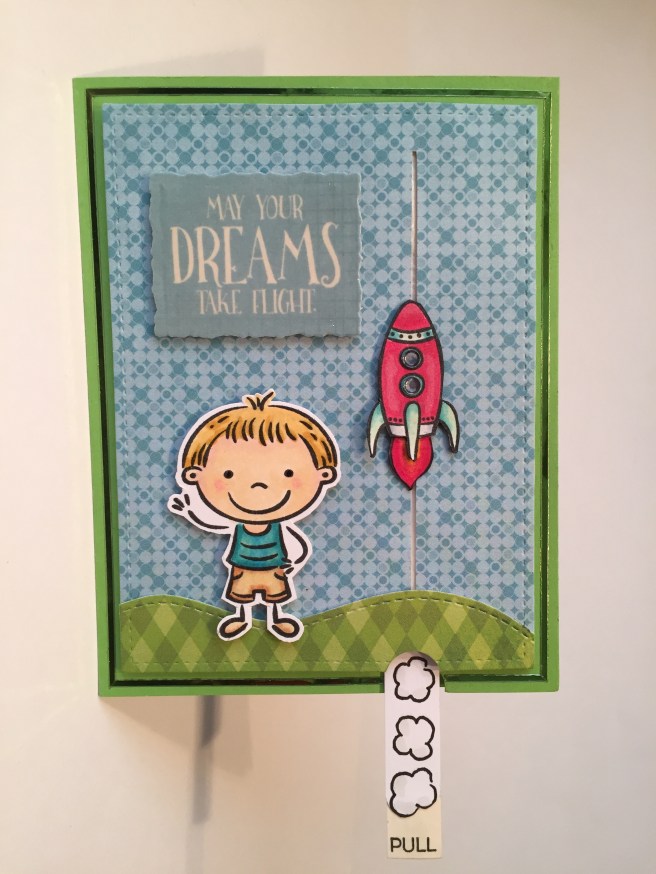 white card and trimmed that down to glue on top of the tab. PERFECT! I added some shine with a frame of the grass green mirror peel-offs around the card base and a couple of the gems on the ship’s windows. Oh my stars and garters! I am completely bowled over with this card! The rocket flies right to the top of the card and returns to the hillside with a simple push back on the tab. SO MUCH FUN!!! I don’t think I will ever be able to part with this card…! But now I know that you can adapt the magic slider mechanism to make something move on the front of a card… straight run penny-slider cards may be a thing of my past!!
Naturally, I have tons of supplies left over with this kit – I didn’t even touch six of the pattern papers and I still have a bunch of the stickers, vellum and card cut-aparts, as well as a big chunk of that mottled pink specialty paper. I didn’t use any of the chalk-board labels or the bow die but I believe I used a little bit of everything else in the kit… I think you can tell that I had a great time playing with this card kit and coming up with card ideas to share with those of you who are getting (or have gotten) this kit. If you want to get in on the fun, I highly recommend subscribing to the monthly card kits or follow Love From Lizi on social media where she announces when kits are available AND her affiliate links are actually working, so if you go to buy anything from Lizi please use this link to access her shop:
http://shareasale.com/r.cfm?b=1122545&u=1697228&m=76572&urllink=&afftrack=
Thank you so much for sharing your time with me, and I wish you all Happy Crafting!
