
Hello folks! Scott here with my 10 cards from the Love from Lizi Special Edition Oh Baby Kit. This kit features a huge amount of card stock, and eight decoupage pages. The British version of decoupage is more about layering and less about gluing, and I was interested in seeing what these decoupage kits are all about and if I would enjoy them!
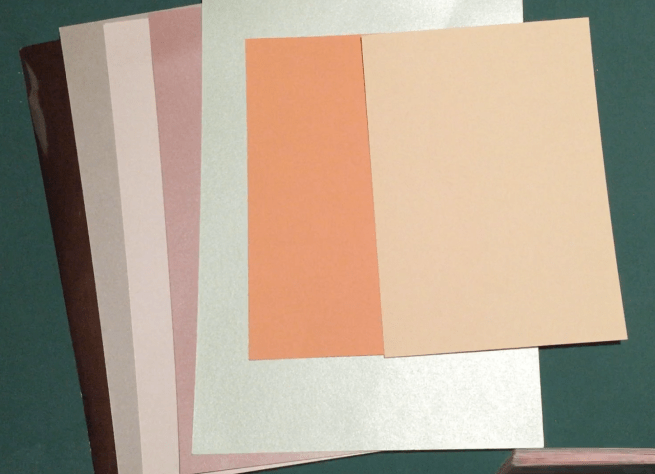 The kit came with 5 sheets of A4 (European) card stock in a Silver Mirror, Silver Pearl, White Pearl, Soft Pink Pearl, and Mint Pearl and two half sheets of A4 card stock in Soft Orange and Magnolia (a very soft mellow yellow).
 We get 32 sheets of pattern paper card stock in this kit! 8 single sided papers in 8″ x 8″ AND 6′ x 6″ (some sheets have spot gloss and some have glitter!), and 8 double sided papers in the same two sizes. A ton of pattern papers included in this kit and not all of them are strictly “baby” oriented.
  There is also a set of stickers in this kit – four pages of glitter stickers (one a full page of alphabet sticker ‘blocks’) that perfectly match all of the images and sentiments in the kit.
Then we get these 8 terrific decoupage sheets. These are all die-cut and sport tons of glitter! The layers are numbered so you start with #1 and use foam tape to add layer #2 to #1 and then add layer #3 to layer #2 and so on. These are really cute and I can’t wait to try my hand at them. There’s eight cards right there! Lastly, we get a great set of dies in this kit.  A complete alphabet with ampersand and a scallop triangle banner! This is a great die set – the alphas are just 1/2″ tall and they are ‘stencil’ die cuts – meaning the inside cut-away parts of the A, B, D, O, P, etc. stay with the cut-outs! Terrific dies. And, of course, the alphas fit inside the little banner die too! I really like all of the colors in this kit and am thrilled that it’s not all “pink and blue”. The purples, yellows, oranges and greens are all a welcome addition and are nicely bright without being garish! Looks like there should be some options for us to make some cards that are not necessarily about babies..! I did go ahead and make card bases from all the colored card stock (the pearl card too) included in this kit. I did use EK Tools 3D-Dots for all my foam tape in layering up these cards. These are very thin foam dots – only 1/16″ thick – and they come in two sizes with some extra thin strips around the edges. Very handy for putting these layered cards together!
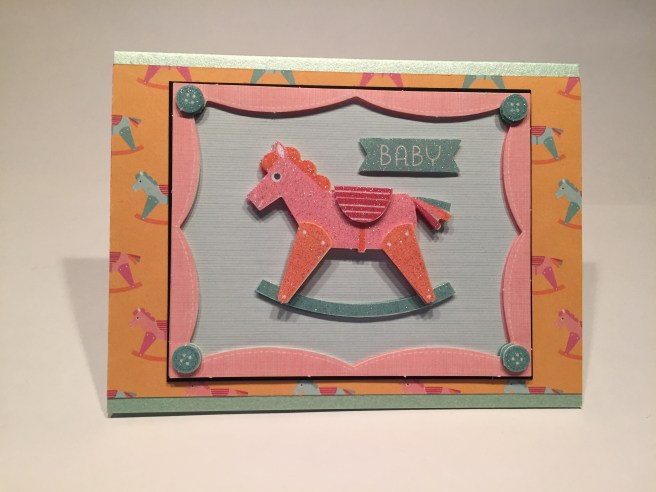 For my first card I dove into the rocking horse decoupage card. This is SO CUTE! You can see all the dimension on the frame and on the rocking horse itself! The decoupage aspect is very straight forward, and with such thin foam dots, it was easy to line up the layers. I used some of the rocking horse pattern paper (perfect match!) on one of the Mint Pearl card bases, and I added a thin black mat behind the decoupage piece to make it really pop. I always keep some really inexpensive black card stock on hand for mats – I figure there’s no need in spending a lot of money for fancy black card stock if you’re just using it for a mat!
 That added a nice touch of contrast to these great colors. I used the BABY banner sticker from the sticker sheets on the outside of the card (mounted up with foam dots!) and then I used the sentiment banner from the decoupage sheet on the inside writing surface. This is just an adorable card, and I think it would look terrific framed in a nursery!
 I liked the stacked elephant decoupage sheet and paired that up with one of the Soft Pink Pearl card bases. I did have to trim the sides of the decoupage base sheet down to fit on the card base, but I used the trimmed polka-dot pieces to line the writing surface on the inside. The ‘sentiments’ on this decoupage sheet were “to: from:” labels, so I went to the alphabet block stickers and stacked up this nice ‘Happy Birthday’ sentiment. I did mat the blocks with a thin black mat (look at that sentiment pop!) and I love the dimension that the decoupage layers give to the stacked elephants… and that little floating heart! SWEET!
 The hot air balloon caught my eye next – there’s more of those floating hearts! I paired up the decoupage base with the hot air balloon pattern paper, and mounted those directly to the Soft Orange card base.
  Once again, I created a thin black mat behind the 2nd decoupage layer to help highlight the focal image. All the rest of the decoupage is completed normally and I even used the sentiment included as it was intended! On the inside writing surface, I added a ‘Congratulations’ sticker (matches that card base perfectly) and one of the ‘Bundle of Joy’ tags from the bunch of balloons decoupage sheet highlighted with a colorful brad from my stash. I am really getting a kick out of these terrific dimensional decoupage cards!
 I’m feeling a little more comfortable with these decoupage sheets now, so I throw caution to the wind and cut the “BABY” decoupage base into its individual blocks. I line the letters up in a row, and (yet again) put small black mats behind all the blocks. I think I did this radical rearrangement because I wanted to use the matching pattern paper on this card!
 Here I’m using the White Pearl card base with the pull-toy pattern paper and a couple of the LFL pink peel offs (from the LFL July 2017 Card Kit) along the edges for the background. There were not a lot of layers to this decoupage sheet, so I did mount the matted blocks up on some foam dots as well. I chose the “Hello Little One” sentiment from the sheet for the inside of the card and mounted that with some foam dots as well. Get a load of all that glitter on those decoupage layers. Certainly don’t need any sequins or other sparkly embellishments! I love this card so much – I think the matching pattern paper is perfect!
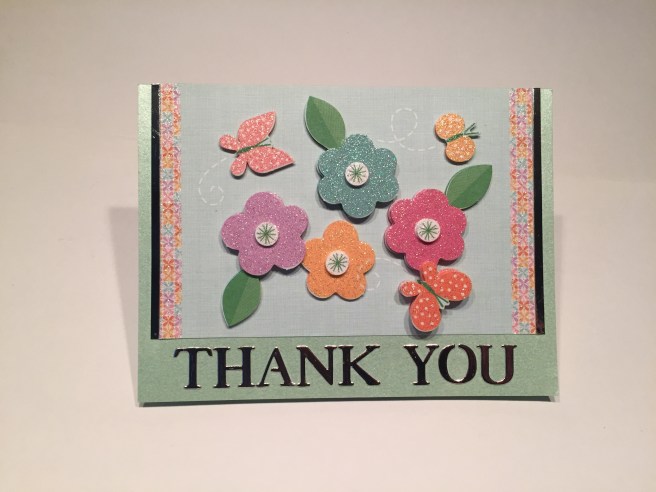 With the flower decoupage sheet I wanted to make another ‘non-baby’ card, so I trimmed the flower base down quite a bit to fit sideways on the Mint Pearl card base and grabbed the alpha dies and the Silver Mirror card stock.
 After die cutting the “Thank You” I cut a couple of 1/8″ strips of the mirror card to add to the sides of the decoupage flower base. I did use my Ranger Multi Medium Matte to glue the letters and strips to the card base. These flowers have so many layers! They almost pop right off the page! That orange butterfly on the bottom right is four layers all stacked up together! I added some of the glitter stickers in the matching flowers and butterfly to the writing surface inside the card, and here we have sweet Thank You card that has nothing to do with babies. I think this is very sharp!
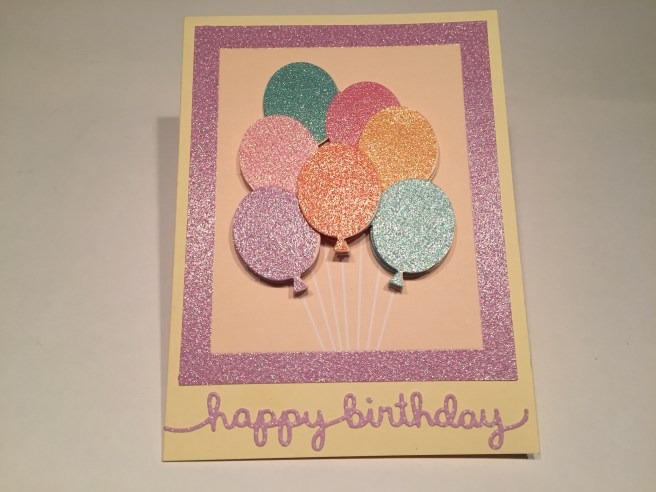 Obviously I think the bunch of balloons decoupage sheet would make a perfect Birthday card, so, on the Magnolia card base, I attached the first decoupage layer (no trimming
  needed) and layered up those terrific glittery balloons. I grabbed my Lawn Fawn Happy Birthday Border die and cut that out of the purple dotted pattern paper. I trimmed off the ‘to you’ part of the die and added some of my Spectrum Noir Sparkle Pen to give the sentiment a little matching sparkle. The dimension on those balloons is particularly stunning! The closest thing I’ve ever seen to an actual 3-D card! Five layers on this decoupage card! I added glittery balloon stickers (and a heart) to finish out the inside of the card. No writing surface needed since the Magnolia card base was fairly pale, and did not have any shimmer or pearlescent to hinder a pen. I think anyone, no matter what age, would love this Birthday Card!
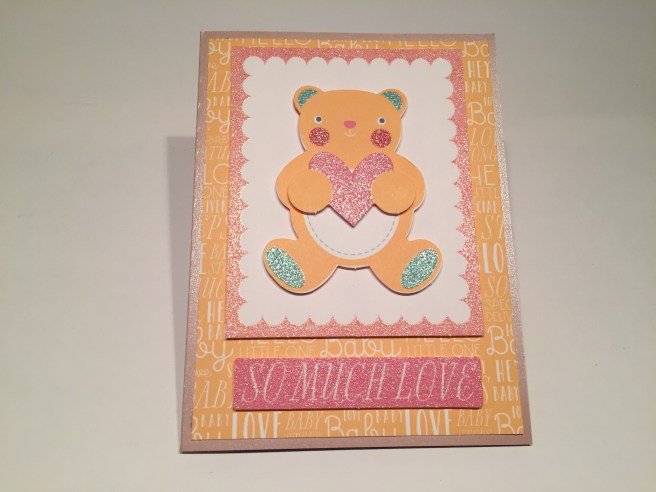 This teddy bear decoupage sheet had SIX layers, so I decided to split them up into two
  cards! On this Soft Pink Pearl card base, I used some of the orange text pattern paper for the background, and used only the decoupage layers 1, 3, and 5 for the teddy bear. Still, plenty of dimension to make that teddy bear stand out! I did use the sentiment included with this decoupage sheet on the front of this card and mounted that with some foam dots as well. Inside, I added two stickers – the “Hello Little One” sticker at the top and a matching teddy bear sticker to the bottom right corner. There were so many options with icons and sentiments and stickers that I ultimately added a little decoration on the inside of all 10 of my cards from this kit.
 Here is the second teddy bear card on the Silver Pearl card base that uses the decoupage
 layers 2, 4, and 6. Again, plenty of dimension on the teddy bear. I did help the depth perception on both of these cards by using foam dots to mount the bottom decoupage layers to the card bases – here on to that terrific glitter heart pattern paper. I grabbed the second ‘Bundle of Joy’ tag from the bunch of balloons decoupage sheet for the sentiment on the front of this card (with another colorful mini brad from my stash for more shine!) and added the balloons and ‘Hey Baby’ sentiment from the sticker sheet on the inside of the card. That’s two cards from one decoupage sheet. Thinking back, you could split the rocking horse, the hot air balloon, the flowers, and the bunch of balloons into two cards easily! That would give you 13 cards just using the decoupage sheets! I think there would still be plenty of dimension to these divided cards and only you and I would know your secret!
  For the last decoupage sheet, I decided to echo the star shape with a star shaped card! I did cut another thin black mat to back layer 1 of the star decoupage, and cut the card
  base from the banner pattern paper and some white card stock from my stash. The pattern paper, black mat, and first layer of the star decoupage are all glued together to make a nice sturdy card front, and I completed the decoupage layers as indicated on the sheet. This is some very intricate layering going on here, and I love the final result. On the inside, I used the ‘Congratulations’ sentiment from the flower decoupage sheet and added the large banner from the sticker sheet. Of course, this card does stand up on its own, and I truly adore this uniquely shaped card. “Hey Baby!”
 I’m all out of the decoupage sheets now, so, for my tenth card with this kit, I decided to play with the scallop banner die and the alpha dies. On the last Silver Pearl card base, I used the footprint pattern paper (spot gloss!) for the background, and mounted that to the card base with some foam tape (I’m addicted to dimension now!). I cut the banner die seven times out of the glittery polka-dot pattern paper, and I used some more of my colorful mini brads to connect the banners together. Four of those banners stretch across the whole card, but I did add some purple and white bakers twine on the top three banners to ‘tie’ them off to the sides of the card. That Silver Mirror card stock from the kit die-cuts beautifully and those alpha dies fit perfectly within those banners! I love that purple pattern paper and with the addition of the glitter banners and mirror letters and those metallic brads, there is a ton of sparkle on this ‘New Baby’ card. True to character, I decided I couldn’t finish up this kit without a pun – I don’t want to disappoint anyone! So, on the writing surface on the inside of this card we get one of my favorite puns so far..
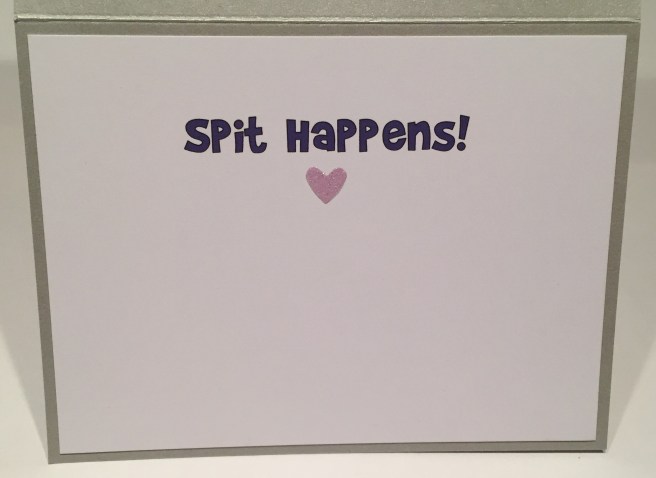 ‘Spit Happens’!! I LOVE that pun! It can be taken in SO MANY ways!! LOL!! This is, of course, printed on the writing surface with my favorite Brady Bunch Remastered font and the addition of a little purple glitter heart sticker adds a touch of sparkle inside.
 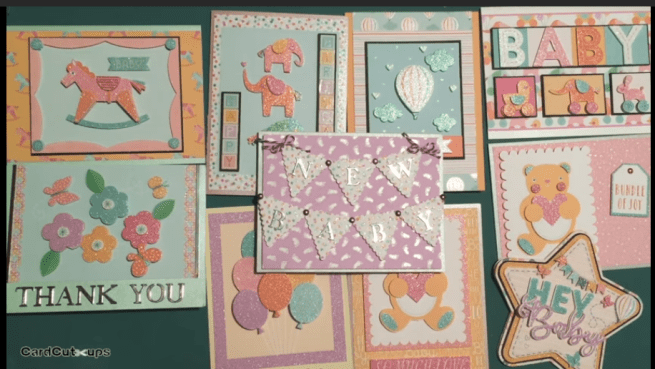 There’s my 10 cards from the Love From Lizi Special Edition Oh Baby Kit released in March of 2018. We have 7 Baby Cards, two Birthday Cards, and a Thank You Card! I think this is a very colorful, fun set of attractive dimensional cards! I think the most amazing thing about these decoupage kits is the simple fact that you can make wonderful cards using only some scissors (maybe a paper trimmer), some glue and foam dots. No stamps or ink pads or markers or pencils needed! I had so much fun playing with this kit and I think anyone can make stunning cards using this method. This kit is still available at lovefromlizi.com – if you go shopping with Lizi, please use the links on this page! Thank you SO MUCH for spending your time with me here… Please pass this post along to anyone who you think might enjoy, and HAPPY CRAFTING!

One thought on “10 Cards 1 Kit | Love From Lizi Special Edition Oh Baby Kit”