
Hello Folks! Scott here with my 10 Cards from the Love From Lizi May 2018 “Totally Tropical” Card Kit. This is a very interesting kit full of masculine pattern papers, colorful card stocks, surprising embellishments, an exclusive stamp and stencil set and a great toucan die! Lizi always packs her card kits with tons of supplies and she doesn’t skimp this month! This will be a challenge to use as many items as possible on these 10 cards! You can check my previous post for a complete breakdown of all the supplies included.  I do tend to start on a new card kit by stamping and coloring all of the images in the stamp set. I stamped the flowers and leaves with my Simon Says Stamp Intense Black ink on the thin ‘copic-friendly’ card stock included in the kit and colored everything with my Spectrum Noir alcohol markers. I love the large hibiscus stamp and the Monstera deliciosa leaf stamp. Those two are my favorites in this stamp set! The images on the border stamp are almost too small to color accurately with alcohol markers, and I got a
  little bit of bleeding at the center of the hibiscus bloom (lots of ink used in the center!) but that big hibiscus stamp and the Monstera leaf stamp are large enough to fussy-cut without much fuss…!! As usual, I did make my 10 card bases from the colored card stocks included in the kit, and I dove into this kit with gusto!
 For my first card, I cut out the hibiscus and monstera leaf images and grabbed one of the Bright Red card bases. I matched up the hibiscus and white flower pattern paper (cut at a slight angle) with some of the dark green and gold shimmer specialty paper and, after attaching a length of the green and white striped ribbon behind the angled edge, used my LF Stitched Rectangle die to cut them into my card front. I mounted those to my card base with foam tape and added a gold peel-off sticker between the pattern paper and the ribbon. I used foam tape to mount the hibiscus and leaf to the top right of the card, and stamped the ‘For you…’ sentiment from the stamp set on a piece of scrap white card stock (using SSS Intense Black ink), and mounted that with foam squares to the card front. I tried to concoct a small stitched rectangle around the sentiment, but didn’t like how my stitched corners overlapped so I just cut the edges away – that’s why the sentiment has a touch of a ‘scalloped’ edge that I thought was very interesting! I added some green, red and white sequins from the sequin mix for a little extra bling, and actually glued a few tufts of the marabou boa to the center of the hibiscus – nice and fuzzy!! This card finally got me rolling with this kit and highlights those two terrific stamps. I’m sure I will get lots of use from those stamps in the years to come!
I was so enamored with the toucan die that even before I started making cards, I spent some time die-cutting and paper-piecing to see what I could come up with. I die-cut the toucan from some black and white card stock, and wanted to see if I could get a little bit of a color blend without using my alcohol markers. I reached for a tool that I have had for a while but have never used – the Tim Holtz Distress Marker Spritzer Tool. I do not have any Distress Markers, but Sharpie markers fit this tool nicely and I have lots of sharpies…! I colored the white cut-out pieces with the spritzer tool in red, orange, yellow, and teal Sharpie markers. This technique came out terrific!! To assemble the whole toucan, I cut a plain piece of paper a little smaller than the die cut and covered that with dry adhesive before attaching it to the back of the black die cut (be sure to remove the black cut-outs first!) then I could easily add the colored pieces into the spaces in the black die-cut. I will use this tool more often as I was very pleased with the results, and decided to use this piece on my next card.
  On the Warm Yellow card base, I cut the ‘spatter’ pattern paper with a Lawn Fawn Stitched Rectangle die and mounted that to my card base with foam tape. I took the dark green with gold shimmer specialty card stock and die-cut one of my Darice Border dies from that, and attached the toucan to the leafy border. I added some gold mirror peel-off stickers as a frame on the pattern paper (no mitering here – just let them go off the edge of the pattern paper), and used foam squares to mount the toucan and branch to the card front. I created this sentiment in my Silhouette software using the Noteworthy font and sized it to match one of my Stitched Circle dies on a piece of jewel yellow card stock from my stash. I did get this sentiment from fellow Design Team member Alicia (Crazy Paper Chick) who had this sentiment in a Stampin’ Up stamp set. I did a little distressing on the edges of the sentiment die-cut with my Spiced Marmalade Distress Oxide ink and mounted that to the card front with more foam squares. I was very pleased with the bright colors that the toucan brought to this card since many of the pattern papers included with this kit tended towards darker colors.
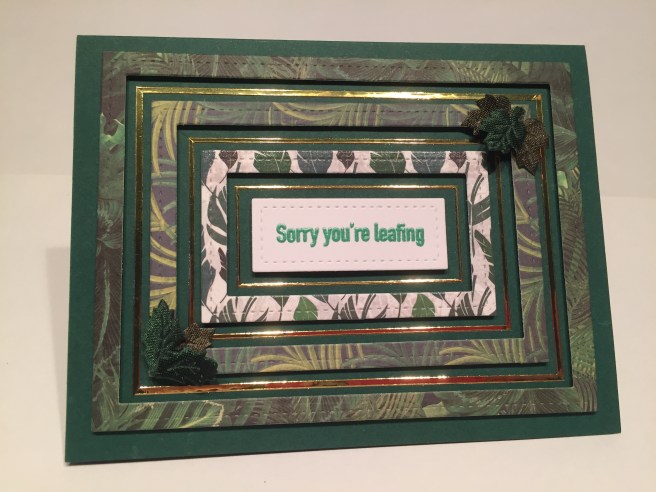 One of my goals with these card kits is to try and use every stamp in the stamp set on my 10 cards, and Lizi included a couple of pun-ny leaf sentiments in the stamp set this month, so I gathered up all the foliage pattern paper included in the kit and one of the Forest Green card bases to see if I could bring these leaf puns to life. Of the three pattern papers that featured only foliage, I noticed that they went from darker colors to lighter – with the lightest being the spot gloss leaves on white… let’s frame in this sentiment with ALL of the leafy pattern papers. I broke out all but the largest of my LF Stitched Rectangle dies and cut three frames in descending sizes from the pattern papers. The sentiment fit perfectly within the smallest rectangle die so I stamped that with VersaMark ink and embossed it with the Love From Lizi Emerald City embossing powder (from the LFL September 2017 card kit). Green seemed appropriate! The frames and the sentiment didn’t pop enough on that forest green card base, so I grabbed the gold mirror peel-off stickers and created more frames between the paper frames using the wide peel-offs on the biggest frame and the thinnest peel-offs on the smallest frame. This was fairly easy using the grid on my Tim Holtz Glass Media Mat and some careful measurements. I did miter the corners of the peel-off frames and then added the pattern paper frames using some foam tape to give them dimension. I added few leaves from the shaped leaf trim for a little texture on the card, and that wraps up this first pun from the stamp set!
 I was very drawn to the diamond pattern paper that featured gold foil on a dark grey background, and noticed that the edges of the diamonds’ lines were continuous – so that’s where I cut a big ‘v’ in the pattern paper. I spread the cut apart about 5/8″ and trimmed the pattern paper to fit on the top of the Pale Grey card base. That gap was too big to use one of the stamp set sentiments, so I grabbed my Lawn Fawn Thank You Border die and cut that out of the gold mirror specialty paper and glued that down to the right side of the gap. Here was a good excuse to use the wood veneer die cuts from the embellishment bag! I colored the flowers with my Delicata Golden Glitz ink pad, and added a center of the Nuvo Crystal Drops from the kit to all three. I added the Liquid Gold ribbon across the top with a nice bow over the arrangement of the veneer flowers and three of the gold leaf sequins. Three more plain sequins on the left side of the gap balances out this card nicely – a very sharp, extremely reflective and classy thank you card!
 Now I had the centers of all the frames I cut for card #3 staring me in the face, so I decided I needed to use all of them on the other leaf pun sentiment in the stamp set. Since these were full rectangles, I decided to cut mats from the gold mirror specialty paper – still using my LF Stitched Rectangle dies. I LOVE that stitched detail on the mirror card stock! Now I gotta have some dimension on this card so all three pattern papers are mounted on fun foam and the sentiment is up on some foam squares. As before, I stamped the Sentiment with VersaMark ink and embossed it with Lizi’s Emerald City embossing powder. I did outline the sentiment with some thin gold peel-off stickers for one more golden frame around our pun. A couple of the gold leaf sequins paired up with a regular gold sequin add a touch of texture and a little more bling! Considering that this card is very similar to the “leafing” card, I think both cards looks extremely different! And the dimension on this card is very cool – kind of comparable to a mini pyramid!
 The floral pattern papers in this kit got me thinking about doing an ‘Eclipse Card’ using the word ‘ALOHA’. Now I’ve never done one of these cards before, and this pattern paper might not have been the best choice to do this technique with, but I think I got very interesting results for my first time! I don’t have any alpha dies this size so I turned to my Silhouette Portrait to cut these letters out of the pattern paper – this is the Gill Sans Ultra Bold font. I also cut four more ‘aloha’s out of some of my grey card stock and glued them all together to make nice chunky letters. I trimmed the pattern paper down with a stitched rectangle die and cut a thin mat from the brushed gold specialty paper and glued them both down to the second Pale Grey card base. After nestling the layered letters back in their negative spaces, I realized that I needed a little more height to help read the sentiment, so I mounted all the letters up on some thin foam dots – that did the trick! I used a short piece of the string of green sequins to underline and highlight the sentiment, and finished off the edges of that with a couple of the big green sequins from the sequin mix. Now I realize that a lighter, more random pattern paper and a darker background would probably work better with this technique – I will try this some more!
 That’s right, I couldn’t resist! LOL! I adore this card! First, I was able to use that Gold Punchinella piece included with the kit and one of the green pipe cleaners for the background! I simply wove the pipe cleaner through the holes on the top and bottom of the gold and attached them down to that pattern paper that had the hibiscus silhouettes and was cut to the same width as the Punchinella. All three pieces are then glued directly to a white card base. Second, I love this sentiment!! – I hope I don’t offend anyone! LOL!! I used my Silhouette software for this sentiment – in my favorite Brady Bunch Remastered font – and sized to fit a couple of my stitched oval dies. I printed the sentiment on some white card stock and cut it’s mat from the green/gold specialty card stock. Lastly, it’s the pink hibiscus that I colored up just for Lizi since she didn’t include any pink in this kit! LOL! I stamped the flowers with VersaMark ink on a piece of the thin ‘copic friendly’ card stock and embossed them with the LFL Golden Crown embossing powder included in the kit. I then used the matching stencil and colored the flowers with a sponge dauber using the Worn Lipstick and Wilted Violet Distress Oxide inks. I like giving my stencils a little ‘stick’ so I took my Zigg two-way glue pen and covered the back of the stencil with the glue and let it dry thoroughly. That makes the back of the stencil tacky and it holds itself in place very nicely! Still, I dabbed more than I rubbed since some pieces of the stencil are very thin and fragile. Once dry, I buffed up the embossing and fussy cut the flowers out. Two of the flowers are glued directly to the background and the other three (as well as the sentiment) are mounted up with foam tape. That Punchinella and gold embossing have plenty of shine, so I used the Nuvo Drops for some colorful highlights on the sentiment. My warped sense of humor really enjoys the fancy look of this card coupled with the (somewhat) off-color sentiment! For that Special Someone!! LOL!
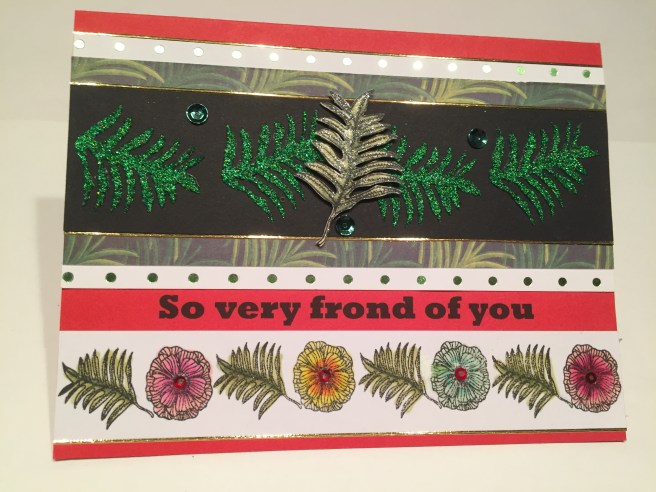 Now I haven’t used that sample of the Nuvo Glimmer Paste that came in the kit so I used the fern stencil to add that paste to some black card stock from my stash. I trimmed that piece down to 1 and 3/8″ and matted that on a piece of the fern pattern paper trimmed to 2″ and then matted to the green foil polka-dot specialty paper trimmed to 2 and 3/8″ – just enough for two rows of polka-dots to show! I trimmed down the border stamp I colored and figured out the space between the two pieces so I could use my Silhouette Software to print this fun pun for a sentiment. This is printed in the Rockwell Extra Bold font directly on the Bright Red card base. I printed the card and then glued the two pieces directly to the card base. I used some gold peel-offs on the edges of the black card stock and on the outermost edges of the border stamp and the polka-dot paper. I had a little bit of a bigger gap between the center two glitter ferns so I fussy cut the fern stamp I colored in the beginning, and using some tiny foam dots, mounted that in the middle of the glitter ferns. I covered the colored fern with my Spectrum Noir Glitter Pen and added a few green sequins from the sequin mix for the final touch of bling. That glitter paste is something truly special and I really like this terrific little pun!
 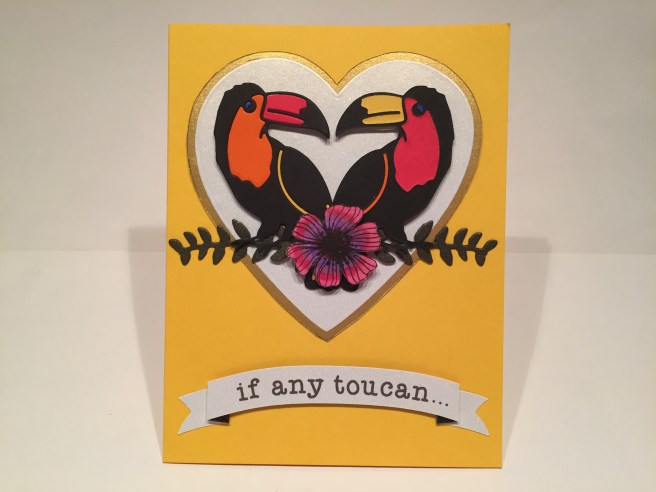 I couldn’t finish out these 10 cards without visiting that terrific toucan die once more. For this card, I did some simple paper piecing with the toucan die. I cut two from black card stock and one each from some plain red, yellow, orange and blue card stock from my stash. I flipped one toucan to the back side and pieced all the cut-outs together on some plain backing paper. When I saw that the toucans formed a heart shape when facing each other I knew exactly what to do to complete this card. I used my largest Heart Nesting die to cut the heart from the back of one of the shimmer pattern papers – yes the back of those two shimmer pattern papers is shimmer too!. I traced the edge of the die to cut the mat from the gold shimmer specialty paper and glued those two hearts together and down to the Warm Yellow card base. I cut another leaf border with my Darice Border dies from the green/gold specialty paper and glued the toucans’ feet to the branch. I did glue the branch and feet directly to the card front, but I used some foam tape to add some dimension to the bodies of the toucans. I then took my last colored stamp of the smaller hibiscus and fussy cut the extra petals away – I think this looks more like a hibiscus without those extra petals – and it’s a little bit smaller too! I mounted that flower on the center of the branch with foam tape and turned my attention to the sentiment. I created this curved folding banner on my Silhouette a couple of years ago, and brought it into service for this card. I printed this sentiment directly on the shimmer side of the shimmer pattern paper (using Typewriter Hand font) and cut the banner with my Silhouette.
 The center of the banner is mounted with foam tape and the ends are glued directly to the card front. Obviously there is more to this sentiment than what you see here, so I finished this little poem pun on the inside of the card using the same font on a piece of white card cut to size with my stitched rectangle dies. This turned out to be the brightest and most colorful card from this kit and I can only praise this toucan die and the myriad possibilities and endless options that it presents as well as bringing some terrific pops of color to my cards! I LOVE IT!
  I still have one more sentiment (‘Wild about you!’) to use from this stamp set and this is what my late-night addled mind came up with! This card went through many permutations before I arrived at this fun little interactive card. While perusing the pattern papers in this kit, I noticed that this piece of chevron paper had ‘fuzzy’ edges on the pattern instead of straight lines… well, that made me think of the pipe cleaners, so I bent the pipe cleaners into their own chevron shape to match the pattern paper, and glued them down. Originally, I was only going to use one of these pieces as a border for my card front, but when I cut it along the middle of the black chevron, I realized that this was starting to look like a mouth…
  SO I decided I COULD make a little interactive card this month! I added strips of the brown satin ribbon for a little contrast and added a couple strips of the gold shimmer specialty paper to the top and bottom. I dug out these two large googly eyes from the LFL October 2017 Card Kit to add a little personality to this creature (you never know when you’re going to need some of those extra embellishments included with these kits so I tend to hang on to all my leftovers!) I did use my smallest stitched circle die to cut the green/gold specialty paper for behind the googly eyes, and stamped that final sentiment (and a few hearts from my stash – along with the pull stamp on the tab) with Peeled Paint Distress Oxide ink and used some clear embossing powder to give it a little shine. This is a very silly card and I had a great time putting this together! I was particularly thrilled with the use of the pipe cleaners on this pattern paper, and, though I thought that I would never come up with an interactive card using this kit, I was tickled at my odd little puppet creature (who, you may surmise, obviously lives in the tropics..!!!) LOLOL!
 That completes my 10 cards for the Love From Lizi May 2018 ‘Totally Tropical’ card kit. At posting, Lizi still had a few of these kits available – if you want to join up, please use my link to shop at LFL.com: http://bit.ly/LFLlink . I had a good time figuring out creative ways to use some of the wacky supplies included with this kit and am pleased with the nice variety of cards I was able to come up with! I actually DID use every stamp from this stamp set here, and, naturally, I have a bunch of supplies left over that will go directly into my stash! I completely adore that Toucan die and the large hibiscus stamp and the monstera leaf stamp. There were actually a lot of things I didn’t get to do with this kit – like using the Punchinella as a stencil with the glimmer paste, or seeing what I could do with stamping these images on dark card stock, but those are all experiments for another day! Lizi has her first Blog Challenge running until May 26th, so if you’d like to enter for a chance to win a LFL gift certificate just click on this link: https://www.lovefromlizi.com/blog/post/love-from-lizi-may-2018-challenge/
On a more personal note, and to keep everyone up to date, I wanted to mention that I will be receiving the My Monthly Hero May Kit – I’m looking forward to start working with a new kit! Thank you so much for joining me here today, I hope I was able to tickle your funny-bone and provide you with a little inspiration. Please remember to share this post and all my links with your best-est buddies, don’t run with scissors, and HAPPY CRAFTING!!!
 To begin with, we have a little more card stock this month than usual! Six sheets of 8.5″ x 11″ card stock in Bright Red, Warm Yellow, Forest Green, Pale Grey and Copic-friendly White. Lizi also included a thinner piece of copic-friendly White card stock – maybe 80# or 65# weight to use for layering and die-cutting and coloring. We also get an A4 sheet (8.3″ x 11.7″) of green foiled polka-dots on white – bright and LOVELY green foil on that!
 We get 16 sheets of pattern paper in the kit this month – these eight are all single sided but feature some specialty elements too. The top two on the left are shimmer paper, the top two on the right have spot gloss accents, and the bottom left pattern paper is gold foiling on a dark green background. The other three are lovely single-sided card stocks.
 The next eight pattern papers are all double-sided and continue the tropical theme with hibiscus flowers, butterflies and toucans and some unique patterns as well!
 The backs of those eight pages are a little more subtle with some stripes and Moroccan patterns as well as some animal prints and texture patterns. Not only are we Totally Tropical but it seems like we’re skirting the edge of rain forest tropical! LOL! A very interesting group of fairly dark colored pattern papers in this kit.
 We get 3 half-sheets (8.5″ x 5.5″) of specialty card stock in this kit – a sheet of glimmer gold, mirror gold, and that dark green with a gold shimmer on top – I think we got a quarter sheet of this same specialty paper in the March 2018 kit – but a bigger piece this time! Our Love From Lizi peel off stickers are in Gold Mirror this month – that’s a new color for Lizi’s shop and they are gorgeous! We also get a strip of Gold Punchinella – basically the left-overs from punching out sequins. This is pretty standard shiny material used in costumes frequently, and I’m already racking my brain to come up with some interesting ways to use this on my cards this month.
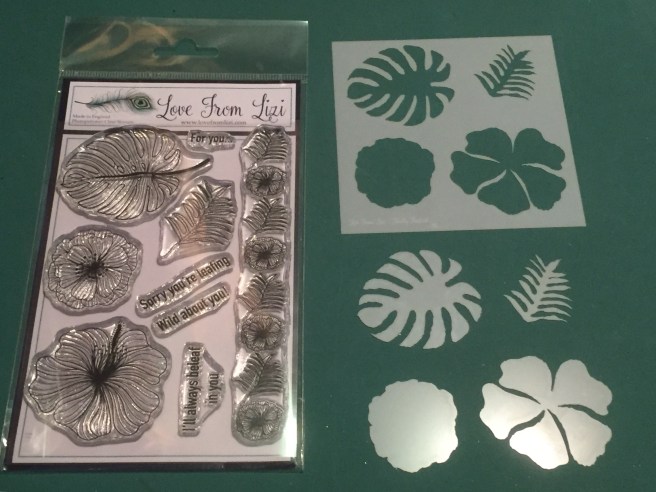 Now we get to the ‘Totally Tropical’ stamp set and… NEW THIS MONTH… Stencils! The stamp set features a couple of hibiscus flowers and a couple of leaf images and a border stamp with both flowers and leaves, and a few sentiments as well: ‘For you…’, ‘Sorry you’re leafing’, ‘Wild about you!’, and ‘I’ll always beleaf in you’. LOL! Always nice to see a couple of puns included in the sentiments!! New for Lizi this month is a stencil that matches the stamp set perfectly – the two hibiscus flowers and the two leaves – perfectly sized to match the stamps. AND Lizi also included the cut-outs from the stencils! These are great for masking or sponging… lots of options when you have both sides of a stencil!
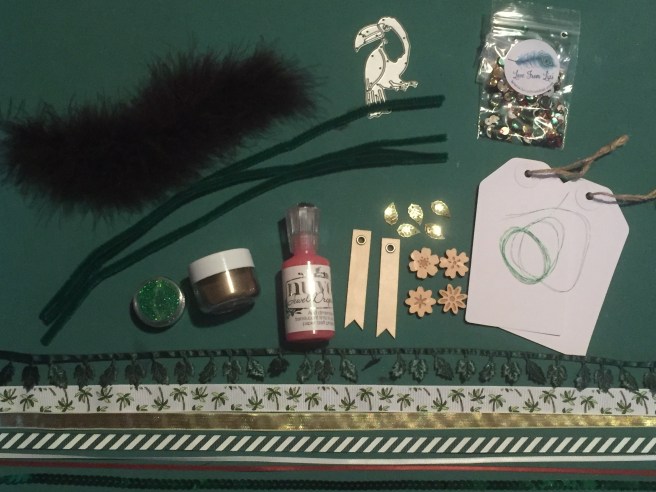 That brings us to the embellishments bag! As usual, this bag is over-stuffed with unique bits and pieces to challenge our creativity! Lots of ribbon and trim pieces – (from the bottom) a string of green sequins (can be removed from the string and used as single sequins too), 1/8″ brown and white satin ribbon, 1/2″ green and white stripe and ‘Liquid Gold” ribbons. The gold ribbon is very cool because both sides of the ribbon are exactly the same! A 3/4″ palm tree printed ribbon and a shaped leaf ribbon trim with embossed veins on the leaves! Continuing up from the bottom, left to right, we get 3 green pipe cleaners (I have no ideas for those..!!), a sample pot of Nuvo Glimmer Paste in Emerald Green (great to use with the stencils!), a full pot of NEW Love From Lizi embossing powder in ‘Golden Crown’, a regular sized bottle of Nuvo Jewel Drops in Strawberry Coulis, 2 wood-veneer banners with silver eyelets, 4 (double thick) wood veneer flowers (with etching), and 5 (or six) gold leaf sequins. We also get two white tags (2.5″ x 4.5″) with twine attached and on top of the tags is a piece of green metallic thread (I just know I’m going to lose that on my desk somewhere!! LOL!) On the top left we get a piece of Marabou feather boa (there’s a tricky piece!) and our die this month is a Toucan! A nice large die that might be my favorite piece of this whole kit! Can’t wait to play with that!! Last, but not least we get a sample bag of the ‘Totally Tropical’ sequin mix with dark greens, golds, whites and deep reds. This is going to be a very interesting kit to work on! So many new products to experiment with! As of posting, this kit is still available at lovefromlizi.com – if you want to join in on the fun, please use my link to shop at Lizi’s store:
  The Communicator itself is made from two layers of black chipboard so there’s room for the ‘bells and whistles’ under the flip top cover. The size is pretty accurate according to web research. The cover is cut from my old
  The recessed area was cut through both layers of the chipboard and filled with fairly accurate ‘inner workings’ of the original Star Trek Communicator! Some brushed silver card stock (the little speaker grid is hand-etched!) and two silver brads are attached to the bottom of the recess and three dots of
 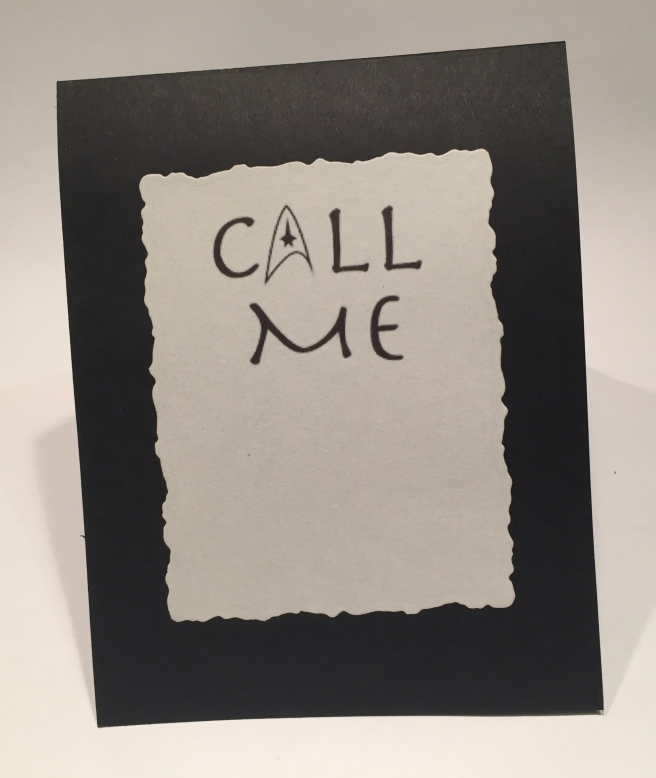 YUP! A little bit of a pun for you! LOL!! Kind of the perfect sentiment for a “Communicator’ Card! This was created on the computer using the Herculanum font and a copy of the Star Fleet Insignia for the ‘A’ and printed on my standard
 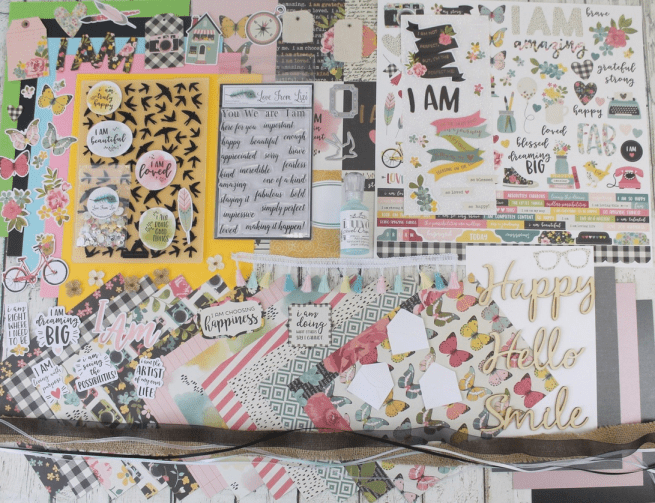 As usual, I did take the 5 sheets of colored card stock and made 10 card bases to begin. I do have a bit of an obsession with trying to use all the stamps in a stamp set for my 10 Card videos, and, sentiments or not, this kit was no exception, so I started experimenting with all the stamps and came upon this interesting ‘word cloud’ concept for my first card.
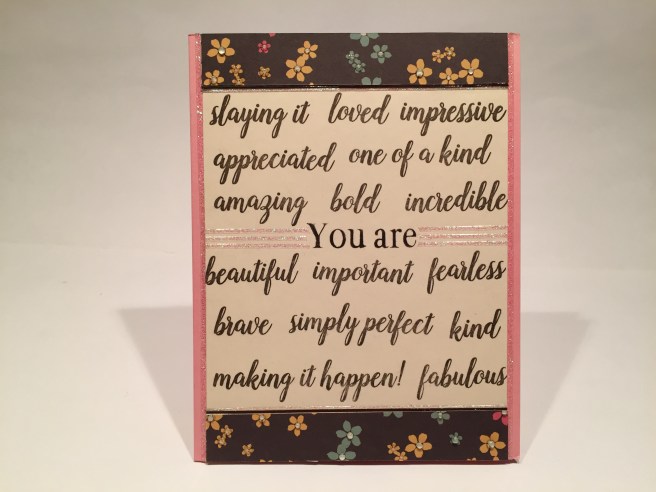 I managed to get 18 stamps on this one card! LOL! I stamped the ‘You are’ in the center with
 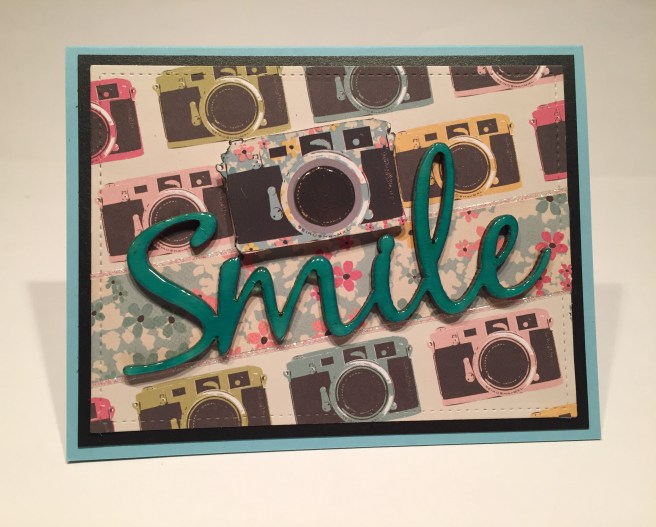 There were three large wood veneer die-cut sentiments included with this kit, and I couldn’t resist pairing up the ‘Smile’ sentiment with some of the camera images. I colored the sentiment with
 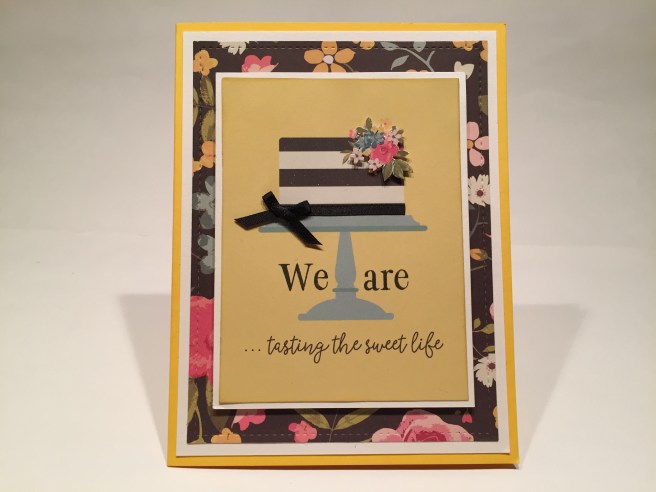 I was drawn to the cut-apart sheet that had the 3″ x 4″ images and wanted to pair this yellow cake cut apart with the ‘We are’ from the stamp set to make this lovely Anniversary card. On the Sunshine Yellow card base, I cut a mat from the Oyster White Pearl specialty card stock and die cut that beautiful flower pattern paper on the dark background with the same LFL Stitched Rectangle die, and glued those both directly to the card base. I stamped the ‘We are’ from the stamp set (SSS Intense Black ink) on either side of the cake stand to add to the printed sentiment, attached that cut-apart to a white mat cut from my stash, and foam taped that up on the card base.
 I covered the bottom black stripe on the cake with some of the black satin ribbon from the kit and added a small bow to the left side. The added dimension of that bow, made me want to add more dimension to the top of the cake, but none of the stickers or ephemera flowers matched the size of the flowers that were printed on the cake. I ultimately fussy cut the flowers from the middle of the notebook paper sticker (now that’s some REAL fussy cutting!) and foam taped those over the flowers on the top of the cake. That sticker piece is not the exact same flower grouping that was printed on the cut apart piece, but was close enough in size to work perfectly here. Any flowers poking out around it just add another layer to the bouquet! I did use my
 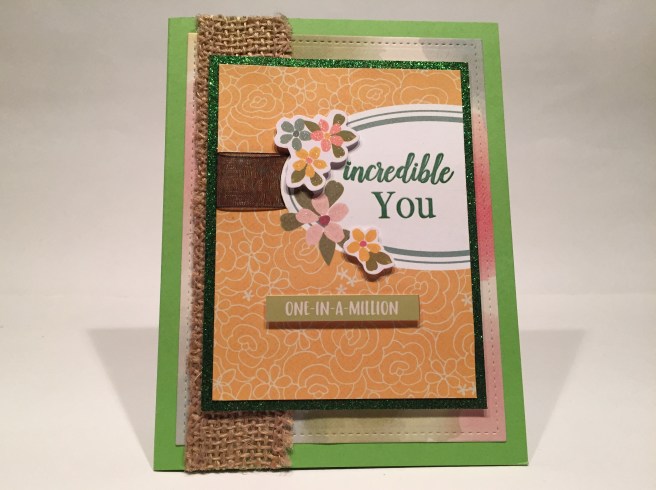 Suddenly, I realized that some of the sentiment stamps in the kit could be reversed – effectively ignoring the ‘are’ and the ‘am’ stamps for a short declarative sentiment – this would work with many of the adjective stamps in this set. This yellow piece with the oval and flowers was another of the 3″ x 4″ cut apart images. I used my craft knife to cut the left side of the oval and threaded a piece of the black organza ribbon behind the oval and around the side of the cut apart. I stamped the sentiment in the oval with my Stampin’ Up Mint Macaron ink pad (discontinued) and then stamped the sentiment in
 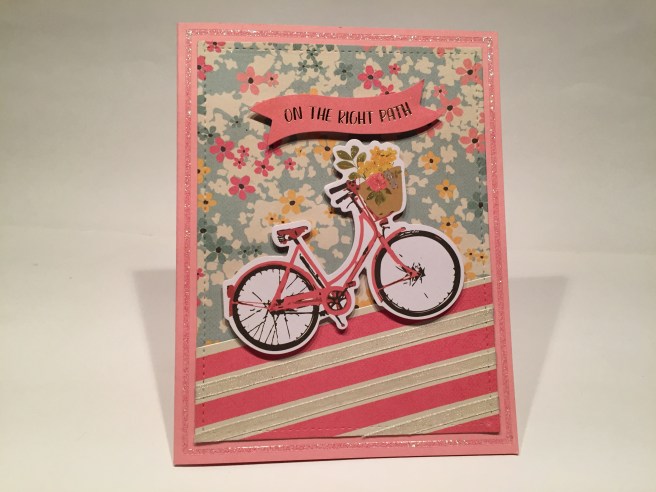 Once again, there was plenty of pink in this card kit, so I throw caution to the wind and had to go all out with the pink for this card! On the Rose Pink card base, I paired up the flower pattern paper with the pink candy stripe pattern paper (on an angle), cut them both with my stitched rectangle die, and glued them directly to the card base. I did take the thin white organza ribbon from the kit and highlighted the off-white stripes on the ‘road’ – that gave us some nice sparkle and a little texture! The bicycle and sentiment are ephemera pieces foam taped up on the card front. I did add a frame of the glitter peel-offs around the card base and added a touch of Spectrum Noir sparkle to the flowers. I thought the ‘on the right path’ sentiment was complete and didn’t need any modifiers! Considering the fact that this is VERY pink, I do like it quite a bit! Simple and sweet!
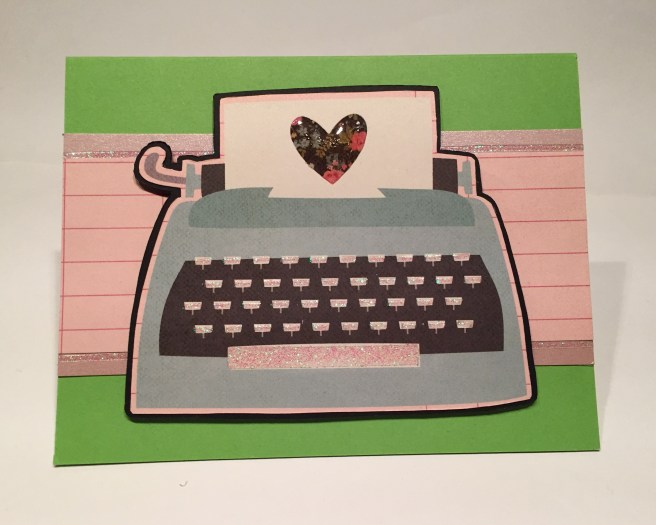 This is the large typewriter from one of the pattern papers – I fussy cut that out and glued it to a black fussy cut mat from my stash. On the Apple Green card base, I added a strip of the pink ledger pattern paper and added thin strips of the Dusty Rose Pearl specialty paper to the top and bottom. I added the glitter peel offs to the edges of the ledger paper and also used them to highlight the typewriter keys and space bar!
 This is the first time I’ve actually used one of the edges of the peel off sheet but it fit perfectly on the space bar! I mounted the typewriter to the card front with foam tape, and I added
 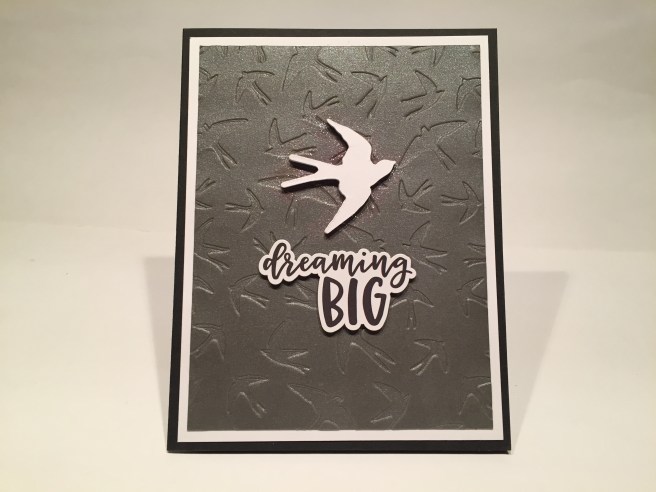 Though I am always jazzed to get new and useful products in my kits, this sparrow embossing folder and die didn’t really seem to go with anything else in this kit, so I decided to pair them up for a simple monochromatic card. On a black card base from my stash (I used both of the black card bases from the kit on the butterfly card) I added a white mat from my stash and embossed the Gunmetal Grey Pearl specialty paper with the embossing folder, and die-cut six sparrows from some scrap white card stock and one from the Oyster White Pearl specialty paper. I glued the embossed paper directly to the mat and glued all the sparrow die cuts together before adding them to the card front as well. The ‘dreaming big’ sticker from the sticker sheet went well with this simple design and I used some foam tape to attach it to the card front. I did use my Spectrum Noir Sparkle pen to add a bit of glitter on the card base around the bird. This card makes me think of Richard Bach’s Johnathon Livingston Seagull! Yes, I know, this isn’t a seagull, but it still evokes the spirit of that story! Am I dating myself here?? LOL!
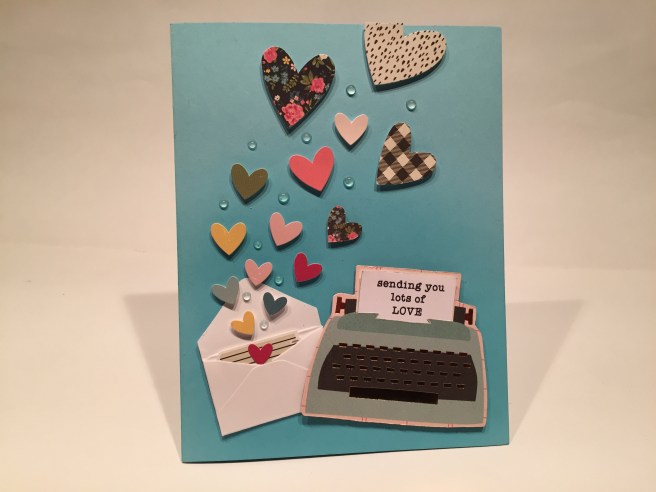 As I kept perusing all the images in this kit, I began to notice that there were a large number of hearts in assorted sizes on both the sticker sheet and with the ephemera. We also have those cute mini-envelopes in the kit, and there’s a smaller typewriter on one of the 3″ x 4″ cut apart images as well. Here’s the result! On the Sky Blue card base, I took some Broken China Distress Oxide ink and used my
  (also, the smaller flower pattern heart was fussy cut from the paper in the typewriter image – I knew I was going to cover that up anyway!). I actually used all of the hearts on this card except for the largest ephemera heart! Some dots of the Sea Breeze Jewel Drops adds some beautiful shine, and for the final finishing touch, I added the smallest typewriter (from the sticker sheet) to the writing surface inside the card. I thought the typewriter and envelope were a natural match, and I LOVE this card!
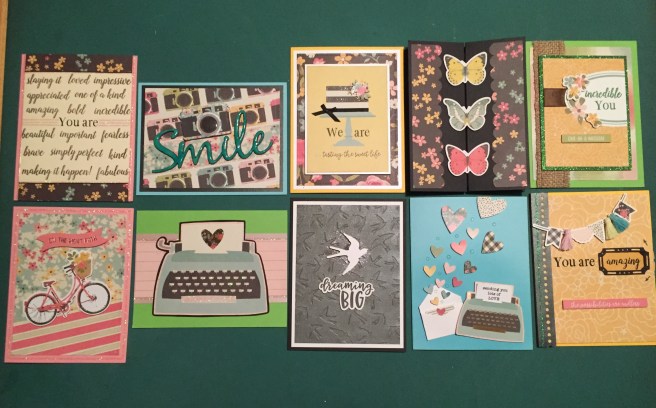 That’s my 10 Cards from the
  The British version of decoupage is more about layering and less about gluing, and I was interested in seeing what these decoupage kits are all about and if I would enjoy them!
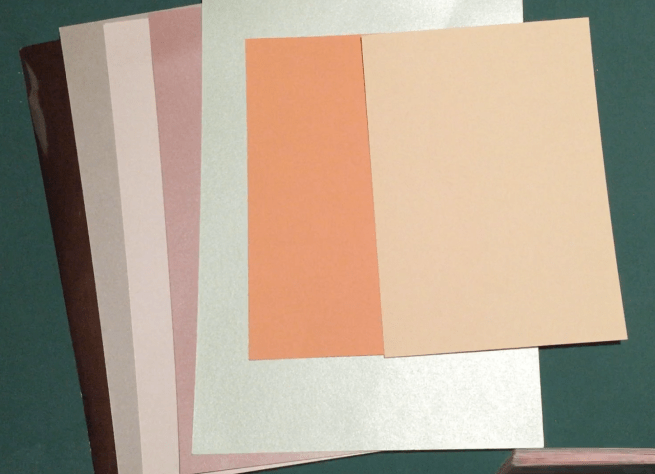 The kit came with 5 sheets of A4 (European) card stock in a Silver Mirror, Silver Pearl, White Pearl, Soft Pink Pearl, and Mint Pearl and two half sheets of A4 card stock in Soft Orange and Magnolia (a very soft mellow yellow).
 We get 32 sheets of pattern paper card stock in this kit! 8 single sided papers in 8″ x 8″ AND 6′ x 6″ (some sheets have spot gloss and some have glitter!), and 8 double sided papers in the same two sizes. A ton of pattern papers included in this kit and not all of them are strictly “baby” oriented.
  There is also a set of stickers in this kit – four pages of glitter stickers (one a full page of alphabet sticker ‘blocks’) that perfectly match all of the images and sentiments in the kit.
 A complete alphabet with ampersand and a scallop triangle banner! This is a great die set – the alphas are just 1/2″ tall and they are ‘stencil’ die cuts – meaning the inside cut-away parts of the A, B, D, O, P, etc. stay with the cut-outs! Terrific dies. And, of course, the alphas fit inside the little banner die too! I really like all of the colors in this kit and am thrilled that it’s not all “pink and blue”. The purples, yellows, oranges and greens are all a welcome addition and are nicely bright without being garish! Looks like there should be some options for us to make some cards that are not necessarily about babies..! I did go ahead and make card bases from all the colored card stock (the pearl card too) included in this kit. I did use
 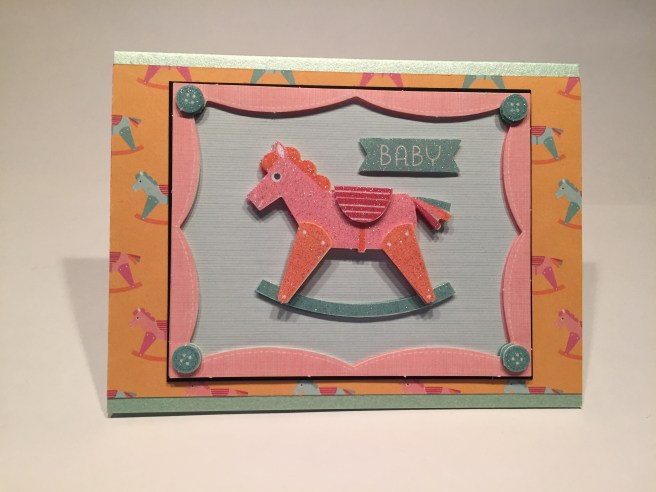 For my first card I dove into the rocking horse decoupage card. This is SO CUTE! You can see all the dimension on the frame and on the rocking horse itself! The decoupage aspect is very straight forward, and with such thin foam dots, it was easy to line up the layers. I used some of the rocking horse pattern paper (perfect match!) on one of the Mint Pearl card bases, and I added a thin black mat behind the decoupage piece to make it really pop. I always keep some really
  That added a nice touch of contrast to these great colors. I used the BABY banner sticker from the sticker sheets on the outside of the card (mounted up with foam dots!) and then I used the sentiment banner from the decoupage sheet on the inside writing surface. This is just an adorable card, and I think it would look terrific framed in a nursery!
 I liked the stacked elephant decoupage sheet and paired that up with one of the Soft Pink Pearl card bases. I did have to trim the sides of the decoupage base sheet down to fit on the card base, but I used the trimmed polka-dot pieces to line the writing surface on the inside. The ‘sentiments’ on this decoupage sheet were “to: from:” labels, so I went to the alphabet block stickers and stacked up this nice ‘Happy Birthday’ sentiment. I did mat the blocks with a thin black mat (look at that sentiment pop!) and I love the dimension that the decoupage layers give to the stacked elephants… and that little floating heart! SWEET!
 The hot air balloon caught my eye next – there’s more of those floating hearts! I paired up the decoupage base with the hot air balloon pattern paper, and mounted those directly to the Soft Orange card base.
  Once again, I created a thin black mat behind the 2nd decoupage layer to help highlight the focal image. All the rest of the decoupage is completed normally and I even used the sentiment included as it was intended! On the inside writing surface, I added a ‘Congratulations’ sticker (matches that card base perfectly) and one of the ‘Bundle of Joy’ tags from the bunch of balloons decoupage sheet highlighted with a
  I’m feeling a little more comfortable with these decoupage sheets now, so I throw caution to the wind and cut the “BABY” decoupage base into its individual blocks. I line the letters up in a row, and (yet again) put small black mats behind all the blocks. I think I did this radical rearrangement because I wanted to use the matching pattern paper on this card!
 Here I’m using the White Pearl card base with the pull-toy pattern paper and a couple of the LFL pink peel offs (from the LFL July 2017 Card Kit) along the edges for the background. There were not a lot of layers to this decoupage sheet, so I did mount the matted blocks up on some foam dots as well. I chose the “Hello Little One” sentiment from the sheet for the inside of the card and mounted that with some foam dots as well. Get a load of all that glitter on those decoupage layers. Certainly don’t need any sequins or other sparkly embellishments! I love this card so much – I think the matching pattern paper is perfect!
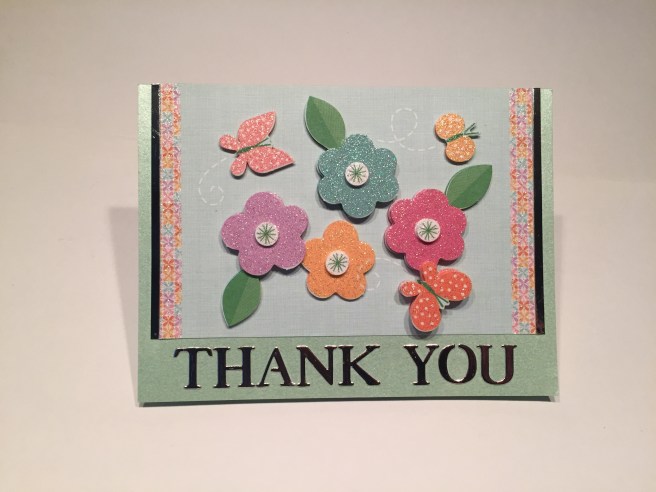 With the flower decoupage sheet I wanted to make another ‘non-baby’ card, so I trimmed the flower base down quite a bit to fit sideways on the Mint Pearl card base and grabbed the alpha dies and the Silver Mirror card stock.
 After die cutting the “Thank You” I cut a couple of 1/8″ strips of the mirror card to add to the sides of the decoupage flower base. I did use my
 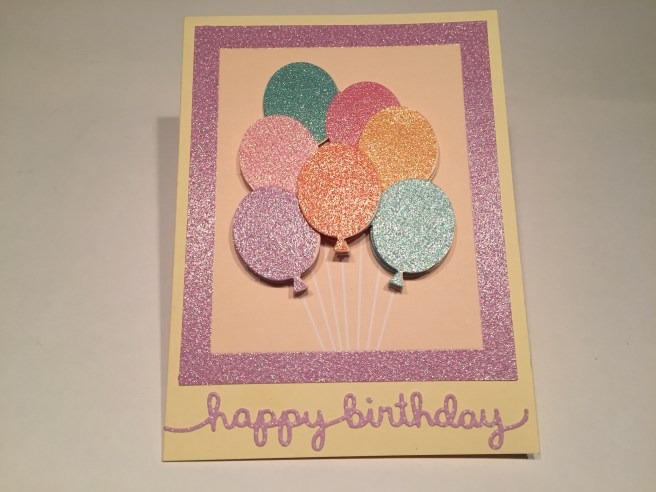 Obviously I think the bunch of balloons decoupage sheet would make a perfect Birthday card, so, on the Magnolia card base, I attached the first decoupage layer (no trimming
  needed) and layered up those terrific glittery balloons. I grabbed my
 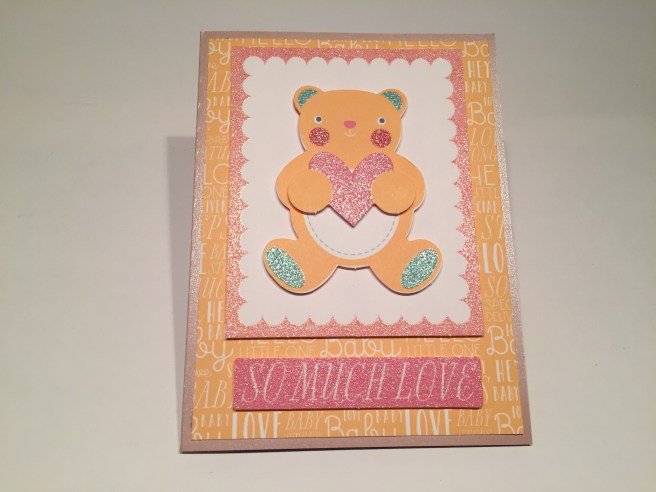 This teddy bear decoupage sheet had SIX layers, so I decided to split them up into two
  cards! On this Soft Pink Pearl card base, I used some of the orange text pattern paper for the background, and used only the decoupage layers 1, 3, and 5 for the teddy bear. Still, plenty of dimension to make that teddy bear stand out! I did use the sentiment included with this decoupage sheet on the front of this card and mounted that with some foam dots as well. Inside, I added two stickers – the “Hello Little One” sticker at the top and a matching teddy bear sticker to the bottom right corner. There were so many options with icons and sentiments and stickers that I ultimately added a little decoration on the inside of all 10 of my cards from this kit.
 Here is the second teddy bear card on the Silver Pearl card base that uses the decoupage
 layers 2, 4, and 6. Again, plenty of dimension on the teddy bear. I did help the depth perception on both of these cards by using foam dots to mount the bottom decoupage layers to the card bases – here on to that terrific glitter heart pattern paper. I grabbed the second ‘Bundle of Joy’ tag from the bunch of balloons decoupage sheet for the sentiment on the front of this card (with another colorful mini brad from my stash for more shine!) and added the balloons and ‘Hey Baby’ sentiment from the sticker sheet on the inside of the card. That’s two cards from one decoupage sheet. Thinking back, you could split the rocking horse, the hot air balloon, the flowers, and the bunch of balloons into two cards easily! That would give you 13 cards just using the decoupage sheets! I think there would still be plenty of dimension to these divided cards and only you and I would know your secret!
  For the last decoupage sheet, I decided to echo the star shape with a star shaped card! I did cut another thin black mat to back layer 1 of the star decoupage, and cut the card
  base from the banner pattern paper and some white card stock from my stash. The pattern paper, black mat, and first layer of the star decoupage are all glued together to make a nice sturdy card front, and I completed the decoupage layers as indicated on the sheet. This is some very intricate layering going on here, and I love the final result. On the inside, I used the ‘Congratulations’ sentiment from the flower decoupage sheet and added the large banner from the sticker sheet. Of course, this card does stand up on its own, and I truly adore this uniquely shaped card. “Hey Baby!”
 I’m all out of the decoupage sheets now, so, for my tenth card with this kit, I decided to play with the scallop banner die and the alpha dies. On the last Silver Pearl card base, I used the footprint pattern paper (spot gloss!) for the background, and mounted that to the card base with some foam tape (I’m addicted to dimension now!). I cut the banner die seven times out of the glittery polka-dot pattern paper, and I used some more of my
 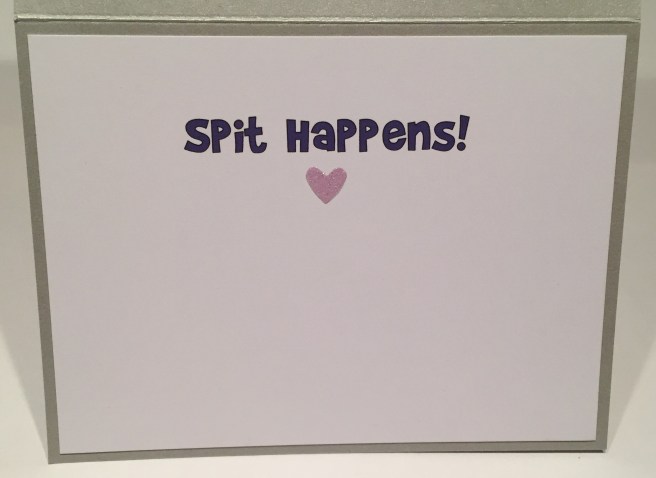 ‘Spit Happens’!! I LOVE that pun! It can be taken in SO MANY ways!! LOL!! This is, of course, printed on the writing surface with my favorite
 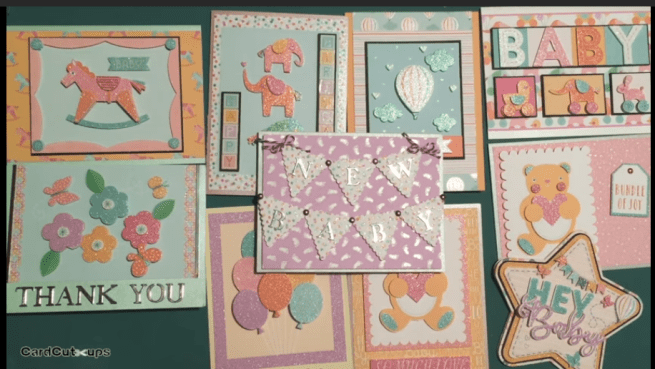 There’s my 10 cards from the
  This card kit is jam packed with Spring-y colors and images and a few surprises as well!
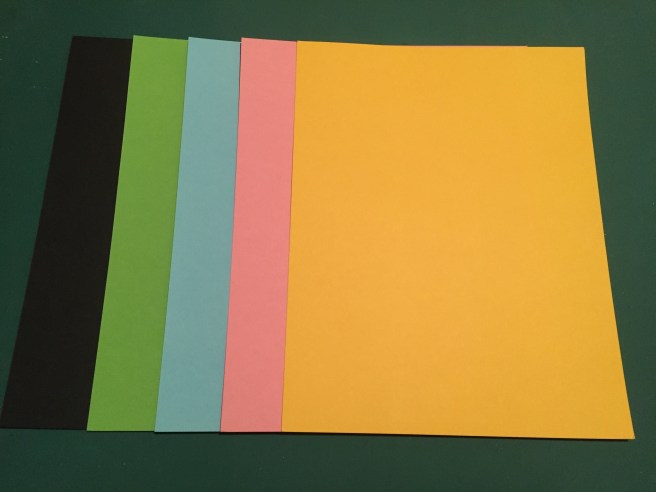 As usual, we get five sheets of standard American/Canadian card stock at 8.5″ x 11″ in Black, Apple Green, Sky Blue, Rose Pink, and Sunshine Yellow – Great Colors! I don’t even mind that pink..!!! (shocking!!) LOL!
 We are treated this month to 12 double sided pattern papers that are larger than normal at 6″ x 8″! I love these larger pattern papers – there’s always a little extra left over! The front side of these pattern papers features large images, icons and sentiments.
 The back side features smaller, all-over patterns – LOVE that flower and leaf pattern on the black background (second from left on the bottom row) and LOVE the size of these!
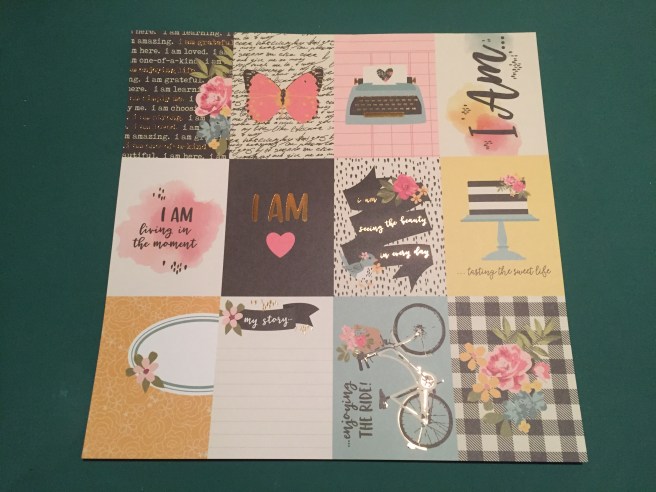 We do get two 12″ x 12″ cut apart sheets with the kit this month – the first one features 12 panels – 3″ x 4″ – with some rose gold foil embossed highlights and lots of images and sentiments. You could make 12 cards with these panels alone!
 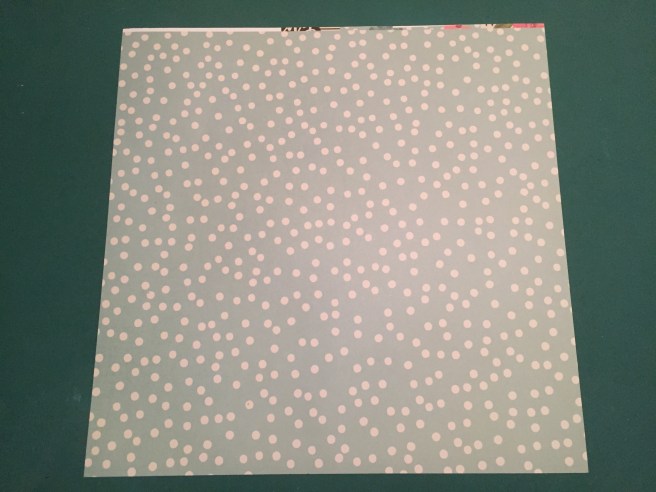 The cut apart pages are double sided and this is the back of our first sheet with pale pink polka dots on a dusty teal background – a little bit larger than the same pattern on the back of one of the pattern papers.
 Our second sheet of 12′ x 12″ cut-aparts has 4″ x 6″ panels with larger images and sentiments but no foil embossing.
 The back features the lovely red, pink, blue and yellow flowers on a black (or at least VERY dark brown) background. Again, just slightly larger than the same pattern on the back of the pattern papers. We also get one more 12″ x 12″ piece in this kit…!
 A sticker sheet! I always like the stickers Lizi (usually) includes in her kits, and this sheet is terrific! Tons of stickers from sentiments to icons to banners and borders and trinkets and tabs. A little bit of everything in perfectly matching colors!
 Of course we do get some specialty papers with this kit – four 8.5″ x 5.5″ shimmer card stocks in Gunmetal Gray, Dusty Rose, Oyster White and Graphite Black. You can cut these in half to make card fronts or fold them in half to make card bases. The pin stripe peel off stickers this month are SO COOL! You can’t really tell in this picture, but they are actually clear glitter peel offs. No color to them just glitter! Should be very interesting to see how these look on our projects! And here’s the first big surprise this month – an Embossing Folder – a LARGE (6″ x 8″) embossing folder covered with birds… they appear to be swallows (the split tail?) in assorted flying poses. This is a great addition for those of you into scrap-booking or Art Journals as well as for adding great texture to cards!
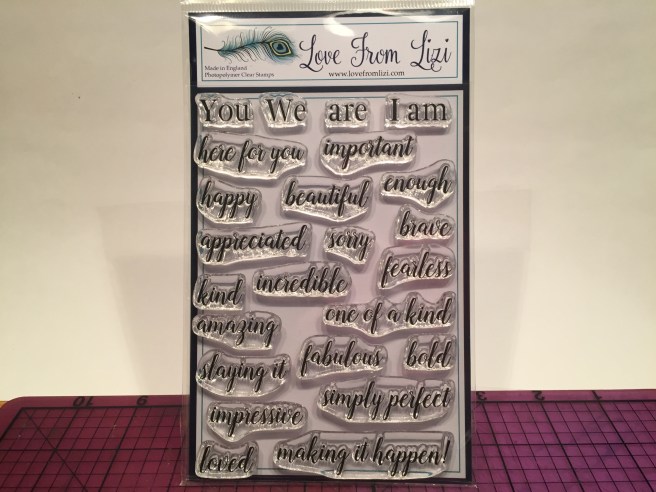 The Exclusive Love From Lizi stamp set this month is a sentiment builder set, with ‘You’, ‘We’, ‘are’, and ‘I am’ in block letters ready to pair up with all these phrases and adjectives. A good sentiment builder stamp set is always nice to have in your stash, and this set has a couple of very unique sentiments like ‘slaying it’ and ‘making it happen!’.
 Which brings us to the embellishment bag – WOO-HOO!! From bottom to top, left to right, we get six (1 meter) ribbons this month – a 1″ burlap ribbon (with sewn edges so no fraying!) a 3/4″ black organza ribbon, a 1/8″ white organza ribbon, and three 1/8″ satin ribbons in black, white, and pale blue. That’s more than 19.5 feet of ribbon!! There are two sizes of canvas tags with grommets, and five burlap flowers (three white and two natural) with a little bit of dimension on the petals and little wooden seed beads in their centers. Another surprise this month is this bit of tassel trim – about 10″ of this ADORABLE tassel trim that matches the colors of the kit perfectly! Can’t wait to figure out how to use this on a card! Of course, we get a sample bag of the sequin mix for the month along with three mini white envelopes, and our monthly bottle of Nuvo Drops is another Jewel Drop (lightly tinted translucent) in Sea Breeze. The dies included this month are a small decorative frame and a swallow die – obviously matching the embossing folder. I did die-cut both of those in black to show you how they looked. And take a look at those large wood-veneer die cuts at the top! ‘Hello’, ‘Smile’, and ‘Happy’ in a large, clean script. These would make great cards virtually all by themselves! Now, if that wasn’t enough (I don’t think Lizi knows the meaning of that word!) we have one more surprise waiting for us in the embellishment bag.
 Ephemera!!! More than 50 pieces of die cut sentiments, images, icons, banners, badges, tags, and words – many with that rose gold foiling on them. I don’t think we’ve ever gotten a bag like this in our LFL kits before, and these are amazing! I almost like them more than the cut apart sheets – as these are already cut apart!! A lovely surprise treat to finish out the Love From Lizi April 2018 Card Kit. As of this posting there are still a few kits available, so if you’d like to grab one for yourself just click here:
  Now I don’t usually get any of the matching ‘add-ons’ that Lizi offers along with her card

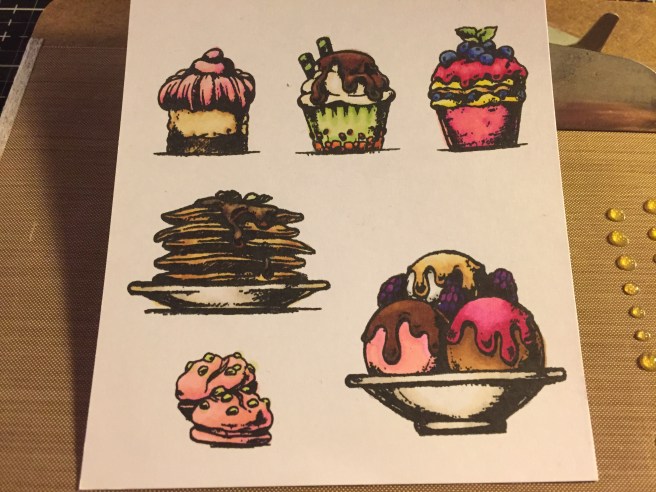 As usual, I did stamp all the images from the stamp set (with
 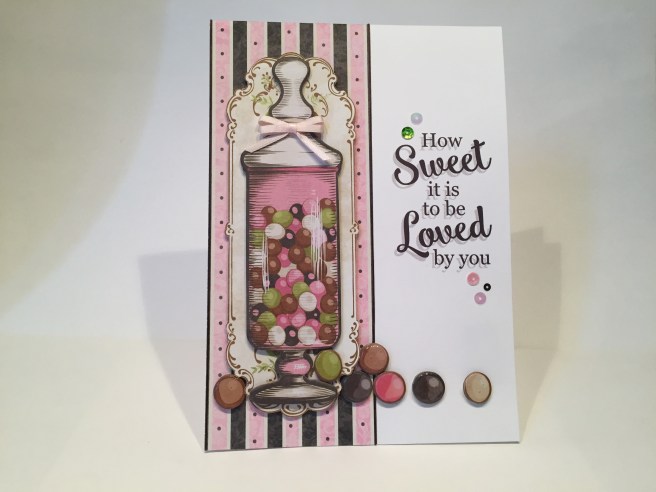 I made a 5′ x 7″ white card base using some 120# card stock from my stash, and created this sentiment with my
 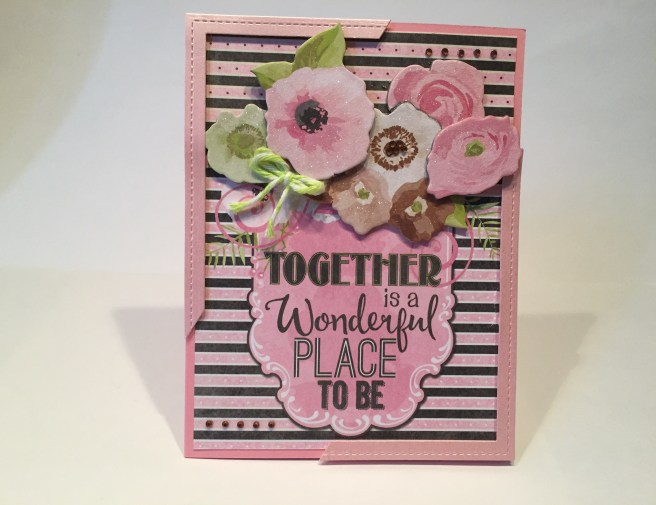 This cut-apart sentiment caught my eye, but it was only 4″ square on the sheet, so I paired it up with the striped pattern paper from the kit and used the chipboard flower stickers to hide the seam. Look closely, and you can see the dots on the pink stripes above the flowers are black, and below the flowers they are white… So, together that piece is 4″ x 5.25″ and mounted directly to the pink card base. I wanted to frame this image so I cut a frame from the soft pink pearl specialty card stock with my
 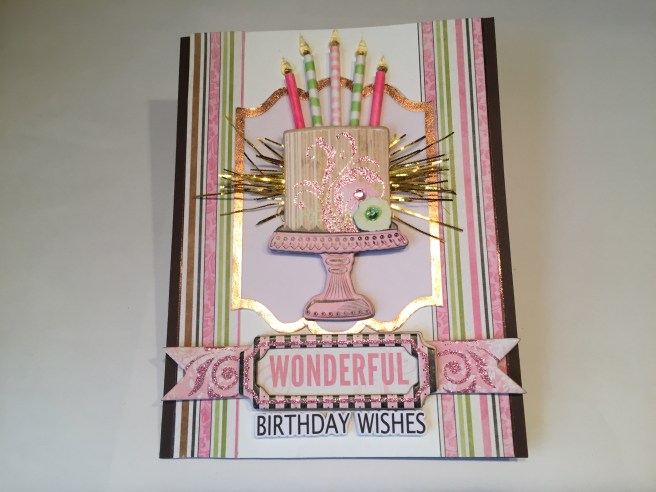 On the Chocolate Brown card base, I mounted the off-white embossed specialty card stock trimmed down to 3.75″ wide and added 3/4″ strips of the pick and green striped pattern paper to the two edges of that, as well as the skinny peel off stickers on the sides. I took one of the vellum pieces, and, after gluing that to some plain white card stock with the
 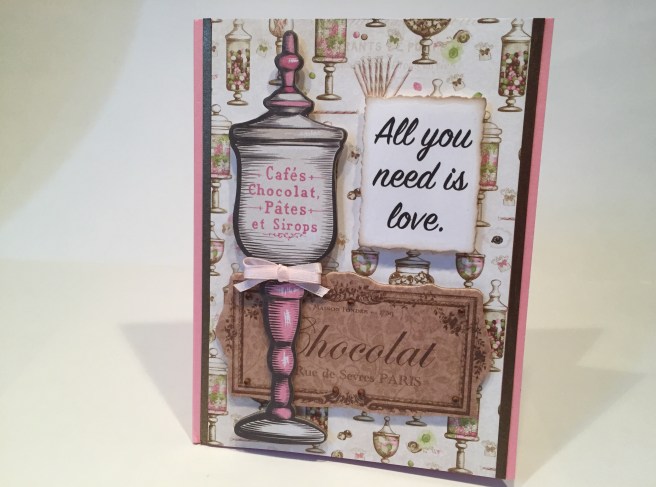 Back to the second pink card base, I cut a 3.75″ strip of the candy jar pattern paper for my background, and added two 1/8″ strips of the Bronze pearl specialty card stock on the two sides. I layered the two ‘chocolate’ chipboard stickers together and added a double pink bow to the jar.
  Here’s another sentiment of mine created on my Silhouette in the SIGN PAINTER font and cut out with a
 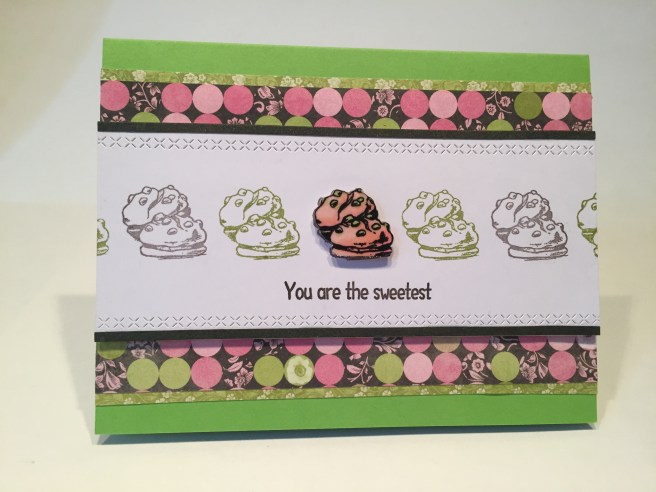 I did have to dig around in my ink pads to find colors that matched this dotted pattern paper, and found that my
 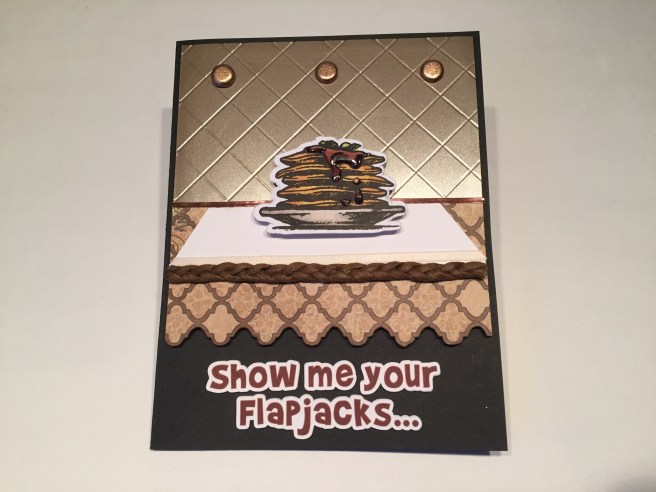 And now to the pancakes!! Here’s another card that uses a lot of the goodies from this kit! I fussy cut the Moroccan pattern paper with a decorative edge, and used my scoring board to emboss the tile pattern on the Taupe gloss specialty card stock. The Taupe piece is 2 and 3/8″ x 4″, and the pattern paper is about 1 and 7/8″ x 4″ and they are both mounted to the Black card base with foam tape. I cut a simple trapezoid ‘tabletop’ from a scrap of white card stock and trimmed that with a piece of the thin white satin ribbon from the kit. I took the paper covered wire from the kit and braided it together to make this chunky trim that frames the edge of the table. I did use tiny bits of the Nuvo drops on the ends of the braid to cover the cut wire. Three of the textured copper brads and a strip of the Chocolate Mirror peel offs between the ‘table’ and the ‘wall’ finishes out this scene very nicely.
  I fussy cut the colored pancake stamp, added Glossy Accents to the syrup (yum!), and foam mounted that on the ‘table’. I added my own sentiment (a little more pancake oriented) using my favorite
 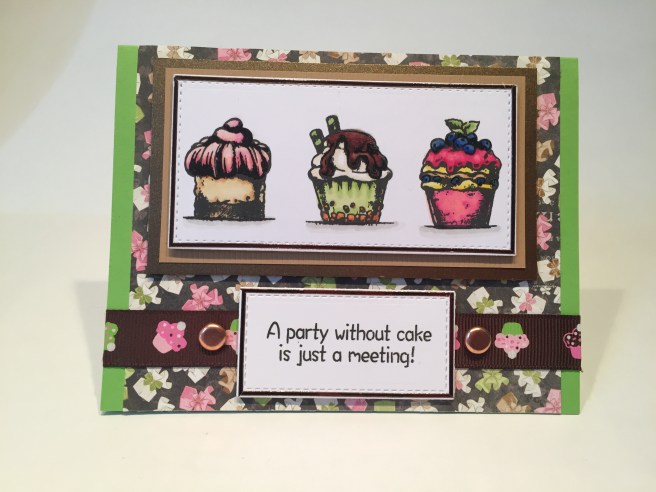 Those lovely cupcake stamps! I cut my colored cupcake stamps with a LF Stitched Rectangle die and outlined the edges with the Chocolate mirror peel offs and mounted that to a mat of the brown embossed specialty paper with foam tape. That assembly is glued directly to a mat of the Bronze Pearl specialty paper and that is foam taped to the background pattern paper (5′ x 4.25″) attached directly to the Apple Green card base. I glued a length of the brown cupcake grograin ribbon (with 2 smooth copper brads) across the bottom portion of the card and stamped the sentiment in SSS Intense Black Ink on more of the white card stock from the kit. I cut the sentiment out with another LF Stitched Rectangle die and outlined the edges of that piece with the Chocolate Mirror peel offs as well. The sentiment is attached with some foam tape for some added dimension, and, though you can’t really tell from the photo, I used my
 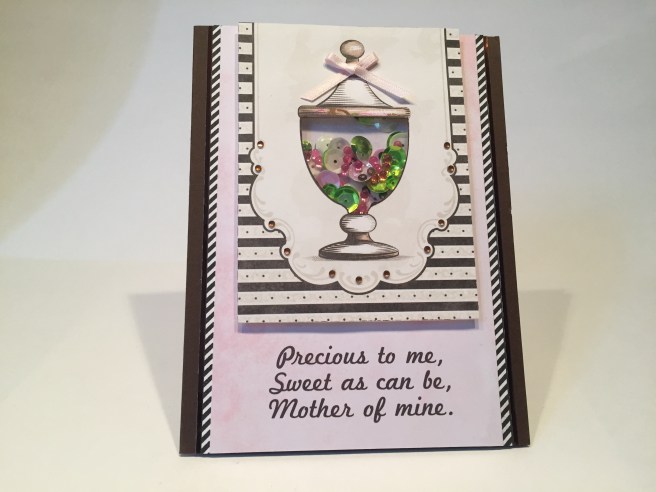 I haven’t done a shaker card in a while, and some of the candy jars on the cut-apart sheets were just begging to be shakers so I came up with this nice Mother’s Day card. On the Chocolate Brown card base, I mounted a 3.5″ x 5.5″ piece of the Pale Pink Marble specialty paper and added two 1/8″ strips of black and white diagonal stripes from my stash and more of the peel offs on the edges. The candy jar is from one of the cut-apart sheets – I simply cut out the inside of the jar to make a window for my shaker bits. I did pack the shaker window quite full with the sequin mix (I avoided the large brown sequins) and added in some
  The sentiment is mine, created on my Silhouette in
 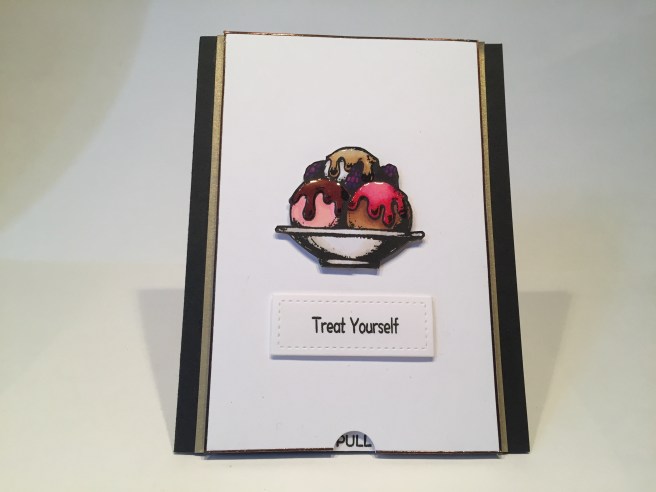 OKAY, SO SUE ME! I COULDN’T RESIST!! If three scoops of ice cream is a treat, then wouldn’t four scoops be an even better treat!? Just pull on the tab at the bottom…!
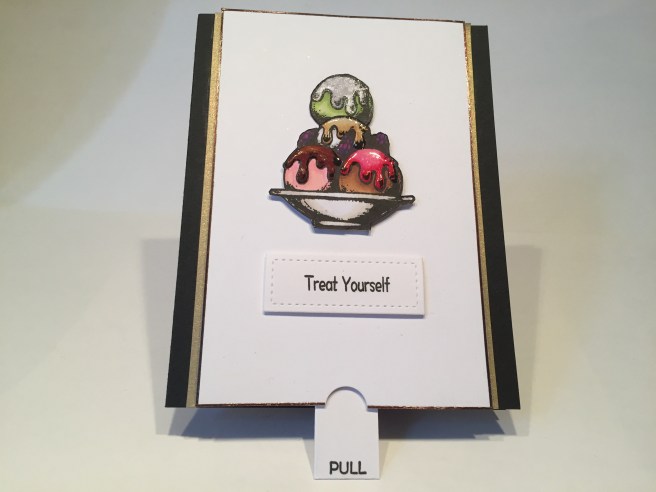 Yes… another double slider pull-tab card from me this month! My big accomplishment with this card was being able to hide the slider slit completely behind the sundae! This is a fairly simple card, as I wanted all the focus to be on the ice cream. I used the last of the smooth white card stock from the kit for my slider base, outlined that with the thin Chocolate Mirror peel offs, and added a couple of 1/8″ strips of the Antique Gold Pearl specialty paper to the edges. All is mounted to the last Black card base. I fussy cut the colored sundae stamp and used Glossy Accents on all the toppings (BIG YUM!) and then stamped the sundae again and just cut out the lower right scoop to be my added treat. I used some clear glitter on the topping of the added scoop for a little razzle-dazzle with the surprise, and stamped the sentiment with SSS Intense Black Ink and cut that out with a LF stitched Rectangle die before mounting it to the card base with foam tape. I recently posted a
 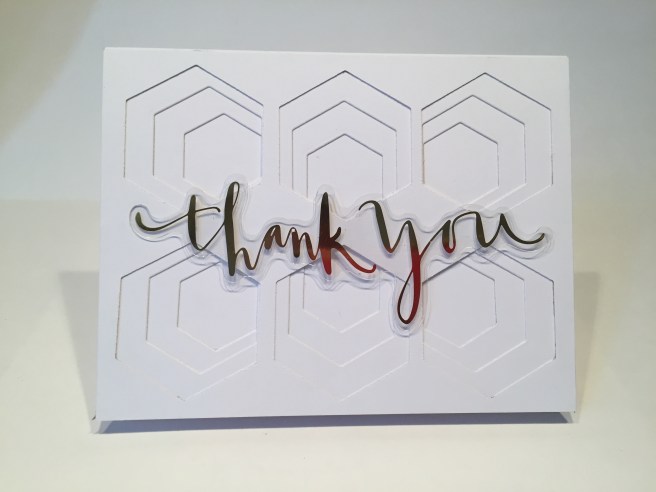 This is what’s up! Now this is much easier that it may seem, and the hexagonal dies included in this kit work perfectly on an A2 card! It will take a little time as you have to run this through your die cutter 18 times, but I simply cut three pieces of 120# white card stock (from my stash) to 4.25″ x 5.5″ and a white card base as well. The large hexagonal die spaces out perfectly – just bisect your card front down the middle in both directions – the center line is where your center hexagons line up. Add a line 1″ away from both short ends of the card. This is the center line for your other hexagons.
 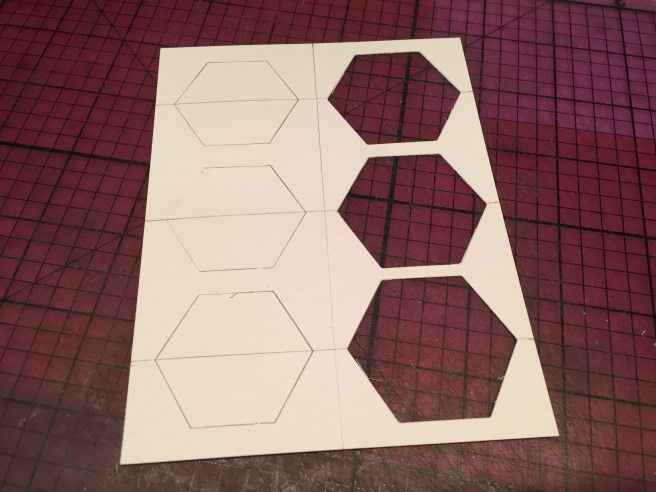 After cutting all six hexagons, use that top piece as a pattern for the placement of the next smaller hexagon on the next layer of card stock.
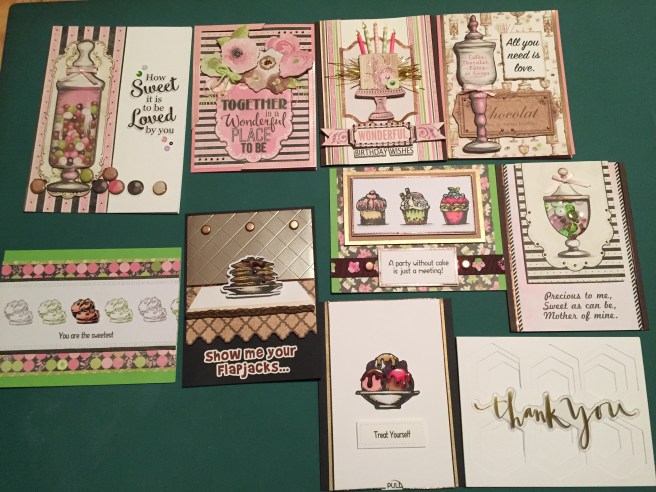 There we go! 10 cards from the Love From Lizi March 2018 card kit – a nice variety of cards and not too much pink! I managed to use all the image stamps from the stamp set, some of the ‘add-on’ chipboard stickers, but I didn’t get to the “Fueled by Cake, Coffee and Crafting” sentiment as it seems that I don’t have a single coffee themed stamp set. Not even tea! As usual, I have tons of extras from the kit – I used a little bit of everything, but I didn’t use any of the alphabet stickers, the craft labels or the buttons – and I only added a couple sheets of white card stock from my stash. I really like the stamp set in this kit – it will probably come available next month at
  This kit is full of sweet treats, a terrific stamp set created by Laura at Crafty Not Shifty, and as usual, a huge assortment of interesting card stocks, papers and embellishments!
 We get five sheets of 8.5″ x 11″ card stock in Pink, Black, Apple Green, Chocolate Brown and a smooth White alcohol-marker-friendly card stock.
 Twelve sheets of 6″ x 6″ pattern papers comes next – some floral patterns, some sweet treats, stripes, polka-dots, and a few lovely monochromatic papers are included.
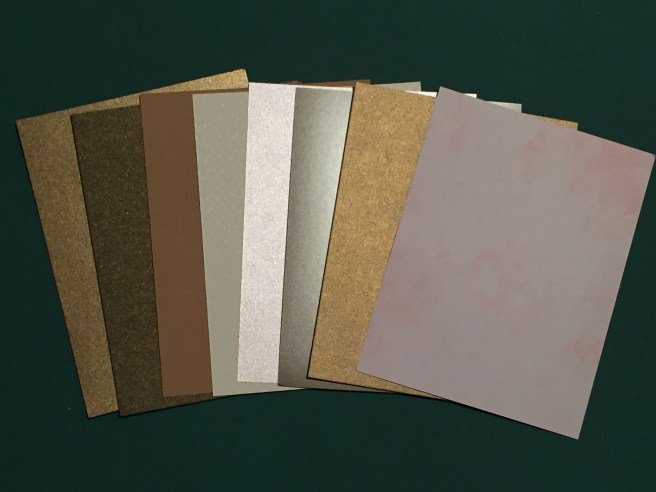 Our Specialty Card Stock for this month is eight sheets of 4.25″ x 5.5″ card stocks in Pearlized Bronze, Dark Green/Gold Pearlized, Embossed pin-stripe Brown, Off-White embossed, Soft Pink Pearl, Taupe Gloss, Antique Gold Pearl and Pale Pink Marble.
 Chocolate Mirror peel Off stickers for this month are complimented with a large sticker alphabet done in a copper foil and featuring hexagonal shapes – numbers too! I love Lizi’s Peel Offs and truly adore the ‘mirror’ type especially when it comes in a color!
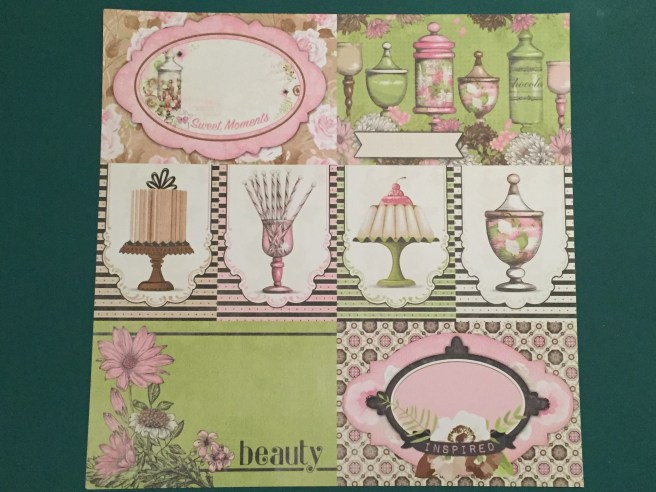
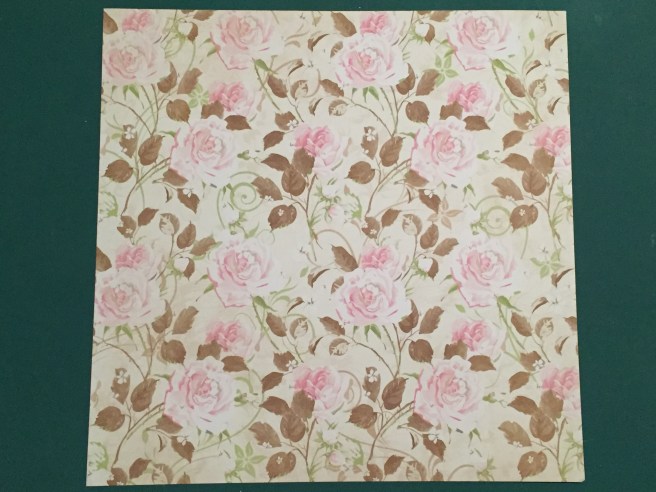 The back of the first sheet features the same tea roses as the pattern papers only larger.
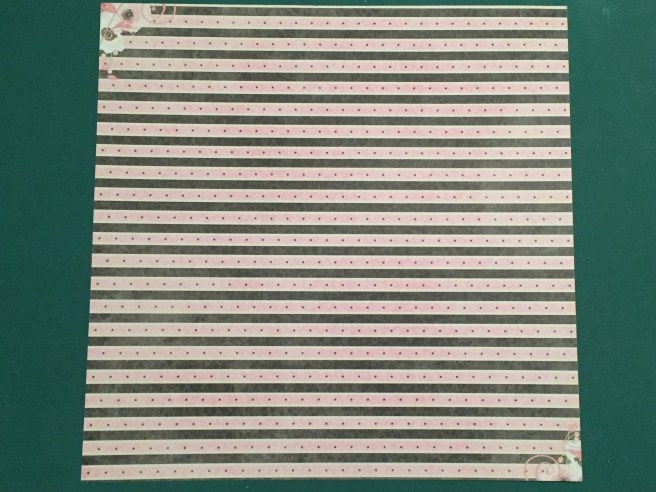 The second sheet has some terrific sentiments and is backed by this terrific stripe.
 The last sheet has these gorgeous ‘sweet shoppe labels’ backed with a nice tonal floral.
 We are also treated to another 12″ x 12″ sheet of vellum pieces foiled with copper – I love the vellum sheets Lizi includes with her kits – and these should spark some fun designs!
 An ice cream sundae, a stack of pancakes, three cupcakes, little sandwich cookies and some fun sentiments – my favorite is “A party without cake is just a meeting!” Love it!!!
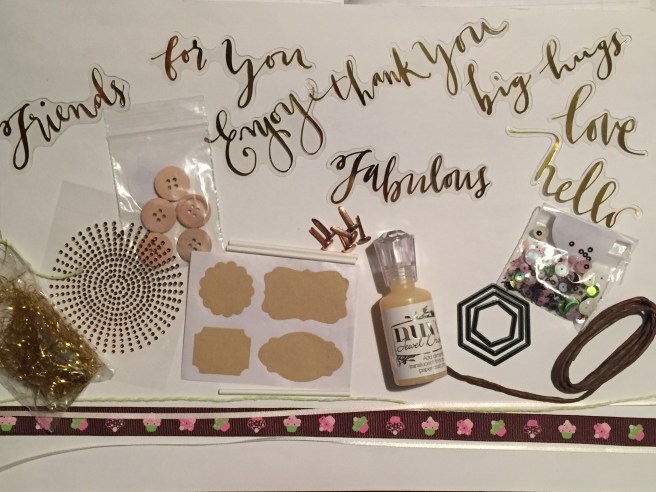 Starting from the bottom, we get a meter each of four trims – thin Ivory Satin ribbon, thin Pale Pink Satin ribbon, a 5/8″ wide Brown Grosgrain ribbon with cupcakes on it, and a piece of Green and White bakers twine. Above the ribbons, from the left, we get a bag of gold tinsel (not sure what to do with that yet), a sunburst of mini Copper Gems (tons of gems here), five wooden buttons, four kraft sticker labels, three lollipop sticks, six copper brads (fairly large), our monthly Nuvo Drops bottle – Limoncello Jewel Drops this month, three nesting hexagonal dies, a sample bag of Lizi’s Sweet Treats sequin mix, and a meter of brown paper wrapped wire – nice thick wire..! The really interesting item in the embellishments bag this month were these copper foiled sentiments printed on thick acetate – eight different sentiments to wrap our crafty minds around..!
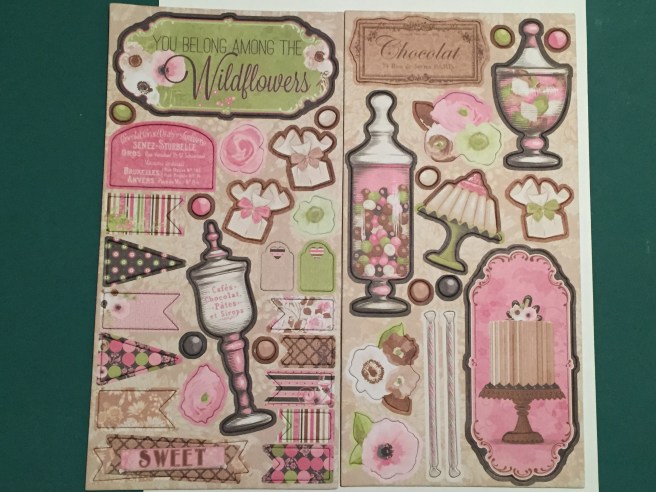 Some of these are very large, so I will have to brainstorm a bit on how to use them! I also
 went for the layered chip board stickers this month as well – these are REALLY pretty – some of them have at least three layers and they are all well sized for use on A2 cards. That’s everything in the Love From Lizi March 2018 Card Kit (with a couple of extras!) and I can’t wait to dig in and start coloring those stamps and figuring out how to use this plethora of goodies. If you want to join me for the fun, this kit is still available for purchase – please use my link to shop at
  The Balloon Card, The Moon Card and the Dream Card – Yes, those of you paying close attention, I added the blue and purple balloons after I had posted my video – those extra balloons fill up this card front nicely.
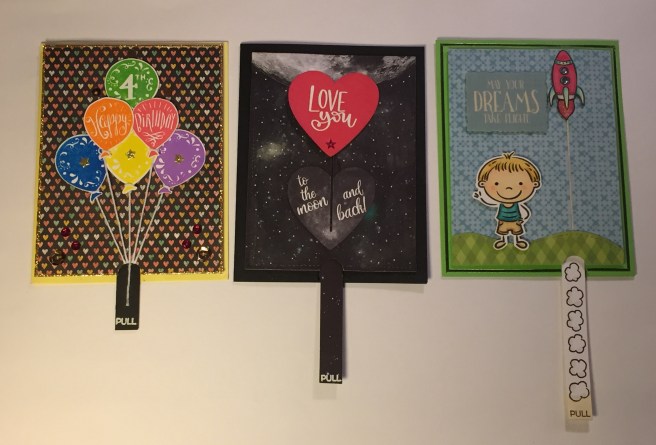 These are all based on the “double slider card” that has been around for a while – you can find bunches of instructional videos on YouTube for a variety of these –

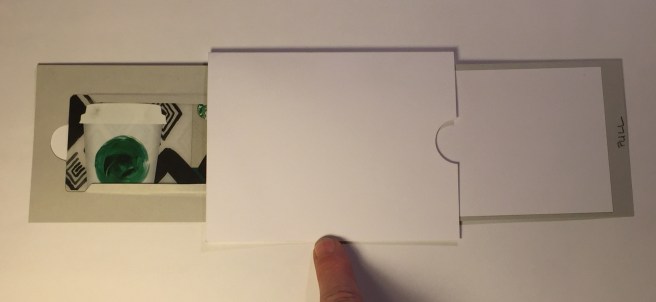 – it’s basically just a track with a plastic conveyor belt in the middle (plastic shopping bag) with the moving pieces attached to both the front and the back.
 This is a little too big for these cards, so I just needed to shrink the mechanism down a little bit – this is all there really is to the action – a track piece with a plastic conveyor belt that has the pull-tab attached on one side and the moving piece on the other.
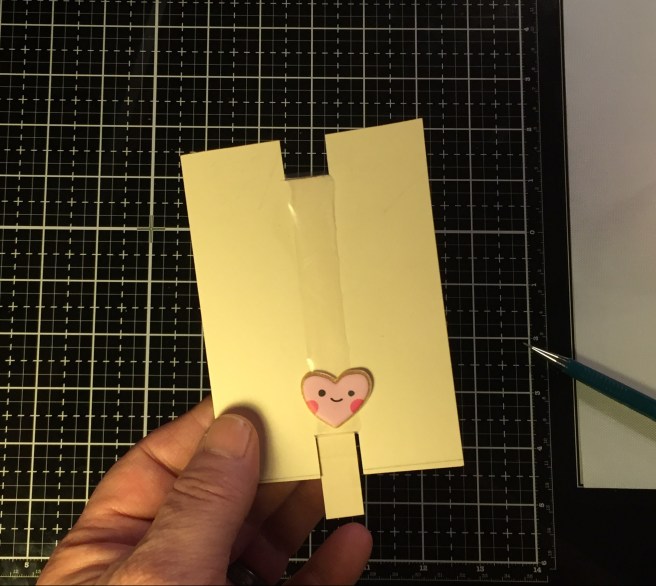

 Let’s make a mock-up first. We have a card base (4.25”x 5.5”), the card front (4”x 5.25”), the track piece (with a partner)(just under 4”x 5.25”) the pull tab (1”x 5.5”) the moving
 piece, the plastic conveyor, and we’ll need to make the paper hinge that attaches the moving piece to the belt.
  So let’s cut an inch off of the pull tab to use for our hinge – we’ll get back to that later.
 I have stepped up from shopping bags to zip lock bags but any reliably strong plastic sheeting could be used for the conveyor belt.


 – be careful not to pull your conveyor too tight – it needs to be able to slide easily.
 I’ll take the partner piece and trim it down to fit on the front of the track piece on either side of the belt just to give the belt a little room to slide easily.


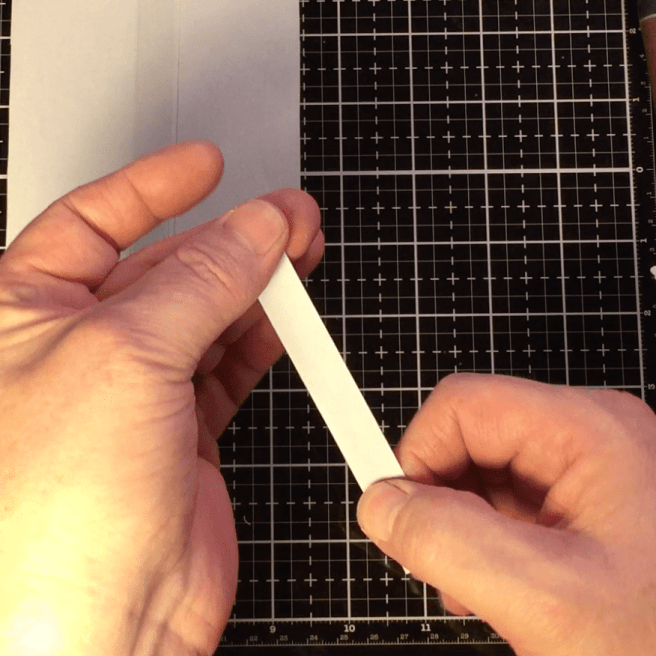 I arrange the seam of the plastic towards the top of the track piece (on the back side) and attach the pull-tab right on to the seam. Again, using a couple pieces of
 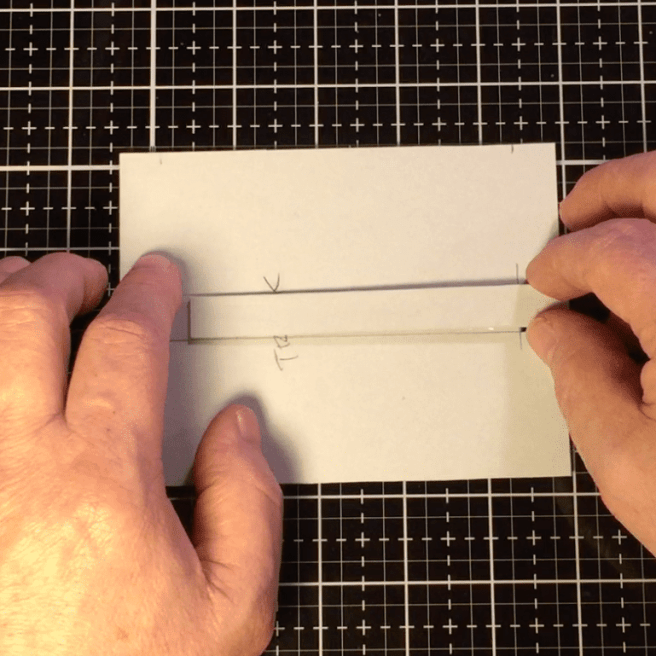 Remember, this is the back of the track piece, so make sure your pull-tab faces forward.


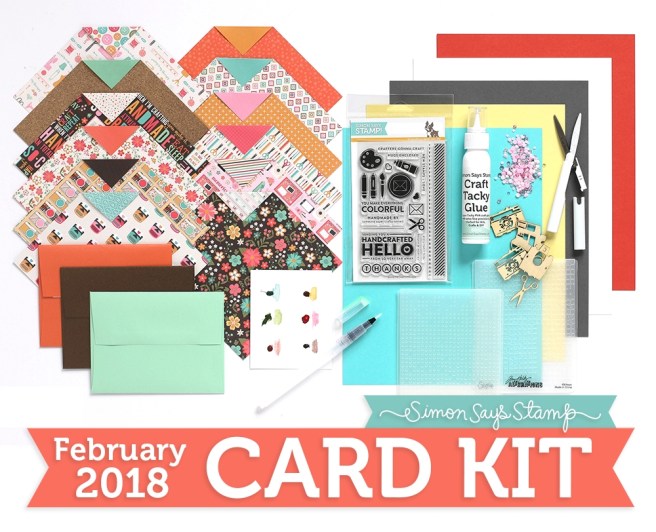
 where I started. I cut a ‘corner’ of cameras from the pattern paper and matched that up with the reverse side which was the dark wood-grain pattern. I actually tried adding Glossy Accents to all of the camera lenses, but there were so many that it started pulling focus from my veneer pieces, so instead, I fussy cut another batch of cameras and foam taped them directly over the the de-glossied cameras – that’s much nicer – nice dimension without pulling too much focus! (I did add some glitter from my
 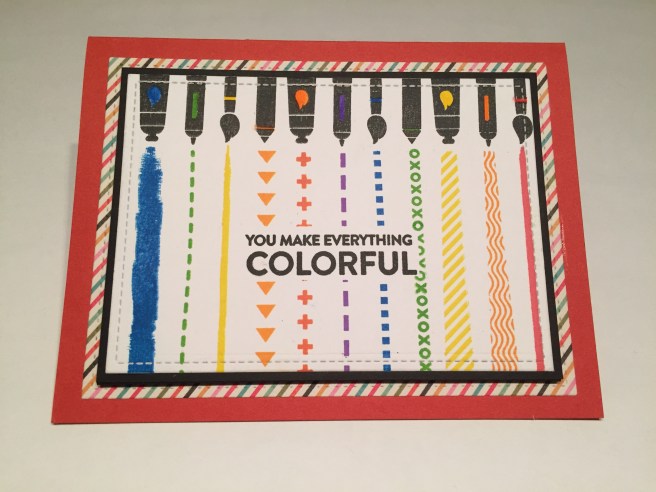 the stamp set. I stamped the brush, pencil, marker and paint tube across the top of a plain piece of white card stock with
 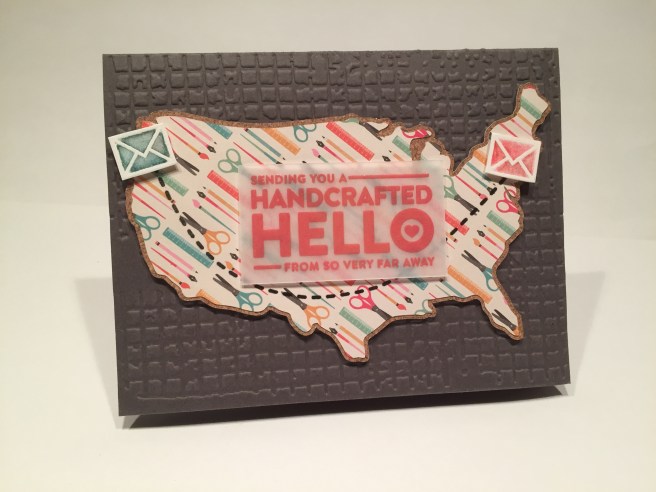 I stamped this sentiment on some vellum with the
 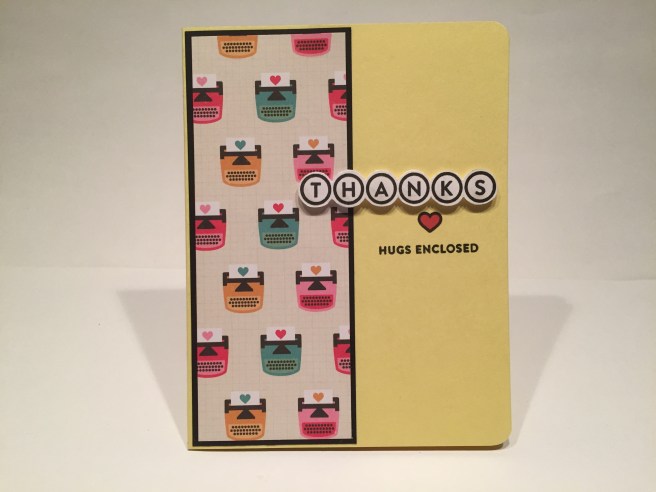 Very straightforward, simple Thank You card! I cut the typewriter pattern paper to 2″ x 5.1/4″ and matted that on black card stock (from my stash) cut at 2.1/8″ x 5.3/8″ and glued that all down to the left side of the Banana card base. I stamped the THANKS sentiment in SSS Intense Black Ink, fussy cut that out and mounted that with
  Here we have a fun Valentine card in the same typewriter vein. I cut a 2.5″ strip of the pattern paper for the center panel, cut the reverse down to two strips of 3/8″ and glued them down to the Slate card base that I had embossed with the Matrix embossing folder. I sized the ‘Circle Distressed Alphabet’ letters down to 3/8″, printed and cut them on my Silhouette, and used my
  Those are mounted to the card front with foam squares. I cut two thin strips of matte black card stock to cover the seams between the pattern papers, and added an old heart brad beneath the sentiment. I did continue the sentiment on the inside of the card, with ‘Happy Valentine’s Day’ in
  I stamped all the art implements with
 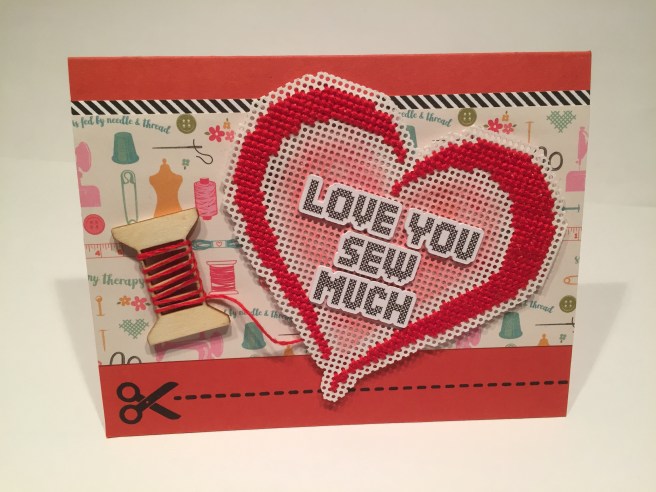 I happened to have some
  This pattern sized down well for a standard card! I cut the sewing pattern paper to a 2.75″ strip, stamped the diagonal stripe border stamp with SSS Intense Black ink on some scrap white card stock, trimmed that down and glued it to the back of the pattern paper leaving a touch more than 1/8″ exposed on the top. I stamped the scissor and the the dashed line border along the bottom of the Burnt Orange card base (still using Intense Black ink), and glued the pattern papers directly to the card front. Naturally, I went to dafont.com to look for a cross-stitch font and found the
  There’s some SNAIL MAIL for ya! LOL!! I think this little guy is so cute! (Of course the googly eyes help a lot!) I am just really taken with the kind of stark nature of this card and how it really pulls your eye to our little snail friend! Here we’re on the Audrey Blue card base sponged with a little
  Of course, I rarely (if never) do a card without a sentiment on the front, so is there something inside? Of course there is! We all of us miss someone’s Birthday every now and then, so what better to blame a belated birthday greeting on than SNAIL MAIL! I created this sentiment with my Silhouette software using the Brady Bunch Remastered font and printed that up on some scrap white card stock and cut it out with a stitched rectangle die before gluing it down to the inside of the Audrey Blue card base I think ‘Sluggo’ is worthy of continued use!!
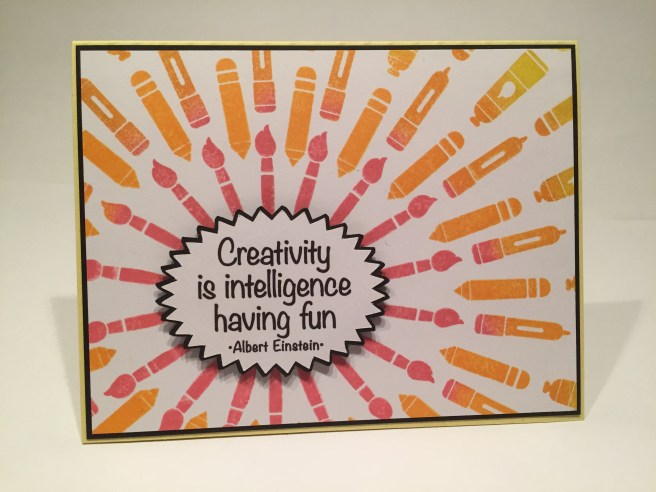 I pulled out my
 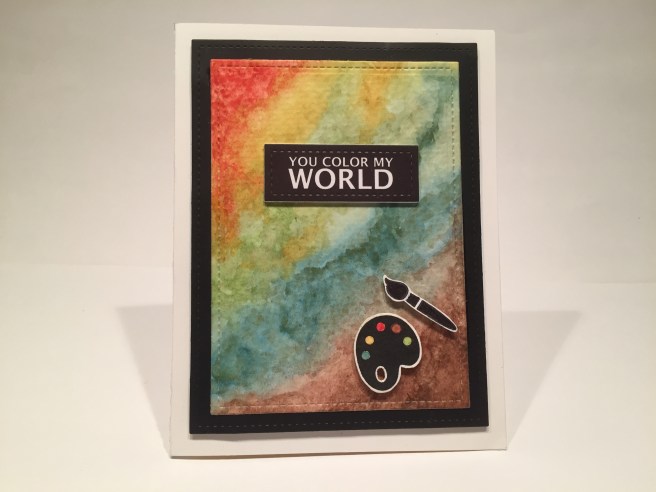 I LOVE IT! There are many layers of watercolor here – I completely used up the Pipestone and Serpentine paints from the palette, as well as most of the Gold and Green, but I was thrilled and very proud of the background I created here. Sometimes the secret is in knowing when to stop fussing with it! I cut the watercolor background and black mat with my Stitched Rectangle dies, glued them together and foam taped them to the last white card base. I stamped the artist palette and the brush in SSS Intense Black ink, colored the spots on the pallet with the DSmith watercolors, and fussy cut them both out. I tried to imitate the sentiments from the stamp set for the ‘You Color My World’ sentiment using the Lucida Grande font and I sized it to fit within my smallest Stitched Rectangle die. I did cut four of them (three from plain white) and glued them all together – I am becoming more enamored of this technique – it gives you great dimension without having to fuss with foam tape! And this may be the first sentiment I’ve created that imitates the ‘white embossing on black card stock’ look. I Like It! Needless to say, I love this card a lot and I feel like this sentiment is very useful. These DSmith watercolors are some of the best on the market and his dot palettes are a great way to experiment with his colors without breaking the bank!
 That concludes my 10 Cards 1 Kit post for the Simon Says Stamp February 2018 ‘A Colorful Crafty Life’ card kit. A lovely batch of cards that are usable for many occasions.
 Here’s a summary of my thoughts (if I may!) on the Simon Says Stamp Card Kits. PROS: 1. First off, the quality of the products included in ALL of their kits is superlative – the SSS card stock is very high quality and their stamps sets are unimpeachable. Of course I didn’t LOVE every kit that came out this past year, but I was determined to take the good with the bad and see what I could create. As a subscriber, you can skip a month if you don’t care for the offerings, but that wasn’t an option for me in my exploration of available card kits out on the market. CONS: 1. I felt like the quantity of products included with the kits varied wildly month to month – the number of card stock papers fluctuated from 3 to 6, and some kits were overstuffed with product while others seemed rather light. 2. They appear to really like PINK over at Simon Says Stamp – if your kit doesn’t have any pink card stock, you can trust that there will be plenty of pink in the pattern papers and/or accessories. 3. Shipping is $6.99 per kit in America and you do not have the option of adding product from their store to be included with your monthly kit – thus avoiding additional shipping charges. 4. The monthly cost of the subscription kits went up this month by $5.00 with NO NOTICE given to their subscribers. After 11 months of being charged $31.94, I was surprised to find my charge for the February kit was $36.98. I sent a note to service@simonsaysstamp.com asking if the increase was only for this month (extra supplies) or was a permanent increase – I NEVER received a reply, and only after looking at the subscription prices on the website did I discover that it was indeed a price increase. This really irritated me and kind of soured my (otherwise fun) year with SSS. If I have given permission to charge my account a certain amount every month, I feel like it is only GOOD BUSINESS to alert me when that price goes up. I’m sure there is some fine print in their contract somewhere that says they are allowed to change their prices without notice, but that lack of notification felt a little underhanded to me. It’s not like they don’t have my email address! I’m sorry to end this post on a bit of a downer, but this really irked me. Thank you so much for sharing your time with me here – I hope I was able to provide you with a little inspiration and a couple of laughs! Stay tuned for the announcement of my next Card Kit subscription – I might take the month of March off, but will be continuing as part of the design team at Love From Lizi. Thank you so much for your encouragement and support and, Happy Crafting!!!