Hello Folks! Happy Valentine’s Day! Scott here with a quick process video to announce a big GIVEAWAY celebrating 5000 subscribers at CardCutups on YouTube.
A BIG THANK YOU to Love From Lizi and Hero Arts for their generous support. We have five terrific prizes to be won with this giveaway!
4. & 5. A collection of 5 original cards from CardCutups
You will need to watch the video for instructions on how to enter!
And a GREAT BIG HUGE Thank You goes out to all of my subscribers! You are my inspiration! Without you, we wouldn’t be doing this giveaway!
Please share post with all your interested fellow craft addicts, and giveaway junkies, and, as always, Happy Crafting!!
DISCLOSURE: This site contains some affiliate links to products. I may receive a commission for purchases made through these links (at no cost to you). Thank you!
DISCLOSURE: This site contains some affiliate links to products. I may receive a commission for purchases made through these links (at no cost to you). As an Amazon Associate I earn from qualifying purchases. Thank you!
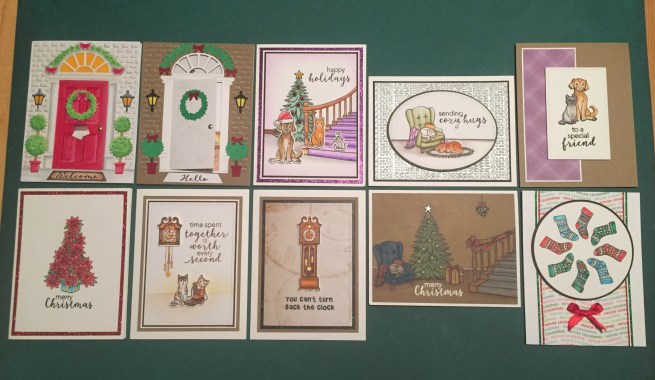
Hello Folks! Scott here with my 10 Cards 1 Kit post with the Love From Lizi February 2020 Card Kit! This kit features a GIGANTIC 8.5″ x 11″ stamp set and lots of pink goodies!
As usual, I do take the the 5 sheets of card stock in the kit and make A2 (4.25″ x 5.5″) card bases with them. That gives me 2 red, 2 pink, 2 blue, 2 green, and 2 white card bases.
When I posted the unboxing video for this kit on YouTube, Judy Brown commented, “Scott! Your challenge? Make a completely pink card for me. 🌈🌈😍😆😆😆”. Shouldn’t be too hard with these supplies!! And Lizi’s decoupage sheets are always a fun way to get started on a new kit!
Judy, I don’t think you can get much more pink than this!! I took a 4″ x 5.5″ piece of the pink pattern paper and punched a heart scallop border on the long sides with my American Crafts Knock Out paper punch, and glued that down to one of the pink card bases. I assembled the “Just for you” heart using all five layers of the decoupage sheet, and the included foam squares. I stamped the valentine sentiment with VersaMark ink using a stamp from the MMH Jan.’19 kit, and embossed that with the LFL Copper Glitz embossing powder. I thought that had a good sense of ‘pink’ while still being dark enough to read… and the ‘glitz’ matches all the glitter on the heart.
I guess I wasn’t satisfied with five layers on the heart itself, so I mounted the whole decoupage assembly to the card front with more foam squares! This card is probably too thick to send in a standard envelope, but I love the 3-dimensional aspect of the decoupage heart. I did think one of the sentiments from our stamp set would compliment this card nicely, so I stamped “you are so loved” on the inside of the card using Worn Lipstick Distress Oxide ink – gotta keep everything pink! As a sweet valentine card, I actually like this quite a bit! This one’s for YOU, Judy!
I was dying to play with the large 6″ x 6″ background stamp that was part of our stamp set. I stamped it on some Bristol Smooth card stock using VersaFine Onyx Black ink, and embossed it with clear embossing powder. I colored the whole sh-bang using my KingArt Dual Tip Brush Pens. These are nice inexpensive watercolor pens that I got for Christmas ’18 from my sister-in-law. Thank you, Alice! Very much like Tombow markers but much less expensive. Now, I know some folks look at a stamp like this and feel a little overwhelmed at the prospect of coloring something this large and detailed. But if you take it step by step, It’s really not an insurmountable challenge! I started by coloring all the greenery – everywhere I saw a “leaf” I colored it green. One of the great things about a stamp like this is you can color something “wrong” and no one will ever notice! Once the foliage was colored, it was easy to see the flowers as individual entities… I just colored each style of flower exactly the same, however often it was repeated in this pattern. Granted, this did take a couple hours to color, but I find it very therapeutic to put on some music and zen out with my colors! And look at the lovely results! I definitely think it was worth the time… Now let’s make a card with this!
I die-cut my preferred section with a Lawn Fawn Stitched Rectangle die, and glued that on a thin white mat before attaching both to the front of the green card base. I love the shine that the embossing powder gives this panel… almost makes the whole thing look shiny! I turned to my Silhouette software and printed “if friends were flowers, I’d pick you” on scrap of white card stock using the Lucida Grande font. I did try printing one with white letters on a black background, but I thought the black on white looked better. I die-cut that with the smallest Lawn Fawn Everyday Sentiment Banners die, and mounted it to the card front with foam tape. LOVE IT! Certainly not what you were thinking would come out of this card kit…! But, I love all the bright colors, the shine, and the friendly sentiment. I can’t wait to send this card to someone special!
Okay… My coloring mojo is still in gear… lets try coloring another one of the stamps!
I stamped and embossed this stamp exactly the same as the background stamp, but I colored this one using my Zig Clean Color Real Brush Markers. I did take the time to fussy-cut this out using my craft knife. I know, I know, incredibly fussy… but I think it’s worth the effort! I die cut a piece of the blue gingham pattern paper with a LFSRD, glued that to a thin Black Tie glitter card stock mat and added a frame on the edge of the gingham using the Sky Blue peel offs from the kit. Finally, I glued the whole background assembly to one of the blue card bases.
I cut a 3/4″ x 3.3/4″ strip of my Black Tie glitter paper (I love the multicolored glitter on this card stock), and wrapped a piece of the blue flower ribbon from our kit across the center. I glued that down to the card front and ran more peel offs across the top and bottom edges. I attached the flower arrangement to the card front with my standard foam tape, and added one of the foiled sentiment stickers from the kit to the center. A generous sprinkling of our Blue Babe Nuvo Crystal drops adds the final touch to this blue themed card. That soft blue gingham is probably my favorite pattern paper in this kit!
I’m on a roll coloring these stamps, and there is another smaller arrangement in our set.
I stamped, embossed and colored this stamp the same as the blue flower arrangement and went ahead and fussy cut it out. I die-cut a piece of plain black card stock from my stash with a Lawn Fawn Stitched Rectangle Die, and matted that to some red glitter card stock, and glued it to one of the red card bases.
I took one of the wood-veneer tags from our kit and, on the back, gave the bare wood a coat of Multi Medium Matte glue to seal the wood so ink wouldn’t bleed. Once dried, I colored the tag with Vermillion Archival ink (permanant) and then (once dry) stamped the “miracle” sentiment on the tag using VersaFine Onyx Black ink and I clear embossed that to assure it was permanent.
I attached the tag and flower to the card front using foam tape, and finished this up with a double red satin bow on top of the tag, and a few red pearls from my stash. Quite red here, but I think it’s actually very eye-catching, and I love the fact that there are a few sentiment stamps in our stamp set that will fit on these small wooden tags!
I think those three cards finally satisfied my need to color… let’s do another decoupage!
I cut a strip of the blue stripe pattern paper to 2″ x 5.5″ and glued that to the center of a white card base. I outlined the edges of that with the medium width peel offs and then added the wide and narrow peel offs to the top and bottom spaces of this card front.
I assembled this decoupage piece using the extra sentiment piece and layers 2 and 4 from the decoupage sheet. I did use some of my thin foam tape to try and keep the dimension under control. I trimmed away the partial leaves on the flower die cuts so you could see the whole leaf on the layer below. I think these decoupage sheets work best when the die-cutting doesn’t leave a white border. I liked seeing the stripe background in the center of the oval instead of the plain grid behind the sentiment. A few Blue Babe Nuvo drops on the front adds another touch of blue and a little more shine. I thought this decoupage card was perfect for using another stamped sentiment on the inside, so I stamped “you are so sweet” on the inside of the card using Hickory Smoke Distress Oxide ink. I think the blue and white on this card kind of minimizes the pink (as if!), and here we have a lovely, 3-dimensional friendship card! For a SPECIAL friend!
Back to our second pink card base… It’s hard to ignore the pink when it’s your card base!
This kind of feels like a card you’d give to your grandmother… or at least to someone who is into roses! I die cut the rose pattern paper and the red mat with my Hero Arts Nesting Oval dies. I do find it easier to use two dies to cut a “frame” for the mat instead of just using one die for each layer and having to center one oval on top of the other. I glued those flat to the card base and stamped the sentiment using Onyx Black ink and clear embossing powder. I added the two wood-veneer rose die cuts with some foam tape and went to town with our sequin mix! I did try different quantities and arrangements of the sequins, but I decided this old-fashioned card could support a lot of sequins. Again, this sentiment paired up with the “wish you were here” sentiment, so I stamped that on the inside with Onyx black ink. For a final touch, I rounded all four corners of this card with my We R Memory Keepers 1/4″ & 1/2″ Crop-A-Dile Corner Chomper. I thought rounding the corners felt more “retro” and finished off this (another very pink!) card quite well!
I do challenge myself to use all the stamps in a kit on my 10 cards, and there were LOTS of stamps in this over-sized stamp set… including 14 individual flower and leaf stamps.
This “one layer wonder” card uses all fourteen of those single image stamps. After a little practice stamping on some scrap paper, I stamped this arrangement on the left side of the green card base using Archival Emerald ink. I wasn’t quite sure what I was going to do with this arrangement, so I erred on the side of caution and used a permanent ink. I took some light grey Spectrum Noir alcohol markers (BGR2 and BGR1) and colored the background shadow around the flowers. That didn’t quite give me the contrast I was hoping for, so I grabbed a white colored pencil, and softly colored all the images – being careful to avoid the stamped lines and leaving some of the regular green card stock showing through. That’s just what was I was looking for!
I stamped the sentiment using Hero Arts Unicorn pigment ink (no embossing powder) being careful not to over-ink the stamp. I did stamp that sentiment a few times using my mini-MISTI stamp platform and am kind of thrilled at being able to achieve a nice white sentiment without embossing powder! This is a pigment ink so you do have to make sure it dries completely! For a final touch, I added some Love From Lizi Mint Glitter peel offs to create a bounding edge on the top, bottom and right sides of this card. Very tranquil… very peaceful… very green! One Layer Wonder!
We also have that “storms never last forever” stamp that gave me a little pause… we don’t have any particular “storm” stamps – so how can I possibly convey this sentiment?
With Sunbeams! I masked off 1/2″ all the way around the edges of this card base, and masked off these two ‘beams’ and, using a Tim Holtz Distress Blending Brush and my HA Unicorn ink, added the two sunbeams to the card front. Before removing the 1/2″ masking from around the edges, I used the LFL Silver peel off stickers to create my ‘partial frame’ on the top right and bottom left, using the masking to line everything up.
I realize lots of folks are going to use these flower stamps to simply emboss on card stock instead of trying to color them, so I wanted to try embossing the smallest flower arrangement stamp – I figured if embossing powder would preserve the detail on this small stamp, then it would work great on the bigger stamps too. Using VersaMark ink and LFL Silver Dollar embossing powder, I embossed this stamp on a scrap of white card stock. And, yes… I did fussy-cut this out! That stamp embossed beautifully!
I stamped the sentiment using Faded Jeans Distress Oxide ink (no embossing!) and attached the flowers with some foam tape. More Blue Babe Nuvo drops for some soft shine and a little more dimension finishes this card. I think this does a decent job of conveying the end of a storm… it almost feels kind of religious… must be the sunbeams!
Wow! I have actually used every stamp in this stamp set on these first 8 cards! Of course, I did some doubling up with sentiments, but nothing untoward! I was really looking forward to seeing what I could do with the watering can die…
It is very rare for me to make a card without a sentiment on the front, but I fell in love with this little vignette and couldn’t bear to add anything else..! I die cut the watering can two times from some medium grey card stock in my stash. I trimmed the flowers off of one and glued that on top of the other, and added some shadows with a grey alcohol marker. I die-cut the flowers from some alcohol friendly card stock and colored them with my Spectrum Noir markers before paper piecing them on the can. I used an extra-fine point silver Sharpie to add some silver highlights to the can, folded the spout and handle forward on the sides and used my bone folder to give the can a little curve.
I fussy cut a diamond from the blue rose tile pattern paper and mounted that to a thin grey mat that matched the can. I die cut the blue stripe pattern paper with a 3.5″ x 2.25″ LFSRD snd matted that to a darker grey mat and then to a wider mat of the red-ish rain drop pattern paper. Those are glued directly to the card front, the diamond is mounted with foam tape and the watering can is attached with a strip of foam tape down the center, liquid glue on the edges, and the handle, spout, and center flower are raised up with tiny spots of foam tape. I used my Silhouette software and printed “you help me grow” on the inside of this card using Arial and Mona Lisa Solid fonts. A lovely little sentiment for a watering can that can be used for many different occasions. I don’t know what it is about this card, but I’m really attached to it!! It feels homey and a little old-fashioned and showcases this watering can die perfectly!
I still have a decent sized piece of that background stamp I colored at the start of this kit, and I was certainly not going to let that piece go to waste!
This is a 2″ x 5.5″ piece of my original colored background, matted with more of the Black Tie glitter card stock and glued down to our last red card base. I cut a 1/4″ strip of purple card stock from my stash to glue behind the sentiment, and two very thin strips to go above and below the stamped panel. I die-cut the Lawn Fawn Scripty Congrats die from the same purple card stock five times, glued them all together, and topped them with one last die-cut “congrats” using the Black Tie glitter card stock, and then glued that whole chinky sentiment down to the card front. It wasn’t easy coming up with any puns for this kit, but I did manage a nice one with this card. I printed “you bloom me away” on the inside writing surface using my Silhouette software and the Freehand 521 BT font. I die-cut the writing surface with a LFSRD and mounted that to the inside of this card. Love the play of red and purple on this card! Very colorful!
That’s my 10 Cards using the Love From Lizi February 2020 Card Kit. That giant stamp set is nothing short of amazing, and I think this is a very interesting assortment of cards.
I did use every stamp in our stamp set, I used 6 of the 12 pattern papers, and two of the eight decoupage sheets. I used a little bit of everything in our embellishment bag (only one of the ribbons), plenty of our peel offs, and I do have 2 sheet of super smooth alcohol marker-friendly White card stock that will go into my stash along with all the other leftovers from this eclectic kit. I did have a great time creating these cards, and I actually quite enjoyed coloring these fun flower stamps. That stamp set is certainly a keeper!
Unfortunately, this kit has already sold out – as most of Lizi’s kits are prone to do! If you don’t want to miss out on any of this crafty fun, I would suggest subscribing at lovefromlizi.com. Lizi’s kits are very unique and usually over-loaded with all kinds of crafty goodness. If you do go shopping with Lizi, please use my links whenever you can! It is always supremely appreciated!
Thank you so very much for sharing your time with me here – YOU are the ones who truly keep me inspired! My CardCutups channel on YouTube is rapidly approaching 5000 subscribers, so stay tuned for a little bit of a celebration when that milestone is reached, and I believe we’ll have some nice giveaways to impart a big Thank You for your continued support. Remember to Like me, List me, Pin me, Post me, Share me with all your friends… Don’t run with scissors, and Happy Crafting!
DISCLOSURE: This site contains some affiliate links to products. I may receive a commission for purchases made through these links (at no cost to you). As an Amazon Associate I earn from qualifying purchases. Thank you!
Hello folks! Scott here with my 10 Cards 1 Kit posting featuring the My Monthly Hero January 2020 Kit. This is a very unique kit from Hero Arts this month! And now for something completely different…! It seems that our “Fancy Dies” are taking the lead this month. Instead of our usual 6″ x 8″ stamp set, we get a 4″ x 6″ clear stamp set with a large assortment of useful sentiments, a small “newsprint” stamp and assorted postage icons. And ALL of our dies are Fancy this month! Nine flower and leaf dies, two butterflies, a small envelope die, a bouquet wrap die and a sentiment banner die. I have always enjoyed Hero Arts’ Fancy dies but this is the first kit I’ve received where the dies are the main event! I guess we’re going to be doing some flower arranging this month! We do get some terrific extras as well this month; eight 5.5″ x 8.5″ sheets of Card stock (Rose, Fireweed, Gold Breeze, Kraft), a half ounce pot of Pink Sparkle Embossing Powder, a vial of Aqua Glimmer Metallic Ink, and 2 yards of Pink Satin Ribbon. Lots of pink this month, but Valentine’s Day is right around the corner, so pink is certainly appropriate! This kit must have struck a chord with folks this month as it sold out almost instantaneously! Glad I’m a subscriber!
I do always challenge myself to use everything in a kit in the course of my ten cards… this stamp set has 13 sentiment stamps (not counting the “to:” and “from:”) so I figured I might have to double up some sentiments in an effort to use them all!
I decided a bouquet of roses seemed like the perfect way to kick off this new kit.
Here we have a dozen roses wrapped up in ‘newsprint’ and ready to give to your favorite valentine! I was a little intimidated by the thought of having to color 12 roses (and assorted greenery) so I dug out some “watercolor” pattern papers I had in my stash – the papers are from a huge Altenew freebie pack (Reflection Collection Paper and Sticker Sheet Bundle) I received in October of 2018 (and have never used!). I thought the watercolor nature of these pattern papers would make for some simple paper piecing – roses in the pinks and reds… stems and leaves from the green. That worked very well! I love the variety and shading the pattern paper gave to these roses… and I didn’t have to color a thing!
I die-cut a piece of the Rose card stock with a Lawn Fawn Stitched Rectangle die and embossed that with a Darice Dot Background embossing folder, matted that on a piece of the Fireweed card stock and glued those to a Neenah Solar White 110# card base. I thought I might have some newsprint paper in my stash but I couldn’t find any… but I DID find a decades old Mead Academie Sketch Pad that was showing its age quite nicely, so I decided to use that for my “newsprint” bouquet wrap. I die-cut the wrap and stamped the small text stamp using HA Soft Granite ink on all three pieces of the wrap – I didn’t realize I was going to lose the center back triangle – I folded on the score lines and glued the front flaps together, and then glued the whole wrap to the card front.
All of the roses do have green stems and sepals though they ended up mostly buried in this arrangement – it wasn’t easy to get 12 roses in there..! The roses are glued into the wrap and the buds are mounted with foam tape. I added some leaf die cuts among the buds (glued and foam taped) and used my Hero Arts Clear Lacquer Pen to add clear drops to the arrangement for a fresh, wet feel! I stamped the sentiments on the same sketch paper using HA Soft Granite ink, embossed those with clear embossing powder, and die-cut them using the sentiment strip die. I glued the banner sentiments along the two sides of the bouquet and added a small double bow using the pink ribbon included in the kit. For a final touch I stamped the “LOVE MAIL” stamp on the inside using the same Soft Granite ink.
Well… that is certainly PINK… but it’s actually quite a lovely valentine! And no roses were harmed in the making of this bouquet. That rose bud may be my favorite die in this kit!
I toyed with the idea of using that Altenew watercolor pattern paper to die cut all the flowers this month, but my control freak asserted itself and I decided to try coloring some of the flowers.
I die-cut these flowers and greenery using Neenah Solar White 80# card stock and colored all with my Spectrum Noir alcohol markers and added then some white gel pen highlights in the centers. I die-cut a piece of my Kraft card stock (close match to the kit Kraft card stock) with a LFSRD, embossed that with an older Darice embossing folder and matted that to a thin white mat, then glued both to a card base made from the Kraft card stock in the kit.
I stamped the sentiments on white card stock using Walnut Stain Distress Oxide ink and clear embossed them both before die-cutting them with the sentiment die. I arranged the flowers, buds and leaves into a pleasant grouping, glued them together and to the card front, adding foam tape on the blooms and greenery at the top of the bouquet. I glued the top sentiment to the card front and foam taped the bottom sentiment over the flower stems. A few wood-dot embellishments (from the Love From Lizi Dec.’19 Card Kit) adds some rustic decoration and we have a cheerful yellow get well card! Some of these kit sentiments actually go together perfectly!
What will happen if we die cut some flowers from pattern paper but then did some coloring on top of that – highlights and shadows to enhance the patterns…
Paper pieced flowers from the Altenew pattern paper but touched up with some alcohol markers and a little white gel pen… I was going for “baby’s breath” with the background greenery, but I think it looks a little like broccoli! Isn’t that trendy? Using vegetables in your flower arrangements?? I didn’t realize this kit was going to be a crash course in flower arranging…! VERY interesting!
Here, I die cut the sentiment strip twice to make a 5.5″ banner and stamped the two sentiments on each end using VersaFine Onyx Black ink, and then folded the banner around the flower stems. I did add a little grey marker to the exposed back side of the banner (between the sentiments) to help it stand out before mounting it to the white card base with foam tape and glue. The flowers are glued and foam taped to the card front, and a few black heart sequins adds a modern touch of bling. I do like these flowers, though I can’t imagine going any darker with these blooms. Hey! 3 cards, 6 sentiments!
If you have followed me at all over the last few years you probably know that I am not a huge fan of butterflies… let me tell you, these could change my mind…!
I did a random Google search to see if anything would turn up looking for “blue butterflies” and lo and behold I found lots of blue butterflies but this one is what caught my eye – it’s the same basic shape as our large butterfly die in this kit! And that Aqua Glimmer Metallic ink was just sitting there begging to be used. I die-cut the three butterflies from some HA Pitch Black card stock and painted them with the Aqua ink at full strength. WOW! Talk about bang-for-your-buck! These guys are gorgeous and have that light luminescence that real butterflies have! Groovy!
I die cut a piece of the Gold Breeze card stock with a LFSRD, matted that on a thin black mat, and glued that to another white card base. I stamped the sentiment using VersaFine Onyx Black ink and embossed that with some clear embossing powder. I mounted the butterflies to the card front with glue on their bodies and small foam squares behind their wings. Finally some blue bubbles (from the MMH March ’19 kit) for a little accent and here’s a butterfly card I would be proud to share!
It seems as if Hero Arts was trying to cover all our basic stamping needs with this stamp set and the wide variety of sentiments contained. Obviously this kit isn’t intended to be used strictly for valentines…
Perfect example of the power of white space. I LOVE this! Couldn’t be much simpler – 5 rosebuds die-cut from 80# Neenah, one colored with alcohol markers, then all 5 layers glued together. The sentiment is stamped with Hickory Smoke Distress Oxide ink and embossed with clear embossing powder. A light alcohol-marker shadow added to the card front and the layered bud glued on top of that. I think this might be my favorite sympathy card ever!
We have a “Happy Birthday” sentiment as well, but I just couldn’t do another bouquet…!
How ’bout a birthday cake? I cut a piece of my Kraft card stock to 4″ x 5.25″ and embossed that with a Darice filigree embossing folder and glued that to a white card base. I cut two cake “layers” from the Gold Breeze card stock, and the flowers and leaves from 80# Neenah, and colored all with my alcohol markers. I arranged the “frosting” flowers on the layers and wasn’t really happy with this card until I added the leaves – that gave us some contrast and helped ‘ground’ each layer. I stamped the sentiment on a scrap of White card stock using Walnut Stain Distress Oxide ink and clear-embossed that before die-cutting with the sentiment banner die.
The top flower and ‘layer’ is attached to the card front with foam tape and the bottom ‘layer’ is attached with a double layer of foam tape. The sentiment is mounted with more foam tape, and I tied a double bow with the twine from the MMH Dec.’19 kit and glued that to the left end of the sentiment. A few Darice Crystal sequins adds a little sparkle and here we have a uniquely decorated birthday cake card!
I’m not exactly sure what gave me this idea… I was playing with the envelope die and…
Maybe I was just itching for something bright and graphic!? I die cut six envelopes in rainbow colors from some thin (60# Reflections) card stock and assembled them all using scor-tape. I grabbed my HA Reactive inks in Fruit Punch, Creamsicle, Lemon Drop, Green Apple, Blue Hawaii and Thistle and stamped the two postage stamps across the top and bottom of a white card base, then arranged the envelopes together and glued those to the card front with a couple pieces of foam tape on the left edge of the red envelope.
I turned to my Silhouette software to print this sentiment on a piece of my Mead sketch paper using the American Typewriter font. I trimmed that down and folded it over to add to the last envelope. I think this sentiment coupled with six envelopes really drives the point home! Very graphic and colorful yet not so thick that it couldn’t be mailed – that thinner card stock for the envelopes helps keep this card from requiring extra postage! That is a really nice, not too small, envelope die!
Lets have another go at those butterflies using more glimmer metallic ink – this time using the purple and red inks from the MMH August ’19 Kit!
I stamped the small text stamp using VersaFine Onyx Black ink a couple times on some Grey card stock from my stash, die cut that with a LFSRD, matted that on a thin black mat and glued them down to a white card base. I die cut the butterflies from HA Pitch black card stock (four of the profile butterflies) and painted them with the Red and the Purple metallic inks. I stamped both sentiments with Onyx Black ink and clear embossed them and then assembled the butterflies. On the profile die cuts I just glued the bodies together beeping their ‘tails’ lined up and offsetting their ‘heads’ to create two antennae and separate their wings a little bit. Their bodies are glued to the card front and little pieces of foam tape give some dimension to their wings. Some purple sequins adds a little more sparkle and I have another butterfly card that doesn’t make me hate butterflies! I must remember how well the HA glimmer metallic inks work on black card stock! YEAH!
Let’s look at that envelope die again. I don’t feel like my rainbow card quite did it justice!
I’ve always wanted to make an interactive card like this, and our envelope die is the perfect size! Two envelopes die-cut from my sketch paper and assembled. I stamped the stamp stamp with Soft Granite ink on a scrap of Neenah card stock, colored that with alcohol markers, and fussy-cut it out. I stamped the sentiment and post mark using Onyx Black ink and added some little heart glitter pieces on the top left. I die-cut the Fireweed card stock with a LFSRD and added a thin mat of the Rose card Stock behind that. The center of the Rose mat has been cut away with another LFSRD to start making a thin hollow chamber behind the card front. I cut a slot in the back of the top envelope just below the middle to feed our love note through, and copied and cut the same slot through the Fireweed card front as well. I did die-cut some scrap white card stock to make two more “frames” (using two LFSRDs) and glued them to the back of the card front for a little more wiggle room to hide the rest of our note. Using my Silhouette software, I printed this poem on a scrap of white card stock that measures 2.1/2″ wide by 4.3/8″ tall (the bottom 1/4″ is 3″ wide to provide a stopper so the note doesn’t pull all the way out). I dry-fit everything to make sure I had room for this whole poem, then glued the envelopes to the card front.
I stamped the sentiment on a scrap of white card stock using VersaMark ink and embossed that with the Pink Sparkle embossing powder included in our kit, and die-cut that with the banner die.
Finally, I slid the printed poem through the slot and glued the whole card front down to a white card base – only putting glue around the edges. I die-cut the little heart from the Rose card stock using one of my NEW HA Nesting Hearts Infinity dies (Merry Christmas!) and stamped the “open” using a MFT Interactive labels stamp and Onyx Black ink topped with clear embossing powder. A little removable glue dot holds the flap down, and not only is this a perfect (classic) Valentine poem, but I am a little amazed that I was able to get the entire poem on this magic reveal letter. When you start taking the letter out of the envelope, it just keeps going and going! A little touch of magic for you and your sweetheart!
One more sentiment to go, and I will have used a little bit of everything in this kit!
I am totally into these blue roses!! Not quite a wreath, but close! Flowers and greenery die-cut from Neenah 80# card stock and colored with alcohol markers (with some stardust glitter pen for the dots on the ‘bushy’ piece and a few white gel pen highlights). I die cut a piece of the Gold Breeze card stock with a LFSRD and added a mat behind that using some silver mirror card stock, and glued those to my card front. I used two of my NEW HA Nesting Oval Infinity dies (Merry Christmas!) to create this silver oval frame. I used the frame to lay out my sentiment and I stamped that on the card front using Faded Jeans Distress Oxide ink and embossed it with clear embossing powder. I glued the oval frame down to the card front and arranged the flowers and leaves on the two sides using glue and spots of foam tape. I tied a simple bow with some silver cord to add at the top and finished up this card with some Nuvo Sea Breeze Jewel Drops. LOVE this card!!
You know I was trying to use all the stamps in our set, but that didn’t give me much of a chance to play with any puns this month… but I do like this bit of a pun on the inside. “Congratulations” “You rose to the challenge!” work perfectly together and if it doesn’t give you a giggle, I hope it at least gives you a groan!
That wraps up my 10 cards for this sold out MMH January 2020 kit…! This is a very unique kit that can create a variety of cards – I managed only 2 Valentines but ended up with 8 different occasion cards. I can understand why this kit sold out so quickly – who doesn’t love flowers and butterflies? If you don’t want to miss out, I would suggest subscribing…! The six month plan lets you skip one month if you don’t happen to like the kit – not very many subscriptions let you do that! If you do go shopping at Hero Arts please use my links throughout this post and to go directly to Hero Arts click here: http://shrsl.com/1f7qx Thank you!
I did use every stamp in our set EXCEPT the “to:” and “from:” stamps, I used all of the dies, and actually a little bit of everything including the pink sparkle embossing powder! I did have a good time creating these cards… I LOVE that rosebud die and the envelope die and I’m starting to fall in love with those glimmer metallic inks! Thanks so much for sharing your time with me here… let me know which cards you like best, and remember to Like me, List me, Pin me, Post me, share me with all of your friends and remember… Don’t run barefoot through the roses! Happy Crafting!!
DISCLOSURE: This site contains some affiliate links to products. I may receive a commission for purchases made through these links (at no cost to you). As an Amazon Associate I earn from qualifying purchases. Thank you!
Hello Folks! Scott here unboxing the new Love From Lizi February 2020 Card Kit. I believe Lizi is calling this the “Happy Days” Card Kit and she has some BIG surprises in store for us this month (look at the size of that stamp set)!
Yes… this kit is quite pink this month, but seeing that Valentine’s Day is coming, all the pink is easily forgiven! At least there’s some nice red to balance things out!
Let’s start with our card stock in the kit. We have our usual five sheets of 8.5″ x 11″ card stock in Dark Green, Pink, Warm Red, Mid Blue, and a super smooth, alcohol-marker-friendly White. Instead of specialty card stocks in our kit this month, Lizi has given us two extra sheets of the Super Smooth White. Hmmmm… Explanation to follow!
Our patterned papers this month include twelve 6″ x 6″ single-sided sheets in a soft pale blue, pinks, and warm reds. A nice assortment from gingham to flowers, stripes, damasks, and text. Don’t worry… there’s plenty of pink in this collection!
Our peels offs this month are a new color – Sky Blue pinstripe peel offs. They do not have a mirror finish – they have a “matte” finish although you can see that they still have some shine! A perfect match to all the soft blues in this kit!
This month, Lizi is treating us to some new Decoupage Sheets! Eight of them!
I LOVE Lizi’s decoupage sheets – These die-cut sheets are all about dimension and layering up the pieces to make stunning focal images. All of the sheets have numbers to assist in layering up the images. Most of the sheets have some “extra” pieces as well (some are extra sentiments), and all feature glitter highlights.
There are also three sheets that feature Decoupage Tags – the top left one here is actually ONE tag with SIX layers – and the bottom left one in the first pic is two tags each with three layers. Of course, you can always decorate a card with a tag or you could even use these as actual gift tags. Plenty to play with here!!
Now we get to our amazingly unique touch of Love From Lizi magic for this month…
This is our GIGANTIC 8.5″ x 11″ stamp set this month! Oh My Heavens… this is the largest stamp set I have ever seen!! This amazing stamp set features a 6″ x 6″ background stamp that is actually an “infinity stamp” – the pattern will match up for repeat stamping to the left and right and to the top and bottom. Perfect if you are doing scrapbook layouts, and want am image larger than 6″ x 6″ (I don’t think I will need any more than a single image of this stamp). That infinity stamp is joined by three smaller flower arrangement stamps and a whole bunch of individual flowers and leaves as well as seven sentiments. I’ve never seen anyone release a stamp set this large! This feels like two complete stamp sets to me! Amazingly Gigantic! The retail price of a stamp set like this is more than the price of the kit all by itself! Truly amazing!
That bring us to our embellishment bag, which always has a bunch of goodies!
We start off with a sheet of foam squares – Lizi most always includes a sheet of foam squares when we get decoupage sheets! We get four printed wood-veneer die-cuts – two “with Love” tags and two roses, and we get a sheet of 8 gold foil sentiment stickers -these have foam dots on their backs for a little added dimension. Our “Happy Days” sequin mix includes some pink flower sequins along with dark green and gold sequins in assorted sizes. We get a new color of Nuvo Crystal Drops this month – Blue Babe – which matches the soft blues in the kit perfectly, and we get five different ribbons in this kit – each a meter long and all with some kind of coordinating pattern – I LOVE the cardboard spools these come on – makes it very easy to store any extras! Finally, we get two dies in our kit this month – a watering can with flowers coming out of the top, and a small birdhouse in a circle with flowers all around. That wraps up all the items included in this kit… WOW!
I did manage to get an additional add-on this month. I got the “Happy Days” Peel off pack which has a sheet each of Rose Gold Straight peel offs, Soft Peach Pinstripe peel offs, Silver Moondust Pinstripe peel offs and Apple Green peel offs – perfect colors to compliment this kit!
That covers everything I got in my kit this month! I cannot say how excited I am to play with that gigantic stamp set. Once again, I think Lizi has given us a stunning card kit with the most unique and certainly the largest stamp set I have ever seen! Flowers and pink may not be my go-to favorite, but I am really looking forward to digging into this kit and seeing what it inspires me to create! Stay tuned for my 10 Card 1 Kit video featuring this kit as soon as I can get them all together!
At posting, this kit is still available at lovefromlizi.com. You should hurry up and grab one of these kits for yourself – feels like this one is going to sell out pretty quickly! If you do go shopping at Love From Lizi please use my links: Love From Lizi: http://shrsl.com/1yyuwLFL 2/20 Card Kit: http://shrsl.com/231ksHappy Days Peel off Pack: http://shrsl.com/231l0 .
Thank you so much for sharing your time with me here… it’s been a while since I’ve been this excited with a LFL kit…! I hope it excites you too! Please remember to Like me, List me, Pin me, Post me, share me with all your friends, and as always… Happy Crafting!
DISCLOSURE: This site contains some affiliate links to products. I may receive a commission for purchases made through these links (at no cost to you). As an Amazon Associate I earn from qualifying purchases. Thank you!
Hello Folks! Scott here with my 10 Cards featuring the Love From Lizi January 2020 “Hello Sweetie” Card Kit. Cupcakes, donuts, cookies and biscuits are featured in this kit with a bright spring palette (lots of pink!) and tons of supplies! I apologize for being tardy with this post. I did some traveling over the holidays – a little bit of a “Second Christmas” with family in Kansas – and I’m a little slow to get back into the groove…!
If you made a New Years resolution to shed a few pounds, then this kit might push you into a relapse with all the goodies sprinkled throughout – OH – and sprinkles too! As I always do with a LFL kit, I made card bases out of the five sheets of card stock included.
For my first card, I fussy cut the “row of donuts” pattern paper (discarding the pink portion) and die cut it to match the the white “sprinkles” pattern paper with a Lawn Fawn Stitched Rectangle die. I glued the background panel to the Pink card base, and framed that panel with some of the Lemon Yellow peel offs. I stamped the sentiment using Walnut Stain Distress Oxide ink, and embossed that with some clear embossing powder.
I did add some Glossy Accents to the ‘glazed’ portions of the donuts, and when that was dry, added that panel to the card base using foam tape. A few small sequins from our sequin mix pulls your focus towards the sentiment, and we have a nice pun-ny card with some truly appetizing donuts to temp you with! It doesn’t look like I’m going to be able to avoid the pink completely in this kit, but, hey… even Homer Simpson eats pink-frosted donuts!! With sprinkles!
We got two sheets of matte mirror specialty card stock along with an embossing folder this month, and I thought that gave us an opportunity to add a touch of classy shine.
I die cut a piece of the Gold mirror card stock with a LFSRD and embossed that with the “falling sweeties” embossing folder – love how nicely that card stock takes the embossing! I matted that panel on a thin black mat and glued it directly to the Yellow card base. I fussy cut the bunch of “sweeties” (I believe Lizi called those little merengue cookies “sweeties”) from one of the pattern papers and cut a matching blank piece from another. I matted both squares to a thin black mat and stamped the sentiment on the blank one using VersaFine Onyx Black ink and then embossed that with more clear embossing powder. The two square panels are attached to the card front using foam tape – a single layer under the sentiment and a double layer under the sweeties. A few more sequins adds a touch of sparkle to the sentiment and I am surprised how the use of that mirror card stock takes this card beyond the simply playful and makes it a bit more classy!
Our stamp set this month has a couple of pun-ny sentiments and a great assortment of cookies. I had to play with the gingerbread man stamp first!
I stamped the gingerbread man twice on Neenah Classic Crest Solar White 80# card stock and colored them with my Spectrum Noir alcohol markers. I used a VersaMarker pen and White embossing powder to add the ‘icing’ highlights and then fussy cut them out and glued them to a piece of the blue ‘linen’ pattern paper. I bisected the sentiment stamp and stamped that below the cookies using VersaFine ink. I marked a 2″ band behind the gingerbread men, and fussy cut the pattern paper allowing for a bit of a border around their arms and legs.
I cut the background pattern paper to 3.75″ wide and glued that to the Pale Blue card base and trimmed the edges with some Sky Blue/ Silver pin stripe peel offs from our LFL November 2019 kit, and added more peel offs to the straight edges of the Blue pattern paper. The center panel is attached to the card front with foam tape, the “linzer” cookie (from the die-cut sheet) is attached with a spot of foam tape, and has a layer of Glossy Accents on the ‘jam’. The blue satin bow adds the final touch for a fun (almost pun-ny) valentine or thank you or love you card. All of the fine detail on the cookie stamps in this set makes them nicely dimensional as well as quick and easy to color.
Due to the “smart cookie” sentiment in this kit I kind of felt like this card was a given!
I took two of our washi tape rolls and alternated them on the Green card base for this fun striped pattern. I stamped the cookie on Neenah 80# card stock, colored it with my Spectrum Noir markers and fussy cut it out. I die-cut a piece of Ivory card stock with a Darice nesting circle die and curved the sentiment using my stamp platform to match the circle and stamped the sentiment using VersaFine Onyx Black ink. I matted that on a thin black mat and mounted it to the card front with foam tape.
I couldn’t resist putting glasses on this cookie, since I had a perfect stamp from the Simon Says Stamp Some Bunny stamp set that was featured with their March 2017 kit. Stamped and colored in black, I cut them out with a craft knife and glued them to the cookie. These google eyes fit perfectly, and make me laugh! I attached the cookie using more foam tape, and added a couple strips of the peel offs and a few sequins to finish off this fun card! I know the whole glasses/smart thing is a stereotype… but it’s always fun to anthropomorphize food items!
We had that one “chocolate” sentiment in our set, but actual chocolates were sparsely represented in this kit, so I dug around in my stash for some chocolate-y card stock.
I found this Rich Copper card stock from the My Monthly Hero September 2019 Kit and it looks good enough to eat! I wanted some sprinkles for the background, but the pattern paper sprinkles thinned out towards the bottom of the page, so I used the sprinkles washi tape to create a ‘frame’ background on the pink card base. I just laid out the 4 sides of the tape frame 1/4″ from the edge of the card front and mitered the corners. I did divide this sentiment stamp and embossed the “You’re sweet” portion here using the LFL Very Vanilla embossing powder. I die-cut the ‘chocolate’ card stock with a LFSRD, matted that on a thin white mat and glued it directly on top of the washi tape frame.
I fussy cut the tower of cookies from one of the pattern papers, and fussy cut five of the small chocolate wafers from another. I added a touch of Glossy accents to the small cookies (looks more like chocolate!) and added all the pieces using foam tape. I did complete this sentiment on the inside of the card, stamping the sentiment with Walnut Stain Distress Oxide ink and embossing that with more clear embossing powder. This feels about as chocolate-y as I could get with this kit to go along with this sentiment!
I have one more sentiment from our stamp set to use, and lots of cookies to go along!
I stamped all the rest of the cookie stamps on Neenah 80# card stock, colored them all with Spectrum Noir markers and fussy cut them out. The “digestive” cookie on the far right is stamped on kraft card stock using Walnut Stain Distress Oxide ink and embossed with clear embossing powder for a little chocolate-y shine. I added some of our Nuvo Drops to the center of the biggest cookie and spots of enamel dots on two others, and some Spectrum Noir sparkle pen to the crackle cookie and tiny tart and set them aside to dry.
I cut a 1.75″ width of the ‘linen’ pattern paper and glued that to the middle of a white card base, and added peel offs to the edges. I took a strip of the shaped washi tape, cut it right down the middle and added that to the top and bottom edges of the card front. I stamped the sentiment using VersaFine ink and embossed that with clear embossing powder. Then I glued the small cookies down to the card front and attached the larger cookies using foam tape. Kudos to Lizi for giving us a good pun this month!
That actually covers all the stamps in this stamp set! Let’s take a look at our dies!
Using some E6000 spray adhesive, I covered the front of a pale Blue card base with the printed tissue paper and set that aside to dry. I die cut the frame from our matte silver specialty card stock using two LFSRDs and added a thin mat to the “Birthday wishes” die cut banner in silver too. I die cut the cupcake from Neenah 110# card stock and colored the pieces with my alcohol markers. I die-cut it a second time from more of the silver card stock and inset the sentiment on the frosting, and the base of the candle as well.
I added some sparkle pen highlights to the sweets on the background tissue and glued the frame directly to the card base. I die-cut a round piece of vellum to glue behind the cupcake, and mounted that and the banner with foam tape. The banner seemed a touch odd just sitting there below the frame, so I did add a short piece of silver cord along the top. That’s really a great cupcake die and I think that’ll get a lot of use over the years!
The “Best Wishes” die looks nice too, and I still have some ‘chocolate’ card stock!
I die-cut a piece of the blue patter paper (plenty of pink on that too!) matched up with a 2″ wide piece of the blue ‘linen’ pattern paper using a LFSRD, glued them together and matted them to a thin ‘chocolate’ mat before gluing all down to a white card base. I added thin strips of the ‘chocolate’ card stock to the top and bottom of the linen strip as well. I die cut the sentiment from back card stock twice and the ‘chocolate’ card stock once and glued all three together to make this chunky sentiment.
The “linzer” cookie was removed from its clothespin, the heart enameled with the Hero Arts Glitter Lacquer pen, and some sparkle pen was added on the cookie for that special sugar effect! I glued the stacked sentiment to the middle of the panel, and just had to cut up one more sentiment to finish this card out. On the inside, I stamped “Sweetie” (from the “Hey Sweetie” stamp) using Walnut stain Distress Oxide ink and more clear embossing powder. I think that helps justify a cookie / sweet treats card sporting a Best Wishes sentiment. Unless you might want to give this card to a friend starting a new diet! Is that mean?
I have some extra pieces from the silver frame card and the ‘chocolate’ field on the ‘You’re sweet’ card so let’s not let them go to waste!
The silver piece is from the inside of the silver frame, and the ‘chocolate’ frame is from the outside of the “You’re sweet” panel, so they fit together perfectly. I embossed the silver panel using the embossing folder, and glued that and the frame to the yellow card base. The cookie is one of the stickers glued down to a scrap of card stock and fussy cut – the heart is enameled with Glossy Accents, and some Hero Arts Prisma Glitter (from the MMH October 2019 kit) was added for a little touch of sugar sparkle.
I created this sentiment using my Silhouette software and the Sign Painter font, and printed that on a piece of photo paper to make it nice and shiny. That is a bit of a paraphrase of a Cookie Monster quote! The cookie and sentiment are attached to the card front with foam tape, and this makes quite a dear friendship card!
Though we had a couple of nice puns in our stamp set, I couldn’t resist just one more!
LOVE THIS PUN!! Perfect card for any loved one who has a doughnut obsession..! This card kind of turned into a referendum on different glazing mediums. I “glazed” the white donut using a Hero Arts clear lacquer pen, and the other two donuts using theNuvo Morning Dew Crystal Drops, and, of course, Glossy Accents for the sentiment. It’s always a bit of a crap-shoot when trying to “glaze” such large surfaces on a card. The Hero Arts lacquer pen worked very well and leveled out nicely but developed some light wrinkles when dry. The Nuvo Drops flowed easier but didn’t level off particularly well. All dried perfectly clear, and gave me the “glazed” effect I was going for.
I die-cut the yellow sprinkles pattern paper with a LFSRD and printed the sentiment on that using my Silhouette software and the Candara font (“you drive me”) and the Santa Fe font (Glazy). I glued that to a thin white mat and down to the last Green card base. I did take Glossy Accents to the “Glazy” portion of the sentiment and let that dry. I glued the pattern paper donuts to some scrap card stock to add some rigidity before fussy cutting all three. Those are attached to the card front with different thicknesses of foam tape. This pun never fails to bring a smile to my face!
That’s my 10 Cards from the Love From Lizi January 2020 “Hey Sweetie” Card Kit. I did manage to use every single stamp in our stamp set this month. WOO-HOO! I used 10 different pieces of our pattern paper (I have SO MUCH left) a couple of the die cut sentiment pieces, one piece of tissue paper, both the silver and gold specialty card stock, the peel offs, embossing folder, a sticker, a satin bow, all four of the washi tapes, two of our three dies and even some sequins from the mix. Looks like the only thing I didn’t use at all was one of the round Gift tags . And though I didn’t use one of the clothespins (VERY chunky), I did use a decoration FROM one of the pegs! I thought the sentiments were pretty fun this month and the cookie stamps are quite nice and lend themselves to many different stamping methods!
As of posting this kit is still available at LoveFrom Lizi.com. If I have managed to inspire your imagination or titilate your sweet tooth, please use my links when you go shopping with Lizi! It is truly appreciated and helps support this page!
Thank you so much for sharing your time with me here, I’ll be back in the swing of things shortly…! Thank heavens Lizi is delaying the release of the February kit due to the Creativision trade show in Phoenix… that will help! Please share this post with others who might be interested, and don’t forget to Like me, List me, Pin me, Post me, and remember… It’s hard to be sad when you’re eating a cookie! HAPPY CRAFTING!!
Hello Folks!! Scott here with my 10 Cards 1 Kit post featuring the My Monthly Hero December 2019 Kit. Sorry this is a little tardy this month… holidays, you know! Hero Arts is celebrating the diversity of our beloved (yet stressed) planet Earth this month with this lovely 6″ x 8″ stamp set with a stunning (and large) “Earth Goddess” stamp. I think this must be the largest image stamp I’ve seen in a MMH kit in the couple years I’ve been a subscriber. Really beautiful! She is complimented with an earth, a tree, a pair of fish, a peace sign and a few sentiments sized to fit in the crook of her arm. There’s also a pair of hands, some birds, flowers and clouds to round things out.
We do get 18 coordinating frame cuts to die-cut all the images, a new Earth Palette Reactive Ink pad (LOVE IT!) and a pack of Green Biodegradable Glitter. VERY interesting! I’m tempted to toss some in a glass of water and see what happens!! Finally we are treated to five little mini brushes – I find these most useful for super small glue or paste or more permanent media details since they aren’t much good after a single use or two. Though I’m not overly thrilled with all the sentiments here, I do think this is one of the most interesting and unique kit I’ve ever received from Hero Arts!
So, of course, I just couldn’t resist grabbing that big Goddess stamp and plunging right in!
I stamped this (and all the other cards this month) on Bristol smooth card stock using VersaFine Onyx Black ink and I embossed this stamp with clear embossing powder. I rarely emboss stamps I’m going to color, but for some reason I thought it was very appropriate for this stamp. WOW! I LOVE the shine that gives to this entire image! I don’t know why I don’t do that more often! I reached for my Stabilo pens to color this whole image and just worked my way around from the ‘water’ to the ‘fire’. I really like how vivid those Stabilo markers are, and, with a little water, they move on the Bristol smooth card stock super easily!
I wasn’t sure what image I wanted to put in her arms, so I went ahead and stamped, embossed and colored the earth, the fish, the tree, and the peace sign in the exact same way. Of course, the earth won out..! I cut out my stamped panel with a Lawn Fawn Stitched Rectangle die and glued that to a white card base. I fussy cut the Earth (the die in the kit leaves a small border around that stamp), added a little Spectrum Noir Sparkle pen to the oceans, and mounted that in her arms with some foam tape.
Wow WOw WOW! LOVE this so very much! The shine from the embossing makes her feel very ethereal, and I love the buck and deep blue oceans on the earth..! I couldn’t bring myself to add a sentiment to the front of this card, and I was in a bit of a celebratory mood after making this, so I turned to my Silhouette Software to create the sentiment on the inside. “You GO Gaia” is printed on a scrap of card stock using the Typewriter Hand font and die-cut with my smallest LFSRD. In Greek mythology, Gaia, is the personification of the Earth and one of the Greek primordial deities. Gaia is the ancestral mother of all life: the primal Mother Earth goddess. This does echo the classic “you go girl!” which made it seem all the more appropriate for this card! I LOVE THIS!
Bit of a side-bar here… After much consternation and debate over prices, I treated myself to a ream of Neenah Classic Crest Solar White 110# card stock. I have experimented with MANY heavy-weight card stocks over the last few years, and ALL were much cheaper than the Neenah… but I have to admit you get what you pay for. This Neenah card stock is smooth as butter, bright white, scores and folds beautifully, goes through my printer with no problem and it is luxuriously thick. A ream of 250 sheets stands about 3.75″ tall! All my white card bases this month (and for the foreseeable future) are Neenah!
Though I kind of felt like I had “Mastered this Kit with a Single Card”, I do have a few other ideas, and I did have three more of the round images already colored…
One of my favorite “peace” quotes of all time! I printed this sentiment on a Neenah card base using my Silhouette Software and the Typewriter Hand font again. I was very pleased that the 110# Neenah would go through my printer using my ‘piggy-back’ printing method! You can review my technique for Printing Unique Sentiments for your cards here: https://cardcutups.com/2017/07/18/printing-sentiments-for-cards/.
I fussy cut the (stamped, colored and embossed) peace sign (very carefully) with a craft knife, and mounted it to the card front with thin foam pieces. I thought this unique stamp was cool enough to hold it’s own on the front of a card – and is very appropriate with this quote that I do attribute on the inside of the card. Plain yet powerful!
The fish stamp seemed very “Yin/Yang” to me – whether it was intended to or not, so I did color that stamp as if it was a Yin/Yang symbol – basically just reversing the colors from one fish to the other. I added a touch of light blue in the background, and die-cut them using the circle die in the kit.
Now, I have seen LOTS of spinner cards and rotating cards and window cards using this set coming from a lot of the HA design team – obviously, this kit lends itself to those type of interactive cards, but I wanted to try something just a little bit different. I stamped the hands on a piece of Bristol smooth card stock cut to 3.5″ x 5.5″ and printed this sentiment using my Silhouette Software and the Smoothie Shoppe and Arial fonts. A simple hole punched in the middle to connect the spinning wheel to the fish. I used a stitched circle die to cut the spinner and stamped the arrows using the MFT Interactive Labels stamp set, and punched a finger-notch on the left side right in line with my center hole.
I ink blended the edges of that panel with Hero Arts Splash Reactive ink and a mini ink blending tool, and added a couple strips of pattern paper (from the Sizzix Geometrics 6″ x 12″ Cardstock Pad) down the two sides of my white card base. I attached the spinner to the fish with a brad through the center hole, and used foam tape to attach the panel to the card front leaving room for the spinner to rotate. I think these fish were just begging to ‘swim around’ (pun intended!) and this is a fairly surprising and unique interactive card with a poignant and useful sentiment!
I still have that tree stamp colored, embossed and die-cut that I haven’t used yet …
And here we break into that Biodegradable Glitter! I cut a frame from some adhesive backed card stock using two LFSRDs and covered the adhesive with glitter. I burnished it down quite vigorously, but this glitter is super fine and still sheds a little bit..! I also die cut a slightly larger circle than the tree and covered that with glitter before gluing it behind my tree die-cut for a matching mat. I did print this sentiment on a Neenah card base using the Typewriter hand font and glued the frame to the card front and added the matted tree with some foam tape. Of course there is more to this sentiment than just “Be a Tree”… I printed the rest of this sentiment on the inside of the card using my Silhouette software and the same font. Very good advice for most anybody at most anytime! And I think this is particularly appropriate with this stamp that shows the roots of the tree!
We also had nine little flower, leaf and stick stamps in this kit, and I kept thinking…
I really like the hand stamps in this kit – pretty versatile – and any plant that blooms with three different flowers is damn precious!! I stamped everything using only a mask for the hand – I simply stamped all the foliage as close together as possible. I colored these with my Zig Clean Color Real Brush markers, stamped and clear embossed the sentiment (after I removed the “so take care!”) and die cut that panel with a LFSRD.
I swiped the Earth Palette reactive ink pad on a piece of Bristol smooth card stock and blended the colors together with a paintbrush and a little water – the brownish stripe behind the sentiment happened when the purple went over the light green – it matches the stick part of our ‘plant’ nicely so I let it be! I die cut the background with another LFSRD and glued it directly to a Neenah card base. I matted the image panel with a thin black mat and added that to the card front with foam tape.
Once this was all together, I felt it was still missing something, so I stamped the little bird on a scrap of Bristol smooth card stock, colored and die-cut it out. I did try to make the bird look like a Meadowlark. I like the sense of movement that comes from die-cutting the bird (when none of the other images are die cut) and I love the matching ombre background! Precious, indeed!
We also have dies for all those little incidental stamps (and hands!) in this month’s kit…
I stamped everything on Bristol smooth card stock, colored all with my Zig markers, and die cut everything with the matching dies. I stamped and clear embossed the sentiment on a Neenah card base and arranged all my die cuts on top. The foliage is glued directly to the card front and the hands and butterfly are mounted with foam tape. A thin strip cut from the scraps of my ombre background adds a final touch of color to our abundant cornucopia of nature being offered up. Fun and colorful, this is a great way to use all the little incidental stamps included with this kit. And those hands are really versatile!
Speaking of versatile, I had another interactive card idea to go along with a bit of a pun…
I stamped the hands together masking the right one before stamping the left, colored them with my Zig markers and die cut those with a plain circle die. I swiped the Earth Palette reactive ink pad on a scrap of watercolor paper and blended them out with more water – that gave me more of a ‘brush’ texture on the watercolor paper versus the smooth blending on the Bristol smooth card stock. I cut that down to a 3″ square and used my corner choppers to round the corners. Again, I poked a hole in the center of a Neenah card base, die cut a 4.25″ circle for the spinner, stamped the arrows and attached the spinner to the watercolor background through the center hole. I added the hands to the watercolor piece with foam tape, and took some thin heart washi tape from my stash to run across the top and bottom of this card front. I added a finger notch to the right side this time and attached the front panel to a Neenah card base using foam tape.
There’s the pun! (I couldn’t resist!) LOL! I printed the inside sentiment using my Silhouette software and the Henny Penny font. The Neenah card stock takes the print so well… nice and clean and very sharp. I’m extra thrilled with this card stock knowing that I can print on it! And I really like that the whole ‘square’ rotates and I think that’s a little bit of a surprise. A great interactive congratulations card! Makes me laugh!
I can’t do 10 cards with this kit and NOT do one more Earth Goddess stamp…! Let’s try her on some Kraft card stock and break out the colored pencils!
I hadn’t used the large bird stamp or the clouds yet, so I added them to this card front using VersaFine Onyx Black ink and colored everything with my Prismacolor Colored Pencils. A little more subdued than the first card, but I think every bit as beautiful! I colored the bird in a bit of a parakeet motif and even added some of the twine along the spine tied in a simple bow. Again, no sentiment on the front, so you know I’m going to have something to say on the inside. I love this “Unleash your inner Goddess” sentiment! I printed that on a scrap of ivory card stock using the Brushgyo and Arial fonts, die cut that panel with a LFSRD and added it to the inside of the card. Another fun, colorful encouragement card for all the “Goddesses” in your life! I know there has to be a few! Though it does takes some time to color, I really love that stamp!
A lot of the ‘environmental’ sentiments in this kit didn’t particularly catch my eye – I had a hard time figuring out who I would send a card to that says “One world is enough for all of us” – a feuding neighbor? An estranged relative? A mortal enemy? Might as well try to laugh it up a little bit!
I stamped the four images and the sentiment on Bristol smooth card stock and colored them with my Zig markers and die-cut them all with the matching circle die. I did fussy-cut the earth and glued it to a thin velum mat. I used a 1″ and 1/2″ paper punch to punch out the blue and green dots using the HA Neon card stock from the October 2019 Kit. The punched dots are glued to a Neenah card base, the sentiment, tree, fish and bird are mounted with foam tape, and the earth is mounted with a double layer of foam tape. Though I didn’t realize it at the time, this was the perfect card to add some of the blue and green ‘droplet’ embellishments we got in our MMH March 2019 kit. Perfect match! But what’s the joke you may be asking? You have to open the card to see, silly! “Mulch this card” makes me giggle every time I say it! I printed this on the inside of the card base using the Marguaritas font and the Calibri font. I thought about “Recycle this card” but I think Mulch is a much funnier word! AND it also implies that we’re returning something to the Earth! Protect the Earth!
I have used all the image stamps in this kit (many of them twice!) but there is one more sentiment stamp that I wanted to use, and I’m going to go outside the stamp set (but staying with Hero Arts) for the image on my last card.
This is the Hero Arts From the Vault Earth stamp that I was so happy to receive for Christmas this year! That is one of my favorite “From the Vault” stamps that Hero Arts has re-released in honor of their 45th anniversary. (I asked Santa for this stamp long before I knew that this kit would have an earth stamp too!) I love the size of this stamp and the vintage dot patterns swirling through the oceans and land masses. This stamp is so detailed that it only needs a little bit of color to bring it to life! I stamped that on some of my Neenah 110# card stock and colored it with my Spectrum Noir markers before fussy-cutting it out. I did trace the cut edges with my Memento Tuxedo Black Dual Marker and added some thick foam dots on the back. I stamped the sentiment on the same paper and die-cut it with the coordinating die, and inked the edges with a little Black Soot Distress Ink, and added thin foam dots behind that piece.
On watercolor paper, I created my “galaxy” using Brusho Black powdered pigments with some water, and let that dry thoroughly before ink blending in some Hero Arts Creamsicle, Blue Raspberry, and Taffy reactive inks. When that dried, I ink blended more of the Black Soot Distress ink all the way around the painted “galaxy”, and then spattered some Permanent White Gouache for the stars and then spattered some of my Spectrum Noir Sparkle pen for a little touch of glitter. I die cut the galaxy with a LFSRD and glued that to a Neenah card base, and mounted the two circles with foam tape. Now there’s a truly useful sentiment from this kit! A Valentine for your favorite astronomer, maybe? I really like this card and I love that Earth stamp from the vaults at Hero Arts!
That’s my 10 cards using the My Monthly Hero December 2019 Kit. I was tempted to throw in the towel after just five cards, but I soldiered on and am very pleased with the nice variety of cards I achieved. A sweet batch of encouragement cards with a Valentine or two thrown in for good measure! I am still impressed with that Earth Goddess stamp, and am particularly pleased with how colorful all these cards came out.
This kit is still available at Hero Arts! http://shrsl.com/21ba3 If I have managed to ignite your imagination or inspire an idea or two from you, please use my links when you go shopping at Hero Arts. It is always greatly appreciated! Thank you so much for sharing your time with me here… your support and encouragement is what keeps me inspired!
I have now actually completed a full year of MMH kits! WOO-HOO! (PHEW!) I am still enjoying my subscription, and I really love getting feedback and hearing from all the Hero Arts fans out there! Please remember to Like me, List me, Pin me, Post me, share me with all your friends (and enemies!), and remember… Its not nice to fool Mother Nature! I am sending you and yours all my best for a Happy, Healthy, and Prosperous New Year! Happy Crafting, and see you in 2020!
Hello Folks! Scott here unboxing the new Love From Lizi January 2020 Card Kit! This kit is the “Hey Sweetie” card kit and is packed with tons of treats from cookies to donuts, cakes, pies, gems and some proper English biscuits!
I thought we were suppose to give our sweeties up for our New Years resolutions!? If we can’t eat ’em, then at least we can craft with them! Everything in this kit is curated to be totally coordinated – papers, stickers, die-cuts, – even an embossing folder!
As always, we get 5 sheets of 8.5″ x 11″ card stock in Green, alcohol marker-friendly White, Pale Blue, Pink, and Yellow. In addition to those, we get two sheets of specialty card stock in Gold and Silver matte mirror. I always love Lizi’s specialty card stocks! For a new and unique item this month we get two full-sized sheets of printed tissue paper – a large ‘sprinkles’ print in color, and an outline print of assorted sweets in a soft brown. Very interesting – and unique!
This month we get a sheet of Lemon Yellow Glitter Straight Peel-offs – a new color in the ‘Straight’ shape; and we get a die-cut Sentiment Sheet with 14 different sentiments ready to pop out and use. Sprinkled with Love, indeed!
And look at this pattern paper! Sweeties galore! 6″ x 6″ pattern papers that coordinate with our card stock sheets and come in small patterns, large patterns, subtle and bold patterns – I got 25 sheets in my kit! And they are all double-sided!
I think there may be a repeat in here… but if a pattern repeats in these papers, then it usually has a different background color. TONS of pattern paper! (plenty of pink as well!)
Thank brings us to the “Hey Sweetie” stamp set! This 4″ x 8″ clear stamp set features 9 difference treats and six accompanying sentiments – with a fun little pun! WOO-HOO! That’s a nice large gingerbread man stamp, and the cookies look scrumptious! We are also treated to an embossing folder this month! A 6″ x 6″ cascade of cakes and cupcakes raining down upon us all! Again… perfectly coordinating with this entire kit!
Another treasure trove of unique items in our embellishment bag this month! Four round printed tags in large and small circles, 10 rather larger stickers (2 each of 5 designs) of cakes, cookies, donuts, cupcakes and biscuits! Perfect for a scrapbook page! Then we have our sample pack of the “Hey Sweetie” sequin mix with a really pretty iridescent blue, and (of course) some shiny pink! We get another new bottle of Nuvo Glitter Drops this month in “Enchanting Pink” – lots of glitter there but I’m not necessarily ‘enchanted’..!!
We get four clothes-pins (short, yet wide) with cardboard treats attached on top, and twenty satin bows in yellow and white and pink and blue and purple… I do wish there was matching ribbon..! We are treated to four rolls of Washi Tape this month! A very thin pink, a blue background with colored treats, a wide “shaped” washi with all round treats and tarts, and a yellow background with sprinkles! Perfectly matching everything in this kit! Last, but not least, we do get three dies this month! A Birthday cupcake with “Make a Wish” in the icing, a “Best Wishes” sentiment die and a Frosted Donut die with little sprinkle impressions..! A well appointed and coordinated batch of embellishments!!
Of course, Lizi has all sorts of add ons and new releases to go along with this card kit. I did manage to get the peel off bundle assembled to go with this kit. It includes sheets of Peach/Gold Sway peel offs, White/Gold Pin Stripe peel offs, Ice Blue Pin Stripe peel offs and a Clear Pink Irridescent Straight peel offs. These all go along with this kit very nicely.
At posting, This kit and most of the add-ons are still available at lovefromlizi.com – including an amazing Hey Sweetie Bumper Pack with pattern papers, vellum, die cuts, alphabet stickers and so much more…! If you DO go shopping with Lizi, please use my links… it helps support this page and my YouTube channel and is ALWAYS super-appreciated!
Thank you so much for sharing your time with me here, your encouragement and support means so much to me! I am sending you and yours all my best wishes for a Happy, Healthy, Hearty and Prosperous New Year! Please remember to Like Me, List Me, Pin Me, Post Me, share me with all your friends and remember, Don’t be too sweet, or they’ll eat you!
DISCLOSURE: This site contains some affiliate links to products. I may receive a commission for purchases made through these links (at no cost to you). As an Amazon Associate I earn from qualifying purchases. Thank you!
Hello Folks! Scott here with another 10 Cards 1 Kit post using the new Love From Lizi December 2019 Card Kit. Lizi calls this the “Simple Pleasures” kit and it’s chock full of a spring-time array of pattern papers, stickers, ephemera and embellishments sporting lots of rose-gold foil highlights throughout. I think the holidays are behind us now..!
As usual, I started by making 10 card bases from the included card stock (I did swap out a plain White from my stash for the alcohol-marker friendly White in the kit). I was really drawn to the ephemera pieces, stickers and pattern papers this month, so I started this batch with a card that almost seemed like a no-brainer to me.
That great oval ephemera piece features that rose-gold foiling on the frame as well as on the sentiment. I loved that it matches the bottom half of this piece of pattern paper in a smaller scale. So I die-cut that panel with a Lawn Fawn Stitched Rectangle die and glued it to one of the Ivory card bases. I mounted the ephemera piece to the center with some thick foam squares and framed the panel with LFL Rose-Gold mirror pin stripe peel offs.
I didn’t think this was an ideal sentiment all by itself, so I borrowed one of my favorite sentiments from this kit and printed that on the inside writing surface using my Silhouette software and the Rockwell (italic) font. Now, “Take time to make your soul happy” is a lovely sentiment that I can think of many uses for… I think it finishes off the “replenish” sentiment on the front very nicely! What else needs be said?
You know I’m not a big butterfly fan, but this kit included some really great butterflies!
This is a BIG butterfly ephemera piece – nearly 3″ across – and I loved that fact that it didn’t have a white border..! I also loved this ephemera sentiment from Laura Ingalls Wilder (Little House on the Prairie!). I matted that on a piece of the dark green side of our cut apart sheet, glued it to the Yellow card front, and made a frame using the Grass Green with Gold outline peel off stickers from the kit. I glued (just the body) of the butterfly to the card base and added three Dirty Bronze Nuvo Drops (I really like those!) for a little more dimension and shine. I think I like the “old-fashioned” theme of this sentiment and can think of various uses for a card like this. And that butterfly almost seems real!
We received two large sentiment dies in our kit this month – let’s try one next!
“Big Thanks” eclipse card! I die-cut another piece of the dark green cut apart sheet (LFSRD) and stamped a simple pattern on that with the “thank you”, “you are sweet”, and one of the flower buds using Peeled Paint Distress Oxide ink. I die cut the sentiment from the center of that background, and matted the background on a piece of the light green pattern paper before gluing it to one of the Green card bases. I added partial frames around the background on the top left and bottom right using the kit peel offs for a little sparkle. I die cut the sentiment four times from plain white card stock, and used my Multi Media Matte glue to stack them on top of each other with the die-cut pattern paper sentiment glued on top. Then it’s easy to glue that nice thick sentiment back into the die cut opening on the card front. Very pleased with how well that sentiment reads! I like the subtle, yet apparent background, and I love that this is a very masculine Thank You card!
Back to those ephemera pieces… I can’t seem to ignore them this month!
Another groovy oval ephemera piece – though (alas) this one doesn’t have any foiling. I cut a 2″ strip of that brownish-yellow pattern paper, and two strips of the “half-dandelion” pattern paper for the top and bottom, and glued them together for the background. I ink-blended some Fossilized Amber Distress Oxide ink on the top and bottom edges of a White card base, and glued the background down in the center. I used my thick foam squares to add the oval sentiment in the middle and my thin foam squares to mount the two flower stickers on the sides (I do neutralize the sticky on the back with my powder tool). Three of those cool wooden embellishment dots adds just the right accent on this card front.
Again, I thought the “Be Still” sentiment could use a little extra something, so I printed “the quieter you become, the more you can hear” sentiment on the inside writing surface using my Silhouette software and the plain Geneva font. I LOVE that addition – though patently obvious, I think it’s a nice thing to be reminded of from time to time! Once more, a very masculine card that seems quite useful to me (especially these days..)!
There was one sentiment panel on our cut apart sheet and a smaller version of the same on the pattern paper cut apart that had the rose-gold foiling – the small one wins out!
I cut out that panel and matted it on a piece of the foiled polka-dot pattern paper, and matted those to a plain white mat and then glued all three to a Burgundy card base. I neutralized the sticky on these two matching flower stickers and added them to the front with thin foam squares. With the foiled dots and sentiment, there’s plenty of sparkle here, and I think this is about as pink as I get with these 10 cards! I think this sentiment would work especially well for an anniversary or intimate valentine card!
Now I’m itching for something bolder, and that “Hello Sunshine” die is just the ticket!
Ahhhhh… much better! I began this card by tracing the “Hello Sunshine” die on a piece of masking paper and fussy cutting that out to mask out the ‘shadow’ of the die cut in the center of a piece of plain white card stock die-cut with a LFSRD. I ink blended the background using the Hero Hues inks in Lemon Drop, Creamsicle, and Fruit Punch. Then I reached for the Concord and 9th Sunshine Turnabout stamp set and embossed the rays using VersaMark ink and white embossing powder. Before removing the masking, I sprayed the background with Sheer Shimmer Mist for some all-over sparkle. Then I removed the mask to reveal the crisp white ‘shadow’ in the center.
I matted the background to a thin dark green mat (from the cut apart sheet) and glued both to a white card base. I die-cut the sentiment three times from white card stock and once from the same dark green pattern paper. I inlaid the green die cuts in the speech bubble and glued all four layers together for this chunky sentiment. I did cover the ‘Sunshine’ part of the sentiment with a Spectrum Noir sparkle pen, and glued that in the center of the ‘shadow’ on the card front. Some silver and clear gems from my stash add even more sparkle to this card front. There just happened to be a complimentary sentiment stamp in that Sunshine Turnabout stamp set, so I added that to the inside of this card, making this useful for graduations, sweet 16s, and many different occasions. I have to admit it was a nice diversion to punch up the colors with this card.
I did have one simple pun I was eager to use this month.
I cut a piece of the hexagonal foil pattern paper to 1 7/8″ and matted that to a 2 1/4″ piece of the Burgundy pattern paper, and glued those to the Burgundy card base. I added strips of the LFL Rose Gold Mirror peel off stickers across the top and bottom. I mounted the potted plant ephemera piece – at almost 3.5″, that’s a big ephemera piece too – with my thick foam squares. I printed the sentiment on a scrap of white card stock using my Silhouette software and the Rockwell (italic) font, and die-cut that with a Spellbinder deckled edge rectangle die and ink blended a light touch of the Peeled Paint ink on the edges. The sentiment piece is mounted to the card front with thin foam squares and I added some sequins from our sequin mix and one tiny crystal gem from my stash for the final touch of bling. A fun pun and a great encouragement card! Pretty masculine too!
Now I get back to my favorite ‘take time to make your soul happy’ sentiment.
I fiddled around with this card a lot. I knew I wanted to pair this sticker sentiment with the foiled sentiment pattern paper, and I tried various combinations of flowers, plants, pattern papers and embellishments – but I wanted to see as many words as possible on the background pattern paper, so that finally dictated a simple approach. I die-cut the pattern paper with a LFSRD, glued it to a Green card base, and framed it with the kit peel off stickers. I die-cut a piece of 140# vellum with a stitched circle die, and glued the sentiment sticker to the that and mounted both to the card front with thin foam squares. This is my favorite sentiment in this whole kit! And that Rose-Gold foiling adds a lot of shine here – no sequins needed!
I played around with the Lotus flower stamps in our stamp set for a while and tried coloring those stamps with a couple different mediums… but finally settled on this.
I die-cut more of that Burgundy pattern paper with a smaller LF Stitched Rectangle die, and embossed this arrangement of flowers using masking paper, VersaMark ink and the Love From Lizi Copper Rose embossing powder. I matted that on a piece of white card stock and glued both down to an Ivory card base. On one of the ephemera ‘labels’ I stamped and embossed the “good luck” stamp using the Copper Rose embossing powder, and glued that to a fussy cut mat embossed with the same powder. I mounted the sentiment with thick foam squares, added a bunch of Dirty Bronze Nuvo Drops, and added another ‘partial’ frame with the Rose Gold peel off stickers. I am in love with that teeny tiny Nuvo drop above the ‘g’ – I didn’t think I could make one that small!! I love the texture and the subtle shine of the embossed flowers. Still sticking with a masculine theme here!
I think the little wooden embellishment dots are the most unique item in this kit!
They make perfectly nice very dimensional and graphic flowers for this card! I die-cut the floral pattern paper with a LFSRD, and glued that directly to my last Yellow card base. I fussy cut the notebook paper from one of the cut apart panels, and inked the edges with a little Vintage Photo Distress Oxide ink. I stamped the “thank you” stamp on that using VersaFine Onyx Black ink. I colored one of each size of those wooden dots with a TN3 Spectrum Noir Alcohol Marker and assembled the three flowers on the stamped and inked paper. I die-cut the doily die from a scrap of that dark green pattern paper on the back of our cut apart sheet and used the cut outs for the leaves on the flowers. Kind of perfect! I attached the notebook paper to the card front with thin foam squares, added a sprinkling of Dirty Bronze Nuvo Drops ( I love saying Dirty Bronze..!! ) and another partial frame using the kit peel offs. Even with the flowers I think this Thank You card is actually pretty masculine, and I LOVE those wood dot flowers!
So that’s my 10 cards using the Love From Lizi December 2019 “Simple Pleasures” Card Kit. I don’t think I’ve ever made so many landscape cards with one kit!
Though I didn’t originally set out to avoid all the pink this month, it turns out that I did skip over most of the pinks featured in this kit. That ultimately gave me a nice collection of rather masculine cards with a good assortment of sentiments and plenty of shine!
I did use a lot of the pattern papers, stickers, and ephemera pieces from this kit, and a hefty sprinkling of the embellishments. I didn’t get to the wood-veneer hearts, the pearl flower buttons, the tiny keys, or the burlap flowers, but I think the wood dot flowers more than makes up for that! I used all the flower stamps in our stamp set but didn’t come close to using all the sentiments. I did use all three dies in the kit, and I really like those Dirty Bronze Nuvo Drops. As is always the case, I have plenty of left-over goodies to add to my stash this month!
As of posting, this kit is still available at LoveFrom Lizi.com. If you’re itching for a little bit of spring to brighten up your mid-winter blahs, or if I managed to ignite your imagination, Please use my links when you go shopping with Lizi. It is always greatly appreciated! LFL December 2019 Card Kit
Thanks so much for sharing your time with me here… It means more to me than you will every know! I wish you and yours a happy and hearty Holiday Season, and a healthy and prosperous New Year! God bless us everyone! Happy Crafting!
DISCLOSURE: This site contains some affiliate links to products. I may receive a commission for purchases made through these links (at no cost to you). As an Amazon Associate I earn from qualifying purchases. Thank you!
Hello Folks! Scott here with my 10 Cards 1 Kit post showcasing the My Monthly Hero November 2019 Kit. This month we’re going Home for the Holidays with a heartwarming stamp set and an amazing batch of fancy dies. Our 6″ x 8″ clear stamp set includes some holiday images and furniture with a few family pets and a very interesting staircase stamp. Of course we also get 13 coordinating frame cuts for all the stamped images. And here’s where the fun begins… we get a Doorway Fancy die and five more shaped fancy dies. That doorway die is very intricate, and is complimented perfectly with the wreath, topiary, letters and roof die. Since the Doorway Fancy die is a full 4.25″ x 5.5″ the rooftop fancy die is included to act as a handle for creating treat bags! Very interesting! If that wasn’t enough we also get two round plastic ornaments, 6 glassine (treat) bags, a Glitter Lacquer pen and six A10 envelopes – those are BIG (6″ x 9 1/2″ – fits cards 5 7/8″ x 9 1/4″)… Don’t know if I’ll be making any giant cards this month… but I’ll at least tackle an ornament and a treat bag!
Naturally, I had to start my cards this month using the Doorway Fancy die. I die cut the doorway, the wreath, the topiaries and letters from some alcohol-friendly white card stock and grabbed my Spectrum Noir alcohol markers to color everything. These are the perfect dies to take advantage of my obsessive compulsive nature… yes… I colored every last little brick on this card! I think I was most interested in creating a white house with a red door, and I’m very pleased with the dimension I got (especially the panels) on that door. Here’s a shot of the markers I used to color this card front.
I did stamp the welcome mat on another piece of alcohol card stock and fussy cut that and glued it to the corresponding space in front of the door. I colored the wreath and topiary with the same markers and added them to the card front using foam tape. I glued some orange-y glassine (kite-paper) behind the sconces and the skylight over the door (I like the glossy finish on that paper), tucked a couple of the letters in the mail slot, added a mini gold brad for the doorknob, and glued the whole card front to a white card base. I did stamp the “there’s no place like home for the holidays” sentiment on the inside to finish out this first card! (I recently got a new Gina K Designs Jet Black Amalgam Ink pad so I put it to the test and used it for all my black stamping on these cards) I love this card a lot, but it took me a little too much time to think about making duplicates…!
What if I tried paper-piecing this doorway die? That shouldn’t take quite as much time…!
I die-cut the doorway die from Kraft card stock, and trimmed off the door at the hinge. I couldn’t resist my anal retentive nature and colored some highlights on all the bricks with a white colored pencil. Then I die cut the Doorway Fancy die from some 100# card stock and trimmed off the door, the door frame, the transom window and the mat and glued those on top of the Kraft base. I die cut the topiary and wreath from some green card stock along with four laurel branches using a die from the Love From Lizi October ’19 card kit. I used some dark red card stock from my stash to die cut the six bows (from the wreath) and the two pots, then trimmed them out and glued everything together.
I stamped the “Hello” sentiment on the mat, colored in the topiary trunks and the sconces with markers, and added a mini silver brad to be the doorknob. I glued yellow glassine (kite-paper) behind the sconces and some plain acetate behind the transom window. Using my masking paper to mask off the dog, I stamped the Christmas tree and the Cocker Spaniel / rug stamp on some more alcohol friendly white card stock, and colored them with the same Spectrum Noir markers I used on the door (adding GB1 and GB4 for the dog) I added some colorful confetti sequins and a star gem from my stash to the decorations on the tree. I glued the stamped panel to the front of a white card base and added the house panel on top of that with some foam tape. I like that you can just see the top of the tree through the arched window! That Doorway die is really terrific, though I’m not really sure if this card didn’t take just as much time as the first one! Trust me… I truly contemplated wiring up those sconces with some Chibi lights! Love all of these Fancy Dies in our kit this month!!
But let’s get to stamping…!! You know I like trying to use all the stamps in my stamp set and we have seven distinct sentiments in this kit. Two down… five to go!!
I originally contemplated masking all of the stamps in this scene in order to color a one layer card, but decided that some die-cutting would add nice dimension without a lot of extra headache! I did cut a mask for the staircase stamp, and stamped that and the tree on a panel of Bristol Smooth Card stock and colored them with my Zig Clean Color Real Brush Markers. I did add the suggestion of some baseboard to the left of the tree, and I used some Xmas Red Stickles for all the ornaments. I stamped and colored the dog, the hat, the cat and the mouse using the same supplies, and die cut them all out.
I trimmed that staircase and tree panel down to 3.5″ x 4.75″, stamped the sentiment, and ink blended some Wilted Violet Distress Oxide ink around the edges. I matted that on a thin black mat, then a thin white mat, and then a thicker violet glitter mat, then glued down to a white card base. I trimmed the bottom white border off the Santa hat die-cut and glued that to the dog, then mounted all the animals to the front using foam tape. So stinkin’ cute! I actually stamped, colored and die-cut the bunting/bows for the staircase, but it’s a little short if you use the entire staircase stamp..! Love the little mouse offering the candy to the cat… and I tried to make it look like she was watching him…! I like all the sparkle on this card and it’s really nice to have some characters (animals) to populate our scenes this month!
I do like the fact that we have some non-Christmas sentiments in this stamp set too!
This card makes me want to take a nap! Using the dog/rug mask I cut for card #2, I stamped these two images on some Bristol smooth card stock and colored them with my Zig markers. I stamped the sentiment and die cut that panel using the Therm-o-web/Gina K double stitched Oval die and matted that on a black mat cut with the Large single-stitched Oval die. I die-cut a piece of silver matte card stock with my Lawn Fawn Stitched Rectangle die, and dry embossed that panel with the LFL knitted embossing folder (very cozy)! I matted that on some black card stock and glued that down to a white card base. I mounted the oval piece using foam tape and VIOLA! Our first non-holiday card using this kit. VERY COZY!
Let’s get back to that staircase and the bunting! And more masking!
I cut a mask for the armchair and the present and stamped all on Kraft card stock, and colored this scene using my Prismacolor Colored Pencils. It is easy to sketch in a baseboard to separate the floor from the wall, and I did stamp and color the bunting on a scrap of kraft card stock, and fussy cut that out before gluing it to the railing. I kept thinking of this as my ‘sepia-toned’ Christmas scene, and used white as a unifying highlight color. I stamped the sentiment using VersaMark ink and embossed that with white embossing powder. I glued the colored panel directly to a white card base, added a crystal star from my stash to the tree top and used the Glitter Lacquer pen included in our kit on top of the white ornaments. I think the mistletoe adds some nice height and balance to this scene, and encourages everyone using the stairs to share a kiss!
Here’s another non-holiday sentiment from our stamp set. I stamped the cat on Bristol smooth card stock, masked off the cat, then stamped the dog and colored both with my Zig markers, and fussy cut them out. This is my attempt at a Siamese cat and a Golden Retriever…! I stamped the sentiment on plain white card stock, and die-cut that with another LFSRD. I dug around in my paper stash and found this purple plaid pattern paper (from the SSS April 2017 card kit (Lawn Fawn Perfectly Plaid Rainbow pattern paper)) that I trimmed down using a larger LFSRD and some partial die-cutting. That piece is 5″ x 2″. I matted that with a thin white mat, and glued those to a Kraft card base. I added the sentiment panel to the card base with foam tape, and mounted our the animals to that panel with more foam tape. I really like this simple, heartfelt “special friend” card… no holiday here!
I think this was my least favorite sentiment in our stamp set, It felt a little forced to me… but that won’t stop me from trying to use it! I also thought the grandfather clock stamp was so big, that it pulled a little focus from the cats… I think “together” is more important than “second” with this sentiment!
I stamped the kitten/boot stamp on a scrap of Bristol smooth card stock, masked that off and stamped the big cat and colored them with my Zig markers – I’m shooting for Calico cats this time! I actually used their coordinating dies to cut them out – some partial die cutting was all that was needed on the left of the boot die and the right of the cat die. I simply connected the die cuts in the center with my craft knife.
I masked off the bottom of the grandfather clock with a post-it note and stamped the top on more Bristol smooth card stock and colored that with my Zig markers before using the coordinating die to cut that out. I masked the clock stamp off around the pendulum and weights (post-its!) and stamped those on a plain white card panel using Walnut Stain Distress Oxide ink, and added to their length using a brown Pigma Micron Pen. I did color the pendulum and weights using the Gold Glimmer ink from the MMH August 2019 Kit. I stamped the sentiment with the Walnut Stain ink and embossed that with clear embossing powder, and die cut that panel with a LFSRD.
I used Vintage Photo and Fossilized Amber Distress Oxide ink to blend a little bit of a floor and wall on the main panel (post-its to mask!) and glued that to a thin black mat, a thin white mat, and a thicker Kraft mat and then down to a white card base. The clock is mounted over the pendulum and weights using foam tape and the cats are mounted to the card front in the same way. Very cute! These two cats do look like they’re related!
This next card was an ‘early morning’ inspiration, and a stamp masking triumph!
That is 15 poinsettia stamps to form that tree! (did someone say I was anal-retentive?) I actually only had to fussy cut three poinsettia masks to stamp this tree! And yes… that is the present stamp underneath standing in for the base of the tree! This is stamped with the Gina K. Amalgam ink on Bristol Smooth card stock and colored with my Zig markers. I stamped the sentiment as well and added some clear embossing powder to add a little shine to that sentiment.
That Amalgam ink dries quicker than VersaFine Onyx Black ink so it doesn’t hold on to embossing powder quite as well as the VersaFine does. Otherwise that ink worked extremely well for coloring with alcohol markers and watercolor markers.
I die cut the colored panel with a LFSRD and added a simple red glitter mat before gluing all down to a white card base.
I did do a little research to see why poinsettias are considered a Christmas flower and came across this lovely legend I included on the inside of this card. The flowers are indigenous to Mexico, and I think this was endearing enough to include. Some little dots of white gel pen in the centers of the flowers for a final highlight and I have to say that I LOVE this card!
I had an idea of how to use the whole grandfather clock for a birthday card…
The grandfather clock is stamped on Bristol smooth card stock (still using the Amalagam ink) and colored with Zig markers and the Hero Arts Gold glimmer ink, and die cut with the coordinating die. I found this background patter paper in my image files and printed that with the sentiment using my Silhouette software and the Brady Bunch Remastered font. I die-cut that panel with a LFSRD, added a mat of Black Tie glitter card stock and a mat of kraft card stock before gluing everything to a white card base. I mounted the clock to the front using foam tape and completed the sentiment on the inside of the card. This is one of my all time favorite birthday sentiments for “people of a certain age”!
The only stamp I haven’t used yet is the stocking. It seemed a little large compared with the other stamps in the set, so I felt like it deserved to be highlighted by itself!
I used my homemade wreath builder template to stamp this stocking wreath… same paper, ink and Zig markers used to color. Boy! Those designs get pretty tiny on these socks! I die cut the stockings with a Darice nesting circles die, and used my EK Success Circle Scissor to cut the black mat. I dug through my pattern paper stash and found this perfect background paper from the SSS December ’17 Kit (Doodlebug Milk and Cookies 6″ x 6″ paper pad), trimmed that to 3″ wide and glued it directly to the center of my white card base. I added some Love From Lizi Green and Red glitter Peel Offs to the sides of the pattern paper and mounted the matted circle with foam tape. I tied a little red satin bow and glued that to the card front for a final splash of color and texture. Of course, I can’t leave well enough alone, and though you might not consider this a pun, I do! I printed this sentiment on the inside of my card base using my Silhouette software and the Smoothie Shoppe font. Makes me giggle!!
One of our fancy dies this month is a ‘rooftop’ die – apparently for adding a ‘roof/handle’ to the Doorway Fancy die, and, along with the glassine bags included in the kit, make a sort of a gift/treat bag. That’s interesting… I’m game!
I dry embossed the Doorway die on two pieces of 4.25″ x 5.5″ kraft card stock and added a few definition lines to the front doorway with a BG4 Spectrum Noir marker. I die cut another paper-pieced wreath for the door, and stamped the ‘Welcome” on the mat with Walnut Stain Distress Oxide ink. I die-cut two rooftops, added a definition line of marker and glued those to the top of the Doorway pieces. I cut a 2″ x 4.25″ piece of kraft card stock and scored the two long edges at 1/4″ to fold and attach to the doorways. I found that you want about an inch and a half of a base if you want the ‘bag’ to stand up on its own. I embossed the “merry Christmas” sentiment on a kraft tag from my stash using the HA Embossing & Watermark ink and the HA Red embossing powder. Nice pop of red to match the bow on the wreath! Very Cute! By avoiding actually die-cutting the Doorway die, this was a pretty quick and simple assembly! I’ll have to think hard about some other options for that roof die…!!
I turned my attention to the two round ornaments in the kit. I originally thought I’d be creating a little dog and cat scene inside these globes, but I was a little colored-out by this point, and I remembered I had a new die set I got last year but haven’t used yet. Here’s my Christmas ornament featuring the Altenew Layered Snowflakes die set. Those snowflake dies fit inside this ornament perfectly!! I dug around in my stash for some glitter card stock and found an old piece of sparsely glittered white card stock and some silver glitter card stock that I then colored with an alcohol marker (TB4) to get the blue glitter piece. I interspersed the glitter card with some 40# vellum die cuts and glued all the layers together (on both sides with a piece of invisible thread between the large center die cut. This ‘floating’ snowflake is actually 10 layers! I LOVE THAT SNOWFLAKE! It certainly deserves to be preserved behind glass (or plastic as the case may be!!). Of course you can see the snowflake from both sides of the ornament, and there is a little bit of movement in there as well.
This is a pic of my 10 layers all die-cut and ready to assemble. I did glue a piece of invisible thread between the two center white pieces and let that dry very well before assembling the other layers on both sides.
Once everything was good and dry, I added small strips of 1/8″ Scor-tape at the top and bottom of one of the ornament halves, and affixed the thread to the tape adding another piece of tape on top of the thread. I used my Multi Medium Matte to glue the two halves together, and the scor-tape helps as well!
Once dry, I covered the seam with 1/8″ white satin ribbon run through my zyron sticker maker and created a loop at the top for hanging. I tied a double bow with some white and silver ribbon from my stash and glued that to the top of the ornament with E6000 heavy duty glue. I liked that so much I decided to go ahead and make the second ornament. This time I eliminated the first (largest) white layer and just used the remaining four layers. That makes the snowflake just a touch smaller so the movement on this ornament is a little freer than the first, and I think a little bit more ethereal without the bold white center.
I never thought I’d get around to these ornaments in our kits, but inspiration took hold of me, and I am so pleased with both of these! I have a couple of people in mind who would really appreciate these ornaments as a gift this year! BONUS!
Thats my ten cards, two ornaments and one treat bag created with the My Monthly Hero November 2019 Kit. I used every stamp in this stamp set, all of the fancy dies and quite a few of the frame dies. The only thing in this month’s kit that I didn’t use, was any of the A10 envelopes. Truthfully, the thought of making a card that big gave me palpitations!
Six Christmas cards, a birthday card, and a few friendship cards makes for a nice attractive group of cards this month. I think that Doorway Fancy die is truly something special… the staircase stamp is unique as is that grandfather clock stamp. I think all the animal stamps are pretty adorable and will prove handy in the years to come, and I do like the non-holiday sentiments as well! I had a great time creating these cards (and extras) with this kit – enough to forgive Hero Arts for giving us two Christmas themed kits in a row this year! LOL!
As of posting, this kit is still available at heroarts.com. If you do go shopping with Hero Arts, please use my links throughout this post and my link to the Hero Arts shop directly: http://shrsl.com/1f7qx THANK YOU SO MUCH! That truly helps support this page and is graciously appreciated!
Thank you so much for sharing your time with me here… I am sending you and yours best wishes for a happy, healthy, and hearty Thanksgiving Holiday! Please remember to Like me, List me, Pin me, Post me, Share me with all of your friends, Don’t forget to warm the dinner rolls… and HAPPY CRAFTING!
DISCLOSURE: This site contains some affiliate links to products. I may receive a commission for purchases made through these links (at no cost to you). As an Amazon Associate I earn from qualifying purchases. Thank you!
Hello Folks! Scott here with the new Love From Lizi December 2019 Card Kit. It’s nice to get away from the holiday themes for a little bit, and this kit appears very useful for creating an assortment of cards appropriate for many different occasions!
I can almost feel the spring breeze and warmer weather coursing throughout this kit!
As always, we get five sheets of 8.5″ x 11″ card stock in our kit. I almost always use these for my card bases in my 10 Cards 1 Kit videos. We get a sheet of Lizi’s super smooth alcohol-marker friendly White (I will usually swap this out for a normal white card stock from my stash), along with a sheet of Yellow, Ivory, Green and Burgundy.
We get one 12″ x 12″ sheet of cut-aparts, featuring a few frames, some sentiments, and even a couple of border strips. Lizi cut this sheet apart just below the top two cut-aparts to make it fit in our box this month, and the back of this page is a simple distressed dark green color.
And we get a 12″ x 12″ sheet of stickers! These are nice, thick, card stock stickers featuring touches of Rose Gold foiling and a variety of icons, shapes and sentiments! I always like those small sentiment strips showing there on the bottom right. There’s a “Simple Pleasures” there as well as on the pencil! A PINK pencil of course!
That’ll bring us to this huge assortment of pattern papers in our kit this month! Eighteen 6″ x 8″ single-side pattern papers again sporting more of the rose gold foiling. There’s one mini cut-apart sheet, some flowers, background sentiment patterns, geometric patterns, watercolor washes and polka-dots, stripes and tiles. A GREAT bunch of pattern papers!
We get a new color for our peel-offs this month. Grass Green Mirror outlined with gold! That green and gold work perfectly together! And this is our Simple Pleasures Stamp set. Ten different sentiments and six flower images. Some interesting sentiments here – I really like the “Good Luck” and “Think Positive” ones, and the flower stamps give us an opportunity for some coloring this month! I’m pining for the spring already!
That brings us to Lizi’s Legendary Embellishments Bag!
You may think those are enamel dots, but, no…! They are wooden dot embellishments! I’ve never seen those before..! There must be lots of options for using/coloring/adapting those! We do get a new Nuvo Crystal Drops in Dirty Bronze – don’t think I’ve heard the word ‘dirty’ used as a color descriptive before…!! LOL!! We get three great dies this month, two large sentiment dies “BIG Thanks” and “HELLO Sunshine” (love the size of these!) and a small 2″ doily. I’m not a big doily person but I do like the small size of this die! That’s three metal keys to the right of the doily die, and 10 pearl flower buttons. Those are real buttons and yet not too awfully thick. On the bottom row we have two burlap ribbon flowers with a nice white embellishment in the center, and four LOVELY wood-veneer die cut hearts. The intricacy of those hearts is downright beautiful. WOW.
And if that weren’t enough, we also get a huge pack of ephemera pieces this month!
More rose gold foiling highlights a lot of these pieces, and everything matches the stickers, the cut-aparts and the pattern papers perfectly. There’s a bunch of different sentiments, panels, labels, tags, birds, butterflies, flowers and potted plants. Enough to make dozens upon dozens of cards! That is quite a treasure of supplies in this month’s embellishment bag! WOO-HOO!
I did manage to snag a few add-ons this month!
This is the Rose Gold Sentiments Thicker Sticker sheet with all those large shiny sentiments – a little thinner than fun foam I think. And I’m thrilled to get the Simple Pleasures Peel Off pack with Forest Green pinstripes, Soft Peach sway, Copper Mirror bubble, and Gold Moondust straight. All four peel off shapes in one bundle!
And to wrap up this kit, I got the Foam Sentiments Thicker Sticker pack – these are nice and thick and squishy…! Definitely as thick as fun foam! About half and half as far as the plain peach stickers and the rose gold foil stickers, but all are quite large and will take up a lot of real estate on a card! I do love that rose gold laurel on the left…!!
That’s the Love From Lizi December 2019 “Simple Pleasures” card kit. As usual, Lizi has given us huge amount of card-making supplies this month featuring a spring-y color palette with lots of unique products and beautiful accessories. My mind is already mulling over the possibilities!
This kit and add ons are available at lovefromlizi.com – please use my links when you go shopping with Lizi – it is always greatly appreciated! http://shrsl.com/1yyuw
Thanks for sharing a little time with me today! I’m sending you and your family best wishes for a happy, health, and hearty Thanksgiving!! GOBBLE!! GOBBLE!! Please remember to Like me, List me, Pin me, Post me, share me with all of your friends, DON’T run with scissors… and as always, I wish you Happy Crafting!!

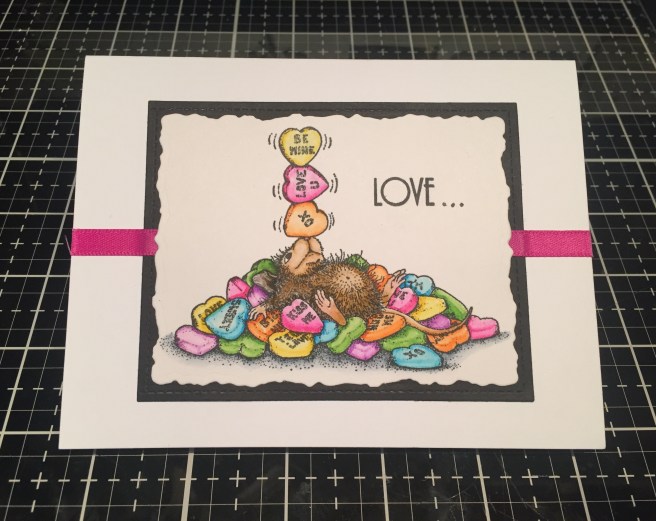
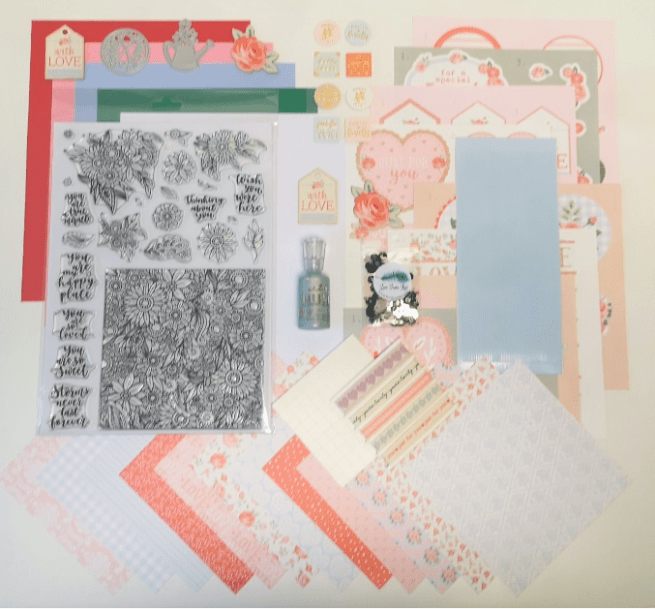

 send in a standard envelope, but I love the 3-dimensional aspect of the decoupage heart. I did think one of the sentiments from our stamp set would compliment this card nicely, so I stamped “you are so loved” on the inside of the card using
  Thank you, Alice! Very much like Tombow markers but much less expensive. Now, I know some folks look at a stamp like this and feel a little overwhelmed at the prospect of coloring something this large and detailed. But if you take it step by step, It’s really not an insurmountable challenge! I started by coloring all the greenery – everywhere I saw a “leaf” I colored it green. One of the great things about a stamp like this is you can color something “wrong” and no one will ever notice! Once the foliage was colored, it was easy to see the flowers as individual entities… I just colored each style of flower exactly the same, however often it was repeated in this pattern. Granted, this did take a couple hours to color, but I find it very therapeutic to put on some music and zen out with my colors! And look at the lovely results! I definitely think it was worth the time… Now let’s make a card with this!

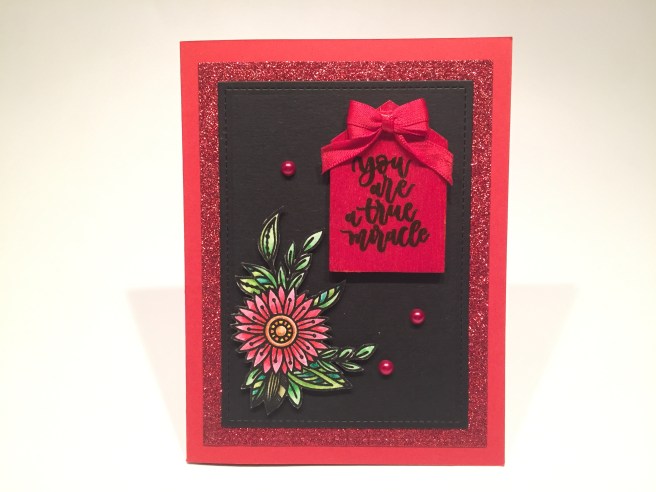
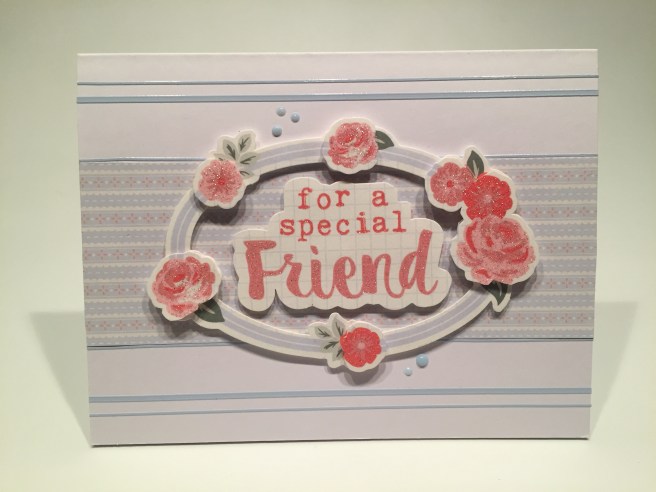
 I liked seeing the stripe background in the center of the oval instead of the plain grid behind the sentiment. A few Blue Babe Nuvo drops on the front adds another touch of blue and a little more shine. I thought this decoupage card was perfect for using another stamped sentiment on the inside, so I stamped “you are so sweet” on the inside of the card using
 Again, this sentiment paired up with the “wish you were here” sentiment, so I stamped that on the inside with Onyx black ink. For a final touch, I rounded all four corners of this card with my


 liquid glue on the edges, and the handle, spout, and center flower are raised up with tiny spots of foam tape. I used my Silhouette software and printed “you help me grow” on the inside of this card using
 It wasn’t easy coming up with any puns for this kit, but I did manage a nice one with this card. I printed “you bloom me away” on the inside writing surface using my Silhouette software and the
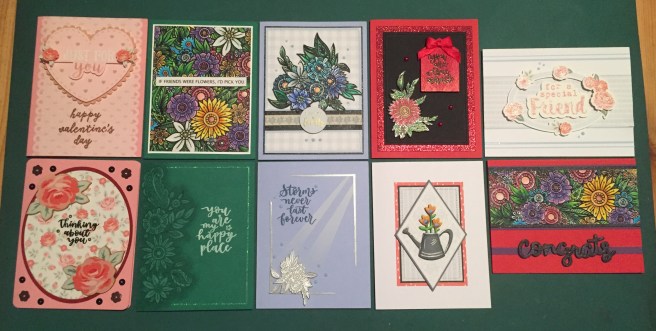


 and die-cut them using the sentiment strip die. I glued the banner sentiments along the two sides of the bouquet and added a small double bow using the pink ribbon included in the kit. For a final touch I stamped the “LOVE MAIL” stamp on the inside using the same Soft Granite ink.


 but this one is what caught my eye – it’s the same basic shape as our large butterfly die in this kit! And that Aqua Glimmer Metallic ink was just sitting there begging to be used. I die-cut the three butterflies from some


 I turned to my Silhouette software to print this sentiment on a piece of my Mead sketch paper using the
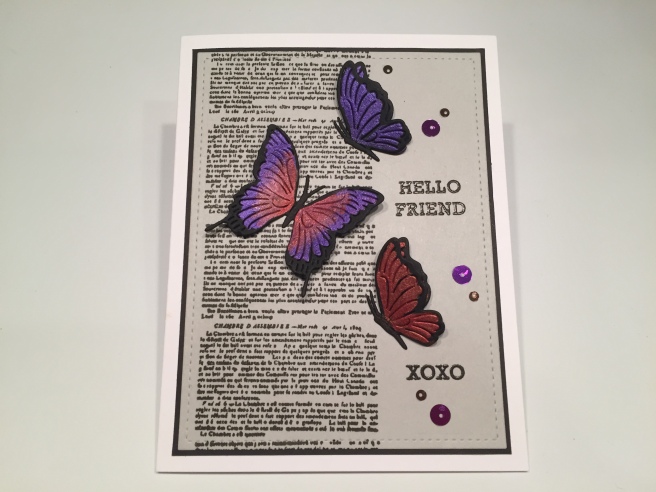

 The center of the Rose mat has been cut away with another
  I printed this poem on a scrap of white card stock that measures 2.1/2″ wide by 4.3/8″ tall (the bottom 1/4″ is 3″ wide to provide a stopper so the note doesn’t pull all the way out). I dry-fit everything to make sure I had room for this whole poem, then glued the envelopes to the card front.

 That wraps up my 10 cards for this sold out MMH January 2020 kit…! This is a very unique kit that can create a variety of cards – I managed only 2 Valentines but ended up with 8 different occasion cards. I can understand why this kit sold out so quickly – who doesn’t love flowers and butterflies? If you don’t want to miss out, I would suggest subscribing…! The six month plan lets you skip one month if you don’t happen to like the kit – not very many subscriptions let you do that! If you do go shopping at Hero Arts please use my links throughout this post and to go directly to Hero Arts click here:
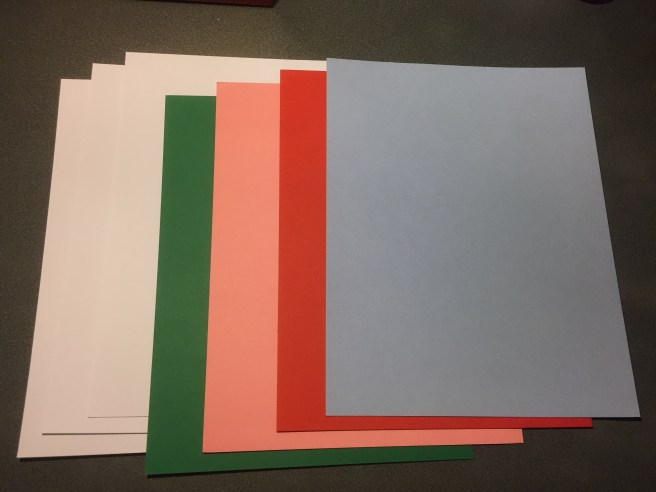
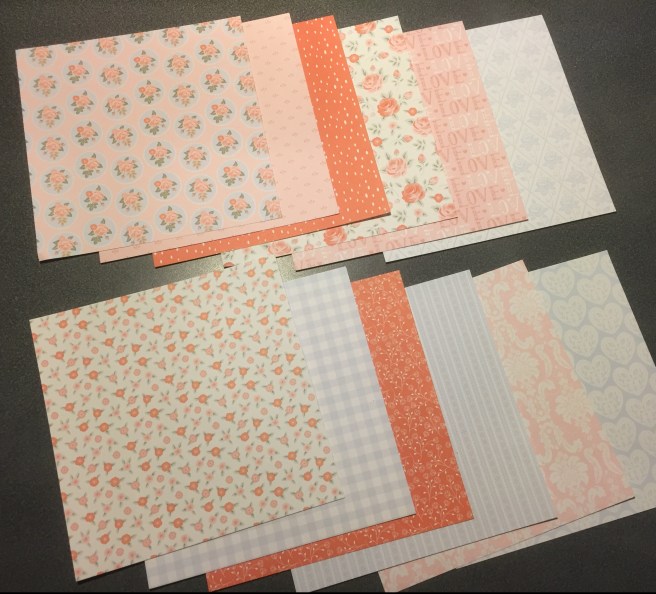
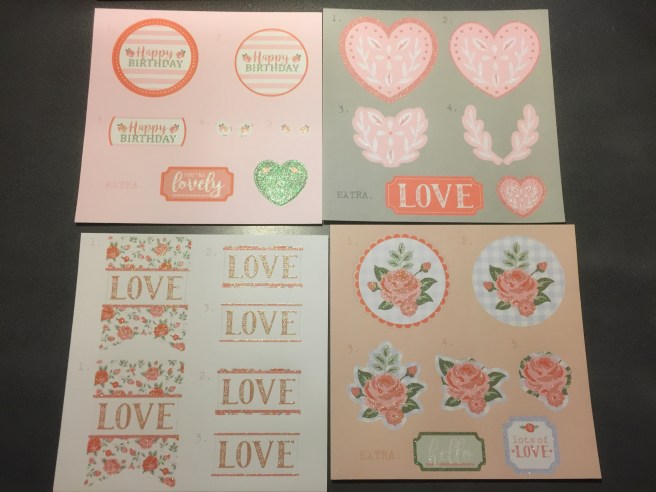


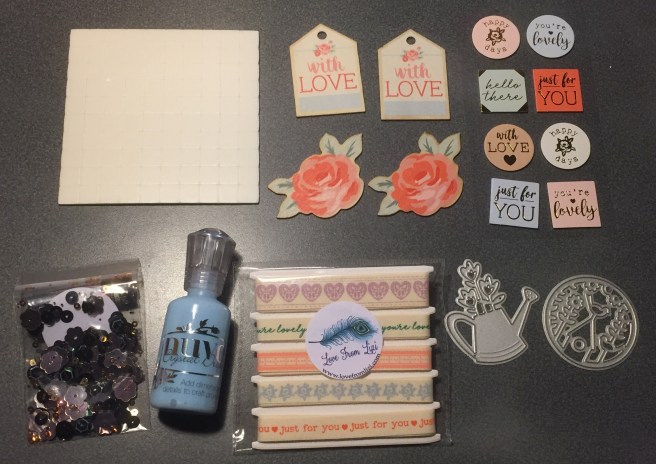
 I did manage to get an additional add-on this month. I got the

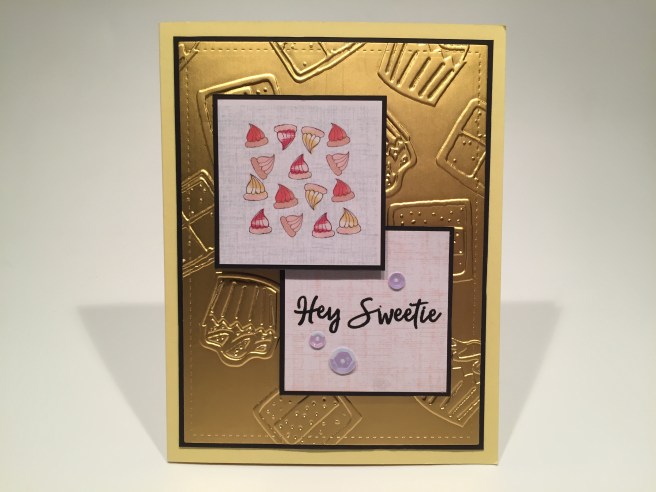

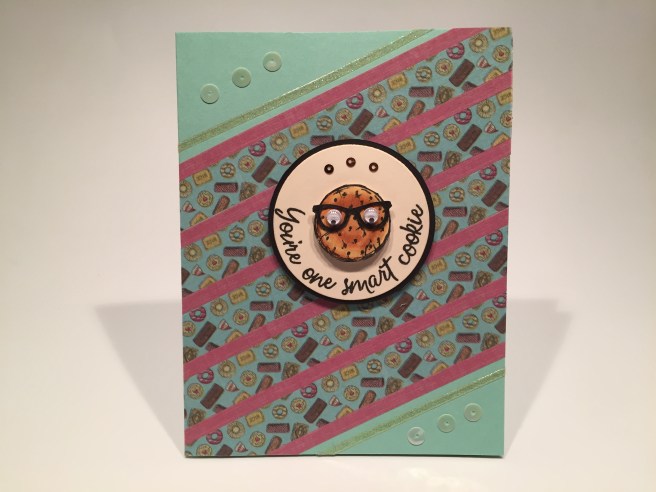
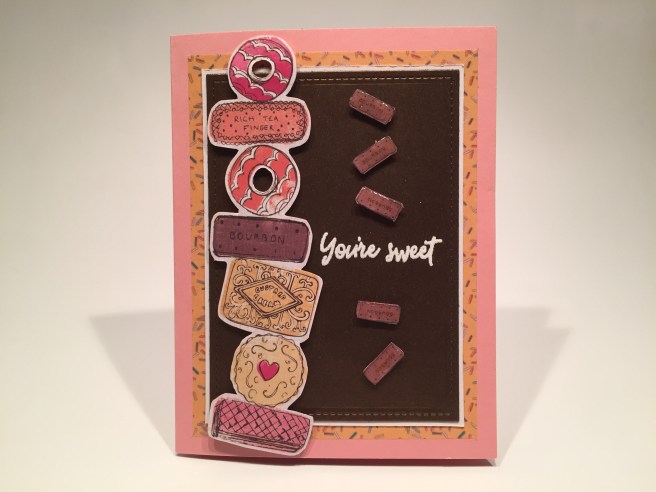
 I did complete this sentiment on the inside of the card, stamping the sentiment with Walnut Stain Distress Oxide ink and embossing that with more clear embossing powder. This feels about as chocolate-y as I could get with this kit to go along with this sentiment!
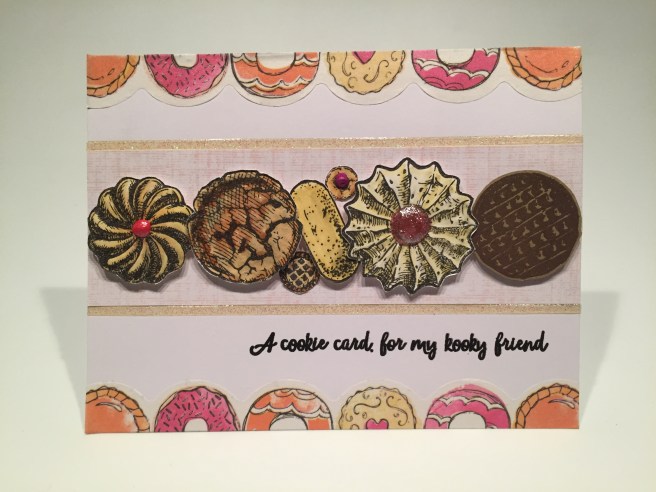

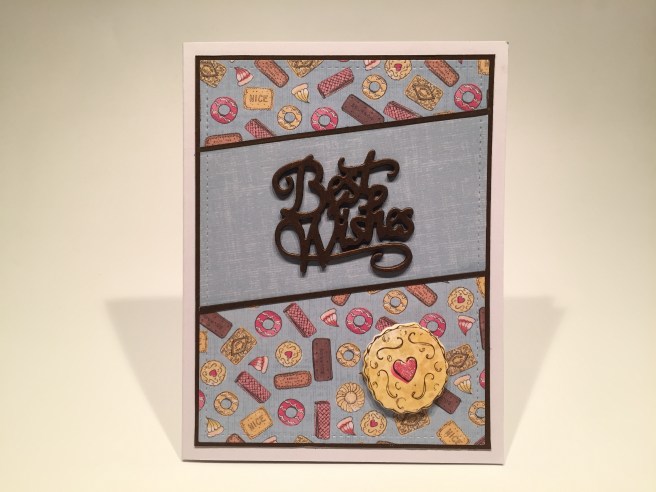
 and just had to cut up one more sentiment to finish this card out. On the inside, I stamped “Sweetie” (from the “Hey Sweetie” stamp) using Walnut stain Distress Oxide ink and more clear embossing powder. I think that helps justify a cookie / sweet treats card sporting a Best Wishes sentiment. Unless you might want to give this card to a friend starting a new diet! Is that mean?
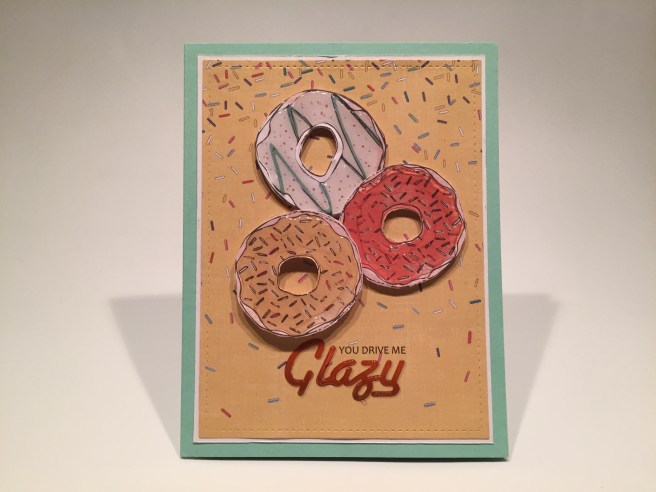
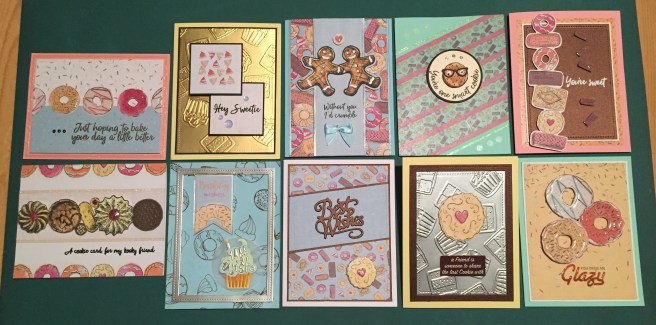
 Hero Arts is celebrating the diversity of our beloved (yet stressed) planet Earth this month with this lovely 6″ x 8″ stamp set with a stunning (and large) “Earth Goddess” stamp. I think this must be the largest image stamp I’ve seen in a MMH kit in the couple years I’ve been a subscriber. Really beautiful! She is complimented with an earth, a tree, a pair of fish, a peace sign and a few sentiments sized to fit in the crook of her arm. There’s also a pair of hands, some birds, flowers and clouds to round things out.
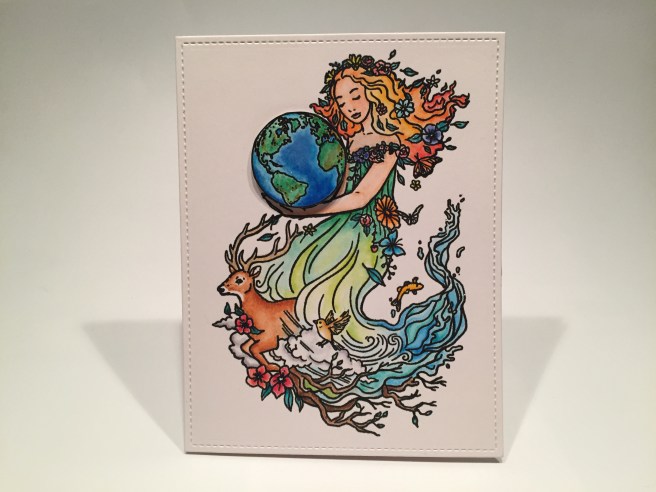
 mood after making this, so I turned to my
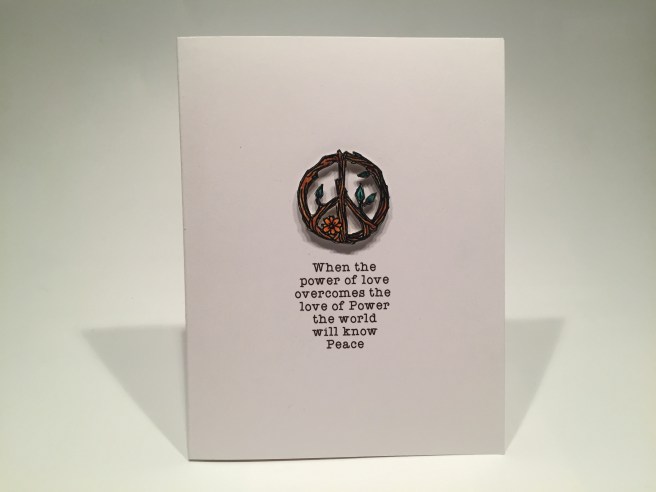
 I thought this unique stamp was cool enough to hold it’s own on the front of a card – and is very appropriate with this quote that I do attribute on the inside of the card. Plain yet powerful!
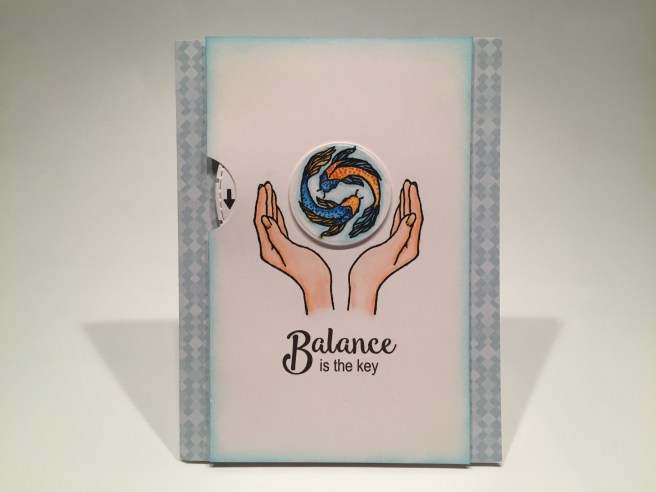
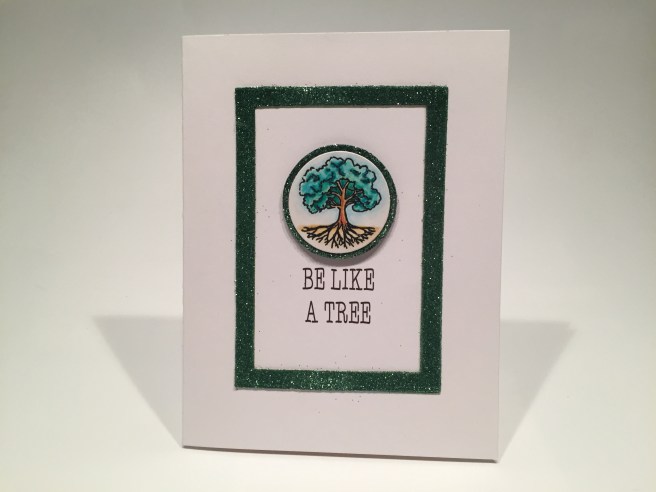
 matted tree with some foam tape. Of course there is more to this sentiment than just “Be a Tree”… I printed the rest of this sentiment on the inside of the card using my Silhouette software and the same font. Very good advice for most anybody at most anytime! And I think this is particularly appropriate with this stamp that shows the roots of the tree!
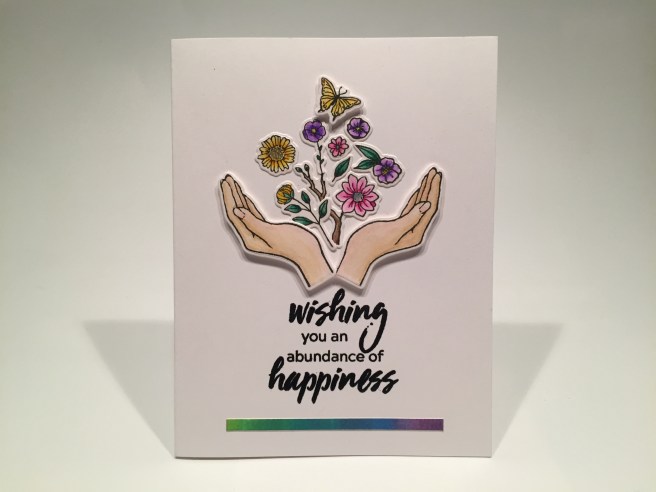

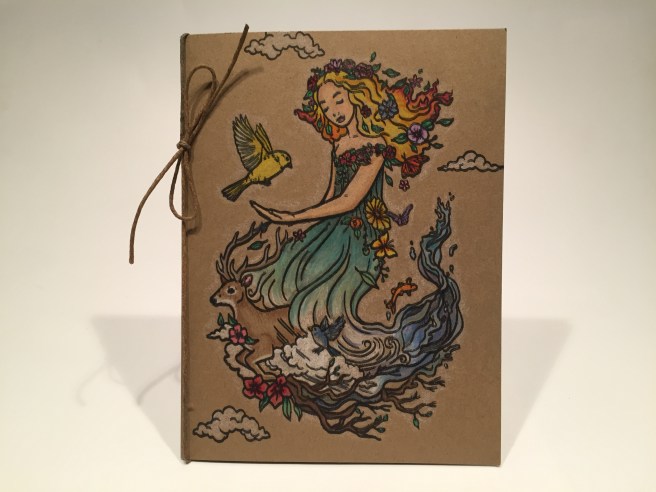
 Again, no sentiment on the front, so you know I’m going to have something to say on the inside. I love this “Unleash your inner Goddess” sentiment! I printed that on a scrap of ivory card stock using the
 Perfect match! But what’s the joke you may be asking? You have to open the card to see, silly! “Mulch this card” makes me giggle every time I say it! I printed this on the inside of the card base using the
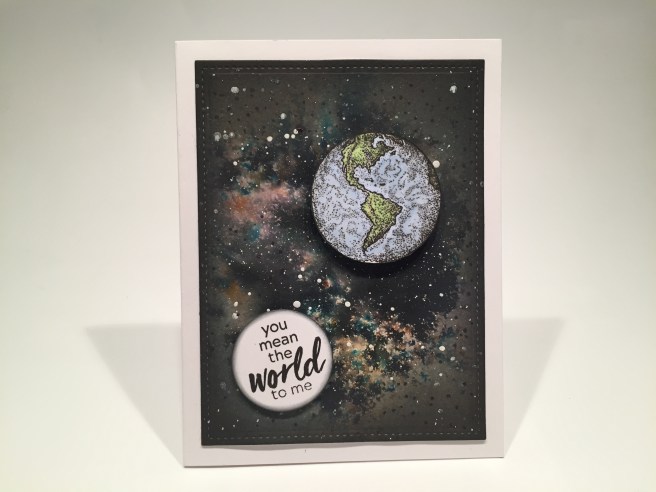
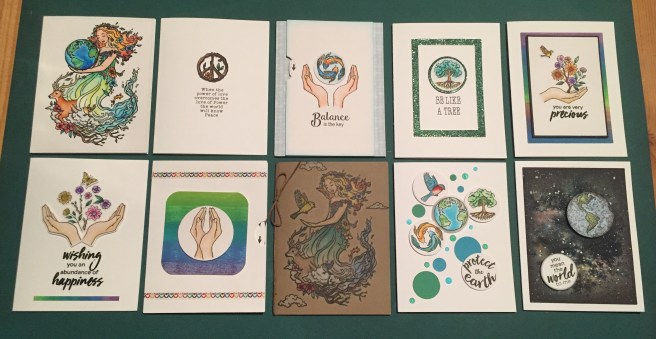

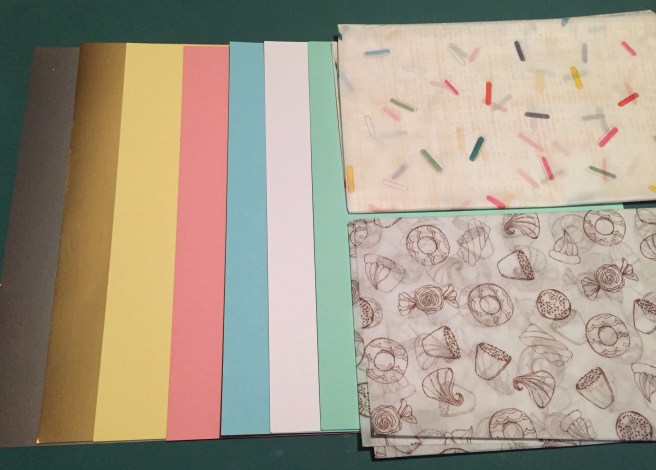

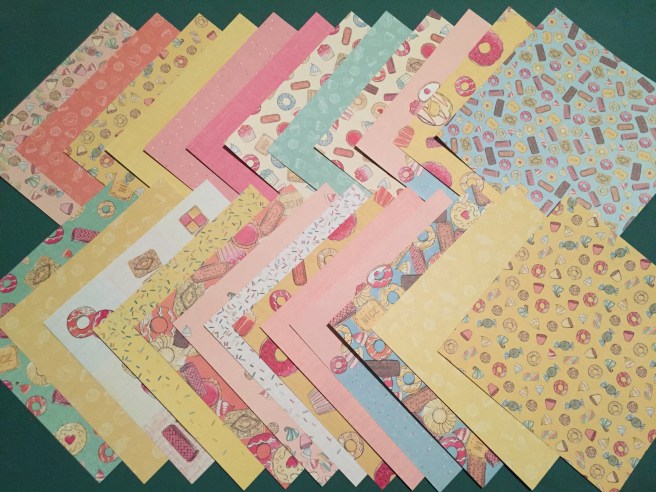


 Of course, Lizi has all sorts of add ons and new releases to go along with this card kit. I did manage to get the


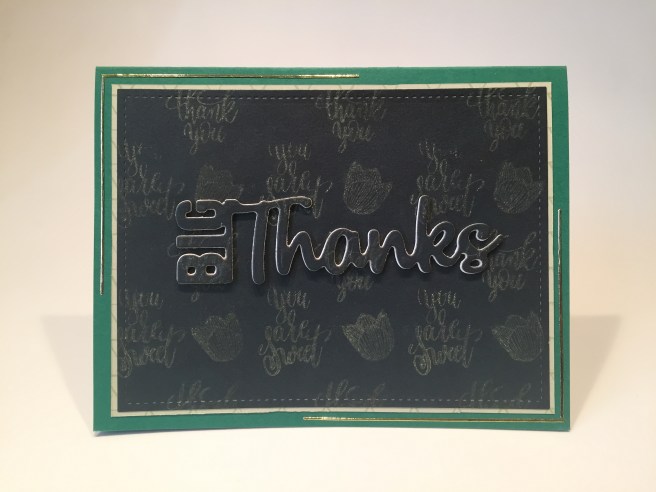

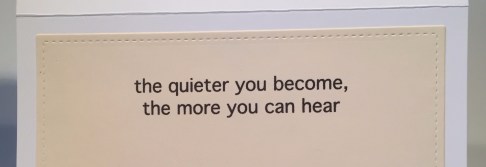


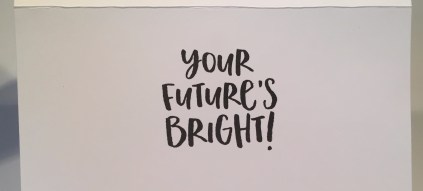 There just happened to be a complimentary sentiment stamp in that Sunshine Turnabout stamp set, so I added that to the inside of this card, making this useful for graduations, sweet 16s, and many different occasions. I have to admit it was a nice diversion to punch up the colors with this card.


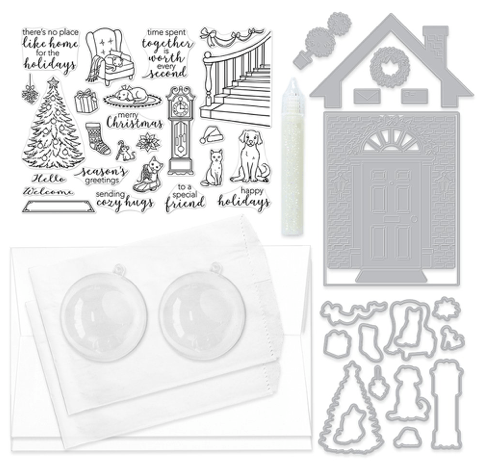 stamp. Of course we also get 13 coordinating frame cuts for all the stamped images. And here’s where the fun begins… we get a Doorway Fancy die and five more shaped fancy dies. That doorway die is very intricate, and is complimented perfectly with the wreath, topiary, letters and roof die. Since the Doorway Fancy die is a full 4.25″ x 5.5″ the rooftop fancy die is included to act as a handle for creating treat bags! Very interesting! If that wasn’t enough we also get two round plastic ornaments, 6 glassine (treat) bags, a Glitter Lacquer pen and six A10 envelopes – those are BIG (6″ x 9 1/2″ – fits cards 5 7/8″ x 9 1/4″)… Don’t know if I’ll be making any giant cards this month… but I’ll at least tackle an ornament and a treat bag!
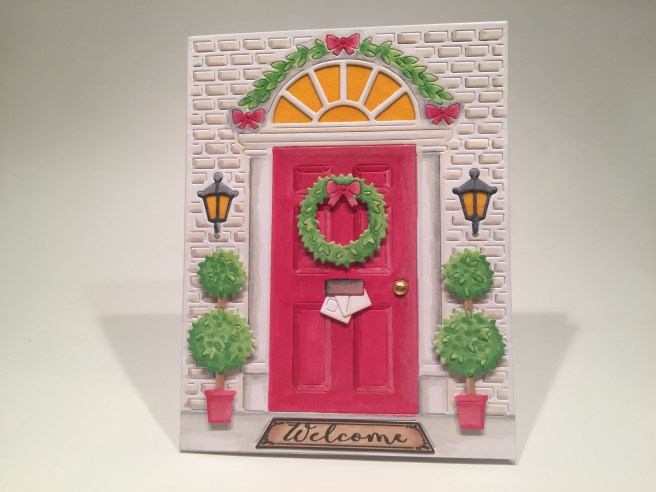
 These are the perfect dies to take advantage of my obsessive compulsive nature… yes… I colored every last little brick on this card! I think I was most interested in creating a white house with a red door, and I’m very pleased with the dimension I got (especially the panels) on that door. Here’s a shot of the markers I used to color this card front.
 (I like the glossy finish on that paper), tucked a couple of the letters in the mail slot, added a mini gold brad for the doorknob, and glued the whole card front to a white card base. I did stamp the “there’s no place like home for the holidays” sentiment on the inside to finish out this first card! (I recently got a new
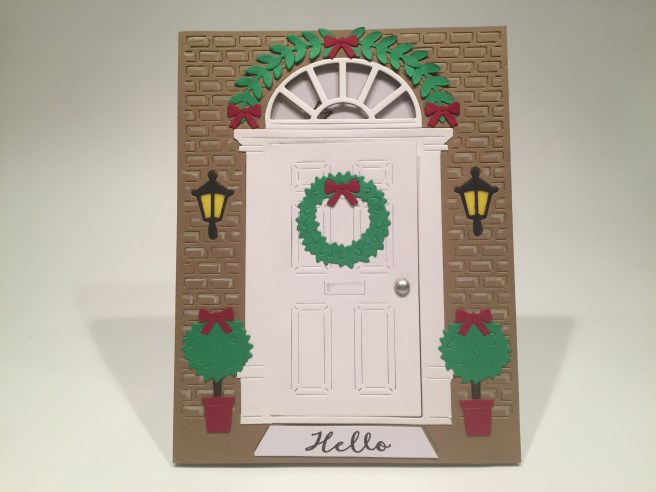
 Using my
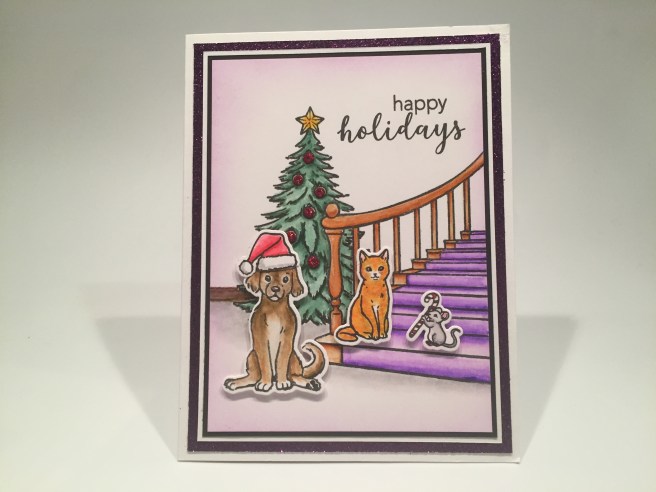
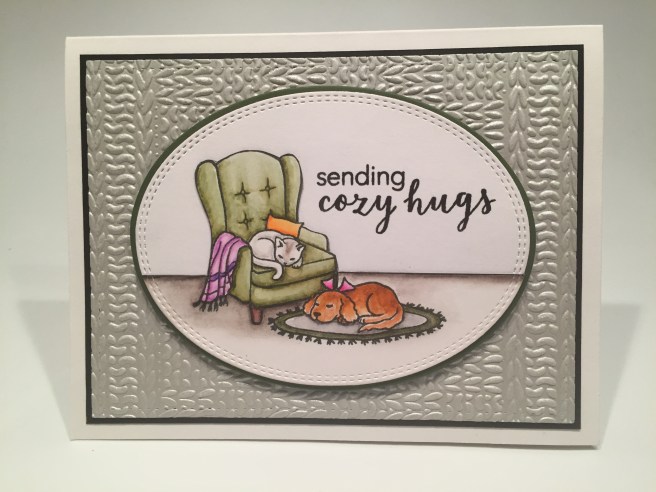
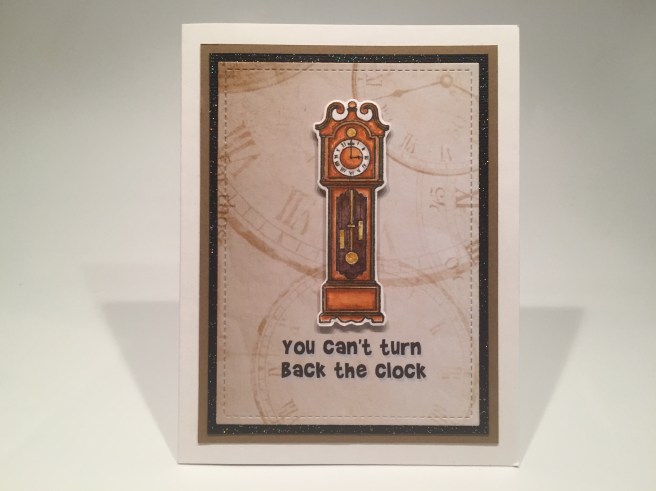
 I found this background patter paper in my image files and printed that with the sentiment using my
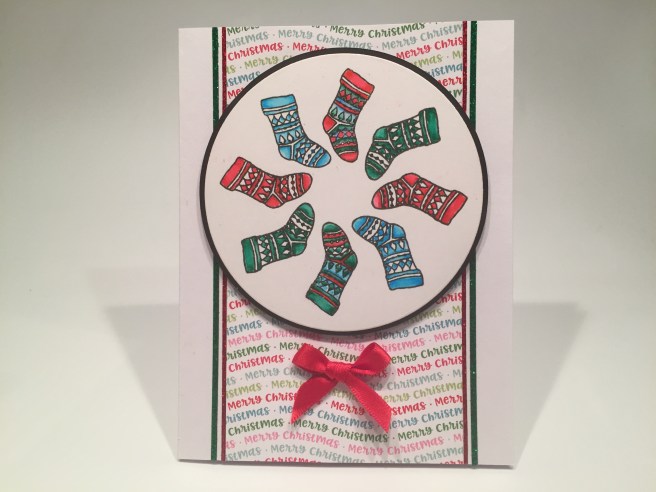
 I added some
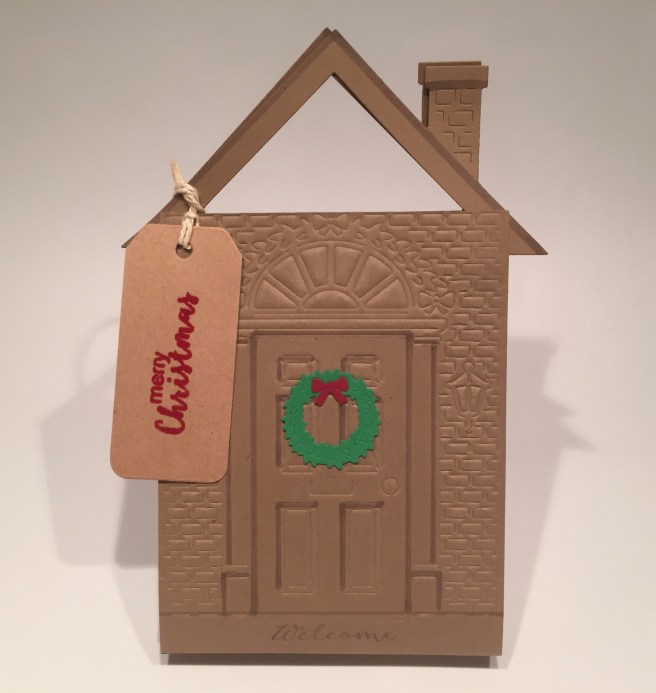
 the
the  This ‘floating’ snowflake is actually 10 layers! I LOVE THAT SNOWFLAKE! It certainly deserves to be preserved behind glass (or plastic as the case may be!!). Of course you can see the snowflake from both sides of the ornament, and there is a little bit of movement in there as well.
 I liked that so much I decided to go ahead and make the second ornament. This time I eliminated the first (largest) white layer and just used the remaining four layers. That makes the snowflake just a touch smaller so the movement on this ornament is a little freer than the first, and I think a little bit more ethereal without the bold white center.