
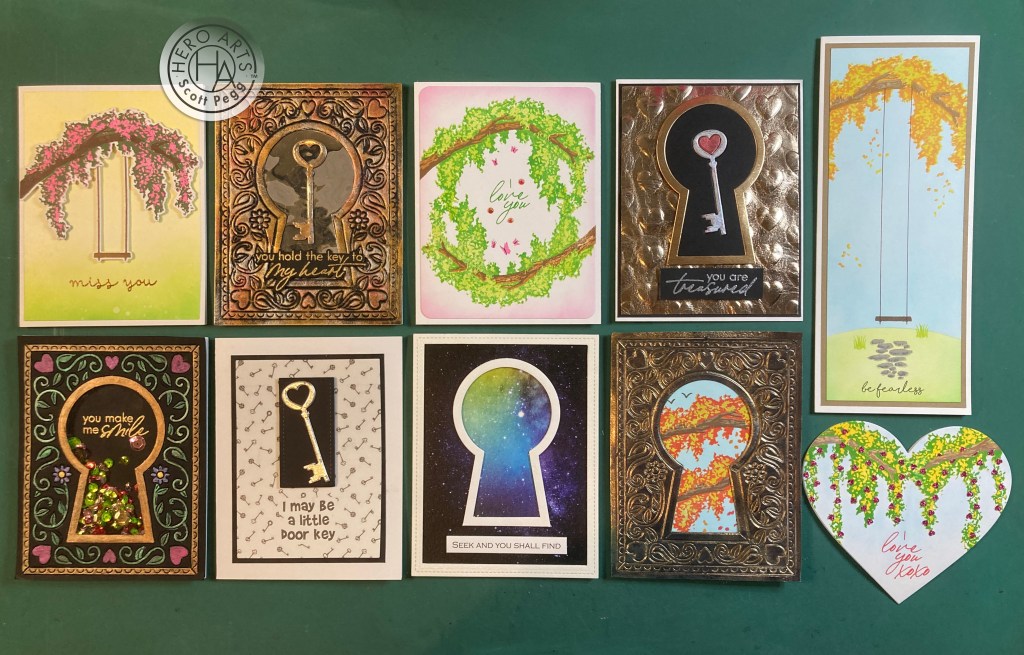
Hello dear folks! Scott here with my 10 cards inspired by the MMH January 2022 kit. According to the Hero Arts website, this kit was “inspired by a visit to Paris and the locks left by lovers and dreamers on the bridges there.” Hmm. I guess they are referring to Pont des Arts which is arguably the most popular “love lock” bridge in the world. Nice! Though I do understand you can no longer add a “love lock” on Pont des Arts due to the architectural danger that all the added weight could actually compromise the bridge… in fact, Paris has had to remove a number of the locks on Pont des Arts already. And though we have a key and keyhole in this kit, we don’t get any locks… those are in the add-ons…!

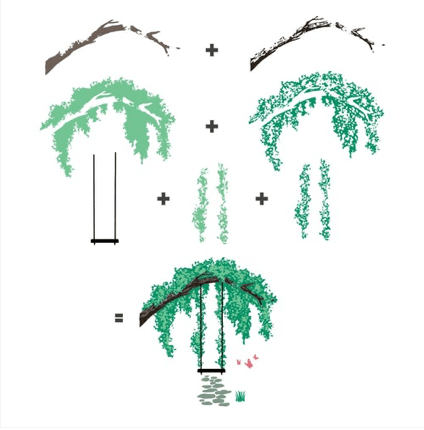
The focal point of this kit is a gorgeous cover plate die with ornate detail surrounding a keyhole. It can be used alone or layered over any number of beautiful scenes. The 6″ x 8″ stamp set includes a lovely Color Layering stamp set featuring a rope swing covered in inviting greenery. There are also ink cubes which work well with the stamps (Green Apple Reactive, Key Lime Fizz Reactive, Taffy Reactive and Cup O’ Joe dye ink). We get three coordinating frame cuts and a Key Fancy die, and the kit is rounded out with some iridescent red gems. We have some nice sentiments in the stamp set that could be used for valentine wishes or simple friendship and encouragement cards.
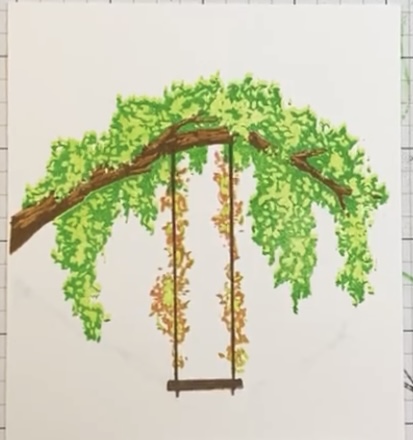
I’m not always terrific at getting my layering stamps to line up correctly, so I did take a moment to practice lining up these stamps. I used Caramel and Cup O’ Joe inks for the branch and swing, and Key Lime Fizz and Green Apple for the branch foliage and Key Lime Fizz and Taffy ink for the greenery on the swing… I think I kept wanting this tree to be a wisteria, but I’m not sure that’s exactly what the designer had in mind…! Other than some small stones, butterflies and grass, this image uses up all the stamps in this kit… coming up with 10 cards might be a bit of a challenge!
I wasn’t thrilled with this bi-colored image, so I thought I’d see if I could get a little more flowers going on in this tree… I’m still stuck on the notion of a wisteria!
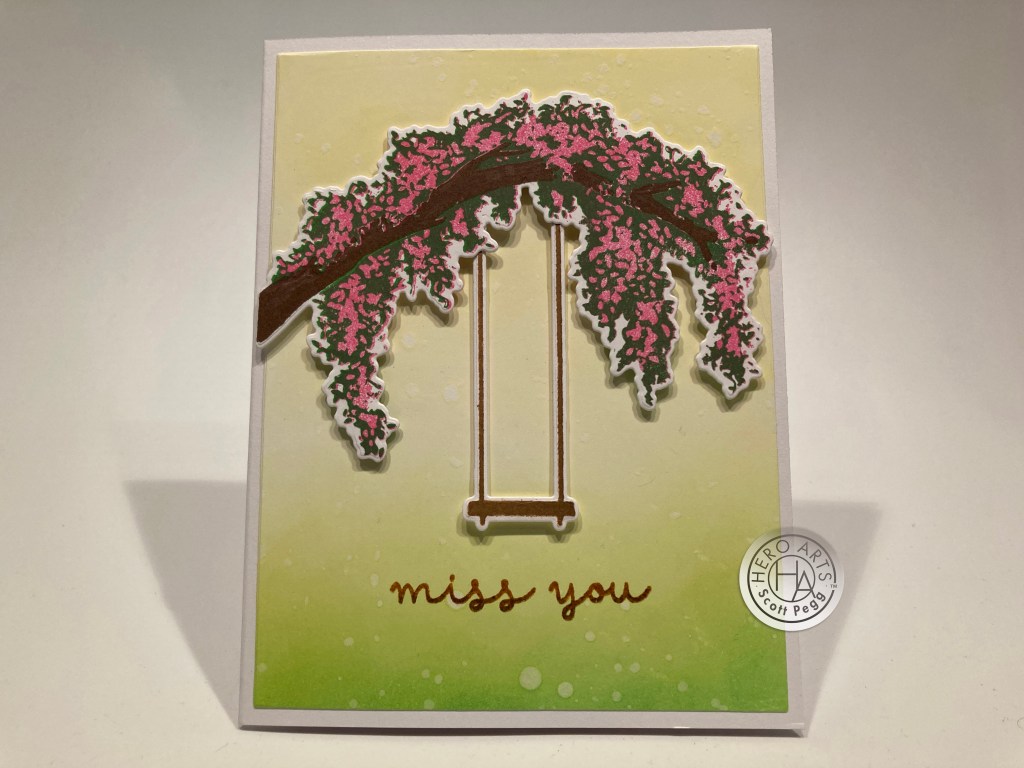
This branch and swing is stamped with Cocoa and Cup O’ Joe ink (alas, too close in color to show much detail). The solid greenery is stamped with Taffy, and the detail foliage is stamped with the Green Apple. Now, that’s quite interesting! Almost starting to feel like a wisteria to me! The Green Apple ink got very dark on top of the Taffy ink… I didn’t allow the Taffy ink much time to dry… perhaps if I had, the Green Apple might have stayed lighter? I used the matching frame dies to die-cut the branch and swing.
I ink blended Lemon Drop, Key Lime Fizz and Green Apple reactive inks on a 4″x 5.25″ panel of White card stock, and sprinkled some water droplets on top for a little added texture. The sentiment is from the Hero Arts Many Everyday Messages Stamp set, stamped with Caramel and Cup O’ Joe inks and embossed with Clear Embossing powder. That panel is glued to an A2 card base, the swing is glued to the back of the branch, and the combined die-cuts are added using foam tape. I didn’t think any of this kit’s sentiments really embellished this image… nothing seems quite so lonely to me than an empty swing… this is one of my favorite “miss you” sentiment stamps… it’s gotten a lot of use lately…!
The Cover Plate Keyhole die is beautifully ornate, with hearts, vines and leaf embellishments. Fortunately, Santa was pretty good to me this year and I have some new Metallic Gilding Polish to experiment and play with!
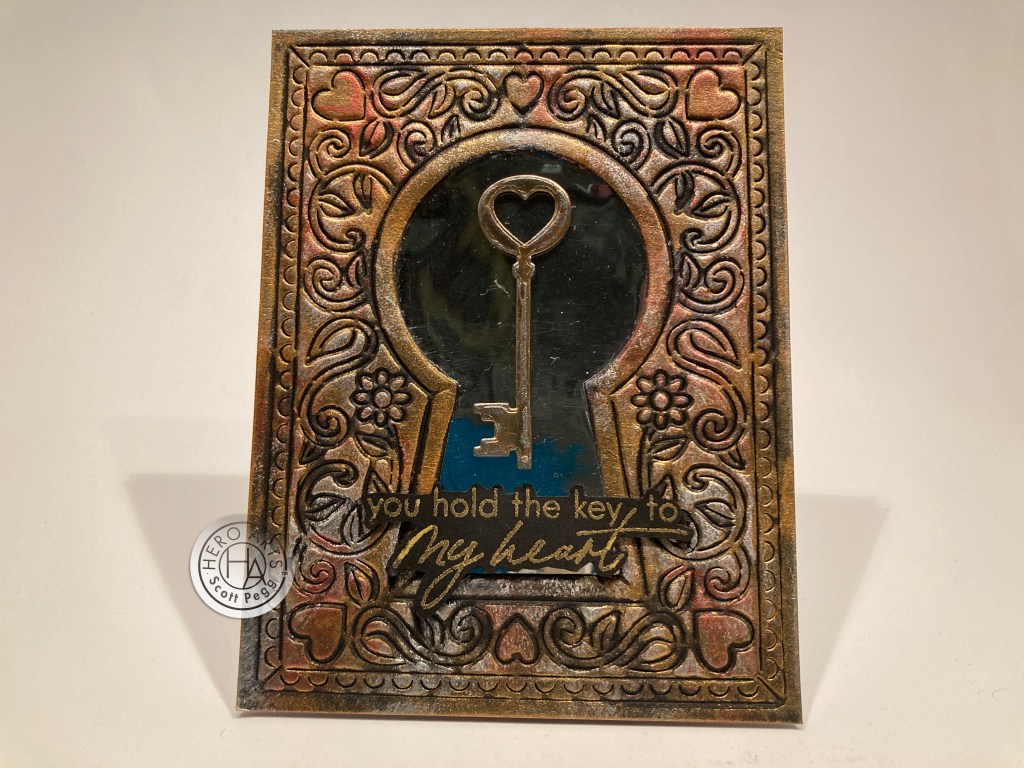
I die-cut the Keyhole from a piece of Pitch Black card stock, and top-coated the die-cut with Creative Expressions Metallic Gilding Polish in Silver Dream, Gold Treasure, and Rich Red. That gilding polish is quite fun, and really brings a metallic look to the die cut! I die-cut the key twice from more Pitch Black card stock, glued them together and used the gold and silver polish on the top. I started out with a black keyhole, but that seemed too flat with this metallic die-cut, so I finally settled upon a piece of Silver mirror card stock behind the keyhole.
I stamped (Watermark and Embossing ink) and embossed (Gold Embossing powder) the sentiment on more Pitch Black card stock and fussy cut around the sentiment. I glued all down to a White A2 card base, glued the key to the center and added the sentiment with some thin foam tape. Those Gilding Polishes are kind of stunning and so easy to use, and add a real sense of antiqued metal to this cover plate die. And the hearts in the die cut are more than enough to carry this sentiment!
Let’s get back to the layering stamps and try stamping them as intended. But you know me…!
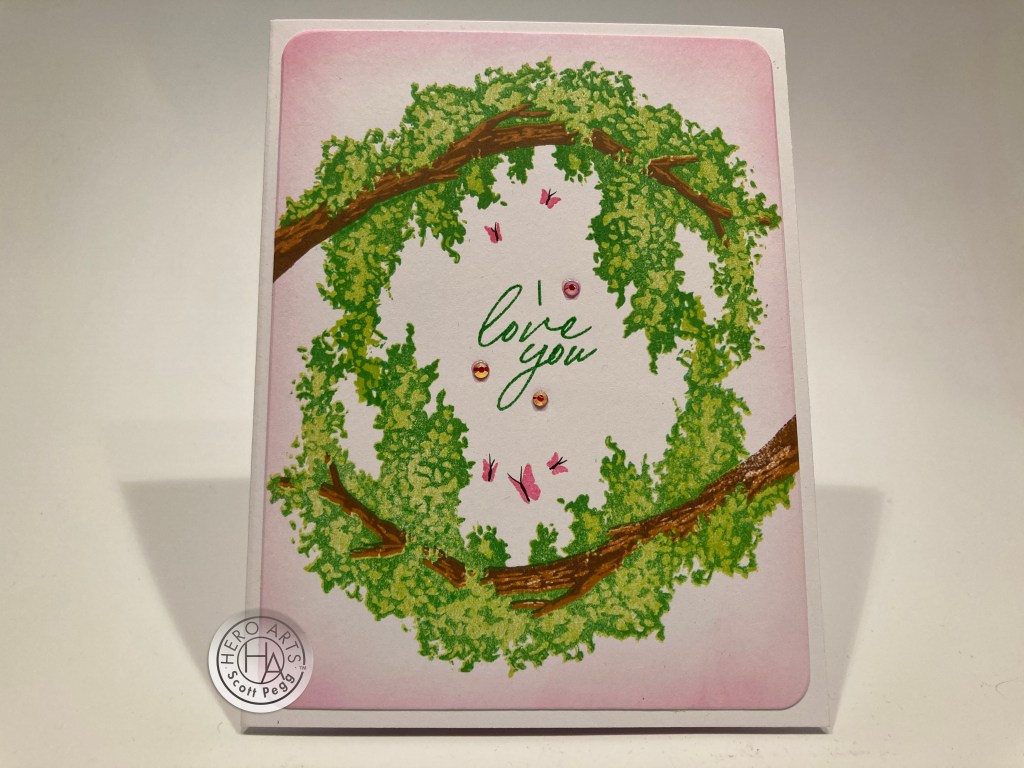
I thought this mirror stamping worked quite well! This branch is stamped in HA Sand Stone ink and the detail branch stamped in Cup O’ Joe. The solid foliage is stamped with Key Lime Fizz with Green Apple for the detail. I stamped this all on an A2 card panel using my MISTI, and just rotated the card stock ninety degrees to stamp the branch in the same spot on the top and bottom. I stamped the butterflies in Taffy and added a little detail with a Pigma Micron pen.
I ink blended the Taffy on the edges of the panel and stamped the sentiment with Green Apple ink before embossing it with some clear embossing powder. I die cut the panel with a Rounded Rectangle Infinity die and glued it down to a White card base. A few of the iridescent red gems highlight the sentiment. This feels like a big green hug to me!
I was also the pleased recipient of a bunch of different colors of Sizzix Texture Rolls this Christmas! These are kind of like leather paper… you can get them wet and distress and crinkle and emboss and die-cut and it just won’t tear!

I took a piece of Rose Gold Texture roll cut to 4″ x 5.25″ and crumpled it up and twisted it around and tried to give it as many creases as possible. Then I ran it through my die-cutting machine to flatten it all out, and then ran it through with a We R Memory Keepers Next Level Heart Embossing folder (unavailable anymore). Love those puffy hearts! And that texture roll does look like leather and holds that embossing perfectly! I added a thin black mat behind and glued both to a White A2 card base.
I die-cut the Keyhole along with the Key in the center from Pitch Black card stock, added Gilding Polish to the key and the heart, and inlaid those back into the Keyhole. I die-cut another Keyhole from normal Rose Gold card stock and cut away the keyhole frame. I inlaid the black Keyhole/Key with the Rose Gold frame and added the whole assemblage to the card front with thin foam tape. The sentiment is stamped on more black card stock and embossed with Silver Embossing powder, trimmed down to size and mounted with foam tape. I thought this was a nice way to illustrate this sentiment.
I try to remember to make Slimline cards part of my 10 Cards videos and I thought this was a fun encouragement card.
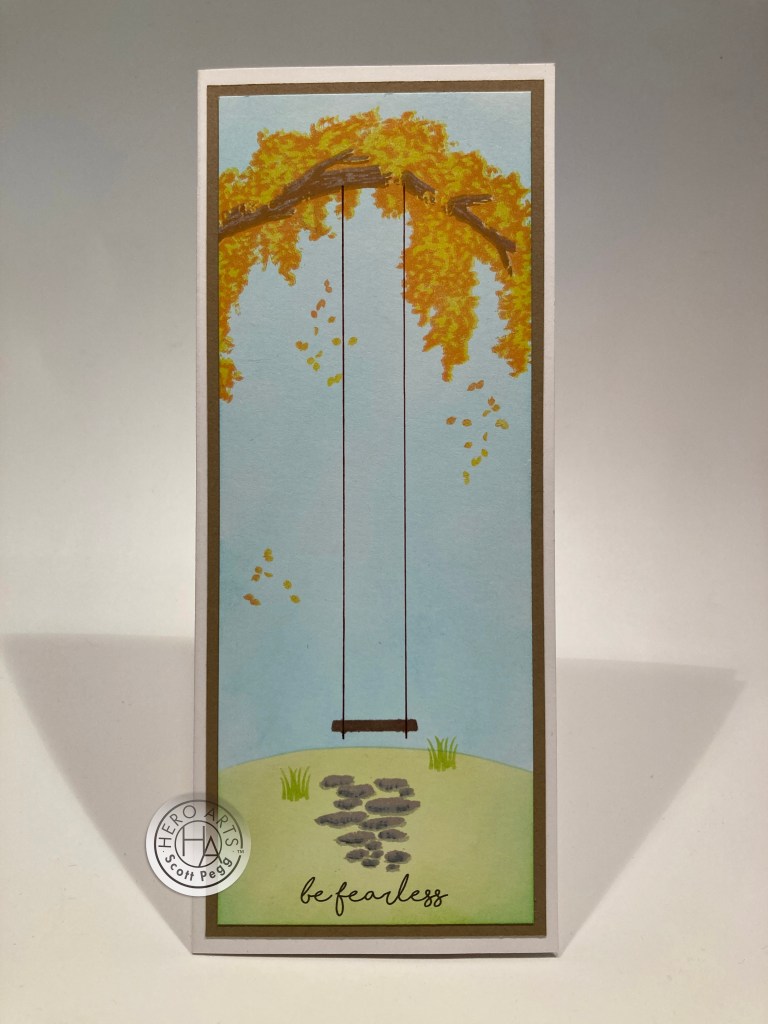
This is a standard 3.5″ x 8.5″ Slimline card. I cut a panel of white card stock to 3″ x 8″ and one blended the background with Key Lime Fizz, Green Apple, and Splash reactive ink. I stamped the branch with Sand Stone and Caramel ink and the foliage with Lemon Drop and Creamsicle ink. The falling petals are a stamp from the MMH March 2020 kit. I like using this layering stamp as autumn leaves! I stamped the stones with Hickory Smoke Distress oxide ink and added a little detail with Black Soot Distress Oxide ink. I drew in a touch of a shadow under each stone with a Light Grey Zig Watercolor marker. I also stamped the tufts of grass using the Green Apple ink.
I masked out the seat of the swing and stamped it with Cup O’ Joe ink and then drew in the “rope” lines with a Brown Pigma Micron pen – along with the help of a T-square ruler! I printed this sentiment on the front panel using my Silhouette software and the Shorelines Script Bold font. The thought of swinging on this rope swing gives me a little tough of vertigo, so this sentiment seemed like the perfect fit. Very unique encouragement card!
Since this kit encouraged us to make some Valentine’s, I thought I would try a heart shaped card just for the season!

I am very pleased with the results! The branches are Sand Stone and Caramel ink, the foliage is Lemon Drop and Green Apple. The right end of the branch is stamped on the left side of the heart and the left side of the branch is stamped on the right side of the heart – I did mask off the end of the branch on the right stamping and filled in the missing foliage with some disposable micro applicators and the matching inks. I stamped the sentiments with Fruit Punch Reactive ink and embossed them with Clear Embossing powder. I also added a little blue to the sky using my Pebbles Chalk Pallet. I do find those chalks are terrific when I want to add some soft colors to a background that’s already been stamped. Finally, I die-cut the stamped panel with the largest HA Infinity Heart die.
I took the same die to a folded A2 card base and die-cut the heart card base by not cutting the very top of the heart on the two sides. Then, when I glued the inked heart to the front of the card base, the card hinge is hidden. Now I had the challenge of finding flowers for this bountiful bower. I couldn’t find any die-cuts in my stash that were tiny enough to work with these trees, but finally remembered I have an American Crafts Knock Outs border punch that punches out tiny hearts. Those would work perfectly! I punched out a number of hears from some red glitter card stock and glued the hearts upside-down on the greenery. I did trim a couple hearts to appear as if they are partially behind the branch, and covered as much real estate as I thought plausible! Lastly, I trimmed off a little of the point on the back panel of the card so it will stand up for display. I really like this! The sentiments work perfectly arranged together like this, the flowers add just the right pop of color and sparkle, and a shaped card is always fun! Happy Valentine’s Day!
The “You Make Me Smile” sentiment made me think of one thing… a shaker card always makes me smile! Back to the Keyhole die again, but this time I wanted to try some pearlescent watercolors on black card stock.

This feels very Folk Art to me! I die-cut the Cover Plate die from 4.25″ x 5.5″ Pitch Black card stock and used my Yasutomo Pearlescent Watercolors to paint all the details. This is an extremely inexpensive set of pearlescent watercolors and I think they work terrifically well! Plenty of color on top of this black card stock! I stamped and Gold embossed the sentiment on a scrap of black card stock glued to the front of a White card base. I added a piece of acetate behind the keyhole, added a double layer of foam tape behind the whole card front, added some colorful sequins in the opening, and glued it all together. Maybe shaker cards engender smiles because we still identify with a child’s rattle!!
Okay… I have used this pun before (it’s been a few years) but I simply couldn’t resist!
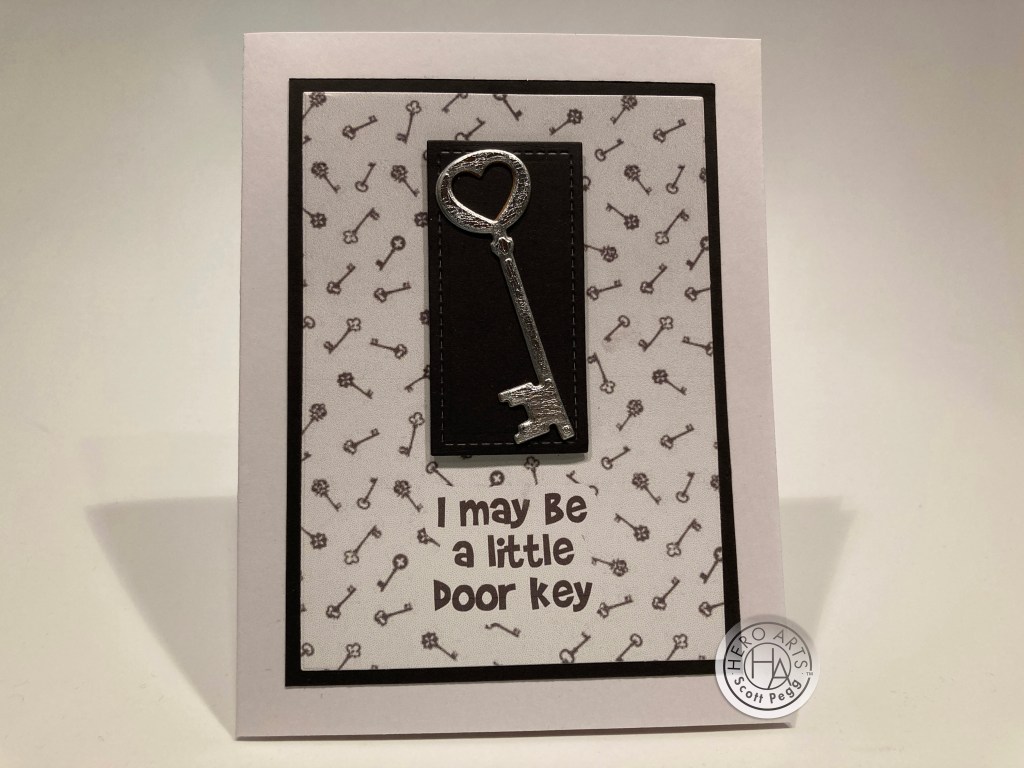
I die cut this key two times from some distressed Silver Sizzix Texture Roll and glued both die-cuts together. That looks an awful lot like a metal key! The background is an image file that I had in my stash which I printed out with the sentiment in the Brady Bunch Remastered font. I trimmed the background down to 3.25″ x 4.5″, added a black mat and glued those to a White card base.

I die-cut a small black panel with a Lawn Fawn Stitched Rectangle die and added that to the card front with foam tape. The key is then glued onto that panel. Naturally, I continue this pun on the inside of the card…! If you’d like a copy of this card front and inside you can download the PDF here or if you’d like the Silhouette file just send a request to me at cardcutups@gmail.com. A good giggle to go along with your Valentine!
I have to admit, the conceit of looking through a keyhole, bugs me a little… makes me feel like I’m eavesdropping on someone or something… but I did keep imagining the possibility of seeing the cosmos through the keyhole.
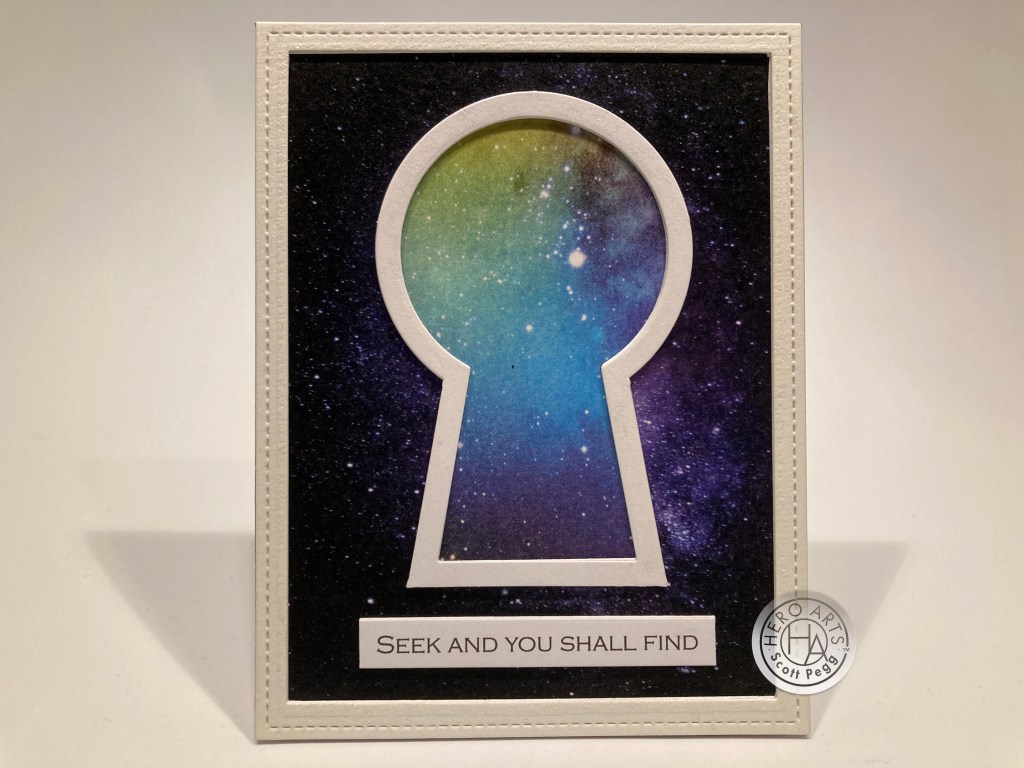
I just happen to have these two Altenew Wide Washi tapes in my stash. I kept going back and forth over which one to use in the keyhole when I realized it would be fun to use BOTH of them together. This reminds me of the opening to The Twilight Zone!! I used the Galaxy Washi Tape to cover the front of an A2 card base. I covered a scrap of White card stock with the Watercolor Nebula Washi Tape and die cut the keyhole from that. I went back and forth over what color to use to frame this card, and finally settled on simple White – it matches the stars on the washiest tapes! The outer frame is cut twice from two LFSRdies, and the keyhole frame is cut twice and glued together for a touch of dimension. The sentiment is printed on some scrap White card stock using the Copperplate Gothic Light font, and die-cut (twice!) with a LF Everyday Sentiment Banners die. I glued the two banners together and glued all down flat to the card base. Talk about an expansive encouragement card!
Now I haven’t actually used the Cover plate die and the layering stamps together yet… How about a fun-fold card?

I die-cut the Cover plate die from some of my new Gold Sizzix Texture roll and covered the front with VersaFine Onyx Black ink. I let that dry for a bit and then took a dry rag and buffed off a lot of the black ink leaving this nicely antiqued finish on the front. I think this one looks the most like real metal. I die-cut the keyhole from some White card stock and ink blended some Splash ink for the sky. I stamped the branch a couple of times using Sand Stone and Caramel ink, and stamped the foliage with Lemon Drop and Fruit Punch Reactive inks. I added a few floating leaves using the stamp from the March 2020 kit and stamped the birds using a stamp from the MMH July 2019 kit. Inviting!

I took a gate-fold card base (5.5″ x 8.5″ scored at 2 1/8″ and 6 3/8″) and did a light ink blending of Splash ink on the left gate fold, and glued the gold cover plate die on top of the left gate fold. I cut another piece of white card stock to 4 1/8″ x 5 1/2″, fussy-cut the keyhole opening in the center and glued that behind the cover plate die and the left gate fold. I closed up the card and glued the stamped keyhole piece to the exposed left gate fold. An interlocking gate-fold! That was fun!

I stamped the sentiment on the inside using Intense Black ink and added one of my leftover gold hearts from the Key Fancy die. This is a friendly, thoughtful card with an inviting image behind the keyhole, and a fun interlocking gate-fold design. I grew to love this layering stamp set and the giant keyhole Cover Plate die is certainly unique and ornate!
That wraps up my 10 cards 1 kit post featuring the My Monthly Hero January 2020 kit. I think we have a pretty good variety of cards this month – and I did manage to use every stamp except the “hello” sentiment.
That cover plate die gives us a wide range of uses, and a Fancy Key die is always handy (though I don’t believe I’ve ever lost my keys)! I do like the ease of trimming away the keyhole frame from the cover plate die, and the layering stamps can be used in a variety of ways. I really like them stamped in autumnal colors. All in all a very useful stash builder!
This kit is still available at Hero Arts! If I’ve managed to catch your eye or spark your imagination, I would suggest grabbing a kit for yourself! When you do go shopping at Hero Arts, please use my links! It helps support this channel and is always supremely appreciated!
My Monthly Hero January 2020 Kit: https://shrsl.com/3cr31
Hero Arts: https://shrsl.com/38def
Thank you so very much for sharing some time with me today! I am always thrilled to hear from you and hope I have provided you with a little inspiration and maybe a few smiles! Please remember to Like me, List me, Pin me, Post me, Share me with all your crafty friends, don’t run with scissors, and I send you and yours my best wishes for a healthy, harmonious New Year, featuring lots of love and laughs, and, as always, Happy Crafting!
DISCLOSURE: This site contains some affiliate links to products. I may receive a commission for purchases made through these links (at no cost to you). As an Amazon Associate I earn from qualifying purchases. Thank you!

Thanks for the inspiration. The past couple kits have been conundrums to me…but, you always manage to create beautiful cards out of them and that is most appreciated!
Best,
M. Keller
Sent from here.
>
LikeLike
Thank YOU! Always nice to hear from you! Much obliged…! All my best to you and yours! Scott
LikeLike
Thanks you so much!
That means a lot to me!
Cheers and Chuckles…!
Scott
LikeLike