
Hello Folks! Scott here with a fun batch of cards created with the new My Monthly Hero kit for November 2021. It wasn’t surprising that his character-building set sold out so quickly… another unique kit from Hero Arts with real versatility!
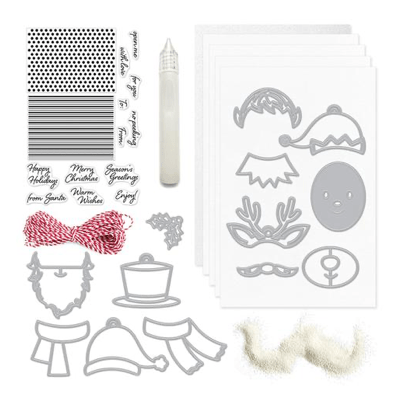
This kit is all about the dies this month! We get we a 4″ x 6″ clear stamp set with polka-dot and striped pattern stamps with a bunch of smaller holiday themed sentiments, and 13 Fancy dies to mix and match to create a Santa, a Snowman, an Elf and a Reindeer. To round out this kit we get ten 5.5″ x 8.5″ sheets of Snow Card stock (I’ll use those for my card bases!), One 5.5″ x 8.5″ sheet of White Glitter paper, a Sparkle Clear Lacquer pen, a half ounce pot of Puff Embossing powder, and a yard of red and white holiday twine. Everything you need to create adorable handmade tags and/or gift toppers for all of your Christmas gift-giving!
My goal is ten cards… I’m not much of a decorative tag person, so I’ll look at some fun ways to make cards with this kit! A snowman seems like the perfect place to start!

Is this snowman adorable or what!? I do enjoy paper-piecing, and these dies are perfect for that! The head is cut from White card stock, and I cut a smaller oval of black to glue behind that for the eyes. I die-cut the hat from Pitch Black card stock, the hat band from red card stock, and just hand-cut a couple thin White strips for the highlight. I cut away the tag loop on the top of the hat, glued the hat to the top of his head, and added the Holly decoration cut from a blue-green and red card stock.
I die-cut the scarf from some pattern paper, and cut a second one in a different orientation to give the top wrap of the scarf some distinct definition from the tails of the scarf. That works really nice… it also helps that I took a black marker to the cut edges of the scarf. I free-hand cut the carrot and glued that in place and added two pink “eyes” to his cheeks for some blush! White gel pen highlights his eyes, and we have a dapper snowman with a coy little smile!
I die-cut some HA Arctic card stock with a Lawn Fawn Stitched Rectangle die and stamped the sentiment using Hero Hues Blue Hawaii Reactive ink and embossed that with some clear embossing powder. I glued that to a Snow card base from the kit, added my snowman with foam tape and embellished the card with some HA Mini Clay Snowflakes. Nothing particularly fancy or labor-intensive, but this is SO CUTE! Surely an indication of the other characters too!
Santa has got to be next on the list!
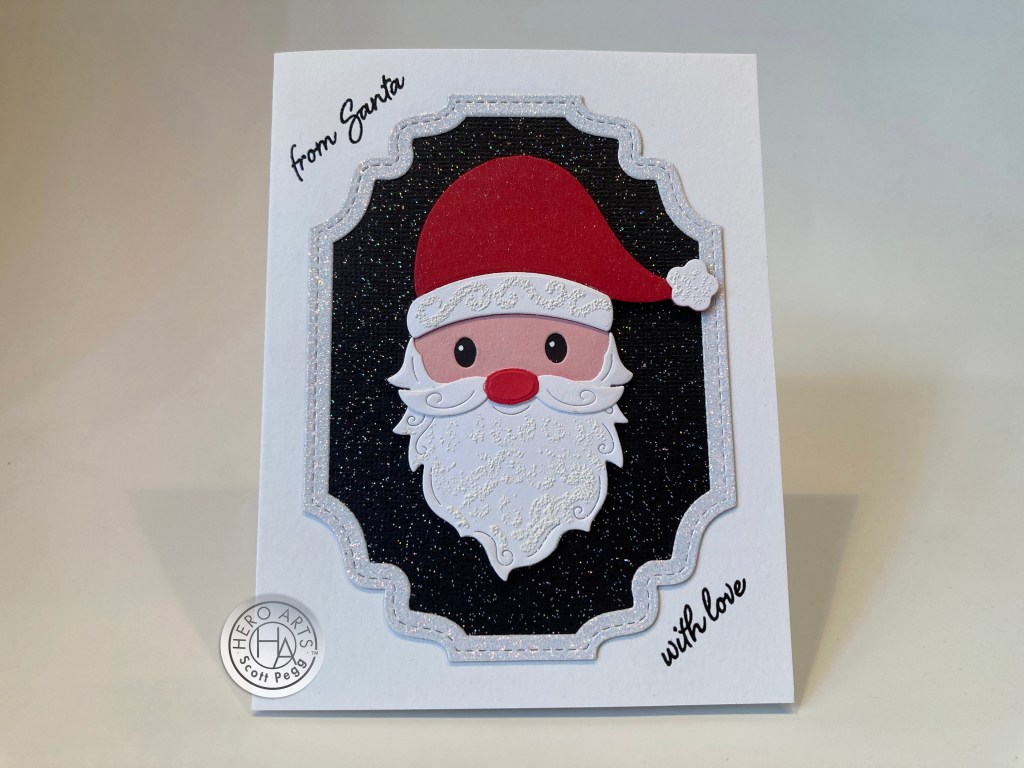
OH YES! Just as cute as the snowman! Pink head, red hat (and nose)(tag loop trimmed away), white trim and beard, and another smaller black oval glued behind the head for the eyes. I took a Versa-Marker pen and drew in some sketchy swirls in Santa’s beard and the trim on his hat, and used the White Puff embossing powder to add some fun texture. I think that White Puff embossing powder works better when used sparingly instead of trying to use it to coat something completely. Really nice texture from that!
I die-cut the background from Black Tie Glitter card stock from my stash and a frame from the White Glitter card stock in the kit using an old LDRS Fancy Rectangles and Layers die. I stamped the sentiments on a Snow card base using Intense Black ink and embossed them with clear embossing powder. I glued the frame in place and added Santa with some foam tape. A little white gel pen for the highlights in his eyes, and some glitter on his hat using a Spectrum Noir Sparkle pen and Santa is ready to spread some love around! Love the die-cut details on his beard and his mustache!
Let’s tackle the Elf next! He actually has some hair and ears and a collar and a hat!
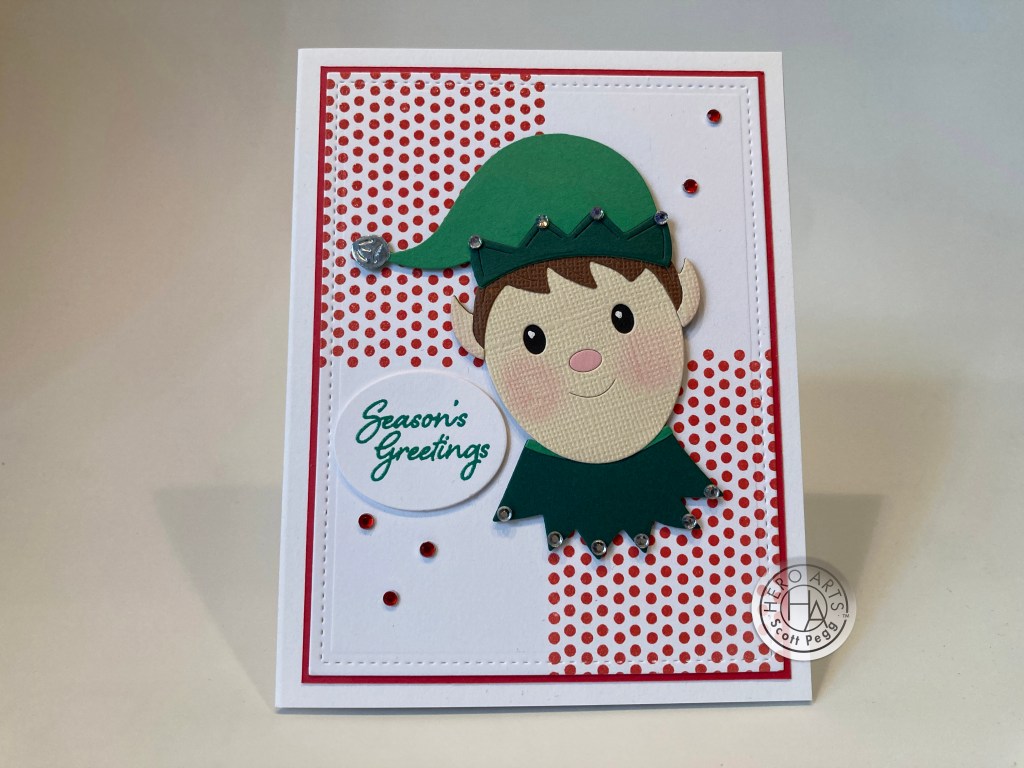
Head and hair/ears cut from some textured beige card stock, hair/ears cut from textured brown card stock, ears trimmed away and hair glued on the beige piece. Black oval cut for eyes and glued behind the head. Hat and collar cut from plain green and dark green card stock (I trimmed the tag loop away again), and paper-pieced together. Pink nose from the Santa die-cut. I did cut out the jingle bell at the tip of the hat from some silver mylar sheets I had laying around. I glued everything together and added a White gel pen highlight to his eyes, and used some Pebbles Chalk to add a little blush to his cheeks!
I stamped the polka-dot pattern on opposite corners of a 4.25″ x 5.5″ panel of white card stock using Candied Apple Distress Oxide ink, and die-cut that panel with a LFSRD and added a thin red mat behind that. I glued those to a Snow card base and mounted the elf with foam tape. Those points on his hat and collar were begging for some extra embellishment, so I added silver crystals to all the points. I stamped the sentiment on a scrap of White card stock with Lucky Clover Distress Oxide ink, embossed that with clear embossing powder, and die-cut it with a HA nesting oval die. I added the sentiment with foam tape and used a few red crystals to pull everything together. Love his pointed ears!
One more character to go… the Reindeer! So clever to have a “muzzle” die to change the whole shape of the head!

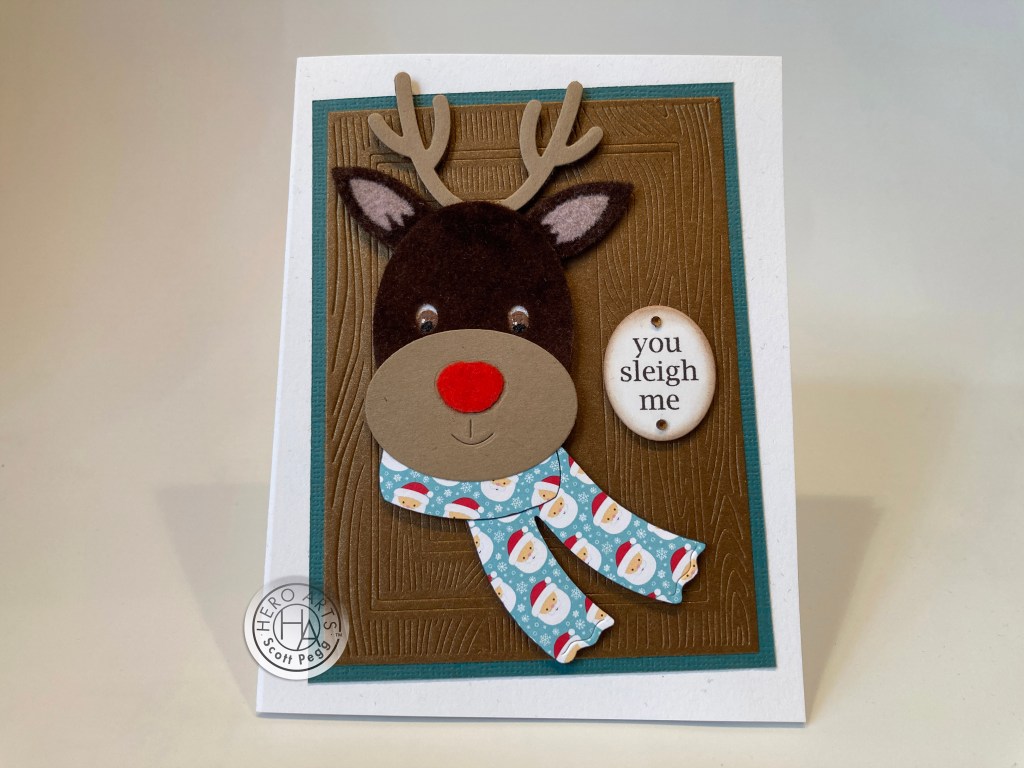
Head and ears/antlers cut from plain brown card stock with a smaller black oval glued behind for the eyes (and the tag loop trimmed away). I die-cut the ears from some pink card stock and fussy cut the bottom edges and glued the pink to the center of the ears, and glued the whole piece to the back of the head. The muzzle is cut from textured beige card stock, the nose from red, the scarf from blue-green card stock and the holly cut from plain green and red. Everything is paper-pieced and glued together. I did use the Sparkle Lacquer pen on his nose – lots of sparkle there!
The oval frame is cut from Dark-Brown textured card stock using a HA Oval Woodgrain Frames Infinity die and backed that with more Hero Hues Arctic card stock. I stamped the sentiment on the Snow card base using Walnut Stain Distress Oxide ink and embossed it with clear embossing powder. Then I glued my frame flat to the card front and added our reindeer with foam tape. More white gel pen highlights for his eyes and our cute reindeer is complete. I seriously was thinking of this as a portrait of a beloved reindeer, but soon realized that it kind of looks like his head has been mounted on someone’s wall! Truly not intended but it does makes me giggle! A good card for your favorite hunter?
I was seeing so many of the HA designers and followers using felt to make these characters, but I don’t have any felt in my stash. I did remembered that I have some Inkadinkado Flocking Powder in my stash. I bought this stuff on sale a long time ago and never spent any real time figuring out how to work with it. I figured this was as good a chance as any!
I fiddled around with that flocking powder for a while and finally arrived at some really great results. 1. You do want to flock on matching colored card stock. 2. I used Scor-tape as my adhesive – since the powder is SO fine, it will transfer any glue textures or irregularities directly into the flocking. 3. Instead of sprinkling the powder on to the Scor-tape, I dumped out a little powder on some wax paper and pressed (fairly hard) the adhesive into the powder. Once everything was adequately covered, I used a semi-stiff paintbrush to brush the excess away. Santa’s hat is completely flocked and, though you may not be able to see it in the picture, it is really nice and even and I can’t help but touch it! Excellent fuzzy flocking texture…! Now that I know how to use it, I will certainly be using it to add more fun texture to other cards!
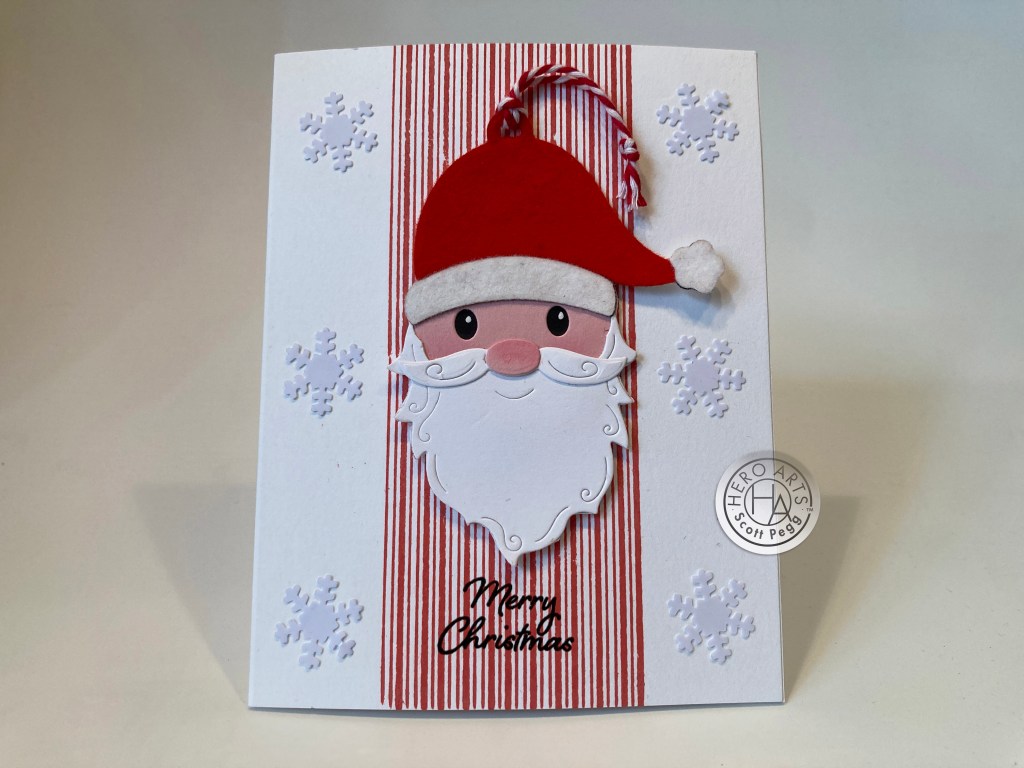
This Santa is die-cut and assembled just the same as my first card with the addition of the flocking on the hat. And his nose is not quite so red here…!

I left the tag loop on the hat so this can be removed from the card front and used as an ornament! Once everything was glued together, I took the hat die and partially die-cut the top of the hat on a scrap of white card stock, then matched that up with the back of the hat and traced the rest of Santa’s head to give me a full piece to glue on the back. I fussy-cut the rest of the head, stamped a Merry Christmas on that (wrote in the year) and glued it to the back. Some of the bakers twine make a perfect hanger for your ornament.
I stamped the striped pattern on the center of a Snow card base using Candied Apple Distress Oxide ink, and added some large snowflake sequins to the sides of the card front. Finally, I attach the ornament to the card front using ZOTZ removable clear glue dots – they hold the ornament securely, but can be removed quite easily! This is my favorite way to include a decorative ornament along with a lovely card. No tags needed! And I am loving that flocking!
Naturally, I have to try that flocking on the one truly furry character in our kit – the reindeer!
The head die-cut from dark brown card stock and flocked (I didn’t flock where the muzzle would be glued on). Antlers / ears cut from dark brown card stock with scor-tape on the front. I removed the liner paper from the outside of the ears by fussy-cutting the liner away from the antlers and the insides of the ears. I flocked the ears in dark brown, brushed away the excess, removed the liner paper from the center of the ears and flocked those with some pink embossing powder. I cut one more set of antlers from brown card stock and glued those on top of the flocked ears piece, and glued the whole assembly behind the reindeer’s head. I think you can actually SEE the flocking in this picture! Very furry!
I die-cut the muzzle from pain brown card stock and cut the nose from some red card stock and (of course) flocked the nose before gluing it to the muzzle. I die-cut the scarf (twice from more pattern paper (I LOVE that there are Santa’s on his scarf), and glued all the head pieces together. The background is three Hero Arts Wood Frame Infinity dies all cut together from some Auburn pearl card stock and glued to a blue-green mat and then down to the Snow card base with a little jaunty angle.
I printed this sentiment on a scrap of white card stock using the Lucida Bright font, die-cut that with a HA Nesting Oval die, did a little ink blending on the edges with Walnut Stain Distress Oxide ink, and attached the sentiment and reindeer to the card front with foam tape. A couple of tiny copper gems add a little sparkle to the sentiment. And what about those eyes!? His eyes are the dark brown die-cuts from his head with drawn-in black pupils. I just put a piece of scrap white card stock behind his eye openings, and glued the eyeballs (just the eyeballs) to the white card stock. When dry, you can move the white card stock around behind the eye holes to make your character look in almost any direction! And a dot of white gel pen highlights his eyes and brings this fuzzy fellow right to life!
Wouldn’t you know it… I actually found a little White felt in my stash – crappy acrylic felt, but felt nonetheless!

This one seemed like a no-brainer for me! I glued a piece of my white felt to a piece of white card stock using more Scor-tape, and die-cut the head from the felt. I did add a light touch of pink chalk on his cheeks. I put scor-tape on the front of some Pitch Black card stock and flocked the hat (minus the band) with black. I die-cut the band from a practice piece of red flocking, and cut the white highlights from the white felt and glued those to the hat. I even flocked his carrot nose with orange flocking powder (it came in the set!). For his eyes, I clear embossed some Pitch Black card stock and die-cut his eyes from that – very shiny but still begging for some white gel pen highlights! I cut out a “collar” by hand, and tied a bow tie with some 1/4″ ribbon. I made the cane (about 3/8″ wide x 4.25″ long) with black glitter card stock and the white glitter card stock in the kit for the tips.
On a panel of Hero Hues Nautical card stock, I Deco-Foiled a simple snow stencil using transfer gel, Silver Shattered Glass foil and my laminating machine. I trimmed that panel down to 3.75″ x 5″ and added a Brushed Silver mat before gluing this to a Snow Card base. I printed the sentiment (Lucida Bright font) on a scrap of white card stock and die-cut it with a HA Circle Infinity die. The sentiment, cane and snowman are all attached to the card front with foam tape. I do think I actually like the flocking better than I like the felt! Fun and quite theatrical!!
I did have an interesting idea about maybe using Santa’s beard for something else… how about Mrs. Claus’ hair?
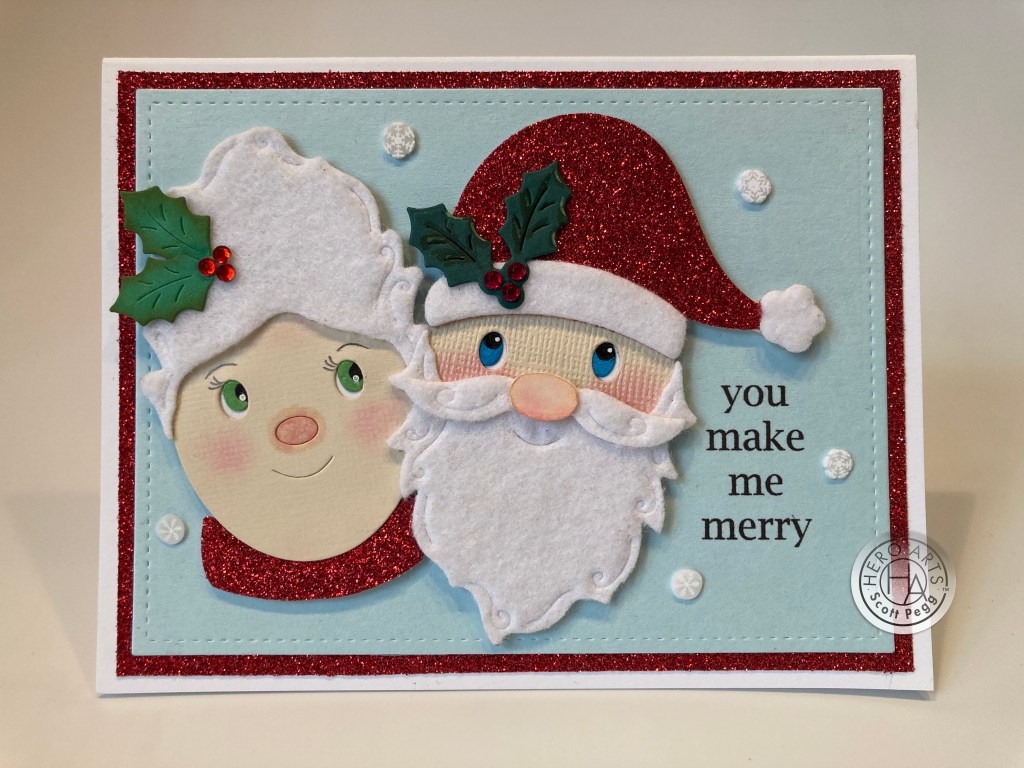
This makes me smile! Their heads are die-cut from that same beige textured card stock (Mrs. Claus is the back (smoother) side) and Pebbles chalk for their blush again. The hat and collar (part of the scarf die) are cut from Red Glitter card stock, and all the white pieces are cut from the card stock-backed white felt. That cheap felt was a little difficult to die-cut, but I love the detail it retained. I trimmed Mrs. Claus’ hair/beard from the smile to the sides for a smooth hairline, and rounded all the points into gentle curls. I colored white eyeballs with alcohol markers, added black pupils and white highlights for their eyes. The holly is accented with red gem berries, and I added some eyelashes and eyebrows to Mrs. Claus with a pencil.
The sentiment is printed on more Arctic card stock die-cut with a LFSRdie and matted on more Red Glitter card stock. That is glued to another Snow card base and the happy couple is mounted with foam tape. More Clay snowflakes add a little more embellishment, and this is a terrific Christmas card for a special loved one! You almost can’t tell that Mrs. Claus’ hair is actually Santa’s beard!
I was eager to try and get a little ethnicity going on at least one card this month. These kids worked perfectly!

Round off the elf’s pointed ears and they’re just normal kids! Very basic paper-piecing here, but I did do some partial die-cutting on the brown hair with the beard die – that works just as good as Mrs’ Claus’ hair! The packages are stamped with the pattern stamps using Candied Apple Distress Oxide ink and die cut with HA Square Infinity dies. I glued two squares together for each present so I could actually tie the ribbons around them. Sentiments are stamped with Intense Black ink and embossed with clear embossing powder on some old snowflake pattern paper which is die-cut with a LFSRD and glued to a Snow Card base. The kids and the presents are mounted with foam tape, and, since this is about “not peeking” I did do the fancy eyes for both! Darn near adorable!!
The simple fact that the Reindeer ears/antlers die were connected by a band inspired this wacky card from me.
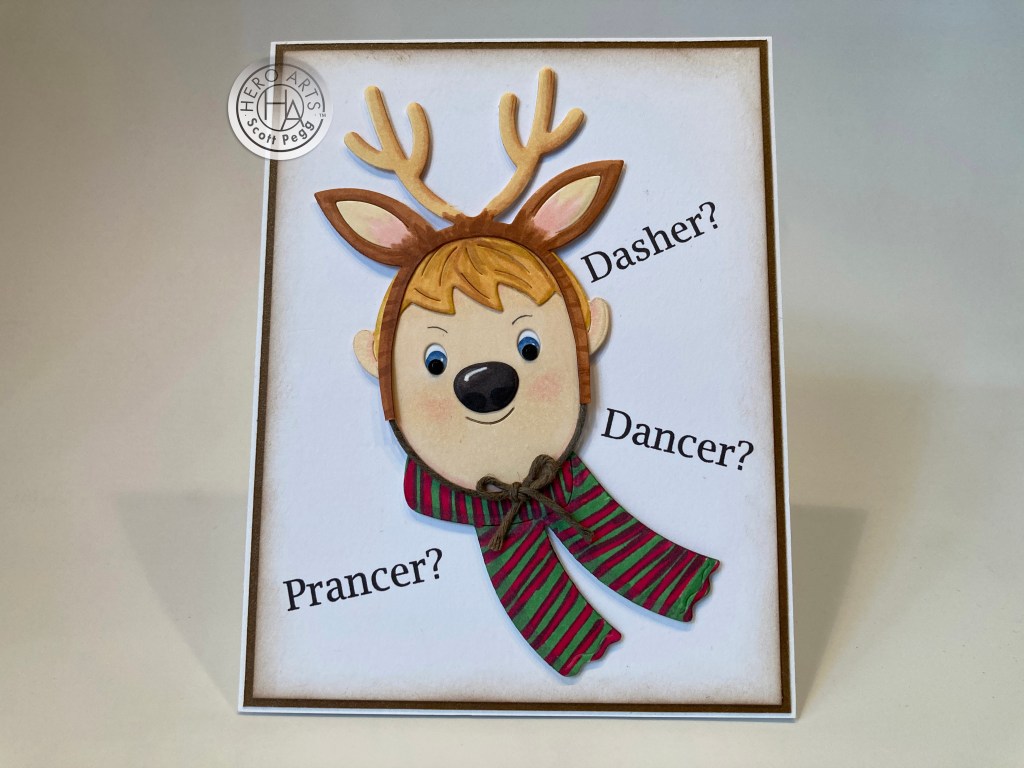
Heaven knows my family is not above donning some silly reindeer antlers over the holidays! This whole character is die-cut from 80# Ninah Solar White card stock and colored with my Spectrum Noir alcohol markers. I partially die-cut the antlers and continued the “band” following the outline of the head. I added some brown baker’s twine for the chin tie and rounded this chap’s ears as well. The reindeer nose makes this fellow super-silly but it kinda grows on you!!

I printed the inside sentient on the last Snow card base, and added a stamped Merry Christmas from the HA Merry Snowman stamp set. I printed the reindeer names on a panel of White card stock, trimmed that to 4″ x 5.25″, ink blended a little Walnut Stain ink around the edges, added a dark brown mat and glued that to my last Snow card base. One more set of fancy eyes and these have small black gems for the pupils – AND a tiny white highlight. I drew in some eyebrows with a pencil and mounted him to the card front with foam tape. Definitely a Bad Dad Joke card!! Love it!!
That wraps up my 10 cards using the My Monthly Hero November 2021 Kit. Already! Boy, that was fast! I think I could keep playing with these character dies all season! It seems like the possibilities are truly endless! I didn’t even get into much ornament or tag making..!

I did manage to use every die in this kit but didn’t use every single sentiment stamp. I used all the Snow card stock, a little of the lacquer pen and White Puff embossing powder and even a small piece of the baker’s twine. All in all, I think I gave this kit a pretty good work-out! Everything is pretty Christmas-y, but I think that’s the point this month!
And yet again, we have a My Monthly Hero Kit that sells out almost instantly! Hero Arts releases the My Monthly Hero Kits on the first Monday of each month, so if you’re hesitant to become a subscriber, at least subscribe to the Hero Arts blog for sneak peeks and that all important Kit Reveal!
Thank you so much for sharing your time with me here today! You inspire me and I hope I continue to inspire you! Remember to Like me, List me, Pin me, Post me, Share me with all your friends… don’t run with scissors… and I send you best wishes for a happy, healthy and hilarious holiday with your family and friends! And as always, Happy Crafting!
DISCLOSURE: This site contains some affiliate links to products. I may receive a commission for purchases made through these links (at no cost to you). As an Amazon Associate I earn from qualifying purchases. Thank you!

As always you’ve gone over and above and out of the box. Love how you created Mrs. Claus. The kids with the packages are so clever and show another idea for using the dies. The Broadway snowman is so dapper. And the last card really made me chuckle. Love the sentiment. Thanks for the awesome inspiration.
LikeLike
Thank YOU, Judy! Gobs of fun to be had with this kit! Always a pleasure to share some smiles with you! Scott
LikeLike
Brilliant idea turning the beard around for Mrs. Claus hair!
Can’t wait for my kit to arrive. 2 grandkids are coming for a week at Thanksgiving. We will be die cutting fools!
Happy holidays
LikeLike
Thanks Joan!
Perfect kit to share with the grandkids! All my best!
LikeLike
This set of cards is absolutely fantastic. The creativity is astonishing! Of course I looked for my flocking from yesteryear only to find every colour but black. No matter……….I will use Deco Foil Flock transfer sheets and my laminator for the snowman’s hat. Thanks for another fun video!
LikeLike
Thank YOU, Deb! I’m looking forward to using that flocking more and more! Scott
LikeLike
Love your cards! Absolutely perfect!
LikeLike
Thanks Victoria! Always supremely appreciated! Scott
LikeLike