
Hello Folks! Scott here with my 10 Cards 1 Kit post inspired by the My Monthly Hero September 2021 Kit. Here comes the sun… or to be a little more specific, Here comes the sunflowers! This months release celebrates the coming of autumn.

I think this kit is the first of its kind for My Monthly Hero! We get a 4″ x 6″ stamp set with a large cluster of sunflowers and four sunny sentiments. A matching frame cut for those flowers and two Fancy Word Dies – “thanks” and “hello” – both with a shadow die as well. The big kicker this month is the set of Five Layering Stencils that will actually color the whole sunflower stamp. I think this is the first set of Layering Stencils I have in my stash! To assist with our stenciling, we also get a small HA Blending Brush and 4 Ink Cubes (Key Lime Fizz, Butter Bar, Caramel, Root Beer). I’m eager to play with those layering stencils…!
On the backer card in the kit, we fortunately get a stenciling guide to show us the original intent behind these stencils.
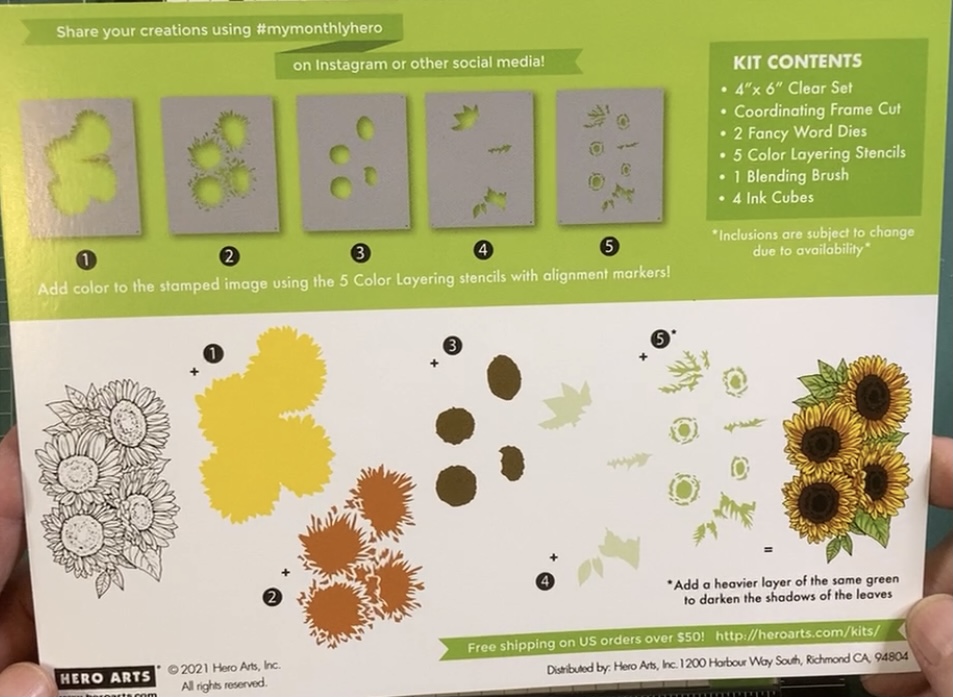
Here’s our five stencils and the suggested coloring using the ink cubes included in this kit. There are small registration squares cut in the corners of all the stencils to help line them up correctly. I thought I’d use my HA MISTI to help me line up all the stencils and the stamp – This worked extremely well for me, and I didn’t have to fuss with the registration squares.

I flipped the foam mat of my MISTY around to the black foam side, and tucked Stencil #1 into the bottom right corner. The stamp then virtually snaps into position when placed on top of the stencil (even without the leaves). Keep everything tucked in the corner and pick the stamp up with the lid of your MISTI. Sure enough, the stamp and all the stencils lined up perfectly when tucked into the bottom right corner of the MISTI. I went for broke and stenciled a lot!

(A) This was my first attempt at stenciling and stamping these sunflowers. I stamped the image first for this one using Intense Black ink, and made the rookie mistake of starting to color in my stencils before letting the outline ink dry completely. Everything lines up just perfectly, but the Butter Bar ink got dulled down quite a bit with the outline ink. (maybe my blending brush wasn’t clean?) This kind of feels a little sepia toned to me… I do love how accurately everything lines up – and really quite simple!
This is colored following the suggestions and inks included in this kit –Butter Bar, Caramel, Root Beer, Key Lime Fizz.
I thought I’d try doing all of the stencil layering before stamping the outline on this next attempt.

(B) There we got that Butter Bar layer nice and yellow! This is again stenciled exactly as recommended in the kit but I stamped the outline AFTER I had colored in all the stencils – no chance of picking up the black ink this way! Bright and sunny! I could have gone darker with the Root Beer ink in the center of the flowers, but I really like the vibrancy of this, and you can even see the green details in the centers as well.

(C) The rig is all set up on my MISTI, so lets keep stenciling and stamping and try some different colors! This one is Butter Bar (1) Wild Honey Distress Oxide ink (2) Root Beer (3) Key Lime Fizz (4) and Walnut Stain Distress Oxide for the flower center details and Green Apple Reactive ink for the leaf details (5). I then stamped the outline using the Walnut Stain Distress Oxide ink. I stamped that a couple of times and added a light touch of intense black ink to the centers for a little more contrast. I like the Butter Bar and the Wild Honey inks together… feels subtle and fresh!
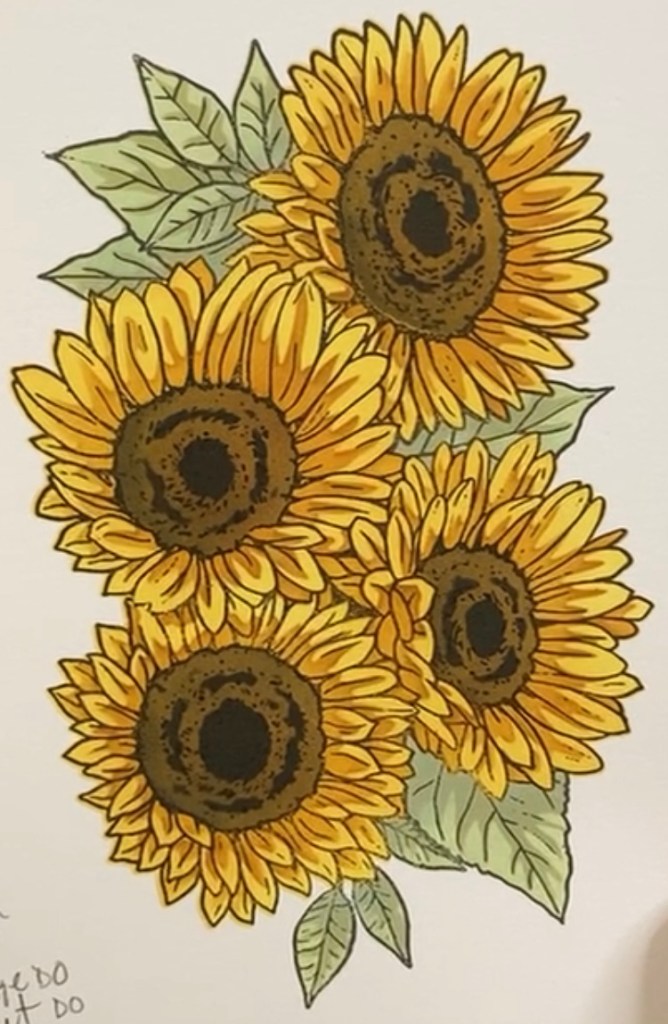
(D) This one has some great contrast! I stenciled the second stencil to begin with using the Caramel ink (2) then I went on top of that with the first stencil in Butter Bar (1) I used Root Beer for the centers (3) and Bundled Sage Distress Oxide ink for the leaves (4) Then I used Black Soot Distress Oxide ink for the center details and Peeled paint for the leaf details (5). The outline is stamped with Intense Black ink. I think this one might be my favorite stenciling!
Of course I have to try some wildly different colors too!
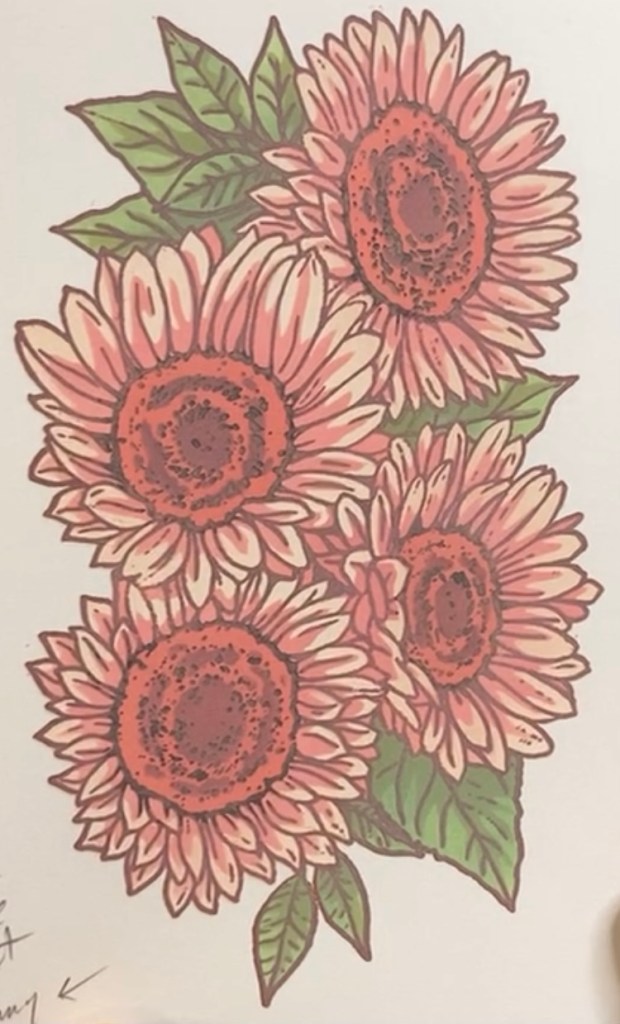
(E) How about some pinks! These are all Distress oxide inks. Tattered Rose (1) Worn Lipstick (2) Abandoned Coral (3) Bundles Sage (4) Aged Mahogany and Peeled Paint (5). I stamped the outline using the Aged Mahogany ink and added some black touches to the centers with Intense Black ink. They almost doin’t look like sunflowers at all!
Joel suggested blue flowers with purple leaves…
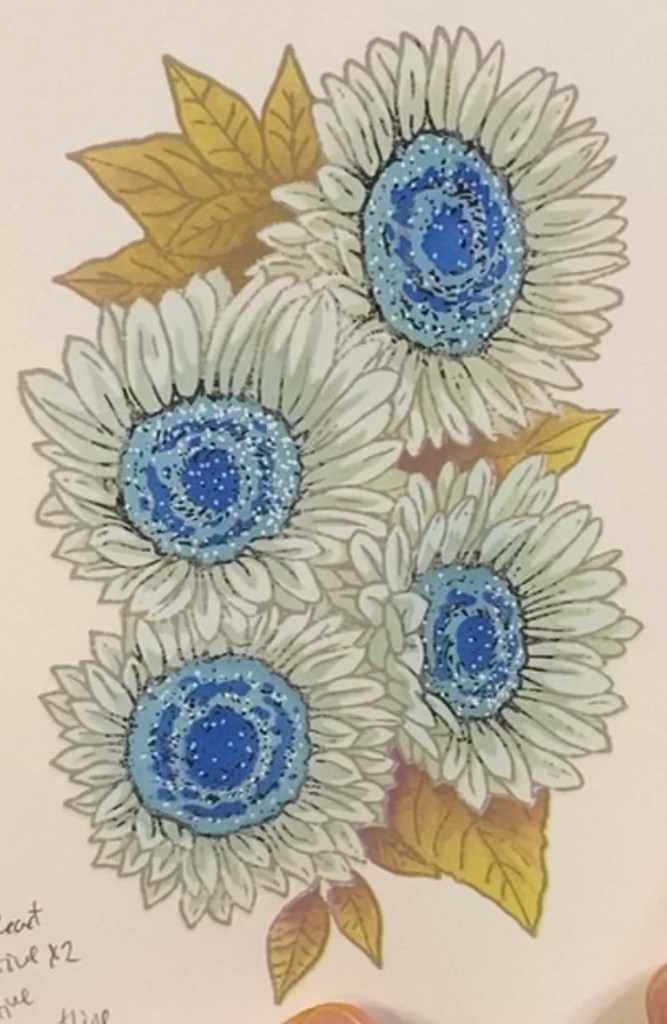
(F) Very wintry! This one is colored with all Hero Arts inks. Soft Sky (1) Dusty Blue (2) Early Dawn Reactive (3) Thistle Reactive (4) Blue Reactive and Thistle again (5) I didn’t care much for the purple leaves so I took some of the Key Lime Fizz ink and went over the leaves again making that Thistle tone down into a lovely crispy brown. Kind of frozen in its tracks! I stamped the outline with Soft Granite ink (a few times) and added light touches of black in the flower centers. I think this color combo is extremely interesting!
I can’t use the stencils to color ALL my card this month! I stamped a couple of outlines on some alcohol-friendly card stock and some watercolor paper to do some coloring of my own!

(G) This one is colored with Spectrum Noir alcohol markers – actually only 9 markers. I thought his was fairly easy to color with the markers and I like the bold brightness of the whole composition.

Here’s a shot of the markers I used to color these sunflowers.

(H) And this is my watercolored piece. I did use an assortment of Daniel Smith watercolors from my big stash of watercolor dot cards. I enjoyed watercoloring this quite a bit – put some music on and took my time layering up all the colors. This is so nice, and probably the most realistic rendering of these sunflowers.
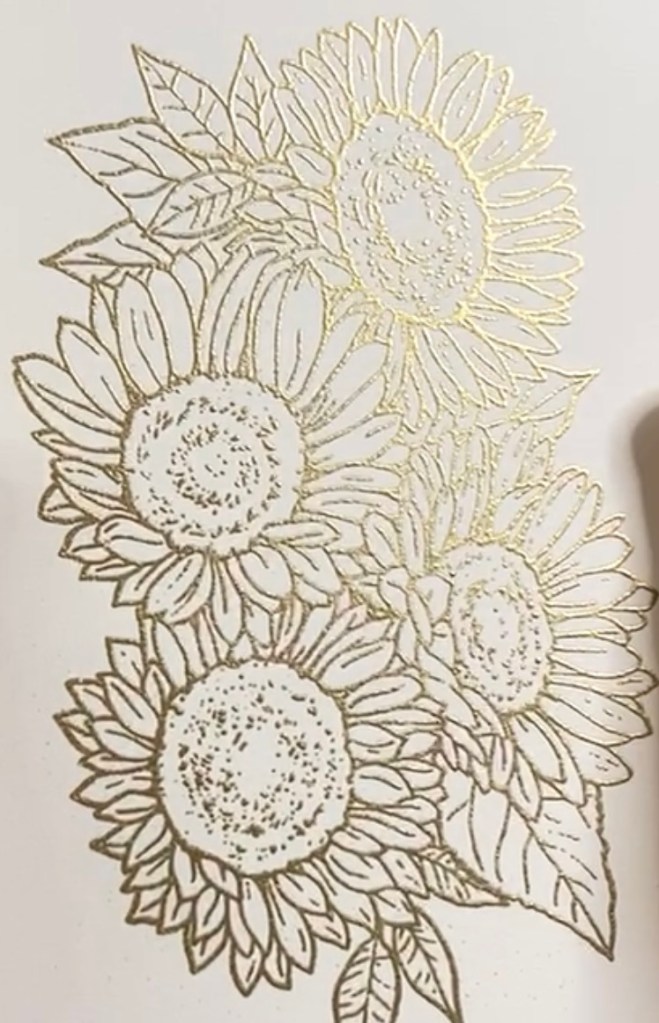
I did also stamp the sunflowers using HA Embossing and Watermark ink and embossed that with some Hero Arts Gold embossing powder. White and Gold always go well together, and this stamp actually has enough detail that you don’t even HAVE to color it for an eye-catching focal point.
I made all of these card panels before I even thought about a card! I certainly have lots of options to play with!
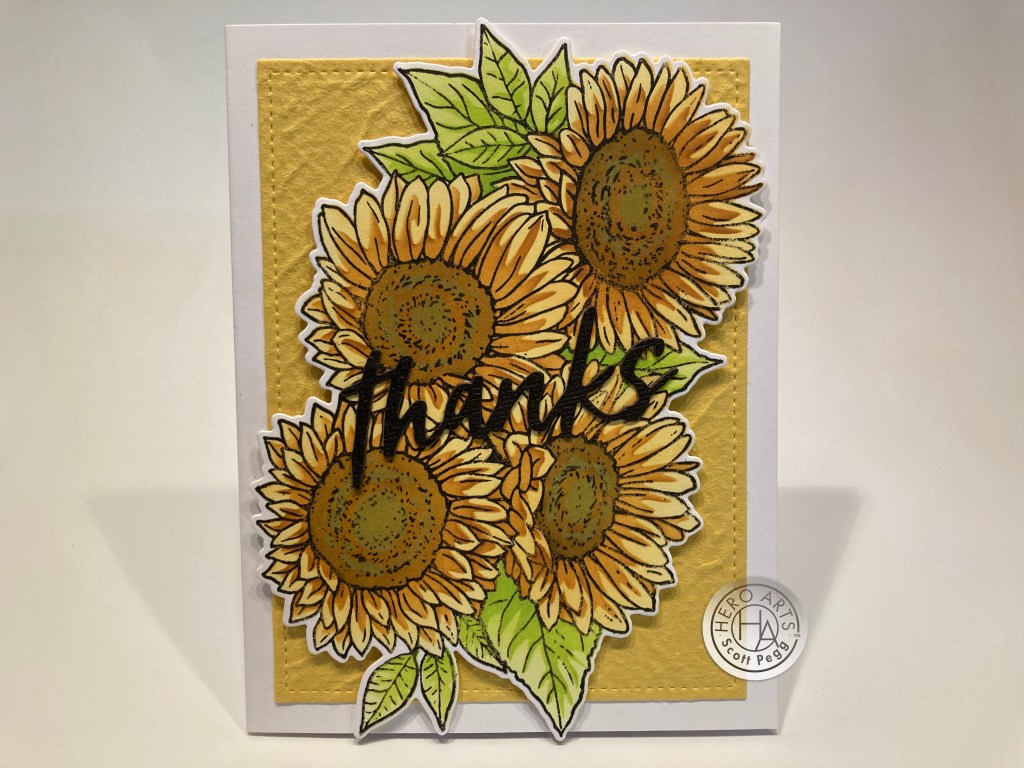
I die-cut a piece of textured yellow card stock with a Lawn Fawn Stitched Rectangle die and glued it to the front of a White A2 card base. This is panel (B) die-cut with the matching die and mounted with foam tape. This stamp is quite large – it barely fits on an A2 card base! I die-cut the “thanks” Fancy Word die from some dark brown card stock twice, glued the two die cuts together and glued that to the front of the card. Really pretty thank you card!
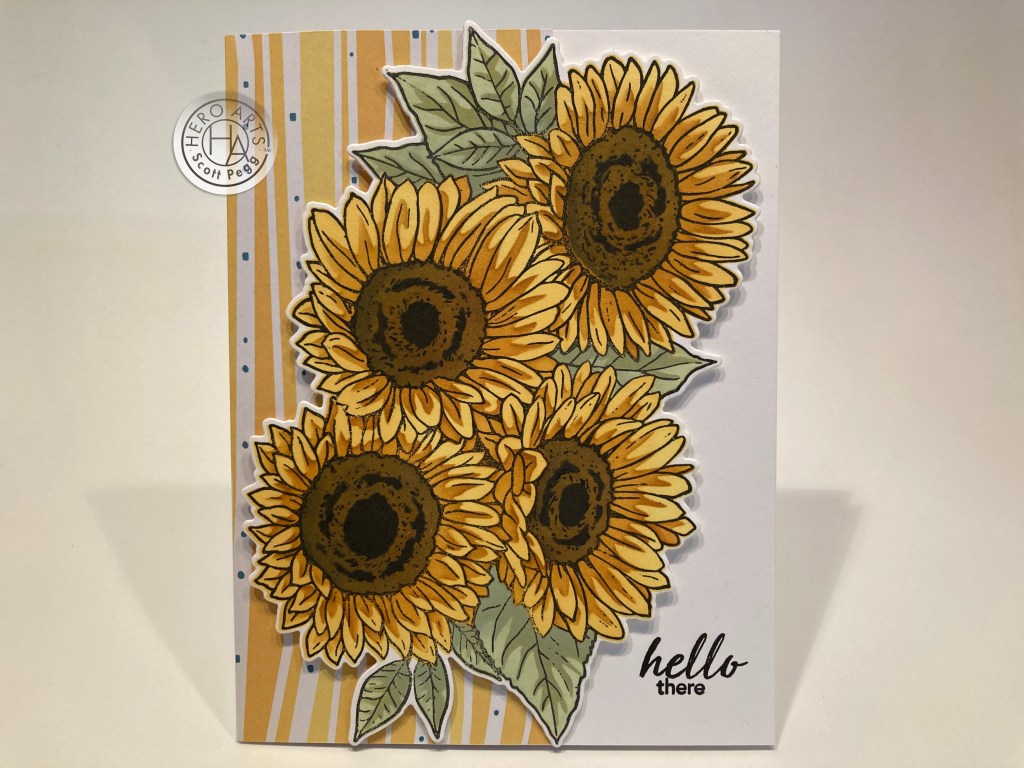
Here, I paired up panel (D) (die-cut with the matching die) and some matching pattern paper. The pattern paper is cut at 2.5″ x 5.5″ and glued to the left edge of a White card base. The sunflowers are mounted with foam tape and the sentiment is stamped with Intense Black ink. I think the dots of blue in the pattern paper add a nice compliment and the pattern suggests a field full of sunflowers!

This card uses my first panel (A). After die-cutting the panel, I cut off the right side of the flowers (from leaf to leaf) and turned the cut off portion around to use on the left side of the card base. I ink blended some of the Key Lime Fizz Reactive ink on a white card base in the general shape of my composition. I added the two sunflower pieces with foam tape on the flower edges and glued the straight cut edges flat to the card base. I die-cut the “hello” Fancy Word die four times from white card stock – colored one layer with the Key Lime Fizz ink and glued all four together before adding that to my card front. I think the green actually brightens up this “not quite yellow” sunflower rendition! And this is a fun arrangement of that stamp!
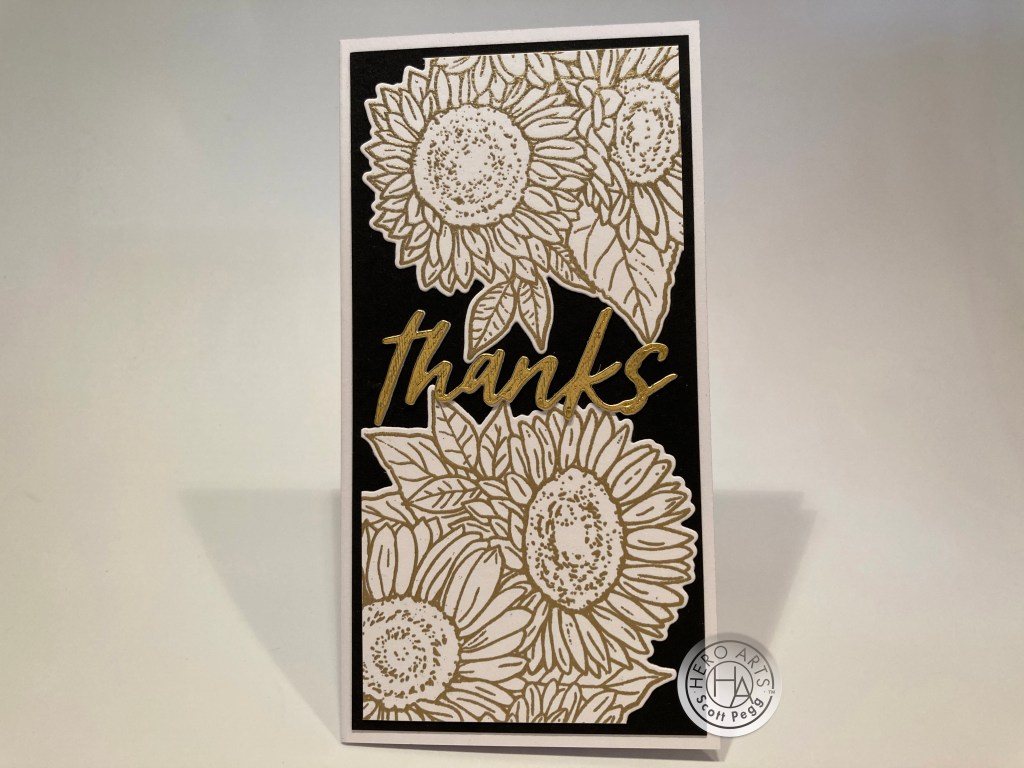
I mentioned how large that sunflower stamp is, but it works wonderfully on a mini slimline card! This is a 3.25″ x 6.25″ card base with a 3″ x 6″ piece of black card stock glued to the front. I cut the sunflowers in half horizontally, and trimmed thin pieces off the sides to make the opposite corners square. The top flowers are the bottom of the stamp and the bottom flowers are the top of the stamp. I glued the embossed flower pieces flat to the card front leaving a little black “mat” showing around the flat edges. I die-cut the “thanks” die from a piece of white card stock and a piece of textured gold card stock and glued them together and then down to the card front. This is actually most of the stamp here – just a small amount of trimming to make the right angles.. There’s a little dimension with the sentiment, but pretty much a flat card. Black White and Gold – a very classy thank you card!
One of the sentiments in this kit gave me the inspiration for this card… makes me giggle!
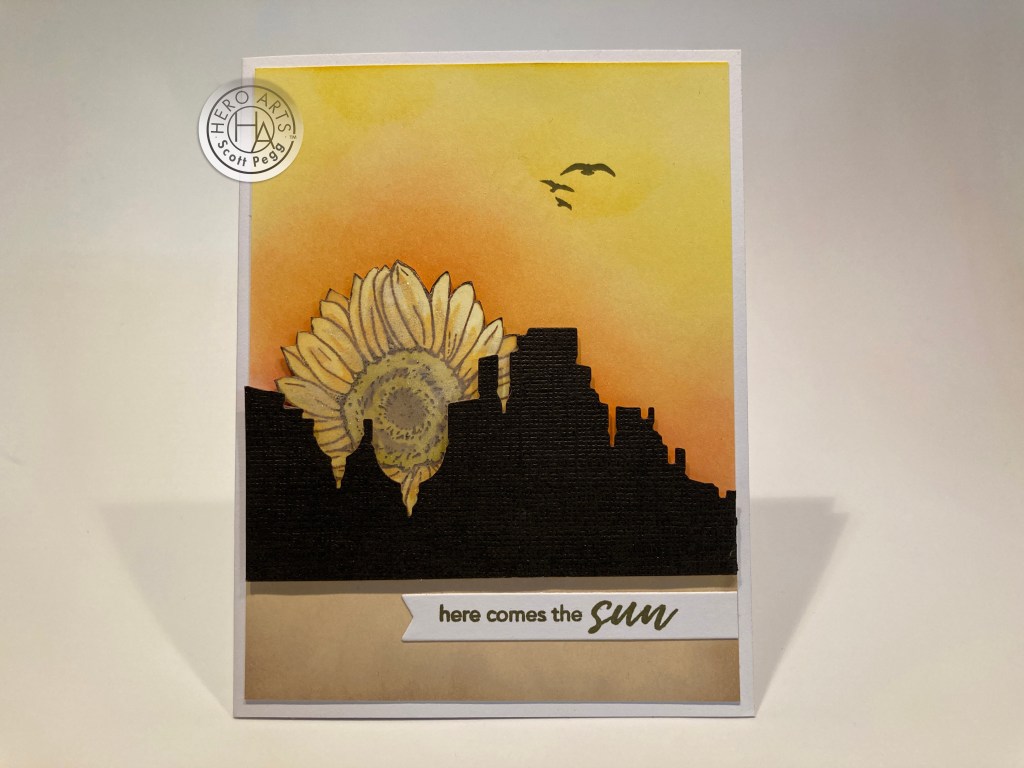
I fussy cut this flower away from panel (C) – it’s the second flower from top to bottom. I remembered that a nice “southwestern” vista could be die-cut from the Venice Fancy die in the MMH April 2019 Kit – this is the negative of that die-cut using some textured Brown card stock. (same as my original “thanks” on the first card). On a piece of white card stock, I ink blended HA Lemon Drop, Creamsicle, and Fruit Punch Reactive inks above the die-cut and Antique Linen and Frayed Burlap Distress oxide inks below the die cut.
I trimmed the inked panel to 4″ x 5.25″ and glued that to a White card base. I added lots of glitter to the sunflower with a Spectrum Noir Sparkle pen and mounted that to the card front with foam tape on the top and glue on the bottom. I added the die cut vista with foam tape, stamped the sentiment on a scrap of white card stock using the Frayed Burlap ink, die-cut that with a Lawn Fawn Many Everyday Messages die, and glued that flat to the card front.
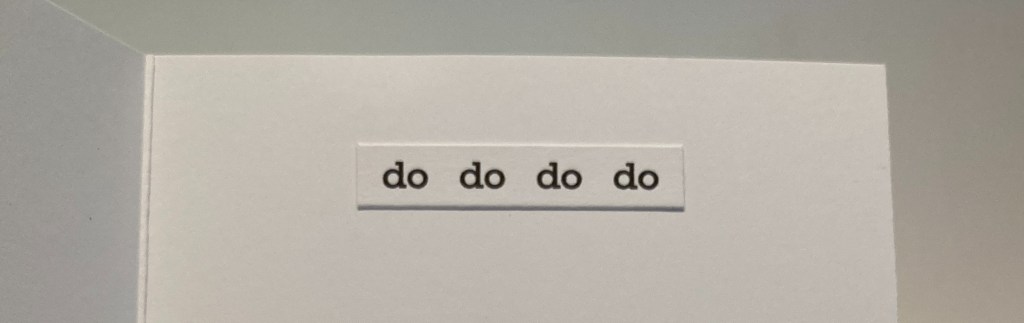
The birds were stamped with Frayed Burlap ink using a stamp from the same Venice kit, and I couldn’t resist adding a “do do do do” to the inside of the card… you know… Here comes the sun, do do do do… Here comes the sun.. just a little something to make you sing!
Okay… that one made me laugh… let’s see what we can do with the oddly colored sunflowers… Valentines Day..?
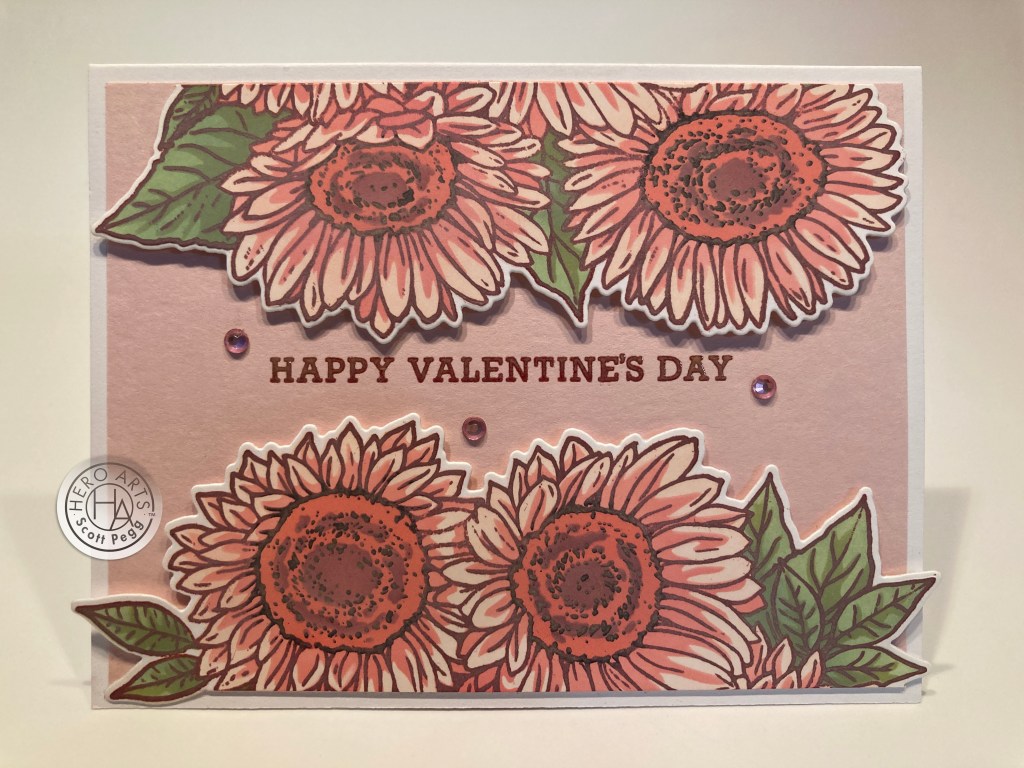
I die-cut panel (E) with the matching die and cut it right down the middle – top to bottom – leaf to leaf! I cut a piece of HA Peony card stock to 4″ x 5.25″ and glued that to a White card base. The sentiment (from the MMH January 2020 Kit) using Aged Mahogany Distress oxide ink (same as the flower outlines) and embossed that with some clear embossing powder. I glued the flowers flat to the card front on the straight edges and added foam tape behind the flowers for a little dimension. A few pink gems add some extra sparkle, and this is another fun arrangement of this stamp! This would be a terrific valentine for anyone addicted to pink!
And those blue flowers still make me think of winter and the cold season we are heading into.
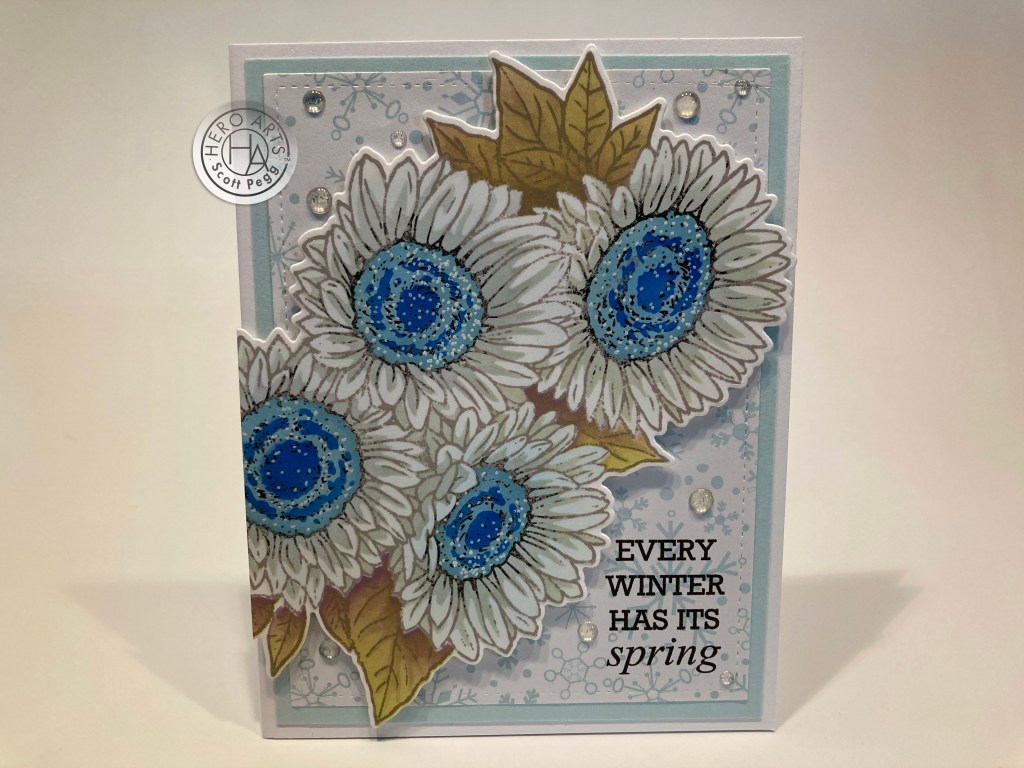
These flowers seem frozen in time! HA Arctic card stock cut to 4″ x 5.5″ and glued to a White card base. Then there is an old piece of snowflake pattern paper cut with a LFSRD and printed with a perfect little sentiment using my Silhouette Software and the Rockwell and Times New Roman fonts, and then glued to the top of the Arctic. The sunflowers have just a little bit trimmed off the bottom and mounted at a jaunty angle with foam tape. Very pretty encouragement card!
I still have more sunflowers to use… ma be we can actually fill up a whole card front with flowers..!?

Almost! Just enough room for a sentiment! This is the leftovers from panel (C) in the background, and the alcohol marker panel (G). Both die cut and arranged on a White card base. Panel (C) is glued flat and panel (G) is mounted with foam tape. I think that gives us some really interesting dimension to this “bundle” of flowers! Sentiment stamped in the bottom corner with Intense Black ink and embossed with some Clear embossing powder, and a couple of thin glitter peel-off stickers underneath to highlight the sentiment.
Now all I have left is one sentiment stamp from our stamp set and my watercolored sunflowers…
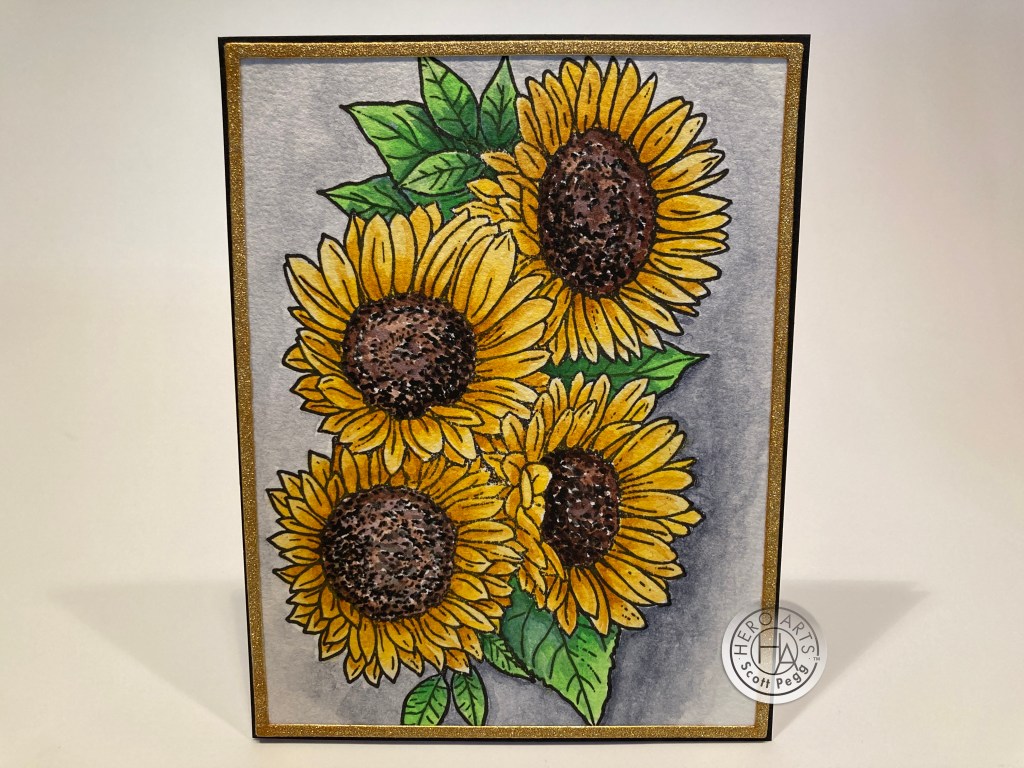
I decided to treat this panel as a piece of fine art..!! I watercolored a background around the flowers and trimmed that panel to just a hair over 4″ x 5.25″ (so it would hide behind this thin Golden glitter frame – and still leaves us with a tiny black mat around the whole panel. The frame was cut with an Altenew Fine Frames Cover die from some glittery gold card stock. I’m very pleased with this watercolor piece and actually considered adding my signature to the bottom…!
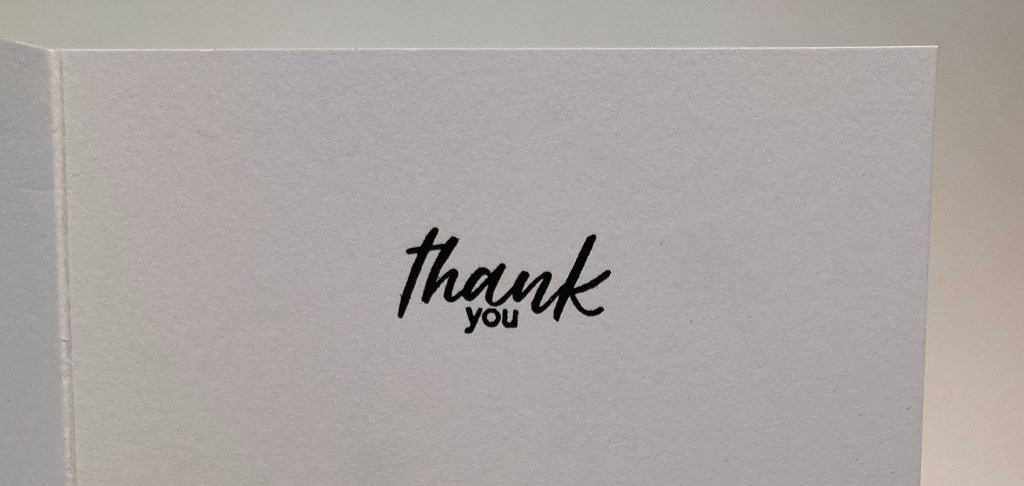
I did add the last sentiment stamp to the inside of this card – I just couldn’t bring myself to add anything on the front of the card! This will be used for a very special Thank you!
I got so carried away with the stenciling and stamping that I almost forgot that you can use the stamp directly on a card!
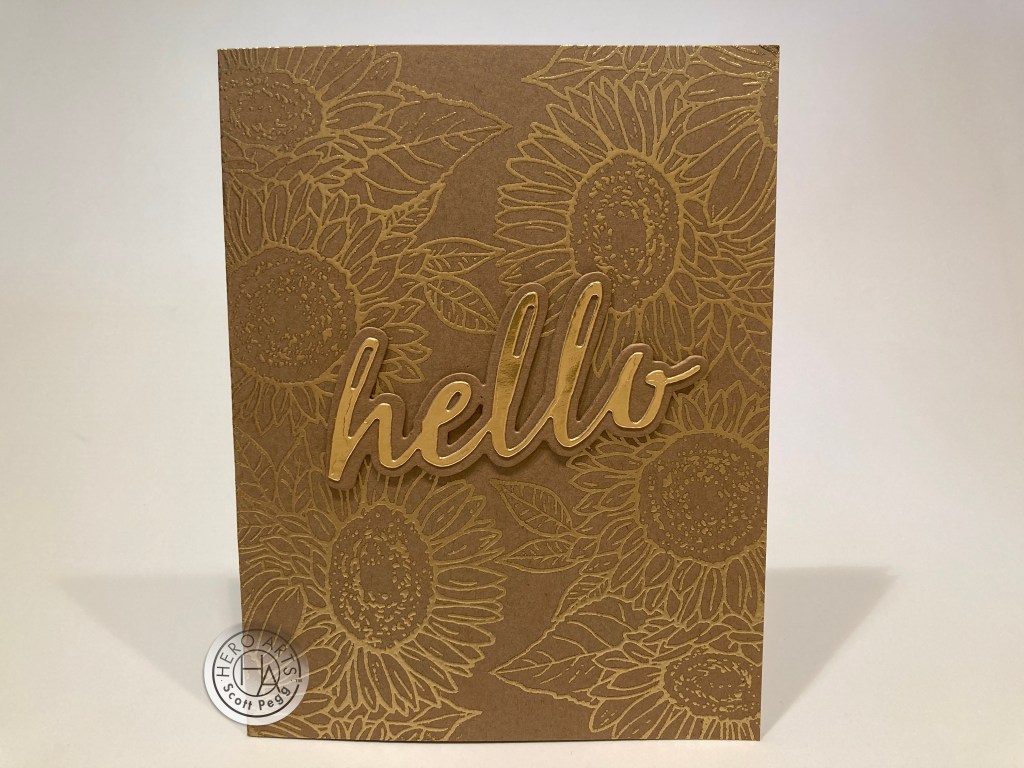
On a Kraft card base, I stamped the bottom of the sunflowers in the top left and bottom right corners using Embossing and Watermark ink and HA Gold embossing powder. I stamped the top of the sunflower stamp in the top right and bottom left corners and gold embossed them as well. That almost fills the whole card up right there! I die-cut the “hello” shadow three times from matching Kraft card stock and glued those together. Then I die-cut the “hello” die from some smooth gold card stock and glued that to the shadow layer and then flat to the card front.
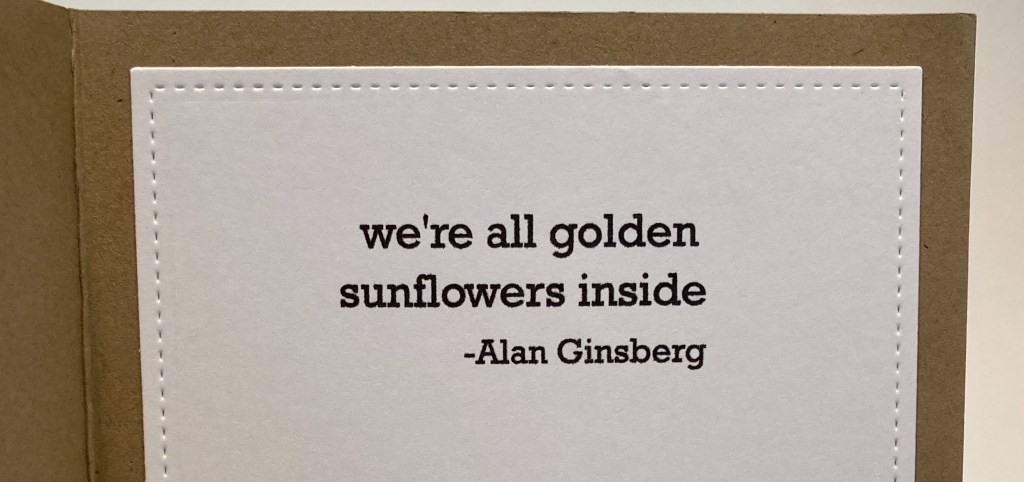
This quote actually inspired this card! I printed this on a white card panel using my Silhouette Software and the Rockwell font, and glued that to the inside of my card. I love the literal and suggestive meaning that this gives to our card! Yes… we are all same on the inside!
And that wraps up my 10 Cards inspired by the My Monthly Hero September 2021 Kit. Sunflowers galore…!

I managed to use all the stamps in our stamp set (not too hard!) and I think this might be the first 10 Cards 1 Kit post I’ve ever done that actually features the same image on all 10 cards! Viewed all together, these don’t all look exactly the same at all, and there’s is a good amount of variety on display. Those layering stencils work SO WELL and should be in the stash of every card maker who likes sunflowers but doesn’t like to color them!
This kit is still available at Hero Arts! If I hope I’ve managed to catch your eye or spark your imagination and you’d like to grab one for yourself! This kit is a greater than normal value this month with all the stencils and ink cubes and blending brush, and if you like sunflowers, then this set should be in your stash! Please use my links if you do go shopping at Hero Arts! It is always terrifically appreciated and helps maintain this website throughout the year!
My Monthly Hero September 2021 Kit: https://shrsl.com/3613h
Hero Arts September 2021 Featured Products: http://shrsl.com/3624m
Thank you so much for sharing your time with me here! Your support means so much to me! Please remember to Like me, List me, Pin me, Post me, and Share me with all your crafty friends! Don’t run with scissors, and I send you and yours Love and Light and Happy Crafting!!
DISCLOSURE: This site contains some affiliate links to products. I may receive a commission for purchases made through these links (at no cost to you). As an Amazon Associate I earn from qualifying purchases. Thank you!

Scott – another fabulous 10 card set! I particularly love the Winter card and it’s sentiment! Great job!
LikeLike
Thank you, Delina!! Always much appreciated! I do have a special fondness for that winter card too!
Love and light to you and yours!
LikeLike
Scott, those cards are just gorgeous! Thanks for sharing your great ideas! ❤️
LikeLike
Thanks so much Jeanne! Always a treat to her from you on here! All my best to you and yours! XO!
LikeLike
Fantastic cards! I especially like the blue sunflower card. I never would have thought of that color scheme but it works.
LikeLike
Thanks Kathy! The Blue Sunflowers hold a special place in my heart! Surprise!! All my best to you and yours!
LikeLike
Love all your cards…so imaginative. My favorite has to be the rising (or setting) sun(flower) and the cityscape…did a double take and appreciated the fun way you used the sunflower in such a totally new way. Thanks for sharing all your ideas!
LikeLike
Thank YOU, Melissa!! Much appreciated! Always trying to think outside the box! All my best to you and yours!
LikeLike
Scott, I finally got to watch the entire video. I started watching this several days ago and got interrupted. Just from seeing how you lined up the stamp with the stencil in the MISTI I knew I had to have the kit. It arrived yesterday and now it’s sold out – glad I got it when I did. I love all your cards, but the last one with the golden sunflowers is my favorite. It really shines. Thanks for all your wonderful inspiration.
LikeLike
Judy! Thank YOU so much! Glad you were able to snag a kit for yourself! I think this is a great stash-builder! The sentiment really sells the golden embossed sunflowers..! Sending you and yours love and light (and lots of sunflowers!)
LikeLike