
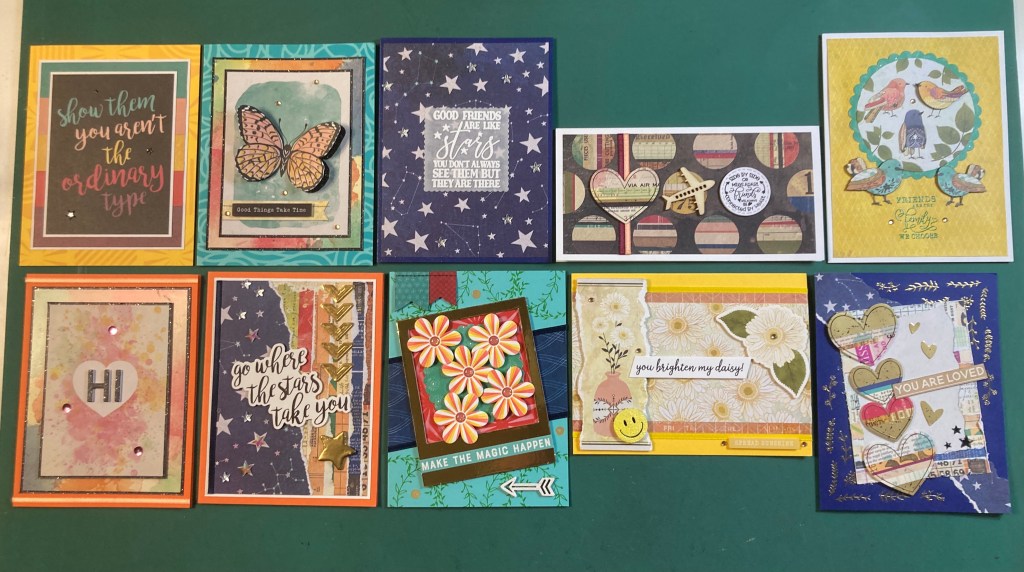
Hello Folks! Scott here with my 10 cards inspired by the Love From Lizi “Bold and Beautiful” Stamp Kit for August 2021.

This kit was a little slow going for me to begin with, but things ramped up before too long! I did get the Colored Card Stock Bundle add-on this month, so I used those to make most of my card bases this month.

Fairly straight forward here…! I couldn’t resist this cut-apart panel. If you look closely at the striped pattern paper behind the cut-apart, you’ll see that I rearranged the stripes to match the colors of the text in proper order. That was fun! I matted the cut-apart panel and the pattern paper with thin white mats and glued them together. I used the kit stencil and Wild Honey Distress Oxide ink on the front of a Yellow card base, glued the panels on top, and added a few Black Mini Star peel offs for a touch of shine. I love this sentiment!
And look…! There’s a few butterflies in this kit too! You know how much I love me some butterflies…!

On the Sky Blue card base, I stenciled the Swirly add-on stencil with Peacock Feathers Distress Oxide ink. The butterfly panel is another cut-apart. Using my craft knife, I fussy cut the butterfly wings but not the body, and glued that panel to a Black Tie Glitter card stock mat. The glitter shows nicely under the wings. I glued that to a piece of the water color specialty card stock and matted that on more Glitter black card stock and glued all to the card base. The sentiment is a sticker mounted with foam tape, there are pieces of foam tape under the wings to keep them elevated, and some of the gems from our embellishment bag ad more texture and sparkle. Good things do indeed take time!!!
This one seemed like a no-brainer to me… I mean, with a sentiment and pattern paper like this, it feels kind of expected!

The star pattern paper is cut to 4″ x 5.25″, and I sprayed that (along with the Navy card base) with Sheer Shimmer spray. I stamped the sentiment on some 40# vellum using VersaMark ink and embossed it with some White embossing powder. I die-cut the sentiment (and a second layer of vellum) with a Scalloped Square Layering die and glued those both together using a Xyron Sticker maker. Then I ran the doubled-up vellum through the sticker maker again, and glued it to the front of the card. Some star gems from the embellishment bag add texture and even more sparkle! Lovely!
A couple months ago I made my first Mini Slimline card where the card base was 3″ x 6″. Then I start seeing a bunch of other Mini Slimline tutorials and they seem to all be on 3.25″ x 6.25″ card bases… Okay… I’m flexible!

I like this 3.25″ x 6.25″ Mini Slimline card quite a bit! Pattern paper cut to 2 7/8″ x 5 7/8″ wrapped with two pieces of ribbon and glued to a White card base. This heart sticker is foam taped on top of the ribbon, and the airplane wood-veneer die-cut is glued flat to the card base. The sentiment is stamped on a scrap of White card stock using VersaFine Onyx black ink, and die cut with a stitched circle die from my stash that was the closest in size to the stamp. The Scalloped Circle dies in the kit just weren’t the right size for this. I added the die-cut sentiment with foam tape and we have a very illustrative Mini Slimline card!
I created an make-your-own envelope for my 3′ x 6″ Mini Slimline card and found the need to adjust the envelope for this larger version, so here’s the new dimensions and scoring instructions to make an envelope for a 3.25″ x 6.25″ version. This larger envelope can be made with an 8″ x 8″ piece of paper – score one side at 2 1/4″ and 5 3/4″ and score the other side at 1/2″ and 7″. Cut away the four corners and assemble an envelope that fits 3.25″ x 6.25″ Mini Slimline cards.
Personally, I think I like the 3×6 version better – but a lot of the commercial dies and tools for Mini Slimline cards are geared towards the larger cards. I do find it more confusing to score a 6.5″ x 6.25″ piece of card stock for a card base than it is to score a 6″ x 6″ piece of card stock for the smaller version… Personal preference I presume, but I do like this card!
Aside from the butterflies, we do have some pattern paper featuring some cute patterned birds.
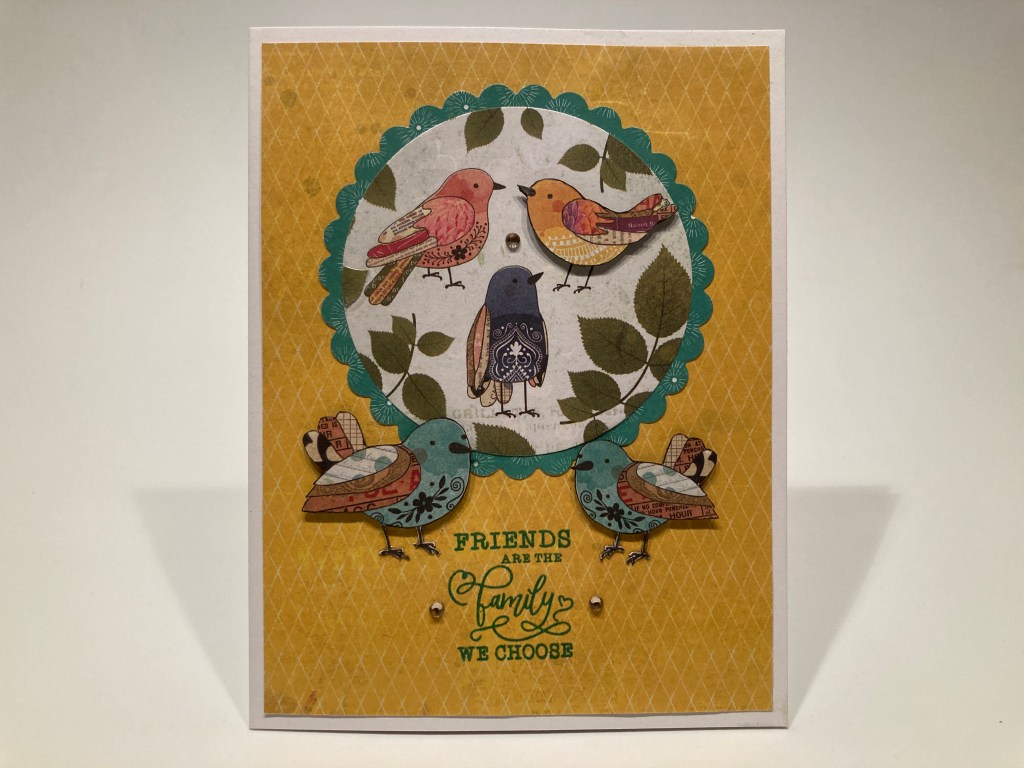
The yellow patterned paper is cut to 4″ x 5.25″ and glued to a White card base. I die-cut the birdie circle and the scalloped circle mat from the same pattern paper – front and back – the leaf at the tail of the pink bird is added to cover a missing piece from the fussy-cut yellow bird mounted with foam tape. I stamped the sentiment using Peacock Feathers ink and embossed that with some clear embossing powder. I fussy-cut the two turquoise birds and added them with more foam tape. A few of the round gems for extra sparkle, and we have a nice ornithological group for this great family sentiment.
There was one more 3″ x 4″ cut-apart panel I was itching to use – I think I called it out in my unboxing!

This cut-apart panel had the tiny “hello” in the center of the heart. Again, both the cut-apart panel and the water color specialty card stock matted on thin Glitter black mats and glued to the Orange card base. Some ribbon glued along the top and bottom for extra texture and shine along with a few sequins from the sequin mix. Once this was all together, I suddenly didn’t care for the minuscule “hello” in the center of the heart so I opted for a big “HI” using the alpha dies from the LFL August 2020 kit. The “HI” is die-cut three times from white card stock and once from the black glitter, the layers all glued together and glued to the heart – I did have a little bit of the “o” from “hello” showing, so a light touch of a white gel pen camouflaged that. I like that big HI much better!
It seems I’ve avoided the more obvious multi-media aspects of this kit so far – Time to throw caution to the wind!

Big multi-media bang for your buck here. I actually tore the star pattern paper and glued it on top of the pattern paper that features all the torn stripes. That panel is cut to 3.75″ x 5″, and some of the dark blue ribbon is added to the left side. That piece is glued to a thin white mat, and then down to the other Orange card base. I neutralized the sticky back of the sentiment sticker and mounted that with foam tape. The chevrons are the gold picture corners with their backs removed, the gold star is the wood-veneer die cut with it’s hole filled in with a bamboo skewer and embossed (many times) with Love From Lizi Golden Crown embossing powder. More of the star gems from the kit and a few larger (and smaller) stars from my stash add more dimension and glitz. Now we’re playing with multi-media fire!
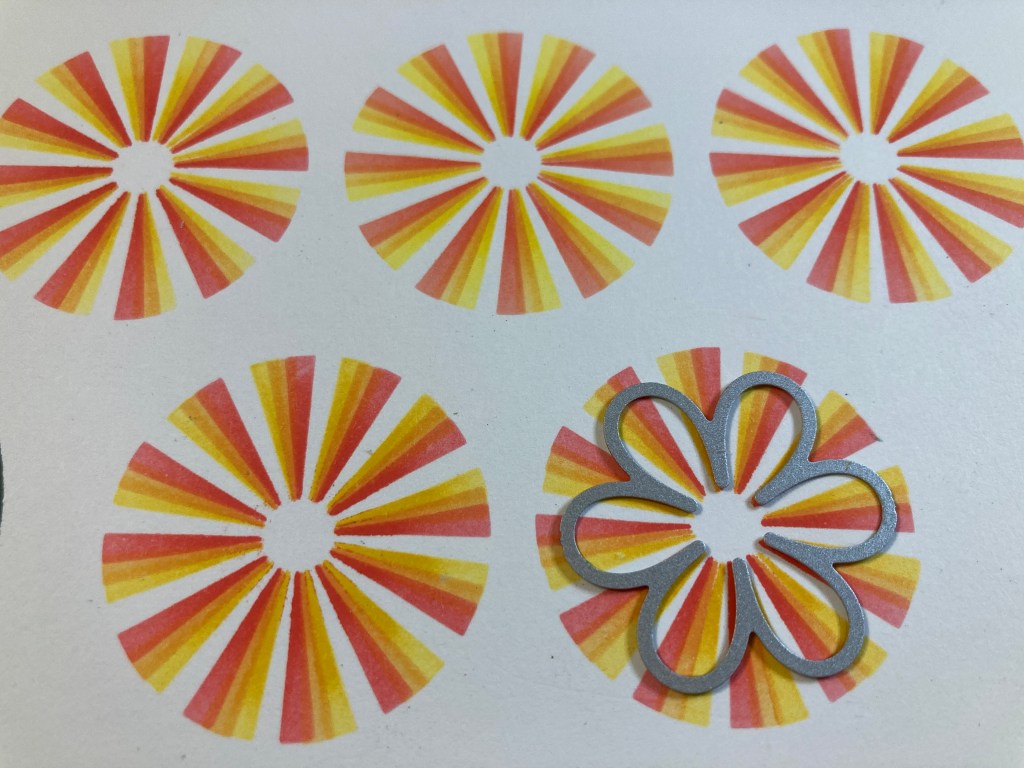
I posted this on FaceBook last week – the sunburst stencil from our kit colored with yellow, orange and red inks for a multi-color effect, and the open flower die from the LFL July 2021 kit fits perfectly!
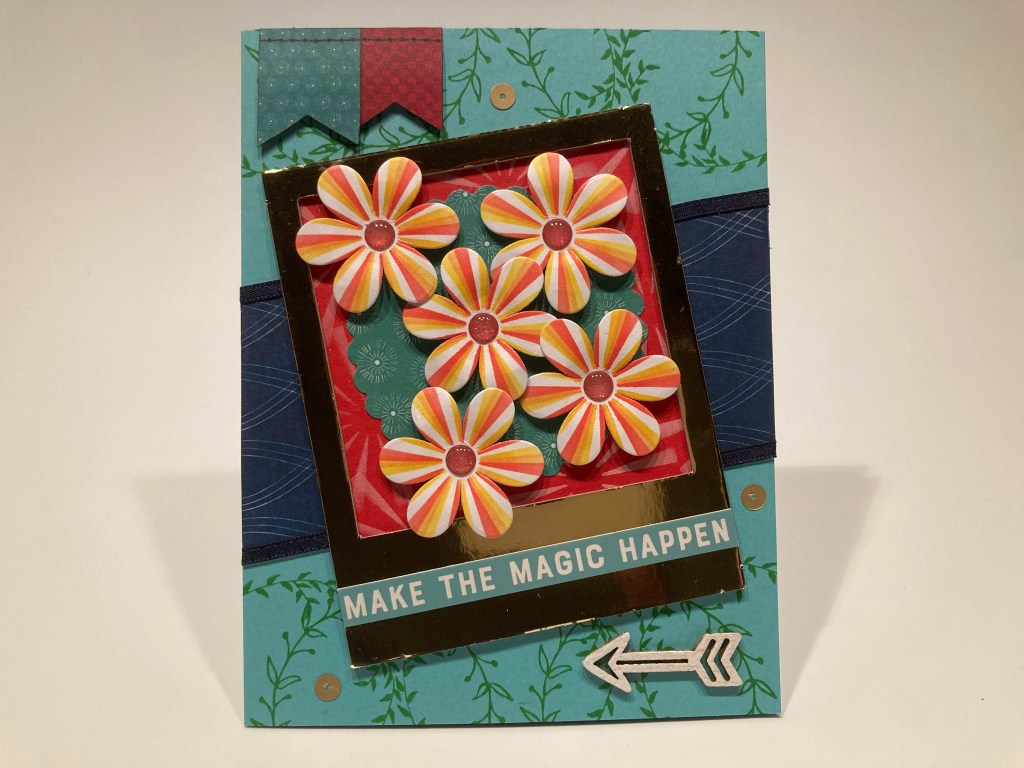
A piece of the red card stock from the add-on bundle is cut to fit the back of the polaroid frame and the sunburst stencil is used to cover the red with some Hero Arts Unicorn White pigment ink. Another blue-green scallop circle from the birdie pattern paper is glued to the center of the red, and the flowers are mounted with more foam tape. Of course I added some Enamel Glitter dots from past Lizi kits to the centers and lightly curved the petals to give the flowers a little dimension.
The banners up left are from the other cut-apart sheet, glued at the top and foam taped on their bottoms, and I added the wood-veneer arrow after embossing the front with White embossing powder. The Gold frame is glued to the card front and the sentiment sticker is glued to the bottom of that. Almost a perfect fit! A few gold sequins wraps up another fun multi-media card!
A little more traditional now but with a little touch of multi-media just to remind me where I am! And a bit of a pun!
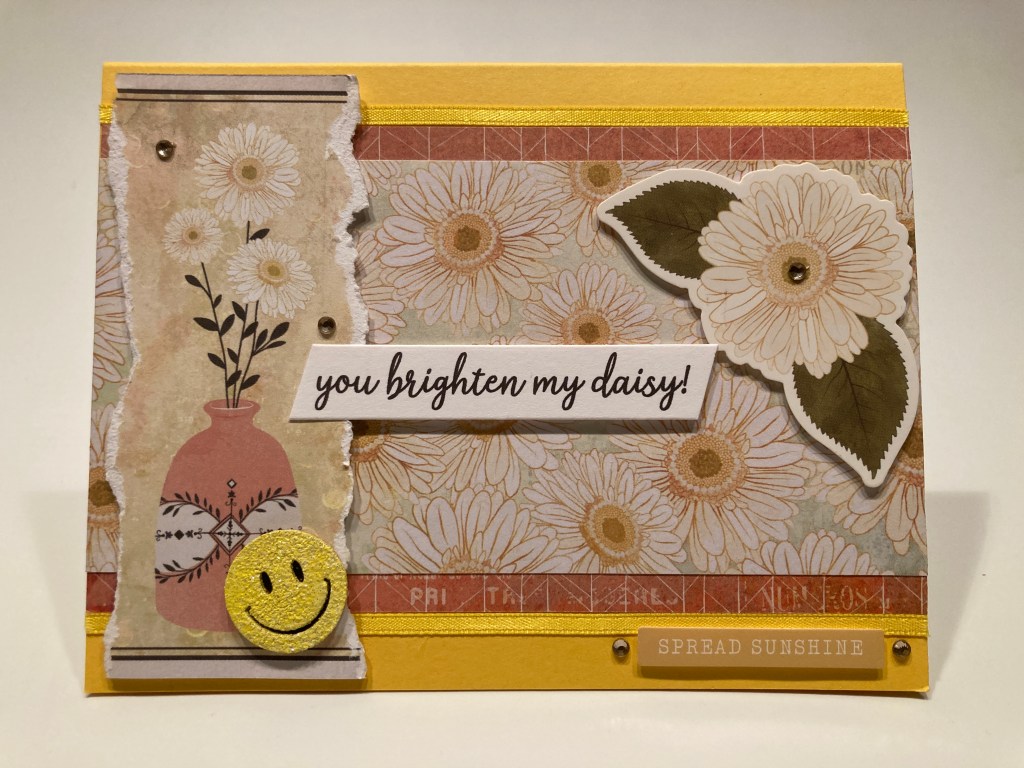
I gained so much hutzpah tearing my star pattern paper, that I thought I could tear the “daisies in a vase” panel as well! On the Yellow card base I added a 3.25″ piece of the orange-y pattern paper and trimmed that with the yellow ribbon. I added a 2.75″ piece of the daisy pattern paper to the top of that. I added my torn daisy vase to the left with foam tape, and the daisy sticker on the right. I printed this pun-y sentiment on a scrap of white card stock using the Dream State font, trimmed it down, and mounted that with foam tape as well.
I embossed the happy face wood-veneer die-cut with some Yellow Prisma embossing powder, backed that with some black glitter scraps, and glued that to the base of the vase. Finally, I added the “spread sunshine” sticker with foam tape and a sprinkling of gems for some surprise glamour! Still very multi-media and a terrifically fun sentiment!
Last chance for another multi-media card. I guess I’m determined to use every last piece of that star pattern paper!
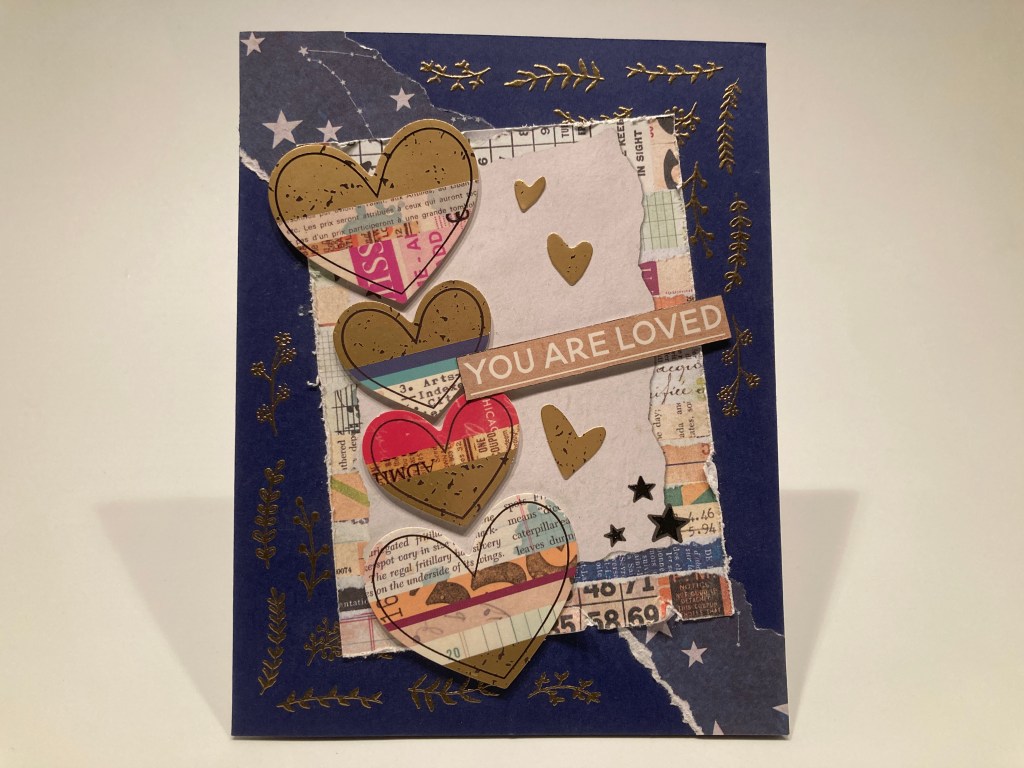
I also had those little foliage stamps to use, so I created a little corner embellishment using all the small stamps and embossed that pattern on the top right and bottom left corners of the Navy card base using LFL Golden Crown embossing powder. Torn star pattern paper goes from top left to bottom right, and I distressed the edges of this 3″ x 4″ cut-apart panel with the blade of my scissors before gluing that to the card front. The big heart stickers are mounted with more foam tape as well as the (reduced) sentiment sticker. A few more gold heart stickers and some Black Mini Star peel offs finish this card with more shine – the three sizes of peel off hearts fit those three printed black stars almost perfectly! Multi-media can be fun!
That’s my 10 cards using the Love From Lizi August 2021 Kit. I missed the opportunity to color something this month but am very pleased with the collection of cards I was able to assemble. A fun assortment of cards in a fairly unique color palette – lots of friendship cards, encouragement cards, love and appreciation cards. And those cool striped flowers!!
I did use some of everything in this kit – I don’t think I missed an item or a sheet! And I used every stamp in this stamp set except for the “sister” sentiment… I just couldn’t…!
This kit sold out very quickly this month – as most of the Love From Lizi kits do… Lizi generally does her kit reveals on the 19th of the month prior, so if you like what you see and want to get in on the fun, look for future kits dropping on the 19th of every month. Or just jump in with the rest of us and subscribe!
LFL Subscription / US & Canada: https://shrsl.com/1rkpj
LFL Subscription / United Kingdom: https://shrsl.com/2b1ev
LFL Subscription / European Union: https://shrsl.com/2b1es
LFL Subscription / Everywhere Else: https://shrsl.com/2b1ey
Thank you so much for sharing your time with me here! It is always appreciated and I am totally humbled by your attention. Please remember to Like me, List me, Pin me, Post me, Share me with all your crafty friends… Don’t pick the daisies… and, as always, I wish you and yours Health, Happiness, Love and Light, and Happy Crafting!
DISCLOSURE: This site contains some affiliate links to products. I may receive a commission for purchases made through these links (at no cost to you). As an Amazon Associate I earn from qualifying purchases. Thank you!

Thank you so much for doing this unboxing in email! I just looked back and I have every one since 8/31/18!! It was fun looking back over the kits!!
LikeLike
Thanks Jeanne! This does turn out to be a great catalogue of everything we’ve gotten from Lizi over the years! Can you believe I just finished 4 years with Love From Lizi!! WOW! Love and Hugs dearest!
LikeLike