
Hello Folks! Scott here with my 10 Cards 1 Kit post featuring the Love From Lizi February 2021 Card Kit. This “So Lucky” Kit features lots of girlfriend images with coffee and shamrocks and a unique color palette.

Lizi mentioned that the Green Parade Nuvo Shimmer Powder that we got in the LFL May ’20 card kit would go well with this kit, so I did take a sheet of watercolor paper, misted it with water, and sprinkled that Green Parade Shimmer Powder all over. I figured that would be handy to have on hand regardless of how much I used it with this kit.
I always challenge myself to use all the stamps in our kits, and I make my 10 card bases from the 5 sheets of card stock included – swapping out Lizi’s alcohol-friendly White for some plain White in my stash. I thought I’d start with the unique perspective stamp looking down at our feet… could I get 2 on one card?
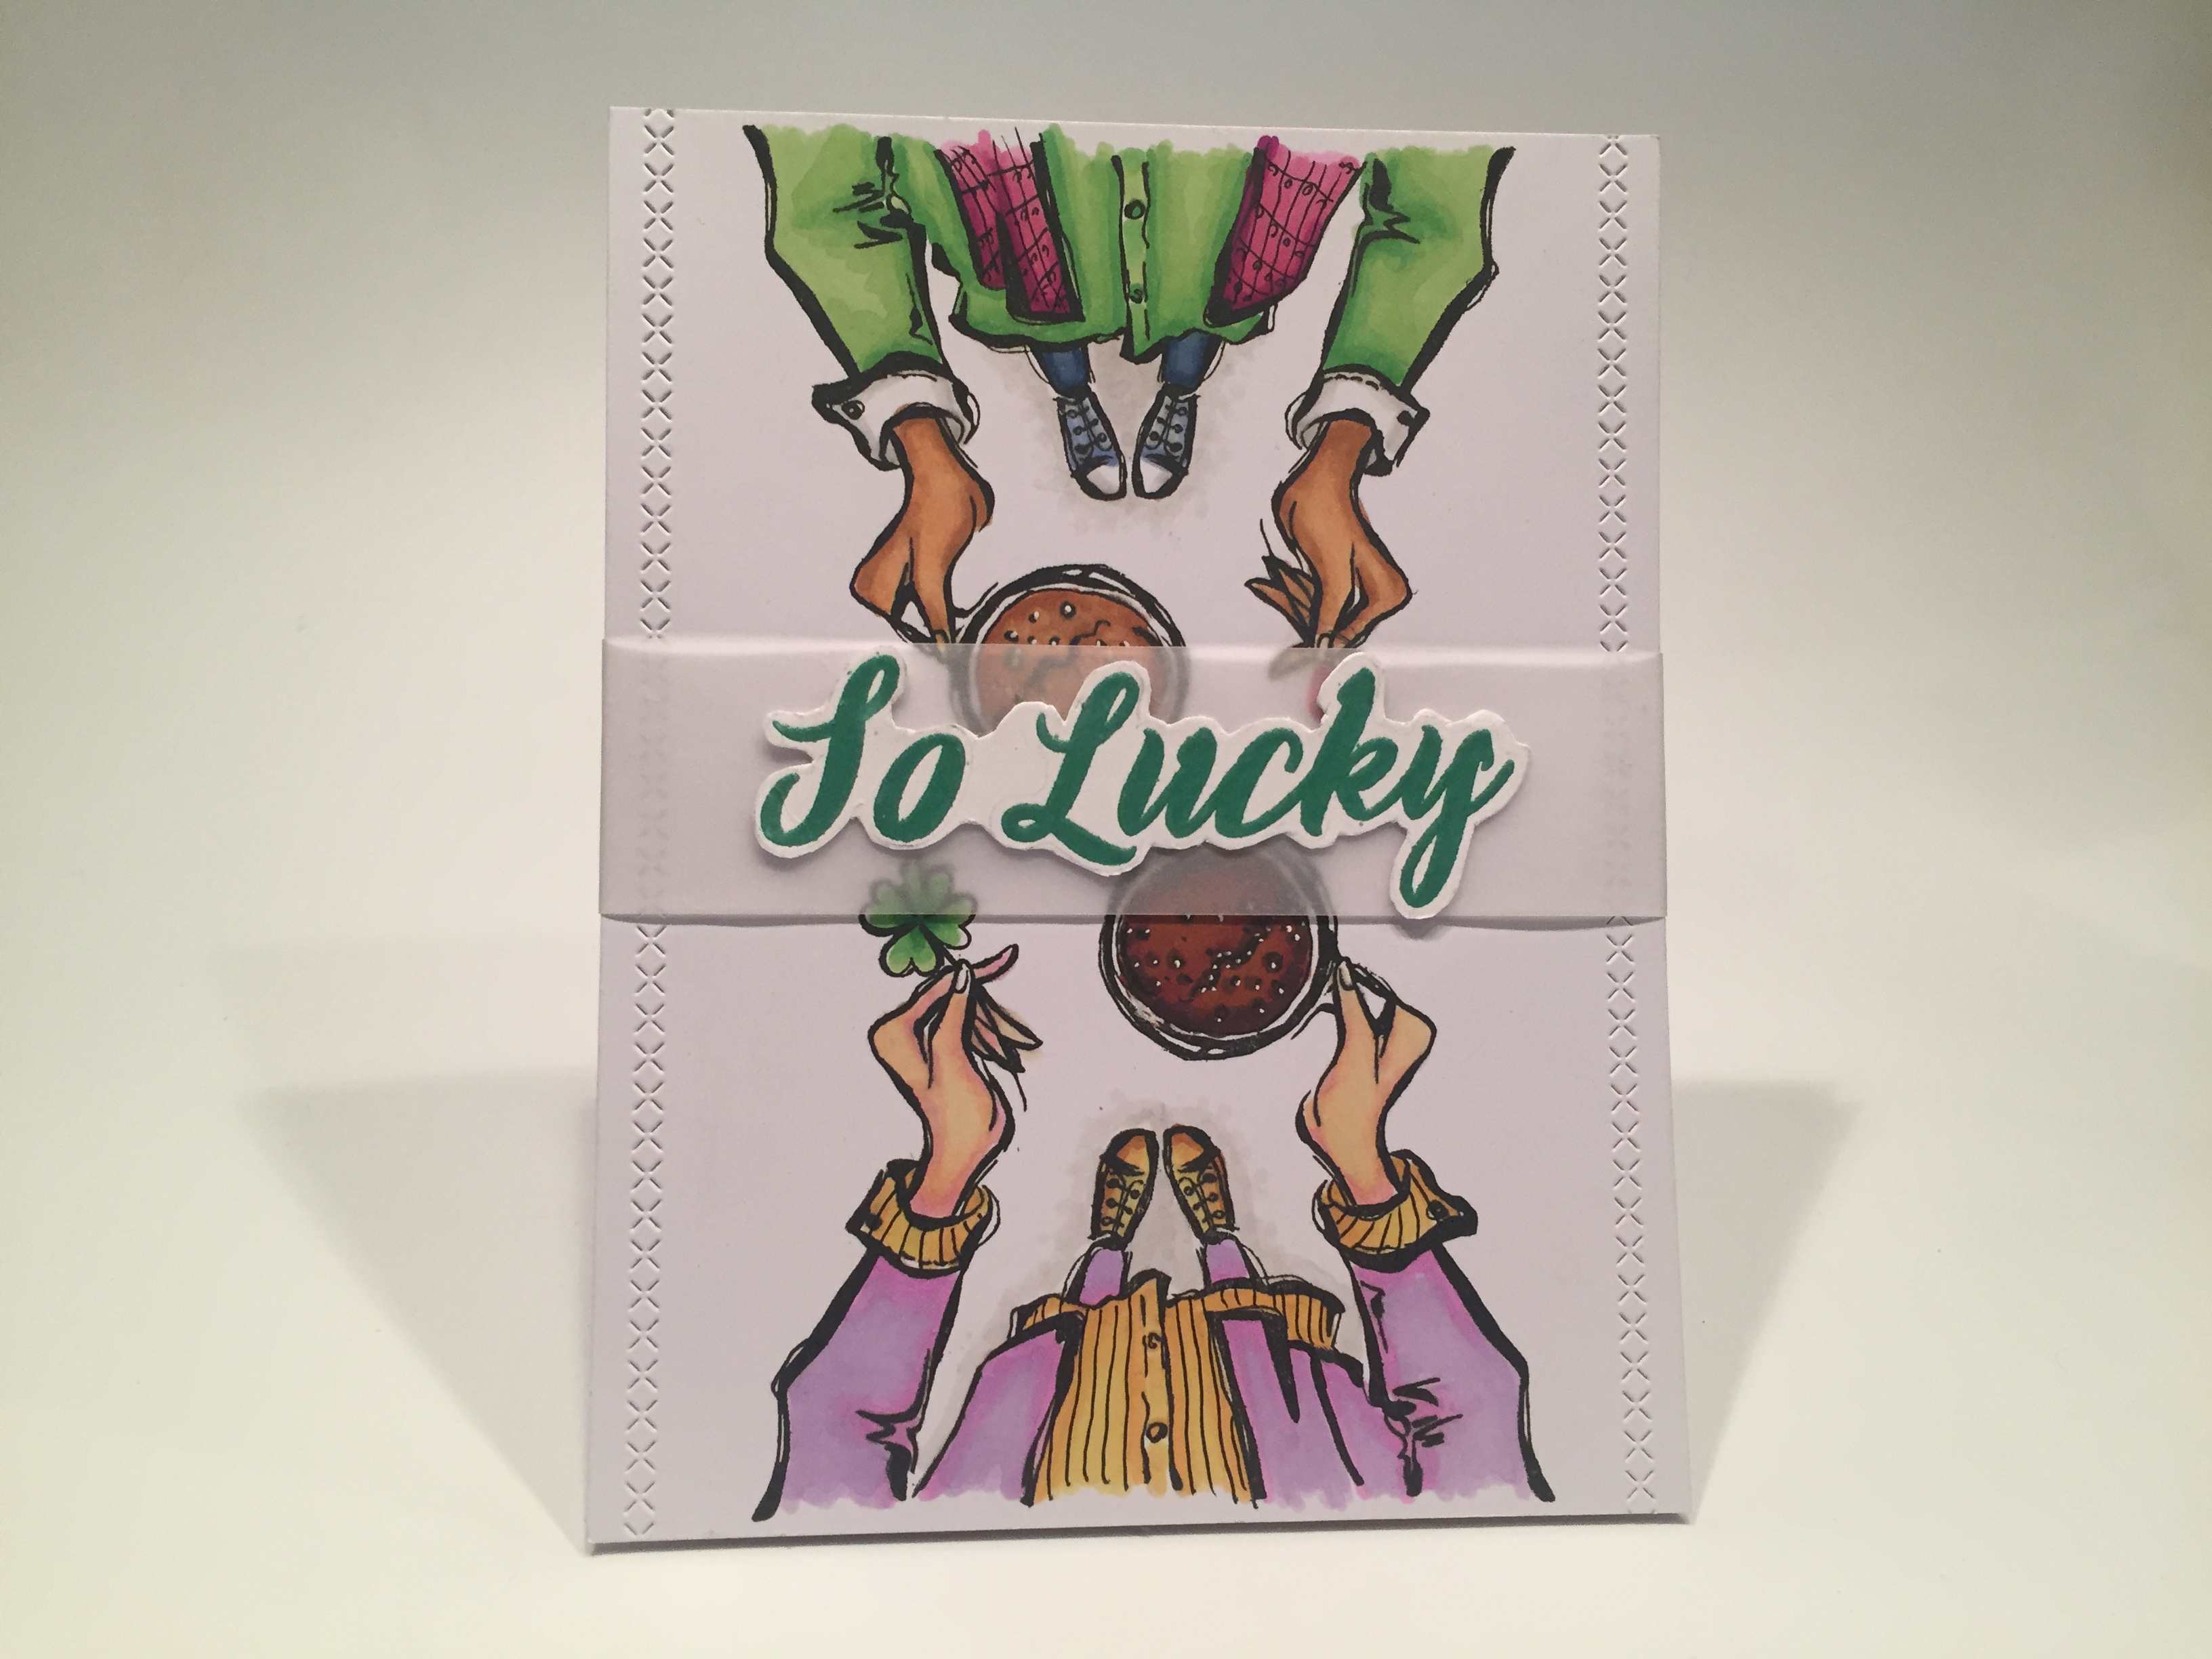
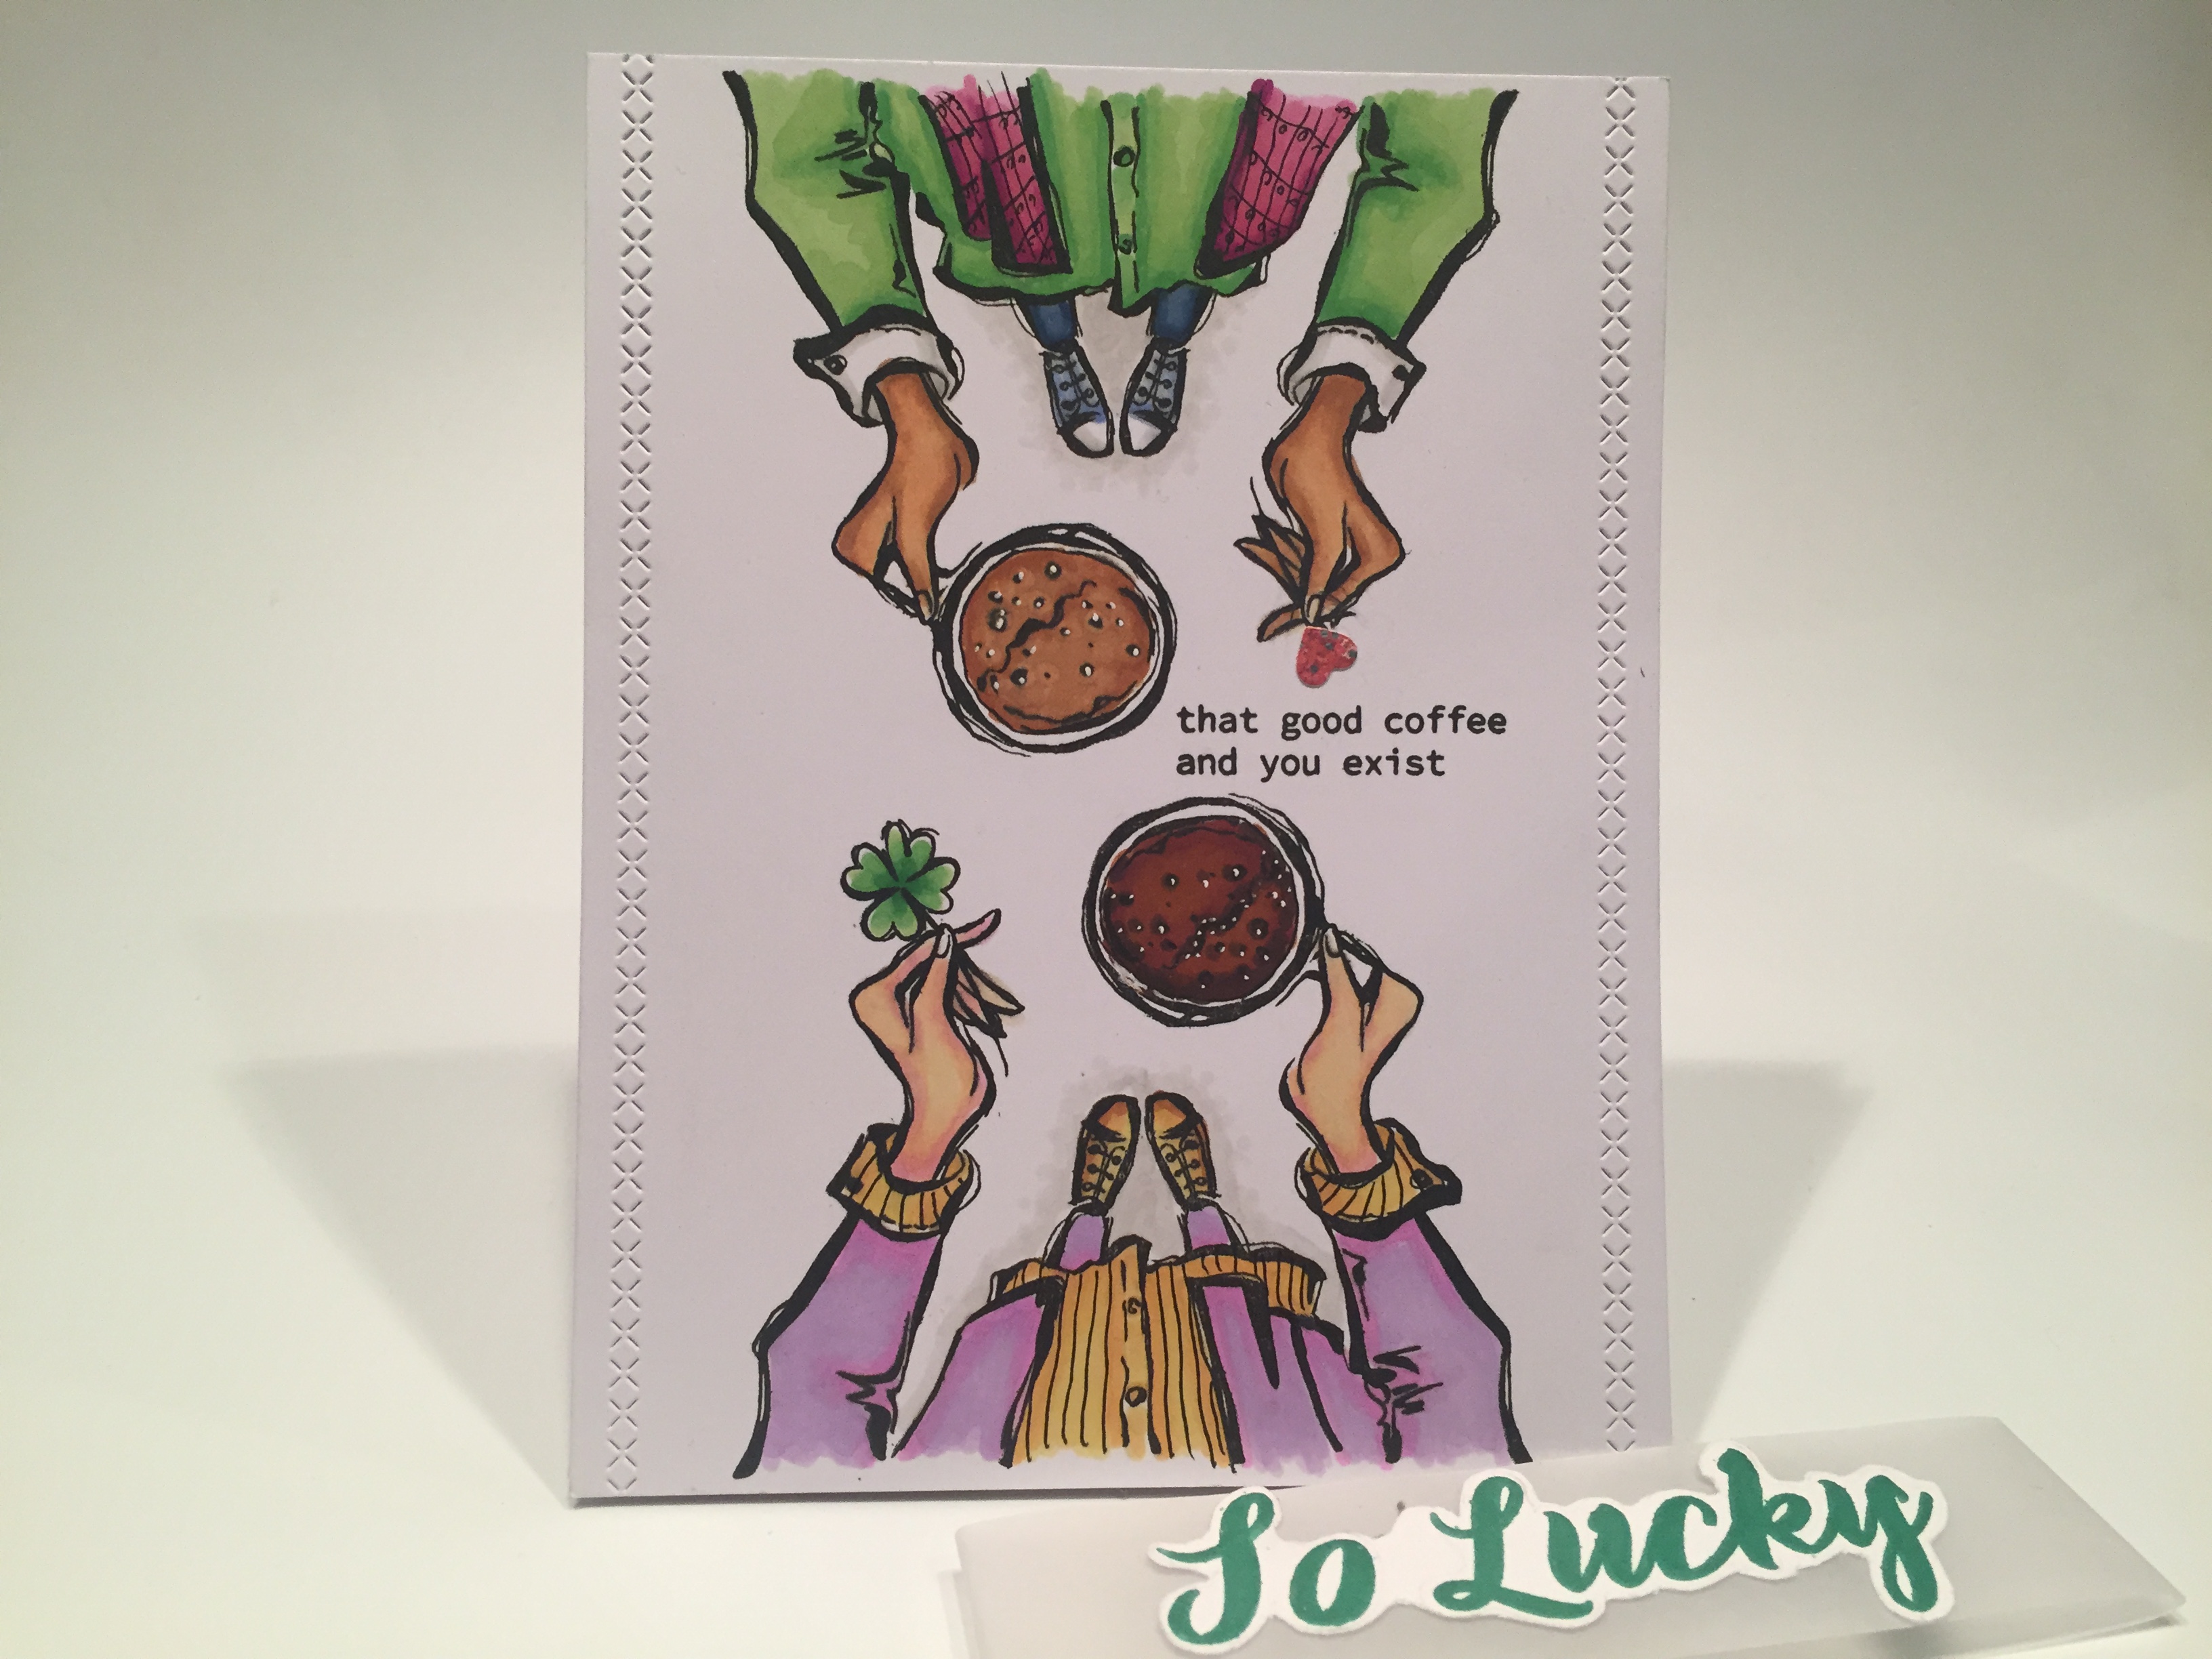

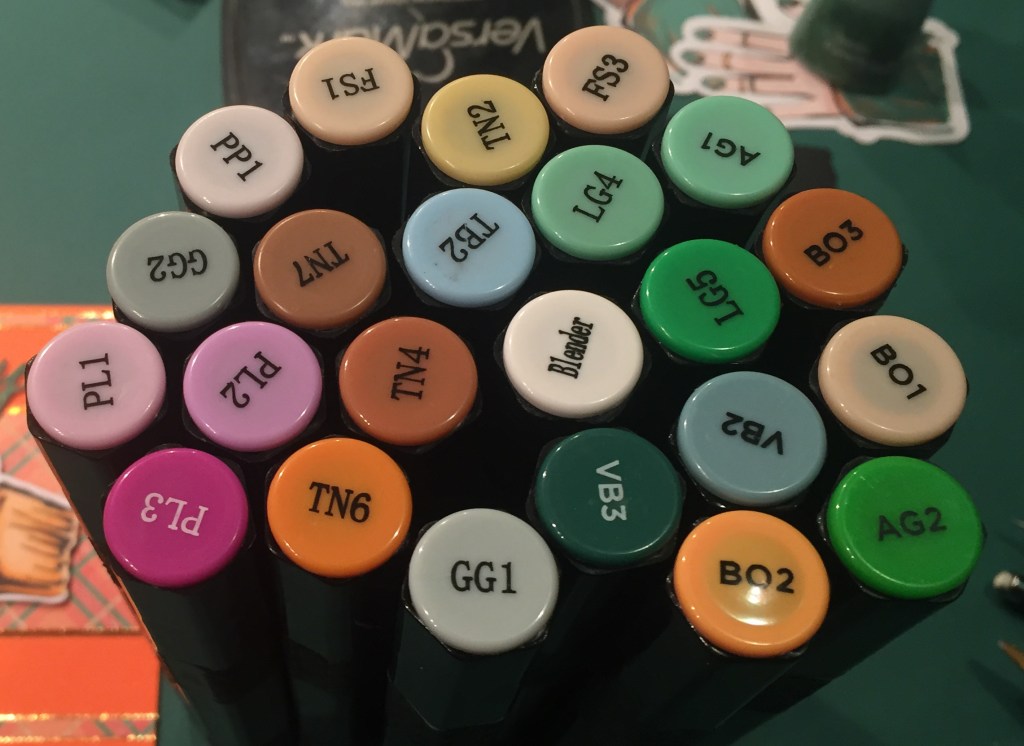
I stamped these with VersaFine Onyx Black ink on an A2 panel of Lizi’s White card stock. I did wipe away the shamrock from the top stamping. I colored all with my Spectrum Noir Alcohol markers, and found it easy to make the ‘scarf’ (as originally stamped) another ‘shirt’ by just connecting the outline under the right arm. That gave me two completely different outfits!
I added some details to the scarf and the shirt with a Pigma Micron 03 pen. I die cut a small heart from the red “glitter” pattern paper in our kit using a Hero Arts Nesting Hearts die and glued that in place of the shamrock on the top stamp.
I stamped the sentiment with Onyx Black ink and added some stitched detail to the sides with a Stitching Lines die from Ellen Huston, and glued that panel down to a White card base. I stamped the large sentiment on a scrap of White card stock using VersaMark ink and embossed that with the LFL Emerald City embossing powder. I LOVE the smooth and shiny results that powder gives you! I did fussy cut the sentiment leaving a thin white border. I debated how to present this card before I decided to just use a belly band – cut from vellum at 1″ wide and 9″ long, wrapped around the card and attached at the back. I used dry adhesive (Scotch ATG) to attach the sentiment to the front of the vellum – Perfectly covers up the small sentiment on the front of the card! Almost an interactive card!
I have all the ephemera from the kit spread out on my desk as I work, and my eye kept falling on the two left hands… a right and a left would have been nice… but could I possibly make these both work together on one card? I began by fussy cutting them out.
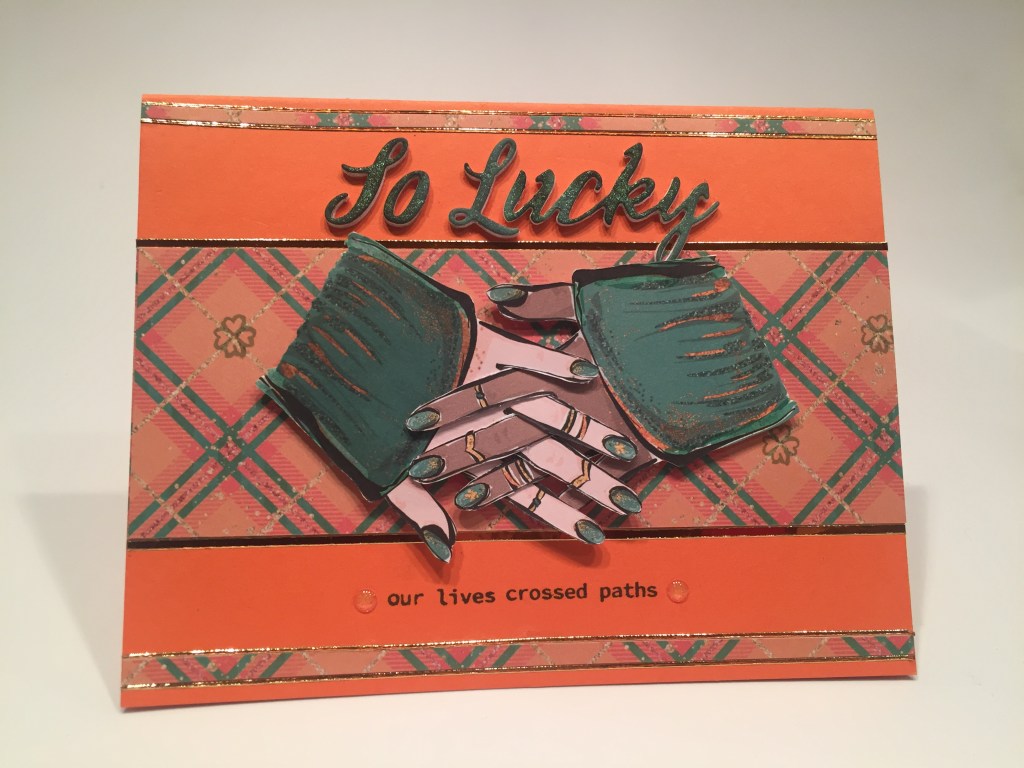
When I found that I could get these two sets of fingers to cross with each other, I realized it was a perfect way to illustrate this sentiment! (Never mind the incongruity of two left hands clasping… unless you’re two-stepping or something…!) I did add a little grey alcohol marker to the sweater on the left for a little more contrast.
I glued a 2″ strip of the orange plaid pattern paper to the middle of a Zesty Orange card base, and added two thin strips of the same to the top and bottom – they don’t have to match perfectly… just put the thicker one on the bottom. I did stamp the small shamrock at the center of the plaids using Lucky Clover Distress Oxide ink. I outlined all the pattern paper strips with the Copper Mirror peel offs from our kit. I die-cut the “So Lucky” sentiment from my prepared Green Parade shimmer card stock and twice more from some 110# card stock, and glued those all together for a nice, dimensional sentiment.
I did cut apart this sentiment stamp so I could make it a single-line sentiment, and stamped it on the card front with Onyx Black ink. I added the hands with foam tape, and used a couple of the enamel dots to highlight the smaller sentiment. Bright and shiny – I really like the intertwined fingers!
More sentiments to go… and we have so many pieces of ephemera to play with as well!!

On the Vibrant Green card base, I glued a 3.25″ piece of the green “glitter” pattern paper to the center, and edged that with two 1/4″ strips of the green houndstooth pattern paper. I added LFL Green Holo peel offs to the edges of all the pattern paper. I stamped and embossed the “Lucky” sentiment as before and used the matching shadow die to cut it out. That fit nicely across the center of the largest clover wreath ephemera piece. I cut out a circle of white card stock to fit behind the opening in the wreath, and stamped my small sentiments in the available openings. I glued the white stamped piece to the card front, added the wreath and sentiment with foam tape, and embellished this with three of the wood veneer shamrocks and two small green enamel dots. I was pleased to be able to use the “Lucky” without the “So”, and I like the layered sentiment!
We got eight pieces of the “girlfriends making a heart with their hands” ephemera so I had to use one…!

I did trim the border on those ladies small enough to fit on this oval die-cut from White card stock using a Hero Arts Nesting Ovals die. I added a black oval mat from the same dies, and glued all three pieces together. I stamped and embossed the large sentiment the same as before, but cut it out with the matching shadow dies… using partial die-cutting to keep from separating the words. Fairly simple! I stamped the small sentiment on a scrap of White card stock and trimmed that to size.
I cut this shamrock pattern paper to 3.25″ wide and glued that to a Black card base. I added two Green Glitter peel offs to the edges of the pattern paper. I attached the girl oval and the sentiments to the card front with foam tape. If you look closely, you’ll see a little orange bow on the back of the redhead’s hair. I did a second generation stamp of that bow to soften the outlines, and colored it with my Zig Real Brush markers. I fussy-cut that out and glued it to the back of her chaplet. I love that the background pattern paper matches their hair colors!
I got to wondering if I could use any of these stamp sentiments without the “So Lucky” qualifier…

I combined the “We’re” stamp with the “and so very grateful” stamp to make this simplified sentiment with no “Lucky” in sight! I just masked off the “and” when I stamped the longer sentiment. When I was happy with my stamped sentiment, I die cut the stamped white panel with a Tonic Scalloped Square Layering die, and the “bows” pattern paper with the next larger die, glued those to a plain black mat and then down to the Zesty Orange card base.
I used my craft knife to cut the border away from the left side of the medium cookie ephemera piece, and layered that with the stack of cookies ephemera piece to make one focal point. I think the cookie in front also helps identify what’s in that stack! I attached those to our card front with foam tape, and added three orange sequins for a little sparkle! I ran a piece of our green satin ribbon through my Zyron Sticker maker and glued that across the bottom of my card, and added a small bow tied from the same ribbon. Ribbon on the cookies, ribbon on the card! This is a great “thank you” sentiment without the need for “Lucky”!
One more sentiment to use and another image stamp to color – that hand holding the coffee… twice?

I reverse stamped the hand on the left using my silicon mat and my Tim Holtz stamping platform, also stamping (normally) the right hand with Onyx Black ink on Lizi’s White alcohol-friendly card stock. Here’s a quick refresher on how I reverse stamp.
I colored the hands with my Spectrum Noir alcohol markers and used the matching die to die-cut them both. On the reverse-stamped piece, I lined up the die on the back of the card stock using a bright light to see through the card and position the die. I think it helps sell the sentiment to have two hands on this card.
I die-cut the two pattern papers to 3.75″ x 5.25″ with a Lawn Fawn Stitched Rectangle die and then split them both diagonally and taped them together. I fiddled with a simple peel off between the two papers when I decided to use the washi tape in the kit. I added the washi tape to a piece of white card stock and trimmed it to size before adding it on top of the patterned papers. Then I added our kit peel offs to either side of the washi tape band. I added our patterned background to a mat made from the Green Parade Shimmer Powder (I die-cut the center away for conservation) and glued those to the Soft Grey card base.
I stamped the “Lucky” on a scrap of white card stock and embossed that with some Coral embossing powder I received in the My Monthly Hero July 2020 kit – matched those stripes perfectly! Then I die cut the sentiment and two more layers with the matching shadow die, and glued them together for a thicker sentiment. I stamped the smaller sentiments on the background with Onyx Black ink and glued the “Lucky between them. I colored one of the small wood veneer shamrocks with Lucky Clover Distress Oxide ink and covered it with Glossy Accents for some shine. When that was dry, I glued it to the card front and added the hands with some foam tape. CHEERS! I’m Lucky to know you!
Enough skirting around the issue here…! This is a perfect kit for making St. Patrick’s Day cards!

I couldn’t resist… this “coffee cup” ephemera piece looks more like beer to me than coffee…! I took a 3.25″ panel of that great orange plaid and printed my sentiment on it using my Silhouette Software (free!) and the Antelope Island and Plantagenet Cherokee fonts. Here’s a link to my video showing how I print sentiments for my cards: Printing Sentiments. I glued the printed pattern paper to the Vibrant Green card base and added Straight Green Glitter peel offs (in the variety peel off pack this month) on the sides. I trimmed the outer border on the medium wreath and glued that to the card front. I fussy cut the whole border away from the beer mug, straightened the handle a bit, and added it to the center of the wreath with foam tape. A few wood veneer shamrocks provide some masculine embellishment – though I did add some Spectrum Noir Sparkle pen to the to the beer (not the foam) and all the shamrocks! Perfectly pun-y St. Patty’s Day card!
Valentine’s Day just passed, and I thought of this very masculine valentine with a sweet pun-y sentiment!

This is a 2″ x 5″ piece of pattern paper on a 2.25″ x 5.25″ white mat glued to the left side of a Black card base. I printed this sentiment using the Raustila Font on some white card stock and then die-cut it using a Hero Arts Nesting Hearts die. I trimmed down the border on the sneakers ephemera (leaving a thin white edge) and added them to the heart with foam tape. Three small hearts die-cut from the green “glitter” pattern paper and three glitter enamel dots add some playful sparkle. Fun and touching!
There’s a lot of “coffee” in this kit, so I thought I should try something a little more caffeine oriented!
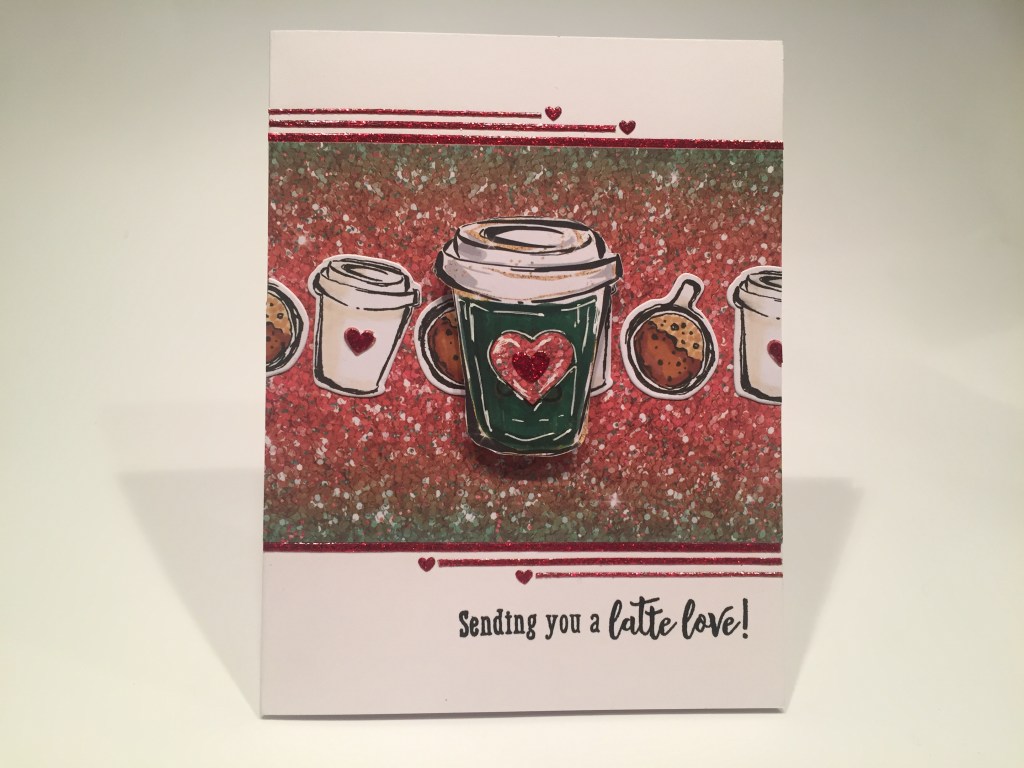
I stamped the to-go cup (without the shamrock) and the coffee cup three times on Lizi’s alcohol-friendly card stock, colored them with my alcohol markers, and die-cut them with their matching dies. I cut the red/green “glitter” pattern paper to 3.25″ x 4.25″ and glued that just above the center of the White card base. I lined the top and bottom with LFL Red Glitter peel offs, and accented the ends of the short peel offs with Red Glitter Mini Hearts. The sentiment is from the My Monthly Hero August 2018 Kit stamped with Onyx Black ink and embossed with some Clear Embossing powder. Cute little pun!
I die-cut some small hearts from the red “glitter” paper and glued them to the small to-go cups and added a glitter heart on top. I glued the coffee cup die cuts in a bit of a pattern across the middle of the pattern paper. I wanted a heart on my big ephemera to-go cup so I used my alcohol markers to cover up the shamrock and make the cup darker. I die-cut a larger heart from more “glitter” paper and glued that to the cup and added another glitter heart on top. Lastly, I did scribble an outline around the heart and some highlights on the front of the cup. I also used a double layer of foam tape to attach this cup to the card front. Great card for your favorite coffee lover! With, maybe, a Starbucks Gift card?
Sometimes I can get a little OCD… which in this case, I think it paid off!

First, I was obsessed with fussy-cutting this pattern paper since I first laid eyes on it… and for some reason, I was determined to use this sentiment on a card (too many marshmallows in your cereal, Scott?) and I was over-confident that I could turn one of the wood veneer shamrocks into a “lucky charm”. I took one of the large wooden shamrocks and colored inside the etched lines with Green and Dark Green Zig Real Brush markers. I let that dry well and added Glossy Accents on top of the green. I let that dry VERY well and finished the “charm” outlining all the green sections with my Stardust Gel pen, and glueing a tiny clear crystal in the center. Actually quite gem-like! Emerald shamrock anyone?
I printed the sentiment directly on the Soft Grey card base using the Dream State font. I fussy-cut the pattern paper and trimmed that to fit on the left side of the card. The edge is glued down at the fold and I used foam adhesive on the cut edge for some nice dimension. I arranged some smooth twine on the card front and glued that in place trimming the ends at the edge of the card. A touch of foam tape holds our charm in place on top of the twine. That “charm” really pops on this card!
That’s my 10 cards created with the Love From Lizi February 2021 Card Kit. This is a great selection of cards and I really appreciate the unique color palette! Lots of friendship cards, a valentine and thank you’s and even a St. Patrick’s Day card!
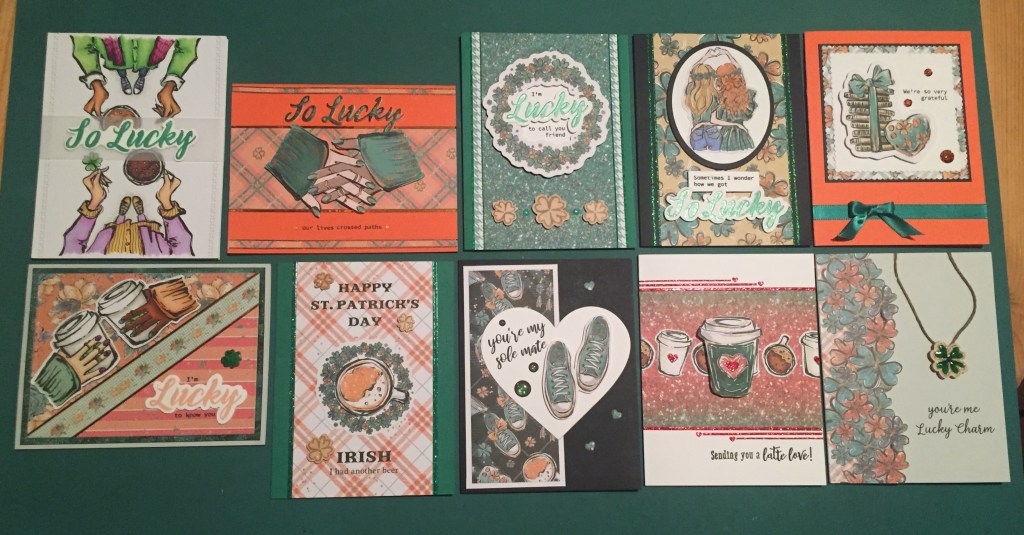
I almost used every stamp in our stamp set with the slight exception of the very small cup of coffee. I did manage all of the sentiments! I used all the card stock in the kit, I used 10 of the pattern papers (almost half!), a good amount of the peel offs, a lot of the ephemera and most of the dies. I used a little bit of everything in the embellishment bag – washi tape, sequins, shamrocks, enamel dots, even a little bit of the ribbon. I had a good time with this kit and now I feel ultra prepared for March 17th!!
As of posting, this kit is still available at Love From Lizi! If I’ve managed to pique your imagination, you should grab a kit for yourself… Lizi’s kits most always sell out…! If you do go shopping with Lizi, please use my links… it helps keep a roof over our heads in this cold dark winter up north! Truly appreciated!
Love From Lizi February 2021 Card Kit: https://shrsl.com/2rt2q
Love From Lizi February 2021 Release: https://shrsl.com/2rt2v
Thank you so very much for sharing your time with me here! Your support means so much! Please remember to Like me, List me, Pin me, Post me, Share me with all your crafty friends, and don’t run with scissors..! I send you and yours Healthy Wishes, Cheerful thoughts and, as always, I wish you Happy Crafting!
DISCLOSURE: This site contains some affiliate links to products. I may receive a commission for purchases made through these links (at no cost to you). As an Amazon Associate I earn from qualifying purchases. Thank you!
