
Hello Folks! Scott here with my 10 Cards 1 Kit post featuring the My Monthly Hero January 2021 Kit. This kit celebrates one of the most important creatures on our planet – the bee! I actually don’t have any bee stamps in my stash, so I’m thrilled with this kit!

Our 6″ x 8″ clear stamp set features a lovely combination of bees, flowers, and honeycomb along with lots of pun-y sentiments. We get six coordinating Frame Cuts and a Honeycomb Window Die. Extras include a Honey Lacquer Pen, and two 5.5″ x 8.5″ sheets of Gold Brilliance, along with 2 Pale Yellow Glitter and 2 Black Glitter card stock sheets. Plenty of supplies to make a whole swarm of bees!
Of course I was drawn to the Honeycomb Window Die to begin with – this card went through a few permutations before arriving at this final version.
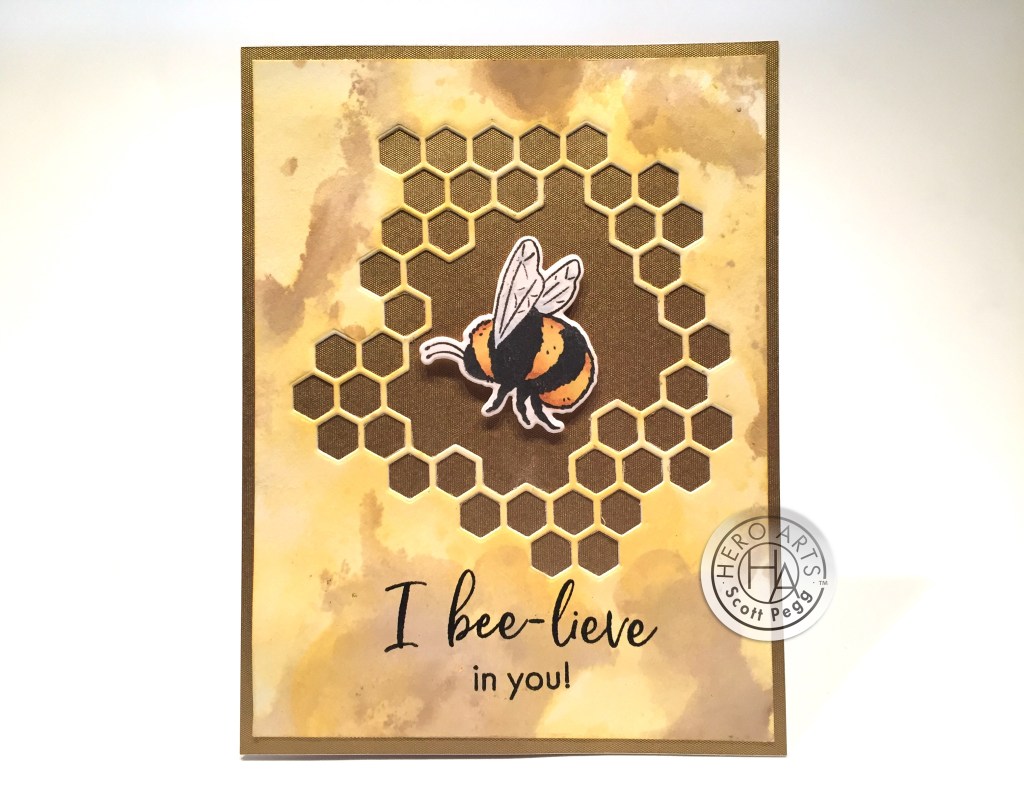
Originally I dry-embossed the window die on a piece of Neenah Solar White 110# card stock. That worked fine, but I didn’t care for it on plain white paper. So, I decided to do some ink-smooshing to color the embossed panel. I used Distress Oxide inks in Wild Honey (naturally!) Fossilized Amber, and Frayed Burlap. I like that, but the ink-smooshing still left the embossed die lines white. Okay… let’s just go ahead and die-cut the window die. I lined it up with the previous embossing, and die-cut it out. Now, I like that!
I cut the window panel to 4″ x 5.25″ and glued it to a 4.25″ x 5.5″ piece of the Gold Brilliance paper and glued those to a standard A2 white card base. I stamped the (combined) sentiment using HA Intense Black ink and embossed that with some clear embossing powder. I stamped the bee in the same ink and colored him with my Spectrum Noir Markers (GY1, GY3, GY5, TB1) and die-cut him with the matching frame die. I added a little sparkle to his wings with a Specrtum Noir Sparkle pen, and mounted him to the card front with some foam tape. I love that ink-smooshed background! I don’t do that enough! This a great pun-y encouragement card, and it feels like Hero Arts had cards like this in mind when they were putting this kit together!
I like that window die a lot, and wanted to see if I could create some depth to my bee-hive by using that die multiple times.
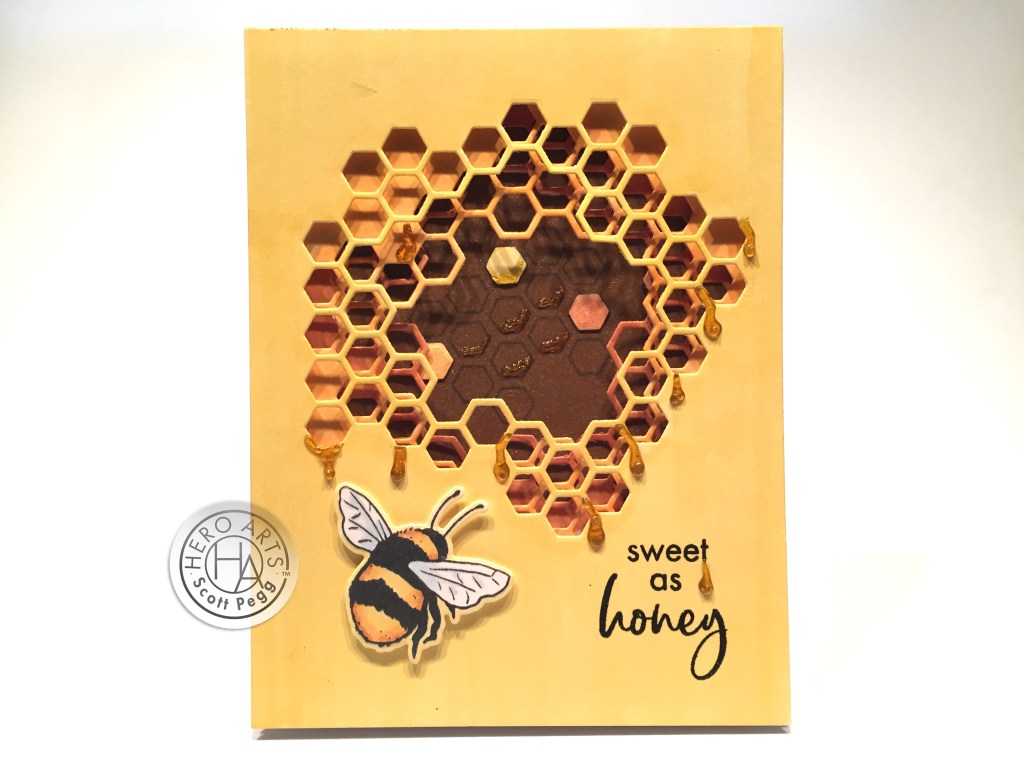
I die-cut the window die on three A2 panels of white 110# card stock rotating the die 60 degrees each time to get a different orientation. I tried to keep the top of the die about a half an inch from the top of the panels – this way, I could layer three honeycomb windows on top of each other and the patterns wouldn’t match. I used the same GY1, GY3, and GY5 alcohol markers to color those three panels – lightest color on top! I cut a smaller panel of my old Auburn Pearl card stock for the background, and stamped the honeycomb outline stamp on that using Acorn Archival Ink – good permanent ink so it wouldn’t smear on that pearlized card stock. I glued that to the back of the GY5 die-cut panel and glued those down to a white caed base. Then I added the two other die-cut panels on top with foam tape for a little more dimension. I think this is a fun approximation of a beehive!
I stamped and embossed the sentiment the same as my first card, and stamped, colored and die-cut the bee the same way as well. I did color the white border of the bee to match the card front and mounted her with foam tape. I took the Honey lacquer pen and “drew” a number of “drips” on my glass media mat, let them dry, and then glued those “drips” to the card front along with a few spots on the background. I also added three of the die-cut hexagons (colored with the same GY markers) to the background for a little more variety. I can almost TASTE this card! I had so much fun illustrating this sentiment!
There are a great deal of sentiments in this kit. I do try to use all the stamps in our stamp set, and I didn’t want to overlook this cute “hi there!”.

I stamped the large floral stamp on the top and bottom of a white card panel with Hero Hues Thistle Reactive ink and embossed both with clear embossing powder. Then I stamped the single profile bloom on the two sides with the same ink and embossing. I stamped the sentiment with Intense Black ink and clear embossed that as well. I die-cut that panel with a Lawn Fawn Stitched Rectangle die, and added two thin mats of the Black and Pale Yellow glitter card stock and glued all of those to a white card base.
I stamped, colored and die-cut the two bees exactly the same as before. I was going to leave the flowers uncolored, but it felt a little barren to me with the brightly colored bees. I took my Pebbles Chalk Palette and lightly sponged some color into the flowers and leaves. I don’t use that palette very often but it comes in handy if you’re looking for some VERY soft hints of color! Then I mounted the bees with some foam tape!

Never one to leave well enough alone, I added this sentiment on the inside. That’s the Lucida Grande font printed on a scrap of card stock, trimmed down and glued to the inside of the card. Perfect addition to the sentiment. Makes me giggle!
Adding a little color to the stamped blooms made we want to do some serious coloring…!

I stamped our large branch of blooms with HA Intense Black ink on some Neenah Solar White 80# card stock and colored all with my Spectrum Noir alcohol markers. I used a White gel pen to highlight the stamens in the middle of the blooms. I die-cut the colored flowers with the matching frame die and arranged that on a white card base leaving enough room for the sentiment. I stamped and embossed the sentiment, stamped, colored and die-cut the bee the same as my previous cards, and used foam tape to attach the bee. Lastly, I trimmed the excess bits of the flowers around the perimeter of the card.
With the bee popped up, the blooms seemed a little flat, so I stamped and colored two of the single open blooms exactly the same as the other flowers, and fussy cut them both to avoid a white frame. I gave the petals a little curl with my fingers and glued those on top of the open blooms on the branch. That made the whole flowering branch much more dimensional, and the bee seems right at home. I thought it was very appropriate to use the “bee-utiful” sentiment with this lovely spray of flowers. And the added dimension works bee-utifully!
I wanted to see if I could stamp interesting patterns with the honeycomb outline stamp.
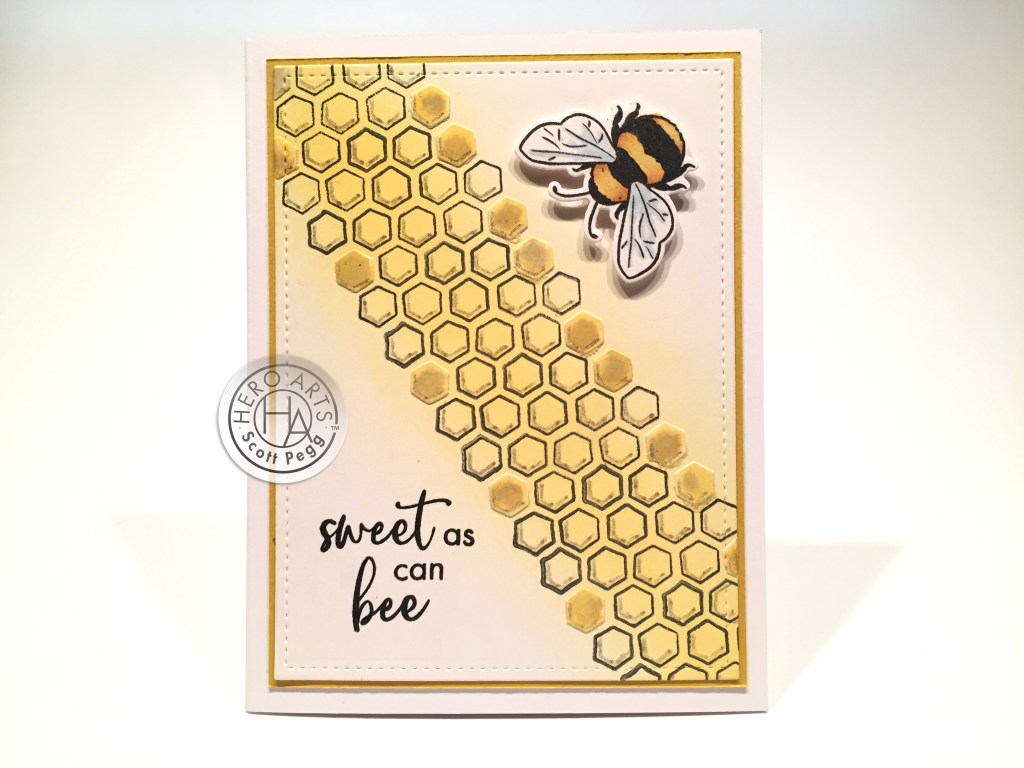
This one was fairly easy… easy enough for me to hand-stamp! (NO stamping platform requited!) If you use the honeycomb outline stamp in the same orientation that it’s mounted on the packaging, you’ll see that multiple stampings gives us a fairly complete, diagonal band across the front of this card. I did practice this pattern on some scrap paper before committing it to my card.
I ink blended some Wild Honey Distress Oxide ink from corner to corner on an A2 panel of White card stock. Then I stamped the honeycomb with Intense Black ink. I added some of the hexagon die-cuts (from my first card) to fill in the blanks on the sides of the honeycomb. I die cut that panel with a LFSRdie, added a thin mat of Hero Hues Mustard card stock, and glued those to a white card base. I stamped and embossed the sentiment as usual, and added the bee with foam tape. For a little “honey” sparkle (instead of the honey lacquer) I added Sakura Stardust pen highlights to the bottom left sides of all the hexagons. That adds a sweet golden sparkle to this card.
I’ve got a couple more sentiments in this stamp set to work on, and this one seemed to suggest a sweet valentine…
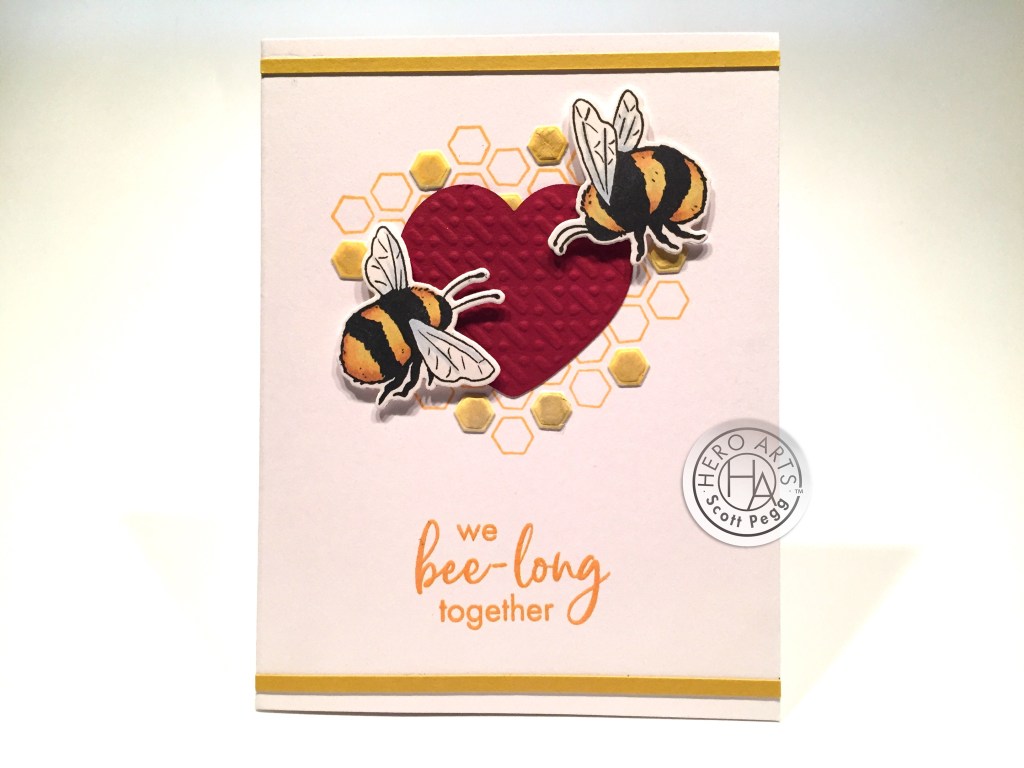
This card was inspired by this “cross stitch heart” Sizzix die-cut. This is from a discontinued cut and emboss die that I got a long time ago as a freebie with some on-line order I placed. I had die-cut the heart when I first got this die, and it was hanging around my desk for lo, these many months. I thought the embossing on this die-cut had a certain “honeycomb” feel to it, so I based this card around that red heart. I stamped the honeycomb outline with Wild Honey Distress Oxide ink to give us a little background behind the heart, added more hexagon die cuts from my first card around the spaces on the edges, then glued the heart in the center.
The sentiment is stamped with Wild Honey ink and embossed with clear embossing powder. I stamped, colored and die-cut the two bees the same as always and foam taped them to the card front. Finally I added two strips of Hero Hues Mustard card stock to the top and bottom to give us a little bit of a frame, and we have a great pun-y valentine!
One more sentiment to go… I think this is a bit of a forced pun, but I thought I could put it in a unique context and help the pun along the way…!

A circular slider card brings this pun-y sentiment to life! I stamped the three profile blooms in Intense Black ink on an A2 sized piece of Neenah 110# card stock, and colored them with HB1, HB2, and HB3 Spectrum Noir alcohol markers (and white gel pen for the stamens). The greenery is colored with AG1 and AG3. I took two HA Circle infinity dies (3.5″ and 3″), and die-cut a circle around the flowers along with a channel for the slider. I blended some Hero Hues Thistle reactive ink around the edges of the A2 panel, and the edges of the flower circle. I stamped the sentiment with Thistle ink and embossed that with clear embossing powder.
I don’t have any circular foam dots in my stash (what?) so I die cut a bunch of card stock dots (6 of them, just under 1/4″) and glued them tightly together to make my sliding spacer. I mounted the A2 panel with a double layer of foam tape to a white card base. I had to be careful around the edges of the circle to allow my penny weight to move around freely. I glued my home-made spacer to the penny, and mounted the flower circle with another double layer of foam tape – again taking care not to get too close to the edges so the penny moves freely. Then it’s a simple matter to glue the bee to the spacer on the penny. This works pretty well as an interactive card, but I think foam dots would add a bit more friction on the edges so the bee spins more. But this will do! And it certainly illustrates this sentiment very nicely!
This one’s for all my Pink fans out there! I thought the “you’re bee-utiful” sentiment could possibly be adapted to work with other “beautiful” sentiments, so I cut the “you’re” away from the stamp, and stamped (and embossed) the “bee-utiful” sentiment in the center of a Bristol smooth card stock panel.

I turned to my Silhouette software to create the “have a” and “day” to add to the stamped “bee-utiful” and printed that using the Lucida Grande font again. Then I stamped the branch of flowers on the two sides with HA Intense Black ink, and colored them with my Zig Clean Color Real Brush markers. Then I die-cut that panel with a LFSRdie, added a thin mat of the Black glitter card stock, and glued them down to a Hero Hues Peony card base. I added the two bees with foam tape, and here we have a completely different “bee-utiful” sentiment. I think this opens up many other sentiment options as well..!
This card idea had been circulating in my head since I got this kit.
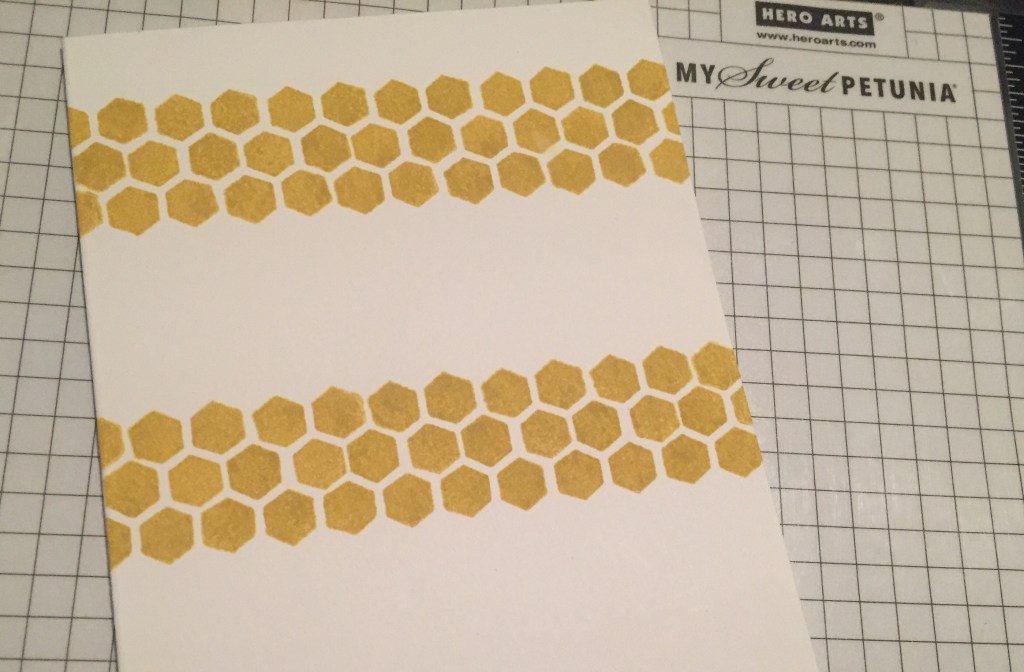
I took the three-hexagon filler stamp and stamped this pattern on a panel of white card stock using Fossilized Amber Distress Oxide ink. I did use my HA MISTI to stamp this – seems a 3/4″ shift between stamps works perfectly. That is two rows of stamping for the top and the bottom.

And here’s our buzzy little hive of bees busily tending to their duties! I stamped, colored and die-cut 10 bees as usual – I did add some BT1 marker to their wings to tone down the blue a little. I colored another bee using the Hydrangea Blue (looks purple to me!) alcohol markers. I printed this sentiment directly on the card base using my Silhouette software and the Raustila font. I spaced the bees out so they covered the “hive” but weren’t on top of each other, and added our purple bee with some foam tape.
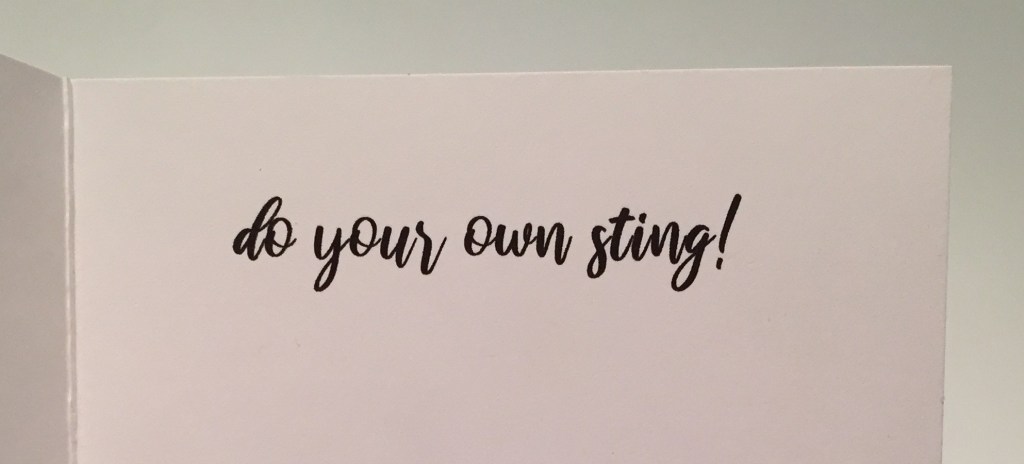
I could not resist adding one more pun to this card! I printed this on the inside of the card base using my Silhouette software and the Raustilla font, and, not only is it a terrific pun, but it goes along perfectly with the “bee yourself” pun on the front!
There’s one more pun I was aching to use… and who would have thought that you could get a Christmas card out of this bee themed kit?

This one makes me laugh right out loud! I printed the sentiment on a card panel using my silhouette software and the Lucida Grande font. I die-cut the printed panel with a LFSRdie and glued that to thin red and green mats then down to a white card base.
I stamped the bee using Vermillion Archival ink on a scrap of white card stock. I used permanent ink so I could add some alcohol marker shading to it and not worry about smearing. I colored the open areas with my green alcohol markers and added a little shading to the red stamped sections as well. Then I took an 03 Pigma Micron pen and traced over the legs, antennae, wings and outline to bring them back to black. I added some holiday sparkle to his wings with my Sakura Stardust pen, die-cut him with the matching die, and mounted him to the center with foam tape. This card tickles me to no end! I think that red and green bee is actually a hoot!! TOO FUNNY!
That concludes my 10 Cards 1 Kit video for the My Monthly Hero January 2021 Kit! I LOVE those chubby bee stamps, and it appears lots of other folks do too – this kit sold out so fast!

If you want to avoid missing out on one of these terrific My Monthly Hero kits, I highly suggest becoming a subscriber so you are guaranteed a kit with free domestic shipping and you get access to special subscriber-only exclusives and promotions! You can subscribe to a Month-to-Month subscription ($34.99 billed monthly) or you can subscribe to a Three-Month plan ($33.99 per kit billed every three months) OR the Six-Month plan ($32.99 per kit billed every six months). With the six month subscription, you have the option to skip a month if that particular kit doesn’t appeal to you. If you do go shopping at Hero Arts, please use my links… it is always gratefully appreciated!! Don’t Miss Out!
Hero Arts: https://shrsl.com/1f7qx
I had a BLAST creating these cards! I did manage to use ALMOST every stamp – except the “in love!” qualifier stamp… I think “I bee-lieve in love” was a little redundant considering the “we bee-long together” stamp. Not only did I have a great time coloring these images, but I had so much fun coming up with different ways to illustrate these sentiments! For me, that’s the mark of a great stamp and die set!
I extend my heartfelt thanks to you for sharing your valuable time with me here. Your encouragement and support mean so much to me during these trying times…! Please take a moment to Like me, List me, Pin me, Post me, Share me with all your crafty friends, and remember the wisdom of the poet William Blake who said, “The busy bee has no time for sorrow.” I send you and yours health and best wishes for a much better year ahead, and as always, I wish you Happy Crafting!
DISCLOSURE: This site contains some affiliate links to products. I may receive a commission for purchases made through these links (at no cost to you). As an Amazon Associate I earn from qualifying purchases. Thank you!

sweet…and clever as usual.
LikeLike
Thanks Joan!!
Always appreciated!!
LikeLike
Your bee-utiful cards always give me a buzz and so much inspiration. Thanks for the tip on stamping the honeycomb. Love the slider card – it goes perfectly with the sentiment. I was glad I was able to get this kit before it flew off the shelf and now it’s winging its way to me,
LikeLike
Thanks so much Judy!!
I trust you will have a fun time with your kit when it arrives!!
Scott
LikeLike
Loved this stamp set!!! Love the presentation!! First time watcher…look forward to more of Hero Arts and your videos!!!!
LikeLike
Thank you, Edith!
Welcome, Welcome!
So nice to have you on board!
Scott
LikeLike
I bee- live in your artful genius, your cards are always a delight, thank you for sharing
LikeLiked by 1 person
Thank YOU, Alice!
Much Obliged!
LikeLike
Loved these cards and hanks for the great ideas! You are always so creative.
What kind of glue did you use to attach the penny to the bee? Thanks!
LikeLike
Thank you, Gael!! I actually used E6000 glue to make sure it stuck to the penny!
LikeLike
Love the Christmas Bee…….Terry
LikeLike
Thanks Terry!!
LikeLike