
Hello Folks! Scott here! I promised to share my double-slider pull-tab card with you and here it is. I was on a roll for a couple of months and made these three cards. The Balloon Card, The Moon Card and the Dream Card – Yes, those of you paying close attention, I added the blue and purple balloons after I had posted my video – those extra balloons fill up this card front nicely.
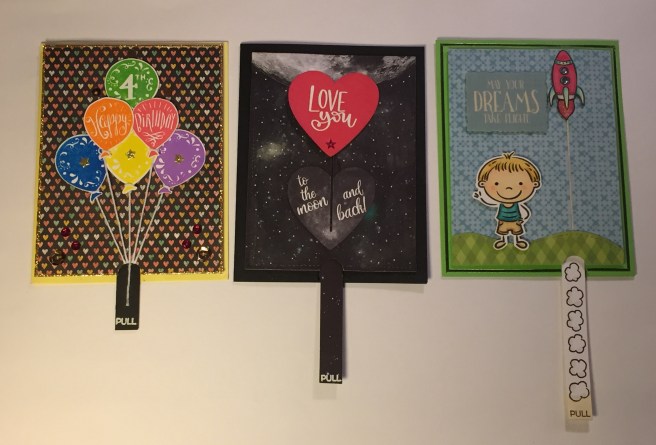 These are all based on the “double slider card” that has been around for a while – you can find bunches of instructional videos on YouTube for a variety of these –


Here’s a mock-up I made for you to show you the mechanism –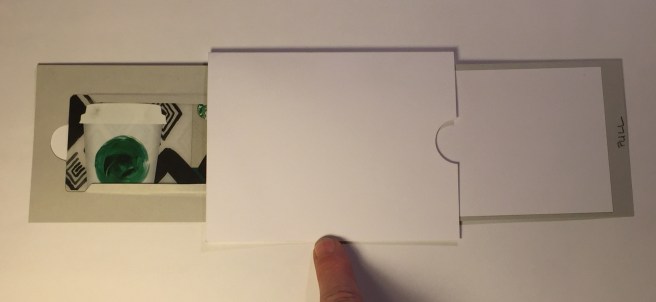 – it’s basically just a track with a plastic conveyor belt in the middle (plastic shopping bag) with the moving pieces attached to both the front and the back.
 This is a little too big for these cards, so I just needed to shrink the mechanism down a little bit – this is all there really is to the action – a track piece with a plastic conveyor belt that has the pull-tab attached on one side and the moving piece on the other.
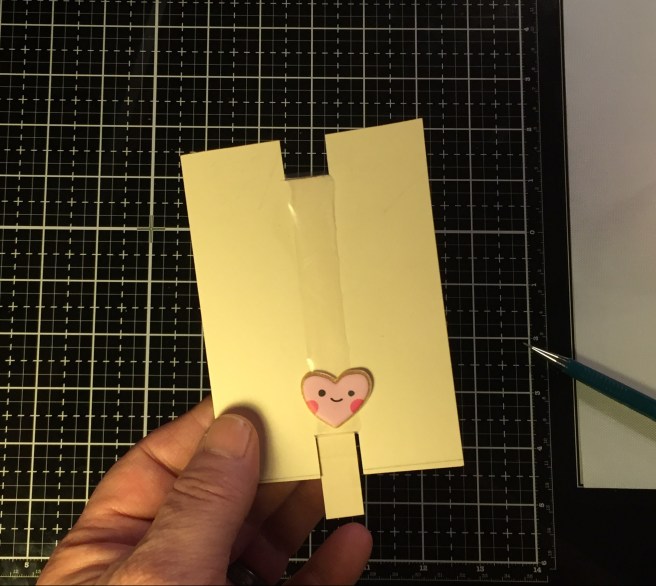

 Let’s make a mock-up first. We have a card base (4.25”x 5.5”), the card front (4”x 5.25”), the track piece (with a partner)(just under 4”x 5.25”) the pull tab (1”x 5.5”) the moving
 piece, the plastic conveyor, and we’ll need to make the paper hinge that attaches the moving piece to the belt.
  So let’s cut an inch off of the pull tab to use for our hinge – we’ll get back to that later.
We want to make a track for the conveyor belt to travel along so I cut two ½” notches on the top and the bottom of the track piece right in the center. I have stepped up from shopping bags to zip lock bags but any reliably strong plastic sheeting could be used for the conveyor belt.


I’m loving the new Tim Holtz Glass Media Mat for cutting – simply tape down your plastic and using a craft knife and a metal ruler, cut off a ½” strip so easily – and this isn’t even a new blade! Wrap your plastic around the track and use some strong double-sided adhesive (I use scor-tape) to join the ends and trim off the excess – be careful not to pull your conveyor too tight – it needs to be able to slide easily.
 I’ll take the partner piece and trim it down to fit on the front of the track piece on either side of the belt just to give the belt a little room to slide easily.


Score your pull tab down the center and scor-tape it together. We need the extra thickness so you can pull AND push it!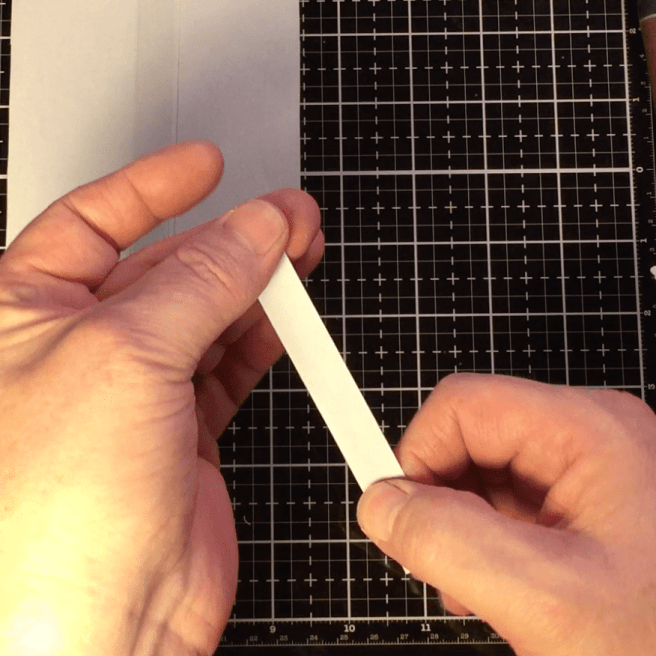 I arrange the seam of the plastic towards the top of the track piece (on the back side) and attach the pull-tab right on to the seam. Again, using a couple pieces of scor-tape!
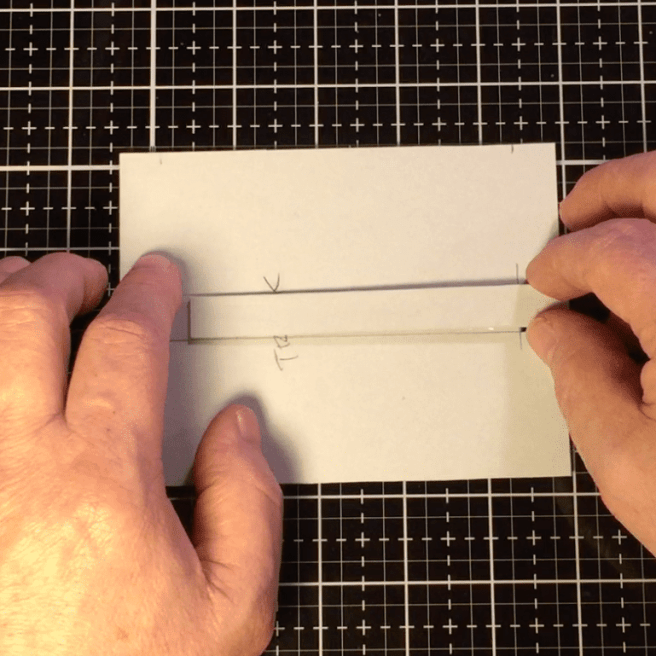 Remember, this is the back of the track piece, so make sure your pull-tab faces forward.
Let’s move to the card front – we need to make a slot for the hinge to go through to attach the moving piece to the conveyor. We know it’s going to be right in the center, so let’s


draw a line right down the middle of the card front – the track is ½” shorter than the card front on the top and bottom – let’s mark those on our line so we don’t cut past them. Using my craft knife, I cut the slot on either side of the pencil line to make a very thin slot through the card front – remember to erase any stray pencil marks! While we’re here,


might as well add a thumb notch at the bottom – I just use my ½” circle punch for that. Now take that 1” piece we removed from the tab piece in the beginning, fold it in half – I


find it helps to fold it over my TH Retractable Craft Pick (so the hinge isn’t too tight). Trim the hinge down to 1/4″ either side of the fold line so it will fit on the conveyor belt,


and then split the hinge on both sides at different places.


Now, depending on the length of your slot on the card front, you may need to mark your conveyor belt to show you where the bottom edge of the hinge should be attached. Just layer your card front and track piece together and mark the bottom of your slot onto your plastic conveyor belt (make sure your pull-tab is in the start position!). Here, we have the longest possible slot on the card front so we know that the hinge goes at the bottom of the conveyor belt. Add scor-tape to one side of your hinge – on OPPOSITE sides


at the cut – we will splay the hinge where it attaches to the conveyor belt. Make sure it moves freely, and if everything is working, we can attach the track piece to the back of


the card front – ATG comes in handy for that – just be sure to feed the hinge through the slot! A little exercise for the mechanism ensures that all is working properly.


I use my 1/2″ circle punch to add a thumb notch to the card base – there’s an extra 1/8″ on the card base so I choke up on the hole punch and trim the extra curve off with scissors.


Foam tape is used to attach our mechanism to the card base. Since the pull-tab is double thick, the extra wiggle room is helpful. Line your card front up with a 1/8″ border all around and press it down.


Now all we have to do is attach the moving piece to the hinge. Add Scor-tape on the opposite wings of the hinge and, attach your moving piece right in the center.


Now, depending on how big your piece is, you have some leeway in where you attach that piece as well as what ever other pieces you are using for your card.
I really enjoyed making these cards! I actually tried doing a how-to immediately after my first card but I did something wrong to the video – OOPS! However, I did get another rocket card (with a girl this time!) assembled with that episode of trial and error!!!


I know I will be on the lookout for more opportunities to use this technique – these would


work on a landscape card just as well where the action would move sideways… I think the possibilities are kind of endless! I hope this was illuminating for you and helps describe the process for these Double Slider Pull-Tab cards. I encourage you to give it a try! My video of this assembly is right below, and may help if you have any questions. Please let me know if you need anything I may be able to help you with! Thank you so much for sharing your time with me here, and Happy Crafting!

Thank you, Scott!!
LikeLike
This is just so very cool! You’ve done an amazing job showing and explaining this! The pics are awesome! Thank you, thank you for sharing and teaching! Hugs
LikeLike