
DISCLOSURE: This site contains some affiliate links to products. I may receive a commission for purchases made through these links (at no cost to you). As an Amazon Associate I earn from qualifying purchases. Thank you!
Hello Folks! Scott here with a new Scor-Pal project for this month! Diana Crick and I were talking and realized that a lot of our usual holiday plans have taken a left turn this year due to the pandemic, so we thought some Hostess Gifts would be appropriate for those of us who might be celebrating the holidays with a different group of friends. Nothing says “Thank you for the invite” more than a thoughtful Hostess Gift! I think these fit the bill!
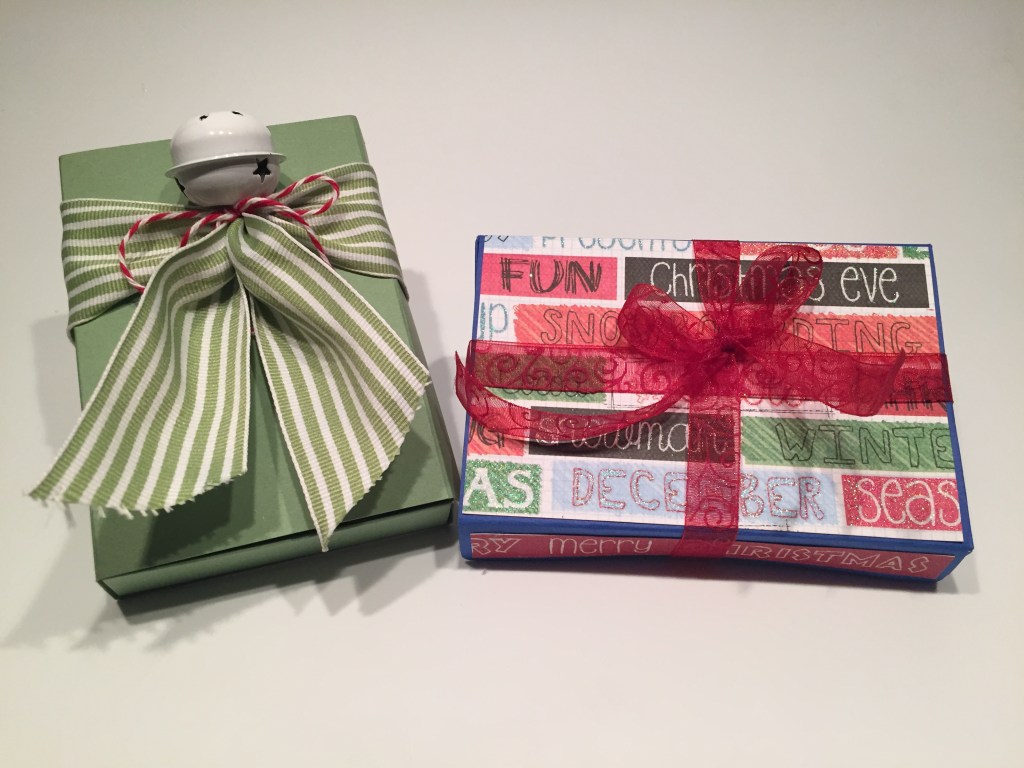
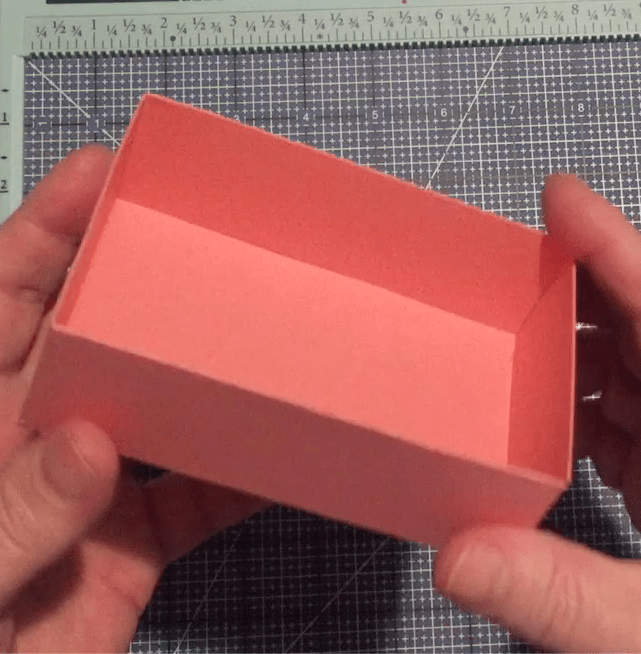
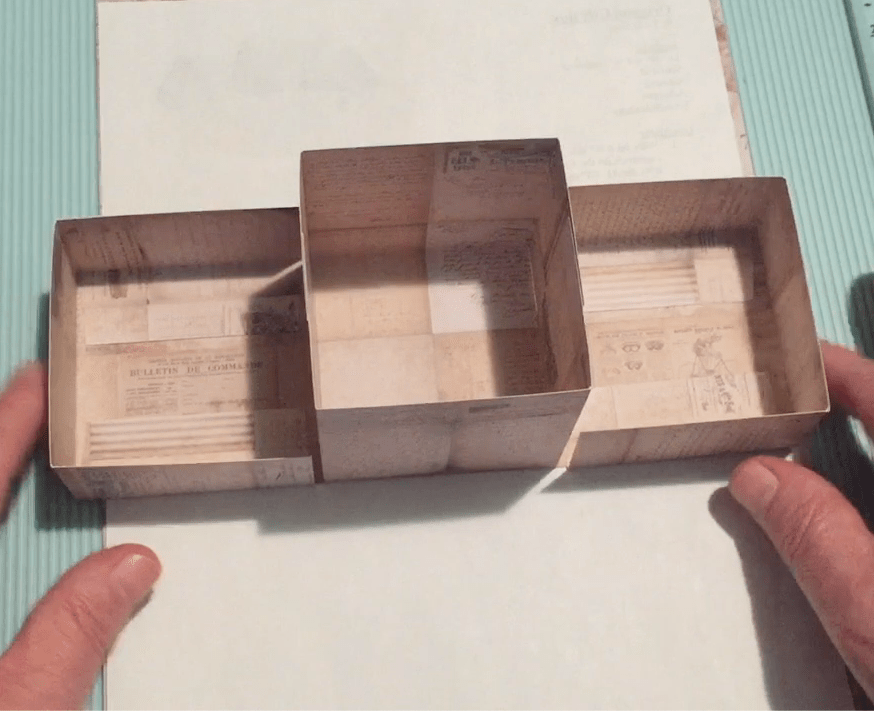
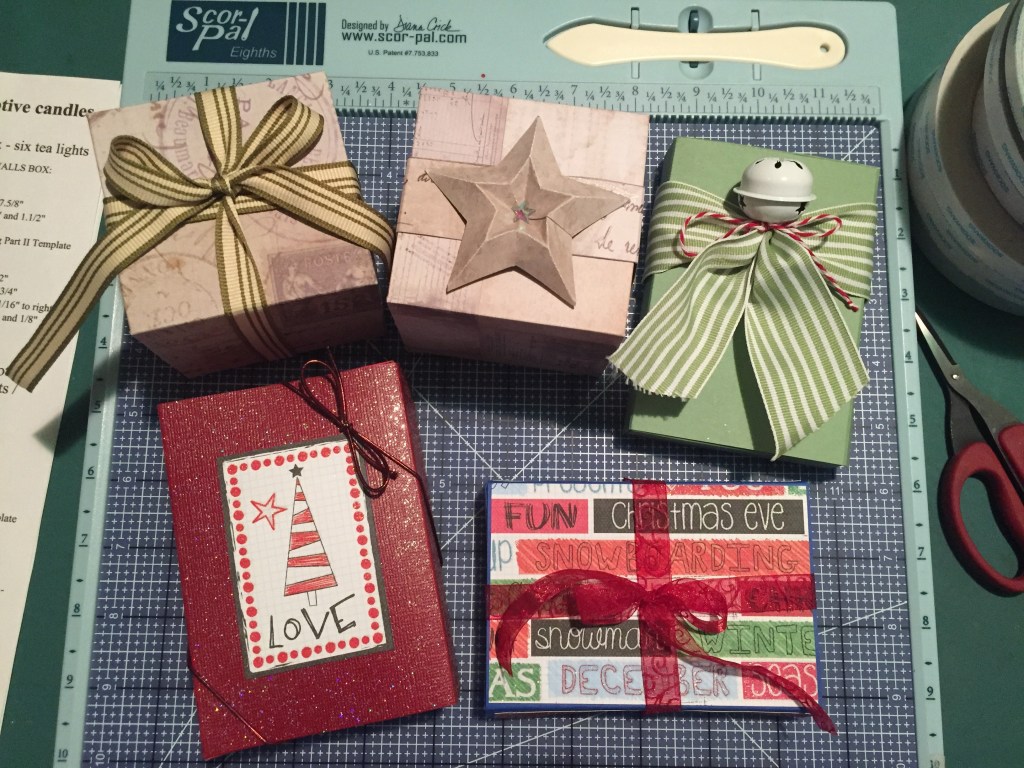
First we have these small fold-over lid boxes that hold six tea lights.
I love scented tea lights but I think everyone likes most any kind of tea lights – from keeping your fondue warm to decorating your holiday table, tea lights are always useful.
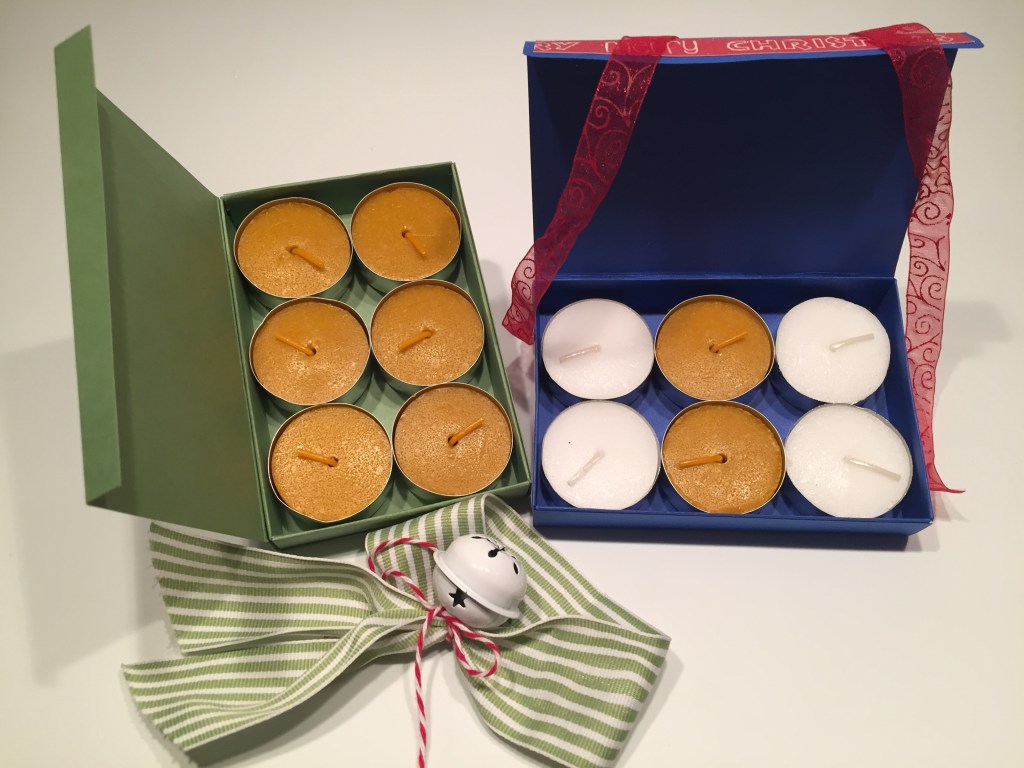
These simple and inexpensive items are turned into special gifts when presented in their own custom boxes. And the larger box features a matchbox type sliding lid and will hold a dozen tea lights!
These boxes will also hold full-size votive candles and even smaller battery-operated tea lights – with the help of a little added tissue paper.
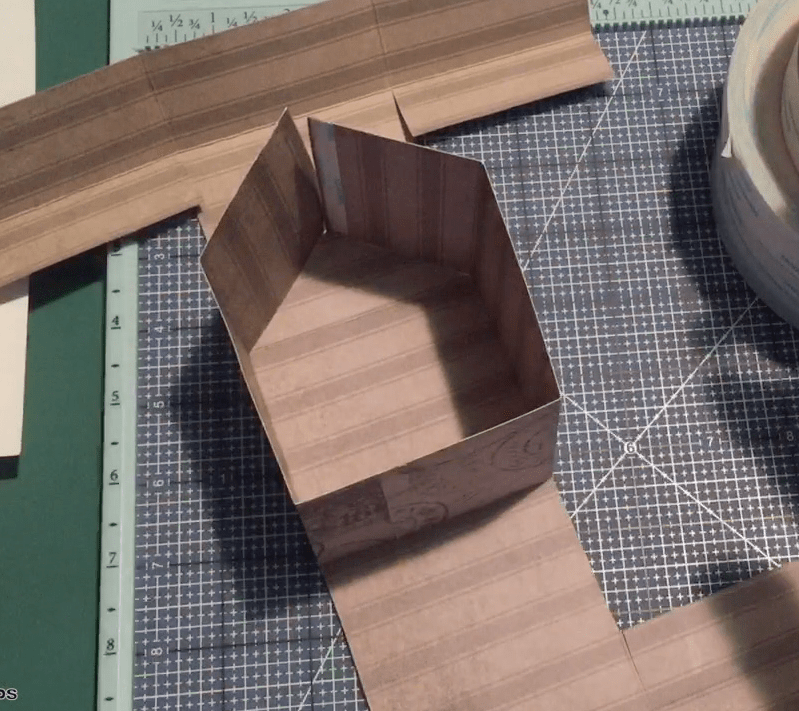
These are both basically a double-sided wall box with wrap-around lids. I did create a template for our boxes this month… no formulas or math… everything is pre-measured!
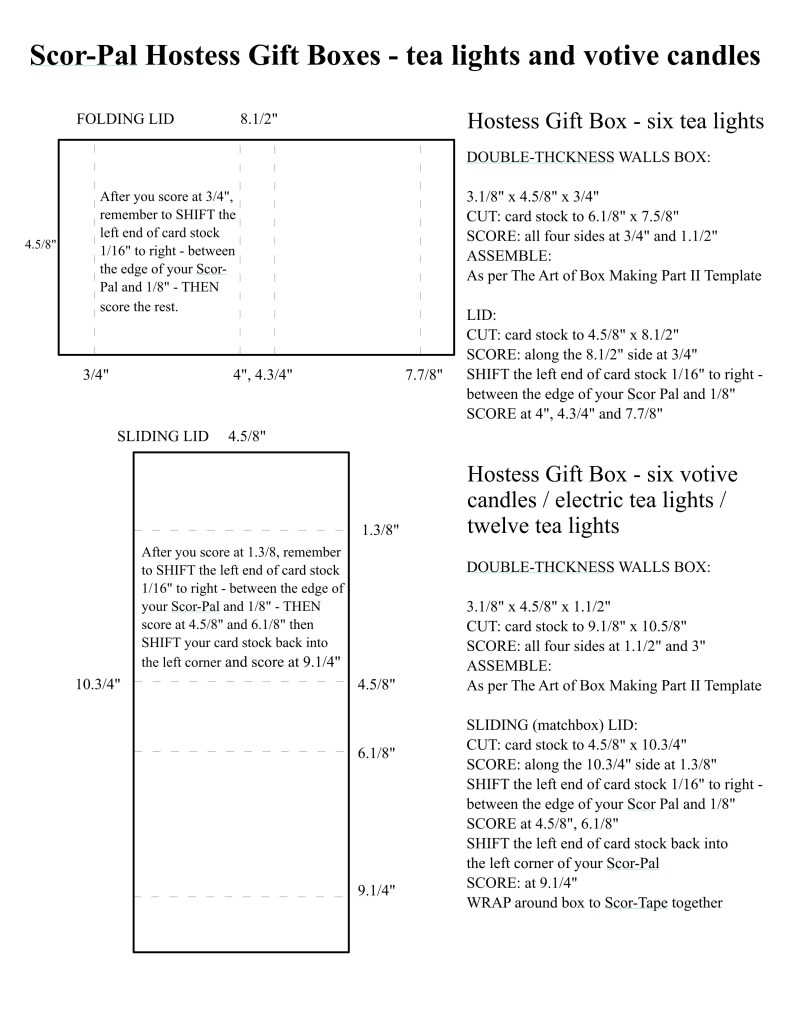
Our small, six tea light boxes measure 3.1/8″ x 4.5/8″ x 3/4″. Basic double-thickness wall boxes for the base – we’ve already covered the making of these boxes, and the measurements are all on the template. You can access the Double-Thickness Wall template here:
This is our basic double-thickness wall box that will be the bottom of our gift box.
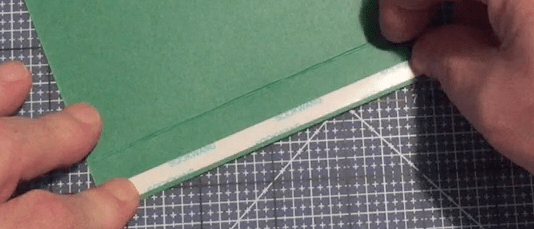
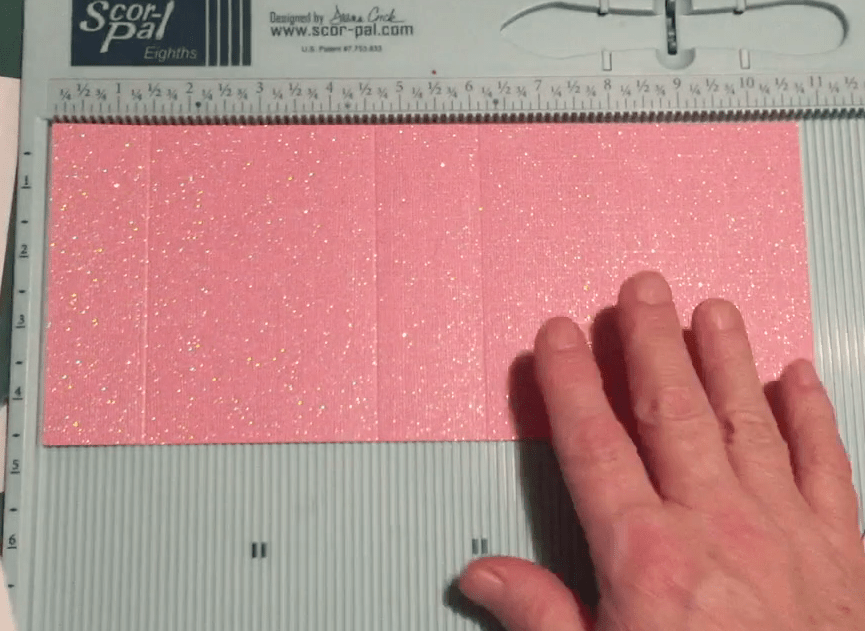
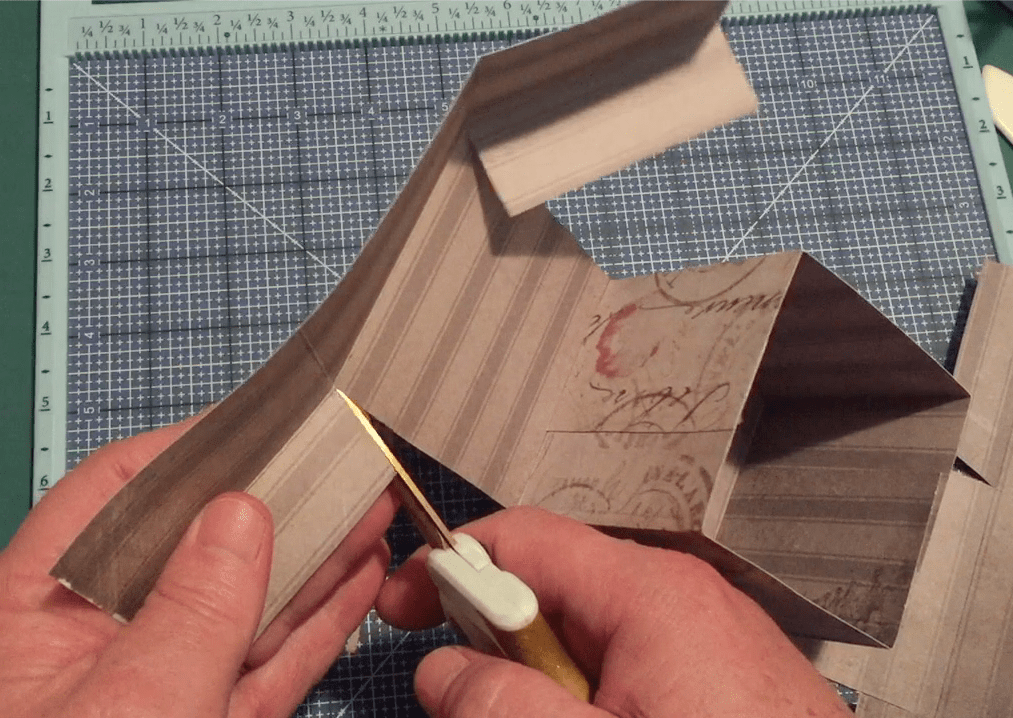
Now we can work on the fold-over lid. Cut your card stock to 4.5/8″ x 8.1/2″, and load into your Scor-Pal with the 8.1/2″ edge along the top. Score at 3/4″ and then shift the left end of your card stock 1/16″ to the right – between the edge of your Scor-Pal and the 1/8″ mark.
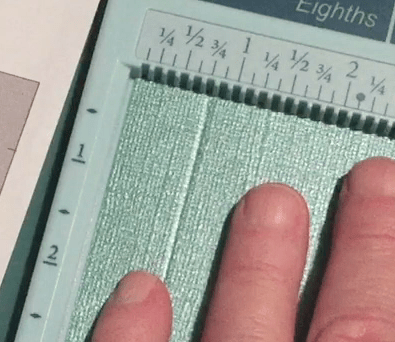
With the left corner in this position, continue scoring at 4″, 4.3/4″, and 7.7/8″. Since this is a wrap-around lid that we are going to attach, I’m trying to make it as tight as possible to the box so there are no errant gaps when we glue it to the box base. When everything is scored you can fold on the score lines and commit the crease with your Scor-Tool.
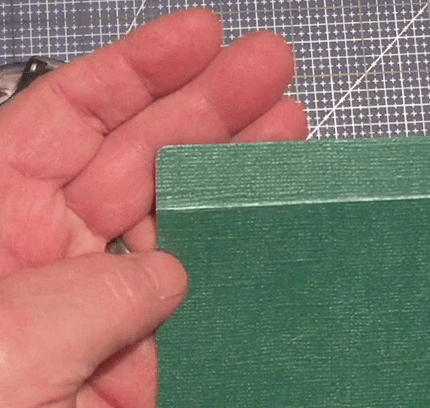
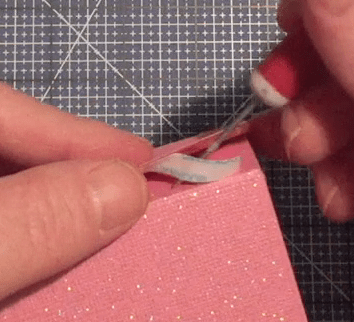
I did want to round the corners on the flap that folds over – that’s the end of the card stock that measure just under 3/4″. Scor-Pal has a new Kadomaru Pro corner cutter that has three different sizes in one tool – and 8mm round, a 5mm round and a 3mm round. I LOVE the smallest 3mm one – it is so tiny and sharp – a great finishing touch that is almost unnoticeable!
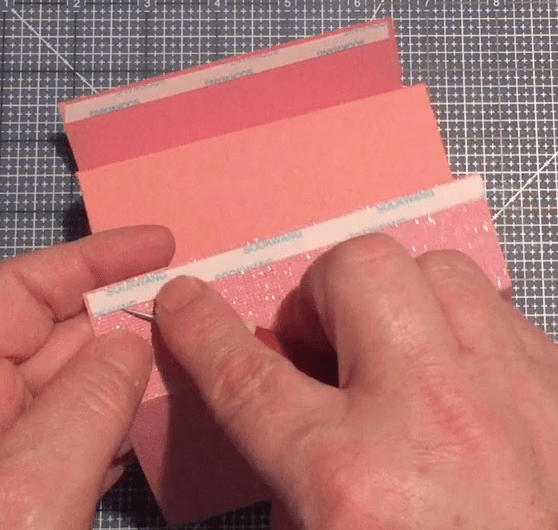
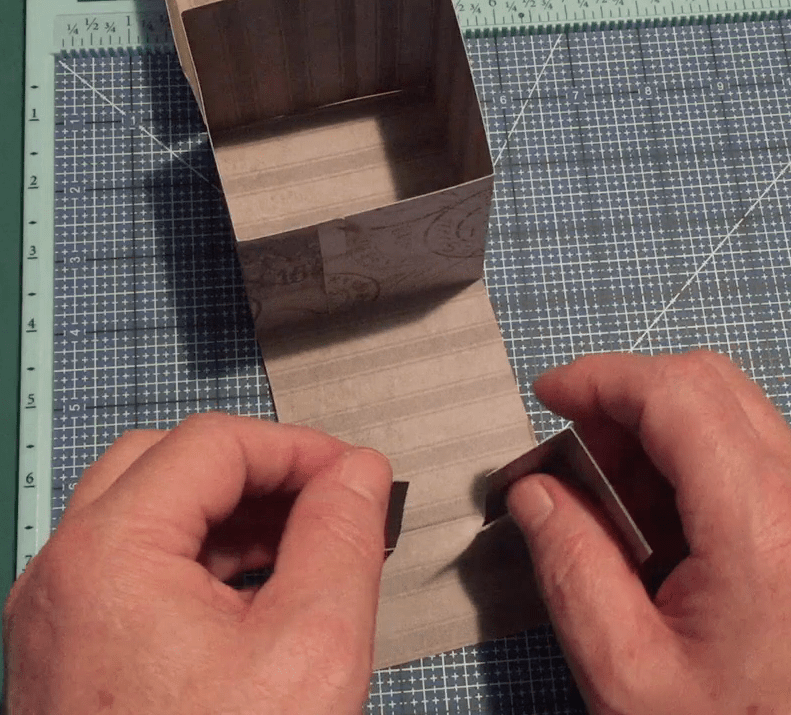
You want to be careful when attaching this lid to your box, so I started with one piece of Scor-Tape on the end of the 3/4″ flap. Attach to one side of your box lining all three edges up and making the corner nice and tight.
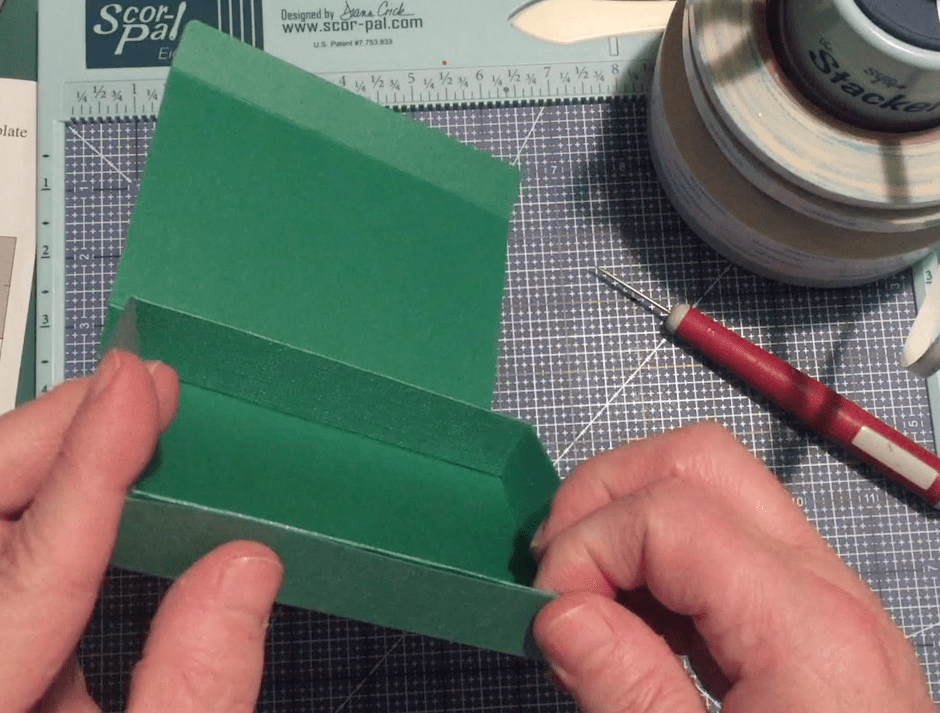
Now I work my way around the box – gluing the bottom down along all 4 sides of the lid.
I moved slowly from the left to the right making sure the edges stayed nice and flush and the corners stayed nice and tight. Once the bottom is all attached, just one more piece of Scor-Tape on the back will finish up this box.
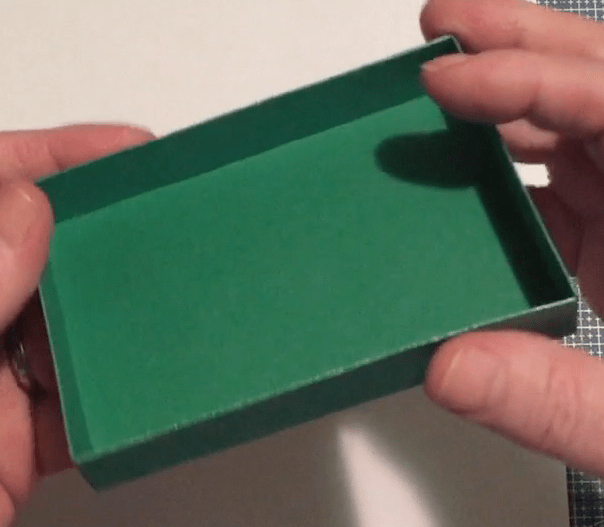
This holds 6 tea lights (scented or unscented) perfectly, and you can decorate this box as much as you like with pattern paper, die-cuts, ephemera, flowers, or I think a simple ribbon tied up into a bow is always a classy touch. Let’s make the votive candle box!
Again, the starts with a double-thickness wall box that is basically the same size as the small box, but it’s twice as tall – 1.5″ vs. 3/4″. Our template has all the measurements.
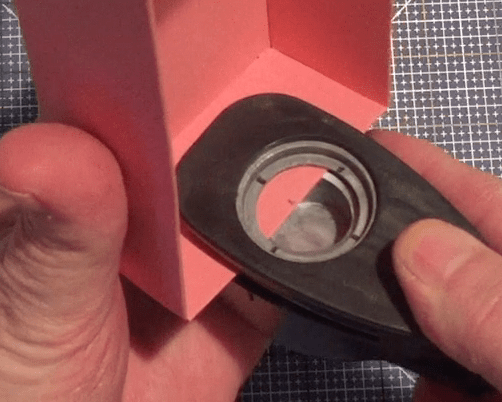
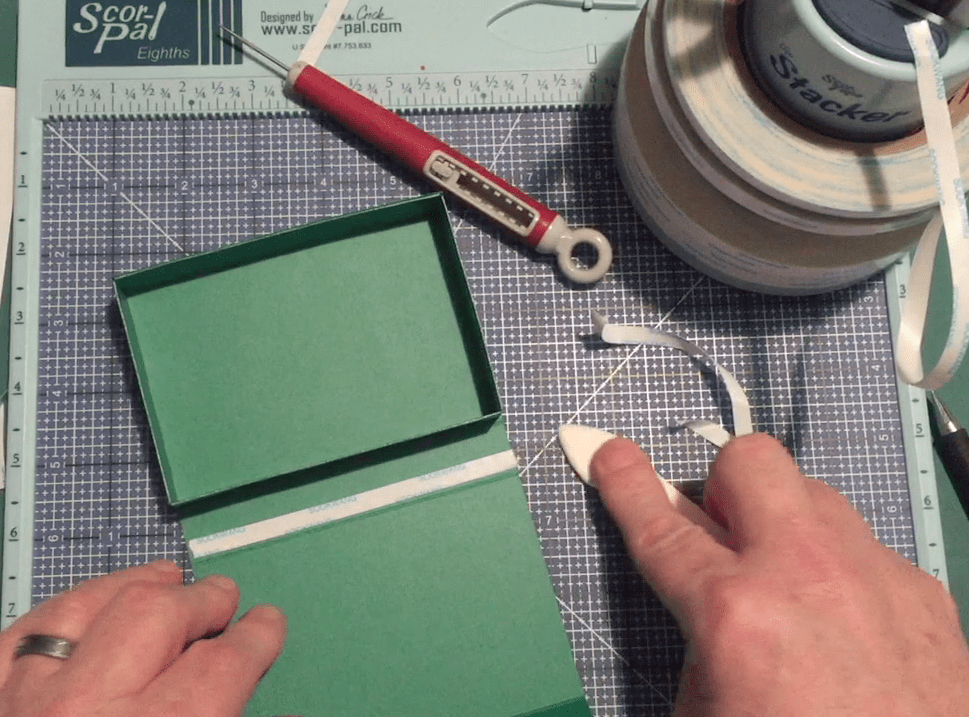
Since the box slides out from the lid, we do need a notch in one end of the box. I used a 1″ hole punch and punched out a little less than half of that circle in the center of one side.
I fiddled around with the matchbox lid for this box quite a bit – I wanted it to be snug, but not too tight, but just tight enough to keep the box from sliding out on its own. Cut your card stock to 4.5/8″ x 10.3/4″. With the 10.3/4″ edge at the top of your Scor-Pal, score at 1.3/8″, then shift your card stock 1/16″ to the right (same as the small lid) and score your card stock at 4.5/8″ and 6.1/8″. Then shift your card stock to the left – back into the corner of your Scor-Pal – an make your final score at 9.1/4″.
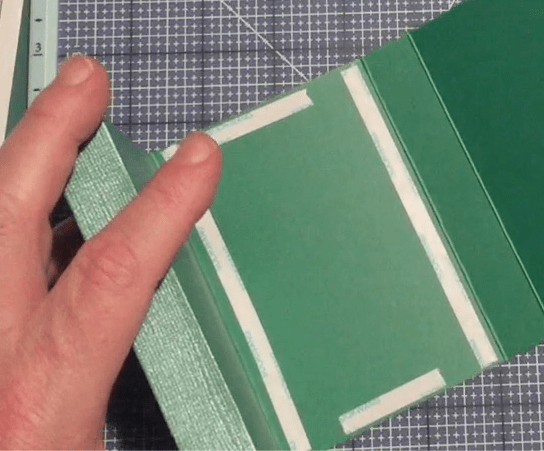
Go ahead and commit your creases but I think the secret of getting this lid snug, is to glue it together around the box – don’t try to glue it together without the insert box – chances are good that it may be too tight. I added Scor-Tape to the outside of one end and to the inside of the other end for glue our lid together.
Remove the liner paper from the flap that goes on the inside, wrap your cover snugly around the box making sure all your edges match. and press to attach.
Then you can fish out the liner paper on the outside flap and finish attaching the flaps. NOTE: This will not make a perfectly flat piece when folded together (it’s not a perfectly square lid) but I think this is what helps it stay snug but not too tight. Six full size Votive candles fit in this box perfectly – as well as a dozen tea lights if you wish!
For electric tea lights, I cut some tissue to 3″ squares and wrapped those around each light and nestled them into the box together – it won’t pack them in tight, but it will limit their movement a lot and give them a little cushioning – perfect for any recovering pyromaniac you may know! You can decorate these boxes as much as you like – but a ribbon will ensure that nothing slides out!!
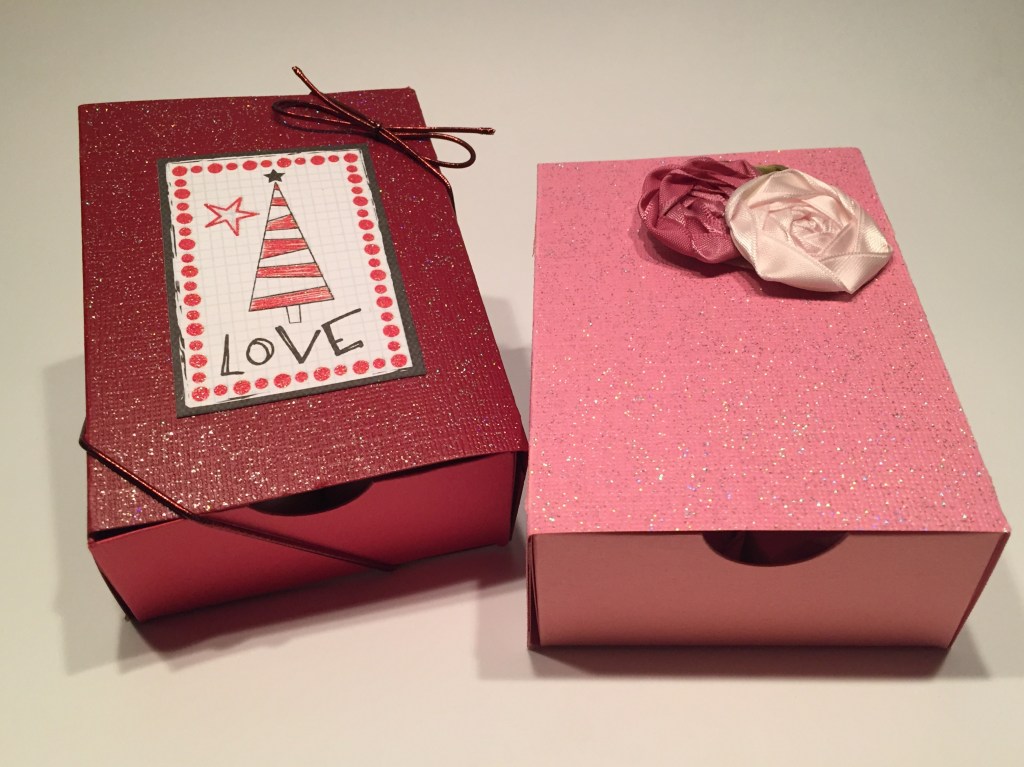
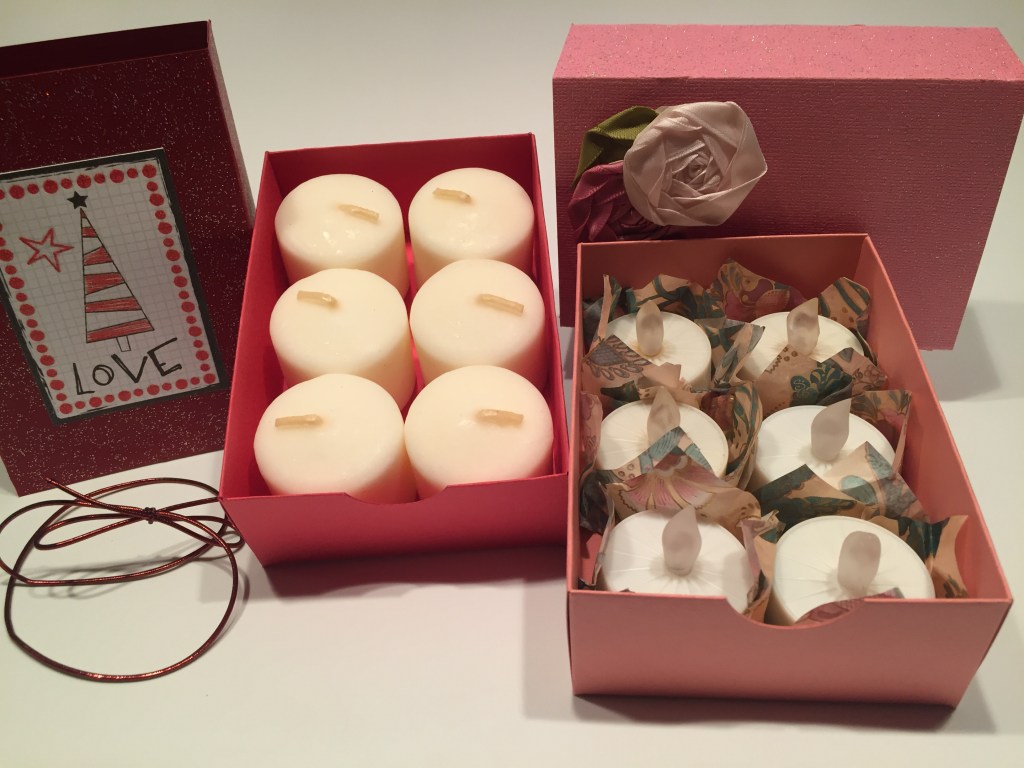
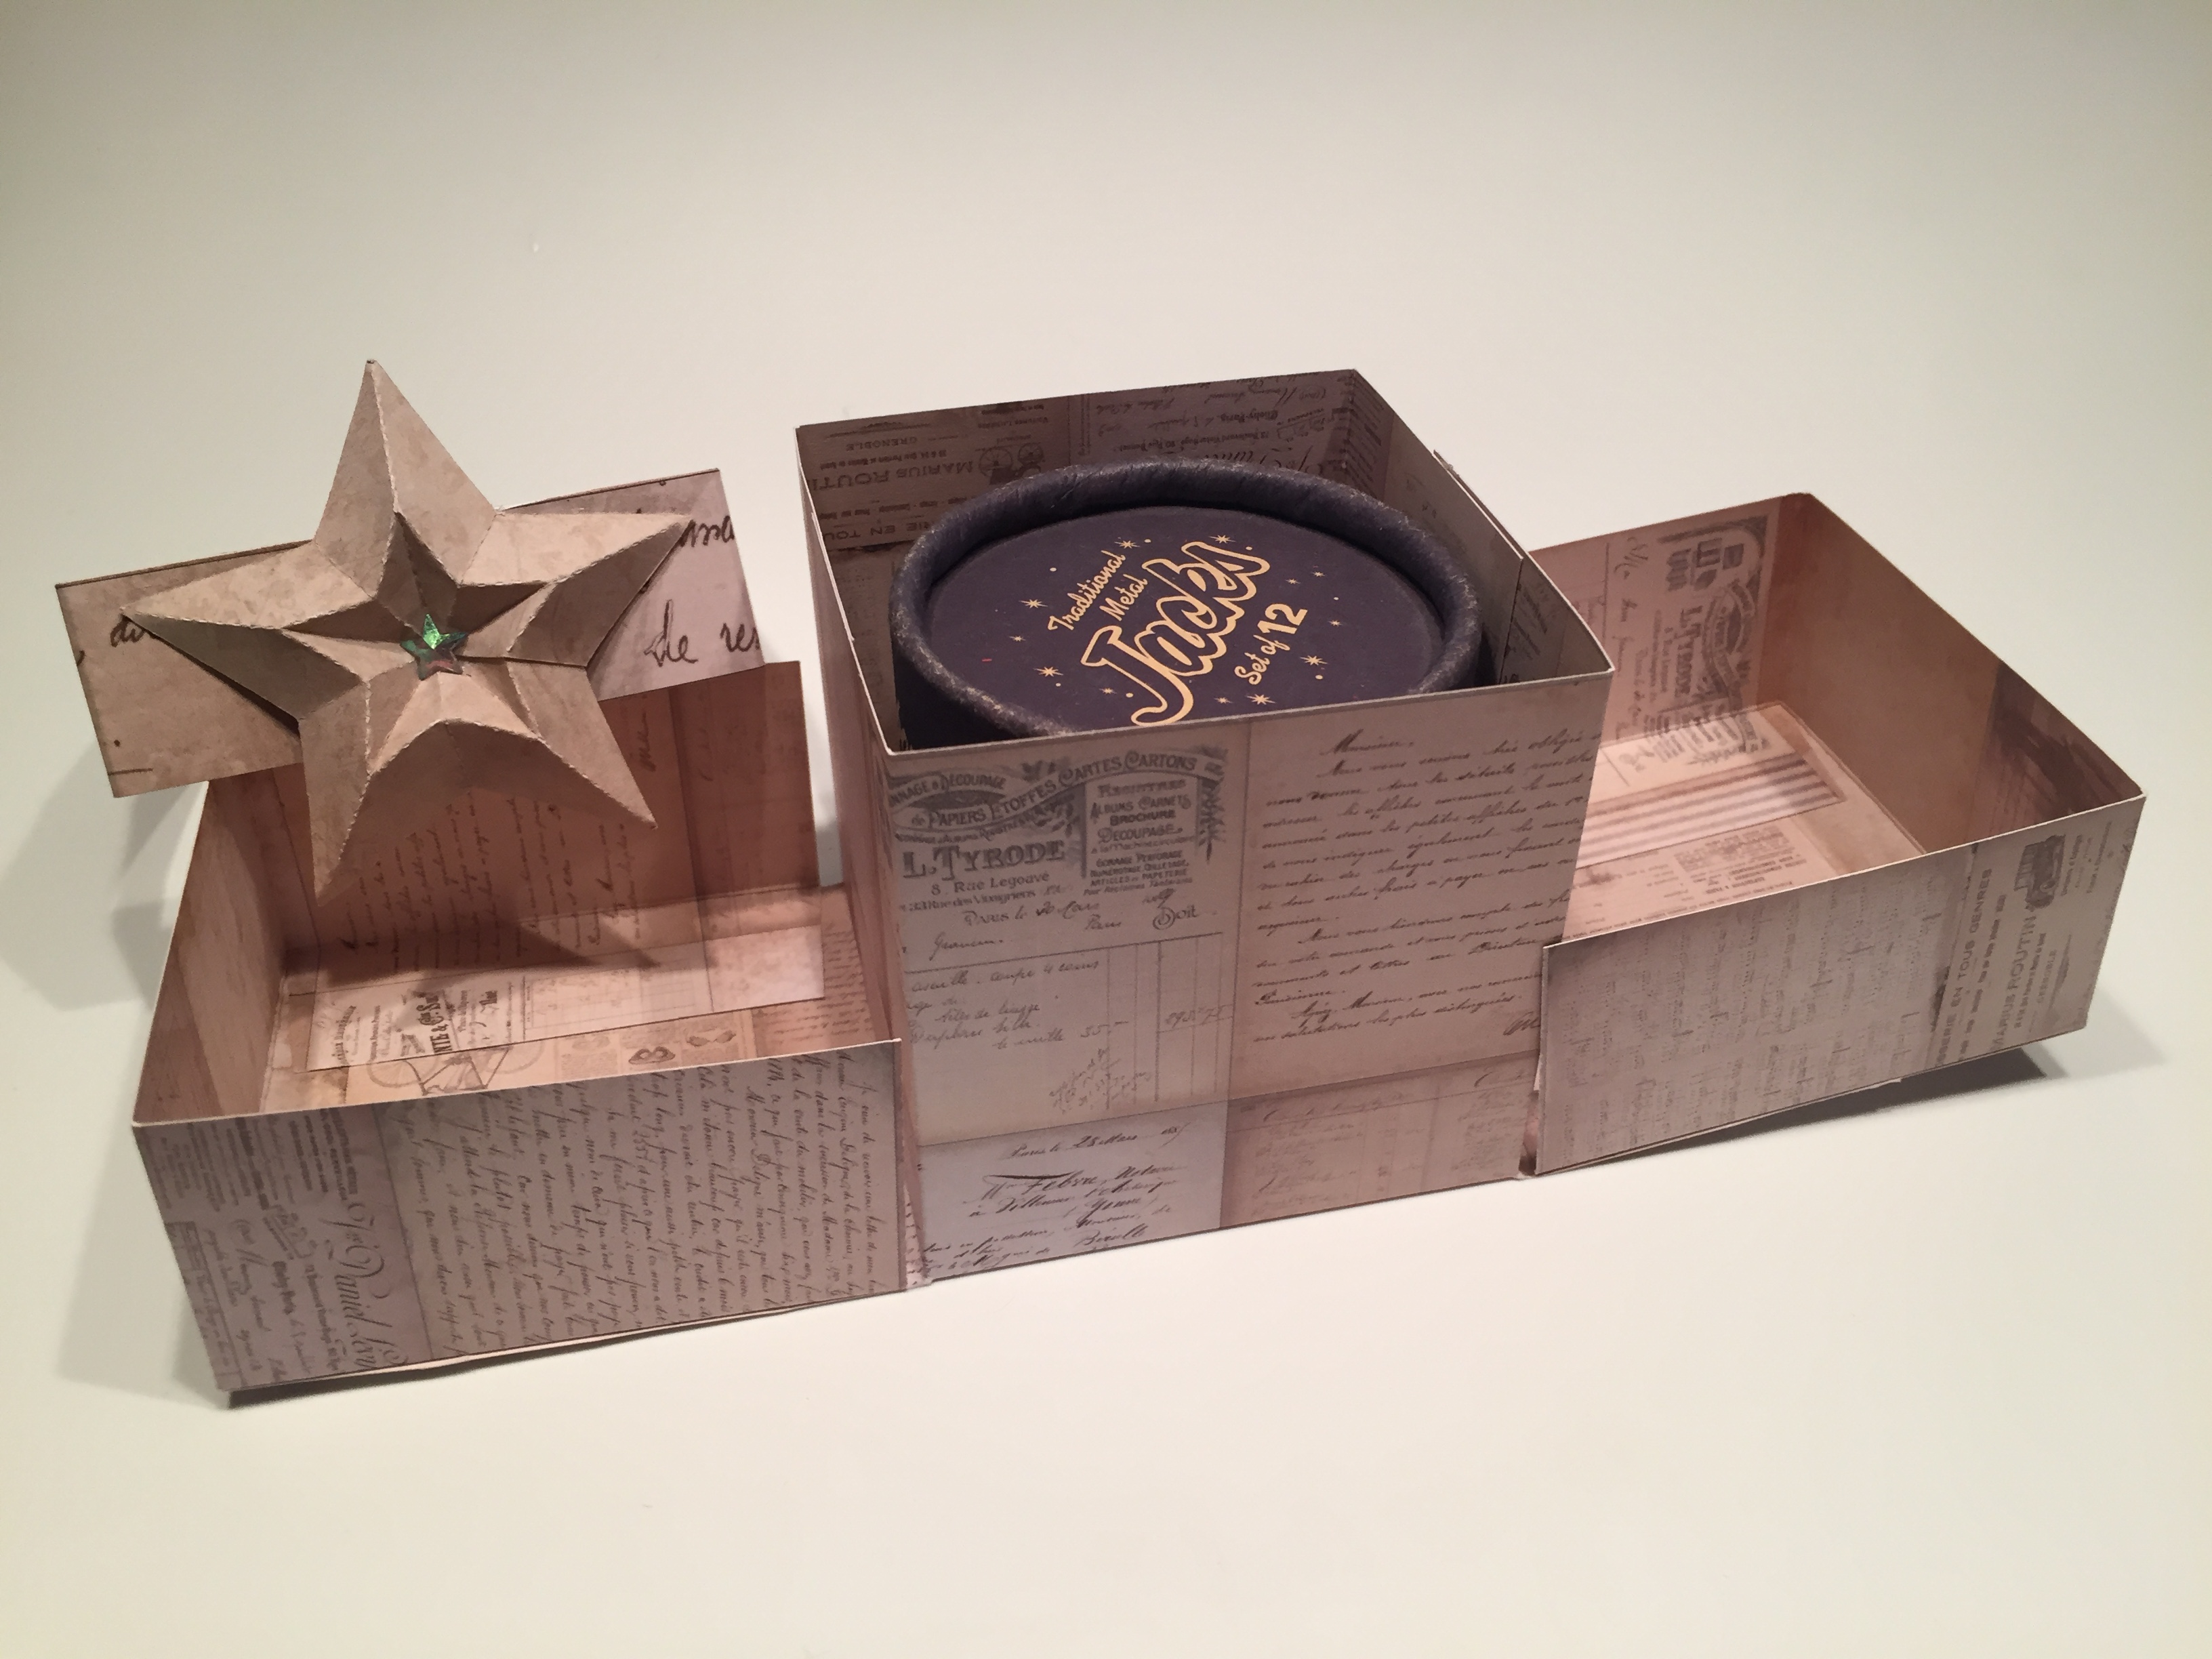
Diana thought it would be fun to do a specialty box this month – this is one of her favorite boxes of all time – and the whole box comes together using a single sheet of card stock.
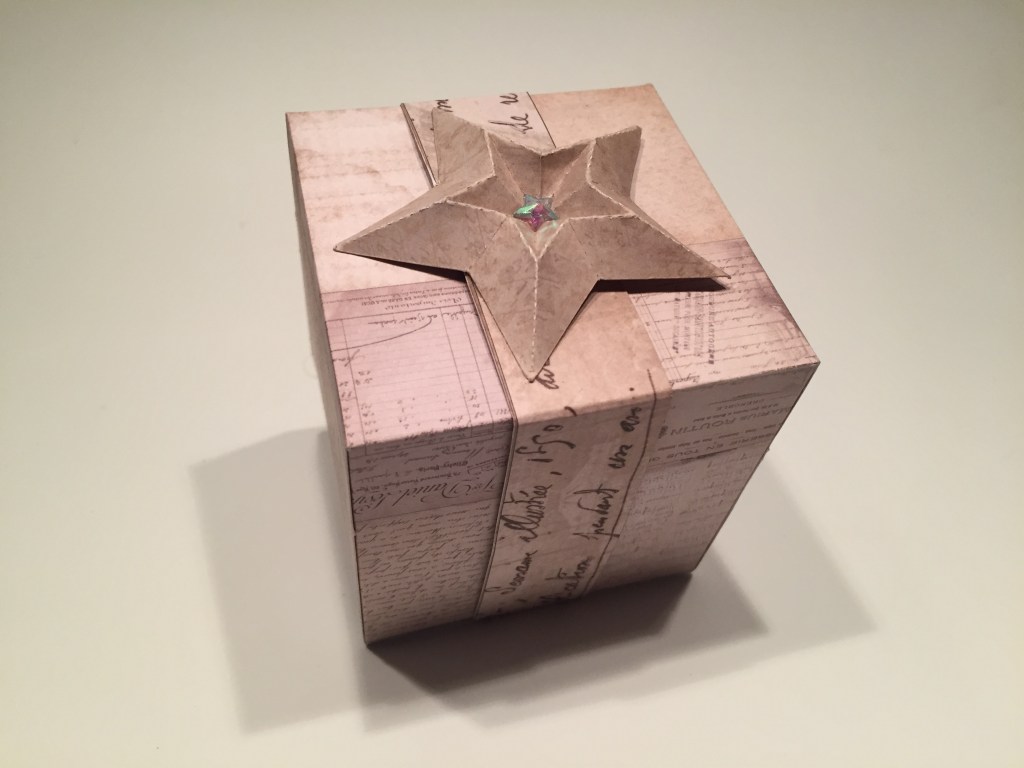
This is the Origami Gift Box created by Vicki Hook for Scor-Pal. An ingenious box that opens up like a clam to reveal the contents housed in another box. I love this one too!
Here’s a copy of the instructions followed by a downloadable file so you can print your own.
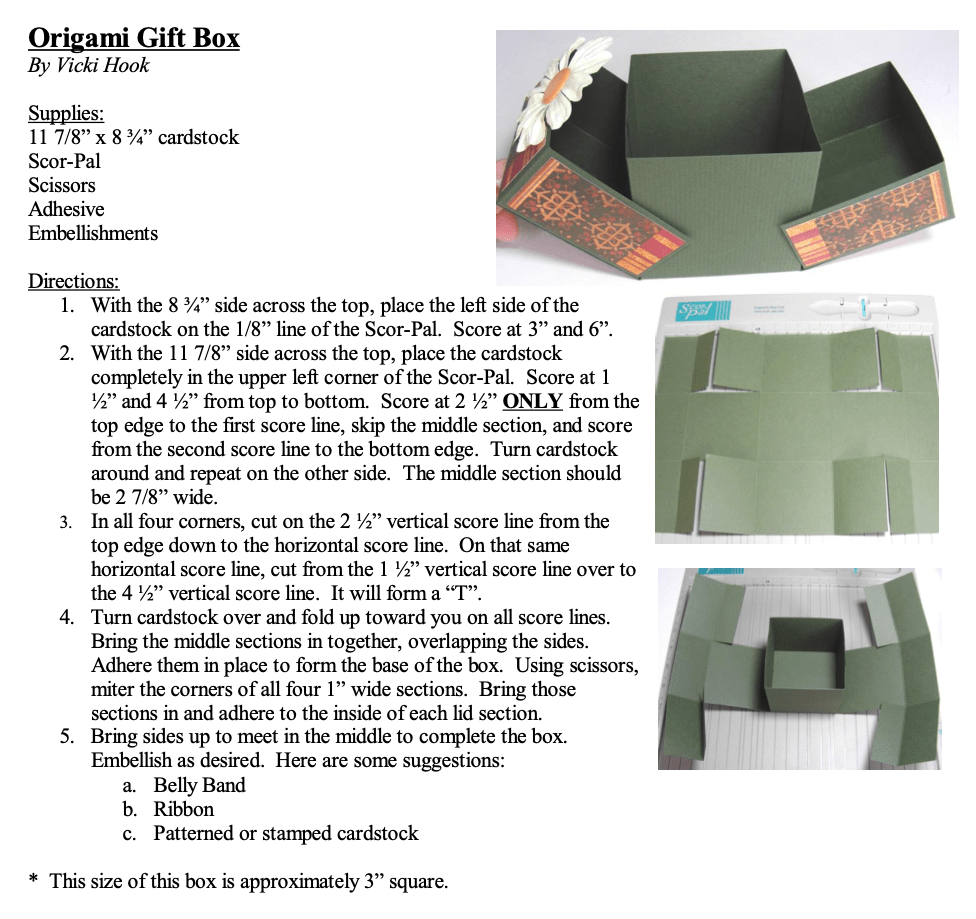
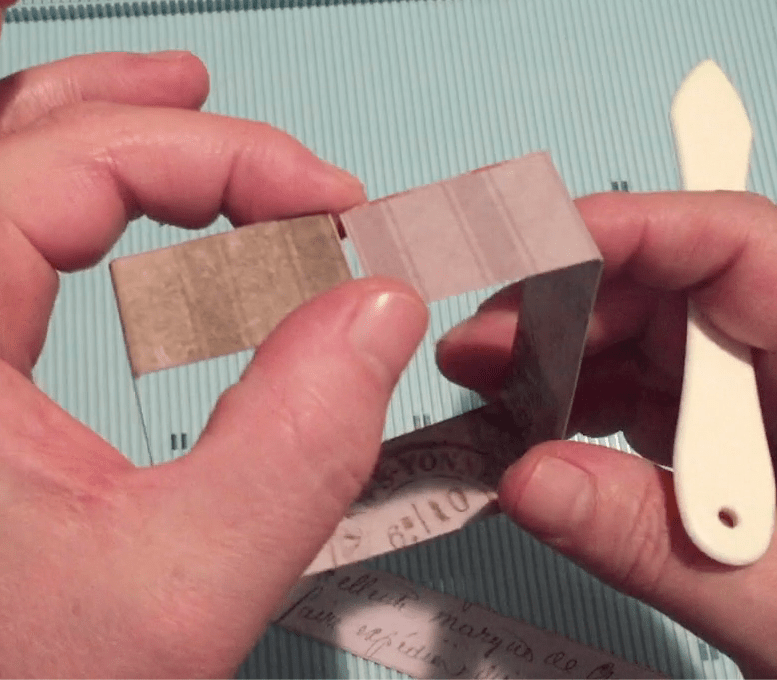
I am especially enamored of this box because it’s pretty simple to assemble, and it all comes together with a single sheet of twelve inch card stock cut to 11.7/8″ x 8.3/4″. There are a couple of special things to note when you are scoring this box. To begin with, note that the first score marks (with the 8.3/4″ side at the top) are made with the left side of the card stock at the 1/8″ mark on your Scor-Board instead of tight in the corner.
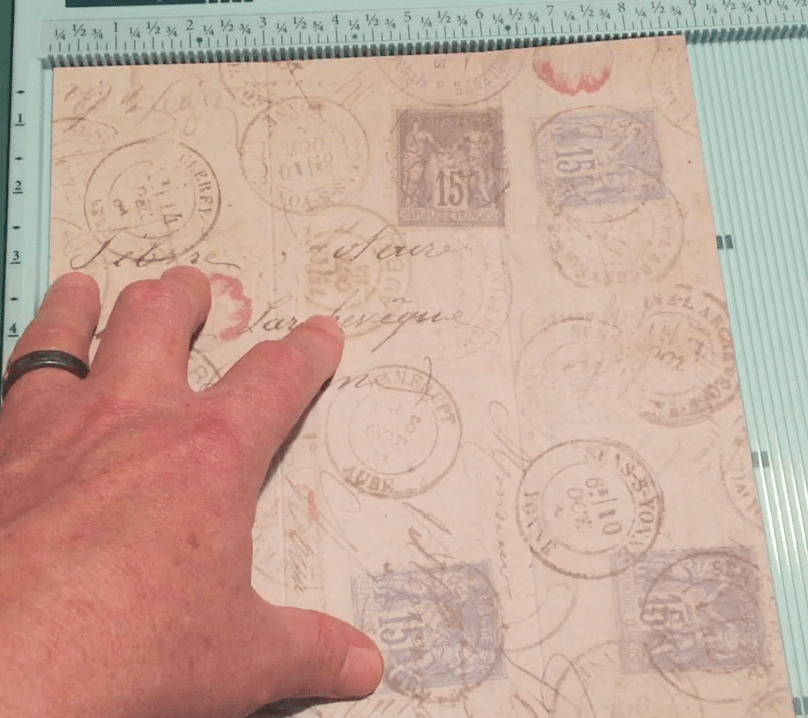
Then, on the 11.7/8″ side you make two score marks (at 1.1/2″ and 4.1/2″) on each end all the way from the top to the bottom, but you make another score mark between those ( at 2.1/2″) that skips the center section delineated by the perpendicular score marks that we first made on the 8.3/4″ side.
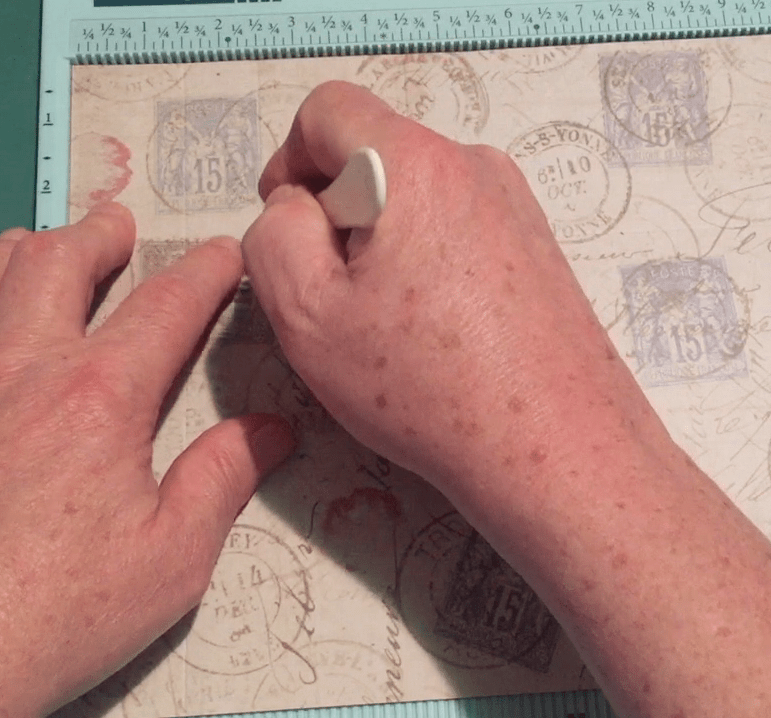
The instructions say to score at 2.1/2″ “from the top edge to the first score line, skip the middle section, and score from the second score line to the bottom edge”. In order to avoid jumping a channel and getting the second half of this score line wrong, I simply rotated the paper into the top right corner of my Scor-Pal, and scored the remainder of that line at 9.1/2″ (that’s 2.1/2″ from 12″) “from the top edge to the first score line”.
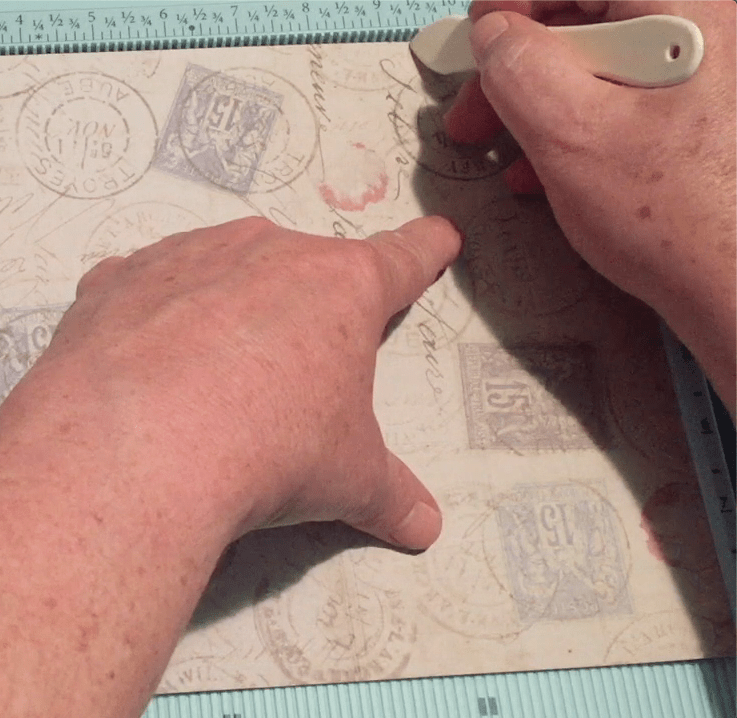
The last out of the ordinary step in assembling this box is in the cutting – on all four corners, we “cut on the 2.1/2″ vertical score line from the top edge down to the horizontal score line. On that same horizontal score line. cut from the 1.1/2″ vertical score line over to the 4.1/2” vertical score line. It will form a “T”. (refer to the pics on the instructions too)
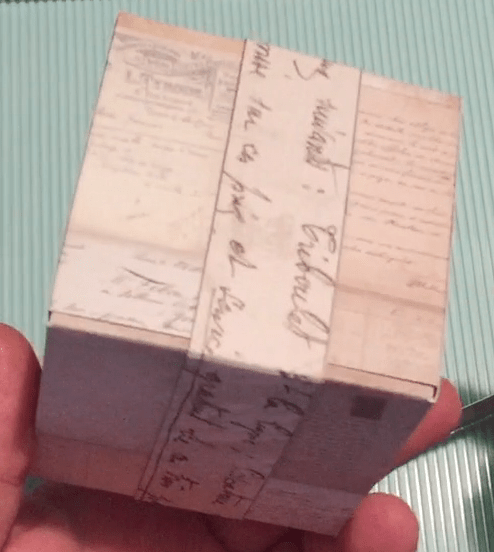
Once all four corners are cut the same, flip your card stock over and fold all the score lines to the inside – commit your creases! Then you bring the middle sections in together, overlapping the sides, and adhere them together to form the base of the box. Since everything has been cut and folded on the square, it’s easy to line up the top edges.
Then we take our scissors and miter the edges on all four of the 1″ wide sections.
Lastly, we fold those sections in and adhere each to the inside of the lid section.
The instructions suggest we can embellish as desired with a “Belly Band” “Ribbon” “Patterned or Stamped card stock”. I prefer a belly band. This is basically a 3″ cube, so to go all around it I need a minimum of 12 inches. I cut a 1″ strip of 12″ pattern paper and scored it at 1.1/2″, 4.1/2″, 7.1/2″ and 10.1/2″. This puts the seam in the middle instead of on a corner – you’ll need an scrap of card stock to glue the belly band together.
I also like putting the belly band on this box OVER the seam – instead of using the band to hold the two sides of the box together, use the band to hide the seam – it will still hold the box together perfectly fine and disguises the unique design.
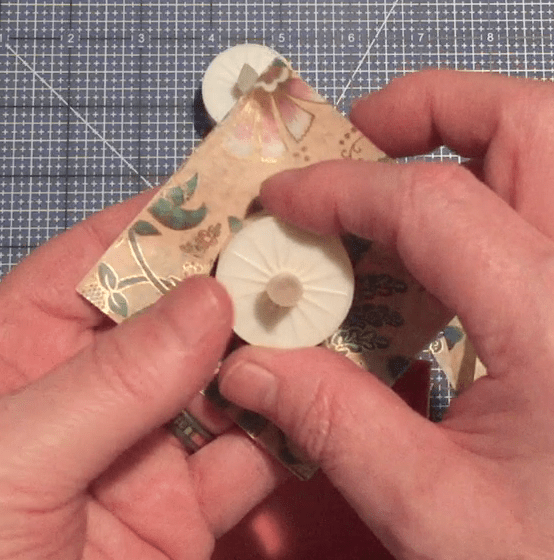
I also wondered if there was some hostess gift type item that would fit in this box and I came up with an extremely fun take on a plain ol’ ordinary hostess gift… JACKS!!
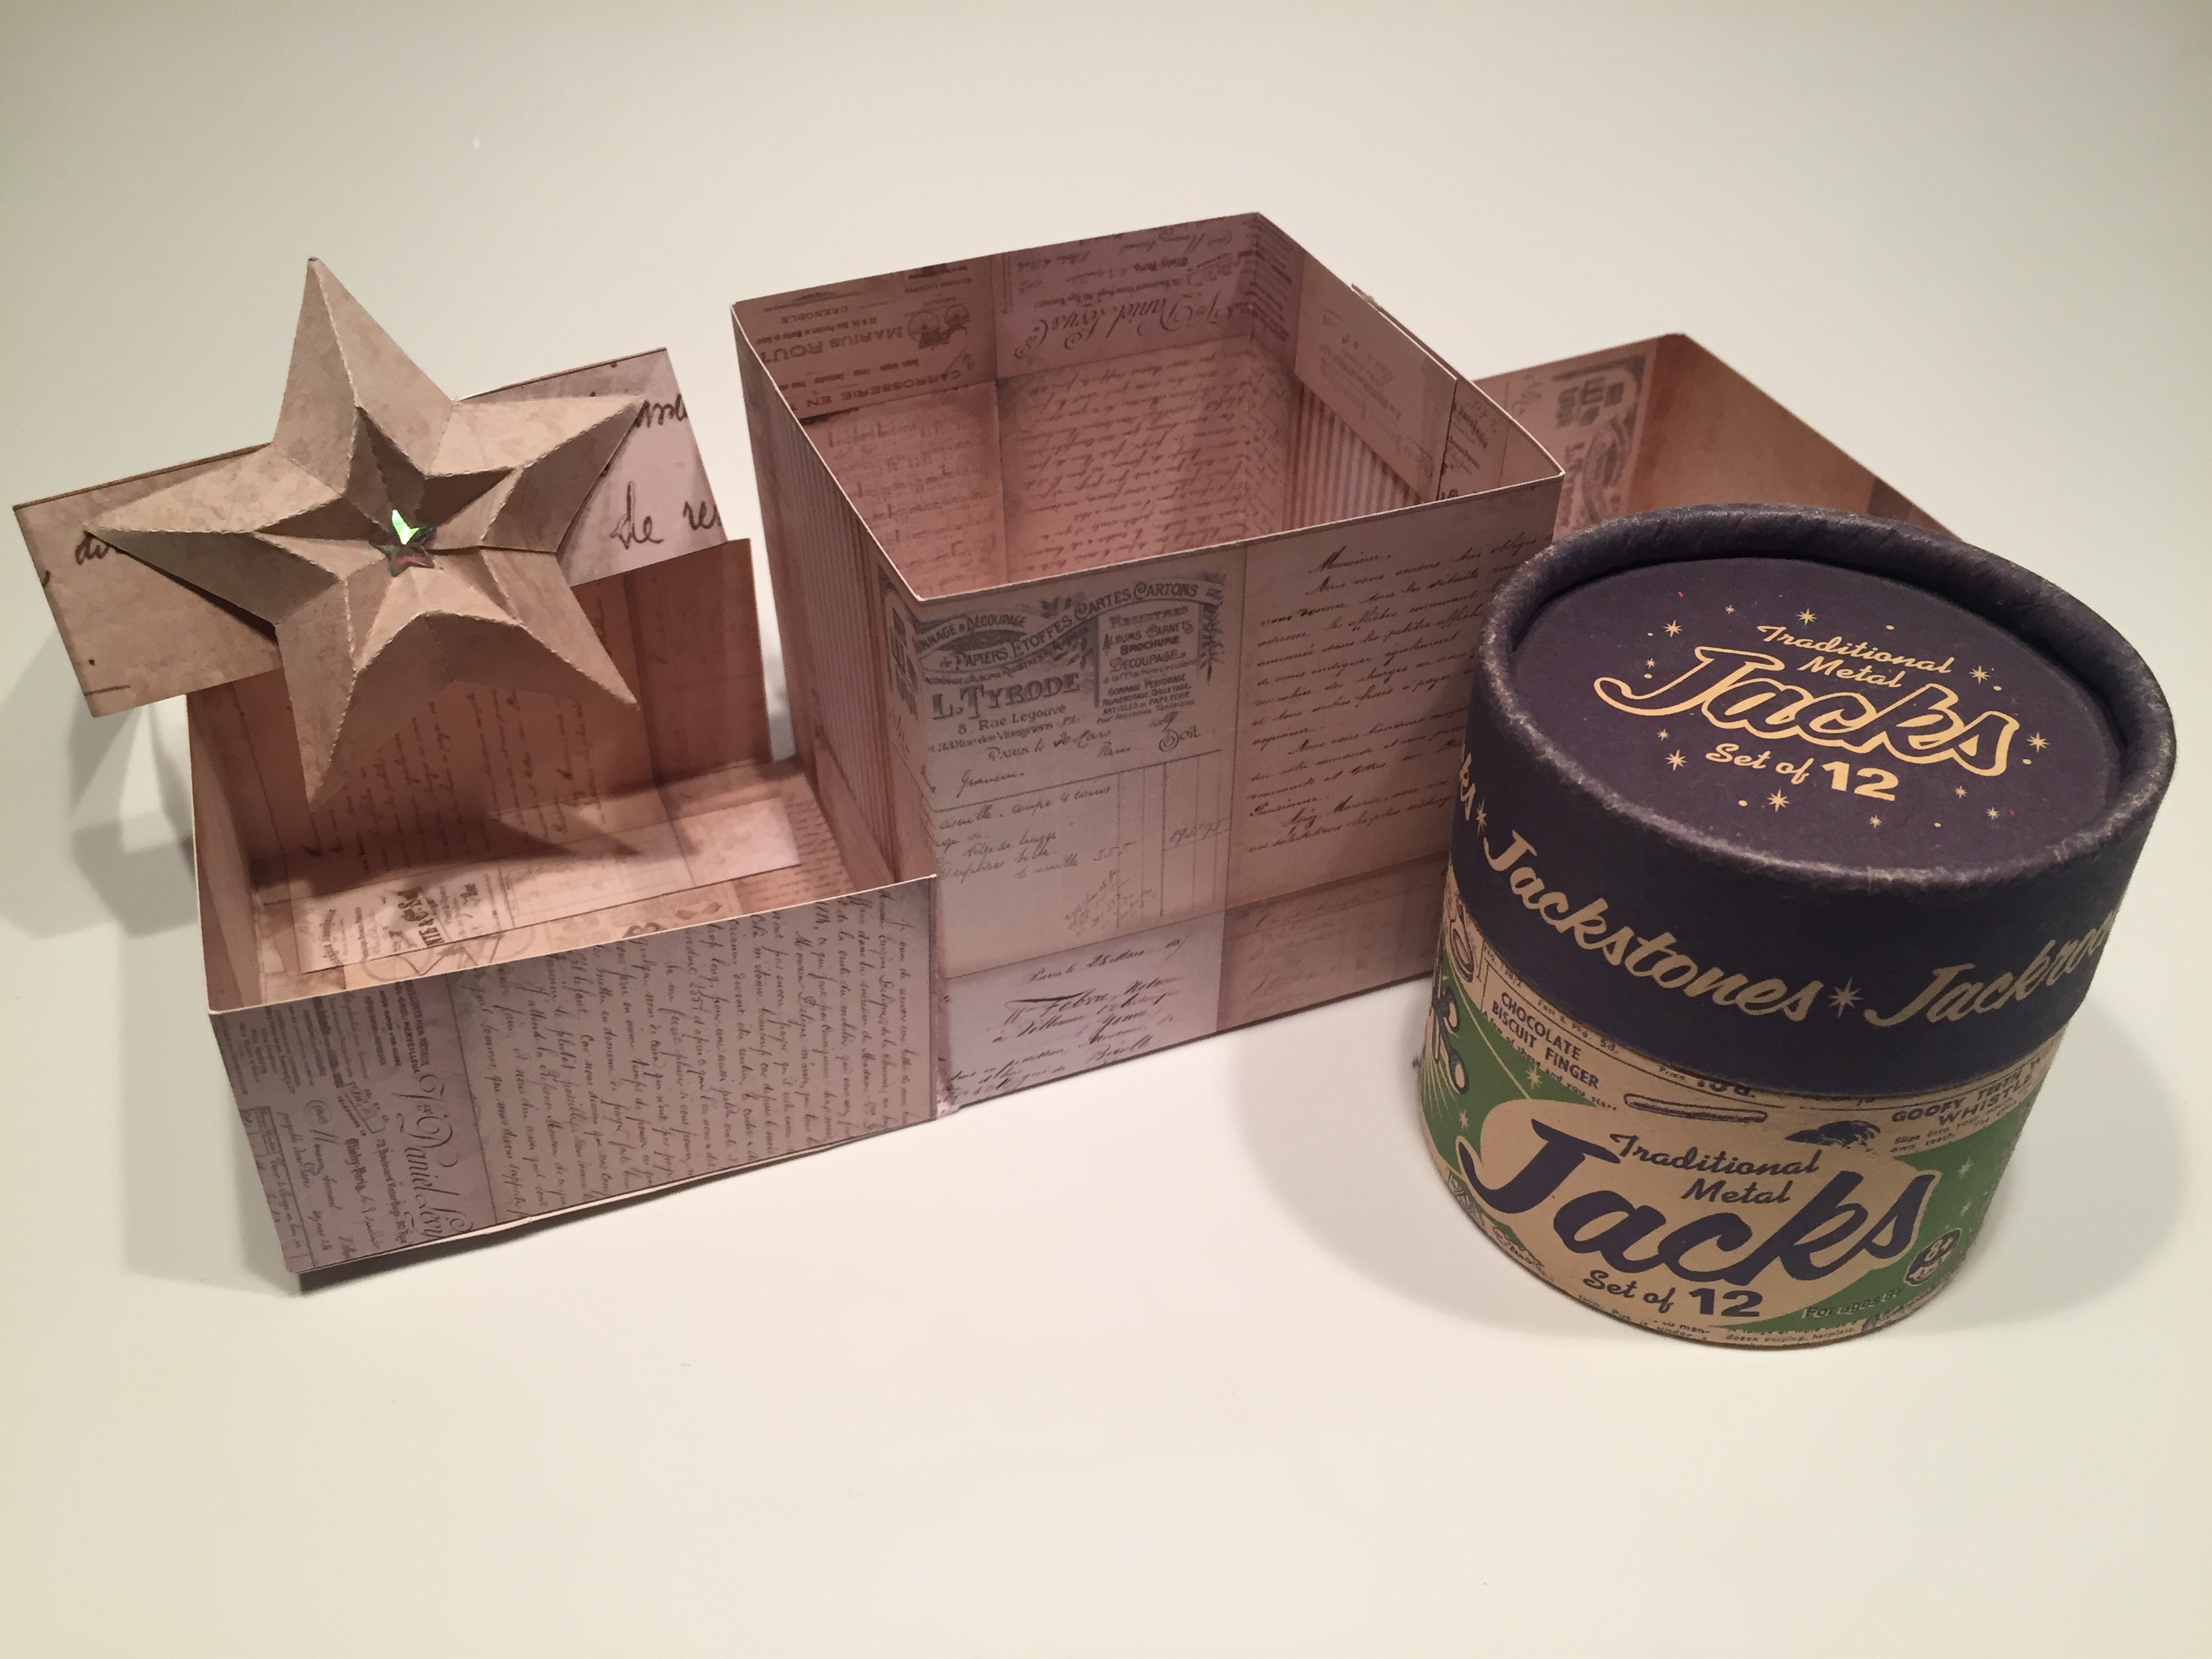
I don’t think you’ll have a better time with a small group of revelers than sitting down on the floor for a game of JACKS! Believe me, it’s a whole different ball game as an adult!
That covers our Hostess Gift Boxes post for this month. I hope you enjoy creating and using these boxes as mush as I have. I know my normal holiday plans are altered this year, so I trust a few hostess gifts will be useful and perfectly in season! Remember, if you have any special projects you’d like me to tackle, please forward those to me!
Thank you so much for sharing your time with me here. I truly appreciate every moment you spend with me! I’m sending you and yours Healthy and Happy Holiday Blessings! Please stay safe, wear your mask, wash your hands, take care of yourself and your loved ones, remember to Like me, List me, Pin me, Post me, Share me with all of your friends… Don’t run with scissors… and as always I wish you Health and Happy crafting!

These are really a great idea for winter fun. I’d love to see your presents all done, the photos are great!
LikeLike
Thank you, Katherine! Always truly appreciated! I think it’s going to be a bit of slim Christmas this year… but my family and friends are safe and healthy, so that is the greatest gift of all! Sending Healthy and Happy Blessings to you and yours!
LikeLike