
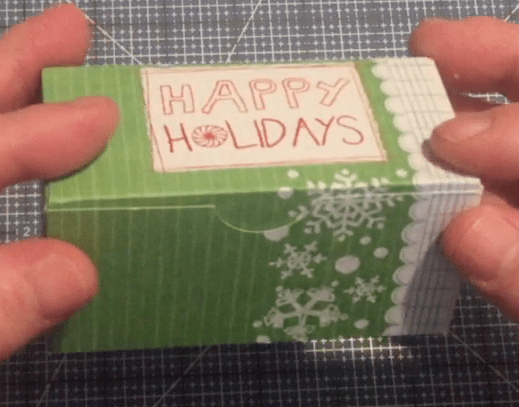
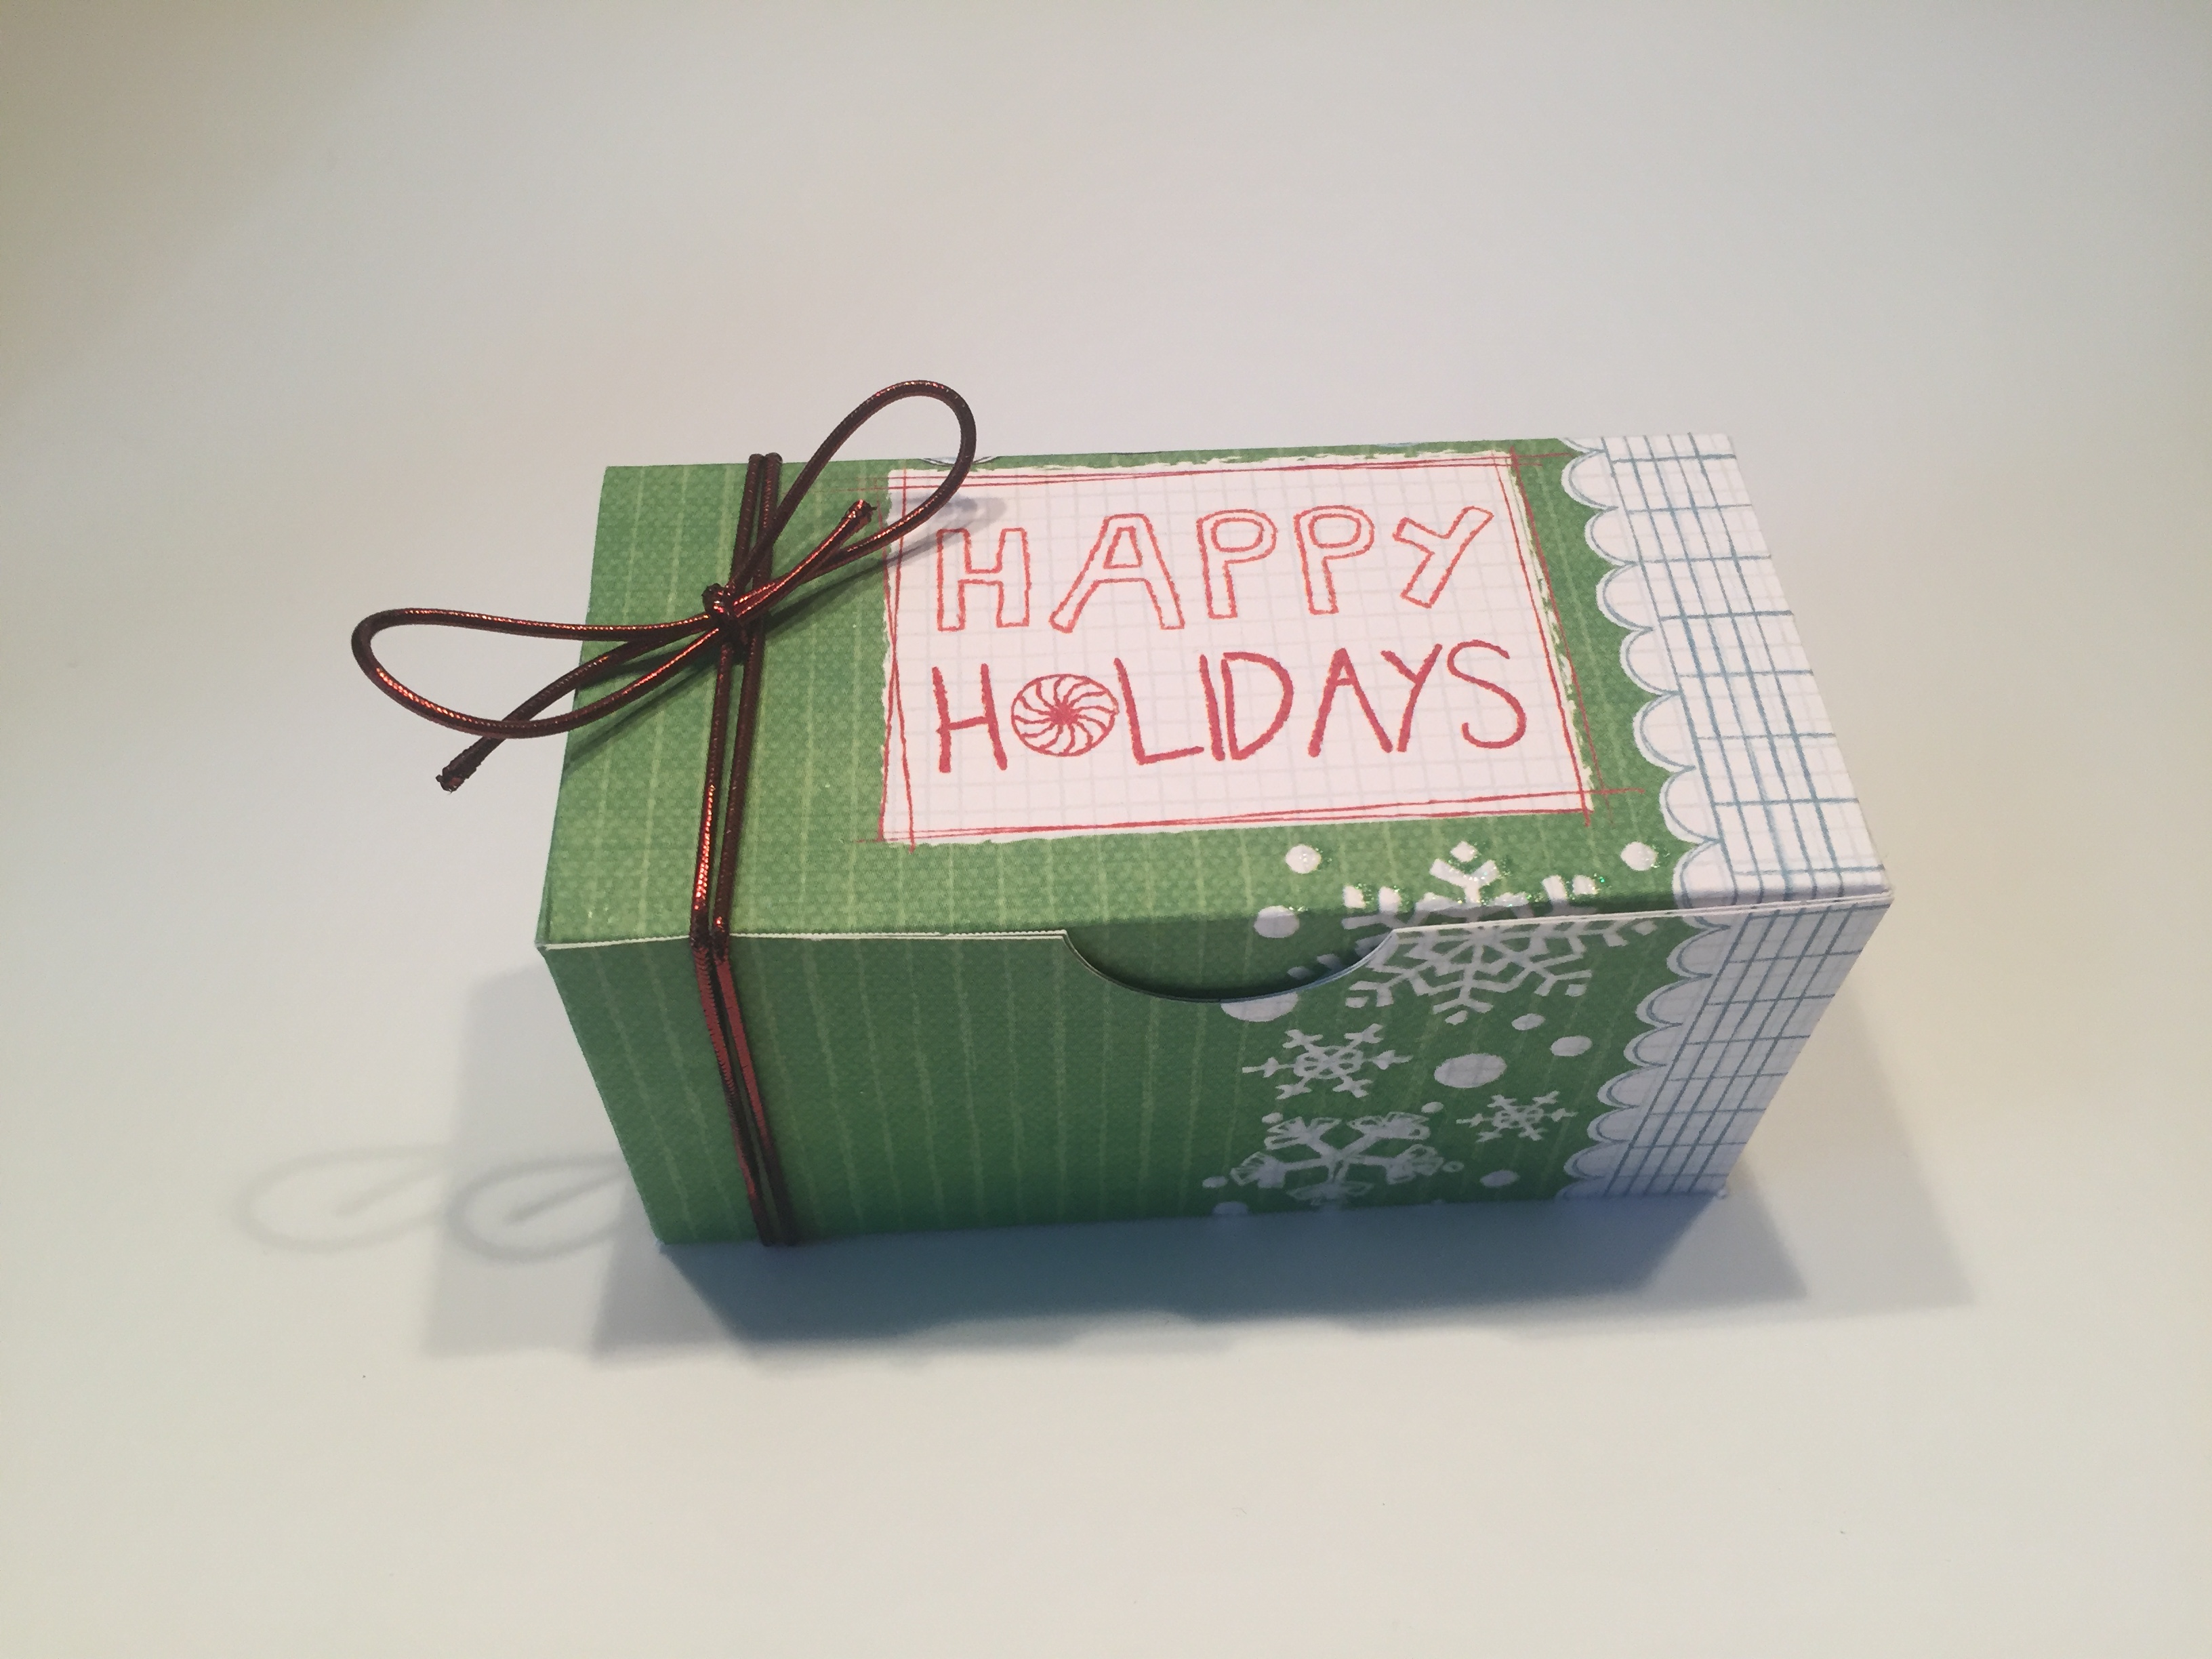
Hello Folks! Scott here with another Scor-Pal project for you… Coffee and Chocolate Gift Boxes! Double yum! The holidays are fast approaching, and these boxes make lovely gifts for your friends, neighbors and co-workers. Who doesn’t like coffee and chocolate!
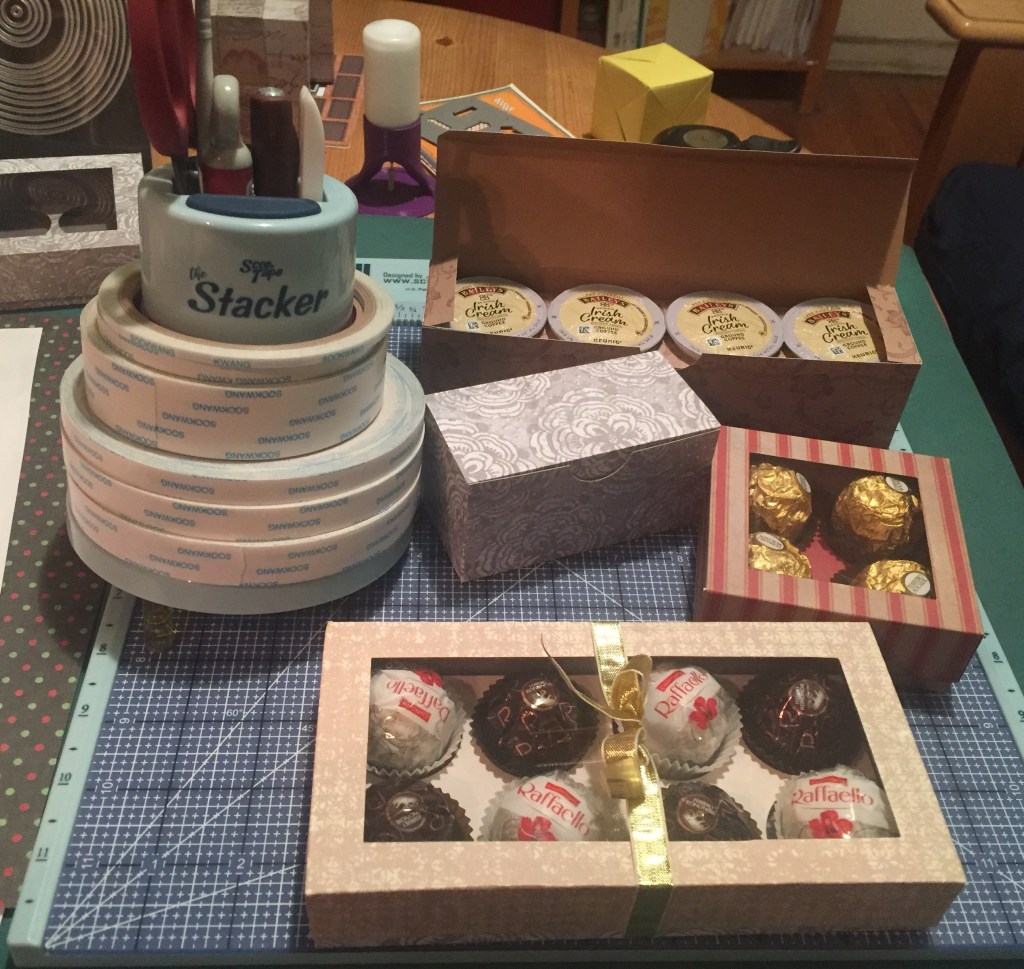
This month we have two different sizes of coffee pod gift boxes with convenient fold-over lids, and two sizes of chocolate gift boxes with windows showing off delectable treats.
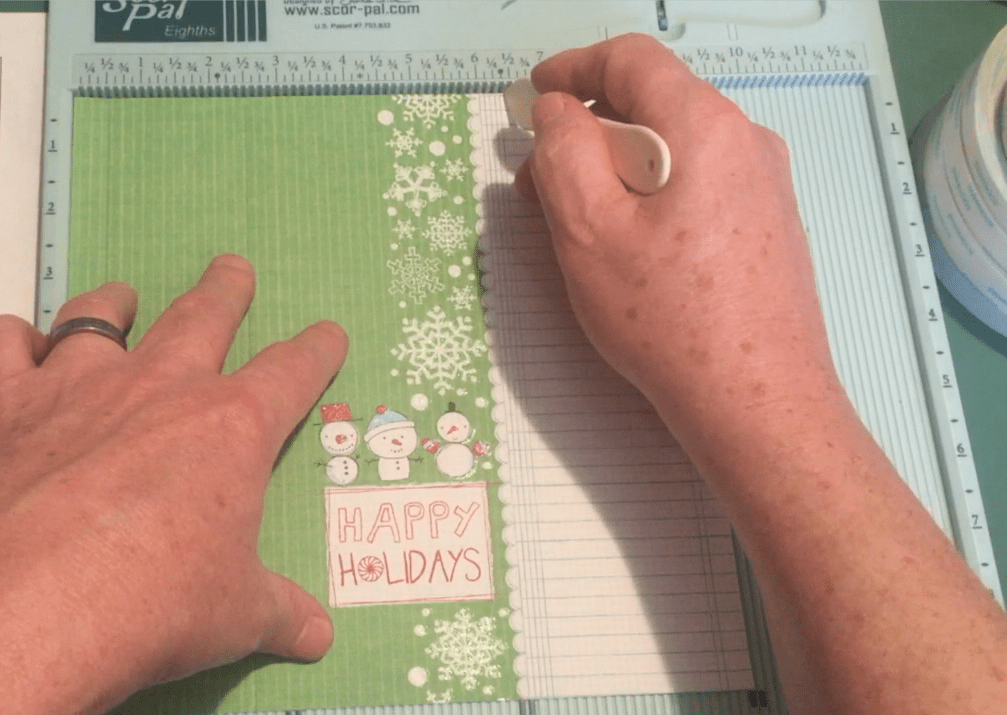
Let’s start with the Coffee Pod Gift Boxes… I have a new template for these right here.

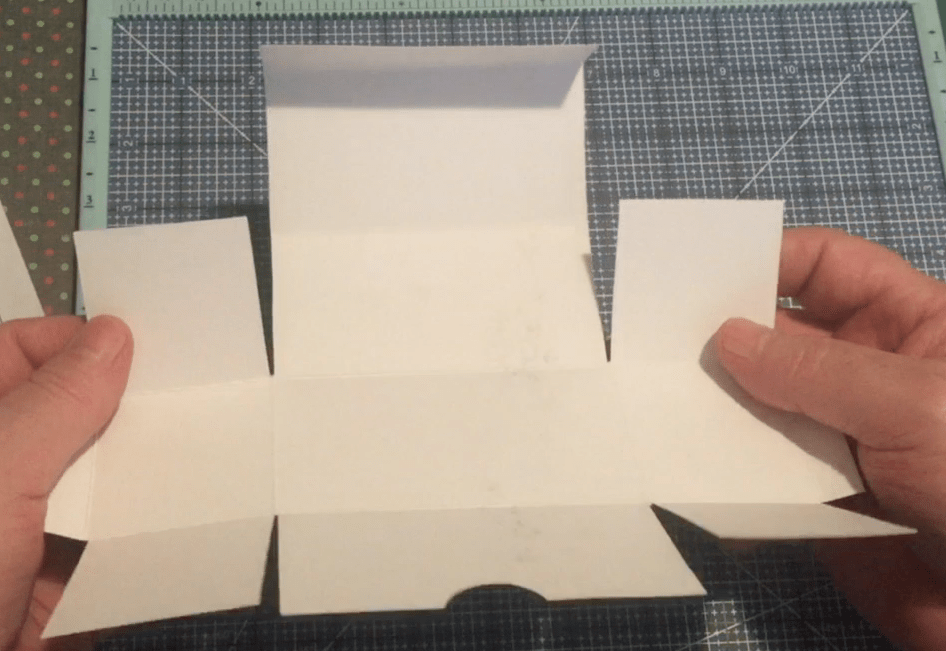
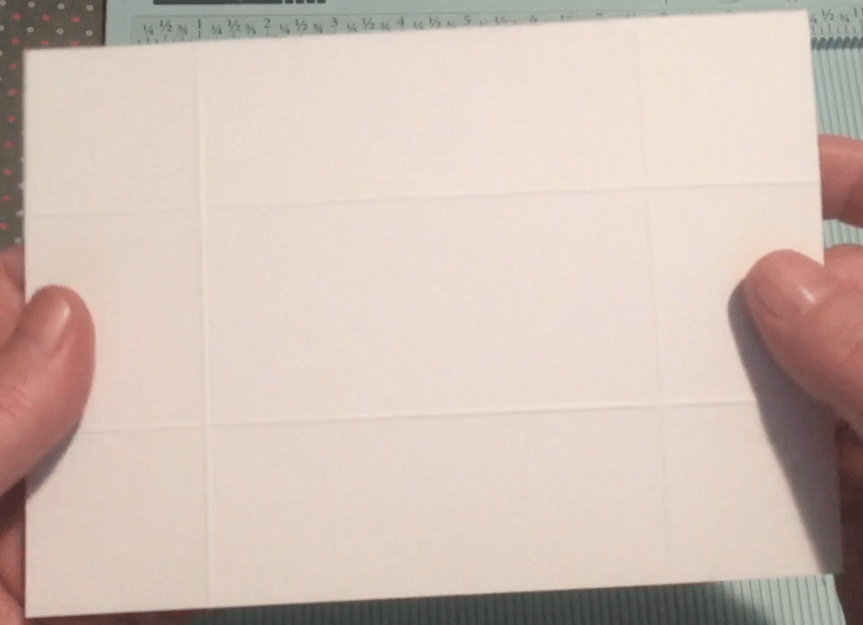
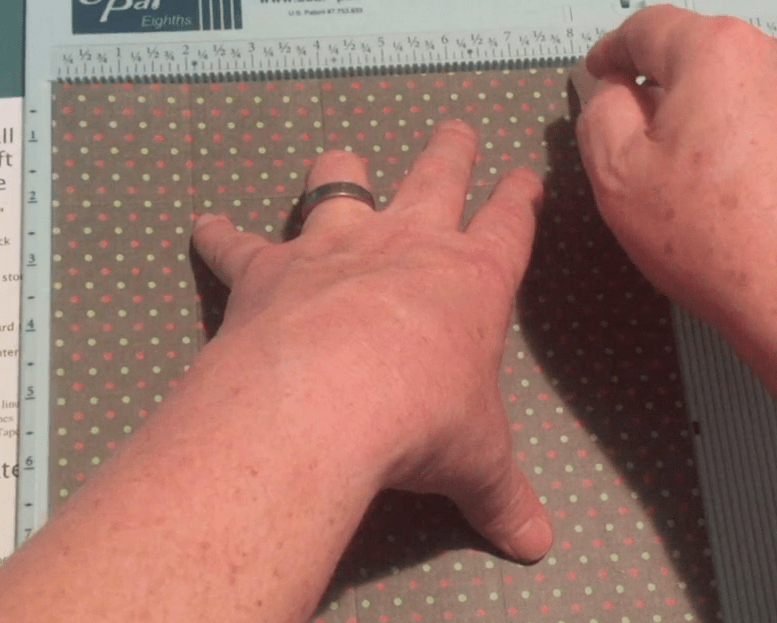
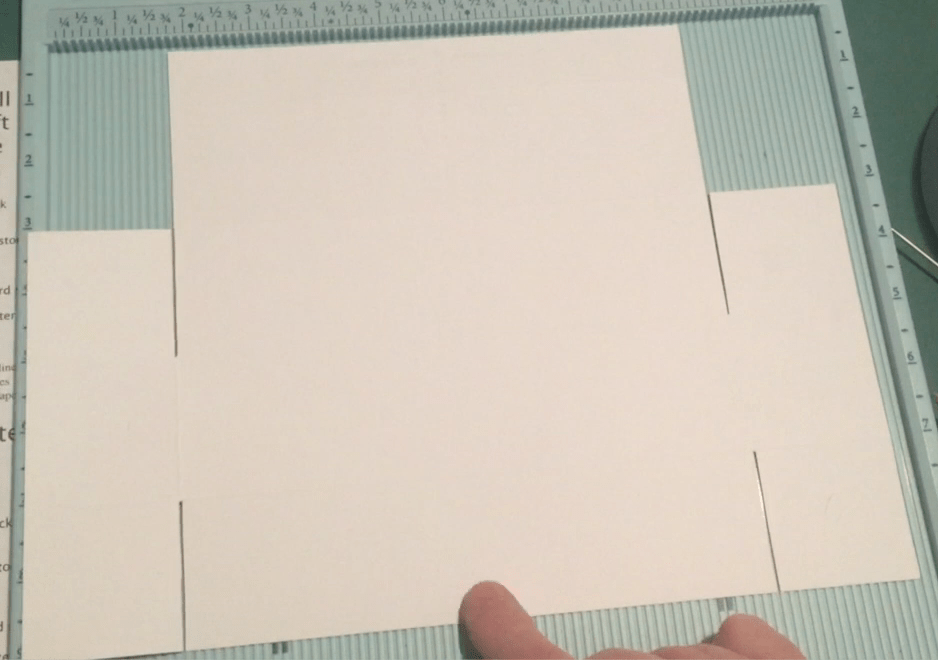
Our template shows two sizes of coffee pod gift boxes – a small one that holds 2 pods and a larger one that holds 4 pods. Let’s start with the smaller one. Our template shows that we need a piece of card stock cut to 9″ x 9″. On one side you score at 1/2″, 2.5″. 6.5″, and 8.5″. Rotate the paper 90 degrees and score in the other direction at 2″, 4″, 6″, and 8″. That should leave you with a 1″ piece of card stock at the end.
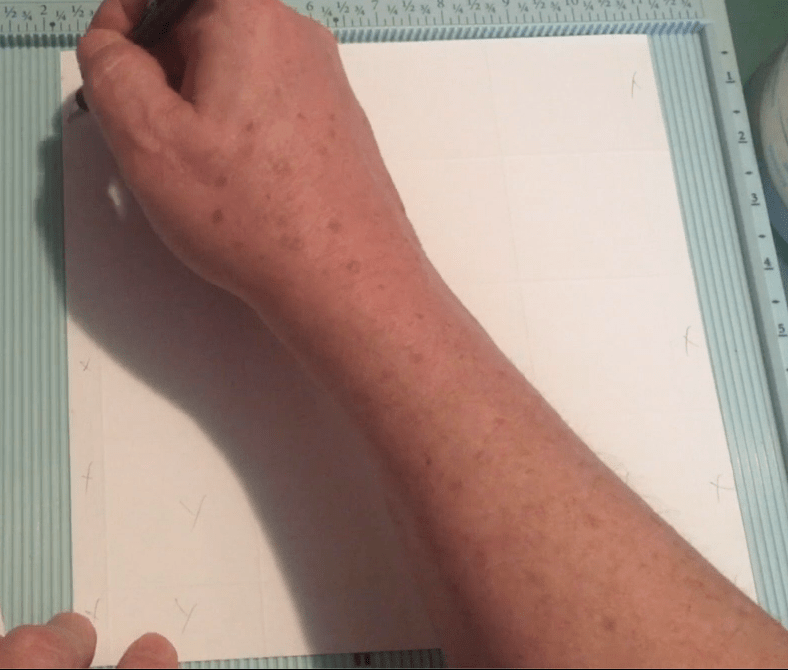
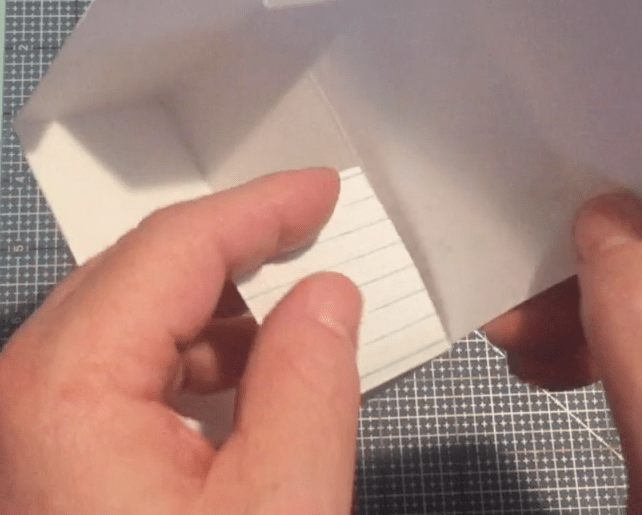
Once scored, we need to cut away the sections shown on the template. I’ll just mark these sections on the back of my card stock so I don’t get confused while cutting.
Once all the sections are cut away, your card stock looks like this.

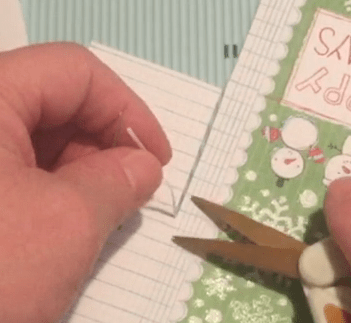
The four outside sections get cut into the tabs that hold our box together. You can cut the tabs with an angle on each side as illustrated in the template, or you can just cut the channel away as we have been doing with our prior box tutorials. I’m having great luck with this terrific tip! I hardly ever have to make any trims or adjustments to my tabs when I simply cut away the score channel.
The template also shows a thumb-notch on the top edge – this makes it easier to open these fold-over tops. I simply mark the center of the 4″ panel that gets the notch, and, punch it out with a 1″ paper punch. I try to stay just shy of the half-way mark. You could use a die to cut this notch or you can draw a half-circle and cut it out by hand. I have always found this 1″ paper punch to be very useful.
We also want to mitre the edges of the 1″ flap that tucks inside and closes the box. I just mark a quarter inch from the edges of the flap and cut straight to the fold line. Do that on both edges of the flap and it will slip in easily to close the box.
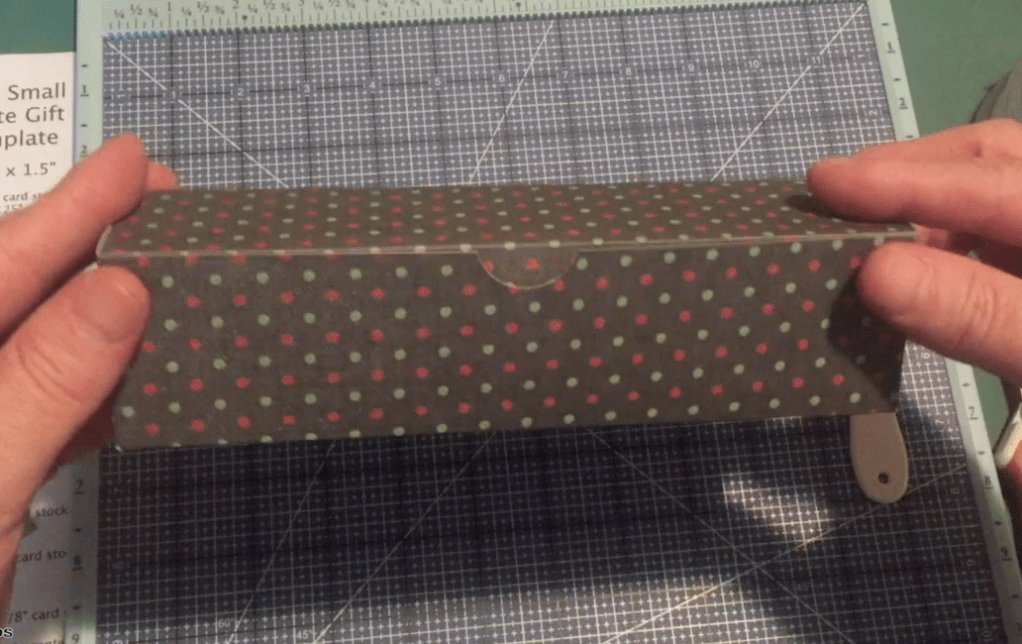
Once all your cuts are done we want to start folding this whole piece. Fold every score line to the inside of the box and commit the crease with your Scor-Tool.
Now I’ll do a quick dry-fit of our box – making sure everything will fit together nicely and verifying that no further adjustments need to be made.
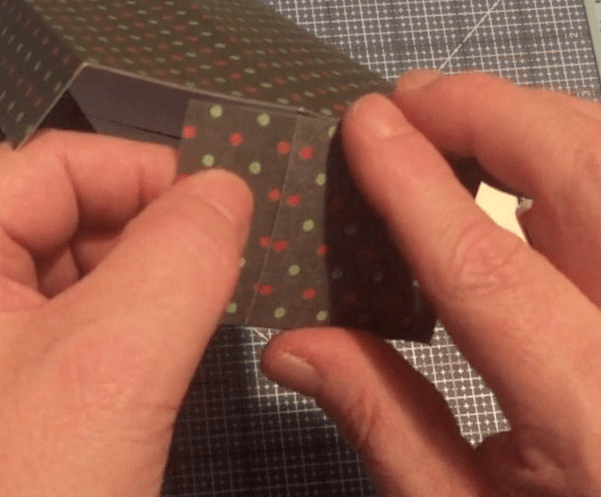
Now we can add Scor-Tape to the four tabs. You can add your tape as illustrated on the template, but I like to add my Scor-Tape along the fold of each tab, and then another piece at a right-angle to that one on the outside edge. Exactly the same as we have done on our original single thickness wall boxes.

Burnish your Scor-Tape down with your Scor-Tool and remove the liner paper to assemble the box. Fold the tabs to the inside of your box, line up your edges, and press to adhere. Assembling the box is the best part!

Your tabs on the front of the box will cover over the thumb notch, so you’ll need to re-punch the tabs matching them up with notch we punched earlier.
That takes care of the box, now we need to make the insert. The template says we need a piece of card stock 4.7/8″ x 6.7/8″ to start with, and that gets scored at 1.5″ on all four sides.
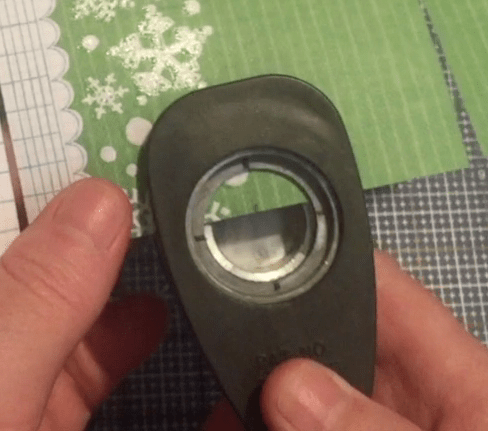
The center rectangle is where we’re going to create the holes for the coffee pods. The template calls for a 1.5/8″ circle to be cut. I do not have a die that size… I suppose that could be cut by hand, but I was trying to make this a little simpler. I do have the Hero Arts Nesting Circles Infinity dies and that has a die that measures 1.3/4″ – just an eighth of an inch bigger than required. Let’s use that one!
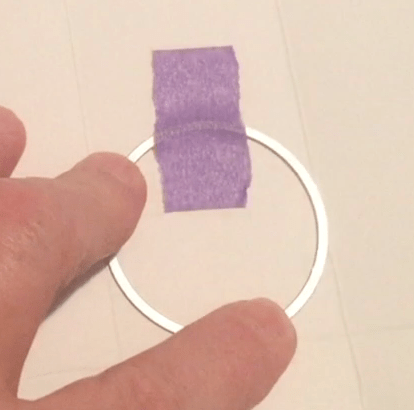
The Hero Arts die has two things going for it – the cutting line is on the inside edge of the die, and the die itself fits perfectly between our score lines. It’s very easy to line up the edge of the die to the three score lines on either end of the insert, and die cut two perfectly spaces holes. If you have an easy way of cutting a 1.5/8″ circle please let me know!! This method works perfectly well!
Once your holes are cut, we want to cut the tabs on the ends. Notice that the template shows straight cut lines – perfect for our “cut the channel out” method.
And since this insert sits inside the box, I’m not even going to glue the insert together or even glue it inside the box. That way, once the coffee pods are used, the insert can be discarded and the box used for something else!
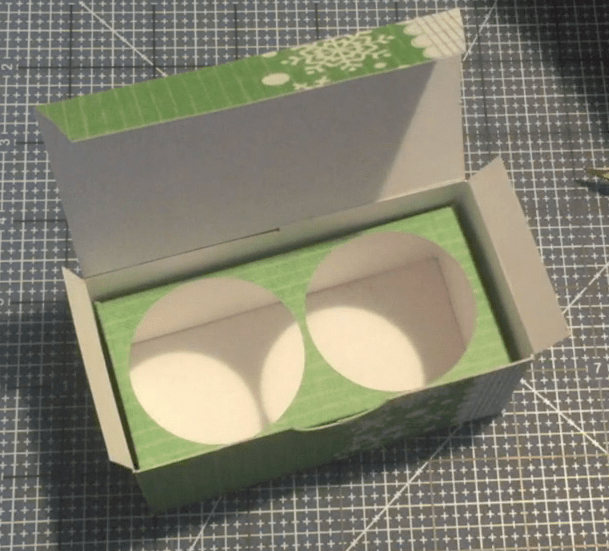
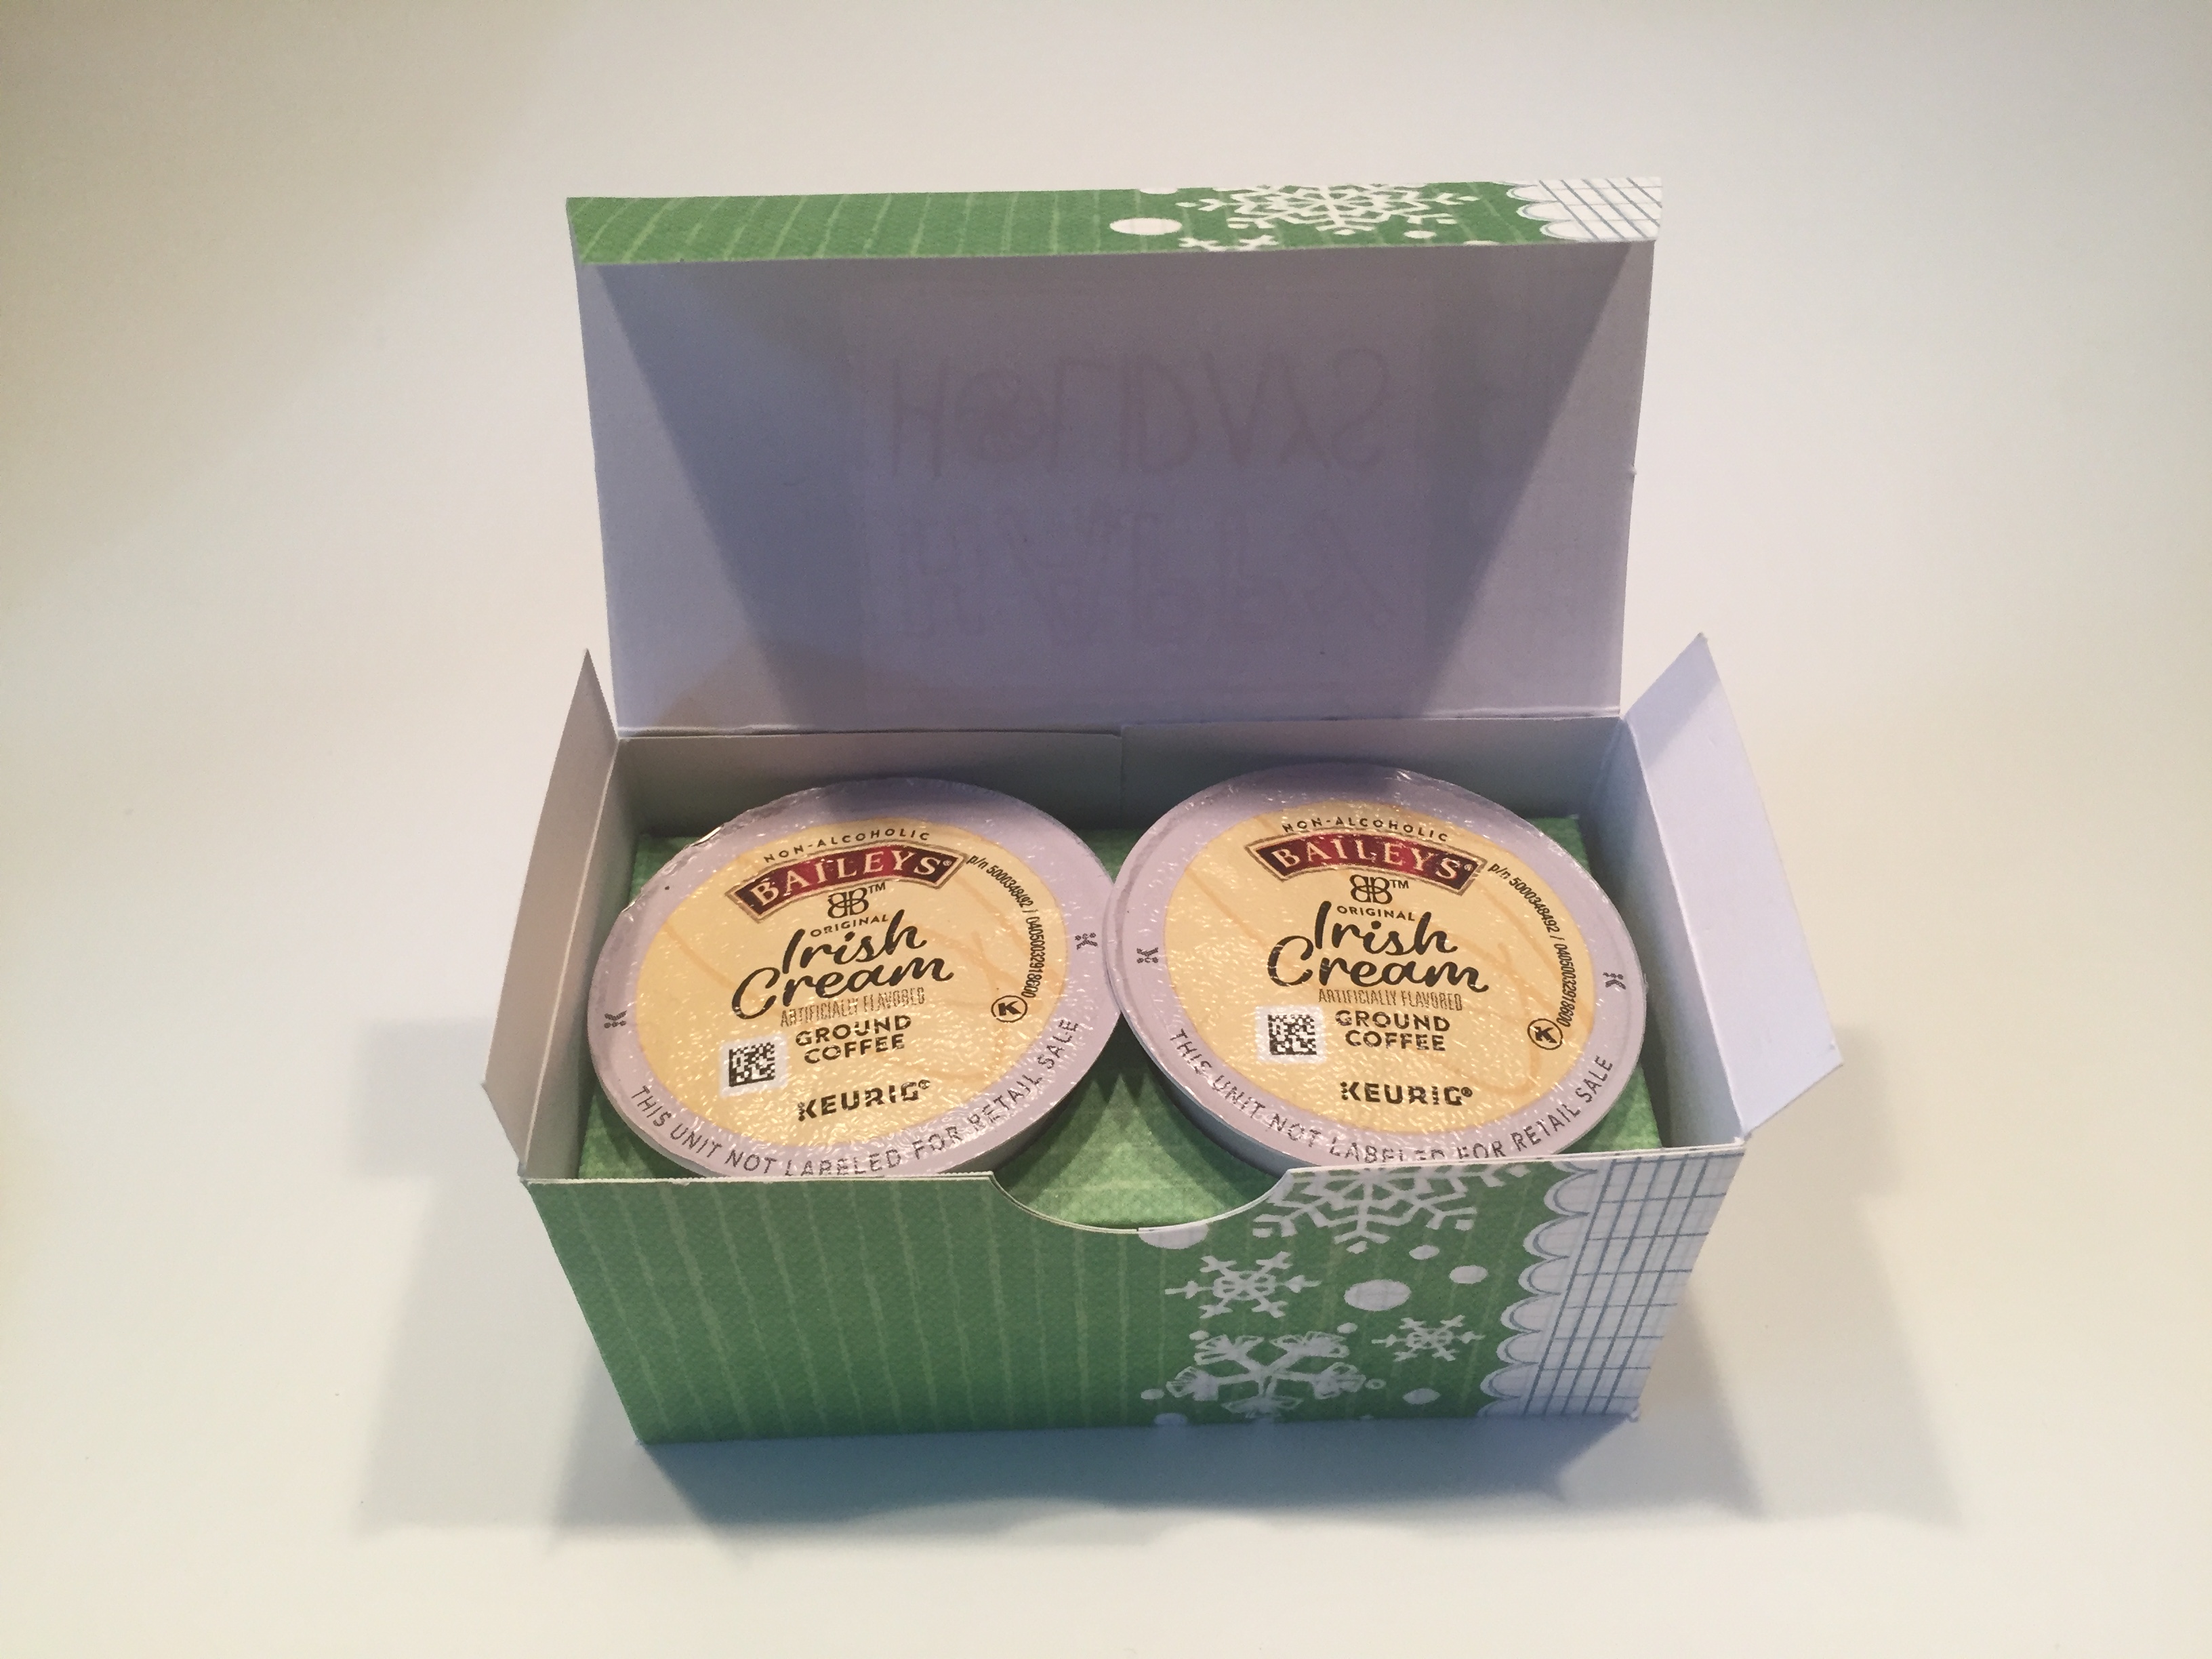
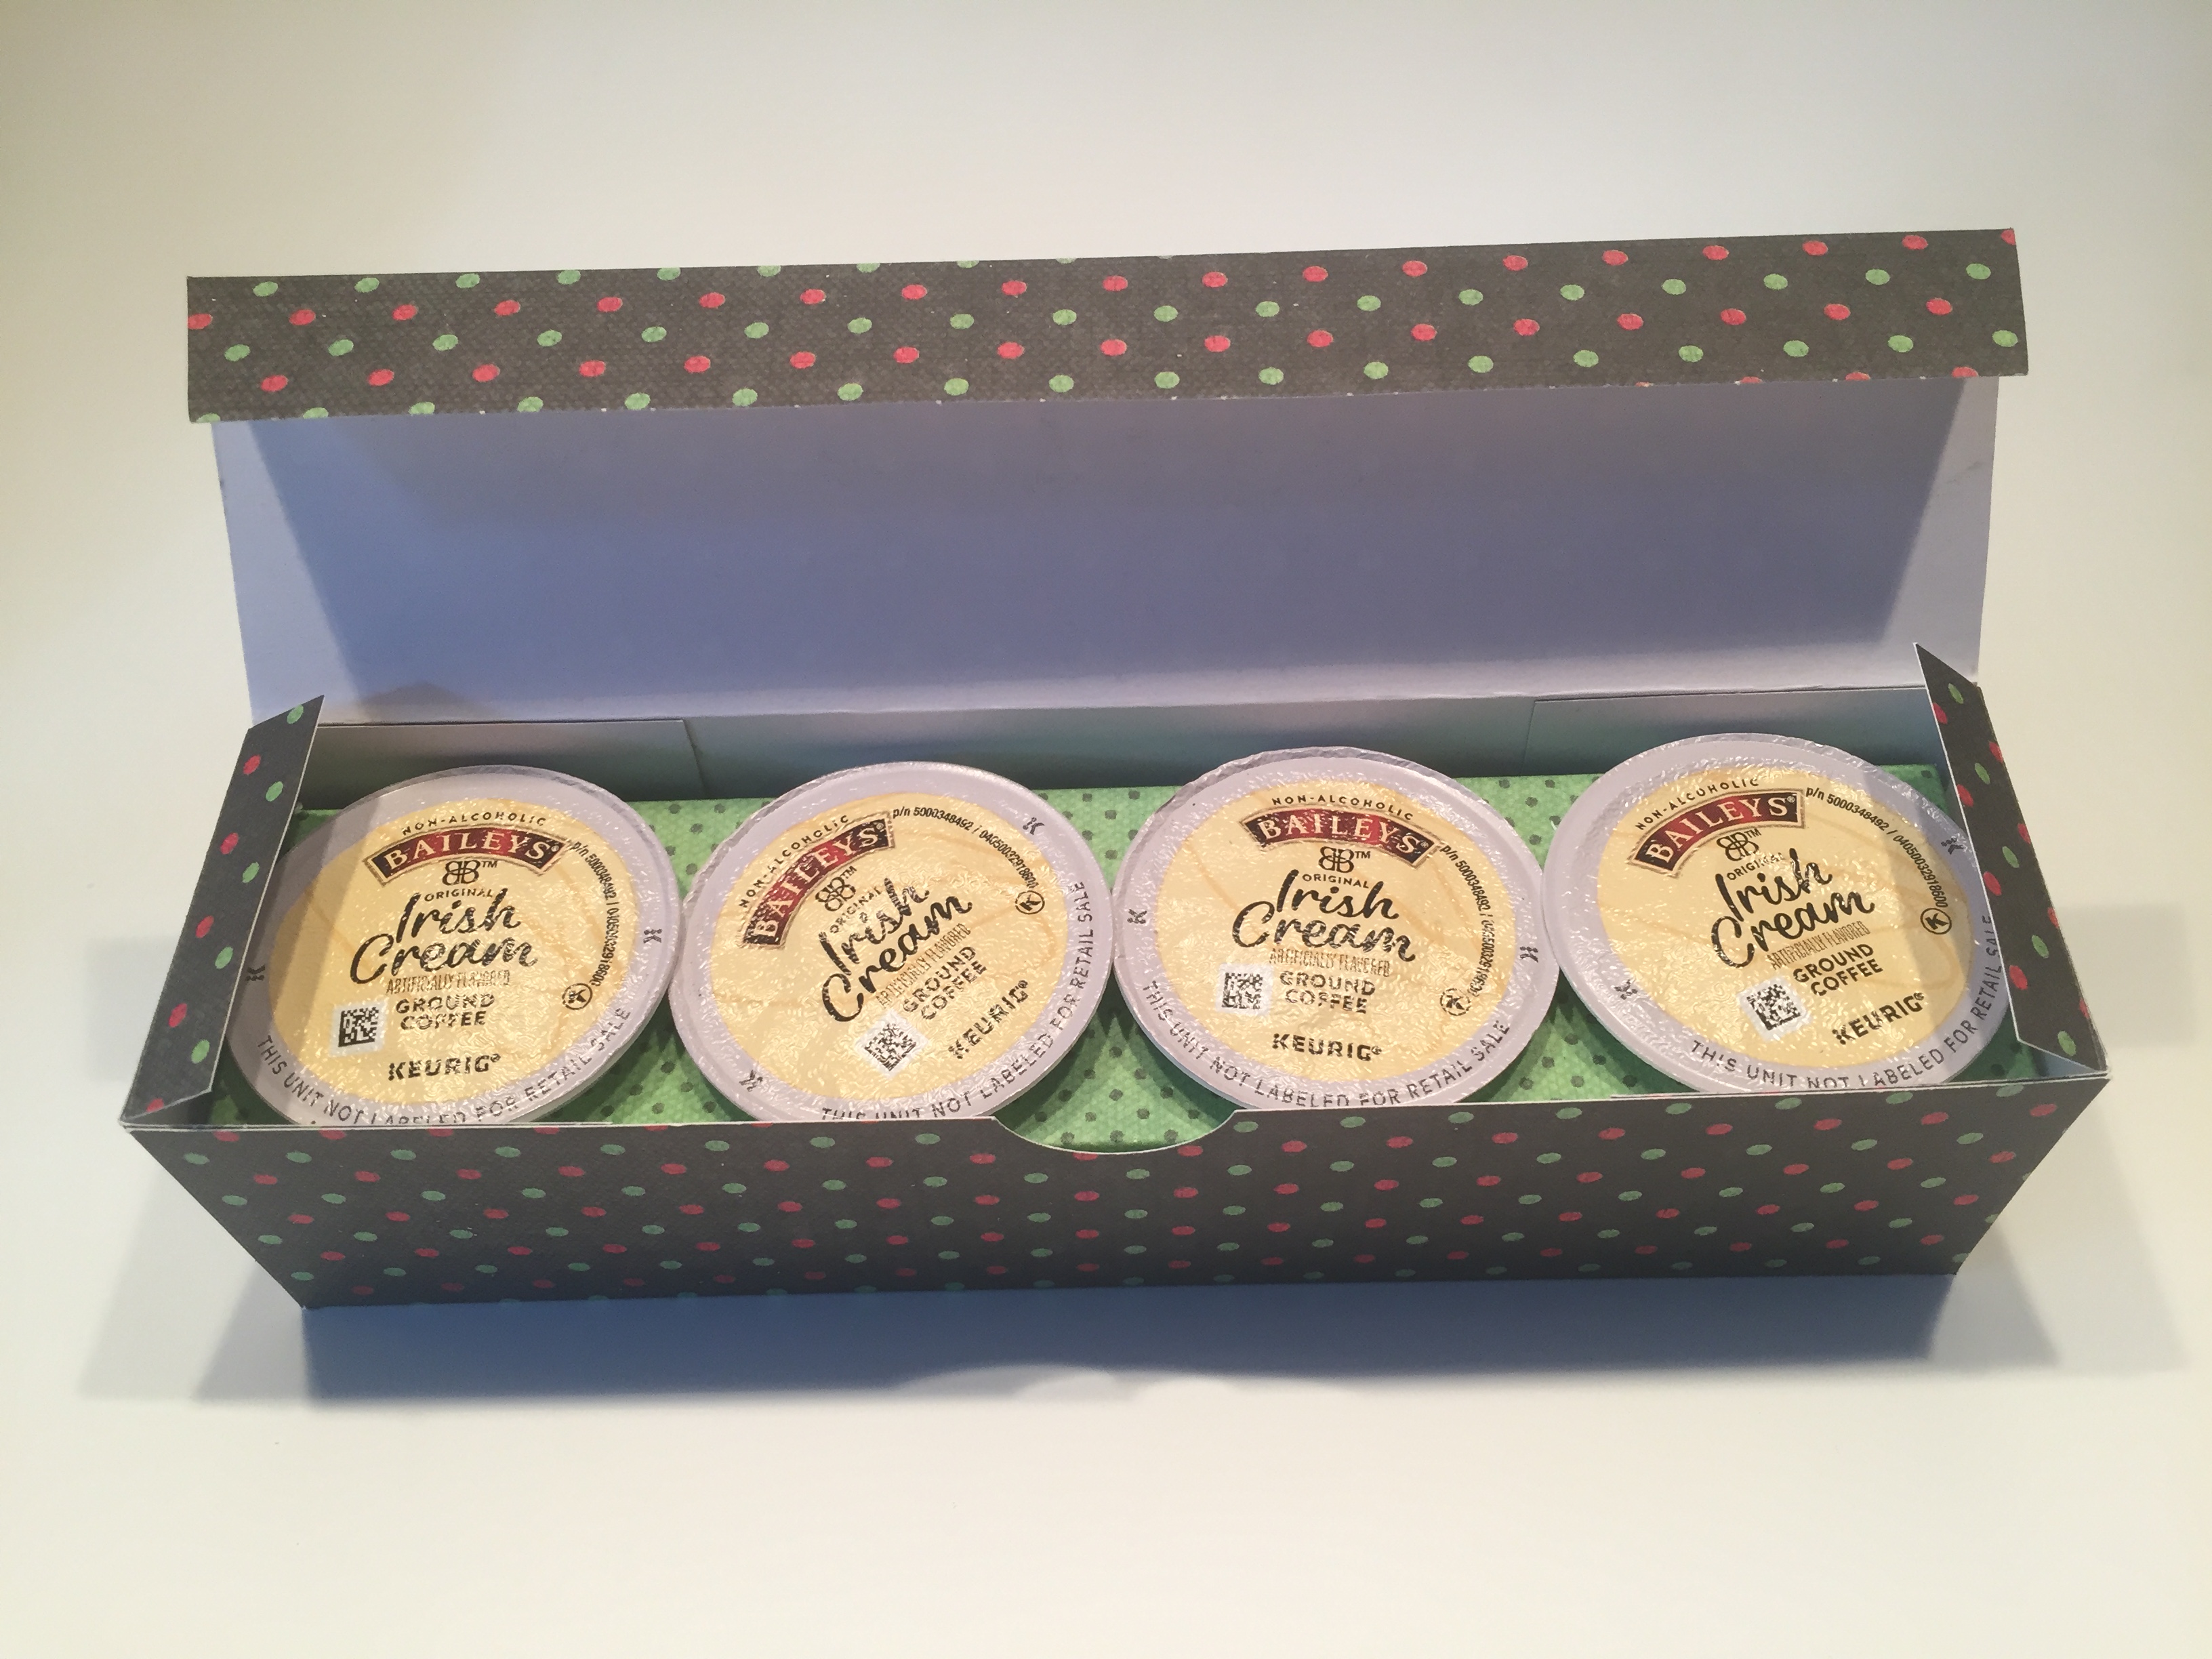
The insert slips effortlessly inside our assembled box. Just pop a couple of coffee pods inside, and you have a nice little gift or stocking stuffer for any coffee lover on your list. I love giving these treats to co-workers who like coffee – I know we have a pod style coffee maker at work and a specially flavored coffee pod like these Baileys Irish Cream coffee pods makes this treat a little extra special.
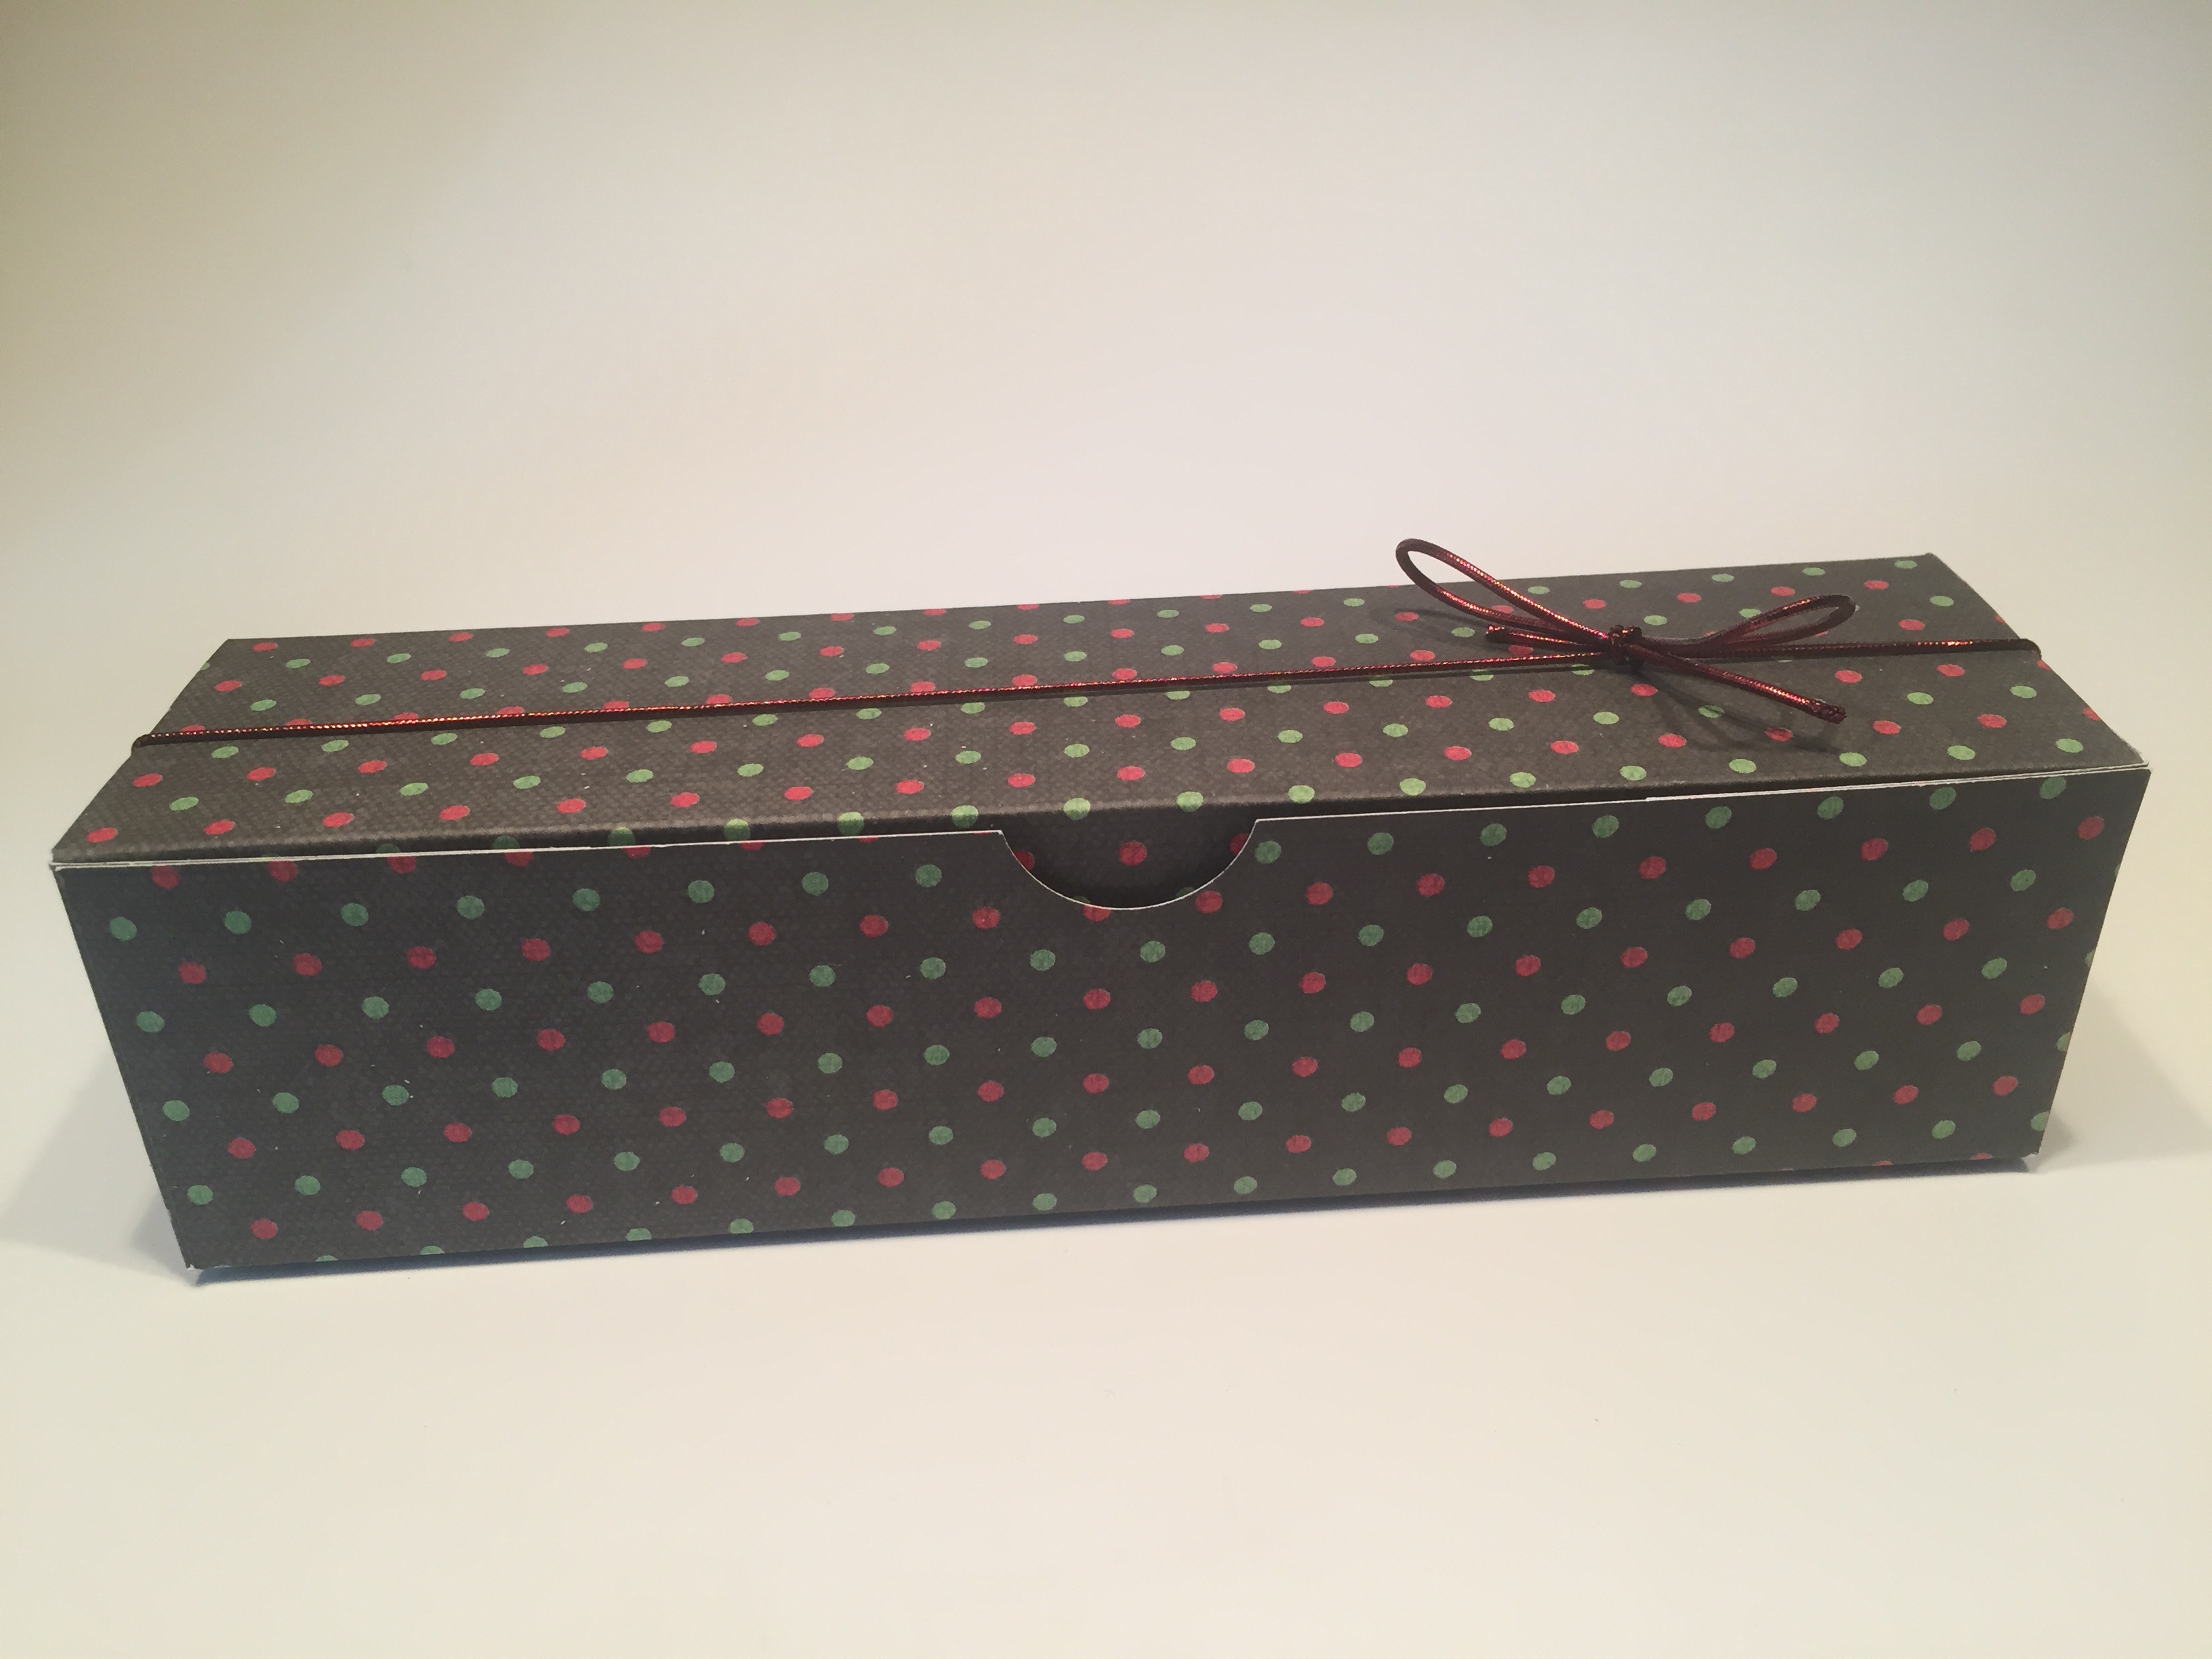
Let’s make the large Coffee Pod Box as well! We start with a 12″ x 9″ piece of card stock.
With the 12″ edge at the top of your Scor-Pal, we score at 2″ and 10″. Rotate your card stock to the 9″ side and score at 2″, 4″, 6″, and 8″. That will leave a 1″ piece of card stock at the end – that will become the flap that tucks inside and closes the box.
We’ll cut away the extra pieces as shown on the template, and cut the tabs as well. Again, you can mitre your tabs as shown in the template, but I chose to just cut out the channels to make my four tabs.
There is a notch that needs to be cut right where my finger is pointing. That rectangle piece is 8″ long so I just made a mark at 4″ and used my 1″ circle punch to make the notch.
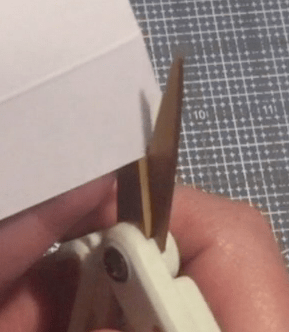
We also want to mitre the corners on the closing flap. I did that the same way as the small box – marking 1/4″ from the edges and cutting to the score lines.
When everything is cut, we fold along the score lines toward the inside of the box, and commit the creases with your Scor-Tool. A quick dry-fit confirms that everything fits.
Use your Scor-Tape to glue this box together. Exactly the same as the small box. Again, you can place your Scor-Tape where indicated on the template or you can place it on the corners as I like to do.
Now this box doesn’t feel as sturdy as the smaller box, and the lid has a tendency to close further than it needs to. It’s the lack of side flaps on the top that causes this. SO… I cut two pieces of matching card stock to just under 2″ x 1″, and scored along the 1″ side at 1/2″ to create my own flaps.

After I scored those extra pieces (and committed the creases) I used liquid glue to attach them to both sides of the top of the box. The liquid glue gives me a little wiggle room to help in lining up the flaps. The matching pattern paper makes it so you almost can’t tell that these flaps were added. These flaps add a lot of sturdiness to the box, and keeps the lid from going too far when to closes. Now we can make the insert!
The insert starts with a 10.7/8″ x 4.7/8″ piece of card stock scored at 1.1/2″ on all four sides. You can line up your circle die cut on the two ends in exactly the same way we did on the small box. Then it’s fairly simple to line up the other two die-cut circles between the end ones… keep them lined up to the sides of the insert, but there’s a little more wiggle room between the circles.
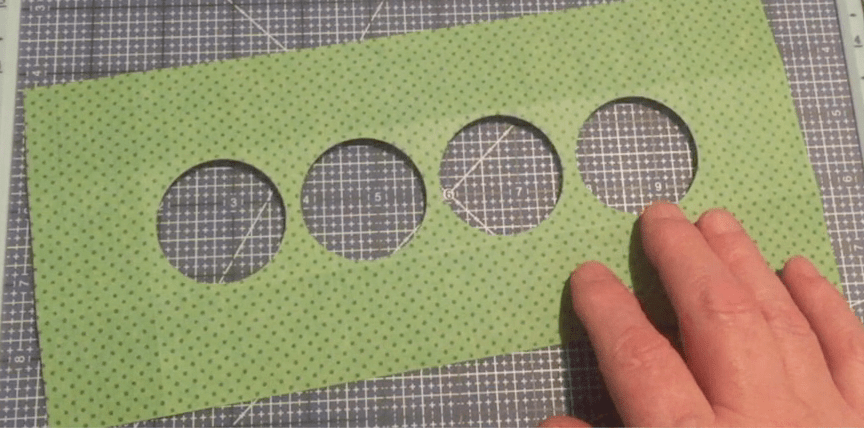
I find using the die cut so much easier than having to measure exactly where the center of the circles belong – you can see on the left side of the large insert template where the measurements for the circle cut-outs are… yikes… that even intimidates me! It’s a good idea to recommit your creases after running this piece through your die cut machine, and then we cut the tabs, fold the insert together and slide it into the box.
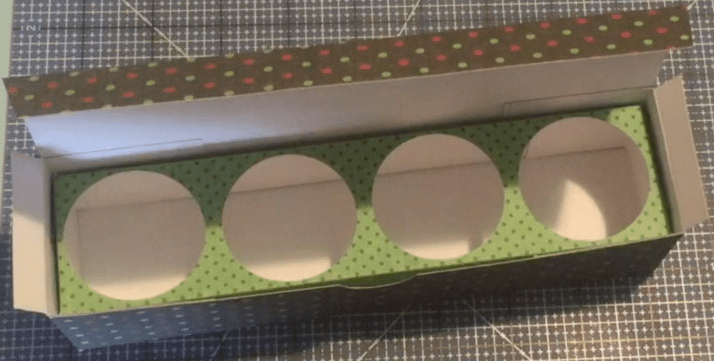
Pop four coffee pods inside, close the lid, and we have another fun treat for any of your over-caffeinated friends and co-workers!

Let’s have some CHOCOLATES!!! I fiddled around with the Scor-Pal template and ended up creating one of my own. Simplified and sized to fit those delectable Ferrero Rocher chocolates, these boxes are assembled exactly the same as our standard single-thickness wall boxes with the exception of a window cut in the top, and an insert to hold the chocolates in place.
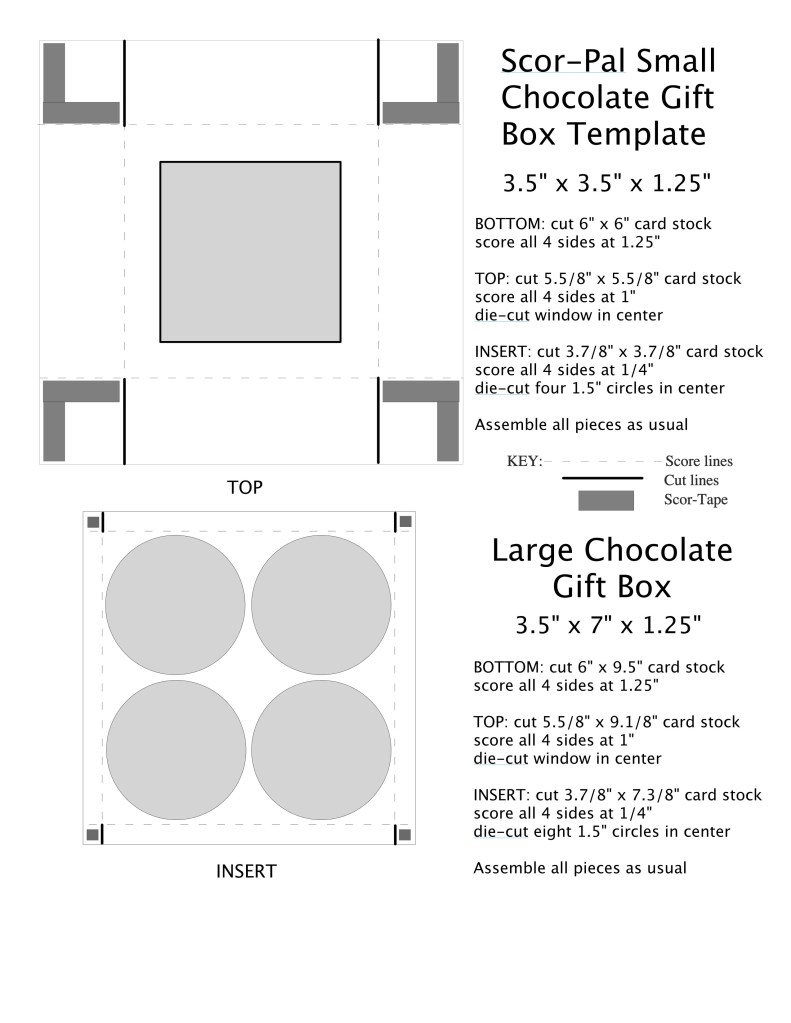
We’ll build the small box today. Start with a piece of 6″ x 6″ card stock scored at 1.1/4″ on all four sides. Cut your tabs, commit your creases, add your Scor-Tape and assemble the bottom of the box as usual.
For the top of the box, we cut our card stock to 5.5/8″ x 5.5/8″ and score all four sides at 1″. This will give us a top that is slightly shorter than the bottom so we won’t have to worry about creating any finger notches on the sides. We DO want to cut a window in the middle of this box top. I used a 1.1/2″ square die cut for this.

It is easy to line up the placement of your window, by drawing two lines from the corners of the box top and centering your square die cut on these two lines. Run that through your die-cutting machine and you should get a perfectly placed window in the center of your box top. I erased the left-over pencil lines on the back and ran some 1/8″ Scor-Tape around the opening. A 3″ x 3″ square of acetate covers the window and gets glued down with the Scor-Tape.
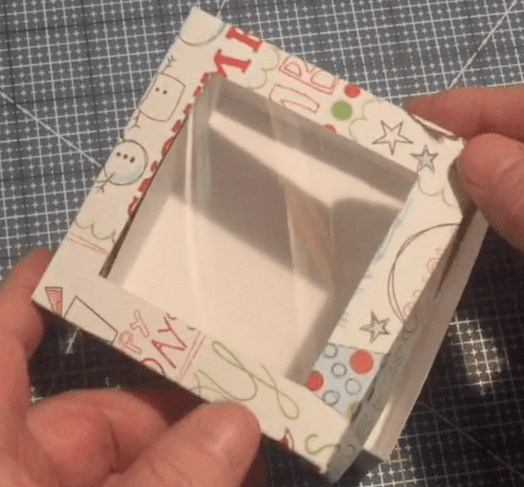
Now you can cut your tabs, commit your creases, add your Scor-Tape and assemble the top of the box as usual.
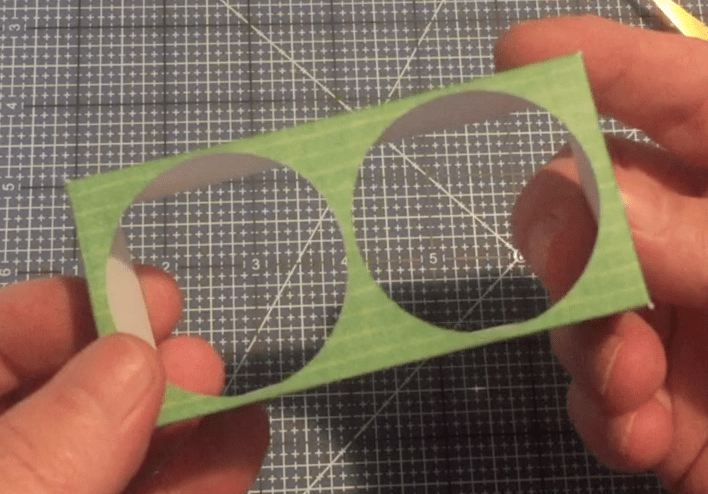
And we turn to the insert of the candy box now. Cut your card stock to 3.7/8″ x 3.7/8″ and score all four sides at 1/4″. Go ahead and commit your creases and that will help place your dies for the openings.
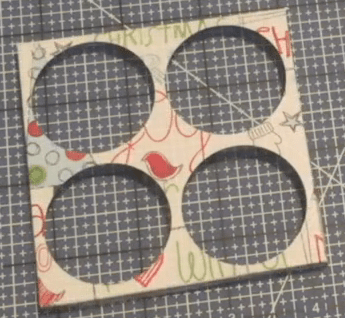
I’m using a 1.1/2″ Hero Arts circle die cut for the openings here. The original template called for 1.1/4″ openings but the Ferrero Rocher chocolates barely fit in a hole that small. Once again, it is easy to line up the die with the corners of the insert and cut the four openings.
You will want to recommit your creases after sending this piece through your die cutting machine, and then cut out your tabs. Since this is only 1/4″ tall I decided to go ahead and glue the tabs to make the box, but I still didn’t glue the insert to the inside. Just offering more options to use this box after the chocolates are gone. This is a lovely chocolate gift box – perfect for the holidays and stocking stuffers, and a great way to economize by buying your chocolates in bulk and dividing them up into small gift boxes!


My template also includes the dimensions to make an eight-piece chocolate gift box, but I won’t go to the trouble of reviewing how that was made. There are however, a couple of things you should take note of. When you cut the window in your top, if you use the same 1.5″ die cut, you will have a little extra card stock left over between the two windows. You can easily cut that away to make the two die-cuts a single window. AND… The insert piece is so long that the center of it has a tendency to sag and lose hold of the chocolates. I added a small square of foam tape (four layers) to the center of the insert to keep the candies in place. Everything else should be exactly the same as the small box!


That completes this Scor-Pal Gift Box tutorial for October. The holidays are right around the corner and it’s never too early to start thinking about small gifts for your neighbors, friends and co-workers made a little more special in a handmade gift box! I think next month we will look at some unique box designs and Hostess Gift Boxes so be sure to join us for that! If you have any special projects you’d like us to tackle, please forward those requests along to me!
Thank you so much for sharing your time with me here, you know how much I appreciate your support! Do let me know if you have any questions, and remember to Like me, List me, Pin me, Post me, Share this post will all interested parties… Don’t run with scissors, and, as always, I wish you and yours Health and Happy Crafting!
