
DISCLOSURE: This site contains some affiliate links to products. I may receive a commission for purchases made through these links (at no cost to you). As an Amazon Associate I earn from qualifying purchases. Thank you!
Hello Folks! Scott here with my 10 cards (and more!) inspired by the Love From Lizi October 2020 Card Kit. We’re in the kitchen this month and cooking up some fun cards and greetings just in time for the biggest food day of the year – Thanksgiving!
You know I’m a big fan of red, so I thought the color palette for this kit is great fun. I did take the 5 sheets of card stock included, and made my ten card bases.

Red card base, two red pattern papers, two ephemera pieces, one sticker and a stamp make this almost pun-y card! The background is pattern paper die-cut with a Lawn Fawn Stitched Rectangle die and glued to a thin white mat and then down to the card base. The red and white tablecloth piece is cut to 1.3/8″ x 5″, glued to the background and outlined with some of the Strawberry Glitter peel off stickers. I stamped the sentiment using VersaMark ink and embossed that with some white embossing powder.
The honey (sticker) is glued flat to the card front and the knife and bread (ephemera) are mounted with foam tape. I used the teapot die to cut these small hearts from some scraps of white glitter paper I colored with my Spectrum Noir markers to match the honey pot. You know I can’t resist illustrating a sentiment whenever I can. I totally love this card!
We had a bunch of ‘recipe cards’ in our pattern papers this month, so I thought I would see if I could use one of those for the background on a card.

Makes for a perfectly appropriate background for this card! I added some of the matching pattern paper to the bottom of this recipe card (although the pattern is bigger, it still works well) and trimmed them down to 4″ x 5.1/4″. I glued those to a thin black mat and then down to the Sunburst Yellow card base. I stamped the sentiment using VersaFine Onyx Black ink and embossed that with some clear embossing powder. The flour sack ephemera is glued to the card front and the bowl, sugar, and recipe box (all ephemera) are attached with foam tape. An extra glitter heart below the sentiment finishes this card and adds a little spot of glitter. This card certainly radiates happiness!
On of my favorite pattern papers in this kit is that black and white animals and vegetables paper – I though I could pair that up with the terrific quote from Julia Child.

I die-cut the pattern paper with a LFSRD and glued that to a thin red mat and then down to the Grey card base. The red pattern paper is cut to 1.3/4″ x 3.3/8″ and the corners are chopped out with a 1/4″ hole punch and then glued to a thin white mat, and those are glued flat to the center of the card front. I mounted the ephemera sentiment with foam tape and added the two vegetable stickers with more of the same. This card strikes me as a perfect thank you card for your Thanksgiving dinner hosts! LOVE this one too!
Ans here we go with a bunch of ‘bake’ puns! Some of these are actually part of the kit!

Once again, the blue background pattern paper is die-cut with a LFSRD, glued to a thin white mat and then down to the Soft Pink card base. The sentiment square is cut from the 2′ x 2″ cut apart sheet and given a thin white mat as well before being foam taped to the card front. The mixer and bowls (ephemera) are glued together and mounted with foam tape. A few pink sequins add a touch of shine to this straight-forward card. Don’t worry… I’ve got some more pink for you this month! Great card for your favorite baker!
This pun is actually in our stamp set! Certainly topical this time of year (this whole year!)
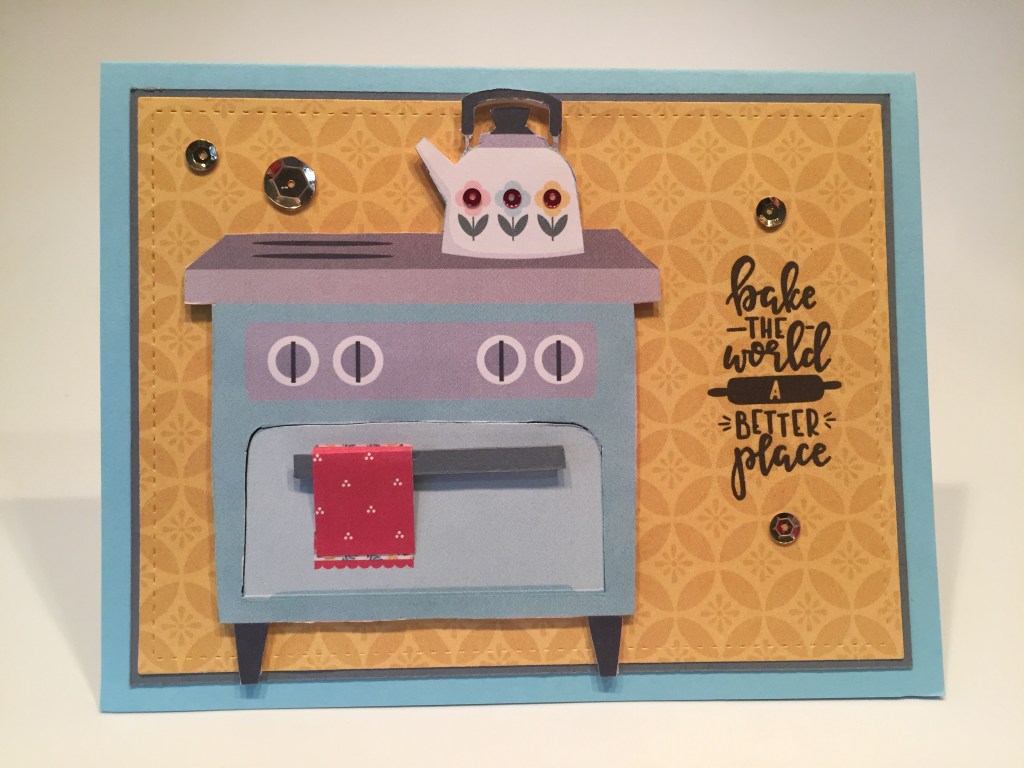
Background pattern paper cut with a LFSRD, glued to a dark grey mat and down to a Pale Blue card base. Sentiment stamped with VersaFine Onyx Black ink. I fussy-cut the stove from the large side of the pattern papers (I just eliminated the upper portion so it would fit on a card). The tea pot was a little extra fussy…! There is more here than meets the eye. The handle and towel on the oven appears dimensional… can you open it?
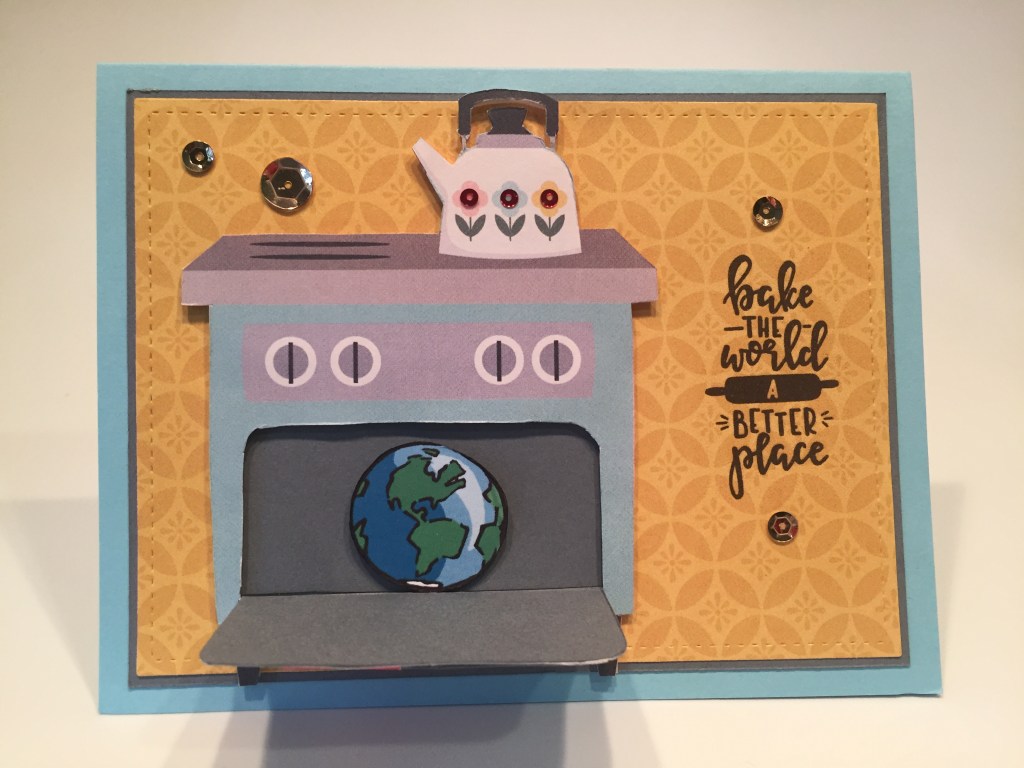
Surprise! This is a little globe image from my files, printed, fussy-cut and mounted with some foam tape. I fussy-cut the oven door and added some grey card stock to the back which continues to the back of the oven and is glued flat to the card front. The oven is mounted with foam tape and some sequins (on the tea pot too!) add sparkle and shine! I’m not sure if this is some kind of double-entendre about global warming or just a playful image to go along with this pun-y sentiment! Fun interactive card!
I was starting to worry that I would run out of pattern papers, so I thought I’d use another recipe card for my next card.

This one’s MY pun! LOL! I trimmed this recipe card down to 4″ x 5.1/2″ and scribbled in some ingredients from Grandma Fortner, and ink blended lots of Frayed Burlap Distress Oxide ink on all the edges… this is an old one from Granny! I printed this sentiment on the pattern paper using my Silhouette Software and the Smoothie Shoppe font, and the glued it directly to the second Sunshine Yellow card base.
I fussy-cut the pie from the tag cut apart sheet (it’s the biggest pie in the kit) and glued it to a scrap of white card stock and then fussy cut that to echo the border on the ephemera oven mitt. I glued them both together and added them to the card front with foam tape. I added some Spectrum Noir Sparkle Pen to the heart on the pie and topped that off with some Nuvo Crystal Drops in Morning Dew for some dimension and shine, and added a few gold sequins to wrap up my big pun for the month!
Okay… here it comes… for all you pink fans out there… This one’s for you!

Another great pun from our tag cut apart sheet! At first I dismissed this cut apart because it was pink… but the sentiment won me over! There’s not much in the way of pink pattern paper in this kit, so I grabbed the Love From Lizi Candy Stripe Background Stamp and used some Worn Lipstick Distress Oxide ink to stamp directly on my Soft Pink card base. I cut out the tag and glued it to a mat of Black Tie glitter card stock, punched out the hole and added a bit of the Charcoal ribbon.
I paired that with one of the wood veneer die cuts that I colored with Frayed Burlap and Walnut Stain Distress Oxide inks. I die-cut the medium heart die from more Black Tie card stock, glued that to the stained tag, added another spot of Charcoal ribbon, and glued that to the card front. A few red sequins bring a pop of color and shine, and I actually like this card a lot! This would make for a great Valentine for the pancake-maker in your life!
There is another sentiment in our ephemera pack that really caught my eye…

Here’s another birthday card for “those of a certain age”! A 1.1/2″ strip of that tablecloth pattern paper is glued to the center of the Grey card base, Strawberry Glitter peel offs line the edges and some of the red satin ribbon adds a little different texture and shine. I took my sparkle pen to the cake on the ephemera piece and added that and the sentiment banner with foam tape. Lots of sparkle on this card, and a wise sentiment as well!
There is one more sentiment stamp I thought would be fun to illustrate for my next card.
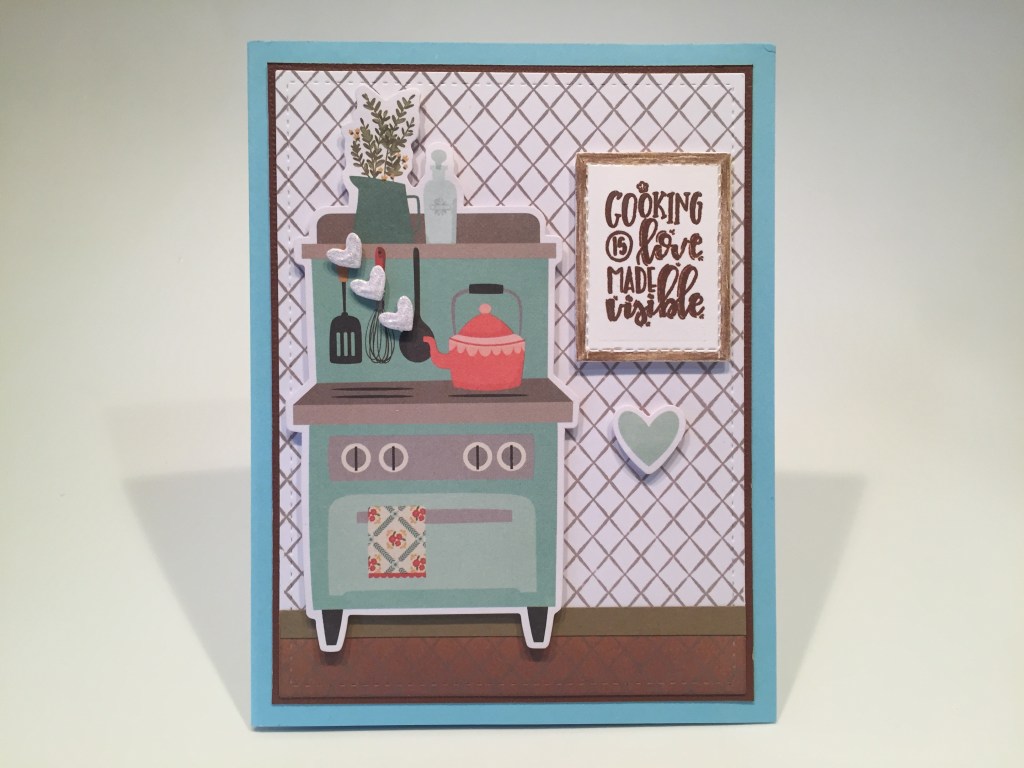
The background is a piece of the LFL white card stock in our embellishment bag stamped with a Carta Bella Designer Diamond A2 stamp using Frayed Burlap Distress Oxide ink. I masked off the bottom and ink blended some Walnut Stain distress Oxide ink for the ‘floor’, and die cut that piece with a LFSRD. I glued that to a thin brown mat, and added a quarter inch strip of a lighter brown card stock for the floorboard and glued all down to the Pale Blue card base.
I stamped the sentiment on a scrap of white card sock and used a LFSRD to cut that to size, and then colored in the ‘frame’ with my colored pencils. The stove and heart ephemera pieces, and the sentiment are attached to the card front with foam tape, and I die cut some white glitter hearts using the smallest heart die from our kit, and added them coming out of the tea pot spout with tiny pieces of foam tape. I don’t think I can make cooking more visible on a card that with these ‘boiling steam hearts’. LOL!
I’m a BIG fan of “licking the bowl” so I couldn’t resist using that sticker!
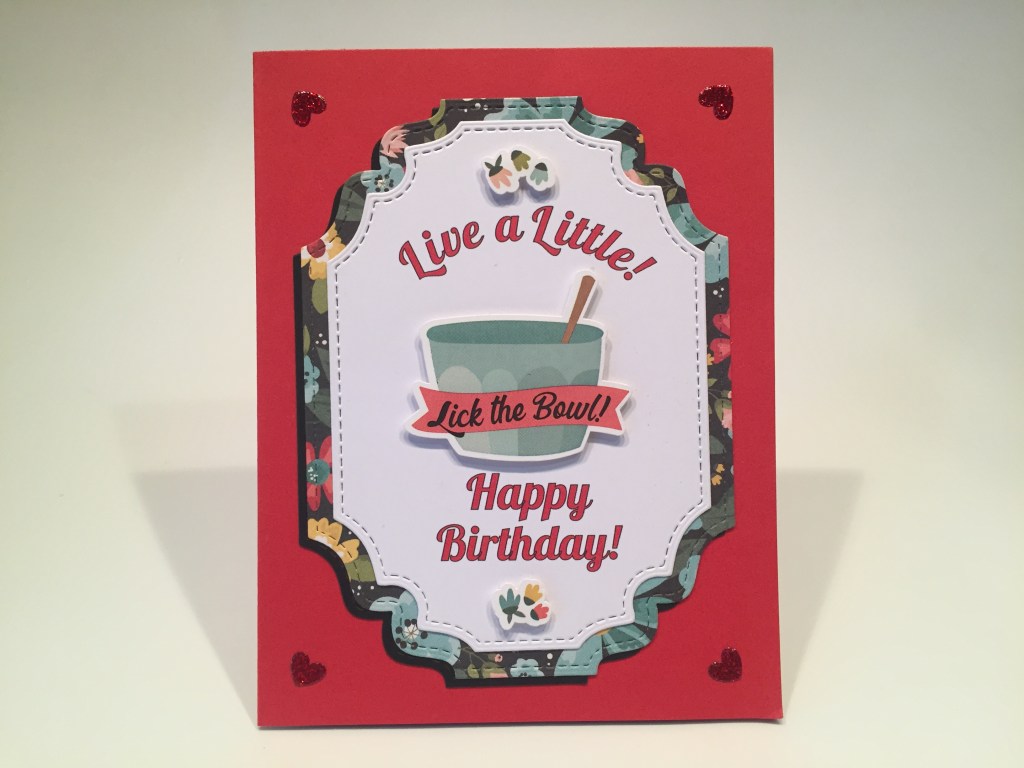
This makes me smile! I printed the Live a Little and Happy Birthday sentiments on another piece of the LFL white card stock from our kit using the Lobster 1.4 font and die-cut that with an old LDRS Fancy Rectangle and Layers die. I die cut the larger layer from pattern paper and a piece of black card stock. I glued those all together using the black piece to add a bit of a drop shadow, and glued them down to the last Red card base. I added the Lick the Bowl and the two small flower stickers with foam tape and finished off this card with some Red Glitter Heart peel offs (from last month’s add on peel off variety pack) to the four corners. If you can’t lick the bowl on your birthday, then something, somewhere, has gone terribly wrong!! I thought this shaped die worked quite well, and seemed very homey to me!

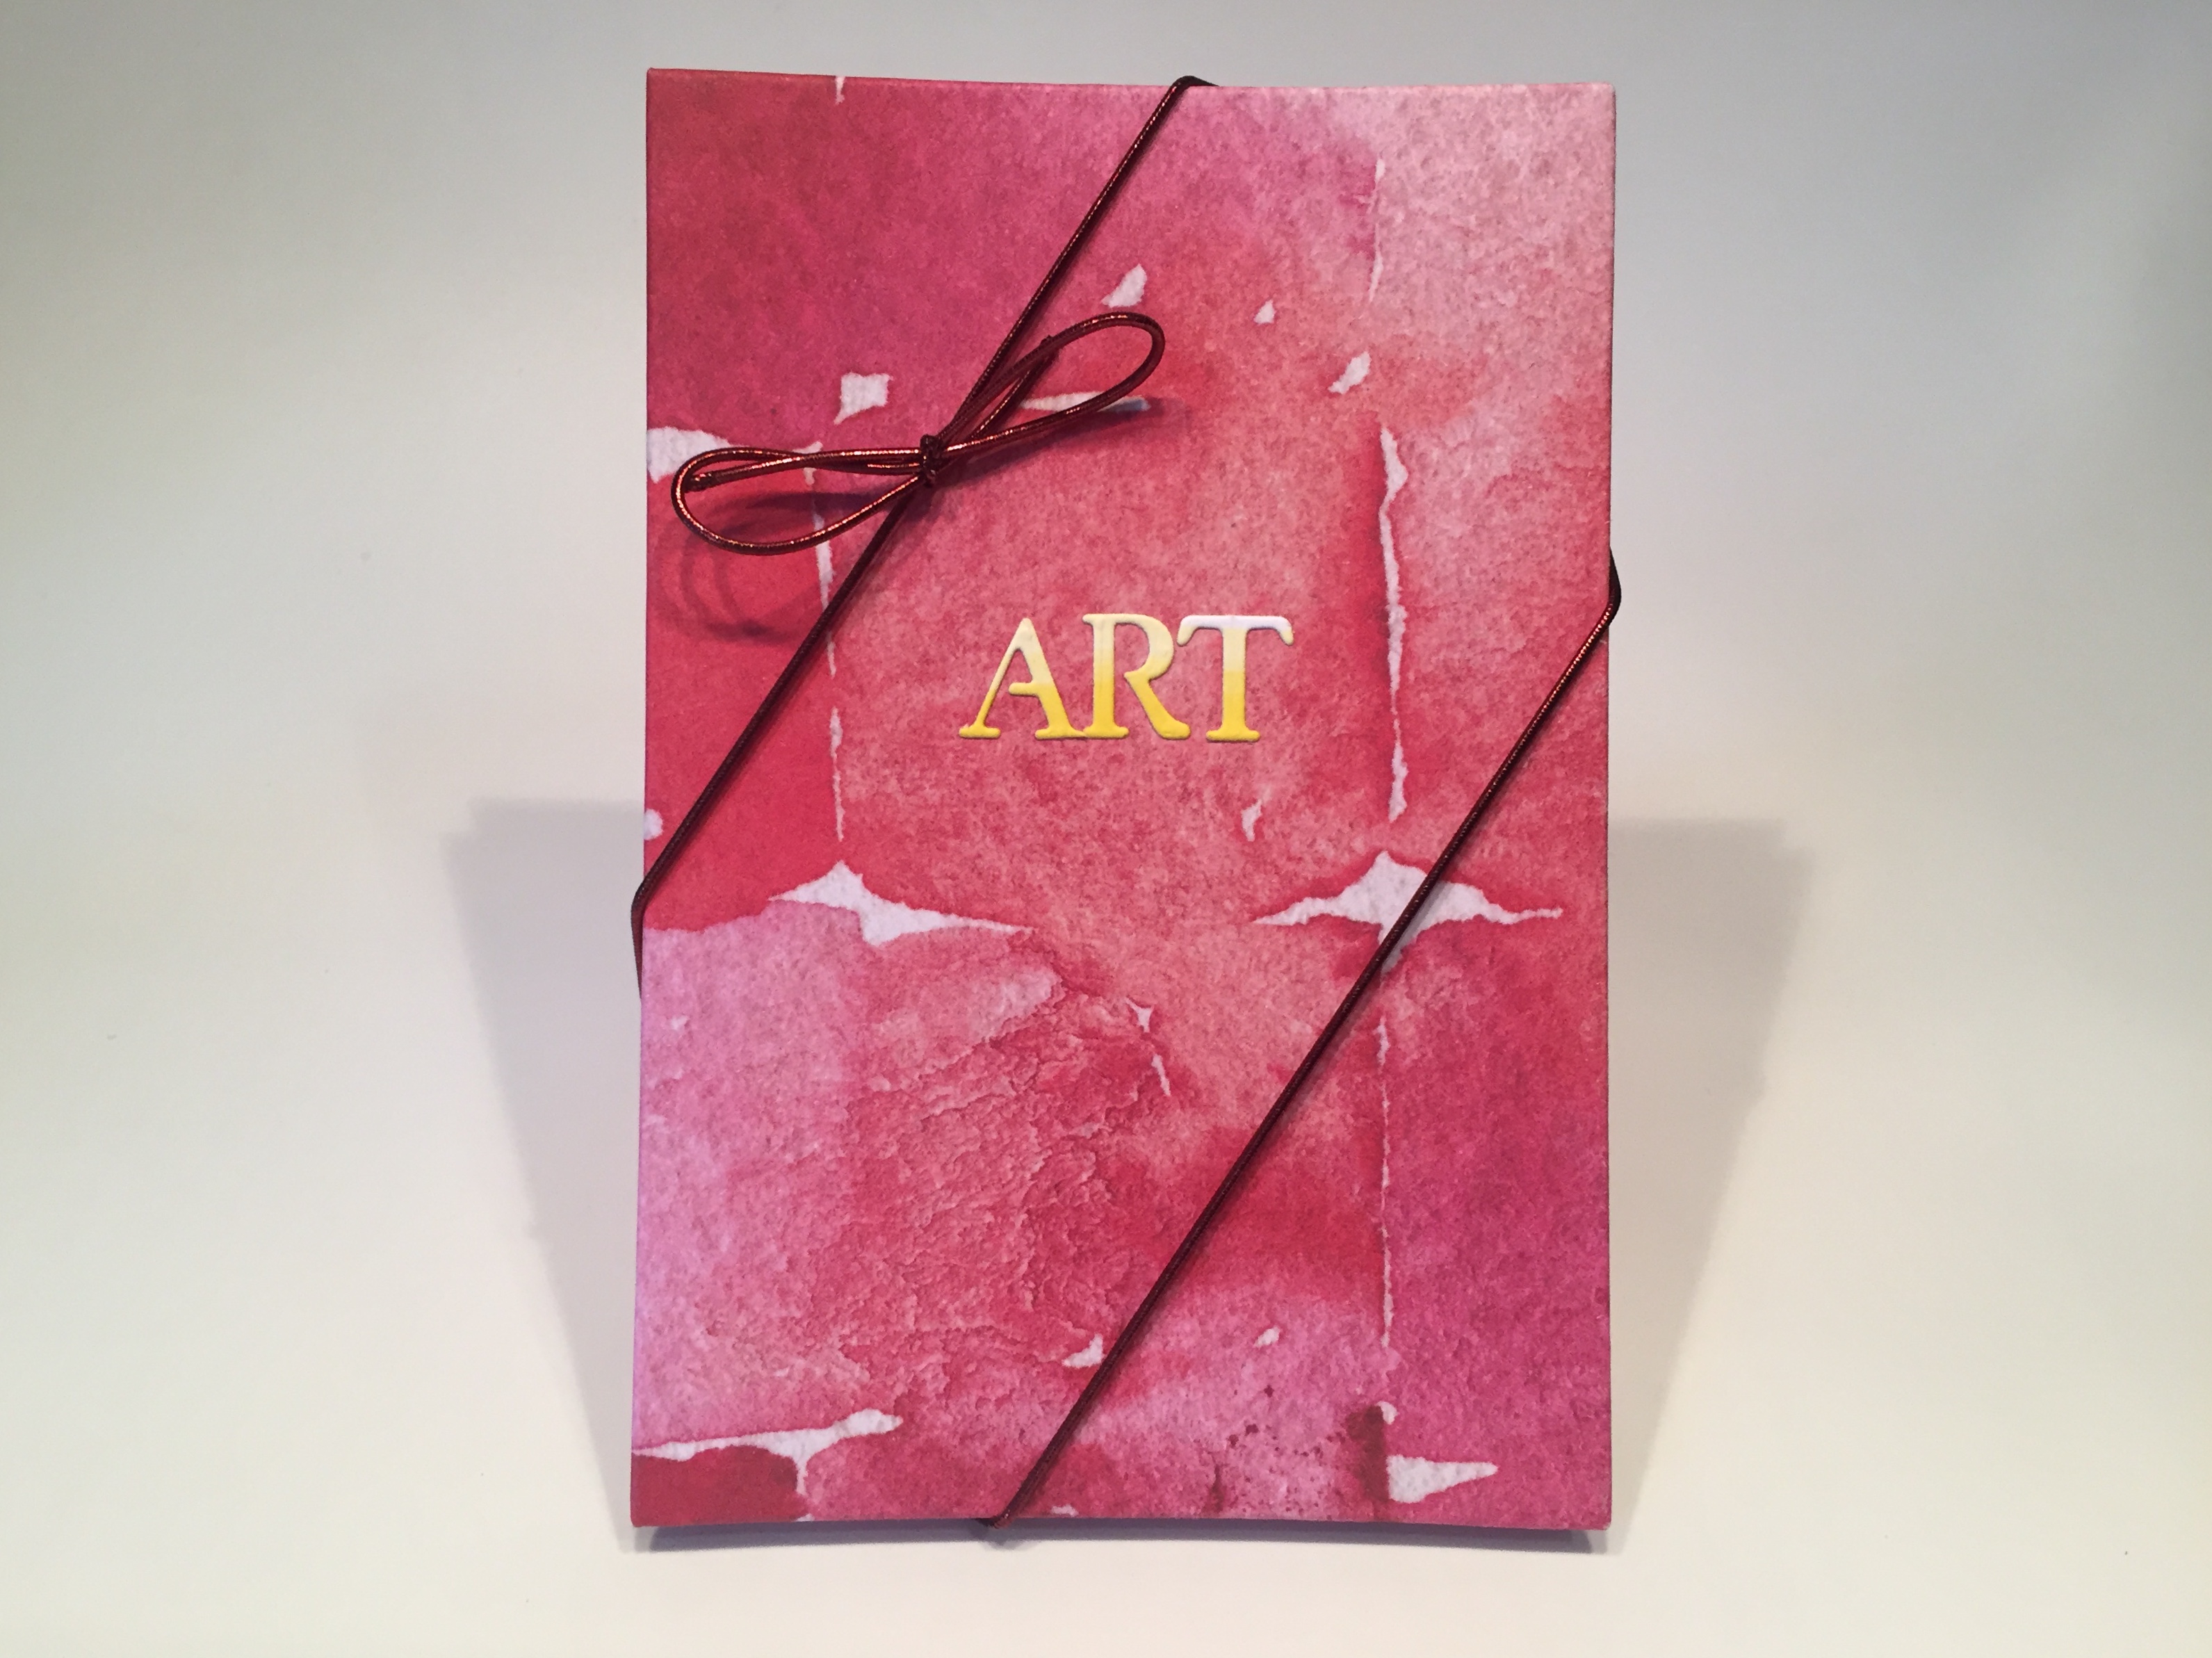
That’s my 10 cards inspired by the Love From Lizi October 2020 Card Kit but there is MORE! My first idea was to make some kind of an art journal using the chipboard pieces for the cover. I looked through my stash for some appropriate art paper to use in the journal and came across a large pad of Strathmore 140# cold press watercolor paper in a 15″ x 22″ pad… That gave me the idea to make an accordion watercolor art journal!

I was going to use the pattern paper from the back of the 2″ x 2″ cut apart sheet, but I had unfortunately cut out one of the tiles (Bake Someone Happy) and that prevented me from using that pattern paper in the right orientation. So I grabbed a piece of pattern paper from my stash for this journal. I cut the pattern paper to 5″ x 7″ so I would have a half of an inch to wrap around the edges.
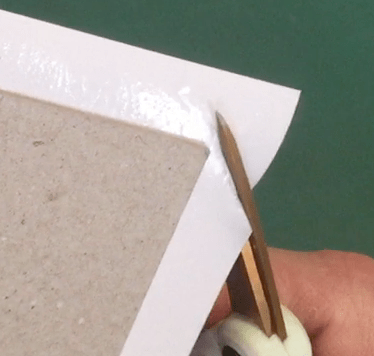
I took some Aileens Tacky Glue and thinned it down with a little water to a thickness that was easy to spread with a brush. I used a damp stamp cleaner to wet down the front of the pattern paper (helps the glue soak into the paper) and brushed the glue all over the back of the pattern paper. I centered the chipboard piece on the pattern paper and pressed it down. Then I trimmed away the corners. When you trim your corners, you want to stay about an eighth of an inch away from the corner of the chipboard. That will help cover the corners of the chipboard without things getting bulky and wrinkly!

Once your corners are mitered, fold over the flaps on opposite sides and glue them to the back. Press them right up against the sides of the chipboard, and over to the back – try to keep them nice and tight and flat. When you have two sides secured, you can fold over the extra bit of card stock on each corner to cover the chipboard corners – I like to use my bone folder for that. Nice clean corners with little extra bulk! Then you can fold over and glue down the remaining two sides. I like to run my damp shammy over all of the pattern paper – front and back – it will remove any excess glue and help the paper absorb the glue as well. Repeat with another piece of chipboard and pattern paper for the back of the journal. Place those under a couple of heavy books and let them dry thoroughly.
I cut a piece of watercolor paper to 5.1/2″ x 22″ and set about dividing that up for the inside of our art journal. After a little calculating, I scored along the long edge every 3.1/2″. That gave me 6 panels. I did flip the watercolor paper over for each score, so it would fold in an accordion fashion. Then it was an easy matter of gluing the ends of the watercolor panels to the inside of our covers.

I die-cut the word art from a scrap of white card stock colored with my alcohol markers using an Alpha die set from the old LFL Oh, Baby kit and glued that to the front of my Journal. I LOVE THIS ART JOURNAL!!!! I am so surprised that this came together so quickly, and was relatively easy to construct! I just may send this off to Sandy Allnock! I know she loves her art journals and maybe she’ll like the handmade quality of this one too!
Now, Lizi mentioned in her Unboxing that she had done another kitchen/food kit a number of years ago… I remember precisely, because it was the first Love From Lizi Kit that I got to play with – the August 2017 kit. I actually made a little recipe book as an extra project with that kit… maybe that’s what gave Lizi the idea to encourage us to make recipe books with this kit! And she included supplies specifically for that project!

I wanted to rise to the challenge and make a recipe book using the supplies in this kit.


I used the other 2 pieces of chipboard for the front and back cover of this recipe book. I covered the outsides with the floral pattern paper and the insides with the pattern paper from the back of the 2×2 cut apart sheet. I didn’t wrap the card stock around the chipboard so I colored the edges of the chipboard with an alcohol marker. I glued the pattern papers to both side of the card stock in the same manner as the journal.
I made a little template for the holes in the covers and recipe cards (so they would all match) and punched them out with an eighth inch hole punch. I added grommets to the holes on the chipboard pieces and added some hole reinforcements to the back side of the recipe cards. Then I bound this with two lengths of the teal ribbon tied into bows in case you want to add, subtract or otherwise change the contents. I decorated the front with some ephemera pieces, and I think this is a truly lovely little recipe book. You could fill it out with 10 of your favorite recipes or you could ask the recipient to fill it out with 10 of THEIR favorite recipes and gift it back to you (or whoever they wish!) A re-gift-able gift! Now that’s conservation! I hope some of you try this for yourselves. It is truly rewarding!

That wraps up my 10 cards and two projects using the Love From Lizi October 2020 Card Kit! I enjoyed working with this kit a lot! We have a number of truly useful cards and a couple of terrific presents as well! I used a little bit of everything in this kit and a LOT of some things! This kit is still available on Lizi’s website… If I have managed to capture your imagination, or given you a new idea for some gifts, please use my links when you go shopping with Lizi! It helps support this site and it is always gratefully appreciated!
Love From Lizi: https://shrsl.com/1yyuw
LFL October 2020 Card Kit: https://shrsl.com/2inni
Thank you so much for sharing your time with me today. I know that there is so much vying for your time these days, and I am grateful when you turn your attention to my humble posts. Please Stay Safe, Wear a Mask, Avoid Crowds, Get your Flu Shot, Wash your hands, and take extra care of yourselves and your loved ones because this pandemic is NOT over…! Remember to Like me, List me, Pin me, Post me, Don’t forget to use an oven mitt… and as always I wish you Happy Crafting!

Hi Scott, I commented over on You Tube about how much I loved your cards and extra projects, but I was especially intrigued with your art journal–you explained things so well!
I used to make similar books for brides for the engagement photos I took, as well as friends who love to travel and/or as mini scrapbooks for a special events, pets, etc.
I think your collaboration with Scor-Pal would be perfect if you wanted to show how to make larger accordion books. I have used my Scor Board and scor-tape to make my projects–which have included accordion books up to 20 pages. Might be a great idea after your amazing box videos. 🙂 Thank you!!
LikeLike
Thanks Jennifer!!! Great Idea!
LikeLike