DISCLOSURE: This site contains some affiliate links to products. We may receive a commission for purchases made through these links. Thank you!!
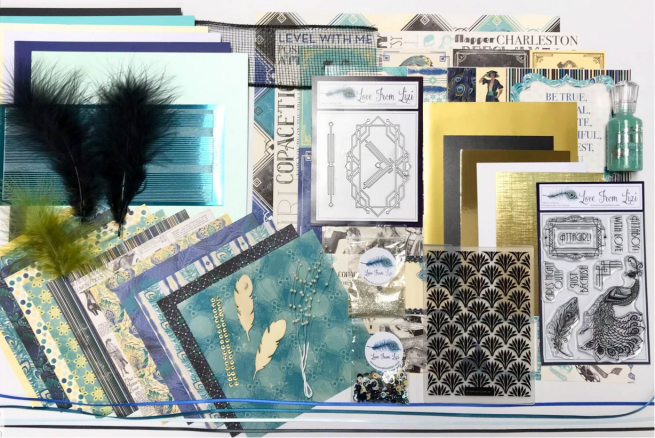
Hello Folks! Scott here with my 10 Cards 1 Kit post featuring the Love From Lizi May 2019 “Snap Happy” Card Kit. 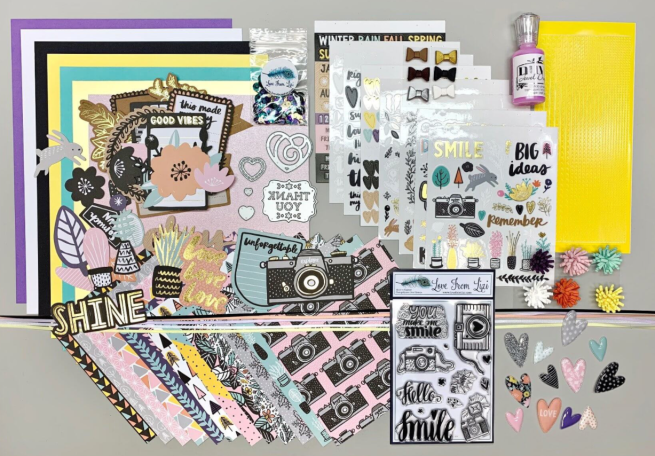 This kit is stuffed with such a huge assortment of stamps, papers, stickers, dies, ribbons, embellishments and ephemera that it kind of feels like a free-for-all! Almost any card imaginable can be assembled using the supplies in this kit! As usual, I did make my ten A2 card bases using the five sheets of colorful card stock included in this kit. Let’s play! If you’d like to follow along with the video, please click here: https://www.youtube.com/watch?v=cHWppFqOG3E
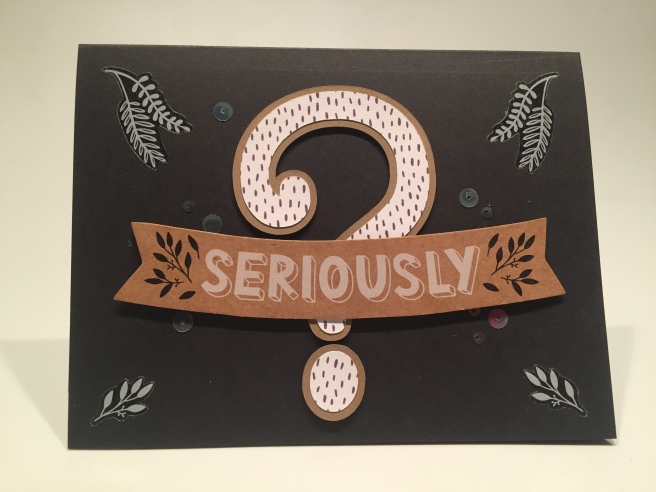
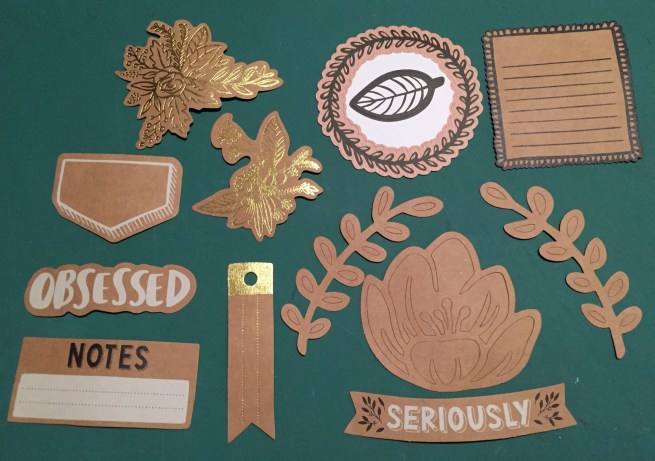
For some reason, I was hugely enamored with this “SERIOUSLY” kraft ephemera banner from our embellishment bag, so I decided to play with that piece on a black card base. I kept thinking of this sentiment as a question, so I turned to my Silhouette Portrait cutting machine to create this large question mark. This question mark is in the American Typewriter font, and I cut that from a piece of our pattern paper and cut a mat for that with some of my own kraft card stock. Both the question mark and the banner are mounted to the card base with foam tape and I added some of the white leafy stickers around the edges to echo the leaves on the banner. A sprinkling of the iridescent sequins from the sequin mix and I think that’s all we need! 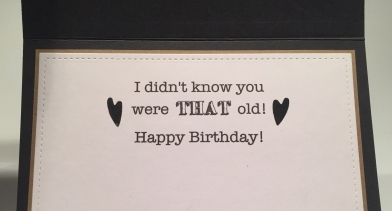 Naturally, I have a little more to say here and added this (kind of snarky) sentiment on the inside. I printed that using the American Typewriter and GrutchShaded fonts and cut the white card stock panel with a Lawn Fawn Stitched Rectangle Die and matted that on a piece of my kraft card stock before adding to the inside of my card. I’m getting to that age were so many people make well intentioned comments like this (me being one of them!) that I though this was a very useful Birthday card to have on hand!
I really liked the kraft ephemera pieces in this kit and thought they were rather unique!
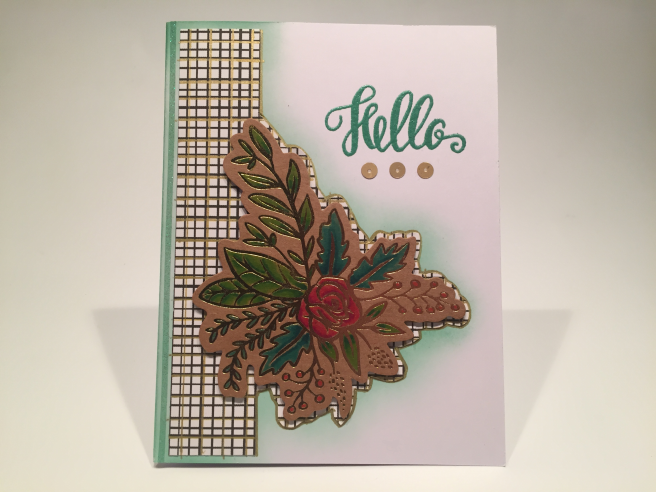
I knew that you could color on kraft with colored pencils, but I thought I would try coloring this arrangement with my Stabilo markers. They worked really very nicely! I was even able to get a little color blending on this card stock! After coloring, I temporarily taped that piece to the grid pattern paper and cut a mask for this bouquet with a card-sized rectangular anchor on the left. Since the Kraft piece had gold foiling, I decided to add some gold stripes to the pattern paper with an extra-fine tip Metallic Gold Sharpie marker – every other line seemed sufficient, and created a bit of a plaid feel too!
I took a white card base, placed the bouquet and mat in the proper place BEHIND the card front, and put them on my light board to show me their positions so I could blend a little halo of Lucky Clover Distress Oxide ink in the proper shape on the card front. Of course I used one of my small Life Changing Cheap-o Brushes for the blending, and I was totally thrilled with the result! I glued the pattern paper mat to the card front, added the bouquet with foam tape, and used VersaMark ink to emboss the “Hello” stamp with LFL Emerald City embossing Powder. Three gold sequins under the sentiment and a peel off strip of Clear Iridescent Mint down the left side, compliment the gold foiling. Lots of shine on this pretty rose “Hello” card!
I was looking for a die in my stash that might work with the “You make me smile” stamp, and when I discovered this speech bubble die fit perfectly, that’s what inspired this card.
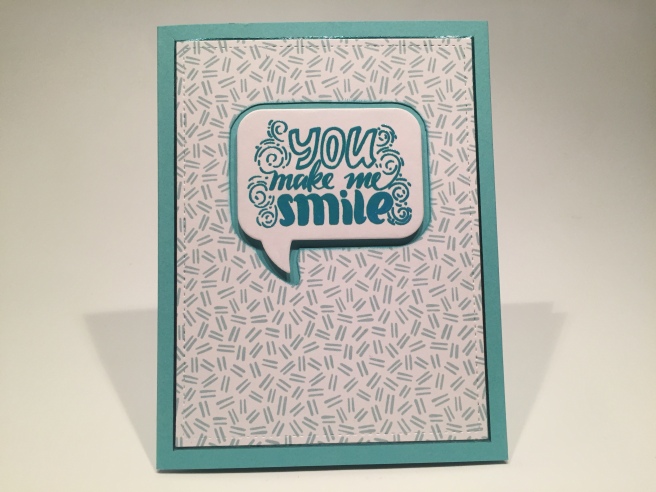
This is a Darice ‘Quotes’ Word Bubble die and since it is a solid die (not open in the center) I die cut a piece of white card stock, and then stamped the sentiment on the already cut piece. That is stamped in Peacock Feathers Distress Oxide ink and embossed with Clear embossing powder. I thought that ink was a good match for this pattern paper – close to the same value, but a touch darker to pull your focus. I cut the pattern paper with a LFSRD and was looking for matching card stock to create a mat behind the sentiment, when I realized I could make a ‘negative mat’ with the Teal card base. I traced the outline of the die on the pattern paper and cut that out with my craft knife. I sponged a touch of the Peacock Feathers Distress Oxide ink around the cut edges of the pattern paper speech bubble, and glued that flat to my card base. I outlined the pattern paper with some thin Teal Mirror peel offs and added the sentiment bubble to the card front with foam tape. 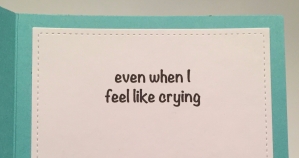 I did want to expand on this sentiment a little bit, so, on the inside writing surface (cut with a LFSRD) I added “even when I feel like crying” (Noteworthy font). I think that makes this feel much more personal than the smile sentiment alone… after all… puppies make me smile…!!! And I really like that “negative mat” idea – it certainly guarantees that your mat is a perfect match for your card base! Clean and Simple and Touching!
I think my favorite stamp in this set is the cute instamatic camera with the long strap. You can almost picture one of those 4-way ‘flash cubes’ sitting on top of it!
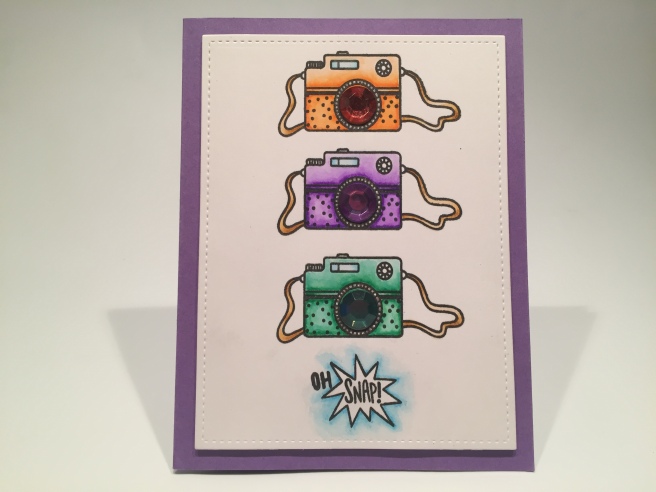
I thought a trio of those cameras in secondary colors would compliment the Violet card base quite nicely! I stamped the cameras with VersaFine Onyx Black ink on Bristol smooth card stock using my MISTI to get perfect alignment and even spacing. Since my Stabilo markers were still out, I grabbed my paintbrush and an orange, violet and green marker and colored all 3 of the cameras. I used a tan marker on the straps and a touch of light blue in the viewfinder. The “Oh SNAP!” sentiment is stamped on the bottom of the die-cut card front (LFSRD) with more of the light blue marker highlighting the ‘snap’. I attached the card front to the Violet card base with foam tape, and used my Stardust Glitter gel pen on the little dots around the lenses. That made me think of some gems I had in my stash that I thought might fit these lenses, so I excavated a green and violet round gem out of my stash (really old, cheap, Oriental Trading Company gems!) but I didn’t have an orange one… No problem! I simply colored a clear gem with an orange alcohol marker – simple solution! Those gems fit the lenses almost perfectly and add a BIG touch of bling to yet another Clean and Simple card! This card has many possible uses!
Violet and yellow are complimentary colors so I wanted to use our new Sunshine Yellow Sway peel offs on the other violet card base. And I do have that new Lemon Zest Party embossing powder from Lizi… I did an experiment embossing the “Smile” stamp with that Lemon Zest on a piece of my own violet card stock and this is what became of that.
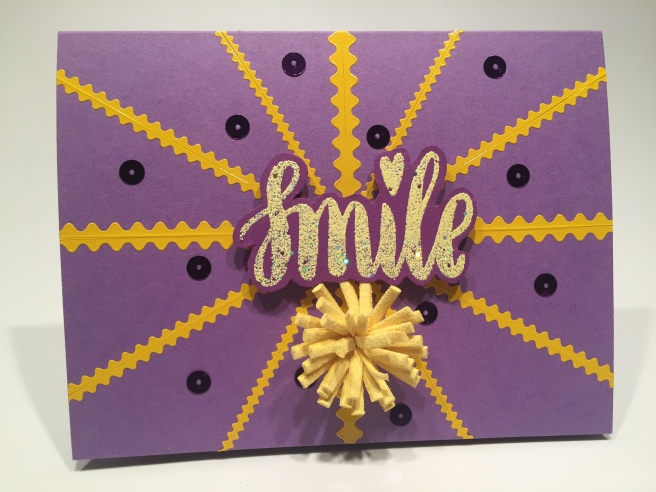
On the violet card base, I created a sunburst of the SWAY peel offs using a Gentleman Crafters oval grid with twelve sections template to get the alignment just right. I used all three widths of the peel offs and butted their flat edges together to make the ‘rays’. I fussy cut my embossed “Smile” and added that to the center of the burst with foam tape, scattered a number of the violet sequins around and added one of the faux leather (fleather??) pom-poms beneath the sentiment. The pom-pom echoes the sunburst and, while this picture of the embossing powder is a little spotty looking, all those dots are the holographic sparkles in the powder! I got one or two too shine for you here! 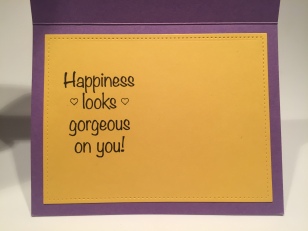 I also seemed to remember a Love From Lizi sentiment stamp that would go along with this card beautifully! The “Happiness looks gorgeous on you!” stamp is from the LFL June ’18 Makers Gonna Make stamp set. Stamped with Onyx Black ink on some yellow card stock from my stash (cut with a LFSRD) and attached to the inside completes this sentiment perfectly and reinforces the violet / yellow color theme with this card. Surprisingly, that yellow card stock is a great match for the Sunshine Yellow peel offs!
Well, that covers the four sentiments in the stamp set… Are you ready for some puns?
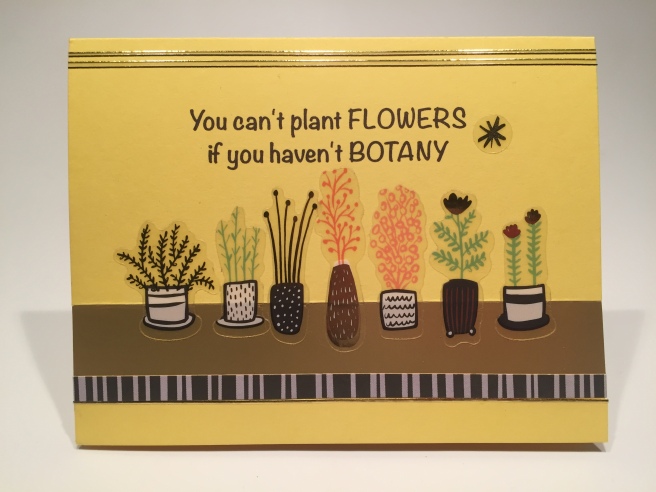
This pun tickles me completely! I fashioned my little ‘tabletop’ from a 1″ strip of the Satin Gold Mirror specialty card stock, and a 1/4″ strip of the striped pattern paper. At first, I just glued that strip right on top of the Sunshine Yellow card base, but soon realized that the plant stickers would have a big crease on them at the seam if the card stocks were different layers. So I cut away the yellow card front behind the strips, and ‘inlaid’ the tabletop strip between the remaining pieces of the card base. That helps make the transition for the plant stickers much smoother between the ‘tabletop’ and the card base. The sentiment is printed on the card front using the Noteworthy font, and I added some Clear Gold Mirror peel offs across the top and at the bottom of the ‘table’. 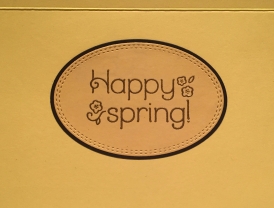 I though this was a great idea for a Spring card, and knew I had this “Happy Spring” stamp from my days as a Paper Pumpkin subscriber – this stamp is from the April 2016 Paper Pumpkin kit. I embossed that stamp on some of my yellow card stock using the LFL Golden Crown embossing powder, die cut the stamp and a black mat with the Gina K. Stitched Oval dies and added that to the inside of the card. I think this is a terrific pun and goes so well with all of those plant stickers – which also happen to have gold foil accents! Lots of gold bling on this card!
I did a little experimenting with the “THANK YOU” die from our kit, and, because the “THANK YOU” lettering is in ‘stencil’ form, I decided that’s how I should use it!
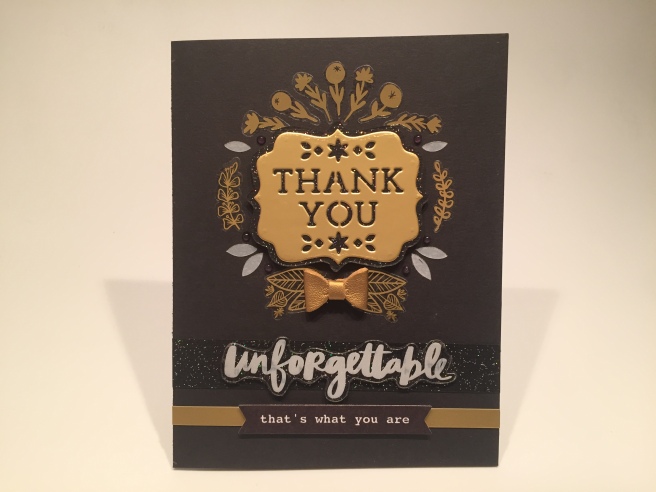
I cut the die from our Satin Gold Mirror specialty card stock, traced the outline of the die on a piece of my black glitter card stock, cut that out, and glued the two together for the big “THANK YOU” on this Black card base. I did send some time working out this sticker 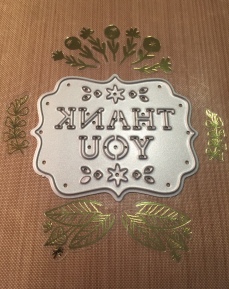 arrangement of the gold foil flowers by using my non-stick craft mat and the die itself. I could move the stickers around and not worry that they would permanently fix themselves to the craft mat. I made a couple of slight adjustments transferring this design to my card front, but this exercise gave me a really good template to follow! I attached the die-cut to the card base with foam tape and arranged the foil stickers around it.
I was itching to use this “unforgettable” sticker and figured that it went well with a thank you card, so I attached the white sticker to more black glitter card stock from my stash, and fussy cut that out following the cut lines of the sticker. I added a 5/8″ strip of my black glitter card stock across the card front and foam taped the fussy-cut sticker on top of that strip. I HAD to complete that (lyric) sentiment so I printed the “that’s what you are” using the Courier font on some white card stock, die-cut that with my new Lawn Fawn Everyday Sentiment die, foam taped that to a 1/4″ strip of the Satin Gold specialty card stock and glued that to the card front under the “unforgettable” sticker. I needed to add a little more white to this card front to balance out the unforgettable sentiment, so I added some white leaf stickers to my floral arrangement. I added some of the Honeysuckle Jewel drops among the flowers (if you use these translucent Nuvo Drops on black, they don’t look pink at all!!) for a little more shine, and finished out this card with the faux leather (fleather?) bow in gold. It fits perfectly between those two leaf bunches! Another super shiny, sparkly card… this time in black!
When I saw the ‘calendar’ stickers in our sticker pack, I knew this card was in my future!
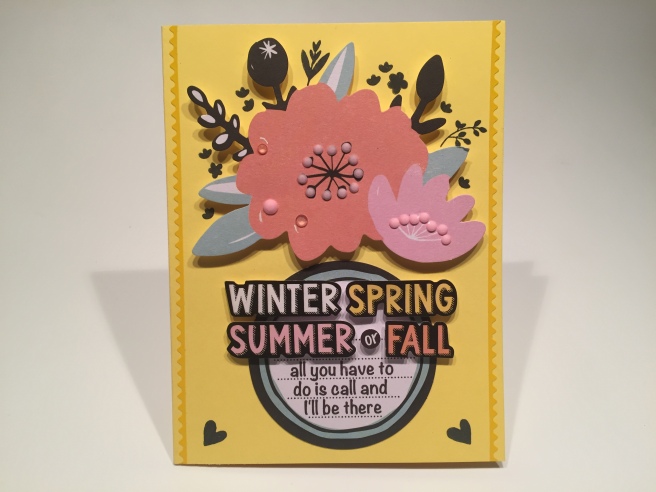
Another lyrical sentiment for us! I fiddled around with my Silhouette software for a while to get this sentiment sized and spaced correctly so I could print it on this round ephemera piece using the Noteworthy font again. I also printed the little “or” on some scrap white card stock and punched it out with a standard hole punch. On the Sunshine Yellow card base, I glued the printed ephemera circle to the bottom and used foam tape to attach the season stickers and the ‘or’ circle to complete this sentiment. I attached the large flower ephemera piece to the card front with foam tape and used Black Soot Distress Oxide Ink to stamp all the small foliage stamps around the edges, and the two hears in the bottom corners. 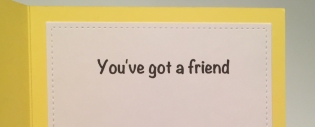 Knowing that the Nuvo Drops in our kit don’t show their color on black, I reached for my Studio Katia Cupid’s Kiss crystals for the glittery accents on the flowers. Since the dots on the pink flower were so close, I didn’t want to risk the Nuvo drops running together, so I used the jewels on the pink flower as well. A couple of the medium peel offs down the sides of this card front and a final finishing sentiment on the inside and we have a lovely friendship card good for any season of the year!
When I saw that camera stamp with the “flash” I knew I was going to have to do another light-up interactive card this month! Here’s all my pieces:
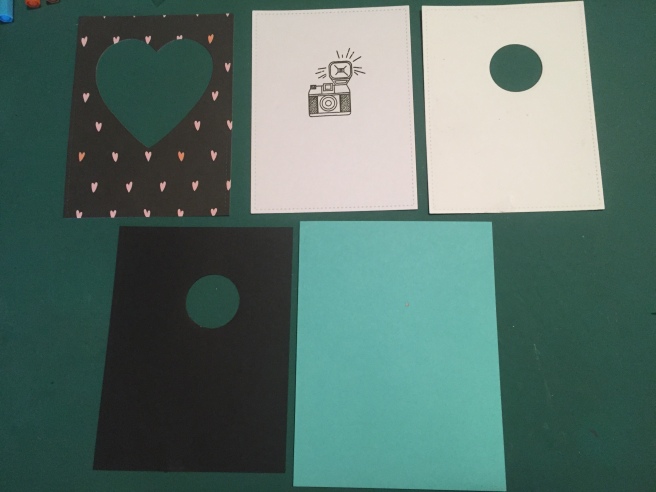
The top three pieces are all cut with the 5″ x 3-3/4″ Lawn Fawn Stitched Rectangle die. I die cut the heart in the pattern paper using a Darice nesting hearts die. I stacked the pattern paper and the second sheet (bristol smooth card stock) on top of each other to get the placement for the camera stamp and stamped that with Onyx Black ink. I cut a tiny hole through the center of the ‘flash’, stacked the two white card pieces together, marked the hole on the third piece then die-cut a circle centered on that hole on that third piece of card stock. The black piece is cut to 5-1/4″ x 4″ (for a thin mat) and I lined up the circle die on that piece as well, and cut it out. The last piece here is the Teal card base.
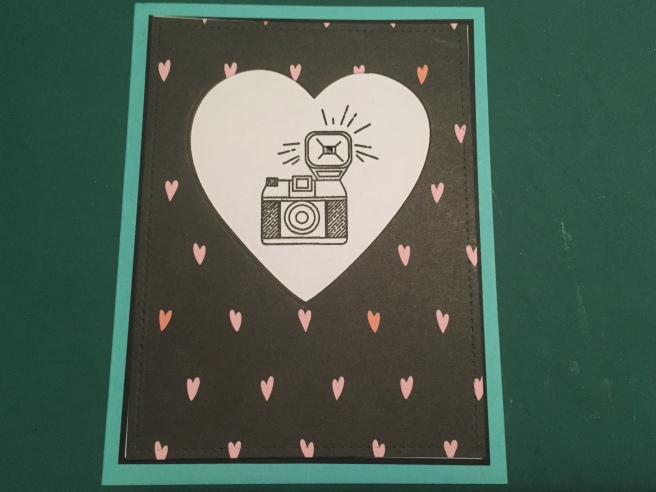
Stacked together, all these pieces make up the card front. I did the circle die-cuts so any light bleed would create a halo of light around the flash. Of course the 140# Bristol smooth card stock doesn’t let much light through anyway… If I did this again, I would use a lighter-weight card stock for the camera image. Here’s a short wiring video if you are interested in seeing how I wired the Chibi light for this card:
Of course I marked the little flash hole on the card base and placed the Chibi light right on top of that spot. I determined placement for the switch by arranging the puffy hears on the front of the card knowing that I wanted to press the right heart to make the light operate. I was actually able to stamp the “press” (from the MFT Interactive labels stamp set) on the pink heart using Archival Black ink… fairly successful stamp there, but I did have to go in and re-ink that word with a fine point Sharpie!
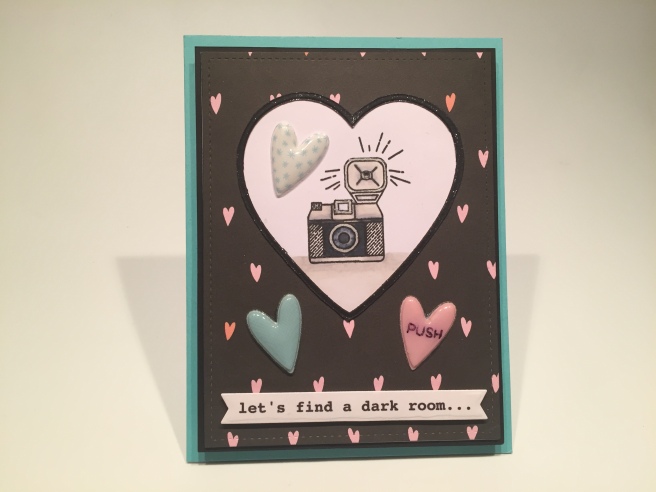
Here’s the card all put together. I colored the camera using grey and blue-grey Spectrum Noir alcohol markers, and glued a small clear crystal from the Studio Katia mix right on the top of the hole in the middle of the flash. I did hand cut the heart frame by outlining the edge of the heart die on another die-cut piece of the black glitter card stock. I printed the sentiment (Courier font) on a scrap of white card stock and die cut it with my Lawn Fawn Everyday Sentiment die. 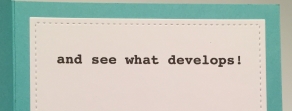 I glued the puffy hearts in place, and used foam tape to add the sentiment banner. Naturally there is more to this sentiment continued on the inside of this card. Pretty good camera sentiment I think! Great valentine for any shutterbug or photography enthusiast! Let’s see this card in action!
I love that the puffy heart is the “switch” – I’ll probably have to keep refreshing that PUSH instruction… at least until I give this card to someone! I hope I was able to shed a little more light on how I do these interactive light-up cards!
One camera stamp to go, and I will have used every stamp in this stamp set! WOO-HOO!
A fun interactive “congrats” pop-up card! Two pieces of white card stock cut at 4-1/4″ x 7-1/2″ and both scored at 5″ and 6″ to make two z-fold pieces. 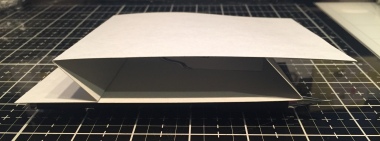 The z-fold is on the left of the front piece and on the right of the back piece. But we won’t glue them together till the end. I stamped the “PULL HERE” with Onyx Black ink (MFT interactive labels stamps) on both sides of the front piece, and then I covered the three panels and the sides of the two stamps with that fun black pattern paper. I stamped the camera on a piece of Bristol smooth card stock using VersaFine Onyx Black ink and embossed that with LFL Golden Crown embossing powder,
 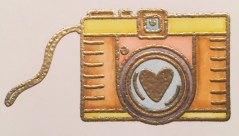 and reached for my Stabilo markers again to color this. I added the “enjoy this moment” gold foil sticker from our kit underneath the camera, fussy cut the top edge of the camera and then cut straight down the two sides about 3″ making a large square below the camera.
The “congrats” sentiment is cut (Lawn Fawn Scripty Congrats die) from the Satin Gold specialty card stock and some black fun foam, glued together and then glued down to the card front. To assemble, you want to score the bottom right corner of the cut-out stamp at 45 degrees and fold that triangular tab forward. Then you’ll glue the back of that tab to the Z fold on the left side of the back piece. In essence, when the card is closed, the camera tab is folded (camera hidden), and when the card is open, the camera tab is flat (camera showing). It’s fairly easy to line things up so you can see the whole camera and the sentiment when they’re popped up!
I did manage to film this card assembly, and I’m sure taking a look at my video will help explain this mechanism. It is really a very simple, yet effective pop-up technique! I think this is a terrifically fun card, and if you pop it open really fast, the camera “magically’ appears! There’s a link to my 10C1K video at the beginning and end of this post.
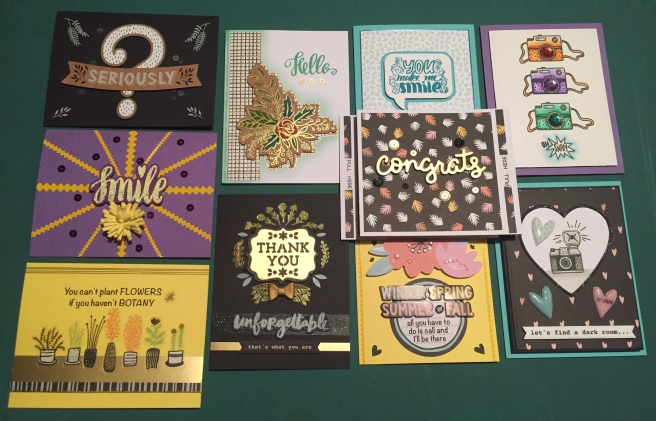
That’s my 10 cards using the Love From Lizi May 2019 “Snap Happy” Card Kit. As you can tell, I managed to create a wide variety of cards using this kit. From Birthday to Thank You, from Valentines to Friendship, from Hello to Congrats, this kit has so many options that you can create cards for almost ANY occasion! And as usual, I have gobs of supplies left over! I used a lot more stickers and ephemera than I thought I would, and pieces from about half of the pattern papers, and while I did manage to use all the stamps in the stamp set, I didn’t get around to using any ribbons or those four heart dies. SEE!? Even MORE options!! LOL!! As of posting, this kit is still available at Love From Lizi – If I’ve managed to ignite your imagination and you’d like to get in on the fun, please use my link when shopping at lovefromlizi.com: http://bit.ly/LFLlink.
I extend my deepest heartfelt thanks to all who follow me here (and everyone who take a look!) – I know your time is important, and I am honored that you choose to share some of that time with me! I strive to bring you some grins and giggles and a little unique inspiration every time I do another post! If you have any questions or comments just let me know! Please Pin me, Post me, Like me, List me, share this post with all your friends, don’t run with scissors… and HAPPY CRAFTING!
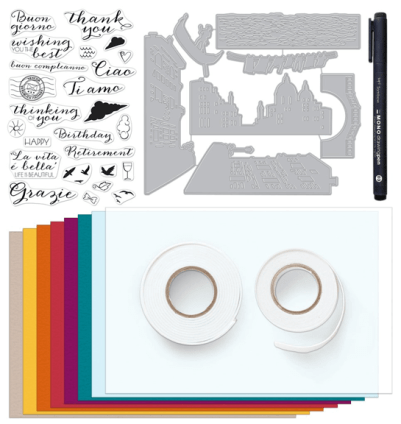 In addition to the fancy dies, we get a 4″ x 6″ stamp set featuring a number of Italian sentiments, some English sentiments (a few translations!) and an assortment of scene-building images – clouds, birds, a sun, some waves, a cancelled postmark, etc. We also get a collection of the new Hero Hues Premium Cardstock in Sand, Mustard, Pumpkin, Cherry, Plum, Adriatic, and Arctic colors – we get two 8.5″ x 5.5″ sheets of each color and two similar sheets of vellum. I’ve been itching to check out this card stock ever since Hero Arts released it, and I have to say it is extremely high quality and the colors are bright and vibrant! To round out our kit this month we get a Tombow Mono Drawing Pen in black, and two rolls of 1/2″ foam tape (2.2 yards) in two different thicknesses. Perfect additions for layering your die-cuts!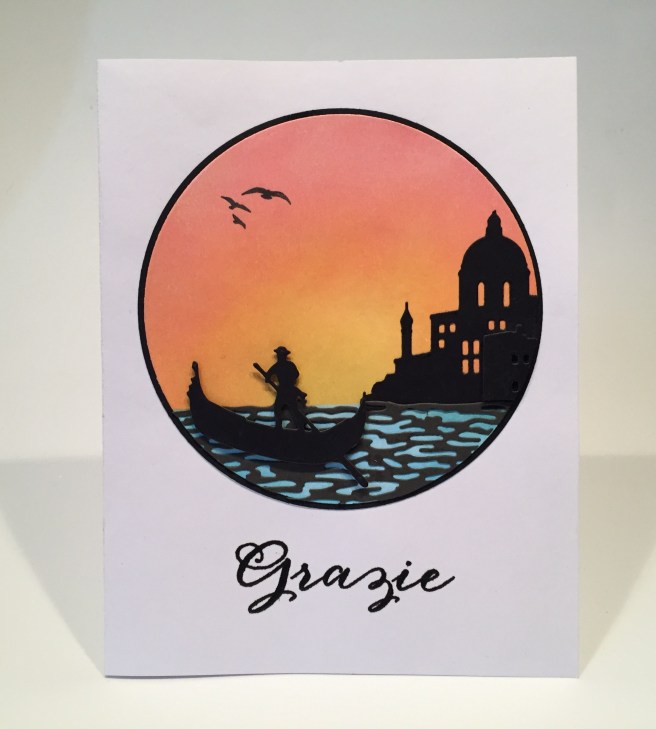

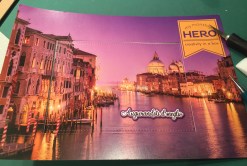 Now, I have been tempted many times, but I’ve never used the backing card images from our stamp and die set on one of my cards, but the photograph of Venice this month was SO beautiful that I couldn’t resist! Those domes on our ‘building’ die, are modeled after the church seen in this picture – the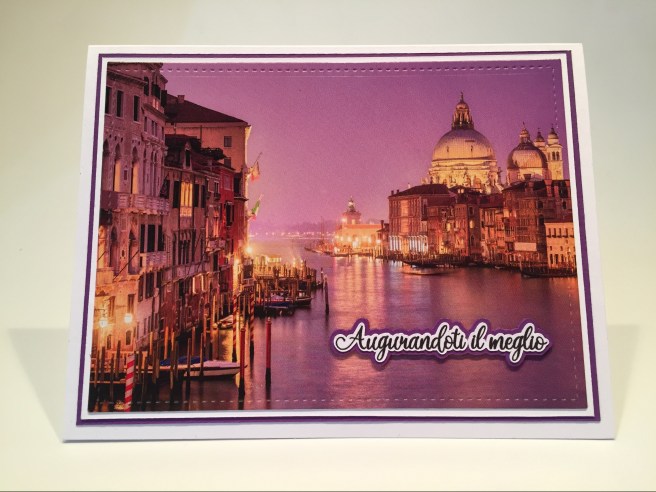
 Since we did a translation on my first card, I figured I would continue that concept here and turned to my

 I even managed to get a couple of those bow-tie pasta (farfalle) stamps on this card front as well! Yes, this printed sentiment is Italian for another one of our stamp set sentiments, so I simply stamped the ‘translation’ on the inside of the card! I think this makes a very effective retirement card – you don’t have to move to Venice for your retirement, but you can certainly travel there – or anywhere else! I really like this colorful ‘travel poster’!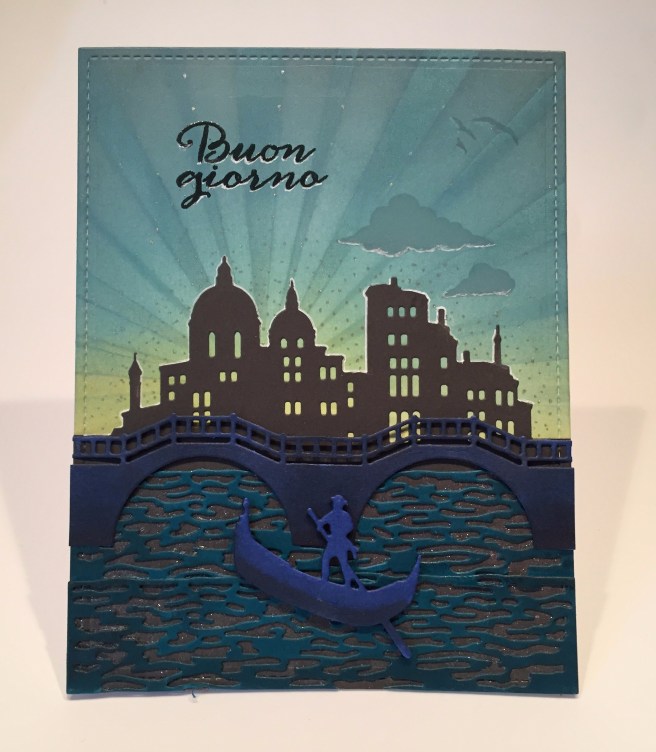
 A final sprinkling of dots using my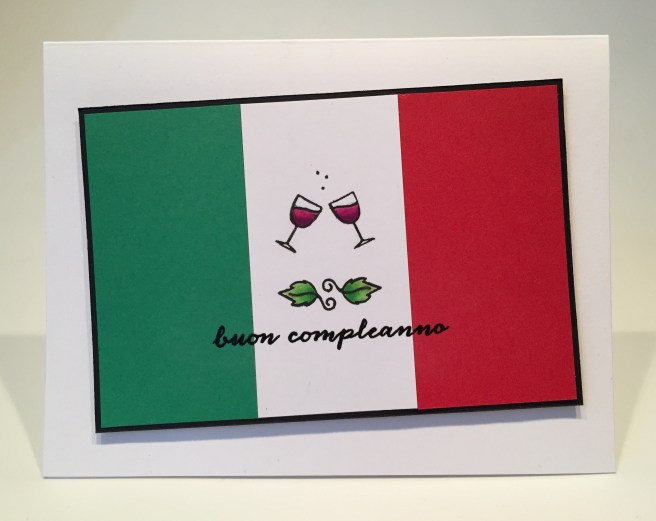
 The red wine echoes the red part of the flag, and the green leaves echo the green! Of course, I did add the “Happy Birthday” stamp on the inside (just in case!) and here we have a Birthday card that is right on theme without having to use any dies! A perfect card for an Italian or an Italophile!


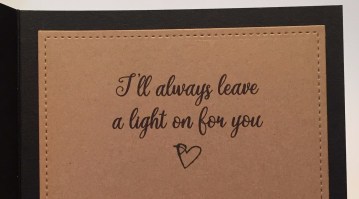 I think I am most pleased with this very simple yet surprisingly effective sentiment printed with the Arabella font on the inside of the card. I stamped the little sketched heart below my printed sentiment for a bit of a loving touch. I can think of many opportunities to use a card like this! I think this is SO SWEET!!
 Lizi is calling this the


 great set of painted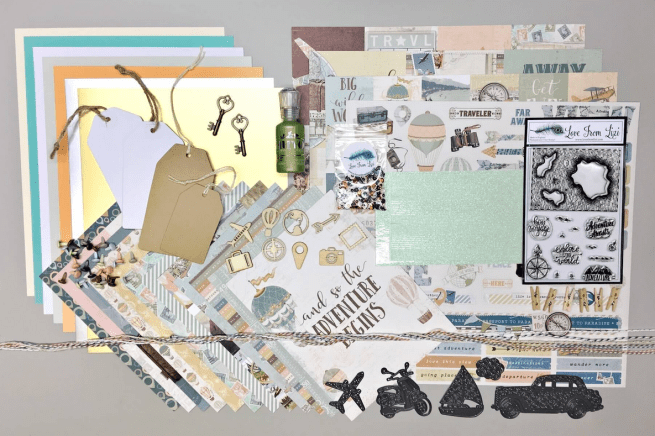

 generally give someone a card when they are going traveling – that’s something they are supposed to send to YOU
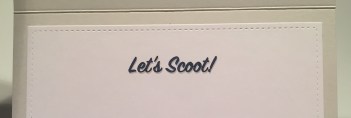 and Ariel fonts, and cut four shadow pieces and glued them all together for a thick chunky sentiment. I mounted the scooter and the sentiment to the card front with foam squares and, true to form, added another bit of a pun on the inside, turning this card into a simple, straight-forward invitation – I think “let’s scoot” is pretty self-explanatory! LOL!!
 I attached the balloons and the sentiment to the card front with foam squares, making sure the two left balloons went over the edges, trimmed their excesses away and added some sequins for a final touch of sparkle. There was also another sticker that went with this card perfectly, so I added that to the inside of the card. “GO FAR” is a great compliment here, making this a perfect graduation or encouragement card!
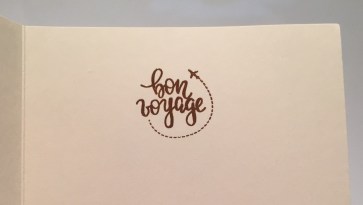 I thought the “bon voyage” stamp would work well with this card so I stamped and embossed it on the inside to match the sentiment on the front. This would be a good card to give to someone who is moving (over land or overseas..!) or maybe close friends about to take their first cruise… definitely some possibilities here! At first I thought I would be doing a lot of coloring on this map stamp, but after creating this treasure map, I can’t really imagine this stamp any other way! BONUS: A Very Masculine Card!
 Of course you have to open the card to get the whole sentiment -“You can’t control the wind • but you can trim the sail.” A perfect sentiment for a variety of occasions! I did glue the knot of the twine down to the card front, and added a few Nuvo drops for a little bit of shine. I have to admit, I really like that sailboat die!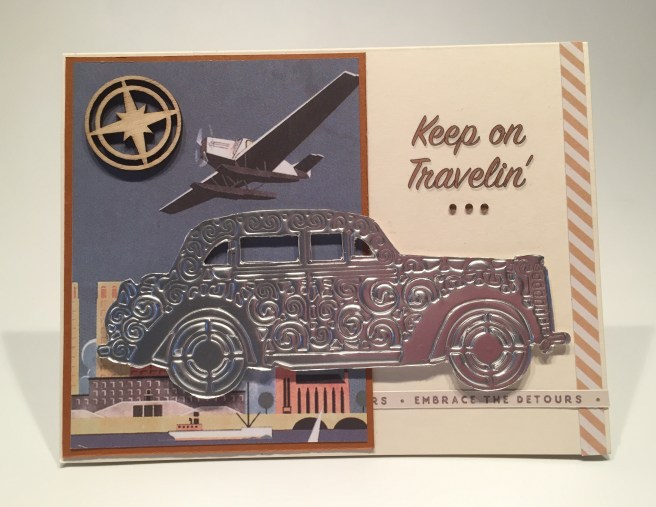
 I can see using this card for retired friends who spend 6 months of every year cruising around in their RV, or any truly devoted traveler!
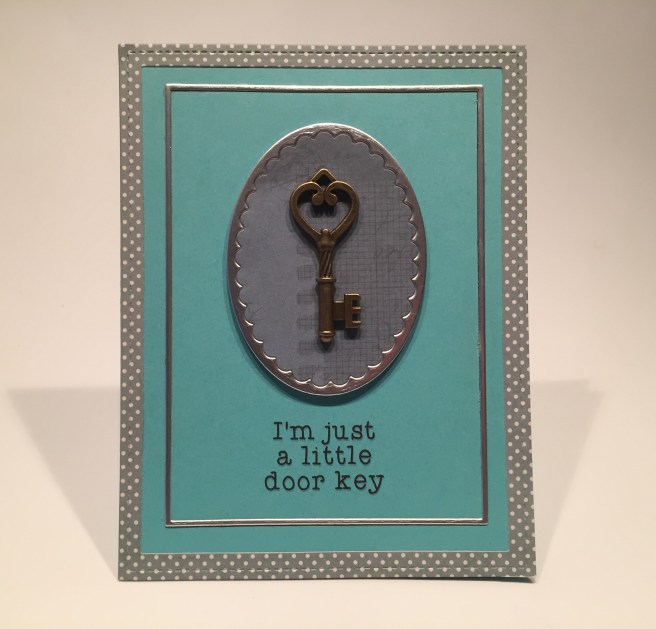
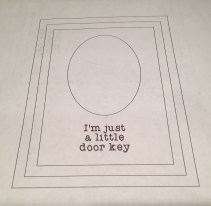 I used my Silhouette Software to figure out where to print this pun-y sentiment – that is truly one of my favorite things about using that (free) software – you can lay out your whole card and figure out exactly where your sentiment can get printed on your card front! This sentiment is printed on the Aqua card base using the
 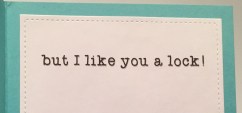 I glued the square frames directly to the card front, mounted the oval frame and background to the card front with some fun foam, and glued the key to the middle of the oval with my


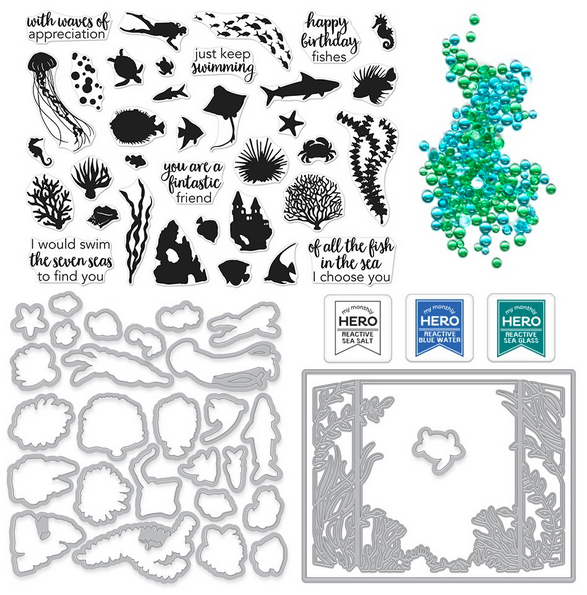
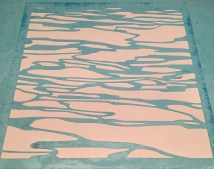 watery effects, I thought a stencil would help, so I turned to my Silhouette Portrait and created this water ripple design which I then cut from some
 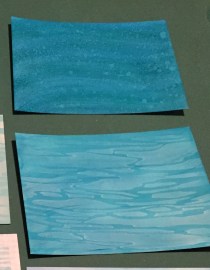 inks (Stonewashed, Sailboat Blue, Stream) blended on yupo paper, and the bottom one is topped off with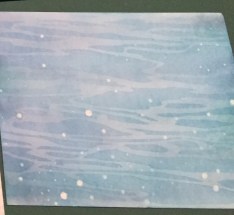
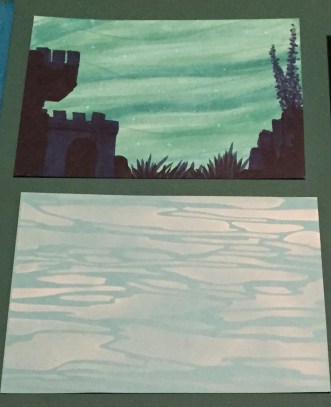

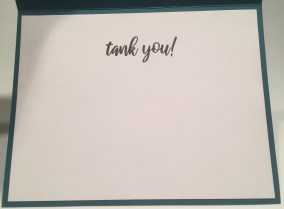 I added thin strips of foam tape behind the aquarium frame before mounting to the card front – that dimension adds a lot to the overall effect!! A few blue and green droplets complete the scene and I couldn’t resist adding to this sentiment with a nice “tank you!” on the inside of the card. I printed that on the writing surface using the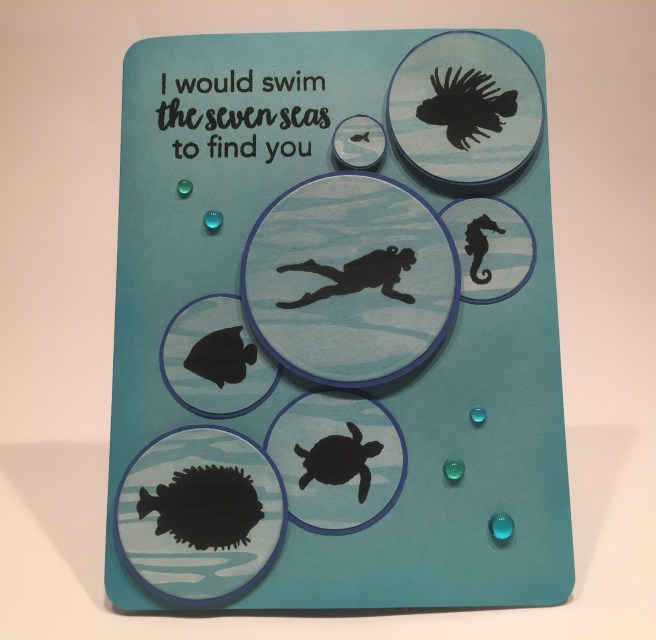
 I added more of the droplets for a little accent of color and shine. Once again, I wasn’t satisfied with this sentiment all on it’s own, so I added “if there weren’t sharks!” on the inside of the card and highlighted that sentiment with an embossed shark stamp! LOL! I think that’s funny! The block letters are the Arial font and the Rustila font is used to replicate the handwriting font in the Stamp set. I like this idea a great deal even if nobody ever notices that there are seven ‘bubbles’… LOL!!

 I did create a little cake template to assist with my stamping, and used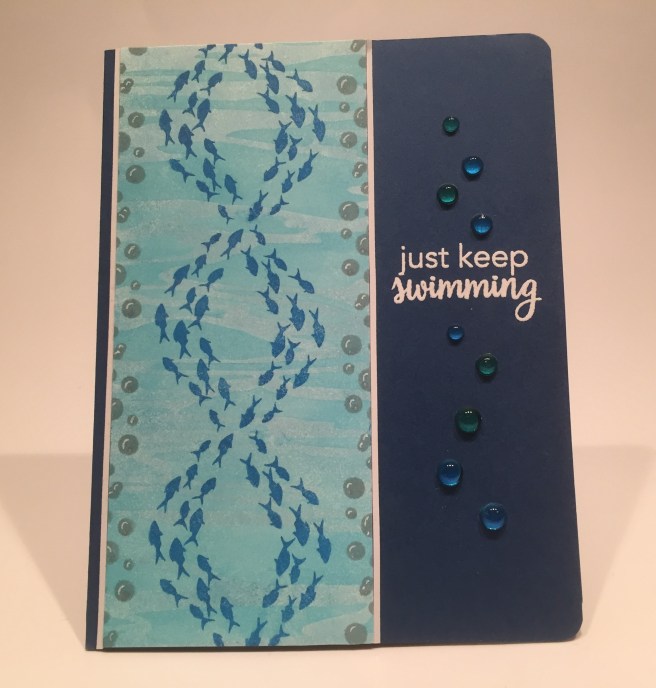
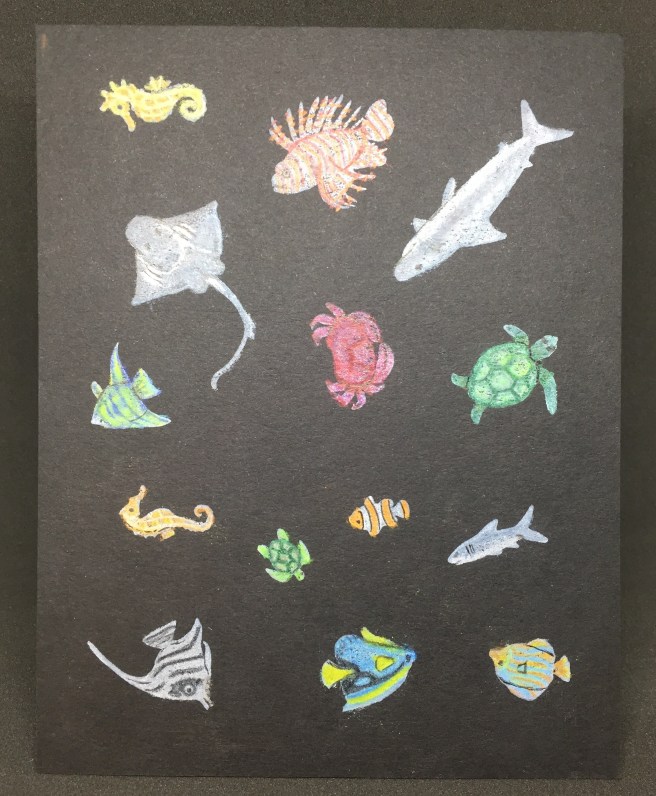

 Of course I have more to say here too!!! LOL! A GREAT pun is all set to be had – I couldn’t stop myself! “you’re a reel catch!” seems almost too perfect! LOL! I love the fact that I’ve got one of the ugliest fish imaginable as the ‘chosen one’… LOL!! Makes me giggle!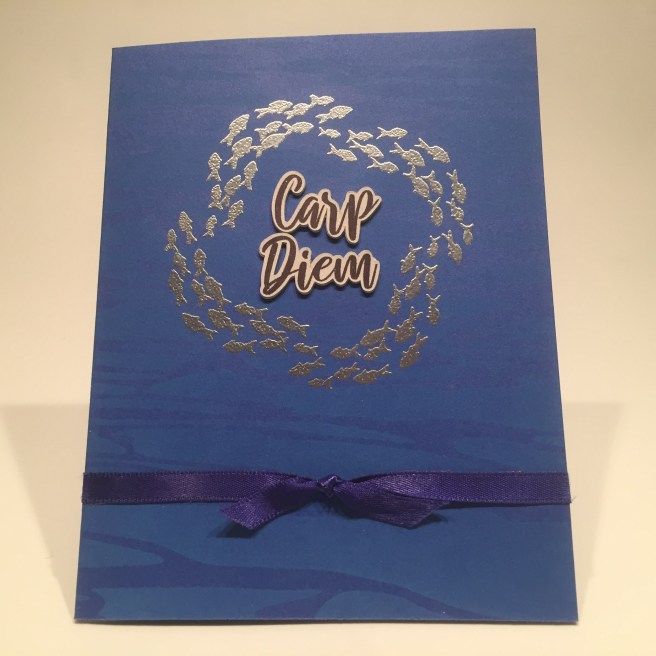
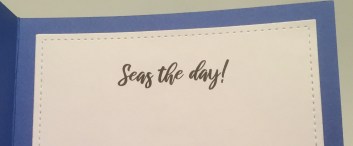 kit matches perfectly. Of course I can’t stop myself, and have more for the inside of this card! “Seas the Day!” really drives it home, huh? LOLOL! I don’t know… maybe I have some kind of a pun disease… do I need a punectomy?? I think this card is terrific fun! Fairly simple, yet highly effective!

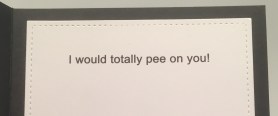 front. The ellipsis indicates more to come, and of course I have to finish this off with “I would totally pee on you!” on the inside. That’s a totally unique friendship / love card if I do say so myself!! LOL! I MUST HAVE A PROBLEM! LOLOLOL!! Oh, my goodness!
 inside of the card: “anemones closer!” OH BABY! Now THAT makes me laugh out loud! Now the three clownfish looking at all the rest of the fish makes perfect sense! I think this is a terrific pun, and so very appropriate! Another unique friendship card! I think I may have broken the all-time pun record with these cards! I guess I do need some professional help! LOL!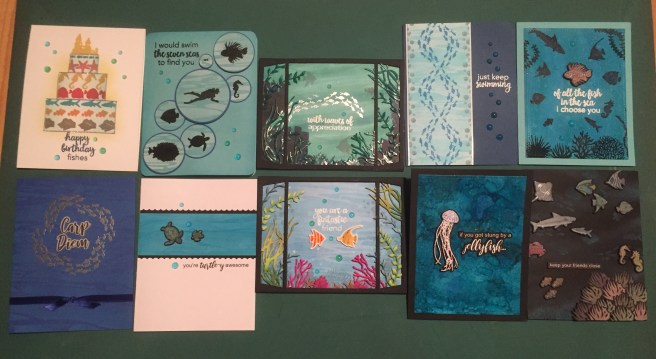


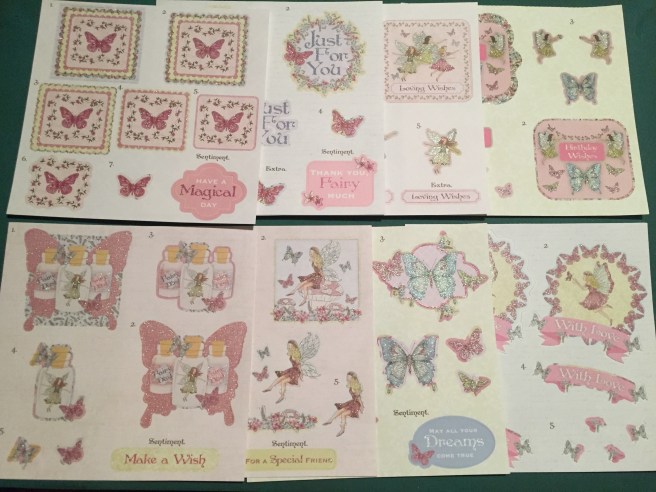
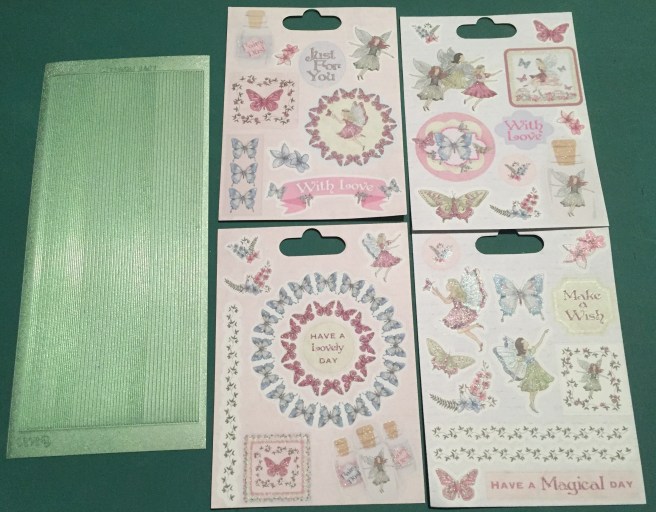
 Powder Pink Party powder before foam taping the sentiment from the decoupage sheet over the pink stripe. A couple of flower stickers from the kit on the top corners adds a finishing touch and I love being able to see the sentiment on the inside of the card! I did add the matching sticker on the inside as well, so the sentiment wouldn’t feel lonely when the card is opened! LOL! Okay, now, that’s pretty darn pink, but I think it makes for a very attractive card! This is a good example of how versatile those decoupage sheets actually are – you can use all the layers or some of the layers – however you would like!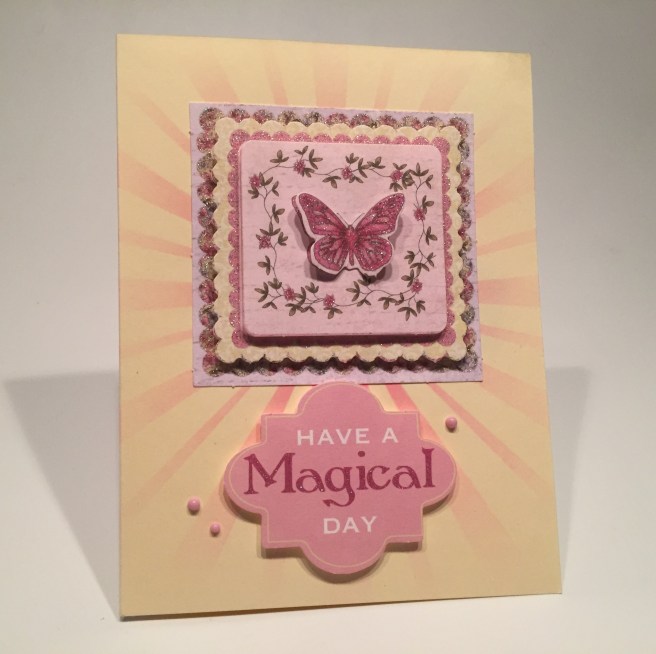
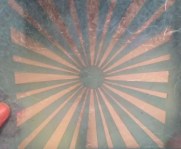 some
some  I did fall victim to the new “Life Changing Blender Brushes” set that seems to be all the rage these days. HOWEVER, I opted for the
 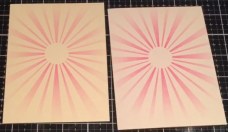 Fence Studios brush set but I can’t imagine them working any better than this inexpensive set! Now here’s a background that really focuses on that great decoupage layering. This first card is layers 1, 3, 5, and 7 from the sheet and this second card is done on a piece of my
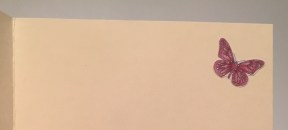 insides for my final touches, and VOILA! Two cards with three layers of decoupage on both! I can only image how thick a card would be if it was made with all seven layers included on this sheet! I’m sure that card would require a box for mailing!! We are still working with a lot of pink here… and I can’t seem to get away from those butterflies, but these are both very handsome (and very pink) cards!
 Moondust peel offs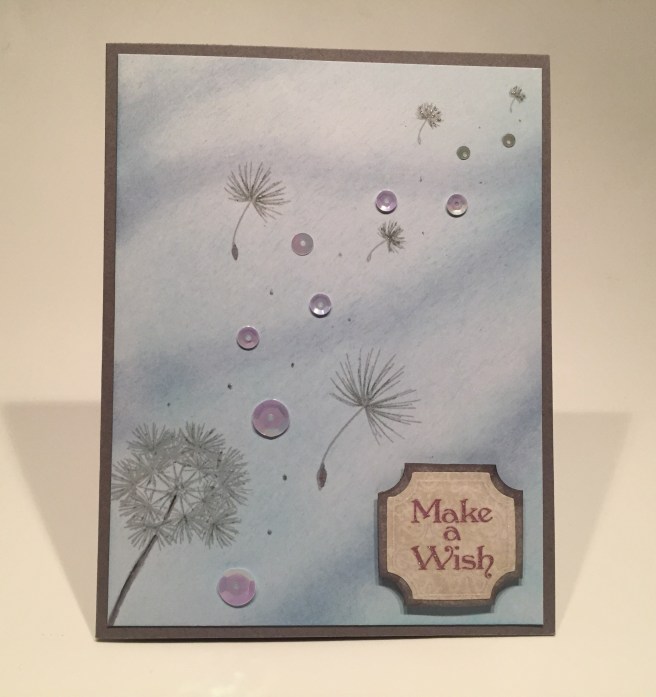
 When I was a kid, blowing the seeds off of a dandelion was an occasion for making a wish, so I grabbed this sentiment from the sticker sheets and glued it to a mat of the silver pearlescent specialty paper. I did darken that mat with an alcohol marker to bring it closer in shade to the card base, and I added that to the card front with some foam squares. Some sequins in graduated sizes for a little more sparkle on the front, and a simple flower sticker on the inside adds just the right finishing touch. I really like this card! Putting it together was actually quite peaceful and calming… especially after all that pink and all those butterflies…!! LOL!
 some light touches of
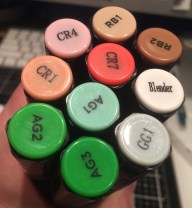 If you are interested, I actually grabbed a picture of the markers I used coloring this stamp. Red Brown (RB), Coral (CR) Alpine Green (AG) and Green Grey (GG) I used the light grey to give a touch of shadowing under all the vines and flowers. Though not immediately noticeable, I think it adds a lot of dimension to this colored stamp! And I only used the blender marker to fix a few “outside of the line” mistakes… OOPS! LOL!
 I love using Deco Foil on stencils – especially word stencils – and the “thanks” and “love” stencils in this kit are large enough to command attention on a card front – especially when foiled! I used my Sakura Stardust pen on all the stamped ‘dots’ to add a touch more sparkle and lined the top edge of the card with with a single Mint Moonstone peel off. Lastly, I defined the writing area inside the card with two of those nice vine stickers from the sticker sheets. Now, this is truly a “One Layer Wonder” card although I did cover the alcohol marker bleed-thru on the back of the card front with a piece of scrap white card stock. So sue me!! LOL!
 This is a great encouragement sentiment and it seems very appropriate with our little fairy stamp..!
 A few golden sequins from our mix highlights the sentiment and I did go ahead and designate this as a birthday card. I stamped the Happy Birthday from the add-on stamp set on the inside accompanied by the matching fairy sticker. I do believe this will be my niece’s next birthday card!! (though it’s 10 months away) I hope the battery lasts!! LOL! I love this card so very much!!! I think my niece will love it too. She’ll be turning 5!
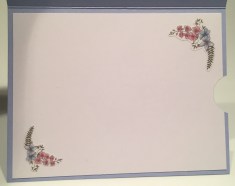
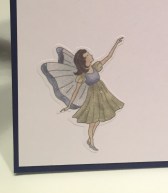 base, mounted the ornament, fairy and sentiment using foam squares, and glued the cord to the top edge of the card. For a touch of bling, I trimmed the ring off the handle of the magic wand and glued that right under the sentiment. With all the sparkle on the fairy and the embossing powder, I didn’t think any extra sequins were needed, but I did add the green fairy sticker on the inside writing surface! Fairy Christmas!! I hope this card tickles you as much as it tickles me! Makes me giggle every time I say it!
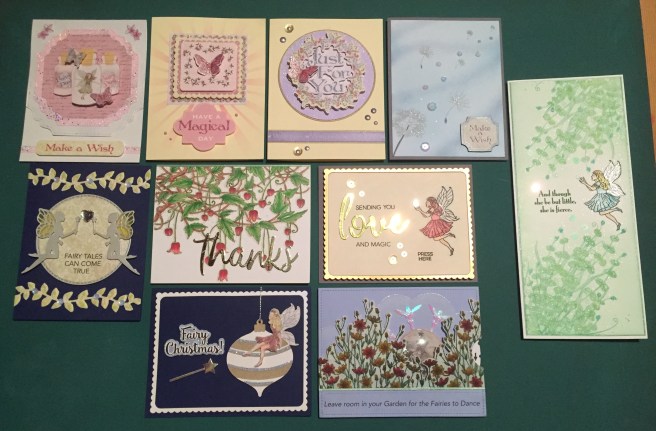 That’s my 10 cards (+1) for the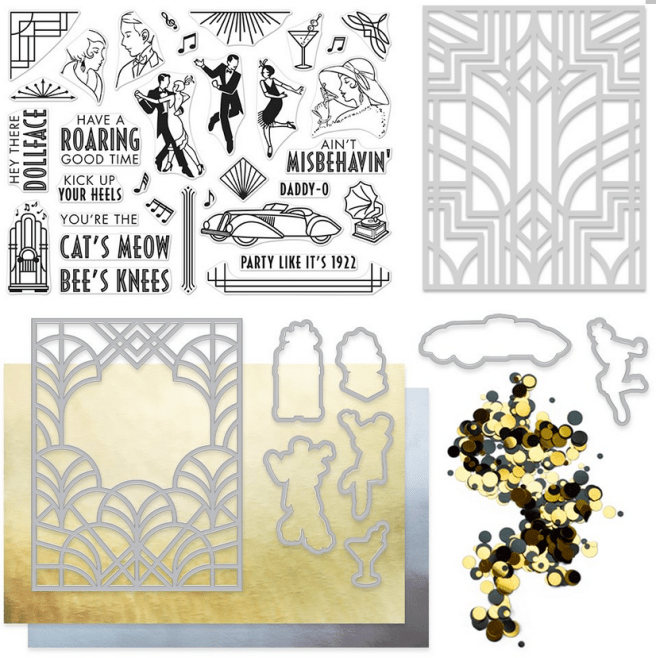

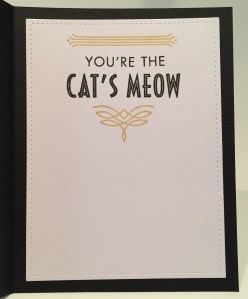 and finished off the card front with some of the gold mirror confetti in all three sizes. No more room on the front of this card, so, I turned to the inside of the card for the sentiment – “You’re the Cat’s Meow” is stamped in Onyx Black ink and the two flourishes are stamped in the Delicata gold again – coordinates very nicely with the card front! Both the front panel and the inside writing surface are glued down to a black card base, and though I wasn’t planning on it, I ended up using 8 different stamps on this one card! That’s a good start to fulfilling my obsession with using all of the stamps on my 10 cards! LOL!!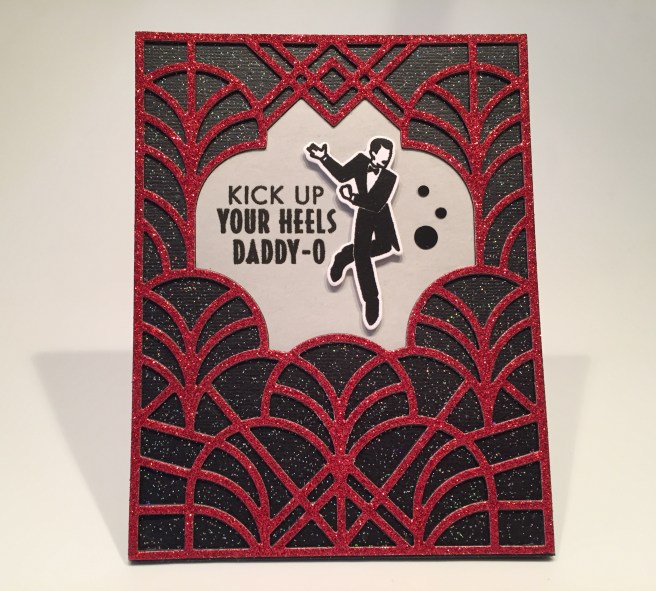
 “It’s Your Birthday! is printed on more of my grey card stock using my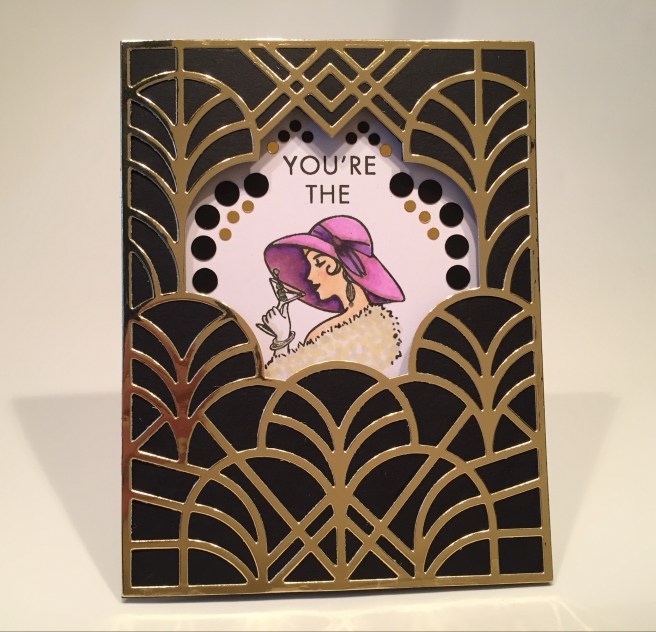
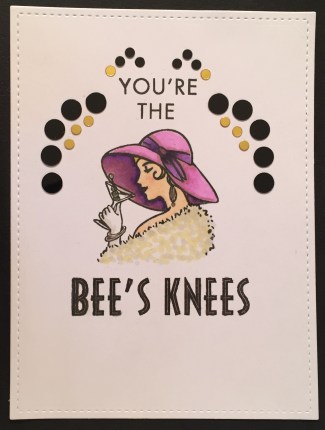 my Daddy-O card was the only combo I found that actually fit an image and a sentiment in the window together. That’s what prompted this card from me and inspired me to cut through the black card front to make this a true ‘window’ card! I did cut the “You’re The” stamp in half so I could stack the words, and stamped that and the lady using Onyx Black ink. I colored her using my alcohol markers and added a lot of the mirror confetti tracing the shape of the window so you still get that art deco feeling when you open the card to see this sentiment completed with “Bee’s Knees”! I like cutting that window through the card front – I think it opens up the possibilities of what you can do with this terrific die.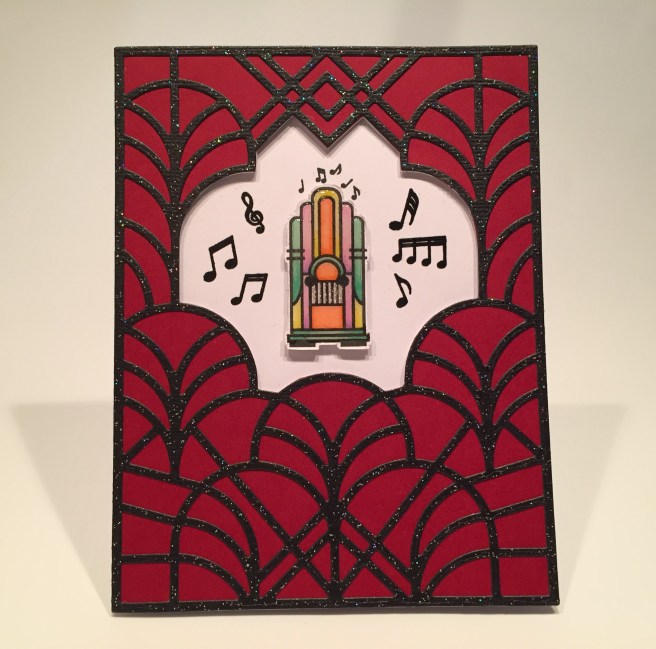
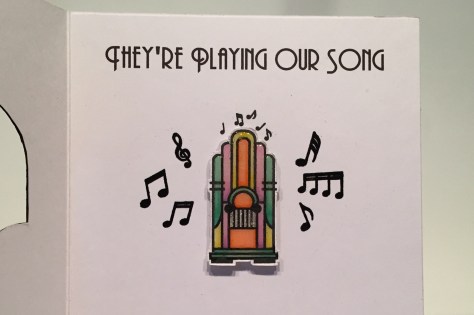 and I think this card would be a perfect anniversary card, or even a simple friendship greeting! I really like having the ‘artwork’ from the front of the card on the inside as well on these last two cards . That fancy die is certainly capable of carrying it’s own weight as a card front while still giving us a peek at what’s inside. Surprise!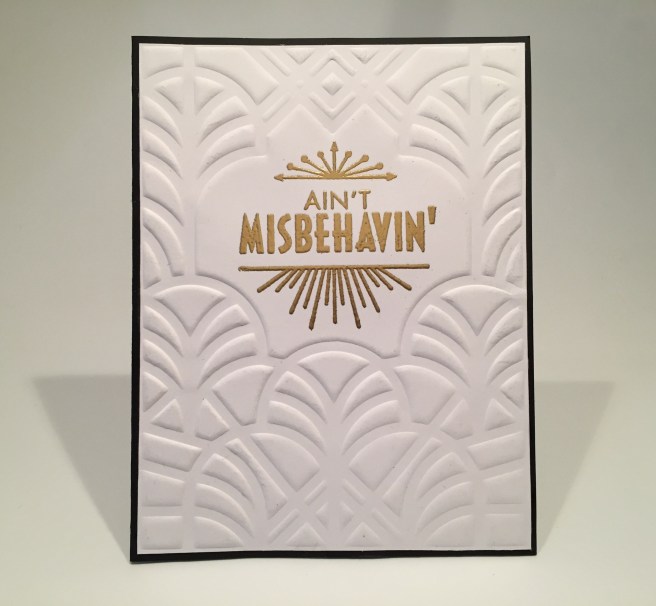
 but the effect still works well! This sentiment felt a little incomplete to me, so, I added “I’m Savin’ My Love For You” (which happens to be the next lyric in the song) on the inside writing surface. (that’s the Phosphate font again) Now that gives some real purpose to this card as a valentine or as any kind of an “I Love You” card! Clean and simple is always elegant!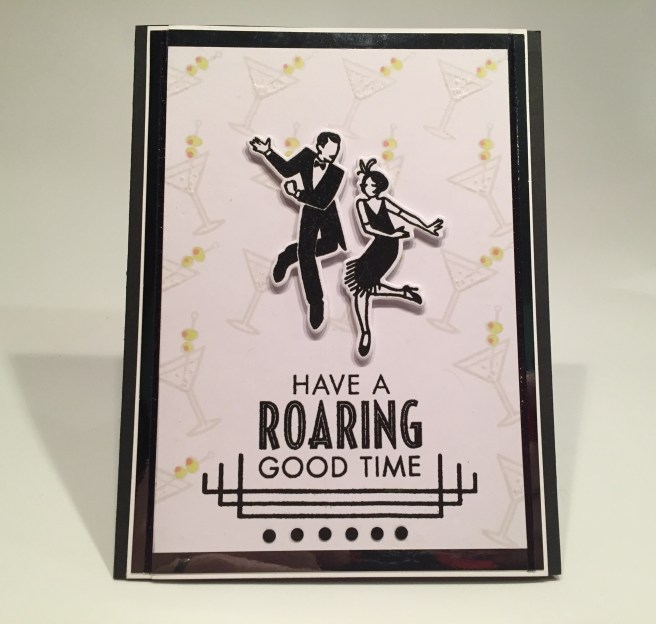

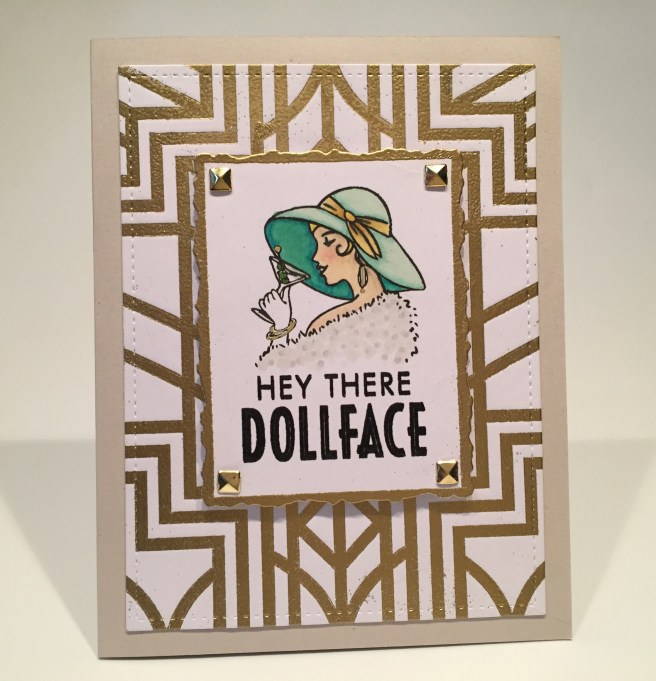
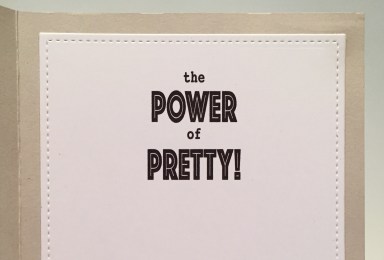 Here again we have a sentiment that feels a little incomplete to me, so I added this fun “the Power of Pretty” on the inside writing surface. I used my Silhouette Software to lay out the inner sentiment and used Courier and Phosphate fonts. I guess that might make this card a little “look-ist”, but I though it was a cute way to complete the “Dollface” sentiment and a terrific encouragement card for any young lady on your list! This stencil works great for embossing – either dry or heat embossing! Or both!
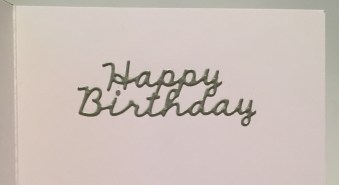 Of course I made this a birthday card with the addition of a die cut sentiment on the inside of the card cut from some shimmer silver card stock from my stash. Of course you would be 97 years old now if you were born in 1922 but I think this would be a fun card to give anyone who was into this time period or was throwing a themed birthday party!
 card base, and added the phonograph and sentiment with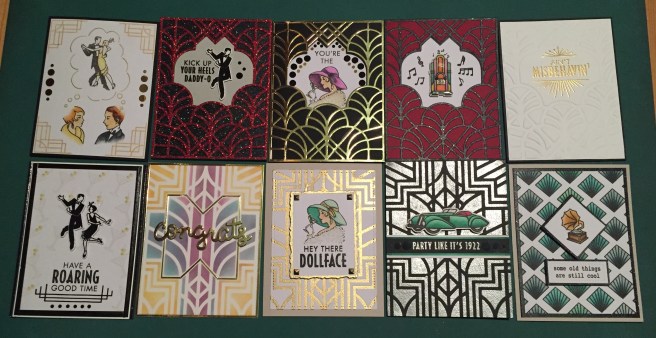



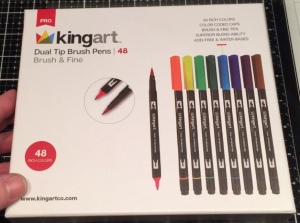
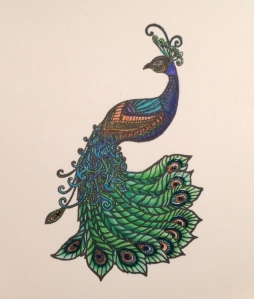 not quite as much movement as I have become accustomed to with the Zig markers. The inks are vibrant and there is a nice variety of colors and shades, and the markers certainly seem nice and juicy! The fine tip is not quite as fine as I would like but, overall, I was very impressed with these markers! Pretty as a peacock!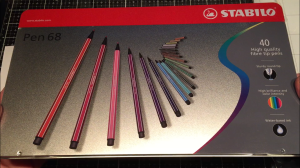
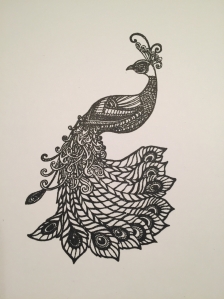
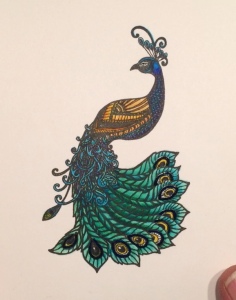 Just as I remembered, these Stabilo pens are super vibrant and colored up my second peacock very nicely. I was VERY impressed with how well they moved on the Bristol card stock and there’s a great variety of colors! I think I think I got little too much color at the top center of the tail feathers where those 10 feathers get very thin… even the 1mm nib on these markers had a hard time giving me a truly fine line… Quite lovely!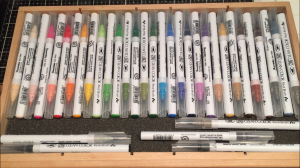
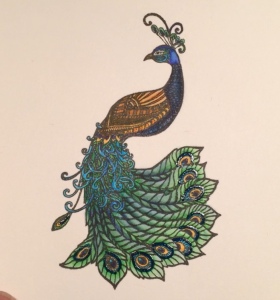 markers move very easily on Bristol smooth card stock, and while I may not have quite the same color selection as the other two sets, you can easily combine colors to get most any color you want! This peacock is a little lighter overall than the other two, but the colors are every bit as vibrant and the shading a little more subtle… this isn’t the best picture of this peacock, but you’ll see how nicely this works on a card. BTW… I did outline the ‘eye’ of the tail feathers on all three of these peacocks with a dark blue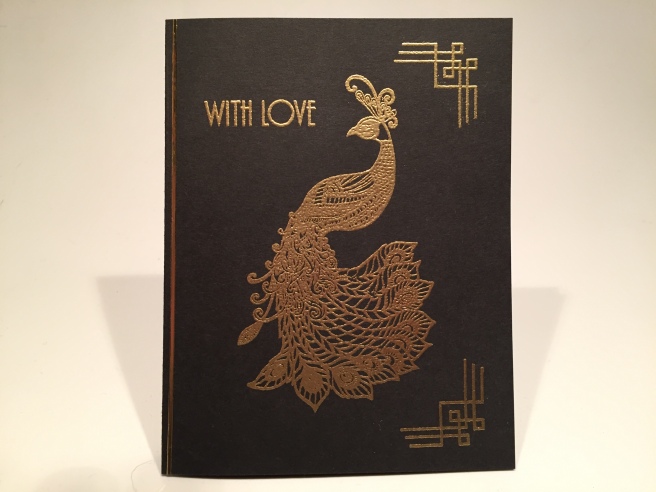
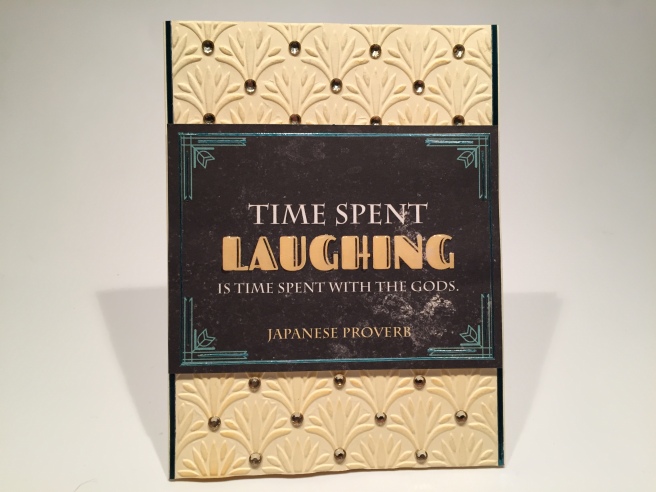 Love this sentiment! I don’t think I have ever heard this proverb before! Since the ‘framing’ on this piece was in teal, I chose to add some of the Teal Mirror peel offs to the outside frame and added little extra touches among the corner flourishes. I also added some Glossy Accents to the ‘LAUGHING’ text for some added dimension and shine. Instead of using pattern paper with this, I decided to use the embossing folder to dry emboss the front of one of the Cream card bases. I did (very lightly) sponge some
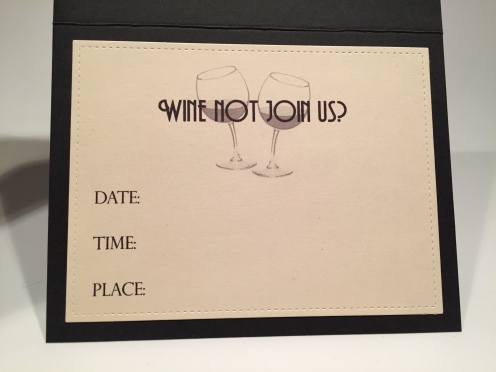
  I did consider how I could use this card, so I turned to my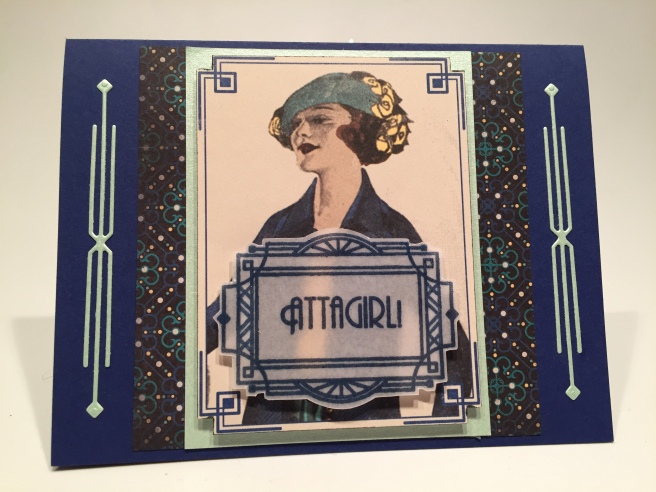
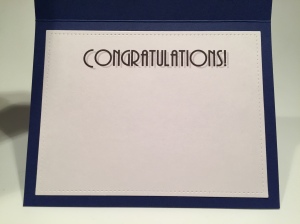 I actually have the same font used for the sentiments in this stamp set in my own font files so I did create a “Congratulation” sentiment on the inside writing surface to finish out the ‘AttaGirl’ on the front. I used my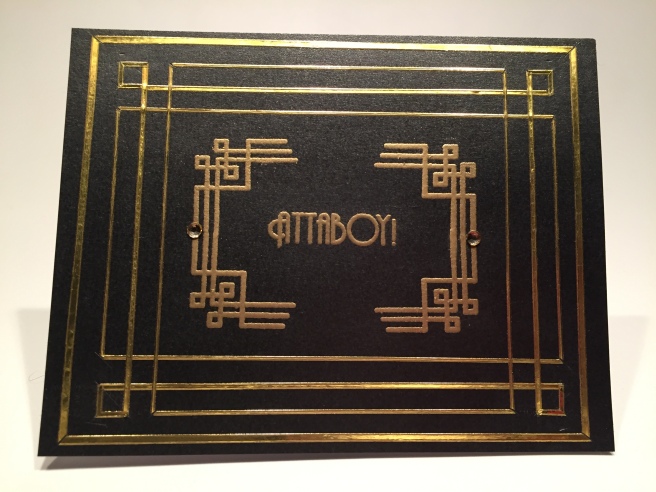
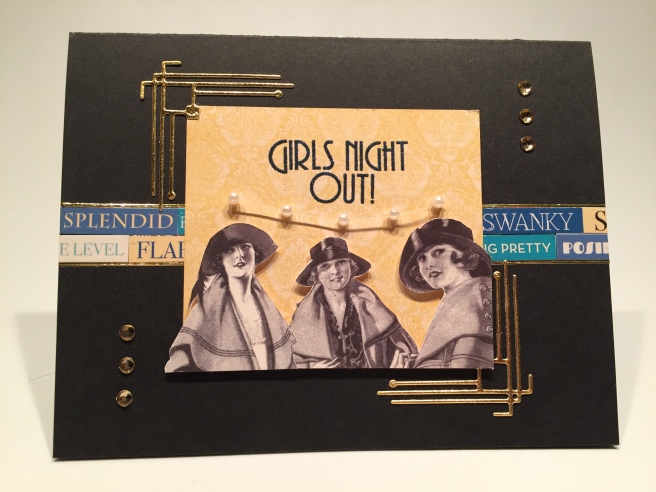
 so I turned to my Silhouette Software to create the inside of this card. On a piece of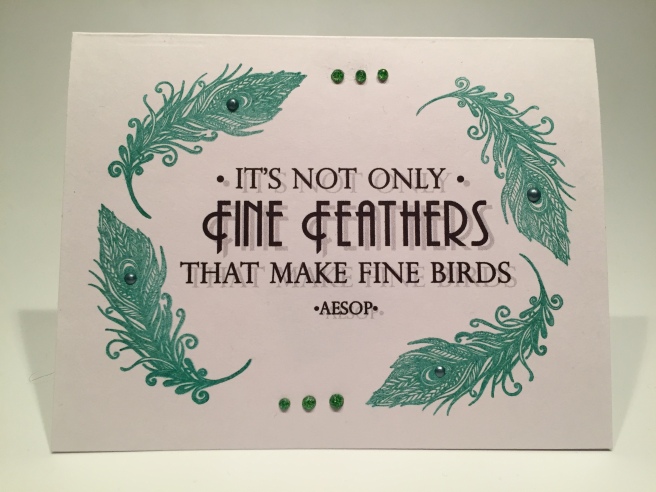
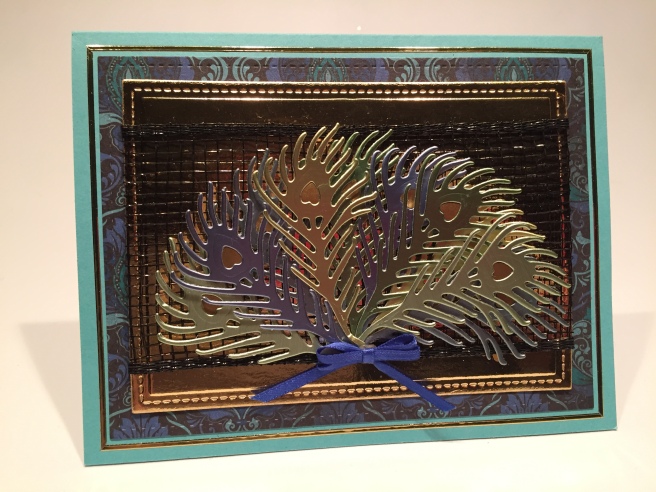
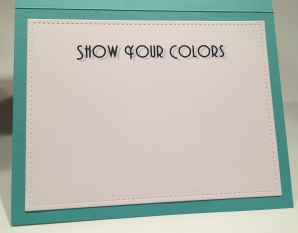 Again, using my Silhouette software and the Andes font, I printed this sentiment on a scrap of white card stock die cut with a LFSRD and mounted to the inside of our card. This is actually printed a very dark blue color with a bit of a drop shadow! I think this sentiment goes perfectly with the shiny colored feathers on the front of the card and all these encouragements go right along with the AttaGirl! theme of this card kit.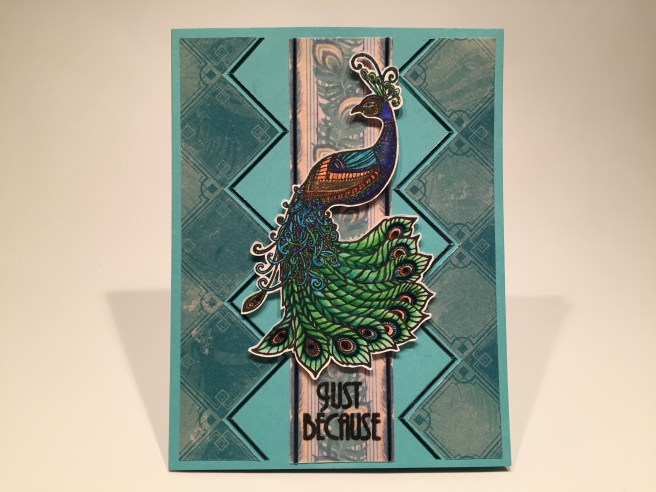
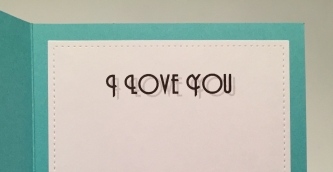 I mounted that to the card front using 1/16″ thick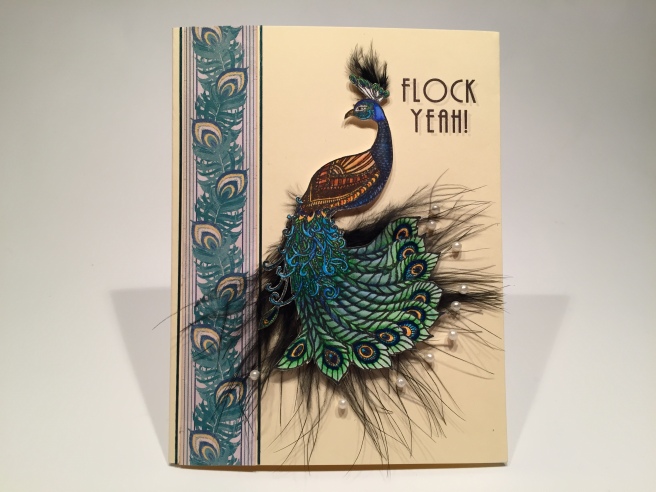
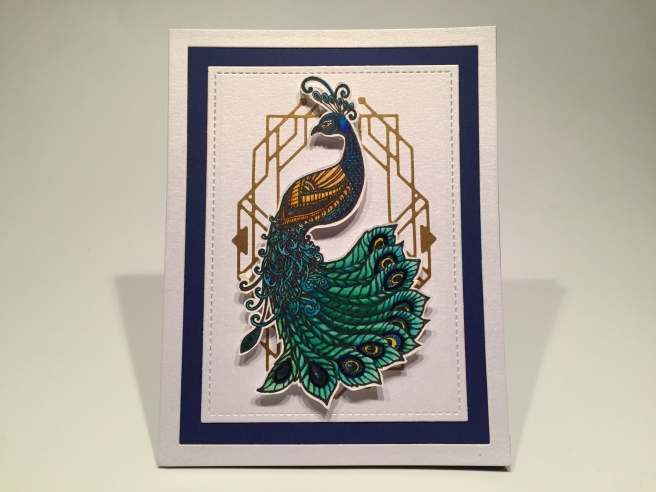
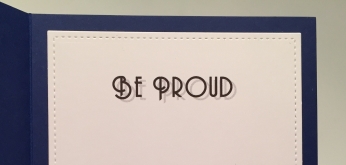 so I turned to my computer one last time to do the “Be Proud” sentiment on the inside writing surface. Another lovely encouragement card to wrap us up this month! I think these last three cards really demonstrate that coloring and cutting that peacock stamp was worth every moment devoted to them!