
Hello Folks! Scott here with my 10 cards inspired by the Love From Lizi June 2021 “Tropical Escape” Card Kit. If you’d like to see details of all the goodness in this kit, I do have an unboxing posted just prior to this. Let’s get Tropical!

As I usually do, I did take the colored card stock in the kit and cut them all in half to make my 10 card bases. I did swap out Lizi’s alcohol-friendly White for some plain White of my own. Kind of an eye-popping color palette this month!
I did stamp the toucan, the monstera leaf, the hibiscus bloom, the bunch of bananas, and the pineapple on a piece of Bristol Smooth card stock with VersaFine Onyx Black ink, and colored them all with my Zig Clean Color markers. All of those stamps have coordinating dies in this kit, so I went ahead and cut them all out. Let’s start with that toucan.

The sentiments in this stamp kit are all toucan puns this month. I trimmed down the leafy pattern paper to 3.25″ x 4.5″ and glued that to a thin black glitter mat and down to the Dark Forest Green card base. I made made a ‘partial frame” around that with some of the Racing Green Straight peel offs from the Assorted peel off bundle this month. I die-cut a scrap of white card stock with a GinaK/Thermoweb Oval die and cut another black glitter mat for that. I stamped some of the foliage stamps from our stamp set on the white oval with VersaMark ink, and embossed them with Love From Lizi Forest Green embossing powder. I finished the oval with the sentiment stamped in Onyx Black ink and embossed with Clear powder. I glued the two ovals together and glued them down to the card front.
Since I colored the toucan fairly realistically with black, I did add some definition back to the image with a white gel pen, and added some sparkle to the black feathers with a Spectrum Noir Sparkle pen. I added the toucan with some foam tape and finished this card out with some sequins. You know I love a pun, and I guess Lizi couldn’t resist this month either. I do wish he was on a branch or a perch or something…
Though we have some bright yellow card stock, I wasn’t sure what to do with the bunch of bananas stamp in this set. Naturally, they’re a tropical fruit, but there is little yellow pattern paper and no other bananas in this whole kit…
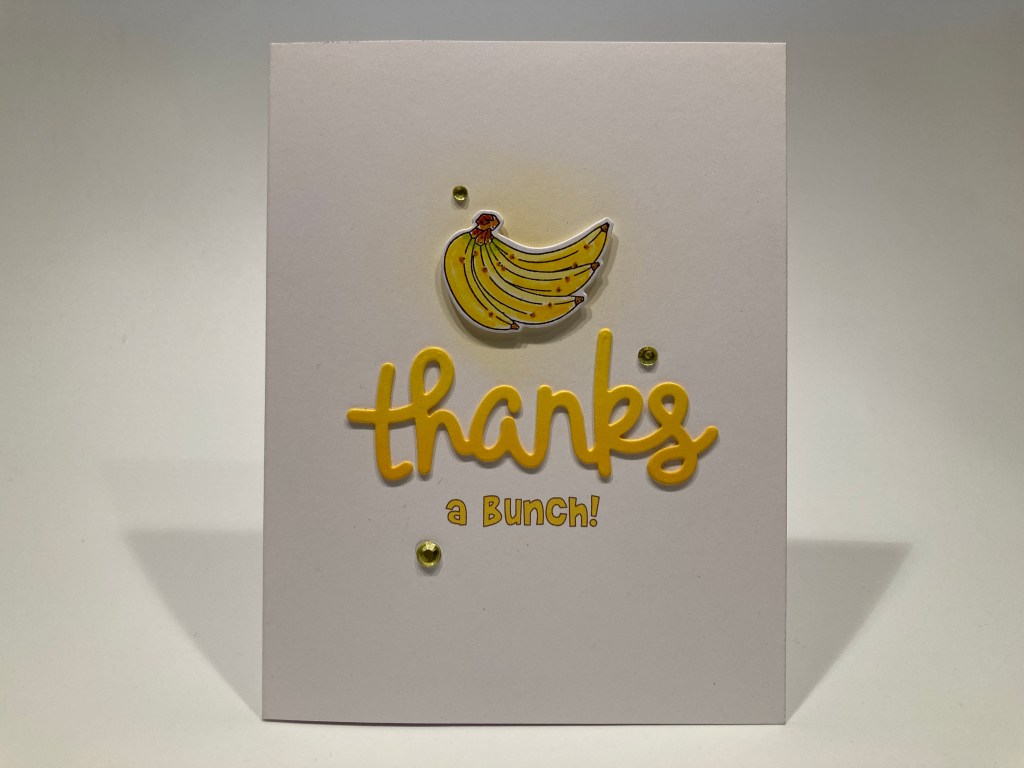
Left to my own devices, this is what I came up with! A really cheerful, simple, yellow, pun-y Thank You card! I printed the “a bunch!” sentiment on a White card base using my Silhouette Software and the Brady Bunch Remastered font. This is the Lawn Fawn Scripty Thanks die – I took some Yellow card Stock from my stash, and ink blended a little Wild Honey Distress Oxide ink for a little ombre effect, and die-cut the sentiment, I cut two more from the same yellow card stock (no ombre) and glued all three layers together to make this dimensional sentiment.
I softly blended some Squeezed Lemonade Distress Oxide ink behind where the bananas were going to go, glued the sentiment in place and used foam tape to attach the bananas. A few of the yellow crystals adds a bit of sparkle. You know how much I love my white space, and I really love the ombre on the die cut.
We got a selective few card toppers and ephemera pieces this month, along with a fun sheet of rub-ons. I see a couple of hexagons… and didn’t we get some hexagon dies in the Love From Lizi March 2018 Card Kit?
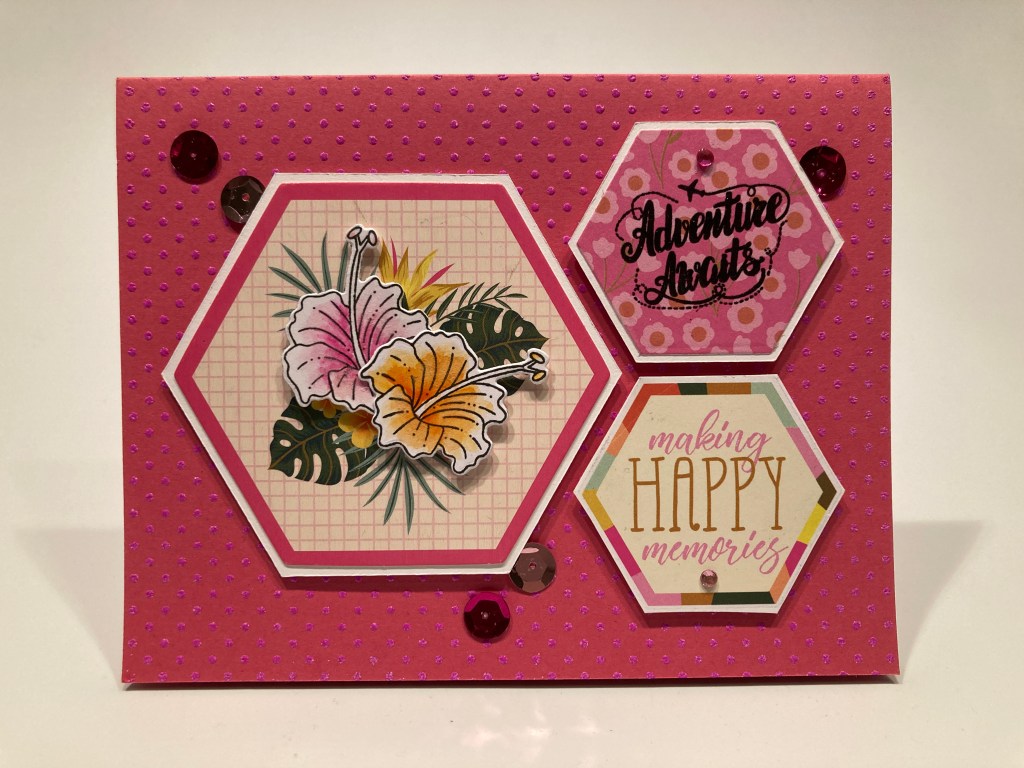
A Hot pink Bon Voyage card! To start with, I embossed the Cerise Pink card base using the Altenew Dainty Swiss Dots background stamp, VersaMark ink and Love From Lizi Peony Purple embossing Powder. I attached the hexagon rub-on to a scrap of White card stock and trimmed a thin White mat around the rub-on. I added a thin White mat behind the hexagon card topper, and die-cut the pink floral pattern paper with the largest hexagon die from the LFL March ’18 kit, and added a thin White mat behind that as well.
I stamped another hibiscus bloom, colored it with my Zig markers and die-cut it to go along with my original bloom. I added both blooms over the printed hibiscus on the card topper – pink for pink and orange for orange. That added a nice touch of dimension to the topper, and brightened up the arrangement. I stamped “Adventure Awaits” (from the LFL April ’19 Bon Voyage stamp set) on the pink hexagon with Onyx Black ink and embossed it with some clear embossing powder. I mounted the three hexagons to the card front with foam tape and added pink sequins for more shine. This is definitely a PINK card! It’s hard to avoid that when you have such a bright pink card base..!
And then we have the lemons. One sheet of pattern paper features lemons, and we have one ephemera piece with two lemons, but there are no other lemons in this kit. Trying to avoid the whole “if life gives you lemons” routine, I came up with an unconventional yellow Valentines card!

I die-cut the lemon pattern paper with a Lawn Fawn Stitched Rectangle Die, added a Dark Green mat from my stash, and glued those to the Bright Yellow card base. I die-cut a circle from the same Dark Green card stock using a HA Circle Infinity die, attached that to the card front with foam tape and added the lemon ephemera piece on top. I printed this sentiment on a scrap of yellow card stock from my stash, using the same Brady Bunch font, die-cut the sentiment with another LFSRdie and mounted that to the card front with more foam tape.
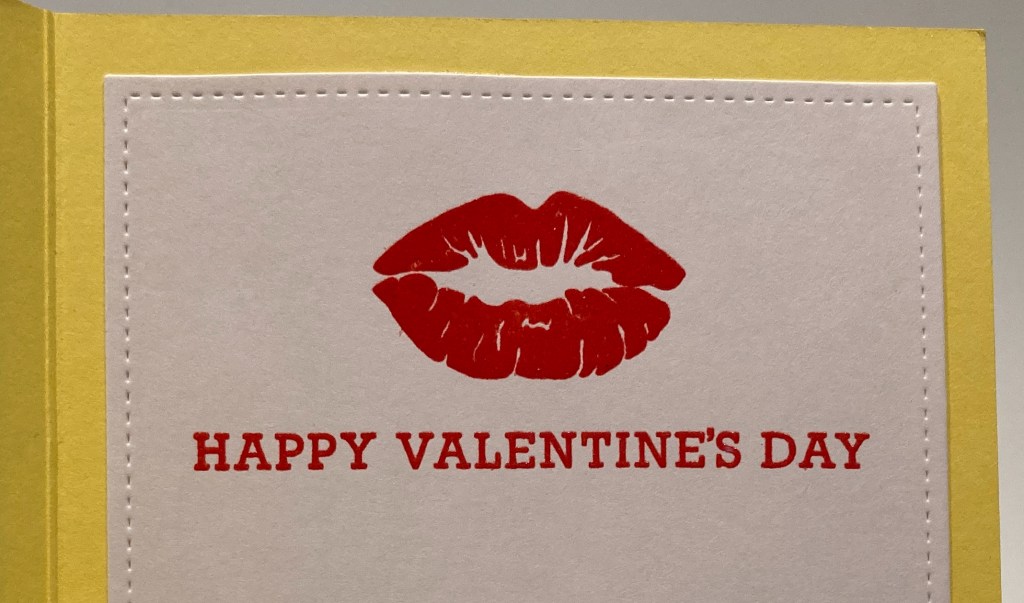
Saying “pucker up” doesn’t quite make this a Valentine, so I stamped the Lips (from the LFL August ’17 kit) and the sentiment (from the HA January ’19 kit) with Candied Apple Distress Oxide ink and embossed both with Clear embossing powder. Nice wet, juicy lips! I don’t think I’ve seen many Yellow Valentines, and this one is very playful and unexpected!
At first I didn’t think I would use many of the card toppers, until I realized that there were some toppers with matching pattern papers – might as well pair them up!

The background is the flamingo pattern paper cut to 3.5″ x 5.5″ and glued to the center of the Zesty Orange card base. When I couldn’t find any plain yellow peel offs, I remembered the White peel offs, and colored a pair of them with a yellow Spectrum Noir alcohol marker – perfect! Any color you need! One of my HA Circle infinity dies was fractionally larger than the card topper so I die-cut a Dark Green circle and glued it behind the topper for a super-thin mat. I die-cut the Happy Birthday (from the add-on die set) using Yellow card stock in my stash, and die-cut the shadow from some thick vellum. I added some sparkle to the words with my Spectrum Noir Sparkle pen, and glued them to the vellum shadows.
I printed this sentiment (more Brady Bunch font) on more yellow card stock from my stash, and die-cut it with a Lawn Fawn Everyday Sentiment Banners die. I glued the die cut sentiment directly to the card front, and added the topper and the sentiment banner with foam tape. I colored the wood-veneer flamingo with a Pink Zig marker, added Sparkle pen on top, and glued that to the topper along with some more pink sequins for extra bling! Cute little pun here – I have a friend in Minneapolis who is madly into flamingos – a perfect Birthday card for her!
We do have one more card topper with it’s own matching pattern paper – who can resist?
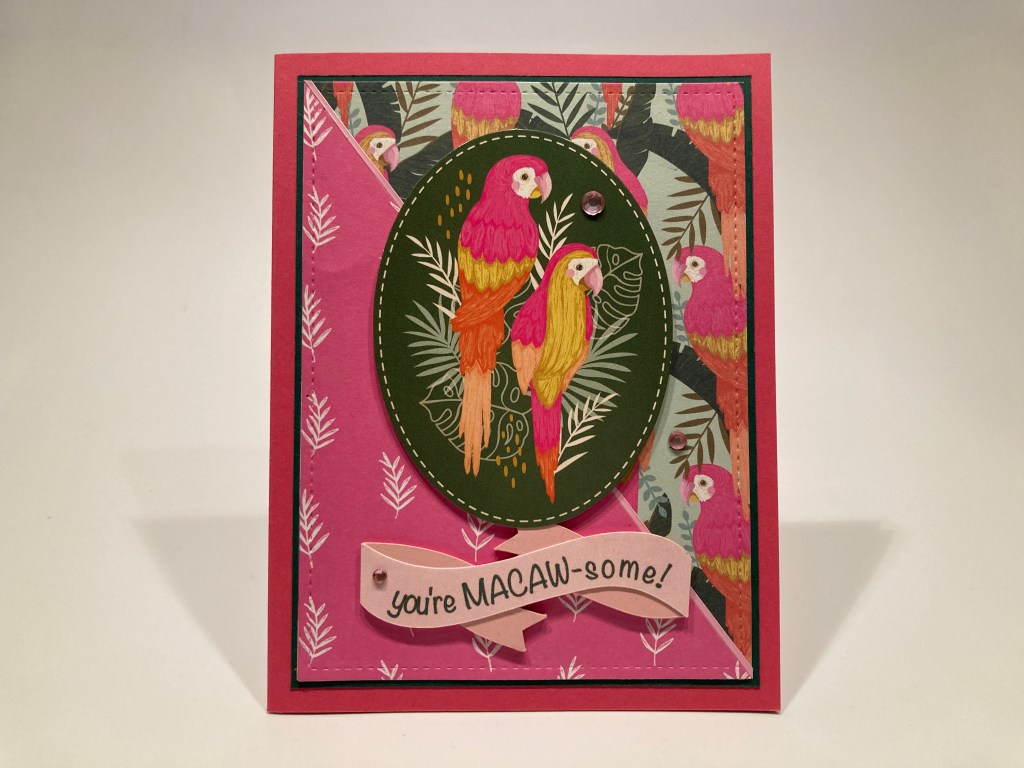
This one makes me giggle! Perfect pun, and another Super-Pink card! I die-cut the two pattern papers with a LFSRdie (3.75″ x 5″), cut the pink one in half diagonally, and glued that atop the parrot pattern paper. I added a thin Dark Green mat and a Pink peel off and glued those to the Cerise Pink card base. The card topper is added to the card front with foam tape. I created this sentiment using my Silhouette Software, the Noteworthy font, and a banner pattern – I cut four background pieces in a darker Pink and two sentiment pieces on some lighter Pink card stock. I glued all the layers together for a very dimensional sentiment, and glued that down to the card front. A few Pink gems add a little more sparkle… and theses Bright Pink Parrots are certainly macaw-some!
I was really itching to use that colorful geometric retro pattern paper, but couldn’t decide just how to use it. Maybe if I colored a bunch of the hibiscus blooms in matching colors…

That works! These blooms are stamped on Bristol Smooth card stock with VersaFIne Onyx Black ink, colored with my Zig markers and die-cut with the matching die. I did my best to match the colors on the pattern paper which I cut to 2″ x 5.5″ and matted on a piece of the Dark Green pattern paper cut to 3″ x 5.5″. I glued those to a White card base, and mounted the blooms with foam tape. I die-cut the “Hello” letters from our die set in more of my Dark Green card stock, and cut the shadow from a scrap of White Card stock. I glued those together and down to the card front. Some of the Clear Gold Mirror pin stripes from the kit line the edges of the green pattern paper and add a nice golden shine!
And I couldn’t resist adding this silly pun on the inside of this card. I printed this directly on the card base using my Silhouette Software and the Brady Bunch Remastered font. Silly but sweet!
Puns, Puns and more Puns! How about a double-pun? I knew I was going to be reverse stamping that toucan sometime!

I reverse stamped the toucan using my silicon mat and Onyx Black ink – here’s my reverse stamping technique:
I colored these toucans with my Zig markers and went for a less-realistic, more bright and colorful version this time. The regular stamping is all warm colors, the reverse stamp is all cool colors – fun! Once the toucans were colored, I did take the time to fussy cut them out. I came up with this great background stamping using all the foliage (no monstera leaf) and small flowers from our stamp set. That is stamped twice across the top and once across the bottom with VersaMark ink and all embossed with more LFL Forest Green embossing powder.
I stamped the sentiment with VersaFine Onyx Black ink and embossed it with clear embossing powder. I wish these sentiment stamps were just a little bit bigger – the scripty “Toucan” becomes a little hard to read at this size. I added the toucans with foam tape and we have a double pun – Toucan achieve anything = You can achieve anything OR Two can achieve anything! HA! I think the leafy background stamping at least suggests perches for our birds… and the unconventional coloring is really a blast! Definitely right in line with the colorway of this kit!
I like the leafy background a great deal and thought I’d use it on another card – maybe some Gold on that Dark Green?
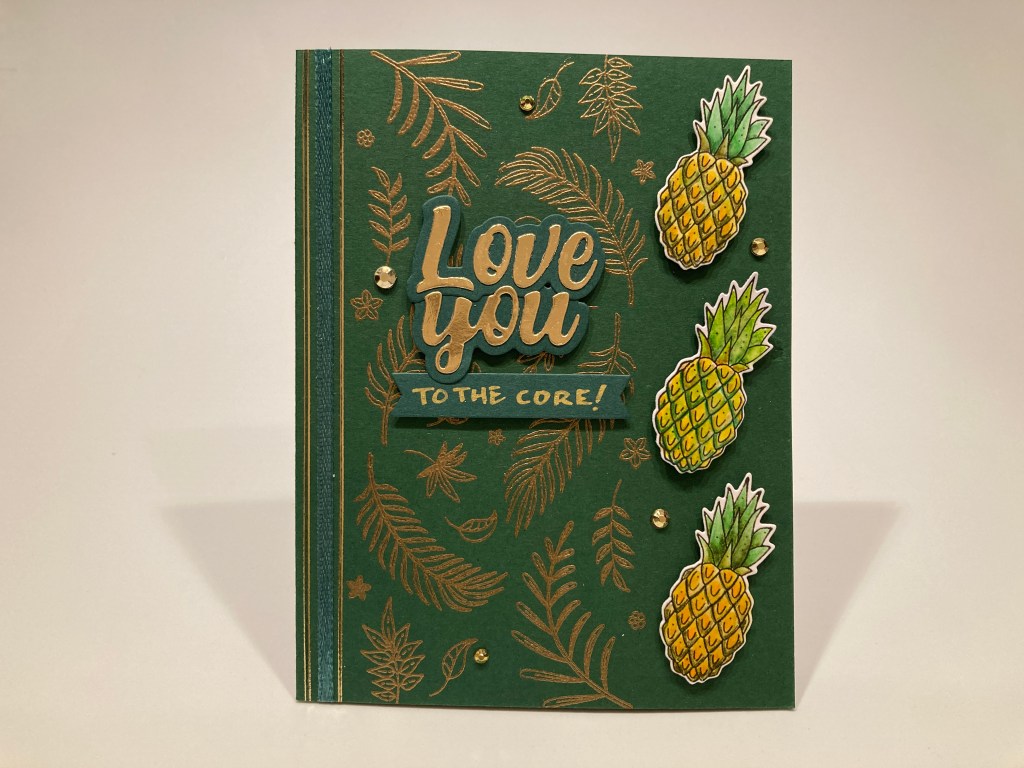
I stamped the foliage directly on the Dark Forest Green card base using VersaMark ink and embossed it with the LFL Golden Crown embossing powder – really sharp! I added a piece of the Green ribbon and two peel offs to the left of the stamping for a nice edging on the card front. I stamped, colored and die-cut two more pineapple and added them to the right of the stamping with foam tape.
I die-cut the “Love” and “you” letters (from the add-on die set) from some gold card stock and their shadows from more Dark Green card stock from my stash – no extra layers here – just the gold letters glued to the green shadow. I ended up simply writing the rest of the sentiment with an extra-fine point Gold Sharpie and die cut that with my LF banners die. I attached both parts of the sentiment with foam tape, and some of the gold gems for even more sparkle! Perfect! I think this qualifies as some kind of pun…! Yes?
It seems I just can’t get away from the toucan puns this month… I thought of this one early on, and decided to try it!
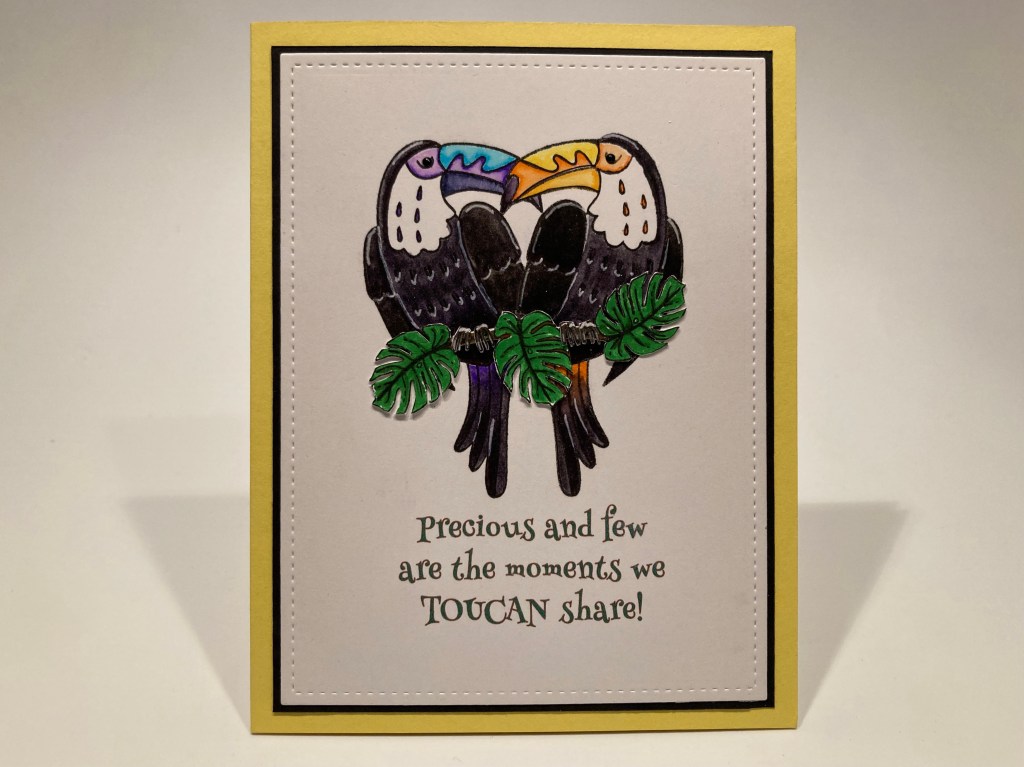
Here we have reverse stamping AND masking to get these two birdies to snuggle up nice and close to each other! All stamped on Bristol Smooth card stock with VersaFine Onyx Black ink and colored (more traditionally) with my Zig markers. I also added some extra definition with a white gel pen – especially among the black feathers. I printed this sentiment (does anyone remember this song from the early 70’s? – it was a BIG hit by the band Climax (I remember the song but not the band!)) using the Henny Penny font and die-cut the panel with a LFSRdie and added a thin black mat before gluing both to the Bright Yellow card base.
I did take the time to stamp some extra toucan feet along with the monstera leaf to create a perch for our birds on this card. Yes, I fussy cut the feet and leaves and glued them in position on the birds. That’s a really nice touch of green and a suitable grounding for our toucans. This would make a great anniversary card for a couple with any number of kids… or anybody who just can’t find enough hours in the day. Love this song! “And if I can’t find my way back home…”
That completes my 10 cards using the Love From Lizi June 2021 Tropical Escape Card Kit. Bright and colorful across the board. Taken all together, these cards don’t feel too awfully pink, but they are certainly bright and cheerful!
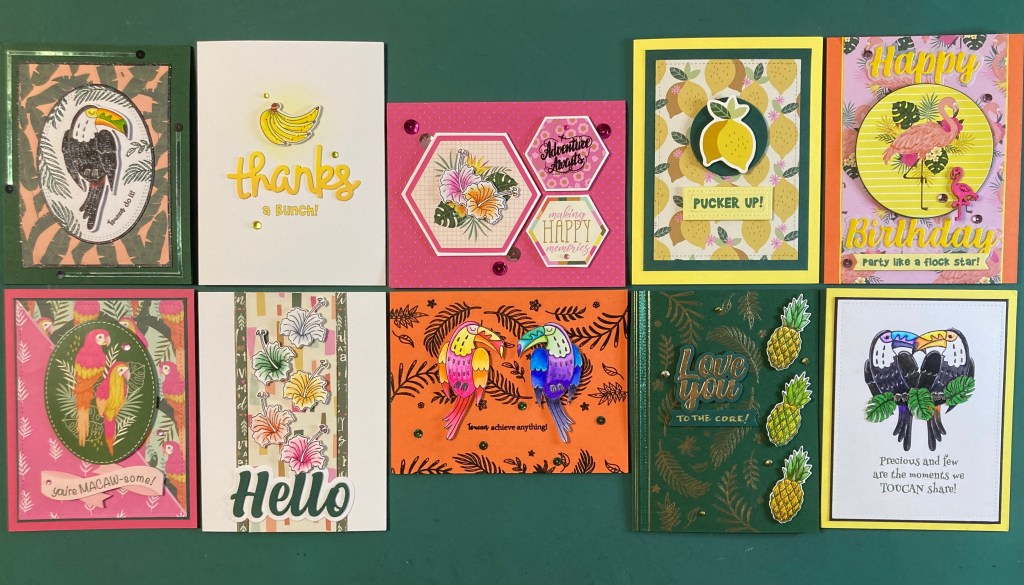
I managed to use every stamp in this stamp set except for the “Don’t ever feel you can’t, Toucan!” sentiment – I just couldn’t come around to that sentiment. I used 8 of the 12 pattern papers (more than my usual!) and a little bit of all the toppers, ephemera pieces, and embellishments. I didn’t get to the chipboard frames, but I think I used most everything else at least once! Here we have a number of encouragement cards, some love cards, a thank you card, Bon Voyage, Happy Birthday, a wide variety!
This kit is still available at Love From Lizi! If I have managed to catch your eye or you’ve seen something here that you like, I would grab a kit for yourself right away. If you do go shopping with Lizi, please use my links – It helps support this channel and is always supremely appreciated!
Love From Lizi June 2021 Tropical Escape Card Kit: https://shrsl.com/2zebn
Love From Lizi June 2021 Release / add-ons: https://shrsl.com/2zebt
Thank you so very much for sharing your time with me today, I hope I have managed to provide a little lighthearted cheer and inspiration for you! Please remember to Like me, List me, Pin me, Post me, Share me with all your friends, Don’t run with pineapples…! I send you and yours Health, Cheers, and Happy Crafting!
DISCLOSURE: This site contains some affiliate links to products. I may receive a commission for purchases made through these links (at no cost to you). As an Amazon Associate I earn from qualifying purchases. Thank you!
