
Hello Folks! Scott here with a new 10 Cards 1 Kit post featuring the new My Monthly Hero April 2021 Kit! This kit explores the trend of stencil layering, and boasts a large collection of graphic animal stamps and geometrics.

The 6″ x 8″ stamp set in our kit this month features these solid graphic animal stamps and all sorts of mix and match sentiments along with a few flowers and embellishments. Of course we get 16 coordinating frame cuts for each and every shape in our stamp set. We get three Geometric Rotating Stencils in our kit along with three ink cubes in Tangerine, Raspberry Jam, and Grape Juice. As an extra special bonus, we get a new Hero Arts Ink Blending Brush – super soft and packed full of bristles, Hero Arts now sells these premium Blending Brushes in a pack of two different sizes. Lots of possibilities here!
These stencils were designed to create countless unique kaleidoscope-inspired designs by layering and rotating them at any angle. I figured I should explore some of the possibilities presented by these stencils first.
I know a lot of crafters have started using Pixie Spray to coat the back of their stencils with a light tack that helps to hold your stencil securely down to your paper. I have always used just a light coat of my Zig 2 Way Glue pen with the broad tip to coat the back of my stencils… when dry, it becomes sticky and retains that tack through multiple washings. I went ahead and coated the back of all three stencils and let them dry.

I took the Straight Lines stencil and ink blended some Hero Hues Lemon Drop Reactive ink on some plain White card stock (cut to 6.5″ x 6.5″) then I removed the stencil, rotated it 90 degrees to the left, and blended the Tangerine ink through the stencil for the second layer. You could keep going… rotating the stencil and blending in even more (or the same) colors, but I stopped with two layers… Very interesting!
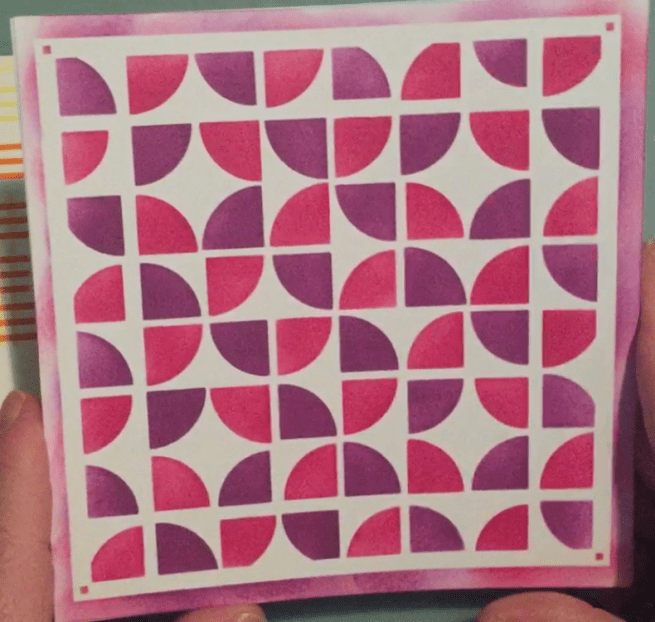
Then I took the Quarter Circle stencil and did the same using the Raspberry Jam and Grape Juice inks included in the kit. I LOVE the graphic nature of this and the colors work brilliantly together!
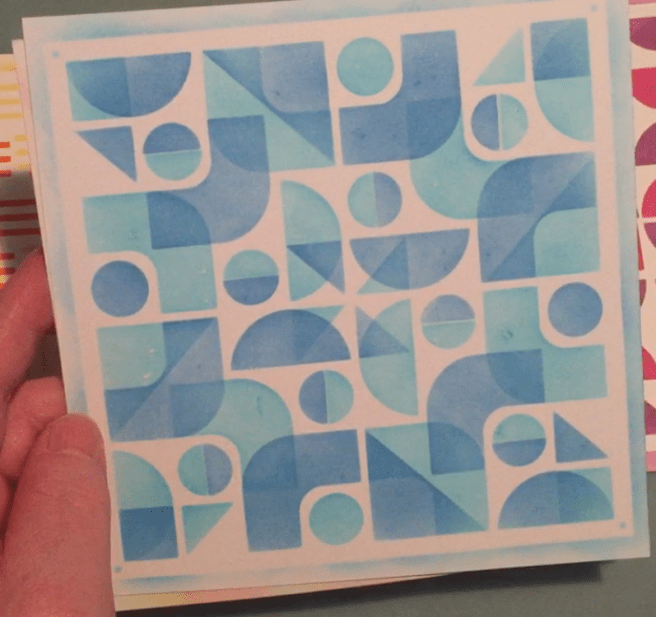
I also did the same technique with the Assorted Shape stencil using Splash and Blue Hawaii Reactive inks. I think this one really shows off the layering aspect of the stencil and creates a terrifically unique pattern.

These stencils were designed to be used in conjunction with each other; so I stenciled this pattern using Lemon Drop ink through the Quarter Circle stencil, Splash ink through the Assorted Shapes stencil, and Fruit Punch Reactive ink through the Straight Lines stencil. I kept my ink blending fairly light for a soft, springtime feel, and I absolutely LOVE the touches of green where the Lemon Drop and Splash inks overlap. I have to admit I really like all three of these stencils – individually AND all together!!
The Raspberry and Grape stenciled pattern really caught my eye to begin with and that’s where I started with my cards.
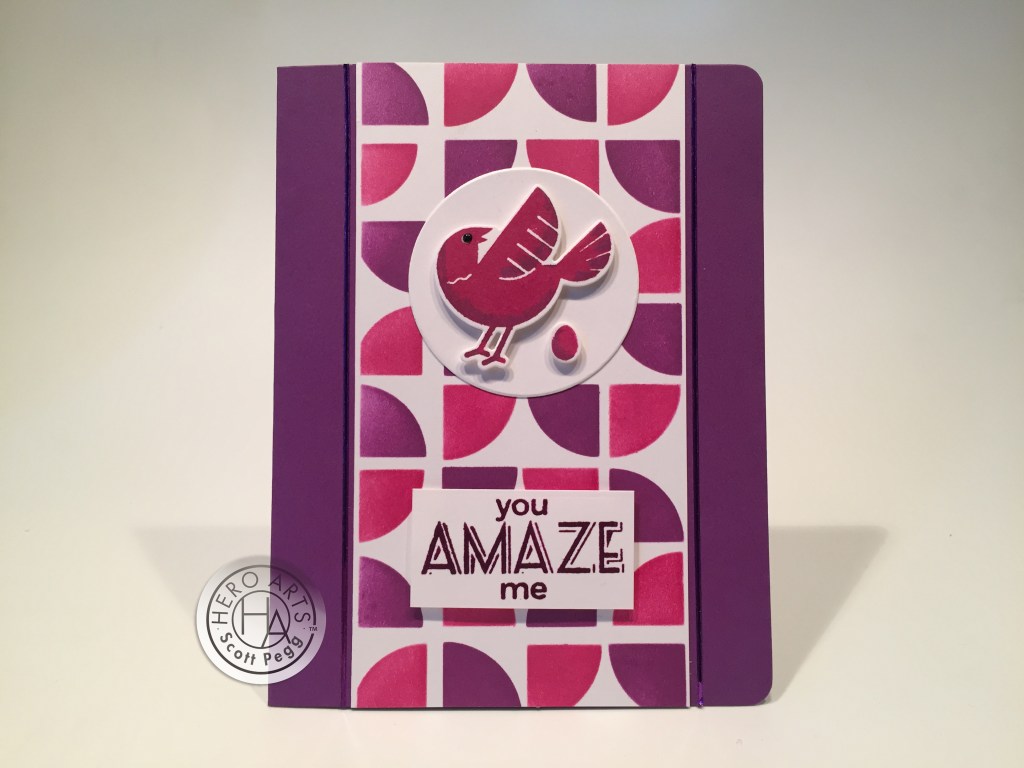
I divided my stenciled pattern right down the middle and used the left half for this card. I really like this Quarter Round stencil – since none of the images overlap, it gives you so many trimming options! I glued that panel to the center of a dark purple card base from my stash, and trimmed the edges with some Love From Lizi Purple Mirror pin stripe peel offs. I stamped the bird (and the tiny egg) on a scrap of White card stock using the Raspberry Jam ink and touches of the Grape Juice ink for a little shading, and then die-cut them out using the matching dies.
I stamped the sentiment with the Grape Juice ink and embossed that with some clear embossing powder. I trimmed the sentiment to size, and die-cut a 2″ circle from White card stock using a Hero Arts Circle Infinity die. I glued the circle directly to the card front, and added the bird, egg and sentiment using foam tape. I did add a tiny Nuvo Crystal Drop in Ebony Black to add a little life to our bird, and I rounded the right corners of the card with my corner chomper. I do think laying an egg is pretty damn amazing!! LOL!!
I am always temped to just stamp solid stamps in black… silhouettes are always effective… here it works even better!
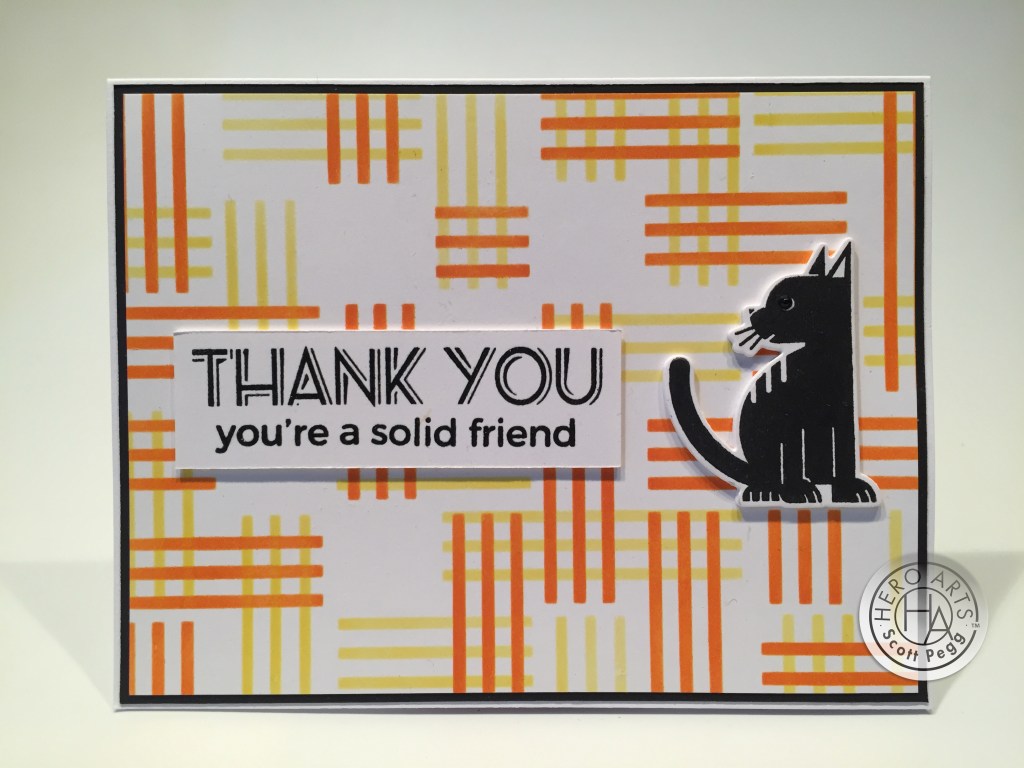
A black cat is appropriate, and I think this helps drive home the “solid friend” sentiment! I trimmed down my Straight Lines stenciled pattern to 5.25″ x 4″ and added a thin black mat behind that and glued them to a White card base. I stamped the cat and the sentiments using Hero Arts Intense Black ink and embossed the sentiment for a little shine and texture. I die-cut the cat and trimmed down the sentiment and added both to the card front with foam tape. I also added a little black Nuvo Drop to the eye of the cat. It’s delightful to see these plain block images come to life with the simple addition of a shiny black eye. Looks even better in real life!
On the backer card for this kit, Hero Arts used the Geometric Stencils for decoration, but the side with the Assorted Shapes stencil seems to be sporting a different arrangement of the pattern. Same shapes but in a different pattern.


This is what I got with two layers of the Assorted Shapes stencil . Similar, but not the same! I started fiddling around to see how they got the pattern on the backer card in our kit.
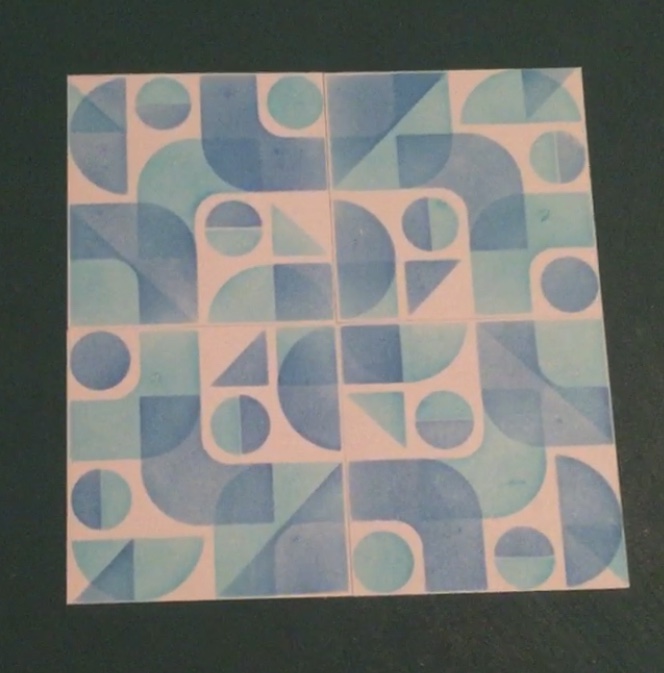
It took a while, but I finally figured out that by cutting the stencil into quarters (following the clear straight lines in the original stenciling) then rotating the four pieces 180 degrees (opposite corners to the center) we get the exact same pattern as the one on the backer card!
So… the backer card is actually four double-layer Assorted Shapes stencils meeting up in the center of the card. It really tickled me to figure this one out! It appears that these stencils could be used to cover much larger areas than just the simple 6″ x 6″ original size – making them all ‘infinity’ stencils if you will. Great for all you scrapbookers out there!
That rounded square in the center was certainly begging to be used as a square card. And who was I to deny that?

I taped the four quarters of my stenciled pattern together in the new arrangement and die-cut the center of the pattern with a 4″ Square Infinity die and glued that down to a 4.25″ x 4.25″ square card base. I like this size of square card because it can be mailed in a standard A2 envelope. I stamped (and reverse stamped) the fish using Hero Hues Creamsicle Reactive ink and a little of the Tangerine ink for some shading.
I stamped the sentiments using the Tangerine ink and embossed both with clear embossing powder. I trimmed down the large sentiment, die-cut the fish with the included frame cuts, and die-cut the smaller sentiment using a Lawn Fawn Everyday Banners die. I mounted all pieces to the card front with foam tape, added some Blue Droplets (from the MMH March 2019 Kit) on the background and some small Orange Glitter Enamel dots for the fish eyes. Truly a delightful Hello card! Love that Blue and Orange!
Now I have that stenciled patten I created using all three of the stencils. The colors are so nice and delicate that this seemed to be the perfect use for that piece.
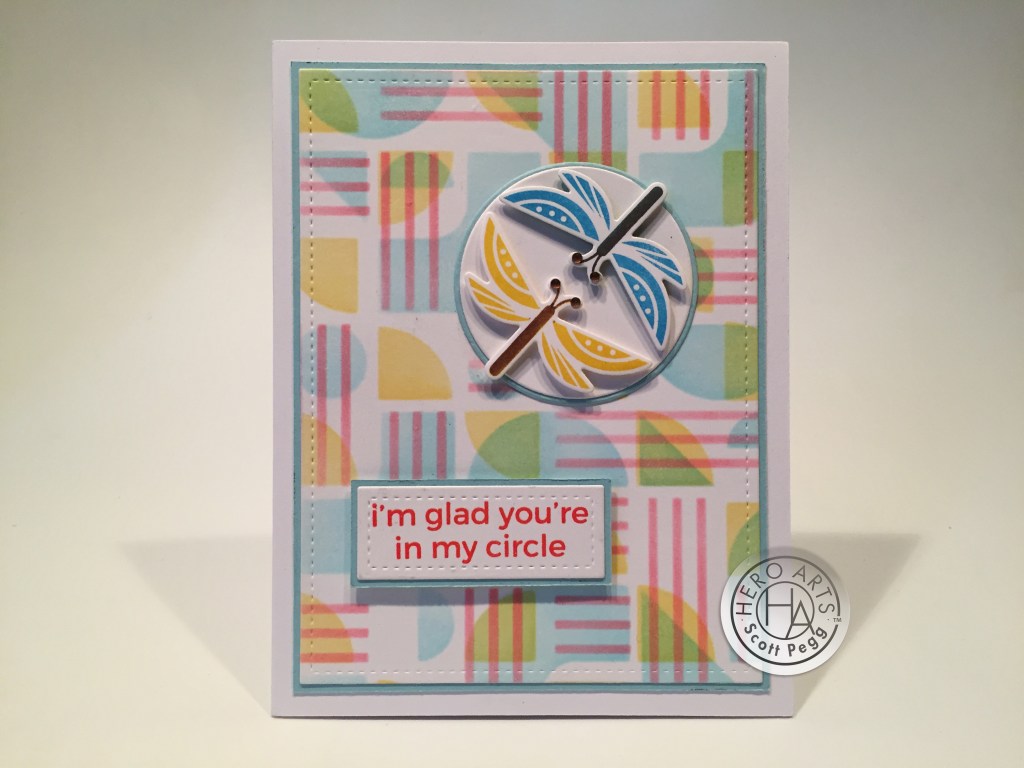
I die-cut the background with a Lawn Fawn Stitched Rectangle die, added a thin mat of Hero Hues Mist card stock and glued those to a White card base. I stamped the sentiment using Fruit Punch Reactive ink, embossed that with clear embossing powder and die-cut it with another LFSRdie. I die-cut another 2″ circle from white card stock and added thin mats of Mist card stock behind that and the sentiment.
I stamped the dragonflies (I really like these stamps) with Lemon Drop and Splash ink, and then used a Brown TomBow marker directly on the stamp to color the bodies. I am using my HA Misti to do all my stamping. I glued the matted circle flat to the card front and added the dragonflies and the sentiment with foam tape. I found some tiny copper gems in my stash (from the Love From Lizi March 2018 Card Kit) and added them to the ends of the dragonflies antenna for a surprise pop of sparkle. I’m loving this card!
Now that uses my four stenciled backgrounds but we have lots of stamps to go! This one makes me giggle..!
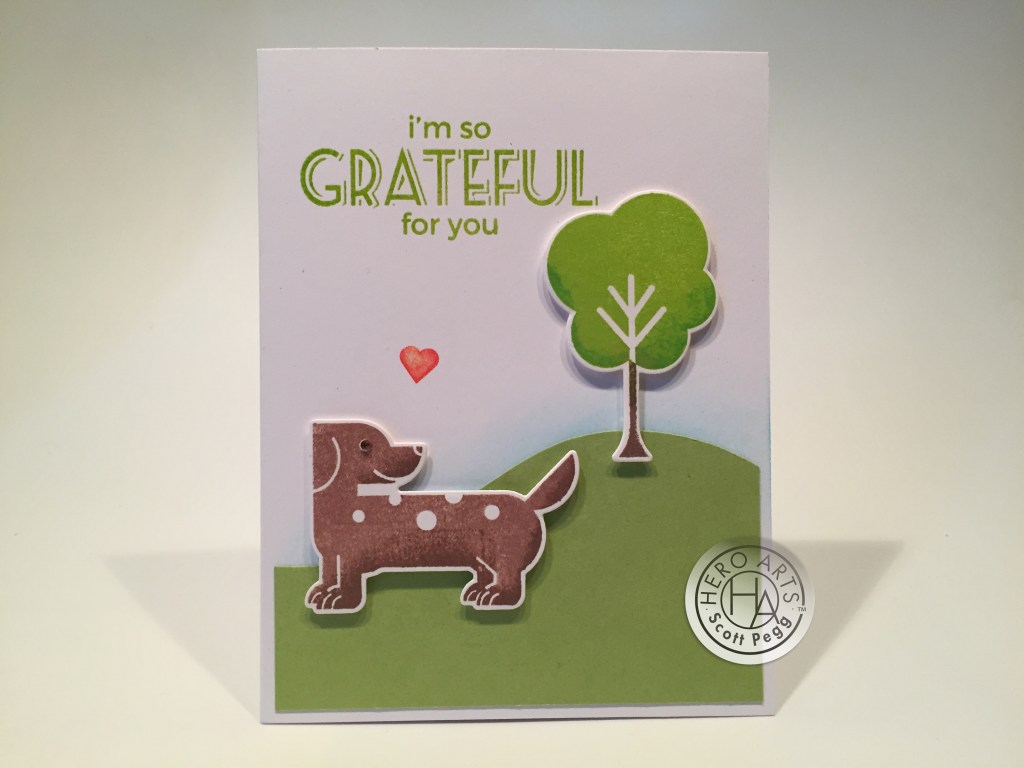
HA! I stamped the dog using Hero Arts Sand Stone and Cup O’ Joe ink, and stamped the tree with Key Lime Fizz and Green Apple Reactive inks, stamping the trunk by using a TomBow marker. I die-cut both with their matching Frame Cut dies. I freehand cut the hillside from some Hero Hues Kiwi card stock, and ink blended a little Splash ink directly behind that on the White card base. I stamped the sentiment on the card base with Key Lime Fizz Reactive ink and embossed it with clear embossing powder.
I glued the hill flat to the card base, and added the dog and tree using foam tape. I had to add this little heart (stamped in Fruit Punch Reactive ink) to show our doggie’s appreciation and I added a little sparkle to that with my Spectrum Noir Sparkle pen. Another mini copper gem for the dog’s eye brings him right to life. Though this isn’t a pun… I do think it’s a great light-hearted joke!
The black cat made me think about the possibilities of stamping some of these animals in white. That could work..!?

I stamped the fox and the bunny multiple times on some Hero Hues Pitch Black card stock using Unicorn White ink and die-cut them both with their matching dies. I die-cut three more ‘blanks’ of the bunny and fox and glued them all together for a little added dimension. I trimmed the other half of my Quarter Circles stenciled pattern to 5.25″ x 2.75″ and glued that to a thin black mat and then down to a white card base. I glued a 5/8″ strip of Bazzill 40# Vellum over the bottom row of the background using my Zyron Sticker Maker. I wanted to give our stamps some ground to stand on, but didn’t want to completely obliterate the background.
I lined the top of that velum strip with another Purple Mirror peel off and glued the animals on top of that. I stamped the sentiment on more Pitch Black card stock using Hero Arts Embossing and Watermark ink and embossed that with White Embossing powder. I die-cut that (and three more ‘blanks’) with the LFSRdie, glued them all together, and glued that to my card front. Once again, I added little black Nuvo Drops to the eyes of our animals – still amazed to see how much life that adds to these stamps. I guess it has truly been an unprecedented year if these two “mortal enemies” miss each other too!!
I haven’t used any of the flower stamps yet, and I thought a colorful single-layer card would put them to good use!
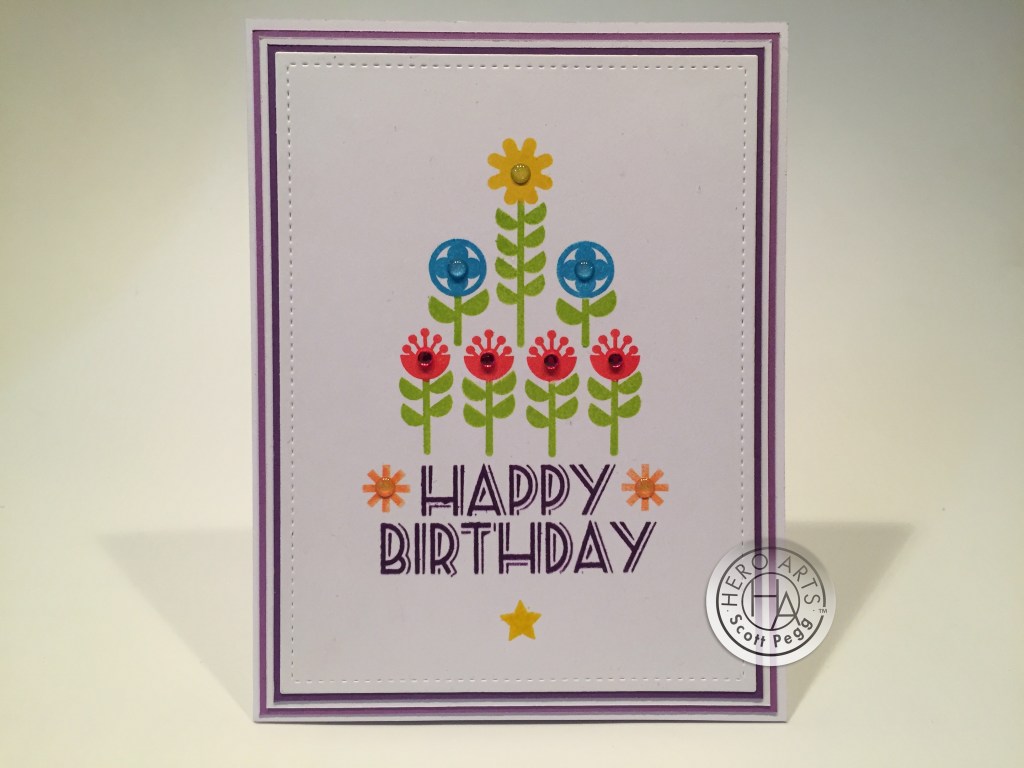
I am loving this Birthday card! Using some simple masking, I stamped all our flowers in this fun arrangement using Lemon Drop, Key Lime Fizz, Splash and Fruit Punch Reactive inks. I stamped the Sentiment with the Grape Juice ink and embossed it with clear embossing powder. I stamped the two asterisks in Creamsicle Reactive ink and the star with Lemon Drop ink – I did add some clear embossing powder to the star. Once I had successfully stamped everything, I die-cut this panel with a LFSRdie, added thin mats of dark purple, white and light purple, and glued it to my card base. I dug through my stash of crystals and enamel dots and found a little sparkle for each of the elements on this card.
To tell the truth, it took me four tries to get this all stamped correctly. I was working on this card after a day of being back to work (part-time but oh, so welcome!!) and I was possibly not as focused as I should have been. I did do a trial run of this arrangement – just black ink on some graph paper – so I knew where I wanted everything to go… I guess I was a little distracted (maybe even a little tired) so I literally had to keep reminding myself to remove the masks after inking the stamps. I do think the effort was worth it as I am completely in love with this card, and I think the graphic suggestion of a birthday cake goes along perfectly with the theme of this kit!
If you have followed me for any time at all, you know I am not particularly in love with butterflies on my cards. However… I did think that the butterfly stamp in this kit was quite unique – a bit more more bug-y than beautiful..!

I stamped the butterfly stamp in two-tones using Creamsicle and Lemon Drop, Fruit Punch and Taffy, Key Lime Fizz and Green Apple, Thistle and Grape Slush, and Splash and Blue Hawaii Reactive inks. I also used my TomBow marker to stamp the brown bodies just like I did with the dragonflies. I die-cut all with their matching frame cut die. I printed this perfectly appropriate sentiment directly on the White card base using my Silhouette Software (remember it’s FREE!) and the Colonna MT font. I thought that font was a similar match to the sentiments in this stamp set.
I trimmed the leftover bit of my three-stencil pattern down to 1.75″ x 5.5″ and glued that to the left side of the card base. I did run a clear glitter peel off down the edge of that as well. I attached all the butterflies to the card front using foam tape, and added an assortment of clear sequins and gems for some extra special sparkle! Love it! What a fun Valentine or Anniversary card for anyone in a long term relationship!
I have now used every single stamp in this stamp set – that’s always my goal, and I try to resist adding my own spin on things until I’ve covered all the bases. Though I really love the dragonfly and the bunny stamp, I thought the fox stamp offered a little bit more flexibility than the others.
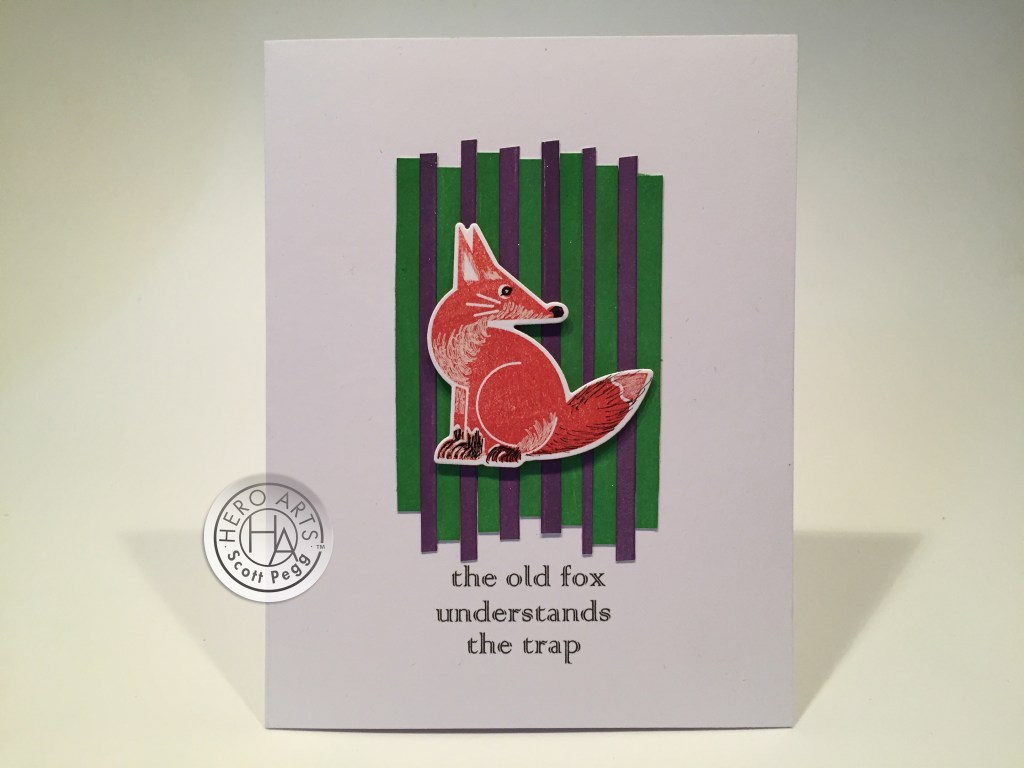
I stamped the fox on a scrap of White card stock using some Stamping’ Up Calypso Coral (the best reddish-orange dye ink I have in my stash) and went after him with my White Gelly Roll pens and a Pigma Micron black pen. It was fairly easy to add a smallish touch of realism to this solid stamp – I like him! I was inspired to create this background by a pile of thin white card stock strips that had accumulated on my desk from all the mat cutting I had done. I colored half of the strips using Grape Slush ink and the other half using Green Apple ink. I assembled them together on a piece of tape and trimmed down the edges to make a kind of graphic suggestion of a forest.
I printed this sentiment (same font as the butterfly card but in black) directly on the card front and glued the background piece in the center of the card front. I added the fox with some foam tape, and for a final touch, stamped the Happy Birthday sentiment on the inside of the card. You can always make fun of a person’s age on their birthday, but it does become more relevant as we get older (and older and older)! Though this card is poking gentle fun, it’s also kind of a compliment acknowledging that with age comes wisdom… I’m hoping!!!
Are you jonesing for a pun? I know I am! I looked high and low for appropriate puns to use with this kit. This one wins!
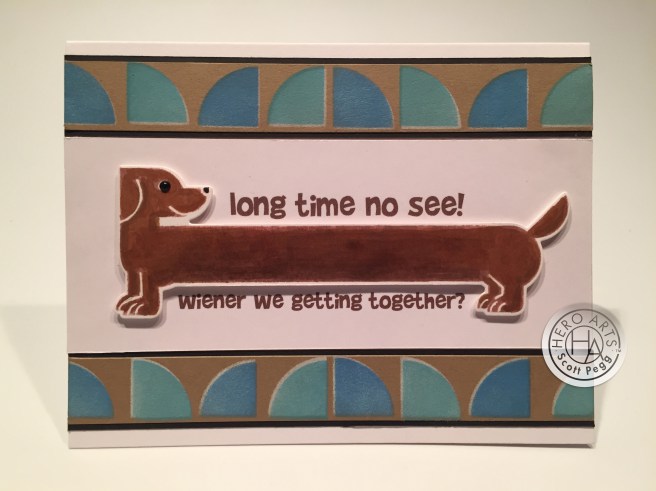
This one makes me laugh out loud, and is perfectly attuned to our life and times at the moment! And I LOVE this super-long Dachshund! When I realized that I could make this dog stamp as long as I wanted (it IS a straight line from his head to his tail) I was very excited! I stamped his front on the left of a card panel and his rear to the right of that panel using my MISTI to keep him lined up. Then I used some post-it tape to mask out the area for his body – just match front to back – then I ink blended more Sand Stone and Cup O’ Joe ink to fill in the body. I also used some alcohol markers to help with the blending, but this is much easier than you might have imagined! Also… Dachshunds don’t tend to have spots, so I colored in all the spots on the stamp too. It was also easy to do some partial die-cutting on the two ends, and connect the cuts with a craft knife. I actually hollered with joy when I got him cut out!
I cut the stenciled pattern strips from a drop-shadow experiment I was trying – I stenciled two layers of the Quarter Circles stencil on some Kraft card stock using HA White Unicorn pigment ink. I let that dry thoroughly, and then stenciled over that again using Splash and Blue Hawaii ink and offsetting the stencil just a little bit… it didn’t give me quite as much punch as I thought it would, but it did provide me with the perfect touch to add some more color and pattern to this card. I added thin black masks behind both strips and trimmed them down to 5.5″.
I printed this sentiment on the card front using the Brady Bunch Remastered font, (one of my favorites for humorous cards) and glued the matted pattern strips to the top and bottom, then added our wiener dog with foam tape. Another dot of Nuvo Drops on the eye brings more life to our pooch, and I honestly believe I have never heard this pun before…! This is almost a double pun as well… “long time no see” what with the dog looking at his tail that’s so far away..! This card gives me great joy – I hope you like it too!
So that’s my 10 Cards inspired by the My Monthly Hero April 2021 Kit. A really amusing batch of of very colorful cards!

I did use every single stamp in this stamp set… I used all of the stencils and ink cubes as well! I have a couple of birthday cards and thank you cards… lots of friendship cards and missing you cards and even a Valentine/Anniversary card! Not too shabby! Quite a unique set from hero Arts this month! I’m always thrilled to get the chance to work with something new and different whenever the opportunity presents itself! I hope you like my little collection… let me know which card(s) are your favorite!
As of posting, this kit is still available at Hero Arts. If I’ve managed to catch your eye or inspire some ideas of your own, I’d suggest grabbing a kit for yourself! MMH Kits are always a GREAT value and once they’re gone… they’re gone! Please use my links when you do go shopping at Hero Arts. It helps support this channel and is always greatly appreciated!
My Monthly Hero April 2021 Kit: https://shrsl.com/2x2p2
Hero Arts April Release: http://shrsl.com/2x34h
Hero Arts: https://shrsl.com/1f7qx
Thank you so much for sharing your time with me here today! I am constantly humbled by your attention, and I will always do my best to keep bringing you cheer and inspiration with every kit I receive. If you are not a follower of this blog, please join up at the top of this page, and remember to Like me, List me, Pin me, Post me, Share me with all of your friends… don’t run with scissors… and I send you and yours Health, Happiness, Cheer and Goodwill and, as always, Happy Crafting!!

Scott, you are simply amazing! You make me laugh and turn my cloudy days into sun shinny happy days! Thanks for the inspiration, the long dog was hilarious! great kit ….take care and be safe … barbara
LikeLike
Thanks Barbara! Always happy to share a little sunshine! Have a great week!
LikeLike
Thanks for all the amazing inspiration! I grabbed this kit the moment I saw it and can’t wait to get started on some fun stenciling and cards!
LikeLike
Thanks Patty!
Always appreciated! Have Fun!
Scott
LikeLike