
DISCLOSURE: This site contains some affiliate links to products. I may receive a commission for purchases made through these links (at no cost to you). As an Amazon Associate I earn from qualifying purchases. Thank you!
Hello Folks! Scott here with my 10 cards featuring the My Monthly Hero July 2020 Kit. This kit invites us to take a crafty voyage to the lost city of Atlantis, deep in the ocean!
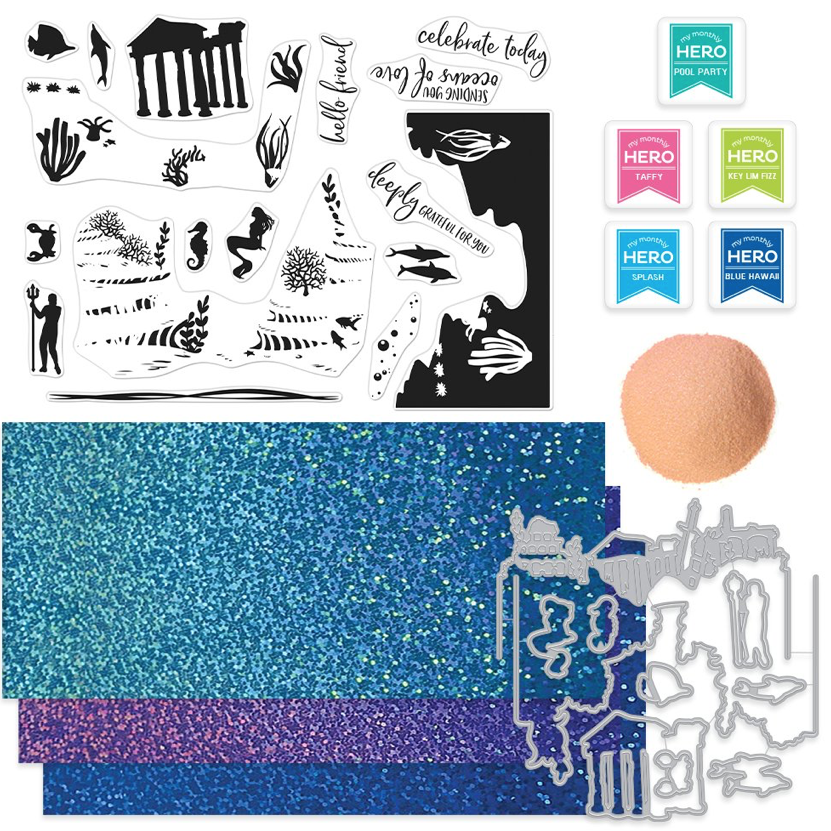
The stamp set in this kit features a brand new HeroScape design, enabling us to build a beautiful reef by inking up the various layers. Our 6″ x 8″ stamp set also includes four sentiments and nine assorted silhouettes. To assist with all that stamping, we get FIVE cubes of Hero Hues Reactive inks in Pool Party, Taffy, Key Lime Fizz, Splash and Blue Hawaii. I LOVE it when we get inks in our kits! We get nine coordinating frame dies to match the stamps (even one for the reef!) and a Fancy Edge Die that cuts three sides of some building ruins. This kit is rounded out with six sheets of glitter sticker paper in , Teal, Purple, and Diamond Blue, and a .5 oz. pot of Coral Embossing powder. Very interesting…! The HeroScape layering stamps are usually very cool! Let’s see what inspiration this kit manifests!
I was drawn to the glitter sticker paper and wondered how I could use it effectively.
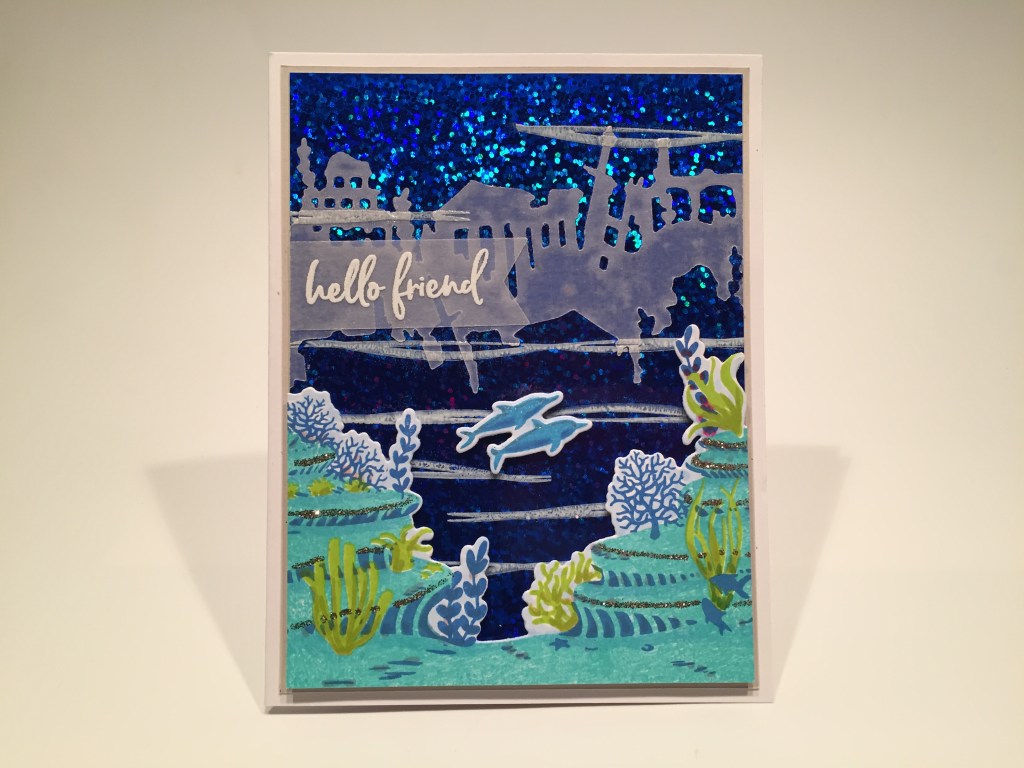
Since it IS sticker paper, I stuck some of the Diamond Blue Glitter mylar to some card stock and trimmed it down to 3.7/8″ x 5.1/8″. I die cut the Fancy Edge die from some vellum, and tried that over the glitter, but I thought it hid too much of that sticker paper, so I cut the bottom edge of the vellum from the back using the same die. I ran the vellum die cut through my Zyron sticker maker to apply adhesive to the back, and glued that on top of the glitter background. Interesting! I stamped the long water ripple all over the background with Unicorn Pigment ink, and embossed that with clear embossing powder to add some watery shine and to help integrate the die cut with the background.
I stamped the Reef stamps using the Pool Party ink then the Blue Hawaii ink and lastly the Key Lime Fizz on some Neenah Solar White 80# card stock using my Hero Arts MISTI. I die-cut my reef and added a bit of extra color with my Spectrum Noir alcohol markers – including toning down the die-cut white border. The double dolphin is stamped with Splash ink, die-cut and detailed a little as well. The reef and dolphins are attached to the background with foam tape.
How about a sentiment! I stamped the “hello friend” on another piece of vellum with VersaMark ink and embossed that with white embossing powder. Kind of like the dolphins are saying Hi to each other! I trimmed that to a banner shape, ran it through my sticker maker and attached it to the card front. I cut a simple grey mat to 4″ x 5.25″ and glued that to a white card base. I mounted the assembled card front with more foam tape, and finished this up by adding a touch of Vintage Platinum Distress Glitter Dust to the edges of the reefs with my Quickie Glue pen. That brings all the sparkle in the background to the front for some equal time! Very sparkly and I think I’m getting a feel for how to use this kit to get some interesting dimension on my cards!
For my next card I wanted to see how much depth I could create with one-layer stamping.

For this card I took some light blue card stock from my stash and ink blended the background with some Splash ink and Unicorn White inks. I stamped the ruined temple towards the bottom, and the curved water ripples with HA Soft Granite Shadow ink. Then I die-cut our Fancy Border die from a piece of Fun Foam , and used that as a stamp on the top of the background. LOVE THAT! I think this is the first time I’ve made a foam stamp from a die and it worked so well!! Definitely a great sense of distance with that stamp!
I stamped the HeroScape stamps using Splash, then Blue Hawaii, and then VersaMark ink for the final plant layer and embossed that with the Coral embossing Powder. Though shiny, I thought it was a little flat, so I added a touch of more color with my alcohol markers. The dolphins and bubbles were stamped in Pool Party ink, the crab in Soft Granite ink, and the fish and seahorse in Sea Glass Reactive ink from the MMH March 2019 kit. I stamped the sentiment using Blue Hawaii ink, then masked off the reef and sprayed the rest of the background with Sheer Shimmer sparkle spray for a nice bit of shine in the water.
I die-cut my stamped piece with a Lawn Fawn Stitched Rectangle die, and made a frame for that with some iridescent blue card stock from my stash with the largest LF Stitched Rectangle Frames die. I glued those down to a plain white card base, and added a few orange sequins from my stash for an extra touch of bling. I think this card has a great sense of depth! Making a foam stamp from the Fancy Edge die really made this card come together… I know I’ll be using that foam stamp more..!! And that Sea Glass ink works very well with all the blue inks included in this kit.
This next card is just two layers – I wanted to use that Fancy Edge die as it was intended!
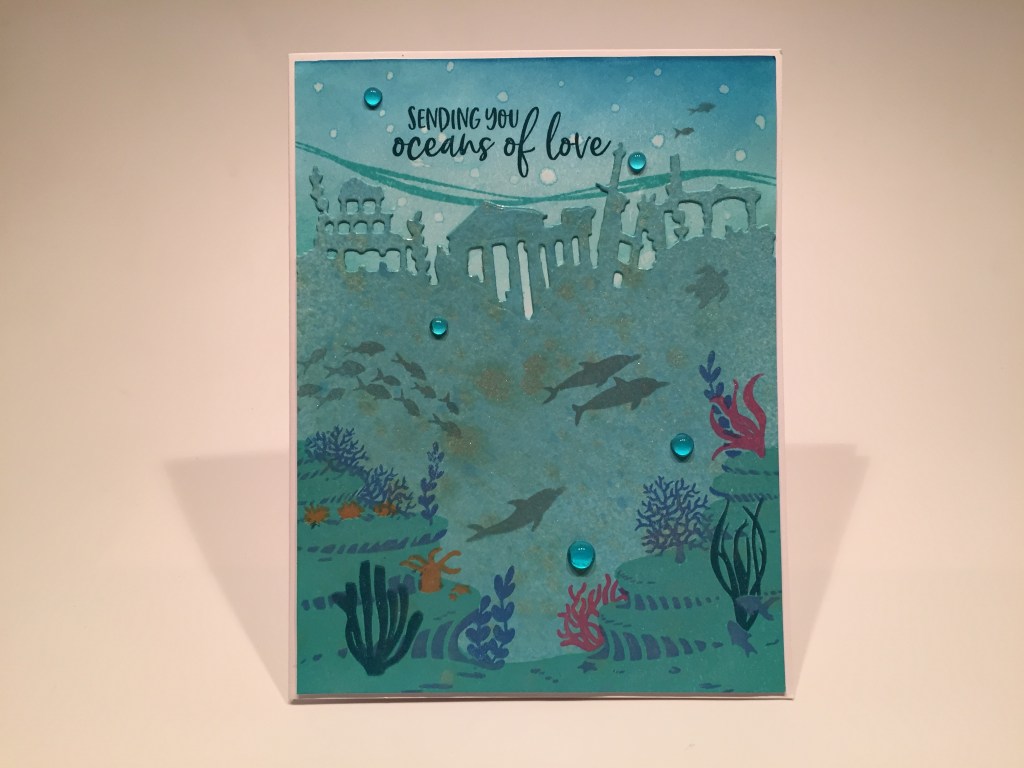
I took two pieces of 80# Neenah Solar white card stock cut to 4.25″ x 5.5″ and ink blended the top of one piece with Broken China Distress Oxide ink, and used Mermaid Lagoon Distress Oxide Spray (with water) to color the second piece. When that was dry, I sprayed some Sea Foam Shimmer spray (from the MMH June 2018 kit) on top. I trimmed both pieces down to 4.1/8″ x 5.3/8″ and I die-cut the darker piece with the Fancy edge die.
On the background piece, I splattered little water droplets to activate the ink and make the ‘bubbles’. I stamped the ripple stamp in Pool Party ink and the sentiment with Sea Glass ink, and glued that piece to a white card base. On the die cut piece, I stamped the reef using Pool Party, and Blue Hawaii inks for the first two layers, and selectively inked up the plant layer with Taffy, Creamsicle, and Sea Glass inks. I stamped the dolphins using Soft Granite ink, and pulled in a few more fish stamps from the MMH March 2019 kit to add the smaller fish and the turtle to this scene. A few blue droplets from the March 2019 kit adds shine and a little dimension. I like the plants in different colors, and some extra fish are always welcome…! This is quite a shimmery card with a nice sense of depth.
We have a statue stamp with a missing arm in our set… could I restore that statue?
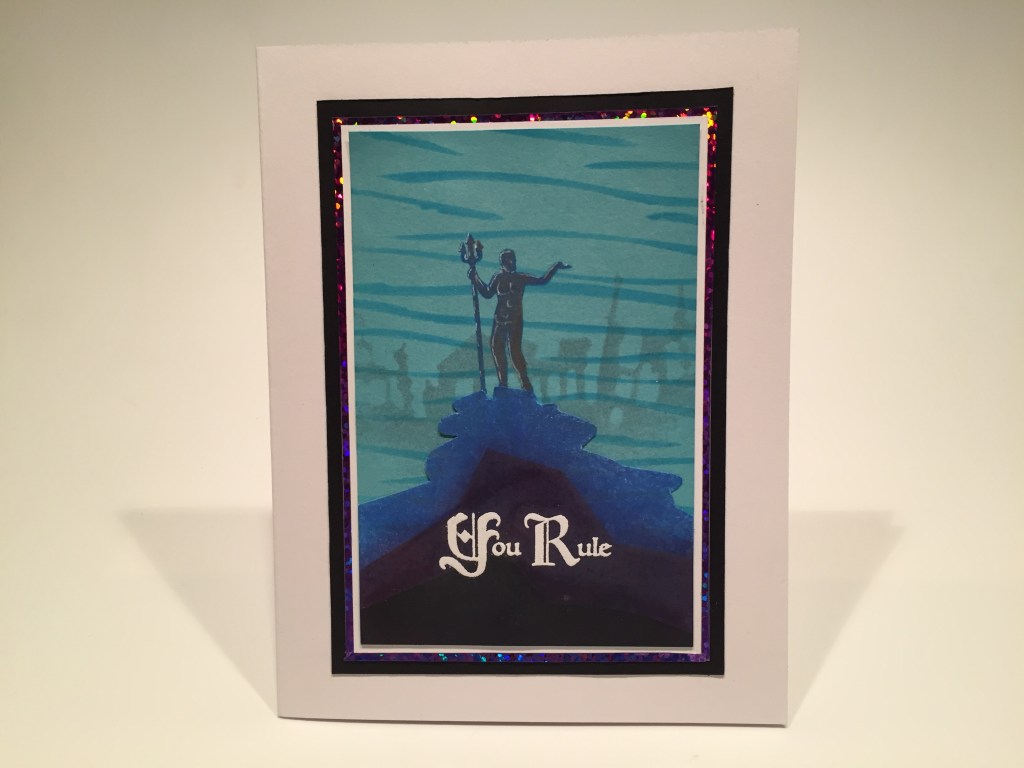
Sure!!! On a 2.3/4″ x 4.1/8′ piece of light blue card stock, I stamped the Fancy Edge die foam stamp with Soft Granite ink, and stenciled in the water ripples with Splash ink through a home-made stencil I created. I stamped the two ends of the #1 reef stamp in the center using Blue Hawaii Ink, then masked off a crude rock shape on top of that and ink blended some Seedless Preserves and Black soot Distress ink down to the bottom of the panel. I stamped our statue standing atop the reef with Blue Hawaii ink, and added his arm back in using my Disposable Micro Applicator brushes.
I find these tiny brushes invaluable for touching up stamps, adding textures or even drawing in a whole new arm! I used those tiny brushes to add a hint of golden highlights to the statue using some Golden Glitz Delicata ink, and used a white gel pen for more detailed highlights. I stamped the sentiment (from the MMH August 2019 kit) with VersaMark ink and embossed that in white. This is a perfect sentiment for this card and I thought we could get away with the ancient typeface being that we are in Atlantis!!
I glued the stamped piece to a thin white mat, then to a thin Purple Glitter mat, then a thicker black mat and finally down to my white card base. For a little more sparkle I traced the stenciled ripples with a Spectrum Noir Sparkle Pen. I really like this card… VERY masculine! And I’m thrilled I was able to give this poor statue his arm back!
Naturally, there’s a mermaid stamp in this set… let’s see what I can do with her.
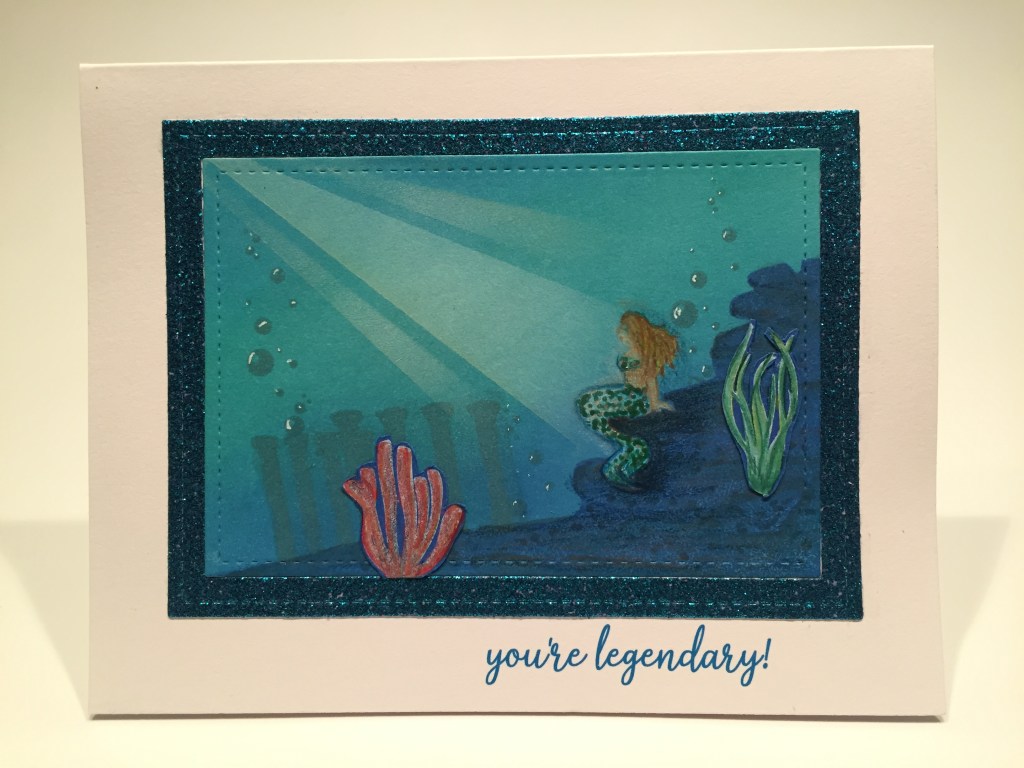
This is a fun card! I die cut another piece of light blue card stock with a LFSRD (2.75″ x 4″) and did some ink blending on that with the Splash and Pool Party inks. I stamped the pillars (the ruined temple stamp turned upside-down) and bubbles with Soft Granite ink, figured out where I wanted my mermaid, and stamped her with Unicorn white ink. Once she was dry, I masked the mermaid off and stamped the right side of the first reef stamp using Blue Hawaii ink. (I masked the left side of the stamp off before inking).
I added some texture to the reef with my alcohol markers, and stamped the two plants with Unicorn ink on some plain blue card stock. I broke out my colored pencils to color the mermaid and plants, and fussy cut the two plants before gluing them down. I added some spots of green to her tail with a green gel pen and gave her a bit of sparkle with my Sakura Stardust gel pen. I masked off the light beams on the background with some Post-it tape and blended in some Unicorn pigment ink for the spotlights on the mermaid. A touch of white gel pen highlights the bubbles.
I printed this sentiment on my white card base using my Silhouette software and the Dream State font. I die-cut the glitter frame with another LF stitched rectangle frames die, and glued all to my card base. I’m loving this card! That mermaid is pretty tiny, but I think I managed to color her up sufficiently. I think the beams of light really sell this card… This is my little art-piece for this month!
We also have a stamp of what appears to be a Longnose Butterfly fish in this kit…
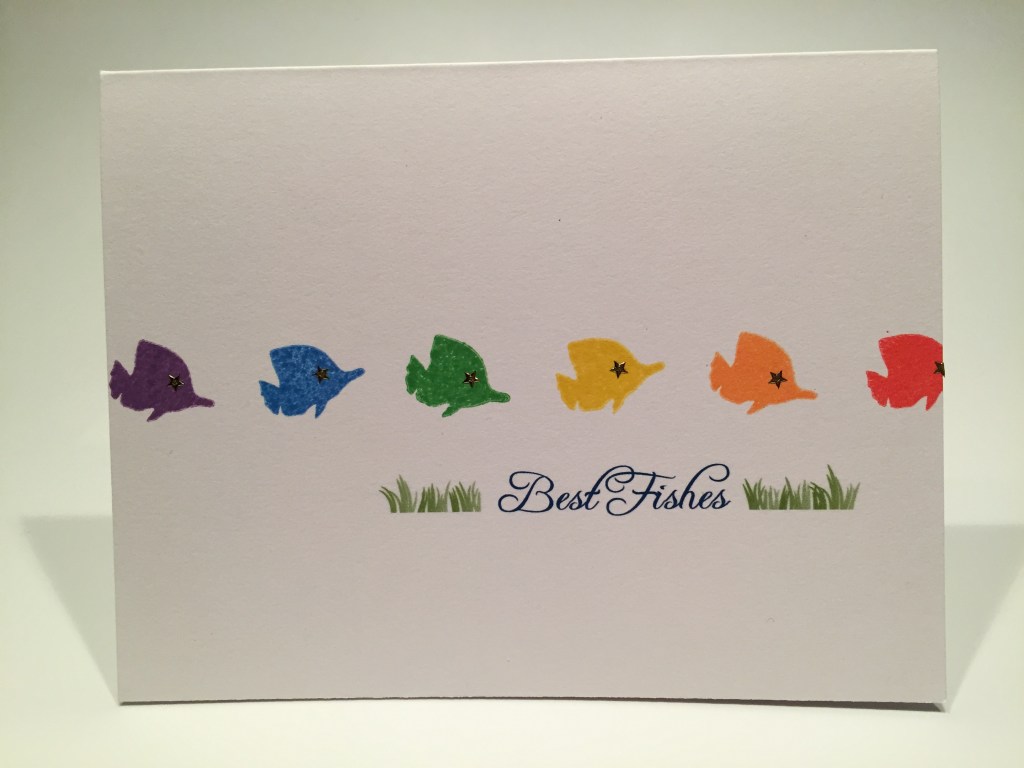
I need to focus on something a little simpler now…! I stamped the fish stamp across the middle of my white card base using HA Grape Slush, Blue Hawaii, Green Apple, Lemon Drop, Creamsicle, and Fruit Punch reactive inks. I printed this sentiment using my piggy-back printing method and the Freebooter Script font and the Border Bits font, and I added tiny little gold stars to all of the fish using the Love From Lizi Mini Heart Gold peel offs. I love this pun-ny sentiment rendered in a formal cursive, and these do appear to be the best fishes – – they all have gold stars!!
I thought the “celebrate today” sentiment was a little odd in a kit themed to an extinct civilization… but I thought I might be able to make that a little more relevant.
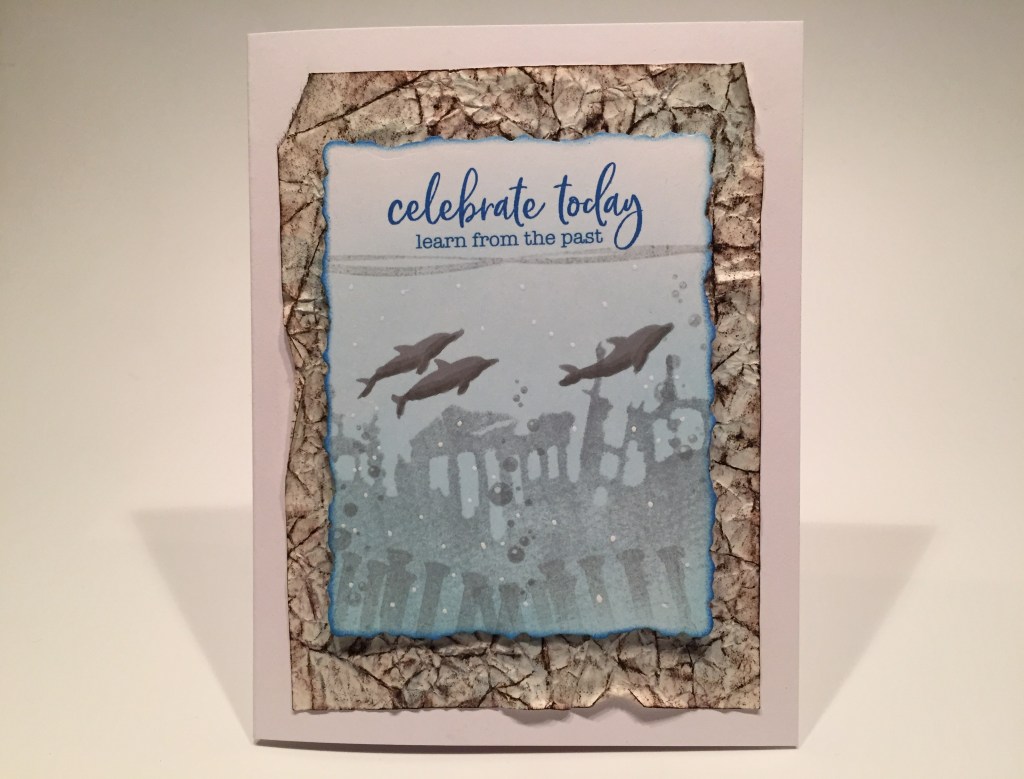
I don’t mean to get all philosophical here, but this makes a little more sense to me! I did some ink blending on a piece of white card stock using Broken China Distress Oxide ink and stamped the water ripple and my die cut foam stamp and the dolphins and the upside-down temple and the bubbles using HA Soft Granite ink – repeat stamping using my MISTI gave me the different values of that grey. I added some dimension to the dolphins with my alcohol markers, and some white bubbles with a gel pen.
I stamped the sentiment with Blue Hawaii ink and printed the addendum using the American Typewriter font. I die cut that piece with a Spellbinder Deckled Rectangle die and did a little distressing on the edges with more Blue Hawaii. I took a 3.75″ x 5″ piece of parchment paper and crumpled it up a few times then spread it out and ran some Vintage Photo and Walnut Stain Distress inks over the wrinkles. I also sponged a little of the leftover Broken China on the parchment to add a touch of blue. I distressed the edges a little and glued it down to a white card base. I mounted the inked panel on top of that with foam tape. I really like the look of this card and I believe that compound sentiment could actually mean something to the right person! That’s all I’m after!
Okay, we’ve done Poseidon, the mermaid, the fish, the dolphins… how ’bout that crab?

If all you have is a small stamp, just stamp a lot of them!! With the help of my MISTI, I stamped these crabs using (bottom to top) Fired Brick oxide, Candy Apple oxide, Fruit Punch reactive, Worn Lipstick oxide, Taffy reactive, and the one on the top in Tattered Rose oxide. I guess you can think of this as the different stages of cooking..!! I printed the sentiment on my stamped panel using the Henny Penny font, and then die cut that panel with a LFSRdie. I glued that to a mat of dark red and then down to a white card base.

Of course I can’t leave well enough alone… nor would I ever be accused of leaving a pun unsaid… so I did print this afterthought on the inside of the card. I know many people who are both crab-ulous AND claw-some! This card cheers me up completely! It’s nice to get a good red card going after all that blue!
I’ve used all the stamp in this set by now… trying to come up with appropriate sentiments.
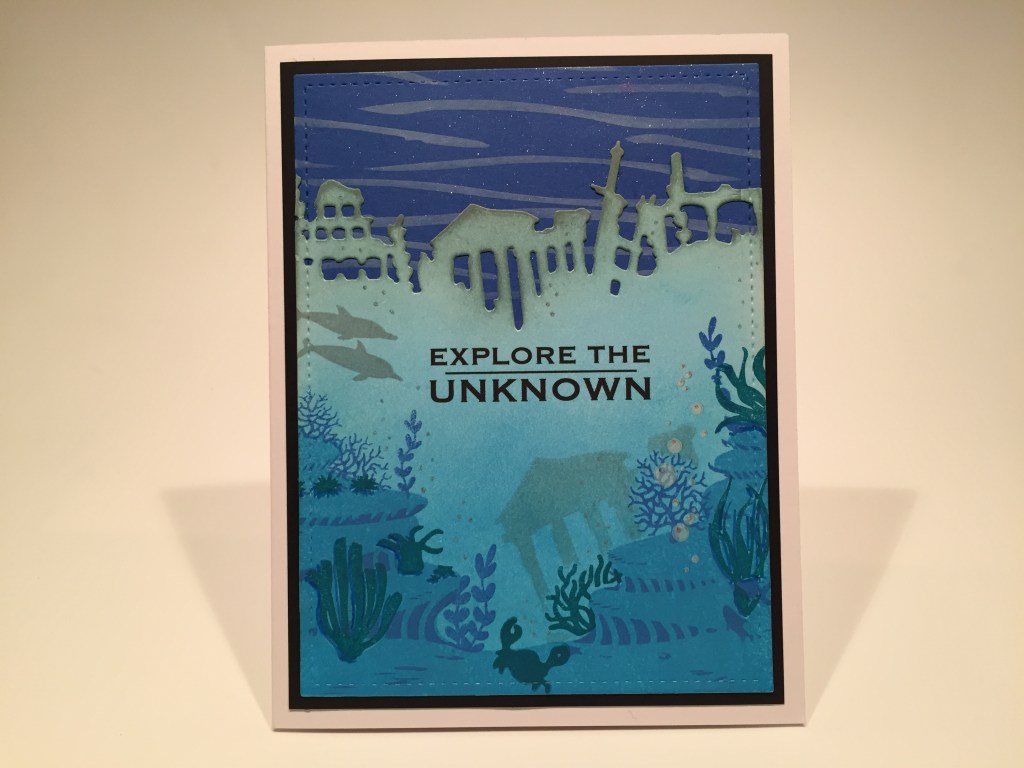
I think “Explore the Unknown” is a great sentiment to use with this stamp set! A piece of regular blue card stock with my ripple stencil in Unicorn white and then a couple spays of Sheer Shimmer mist for some sparkle in the background. A piece of white card stock ink blended with the Splash ink, the reef stamped in Splash then Blue Hawaii, then Sea Glass inks. The temple and the dolphins stamped in Soft Granite ink. The crab is stamped in Sea Glass and there’s some bubbles in Unicorn white. I die cut both pieces with a LFSRD, then the front piece with the Fancy Edge die and I sponged a little Pumice Stone Distress ink on the cut edges.
I laid out the sentiment using my Silhouette software and printed that using the Copperplate font. I did lay some Post-it tape over the die cut edges when I sent that piece through my printer. I glued the two layers together, then to a black mat and down to a white card base. I did add more dots of sparkle on the front panel with my stardust gel pen – can’t let the background have ALL the sparkle! I like this card… the sentiment is useful for many occasions, and I like the reef all in blues… feels a touch more realistic!
I was trying to think of a smaller framing device for my last card – I’m feeling a little water-logged by now – and I came up with this fun idea.

It’s been a while since I did a shaker card, and I think this goggle cut-out is fun! I created this shape using my Silhouette and cut it from some black shimmer card stock three times and glued them all together. I traced the goggle on a piece of card-sized masking paper and cut out the goggle to mask off my inking on the card front. Splash ink for the background with Soft Granite for the stamps and a little Hickory Smoke Oxide ink for the bit of reef on the right. I did add a touch of detail to the reef with a micro applicator and some Pool Party ink. I got the diagonal dapples of light in the water by simply taking a white eraser to the ink. Subtle but noticeable! Of course the best part is taking off the mask and revealing the perfectly shaped ink job!
Yes, it’s Latin… Yes, it’s referencing carpe diem… I think this comes close to being a meta-pun. If such a thing is possible!? I have to admit this tickles me to no end!
Yes, maria diem means seas the day! When I figured out this one you could hear me whooping and hollering in the whole building! So many puns… so many possibilities… so many opportunities! I can’t help but laugh! I printed the sentiments on the card base using the Dream State Font.
At first, I wasn’t thinking beyond putting some acetate in the goggles and glueing them down to the card front, but when I realized that my Darice double-sided foam adhesive strips fit in the goggle frame perfectly, I couldn’t NOT do a shaker card! I dug out some clear micro-beads from my stash to be the shakers and these are kind of mesmerizing! The do have a kind of water-like sense of movement as they shake around. In order to make sure I got the frame on the inked background perfectly, and I didn’t lose bunches of these micro-beads all over, I made a small funnel out of some foam square sheets (so it wouldn’t stick to the foam strips), and laid the frame in place on the card front from the left to the right, finally catching the funnel in the edge on the right side of the goggles. Then it was easy to pour in the micro-beads through the funnel and they didn’t go all over the place! Just pull out the funnel and stick the last bit of the frame down! VOILA! No Mess! LOVE this card! It’s worth catching the video just so you can see those beads move!
We’ve made it through all ten cards featuring the MMH July 2020 Kit. I admit there were a few minutes there when I thought I wouldn’t be able to do 10 different cards, but I think I managed to create a nice variety with some useful sentiments and a couple puns as well!
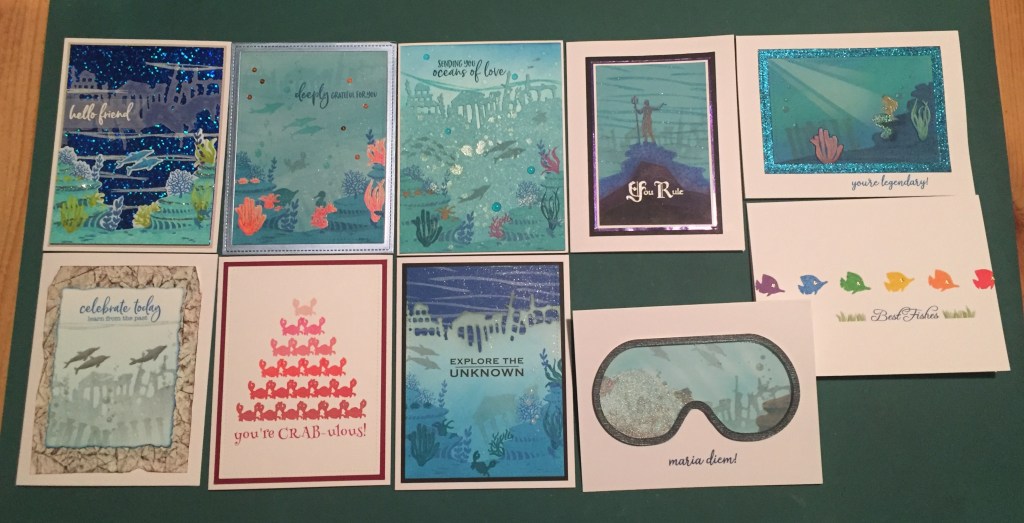
Lots of underwater scenes here, but what did you expect!? I am really thrilled with my foam stamp from the Fancy Edge die, that HeroScapes reef set is really fun, and I love the dolphins and that water ripple stamp. I just wish I knew more oceanographers!
This kit is still available at Hero Arts if I’ve managed to ignite your imagination or given you some new ideas! Please use my links whenever you go shopping at Hero Arts – it helps support my site and channel, and it is always truly appreciated whenever you do! Hero Arts: https://shrsl.com/1f7qx My Monthly Hero July 2020 Kit: http://shrsl.com/2f3rr
Thank you so much for sharing your time with me here! Let me know if you have any questions and which card(s) you like best. If you’d like a PDF copy of my sentiments or my Silhouette file with the sentiments AND the goggles, just drop me a note at the contact button on the top of this page and I’ll gladly share with you! Remember to Like me, List me, Pin me, Post me, Don’t go swimming right after you eat, and as always I wish you Health and Happy Crafting!

I enjoy your genius. Thank you for sharing, stay well
LikeLike
I really enjoyed your 10 cards of both this kit and last month’s kit. You are majorly talented.
LikeLike
Thanks so much Gloria! That means a lot to me!! Stay Tuned!!
LikeLike
You ARE the best thing since sliced bread! I get hundreds of emails and crafty tutorials and of ALL of them I look forward to yours the MOST!!! Just the best combination of craftiness and light-hearted fun. I hope for continued health and a return to an extra fun normal ASAP.
LikeLike