
DISCLOSURE: This site contains some affiliate links to products. I may receive a commission for purchases made through these links (at no cost to you). As an Amazon Associate I earn from qualifying purchases. Thank you!
Hello Folks! Scott here with a new Scor-Pal Project for you! I was talking with Diana Crick (the Designer and Owner of Scor-Pal) and we thought it would be a lot of fun to do a series of projects for you highlighting the Scor-Pal and Scor-Tape. These tools do a lot more than just scoring and folding and sticking layers on top of each other!
BUT FIRST! I must announce the Winners of the new Stacker! Our last Score-Pal post introduced the new Stacker to the Scor-Pal family of products, and Diana was generous enough to give away three Stackers for the introductory promotion. And our winners are (drumroll please) Marilynn Solis from Mesquite, Texas; Gail Loyola from Columbus, Ohio; and Nancy Flemming from Prairie Village, Kansas. CONGRATULATIONS to all the winners, and a big THANK YOU to all who entered!
Let’s start with the basics – The Art of Box Making. If you have card stock and a Scor-Pal (or any scoring board) you can make customizable boxes for all your gift-giving, organizational, and storage needs.
When we first started talking about these projects, Diana surprised me by mentioning that she gets a lot of questions about how to figure out eighth-inch markings on a ruler or on a Scor-Pal. It seems a lot of folks have a hard time figuring out where 3/8″ is or where 7/8″ is… granted, eighths of an inch are rarely marked on any kind of ruler, so Diana came up with an easy way to remember your eighth inch markings.

Diana equates an inch to a pie cut into eight pieces – 2 eights are a quarter of your pie – 4 eights are a half – so 3 eights would be between the 1/4″ and 1/2″ marks. The same would be true for 5 eighths and 7 eighths. I think this is a very clever way of reminding oneself exactly where those specific eighth inch measurements are!
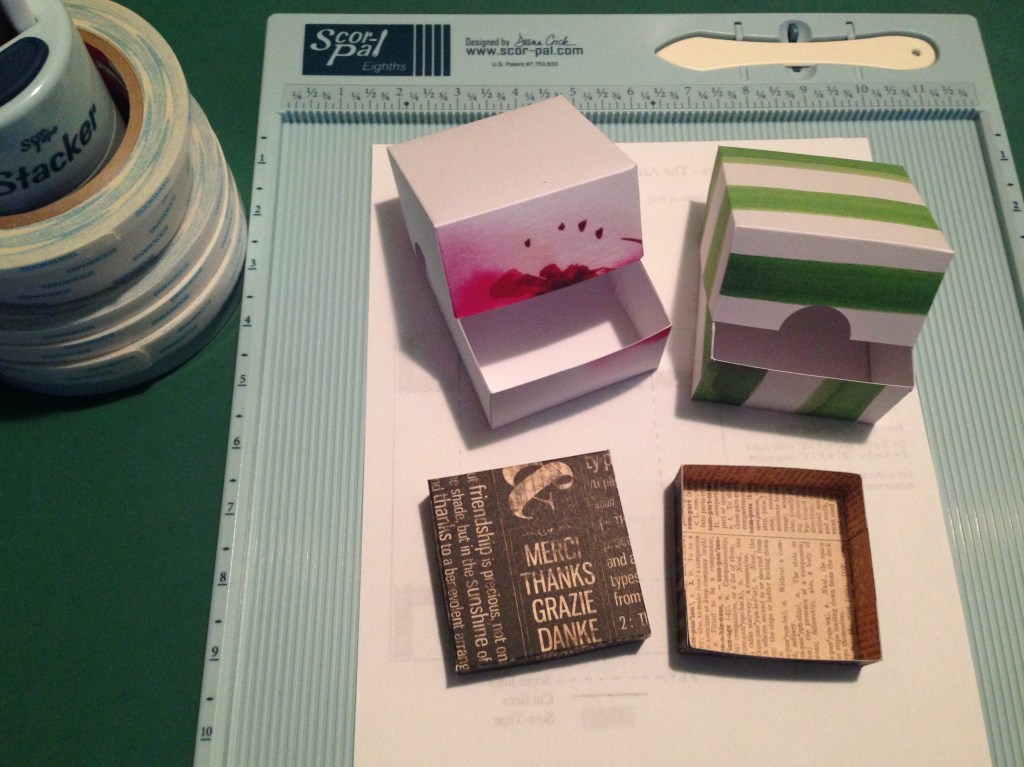
So let’s make some boxes!! Today is all about simple boxes with single-thickness walls. Nothing fancy – yet! I’ve always struggled with how to make sure that the top of a box will fit over the bottom of the box, and have run across many different ways to solve that… I think this technique is fairly simple and easy to remember! There is a little formula that will help you figure out what size of card stock you need in order make a box the size that you want. Here’s a little Box Basics guide for easy reference.
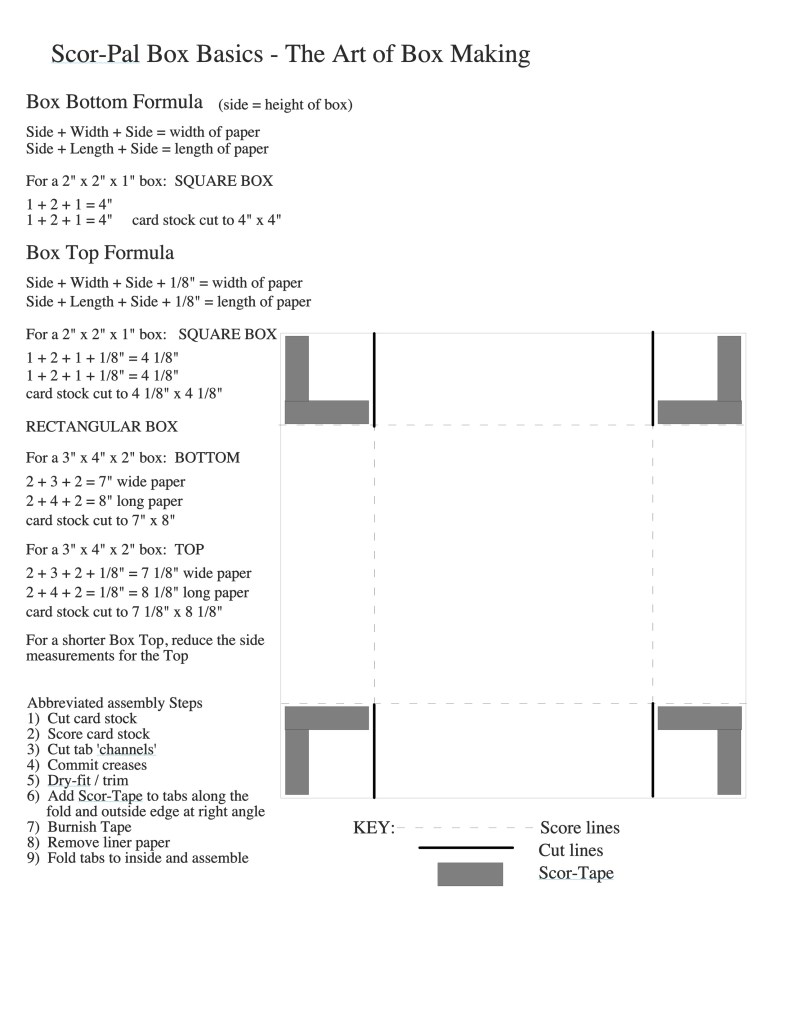
To determine the size of card stock you need to start with, decide on the dimensions of your box. Let’s start with a simple 2″ x 2″ x 1″ box – 2″ wide by 2″ long by 1″ tall. For the bottom of your box (always start with the bottom) You add 1″ (side) + 2″ (wide) + 1″ (side) to give to 4″ for the width of your card stock. You do the same for the length of your box. Add 1″ (side) + 2″ (long) + 1″ (side) for a 4″ length of card stock. 4″ x 4″ is the size of card stock we will start with for this box. Any square box will start with square card stock.


Now we want to score the sides of our box. Since the sides are 1″ tall, we want to score all four edges of our card stock at 1″. I am right-handed, so I often like to score on the right side of my Scor-Pal. I find that my hands don’t get in the way of each other when I score on the right side. That means I would score at the 11″ mark on my Scor-Pal.

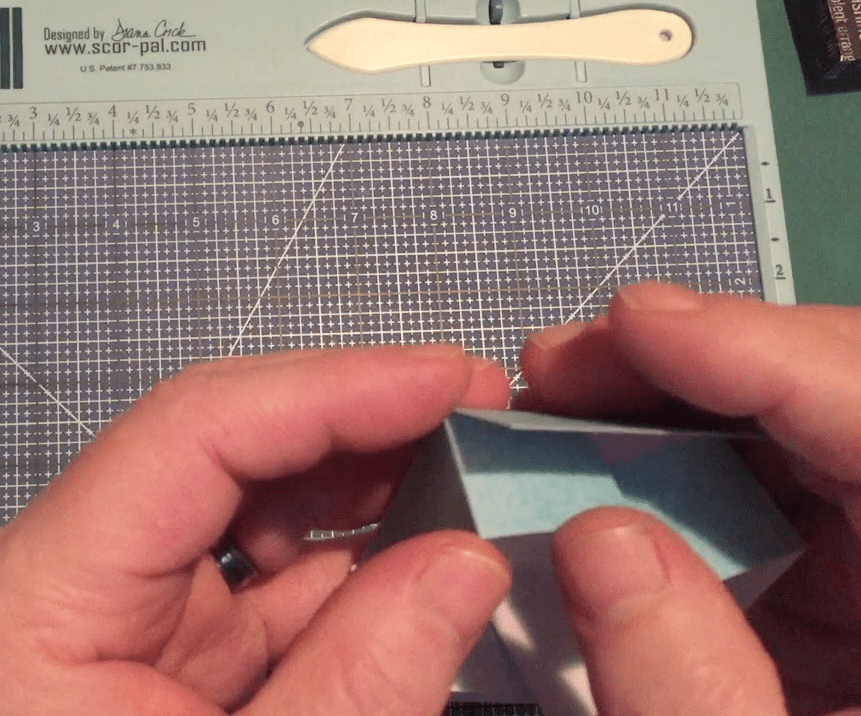
Don’t fold yet! When scoring card stock, your Score-Tool actually creates a ‘channel’ that is your fold line. Here you can see two intersecting score lines on our card stock. Diana suggested this cutting tip to me, and I find that it is extremely helpful and consistently accurate!

When you cut your tabs, you want to actually cut away the entire ‘channel’ that was left by your Score-Tool. That’s right… you want to line up your scissors with the right side of the channel and cut to the perpendicular score line, and then line them up with the left side of the channel and cut the other side of the ‘channel’ away.

This is actually making small slits at the four corners of your card stock. I find this method extremely helpful when assembling your box, because it allows a tiny bit of wiggle room to make sure the corners of your box line up nicely. Cut all four corners of your card stock directly opposite of each other – that makes for a consistent and very sturdy box!

Now we can fold our box up and use your Scor-Tool to “commit the crease” on all four sides of your box. This pattern paper I’m using is white on one side, so I want the white to be on the inside of my box. I grab my Scor-Mat and pop it into my Score-Pal to provide a smooth surface for reinforcing those creases. I love using the Scor-Mat with my Score-Pal because it virtually guarantees that I can keep a 12″ x 12″ workable area clean and clear on my craft desk!
Now that all the sides are folded and we’ve reinforced the score lines, I like to do a dry-fit. Fold your tabs towards the inside and make sure they line up with the edges of your box. Sometimes you’ll find a tiny bit of the tab that needs to be trimmed away, but I swear that cutting away the ‘channel’ helps all of the tabs line up very accurately. But trim any overhangs you may find. Now we can add some Scor-Tape and put our box bottom together.

You can certainly cover your entire tab with liquid glue, or any adhesive you like, but I love using Scor-Tape since it adheres instantly and holds forever! I put my 1/4″ wide Scor-Tape on all four tabs by putting one piece along the fold line, and the other piece at a right angle to that on the outside edge. This puts the adhesive on the corner of the box, and on the top edge of the tab. This is also shown on the Box Basics download.

I almost always burnish my Scor-Tape down to my project before removing the liner paper. I do find a quick press helps the backing come off pretty easily! I do use my Tim Holtz Retractable Craft Pick to help me remove the liner paper. Just slide the point along the edge of the tape and it will slip under and pull up the liner paper with very little effort.

Now it’s a simple matter of folding your tabs to the inside of your box and lining up your corners and edges, and gluing the tabs to the inside of your box. For extra security you can use your Score-Tool to burnish down the tabs on your four corners.

That completes our 2″ x 2″ x 1″ box bottom. Nice, straight sides and clean, even corners. Now we can move on to the Box Top! The top of our box is basically the same as the bottom with one major difference – you want to add 1/8″ to the width and length of your beginning card stock piece. So, if the bottom was made with a 4″ x 4″ piece of card-stock, the top will be made using a 4 1/8″ x 4 1/8″ piece. This makes the top a little bit bigger so it will slide easily over the bottom.
If you make the top and bottom exactly the same size, they will not fit together very nicely at all! So… using a 4 1/8″ x 4 1/8″ piece of card stock we follow the exact same steps to make the Box Top! 1) Score all four sides at 1″. 2) Make four tabs by cutting away the ‘channel’ left by your Scor-Tool on opposite sides. 3) Commit your creases as you fold along the score lines. 4) Do a dry-fit to make sure your corners line up well, and trim away any irregular edges. 5) Add Scor-Tape to the four tabs – along the fold, and the outside edge (the two pieces at a right angle to each other). 6) Burnish down your Scor-Tape. 7) Remove the liner paper. 8) Assemble your box taking care to line up the corners and edges.
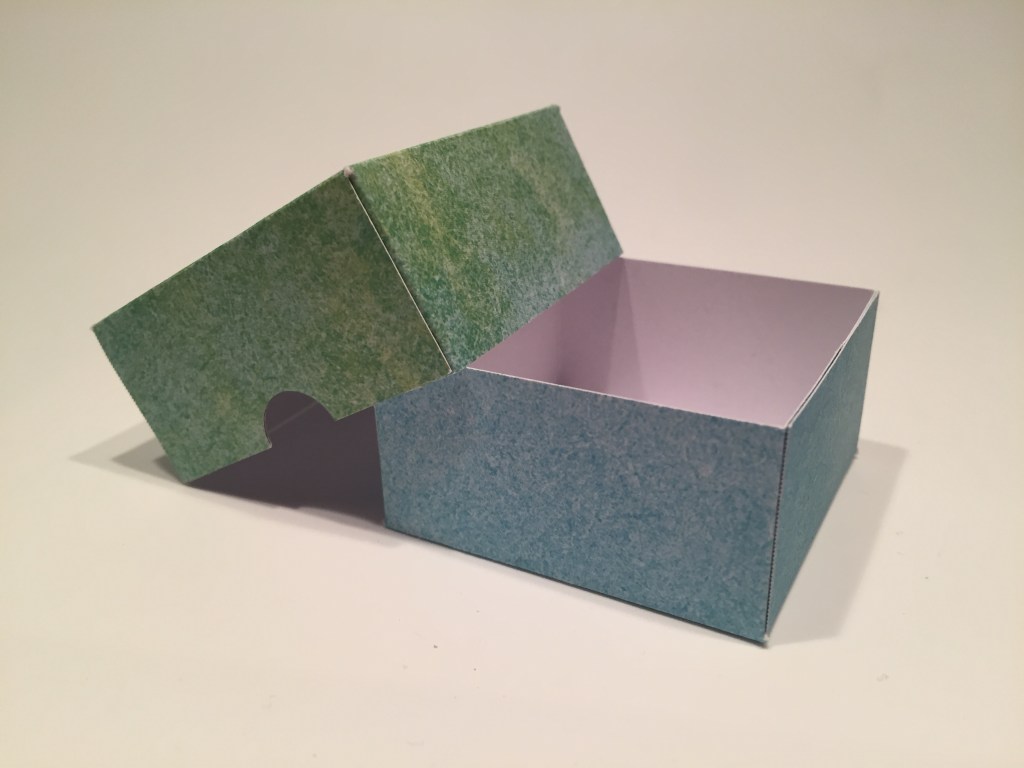
Since the top is fractionally larger than the bottom, it should fit with no resistance. On a small box like this, where the top and bottom are both the same height, it is helpful to punch little finger notches on two sides of the top so you can grab the bottom as you remove the top. You see we get nice, clean corners and even edges on both pieces. Square boxes are pretty straightforward, but what if you need a rectangular box?
This box is 3″ wide by 4″ long by 2″ tall. So our formula for the bottom of the box is 2″ + 3″ + 2″ (7″ wide) by 2″ + 4″ + 2″ (8″ long). The bottom starts with a 7″ x 8″ piece of card stock. The sides of this box are 2″ tall. That means we will score all four sides of our 7″x 8″ card stock at 2″. On a rectangular box, I like to have the tabs glue down to the long side, which adds a little strength for the longer part. So when you cut your tabs, cut the scores on the long side of your card stock (the 8″ side for this box) so the tab will fold in and attach to the long side. That’s the only real difference with a rectangular box. Cut the ‘channels’ away on the long side, commit the creases, dry-fit, add Scor-Tape (on the seam and outside edge at a right angle) burnish tape, remove liner paper, assemble box bottom!

We do have a 1″ shorter top on this box. To make the Top then, we figure 1″ + 3″ + 1″ + 1/8″ = 5 1/8″ wide, and 1″ + 4″ + 1″ + 1/8″ = 6 1/8″ long. We’ll cut our card stock to 5 1/8″ x 6 1/8″ (there’s those pesky eighths!). Since our sides are only 1″, we’ll score this piece at 1″ on all four sides. Cut your ‘channels’ on the score marks on the 6 1/8″ sides and continue as before to assemble the lid. Of course you won’t need notches in the top of this box! When a box is taller, a shorter top often makes sense.
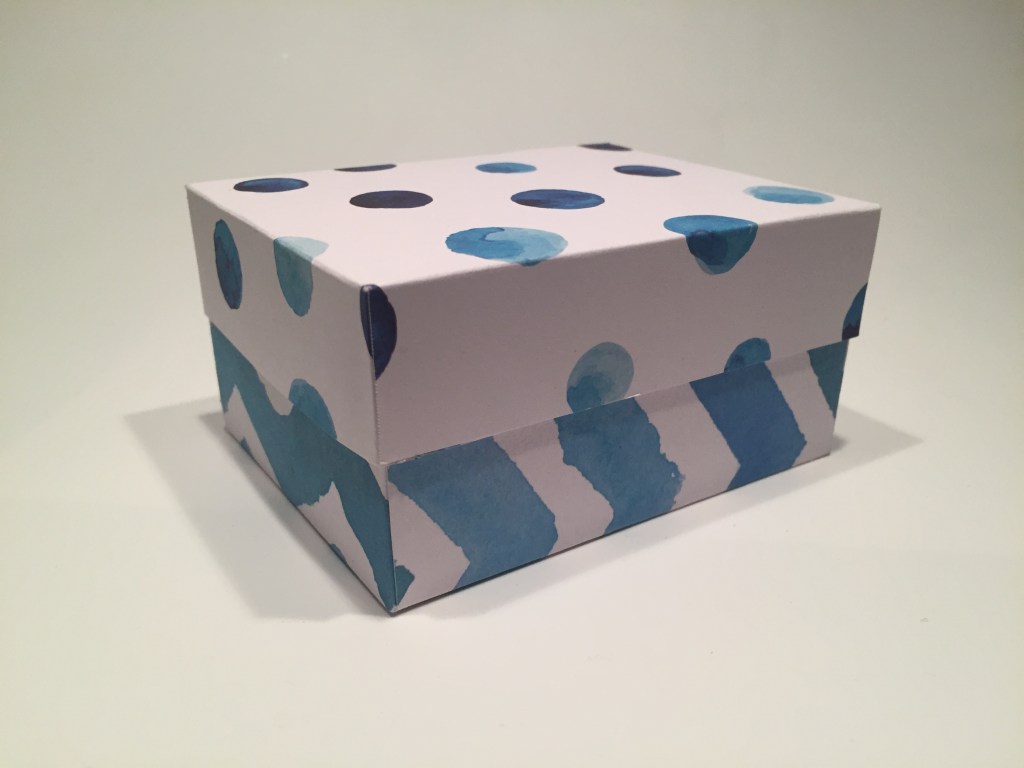
I love making boxes from pattern paper – they require little decorating to make them special. A simple ribbon and bow on this box would be very sharp. Of course you can decorate your boxes with flowers and ribbons and die-cuts and just go crazy if you like!
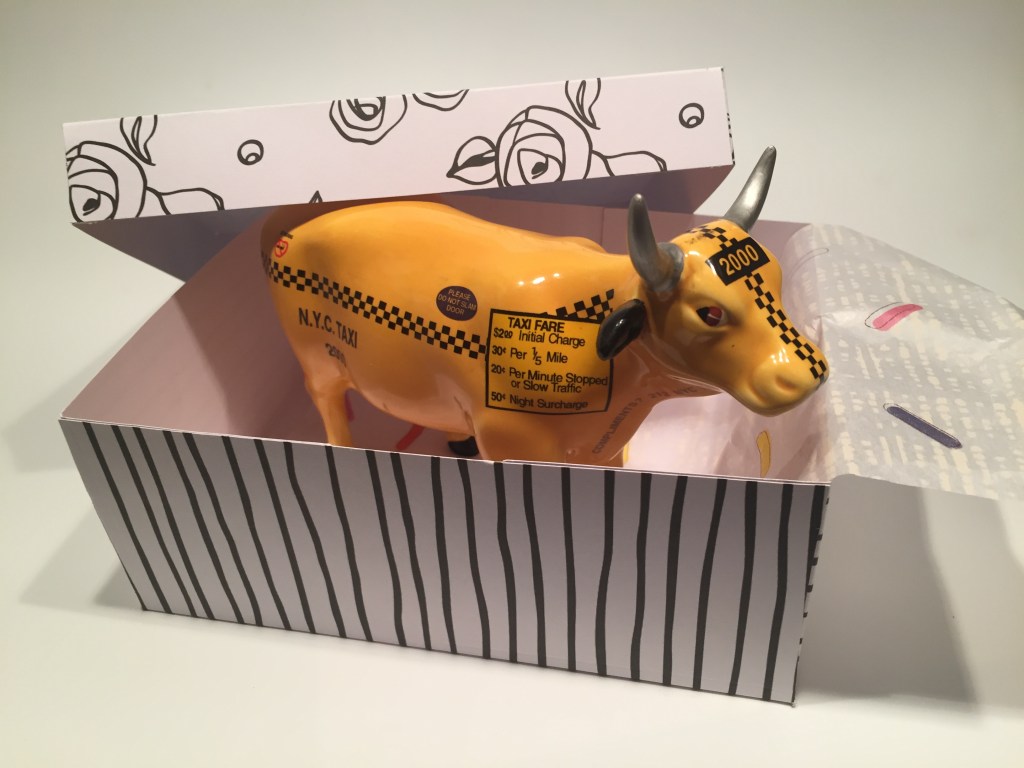
I wanted to show you that you can create your own box for almost anything – – let’s create a box for my NYC Taxi Cow…!

I’ll put her in the box on her side, and we don’t want to squash her, so it looks like she’s 5″ from horn to hoof and 6 1/2″ from nose to tail. Looks like her horns (??) are the widest part of the cow, and they are right at 2 1/4″, so we’ll make our box 2 1/2″ tall. My cow box will need to be 5″ x 6.5″ x 2.5″. So… 2.5″ + 5″ + 2.5″ = 10″ and 2.5″ + 6.5″ + 2.5″ = 11.5″ For the Box Bottom we’ll need card stock cut to 10″ x 11.5″. The box is 2.5″ tall so we score all four sides at 2.5″. Cut your four ‘channels’ on the 11.5″ long side, fold, fit, tape, assemble!

A taller box can have a shorter lid… I’ll make this lid only 1″ tall. 1″ + 5″ + 1″ + 1/8″ = 7 1/8″ and 1″ + 6.5″ + 1″ = 1/8″ = 8 5/8″. Card stock for the lid needs to be cut to 7 1/8″ by 8 5/8″ (there’s those darn eighths again!!). The lid is only 1″ tall so you score the four sides at 1″ and cut the four “channels” on the 8 5/8″ side. fold, fit, tape and assemble!

Nice clean corners, straight sides, and perfectly sized to the item I wanted to box! Unfortunately, I don’t have card stock large enough to box this cow standing up.. I’d need paper over 16″…! So laying it on the side is perfect. A little tissue paper, and some ribbon make this a lovely presentation of a unique item that didn’t come in a box to begin with!
That’ll conclude Part One of The Art of Box Making! I hope we’ve been able to impart a few tip and tricks to ease your box-making fears. I always give my family members a Christmas ornament each year (some home-made) so it seems like I am always making ornament boxes. Remember these open top boxes can also be used for organizing (craft drawers need some help?) and simple storage too!
The walls of these boxes are all single-thickness. I think in Part Two we will look at boxes with double-thickness walls. Not only are they sturdier, but they also hide the tabs on the inside as well! Keep an eye out for Part Two coming the first of September!
Thank you so much for sharing your time with me here, you know how much I appreciate your support! Do let me know if you have any questions, and if you have any ideas for new Scor-Pal Projects that you would like to see, forward along to me! Remember to Like me, List me, Pin me, Post me, don’t lose your score-tool, and, as always, I wish you and yours Health and Happy Crafting!

Thank you for sharing this tutorial … Stay safe
LikeLike
Thanks for this! I’ve made boxes for my A2 cards for years, but these sizes will come in handy!
LikeLike
Thanks for the great video and all the stepouts and downloads here on your blog. This is such helpful information.
LikeLike
Thanks Judy! My Pleasure!!
LikeLike
This is a great tutorial! I am going to make some pretty boxes now. I see you correctly called the cow a “her” over here. 🙂 Many breeds of female cows have horns. Some are hornless, some have them removed, or they are prevented from growing. Just some trivia for you! Thank you for your videos–Scor-Pal got a GREAT spokesperson in you!!
LikeLike
Thanks so much Jennifer…!! Always appreciated!!
LikeLike
I love your clear and easy to follow instructions! I have the newest (large) ScorPal with the 1/8″ lines and have been trying to figure out how to get boxes of appropriate sizes for my highly embellished cards. Now I know how to calculate the sizes I need! Thank you so much. 😀
LikeLike
Thank YOU, Nana!! My pleasure!! Box ON!!
LikeLike