
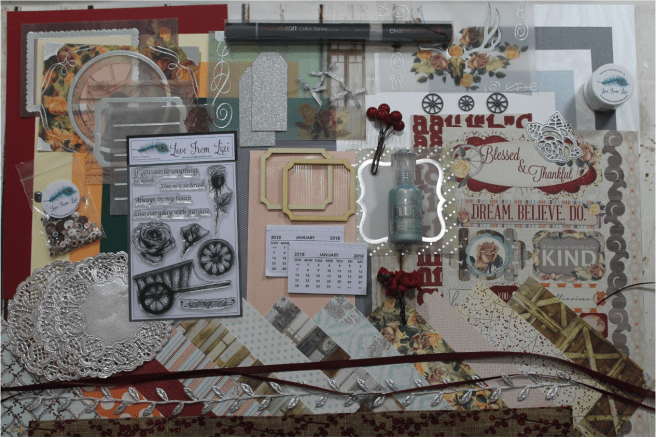
 Hello Folks! Scott here with my 10 cards from the Love From Lizi December ’17 Card Kit. This kit is sold out but some of the items may become available at lovefromlizi.com in the coming months. The pattern papers, sticker sheet and vellum images included with this kit felt very Victorian and Valentine-y to me, so that’s my mind set for this collection. • I was initially interested in the small tear-off calendars included in the embellishments bag, and wanted to do an easel card (a first for me!) featuring one of those calendars. I used a top-folding Peach card base to build on, and stamped out three copies of the blooming rose stamp on Bristol Smooth Cardstock using Distress Oxide ink in Spiced Marmalade. I colored in the stamps with an orange colored pencil and fussy cut them
 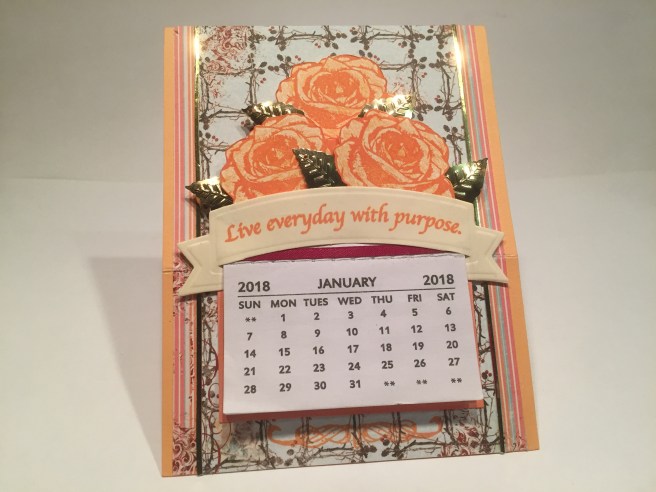 out. I attached the calendar to a plain white mat colored with the Spiced Marmalade ink, and use a touch of the thin burgundy ribbon from the kit to highlight the top of the calendar. I used the ‘trellis’ pattern paper for the main background and added two 1/4″ strips of the striped pattern paper to the sides. I pulled out some Darice Gold leaf sequins from my stash to help define the roses, and cut two super-thin strips of gold mirror card stock for some matching glitz between the pattern papers. I even stamped the flourish from the stamp set below the calendar – fit perfectly! I stamped the sentiment from the kit in Spiced Marmalade Oxide ink on a piece of my ol’ stand-by Staples Ivory card stock and die-cut that with a Darice Banner die. That die fit the calendar perfectly so I just ‘wrapped’ the edges around the sides calendar and attached both pieces to the mat. I wanted the cluster of roses to be the ‘shaped’ top of the calendar when the card is folded into an easel shape, so I attached the roses and leaf sequins to the back of the calendar assembly – I did use some foam tape to add a little dimension and definition to the roses, and scored the card front 2.5″ up from the bottom. I did look through the pattern papers and stickers to find something that would work as a ‘catch’ to hold the easel in shape, but decided that another rose would work perfectly – I stamped a fourth rose on the Ivory
 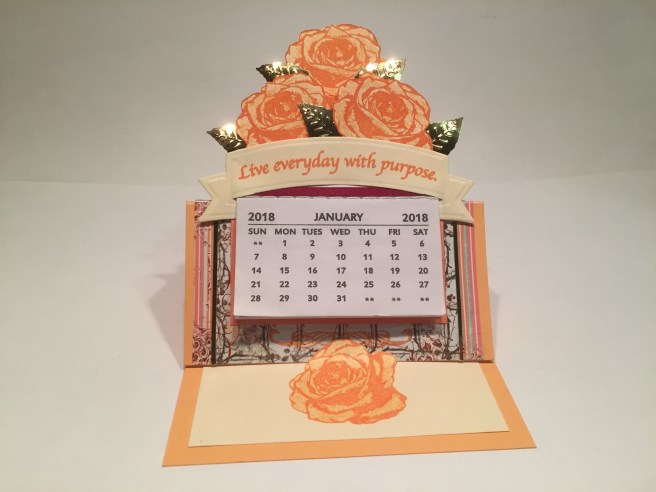 card stock writing surface inside the card, and used my craft knife to cut the top of the rose free so I could curl it up and use it as the easel catch. I am very pleased with my first easel card and I love the fact that it serves as a useful desk calendar as well as a greeting card! And orange roses seem slightly out of the ordinary (yet not unheard of) to me! • Now, I generally don’t think of myself as much of a sticker person, but there were some terrific stickers included with this kit that I was very eager to use. A couple of the stickers actually had the exact same sentiments that were included with the stamp set, so I had to avail myself of at least one of those – “If you can be anything be KIND.” I used a grey card
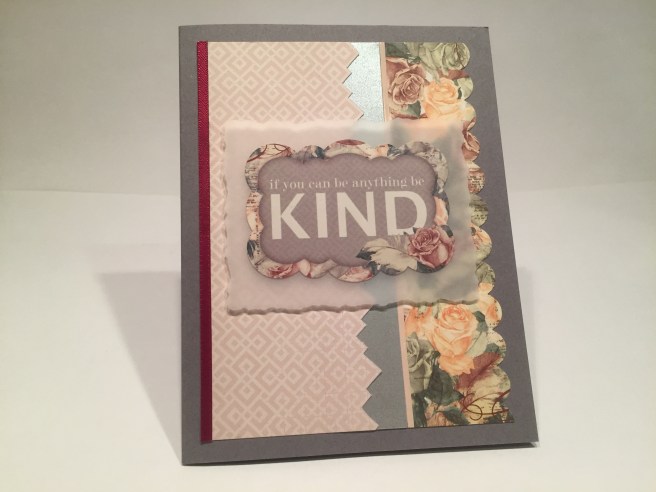 base for this card (because the background of the sticker was grey) and two different pattern papers. I punched a scalloped edge on the lovely floral pattern paper with my American Crafts Border Punch and fussy cut the edge of the pink geometric paper following along with the pattern. I separated the two pattern papers with a strip of the Platinum specialty paper from the kit and added a single ‘soft peach’ peel-off from the kit between the platinum and floral papers. I also added some of the burgundy ribbon to the left edge of the pink paper and glued everything down to the card base. I cut a piece of vellum from my stash with a Spellbinders Deckle Rectangle die and attached the sticker directly to the vellum and used some foam tape to attach those pieces to the card for a little dimension. The vellum helps the sticker pop on top of the pattern papers, and that platinum glimmer paper provides all the shine I needed for this card. A fairly simple card, but I do like the combination of the pattern papers with the sticker. • Now, I don’t think I have ever used a paper doily on any of my cards, but Lizi included 3 silver doilies with this kit so I was determined to use at least one of them! Another sticker caught my eye because of it’s unique shape and terrific sentiment, so I decide to stick with the stickers for another card. This card is on the Peach card base again, and I cut a couple of mats with my Lawn Fawn Stitched Rectangle dies out of the grey glimmer paper and the
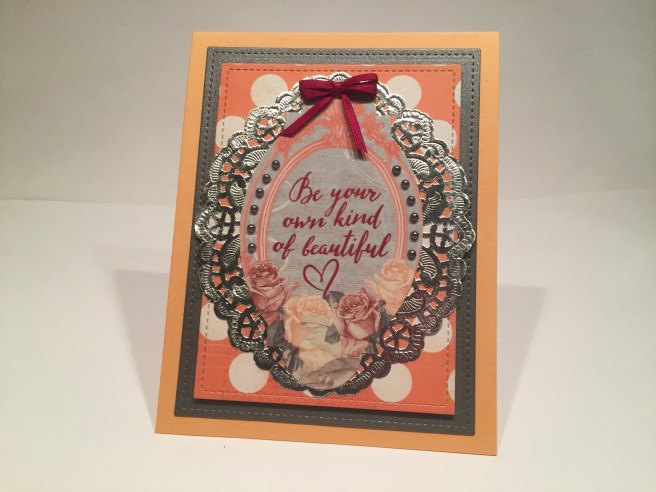 orange and white polka-dot pattern paper. I did cut about a half inch from the middle of one of the doilie to make it more oval instead of round to better match the sticker. I attached the sticker to the doily and glued those down to the polka-dot paper and used foam tape to add some depth on top of the grey mat. I did add some of the grey pearl dots from the kit to the edges of the sticker and I tied a double bow with the thin burgundy ribbon and attached that to the top of the sticker piece. Between the pearls and the silver doily, we have plenty of sparkle and shine on this card. Again, a basic, simple card that feels very Victorian to me. Must be those roses! And, of course, that doily!! • Back to the stamps! I did want to use the nice long-stemmed rose stamp on a card so I reached for the Forest Green card base and a panel of my Staples ivory card stock. Using my Tim Holtz Stamp Platform, I started in the center of the panel and stamped out a whole row of roses in Distress Oxide Fired Brick ink. Using colored pencils again, I lightly colored
 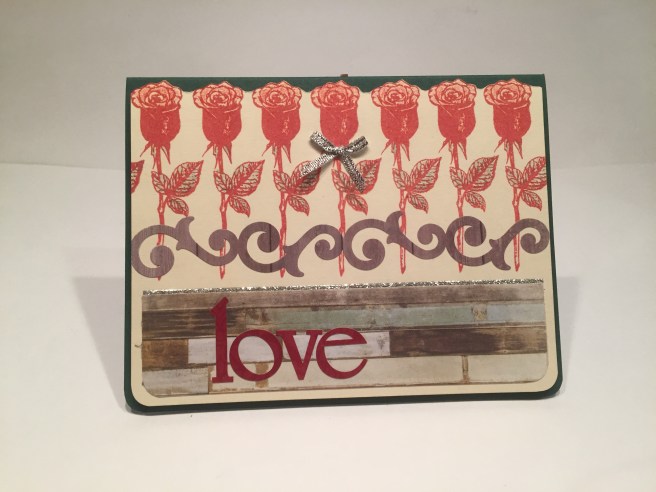 the roses with red and the leaves in green. I like the way the stamps work when stamped with colors and filled in… I think it keeps the cards bright and colorful! The curly-cue border sticker worked perfectly to ‘tie’ the roses together, and, since that sticker is wood-grained, I grabbed the wood plank pattern paper to use as a base for the sentiment. I did fussy cut the top of the roses for added interest – I’m surprised and delighted at how nicely that detail catches the eye!! The pattern paper is glued to the ivory card stock and those are foam taped up on the card base – that helps the top edge pop as well! I did use my WRMK corner chomper to round the bottom corners of all the papers – I don’t tend to do that a lot, but I though it worked especially well with this card. The ‘love’ sentiment is made from the alphabet stickers in the kit, and I centered that over the white boards on the pattern paper. I used one of the silver bows from the kit to ‘tie’ on to the center rose, and decided we needed a touch more silver to help justify that ribbon – the Love From Lizi peel-off stickers in Silver Glitter (from the September ’17 card kit) to the rescue! One thin peel-off at the top of the pattern paper does the trick and provides just the right amount of sparkle for this card. I didn’t want to leave this card just saying “love”, so I did
 add the “You are so loved.” sentiment from the stamp set on the inside of the card (more ivory card stock for the writing surface) with Versa-Mark Onyx Black ink, and added two flourish stamps in the Fired Brick Oxide ink for a bit of decoration. Very Victorian! • I did notice a few people on line talking about the fact that some of the stickers in the kit were way too big to be used on a standard A2 card – well, I’m never one to turn down a challenge, and I particularly liked the ‘DREAM. BELIEVE. DO.’ sticker that was a touch longer than 5 and 3/4 inches – too long for a straight application, but it fits on a diagonal!
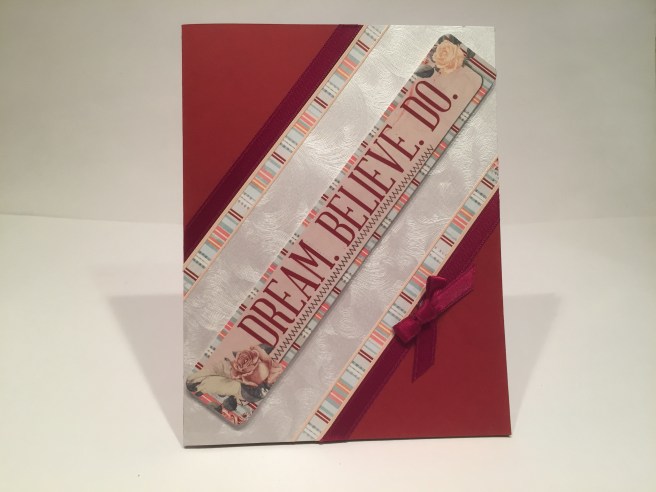 Just barely! On a Wine Red card base, I cut a 2.25″ width of the swirly embossed pearlescent specialty paper (gorgeous) from the kit and centered that corner to corner on my card base. Since the sticker had those stripes as its background, I added two 1/4″ strips of the striped pattern paper to the edges of the pearl paper, and added the thicker burgundy ribbon to the outside edges of the pattern paper, and glued all of that directly to my card front. Of course, I used the peel-offs to define the edges of the card stocks, and, after removing the sticky from the sentiment sticker with my EK Tools Powder Tool, I used foam tape to pop the sticker up in the center of the card. A small, simple bow to accent the ribbon and we have another faintly Victorian inspiration card! I do like that sentiment!! • Now, these first five cards are my ‘serious’ cards from this kit, and things do get a little sillier from here on out. If you have seen my other LFL kit videos you know I like to print on the vellum pieces with my laser printer (at work! – shhhh!!) and then use deco-foil and my Laminating Machine to foil my printed sentiments. This kit was no exception, and I was looking forward to using my Silver deco-foil for the first time! I chose the vellum piece with the door and flowers on the right side, and, using my Silhouette Software, printed my sentiment in Smoothie Shoppe font with my laser printer in the open area of the vellum. I used my silver deco-foil to cover the printed sentiment and ran it through my laminator two times. Success! Excellent silver foiled sentiment that goes along with the silver highlights on the vellum images. I sent the
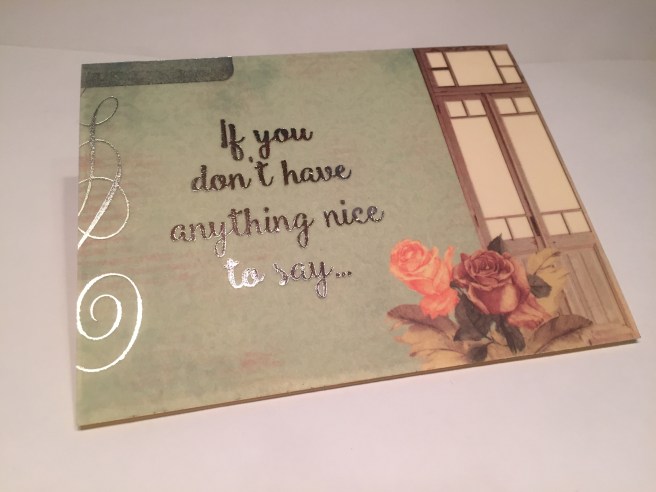 foiled vellum through my Xyron sticker maker and attached the vellum directly to the top of the Ivory card base. “If you don’t have anything nice to say…” Of course, this sentiment is continued on the inside – “come sit by me.” but I didn’t foil the inside of the
 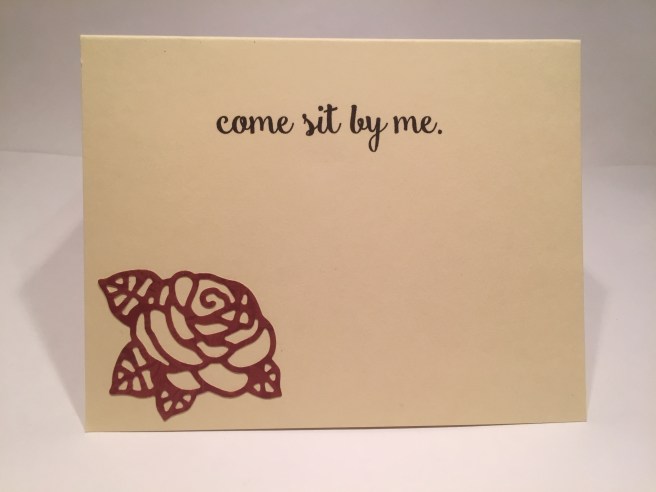 card – just a plain black print directly on the card base and accented with a die-cut rose. That is a great rose die we got with this kit – I didn’t play with it much for this batch of cards, but I know I will use this die over and over again in the years to come! This is a very simple one-layer card that actually packs a good punch!! This card makes me laugh a lot, and I am really looking forward to being able to give it to someone soon! • As usual, we do get a sequin mix in this months kit – Wild Rose is the mix – so I naturally want to make a shaker card! I used the Wine Red card base and the polka-dot vellum piece for
  this card – I was going to attach the vellum piece to my ivory card stock but I didn’t think the blue polka-dots showed up very well on top of the ivory – but I did like the ivory better than white in the open area inside the frame. So, I cut a piece of ivory card to match the frame, glued that in place and then added white card stock behind the ivory extending to the edges of the vellum. That worked very nicely, and the vellum actually gives the white card stock a bit of an ivory tint! Now that my vellum piece is stabilized, I cut out a heart window with my Darice Nesting Hearts die right in the middle, and traced the actual die with an Emboss It pen and embossed that with silver embossing powder. I added acetate behind the window, and used the matching polka-dot pattern paper for a couple of stripes on the card front and as the background for my shaker window. I added a “u” and an “r” from the alphabet stickers to the shaker background, and lightly filled the shaker with some sequins – avoiding the green sequins and not putting too many in the window so they don’t block the ‘u’ ‘r’. A random scattering of the Nuvo Drops (‘Neptune Turquoise’) from the kit match the polka dots and kind of ‘brings the shaker outside of the window’. Naturally, we need to finish this sentiment, so,
 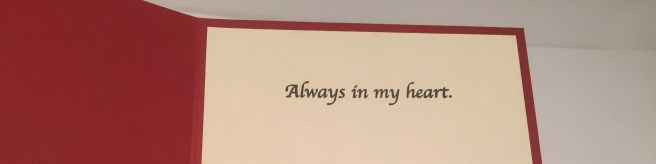 on the inside I stamped the “Always in my heart.” sentiment from the stamp set on the ivory writing surface. SO… “U R … Always in my heart.” Makes me giggle..! • Let’s try that wooden cart stamp now! I stamped the cart in SSS Intense Black ink on Bristol smooth card stock, colored it with my Spectrum Noir markers in TN1, TN2 and TN4 and fussy cut the whole image including the wheel spokes. Now what to put in the cart…? The fabric roses of course! I trimmed down their stems and taped them down to the back of the cart. I did stamp some of the leaves from the long stemmed rose stamp in Distress Oxide Peeled Paint and fussy cut those out to add around the edges of the roses in the cart. I took a piece of the tulle netting and using a light touch of spray adhesive, attached
  the netting to the front of my grey card base. I cut a piece of the wavy lined embossed pearlized specialty paper just following one of the lines to be the ‘ground’ for my cart, and cut a piece of that polka-dot pattern paper for the top. I punched a scalloped heart border with my AC border punch on the pattern paper, and used the Nuvo Drops on the middle two rows of polka-dots. That piece almost feels like an awning on the street! I created the ‘Love you a bunch!’ sentiment on my Silhouette (Ballerina Script font) and printed that on a piece of my Staples Grey card stock. I took one of the wood veneer die cut frames from the kit, and cut 1/4″ out of two of the sides to shrink it down a bit and, after gluing it back together, used silver embossing powder on the top for some shine and an almost pewter look to that frame! All is glued directly to the card front but the cart is attached with some foam tape. I love the way the red roses play off of the greys and light blue, and how they really pop on the front of this card! And a sweet simple pun. • I haven’t used that single wagon wheel stamp yet, but how can I use it and keep to my ‘romantic Victorian valentine’ theme…? And wheel puns are all too easy! I though it would be interesting to see if I could use whole wagon wheels to create a heart shape for this card. I ended up with a bit of a ‘wheel collage’ that I reinforced with a heart shape die-cut from the embossed pearlized card stock and the red pattern paper. After trying
 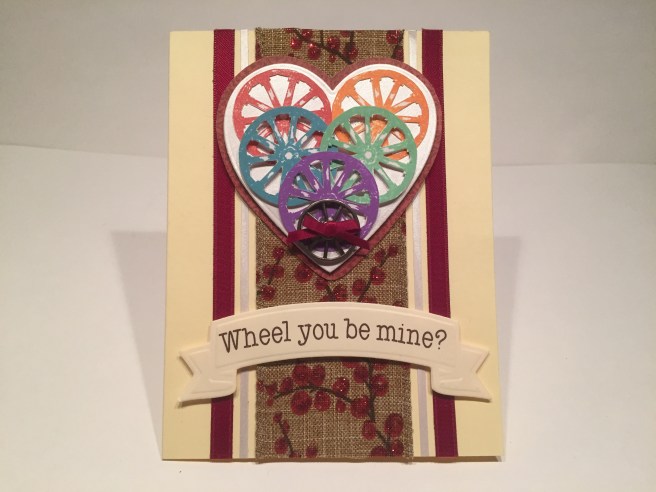 all the wheels stamped in the same brown color (BORING!) I decided to stamp them in all different colors of Distress Oxide ink – Fired Brick, Spiced Marmalade, Broken China, Cracked Pistachio, and Wilted Violet. On the Ivory card base, I ran the wide glitter-berries ribbon down the center of the card, added two thin strips of the embossed pearl card on either side of the ribbon, and added the wide burgundy ribbon to both sides as well. I attached the fussy cut wheels (yes, I cut out the spokes too!) to the heart mats with foam squares and added one of the metal wheel buttons from the kit to the point of the heart. I was actually able to push the thin burgundy ribbon through the holes of the button and tie a little bow on the front. I created the “Wheel you be mine?” sentiment with my Silhouette software in Typewriter Hand font and printed that on my ivory card stock and cut it out with the same Darice banner die used on my first card. A sweet simple pun on a bit of a wacky valentine card – I’m surprised that the rainbow wheels actually seem to work on this card – I almost went back to the brown wheels at one point, but I’m glad i didn’t! • And now we are at the final card for the month! I debated this card for quite a bit, but was ultimately won over when I figured out how to ‘sell’ the idea…!
 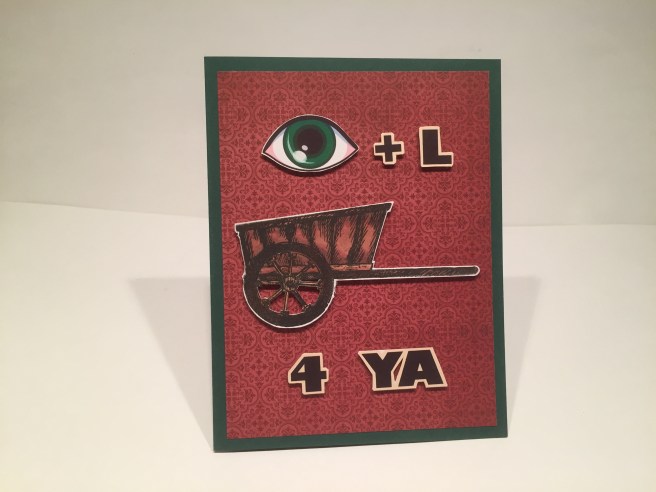 Here we have another rebus puzzle… I stamped the cart in SSS Intense Black ink on Bristol smooth card stock and colored it with my Spectrum Noir markers in RB1, RB2, and RB4. I found the eye (in green to match the card base!!) on line, and printed the letters in Gaudy Heavyface BT font and fussy cut and foam taped everything to the red pattern paper background. SOOOOOOOOO… the cart – which is not a wheelbarrow because it (appears) to have two wheels, is also known as a ‘tumbrel’ (if you have ever read A Tale of Two Cities you’ll remember the term) SOOOOOOOOO… the rebus reads “I’ll tumbrel for ya” If you were listening to rock and roll in the early eighties you remember Culture Club (Boy George) and “I’ll Tumble 4 Ya” was one of their first big hits. ANYHOW…! I thought this addition to the inside of the card would help the unknowing.
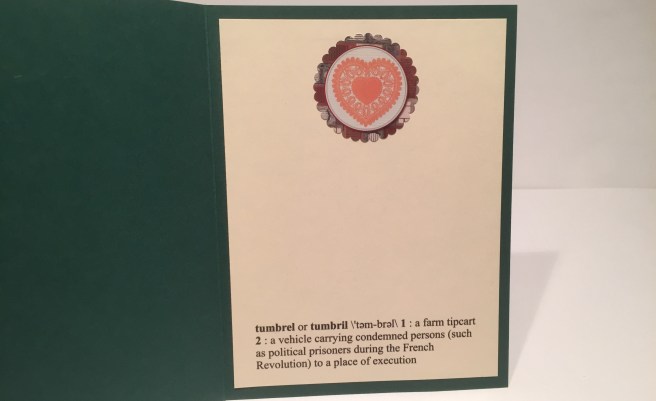 This is the actual Webster Dictionary definition of tumbrel… and naturally, I wouldn’t give this card to anyone younger than 50!! LOL! This may be off the beaten track, but I do think it makes a handsome card, and heaven knows, it has given me a lot of good hearty laughs, and I hope it gives you a giggle as well!
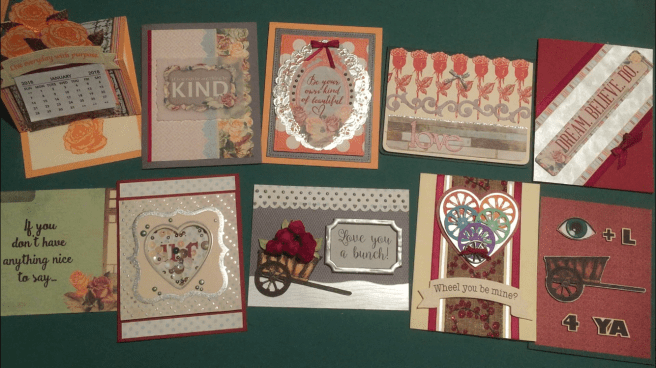 • That’s my 10 cards for the Love From Lizi December 2017 Card Kit – I hope I was able to provide you with a little crafting inspiration (whether you get this kit or not) and a smile or two. If you like this style of card kit I highly recommend subscribing or at least following LoveFromLizi.com to be able to pounce when the next months kit is offered! Thank you so much for sharing your time with me today – If you have any questions or comments don’t hesitate to say something and if you go to the Contact page, you can email me directly! Please Pin and Post and Share me wherever you can! Happy Crafting!
