
Hello Folks! Scott here with my new 10 Cards inspired by the Love From Lizi “Butterfly Wishes” Card Kit. LOTS of butterflies this month with a unique purple and green color palette. As usual, I cut all the colored card stocks in half to make my card bases. I did swap out the super-smooth alcohol-friendly White in the kit for plain White from my stash.

I am not a huge fan of butterflies… now, that doesn’t mean I don’t like butterflies, I just believe they are a little overused in the card making world. I did do a quick inventory of my subscription kit stamp sets and, believe it or not, flowers and butterflies are represented more than any other theme. I guess that shouldn’t be a surprise, but at least you know where I’m coming from. Nonetheless, there are some fun stamps in this kit, so I went ahead and embraced the Lepidoptera!
I’m always thrilled when we are treated to some decoupage sheets in our kits, so that’s where I decided to begin! Remember, the European version of decoupage is layers with dimension… not the American decoupage flat layering.
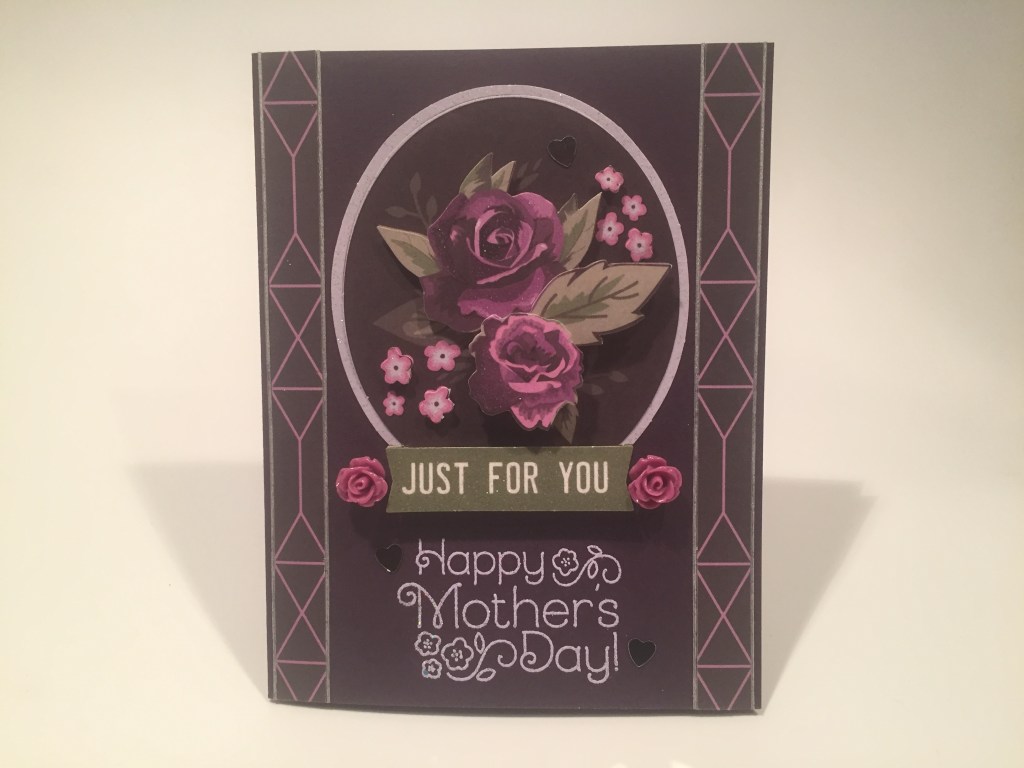
I really do love those dark purple roses! I used all six layers of this decoupage sheet but I did glue the first two layers flat together. I don’t particularly like dimension between a background and its mat… when viewed from different angles, I think it makes the mat look off center – it’s all about the shadow cast by the background. SO… I did glue the first two layers together but I went ahead and added foam tape between all the other layers. The bottom rose is four layers thick! Seems like plenty of dimension to me! I cut two strips of that great geometric pattern paper and glittered them up with some Sheer Shimmer spray, then glued both to the two sides of our Aubergine card base and trimmed the edges with our Silver Moondust pin stripe peel offs. I’m just trying to keep the glitter from the decoupage piece consistent.
I also don’t really love a “Just For You” sentiment, so after looking at cover-up options, I let the decoupage banner stay and just added a nice “Happy Mother’s Day” stamp. I think that’s the only Mother’s Day stamp I own… from an old (April 2016) My Paper Pumpkin kit. The flowers on the stamp match the small flowers on the decoupage! I fiddled around with some different purple inks to stamp this sentiment, and ultimately decided to stamp this with VersaMark ink and emboss it with Love From Lizi Pastel Purple Party embossing powder. More glitter!! I glued the decoupage piece to the card front and added some silver hearts from the sequin mix, and two of the resin roses beside the banner. Mother’s Day is still a week away and now I have a few options for cards to send out to mom!
I do love Lizi’s decoupage sheets! There’s another one with those dark purple roses – AND a butterfly!

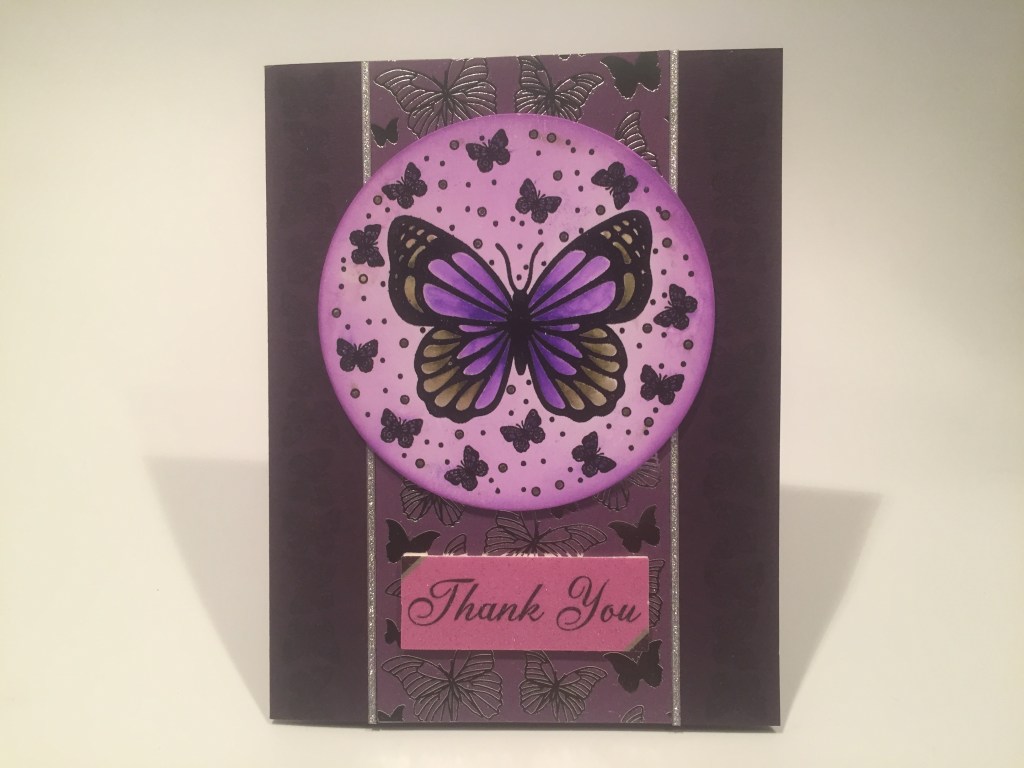
I thought this one was fun because it’s presented to us on the sheet as a diamond and not a square. When I realized the background piece matched up perfectly with this pattern paper, I decided to go square! This decoupage page has three layers and I assembled it normally, except I did glue the body of the butterfly to the background and popped up the wings with foam tape. I cut a square piece of this pattern paper following the lines of the pattern and glued the decoupage piece flat to the pattern paper. I added a small scalloped mat behind that using my Tonic Studios Scalloped Square Layering die and glued the whole assembly to the Lilac card base.
I stamped the sentiment(s) using Hero Arts Grape Juice ink (my darkest purple) and embossed that with some clear embossing powder. I thought the “Get Well Soon” was appropriate for sending someone “Butterfly Wishes”. A couple of iridescent sequins and a purple butterfly sequin adds another touch of shine. I think the square orientation of the decoupage and pattern paper works just as well as a diamond, and I always love squares and circles together!
None of the other decoupage sheets were screaming at me, so I decided to start working with some of the stamps.
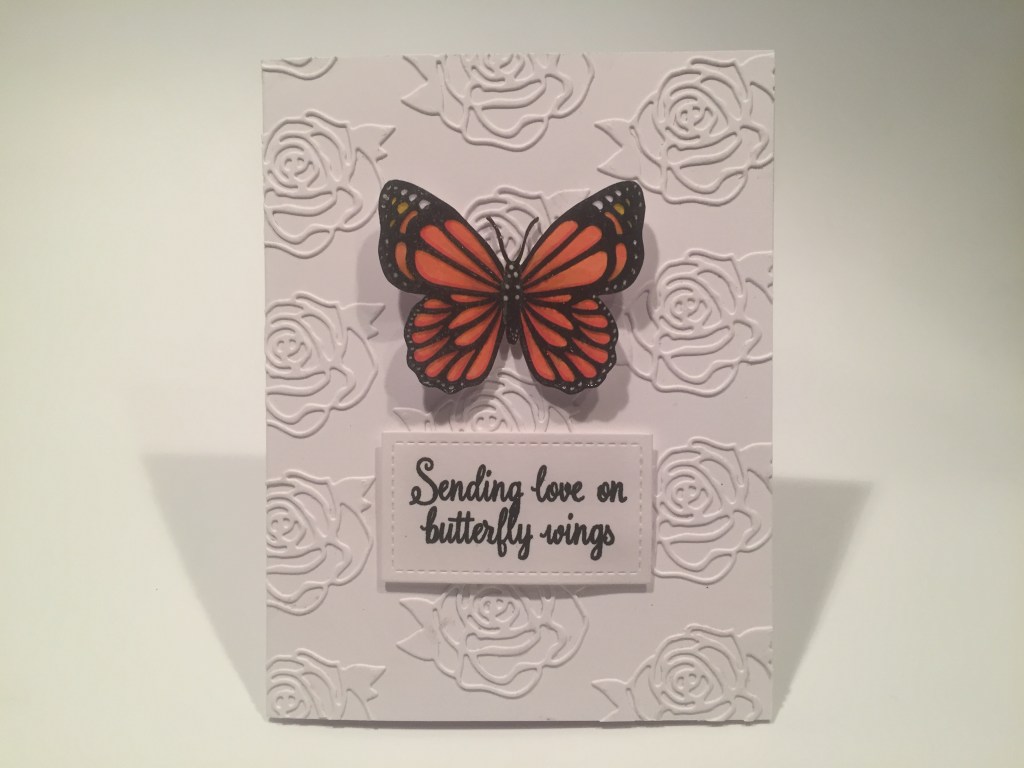
You know I love my white space!! I stamped the main butterfly stamp on some LFL super-smooth alcohol-friendly White card stock using my MISTI and VersaFine Onyx Black ink. I left the stamp in position on my MISTI and colored the butterfly with my Spectrum Noir Alcohol markers. I added a number of white dots to the image using a Gelly Roll White pen to resemble a Monarch butterfly. Then I put the colored image back in my MISTI, stamped it again with VersaMark ink, and embossed that with clear embossing powder. That added a nice bit of shine and a tiny touch of dimension! Then I fussy cut the butterfly (yes, the antennae too! (the embossing powder helped!)) and colored the cut edges with a Memento Tuxedo Black Dual marker. Very pleased with that!
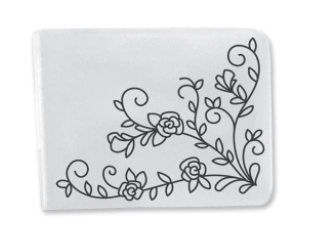
I thought that putting this butterfly on a plain White card base wasn’t quite what I was looking for, so I dug around my embossing folders for something appropriate to add some texture to the background. Then I remembered the Rose die in our embellishment bag and came up with this background. I die-cut the rose 12 times from matching White card stock and glued all 12 pieces to my White card base in a repeating pattern. I trimmed all the overhanging edges and was pleasantly surprised with the results! It would have been easier with an embossing folder, but at least this gave me a great reason to use that Rose die!
I stampeded and embossed the sentiment on the same white card stock, and die-cut that out with a Lawn Fawn Stitched Rectangle die. I mounted the sentiment and the butterfly to the card front with foam tape, and didn’t add any sequins or embellishment – I thought this butterfly spoke for himself! I think I do like realistic butterfly stamps better than fanciful or fantasy butterflies… I enjoy the challenge of coloring them as accurately as possible!
I was pleased to receive the add-on Butterfly Background stamp this month… I don’t have tons of background stamps so even a butterfly background is a welcome addition to my stash!
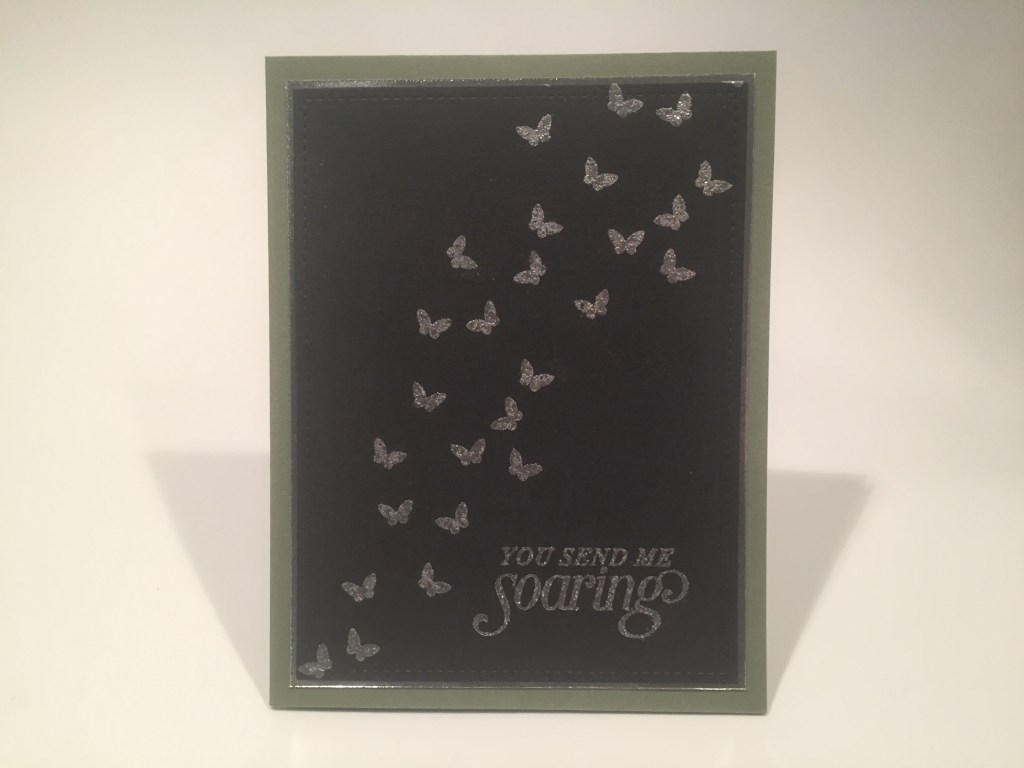
But that doesn’t mean I have to USE the background stamp as a background! Using my MISTI again, I stamped the background stamp twice on a panel of Black card stock. I masked off the butterflies I didn’t want, inked the stamp with VersaMark ink, removed the masking, and stamped the selectively inked butterflies on the panel. I embossed all the butterflies with Love From Lizi Silver Glitz embossing powder. This sentiment is from an old Stampin’ Up “Sky is the Limit” stamp set, embossed with the same Silver Glitz powder – great sparkle! I die cut the panel with a LFSRdie, added a thin mat of brushed silver behind that, and glued them both the the Moss Green card base. I tried the Silver Mirror specialty card stock in our kit but the mirror effect was a little too much competition for these little butterflies! I really like how this card turned out! It’s almost the direct opposite of the Monarch card, but both of them are really effective!
There is also a butterfly die in our embellishment bag, and I thought I could create something colorful and not what you might think of with a precisely themed kit like this.
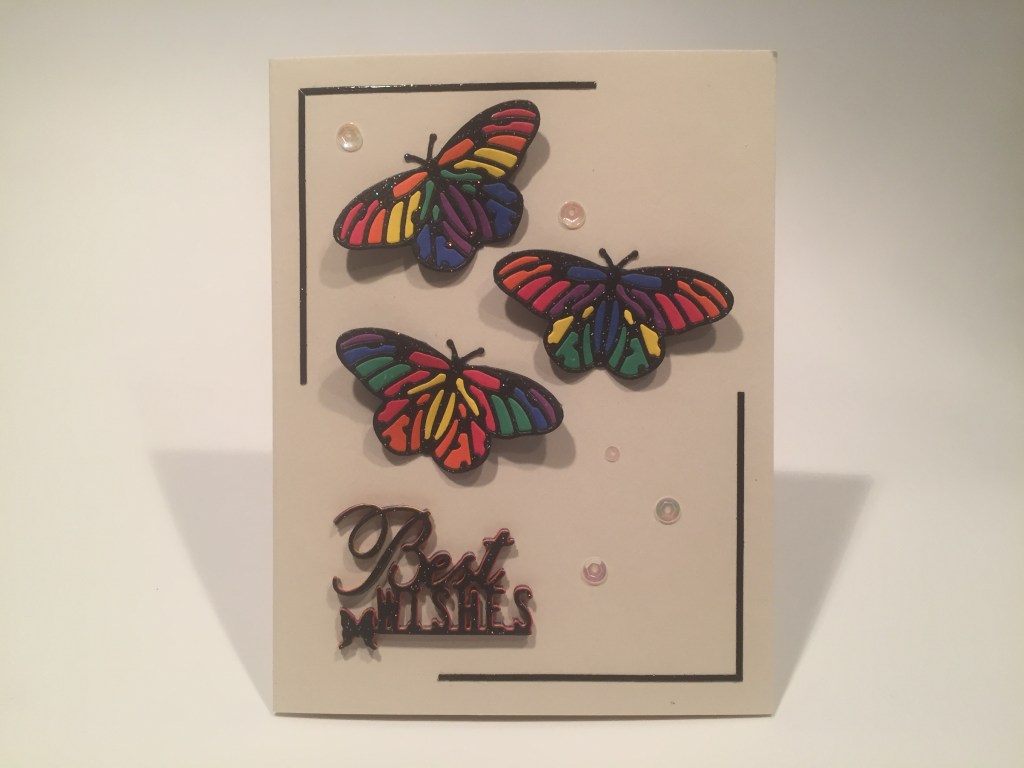
Okay, so I am a totally anal-rententive overly-detailed crazy craftsman, but I really like these rainbow butterflies! I rounded up some rainbow scraps of card stock and my trusty Black Tie glitter card stock and started die-cutting. Three black butterfly outlines and one butterfly each in Purple, Blue, Green, Yellow, Orange and Red. I was very careful not to lose any of the die-cut pieces from the rainbow cut outs. I put a piece of blue painters tape on the back of the Black Tie outlines, and trimmed the edges to match. Then I simply pieced in all the colors – burnishing everything down when complete. SWEET!! I grabbed the “Best Wishes” die from the embellishment bag and cut it 7 times using all the rainbow colors and one Black Tie glitter die cut for the top. I glued those all together for a nice chunky sentiment that matches the butterflies perfectly!
I created this “partial frame” on the Cream card base using the Black Glitter pin stripe peel offs (in this months Variety peel off bundle), and glued everything down to the card front (keeping the butterfly wings free and and slightly folded up). Some of the iridescent sequins from our sequin mix adds more sparkle and a nice sense of movement! You know I like my bright colors and I think this card satisfied my rainbow-junkie needs this month!
Most of our decoupage sheets contain “extras” whether they be different sentiments or even some different images. I believe I mentioned how much I liked this “extra” piece during my unboxing. Let’s make a card with that!

When I was digging through my embossing folders for the Monarch card, I came across this small Sizzix embossing folder that came with my Sizzix Sidekick die cutting machine. There are actually some small roses among that filigree! That should work quite well! I cut a panel of dark Purple card stock from my stash to 2.75″ x 5.5″ and embossed opposite corners with that small folder. I then took my finger dauber reserved for White pigment ink, and, with out adding any more ink to it, lightly brushed that over the embossing to add a little more definition.
The purple rose ribbon caught my eye and I realized how well it complimented the embossing. I glued two strips of the ribbon to the sides of the Lilac card base using my Zyron Sticker maker, and glued the embossed panel on top. I stamped this perfectly tiny sentiment using VersaMark ink and embossed that with Love From Lizi Very Vanilla embossing powder – the background of the rose oval is NOT perfectly white! I added the oval with foam tape and embellished the card front with more iridescent sequins. That’s one way to make a small icon hold focus on a card! Like I said in my unboxing, I really like that single rose oval “extra”!
Let’s get back to our original butterfly stamp in the Butterfly Wishes stamp set. I haven’t used that entire stamp yet…
I stamped this on more LFL alcohol-friendly White card stock using VersaFine Onyx Black ink and embossed the whole stamp with clear embossing powder. In her unboxing, Lizi mentioned that her alcohol-friendly card stock worked with watercolor markers too, so I decided to try that out, and colored the butterfly with my Zig Clean Color markers. NICE! I die cut the circle with a Hero Arts Infinity Circle die, and then ink blended some Grape Juice ink on the background. Never thought of a Purple and Green butterfly before, but I think it works!
I took the long butterfly border stamp and stamped the two edges of the Aubergine card base using VersaMark ink. It’s hard to see in the photo, but reads nicely in real life – a subtle patterning on the sides of the card front. I cut a strip of the silver foil pattern paper to 2 7/16″ (just following the natural dividing line on that pattern paper) x 5.5″ and glued that to the center of the card base. I lined the edges of the pattern paper with more Silver Moondust peel offs from our kit and then die-cut three more circle blanks to glue behind the stamped piece. I inked the edges of the circle with more Grape Juice ink and glued that to the card front. The sentiment is the “extra” from the “Just for You” decoupage sheet and I attached that to the card front with foam tape. The shine from the foiling and the glitter on the sentiment and peel offs provide all the sparkle and shine this card needs!
I also received the add-on Butterfly Wings stamp set this month – a very unique butterfly stamp with flowers for wings!
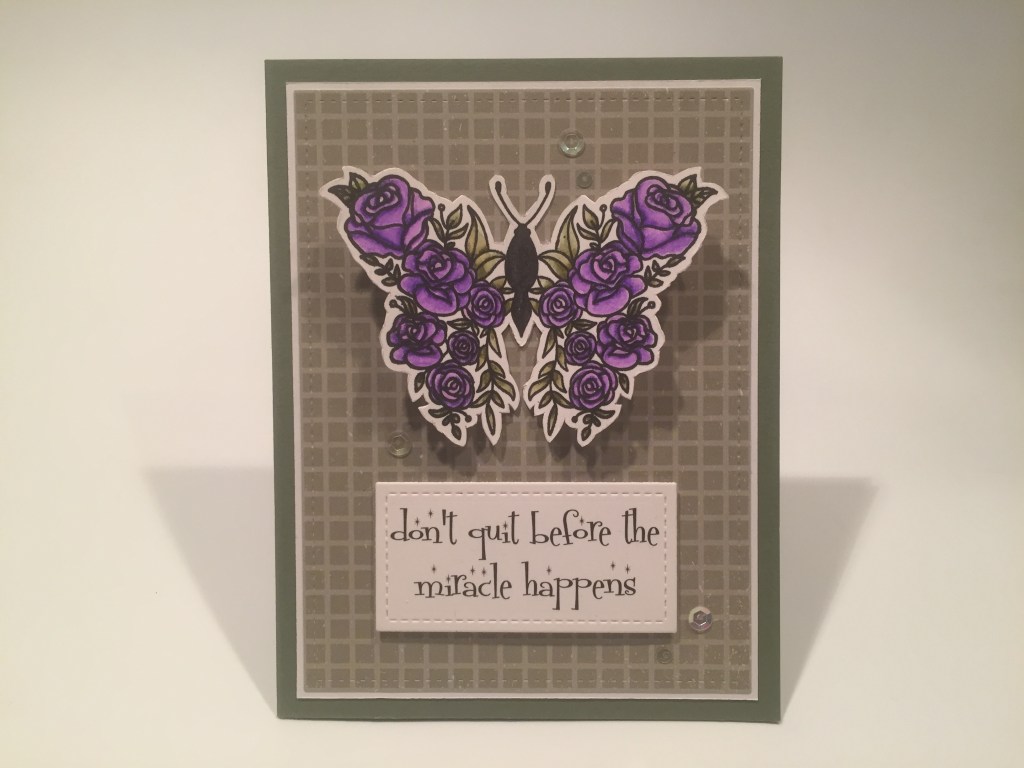
I stamped that groovy butterfly on more LFL White card stock using VersaFine Onyx Black ink and colored it with my Zig Clean Color markers, and then fussy cut him out. I die-cut the grid pattern paper with a LFSRdie, added a thin white mat behind that, and glued them down to the Moss Green card base. I glued the butterfly body flat to the card front and added foam tape behind the wings. I printed this sentiment on a scrap of White card stock using my Silhouette software and the Fontdinerdotcom Sparkly font. I die-cut the printed sentiment with another LFSRdie and foam taped it to the card front. I added a little sparkle to the butterfly body with my Spectrum Noir Sparkle pen, and a few iridescent sequins for a little extra pop. VERY interesting butterfly stamp – don’t think I’ve seen anything like this before! I love this sentiment too – very encouraging!
Though this card is fairly similar to my Monarch card, they are both quite different in appearance. I really enjoy coloring in almost any medium – I think it’s very therapeutic – and figure that if I’m going to take the time to color a stamp, then I think that stamp should probably be the main focal point on a card. And these are both pretty big butterflies!
I still have to use those “perspective” butterfly stamps in our stamp set, and I found a quote that really spoke to me this month. Yes… I’ll still do some research to help this old brain come up with ideas!
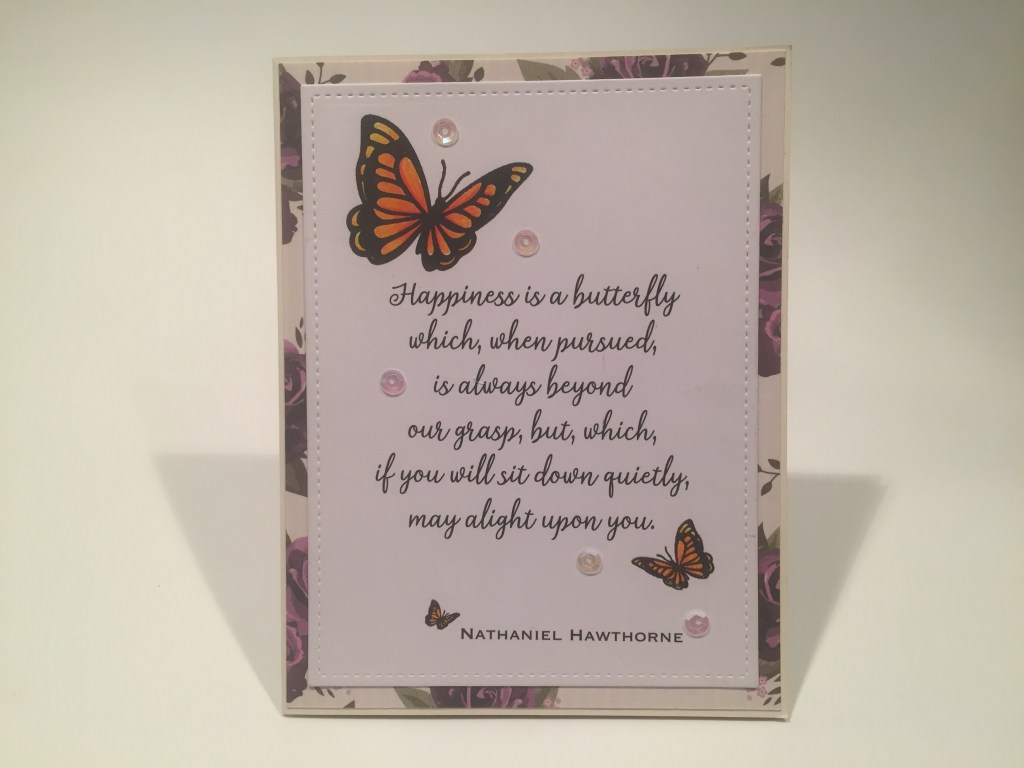
I started this card with the quote laid out in my Silhouette Software, and printed it on another panel of LFL White card stock using the Dream State font for the quote, and the Copperplate font for the name. I laid out the butterfly stamps to help me decide where to die-cut this panel with a LFSRdie. I stamped the butterflies with Onyx Black ink and colored them with my Stabilo Markers – pretty easy stamps to color! I cut the rose pattern paper to 4 1.8″ x 5 3/8″ and glued that to the Ivory card base. I glued the card front to the center and added more sequins for some sparkle and sense of movement. Since these stamps are the same image in different orientations and sizes, it kind of feels like the butterfly is getting closer to us! I don’t usually include such large verses on my cards but this quote felt special to me!
My stash of butterfly puns is running low, but I thought of one more for my last card here. I have been seeing some of these full-frontal shaker cards on the inter-webs recently and decided to try my hand at one.
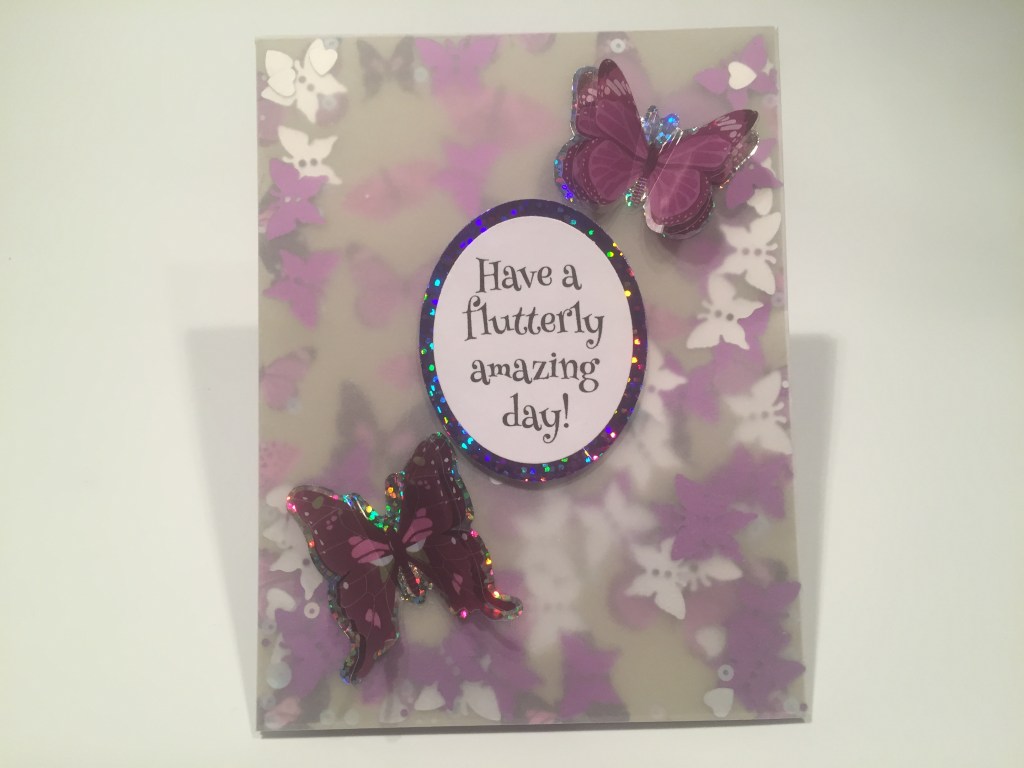
Actually pretty easy and quite effective! And no fussing around with layers of foam tape! I cut the butterfly pattern paper just slightly smaller than 4.25″ x 5.5″ – just a hair smaller! Then I cut a piece of vellum to 5.25″ x 6.5″ – one inch larger than my card. Then I scored all four sides of the vellum at half an inch with my Score-pal, trimmed the corners away and folded the vellum around the pattern paper to fit. I removed the pattern paper and put Scor-tape on all the edges, and filled the vellum with all the flat sequins from our mix – mostly butterflies and hearts but I think a stray cup sequin found it’s way in here and there. Then I just replaced the pattern paper over the sequins, removed the liner from the Scor-tape, and attached the vellum flaps to the back of the pattern paper. Simply glue the assembly to a card base (White) and you have a full-frontal shaker card – this has a lot of movement and would go through the mail easily.
I printed this pun-y sentiment using the Henny Penny font, and die-cut it with a HA Infinity oval die. I added a purple holographic mat behind the sentiment cut with another oval die, and foam taped them to the card front. Two of the butterfly stickers complete the picture.

I did take the small Happy Birthday sentiment and stamped that on the inside of the card using the Grape Juice ink. That’s a good reason to have a ‘flutterly amazing day’! LOTS of sparkle on this one! It’s been a while since I made a shaker card, and I really enjoyed this version!
That completes my 10 Cards post for the Love From Lizi May 2021 Butterfly Wishes Card Kit. 8 out of 10 of my cards have butterflies…! I may have just out-butterflied myself!! I think I actually achieved a terrific variety of cards!
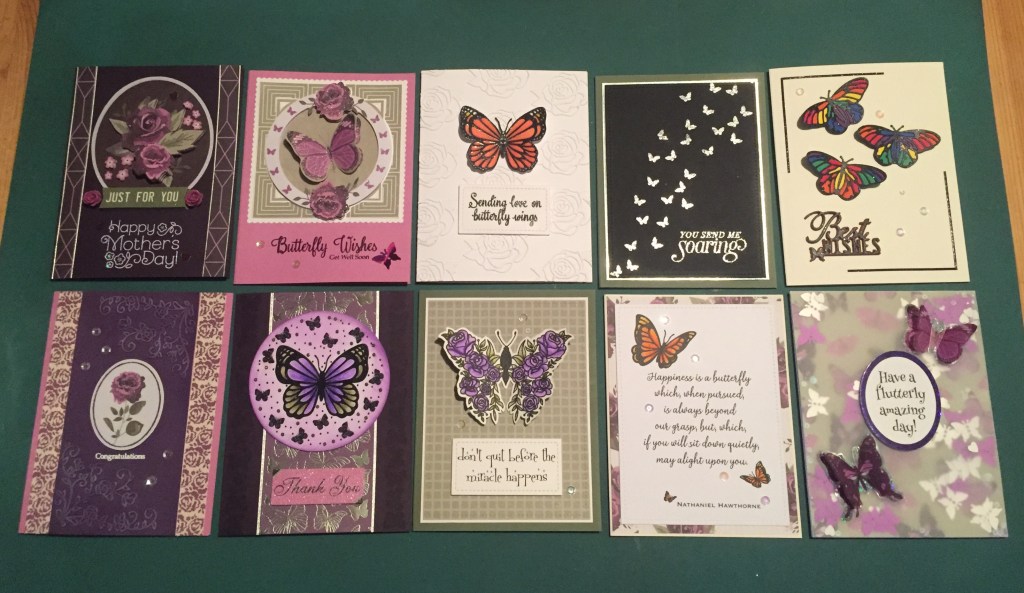
I used all the card stock for my card bases, but I didn’t use any of the Silver Mirror. I used almost all of our stamps with the exception of the tiny Good Luck and Happy Retirement stamps; I used two of the decoupage sheets along with some “extras”; I used six sheets of pattern paper (no matter how much or little pattern paper we get in our kits, I always seem to use only half!); I used a few peel offs and a little bit of everything in our embellishment bag including 3 of the four dies! I even used the two add-on stamp sets here! A really good assortment of very useful cards! I’m quite pleased! And, Hey! I didn’t even collapse into a bumbling ball of butterfly-inflicted psychoneuroses!!
This kit has sold out already – as with many of Lizi’s kits, this one went very quickly! There are a number of the add-ons still available including the pattern paper pack and the decoupage pack – those would make 10+ cards on their own! If I’ve managed to catch your eye or given you some ideas of your own, here’s a link to Lizi’s May release:
Love From Lizi May 2021 Release: https://shrsl.com/2x78y
Thank you so much for sharing some butterfly fun with me here! Your time and attention thrill me every time I post! You can sign up to follow CardCutups at the top of the page if you haven’t already, and I hope you do!! Remember to Like me, List me, Pin me, Post me, Share me with all your crafty friends, Don’t waste your time chasing butterflies – mend your garden, and the butterflies will come!! I send you and yours Chuckles and Cheer, Light and Laughter and, as always, Happy Crafting!
DISCLOSURE: This site contains some affiliate links to products. I may receive a commission for purchases made through these links (at no cost to you). As an Amazon Associate I earn from qualifying purchases. Thank you!

Fabulous as usual! I hope New York opens as planned!
LikeLike
Thanks Jennifer! Keeping our fingers crossed here!
LikeLike