
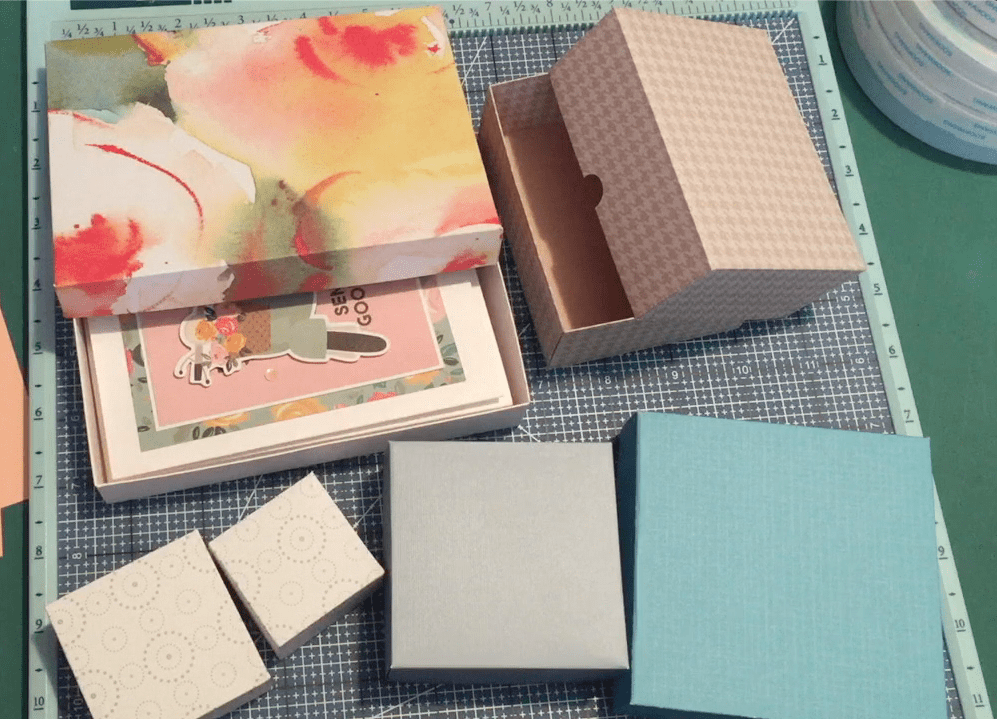
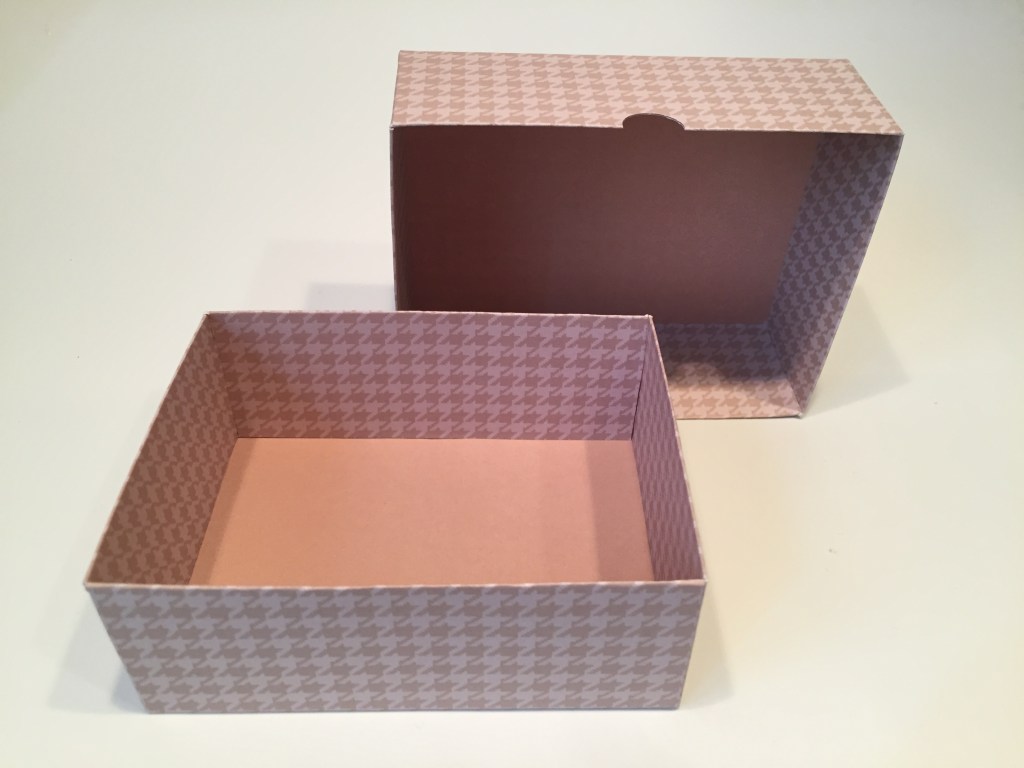
Hello Folks! Scott here with another Scor-Pal Project video for you! In Part 1 we made a variety of simple boxes with single-thickness walls. This month we’re stepping it up a notch and making boxes with double-thickness walls. Not only are they sturdier, but they are clean and sharp with no tabs or fasteners showing.
I was talking with Diana at Scor-Pal and she thought waiting until after Labor Day was a good idea for this month. I hope everyone had a good holiday – or at least some time to yourself as we wrap up this totally bizarre summer! Let’s make some more boxes!
I have created a double-thickness box template for you this month – The Art of Box Making Part 2 – that covers the new formula for figuring out what size cardstock you need for a specifically sized double-thickness box.

You can see the double-thickness formula doubles up the sides of the boxes which gives us the advantage of hiding the tabs that form the box as well as continuing any color or pattern from the outside of the box to the inside of the box. Makes for very sturdy, sharp, clean boxes!
To determine the size of card stock you need to start with to make these boxes, just decide what the dimensions of your finished box needs to be. Let’s skip the 2″ square box on the template and jump right in to the 3″ x 4″ x 1.5″ rectangular box!

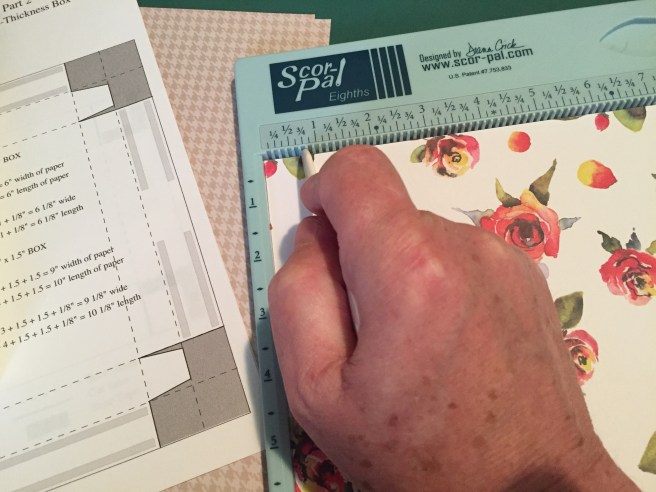
Insert the dimensions of your box into the formula on the template. 3″ is the width, 4″ is the length, and 1.5″ is the height (sides) of this box. So, 1.5″+1.5″+3″+1.5″+1.5″ = 9″ wide. Then, 1.5″+1.5″+4″+1.5″+1.5″ = 10″ long. The bottom of our first box starts with a 9″ x 10″ piece of card stock.
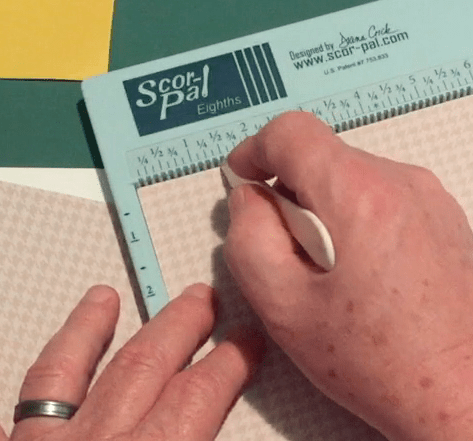
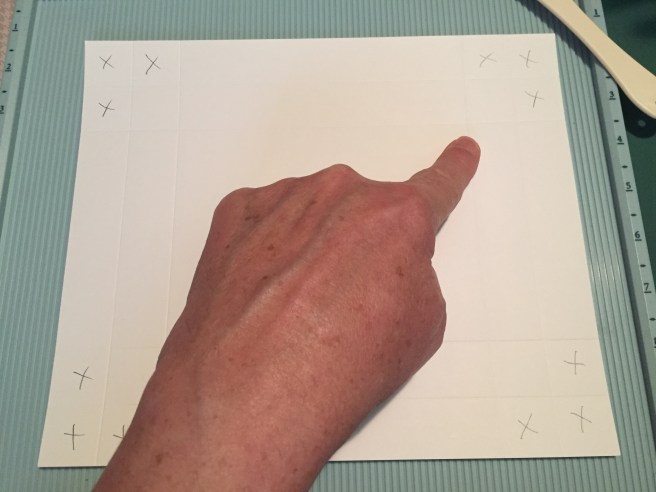
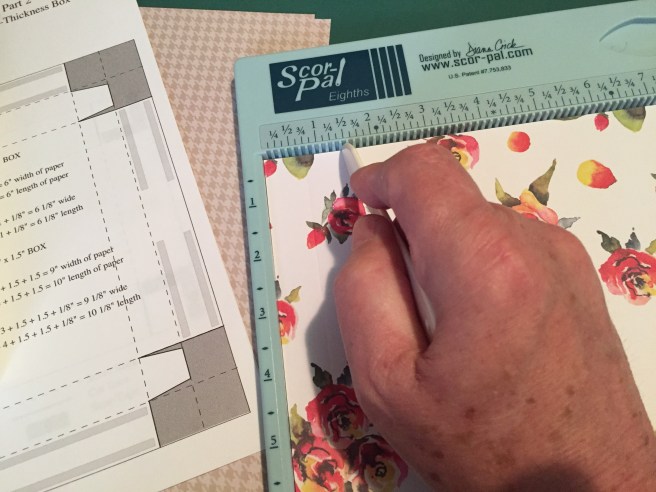
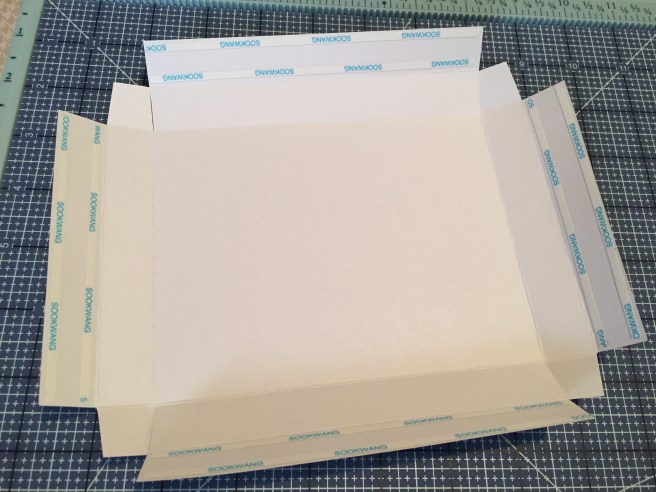
Now we want to score the card stock. Since the sides are 1.5″ tall, we want to score all four edges of our card stock at 1.5″ AND 3″. Remember we are doubling up the sides! In order not to confuse myself, I will do all my scoring on the left corner of my Scor-Pal… 1.5″ and 3″ on all four sides.
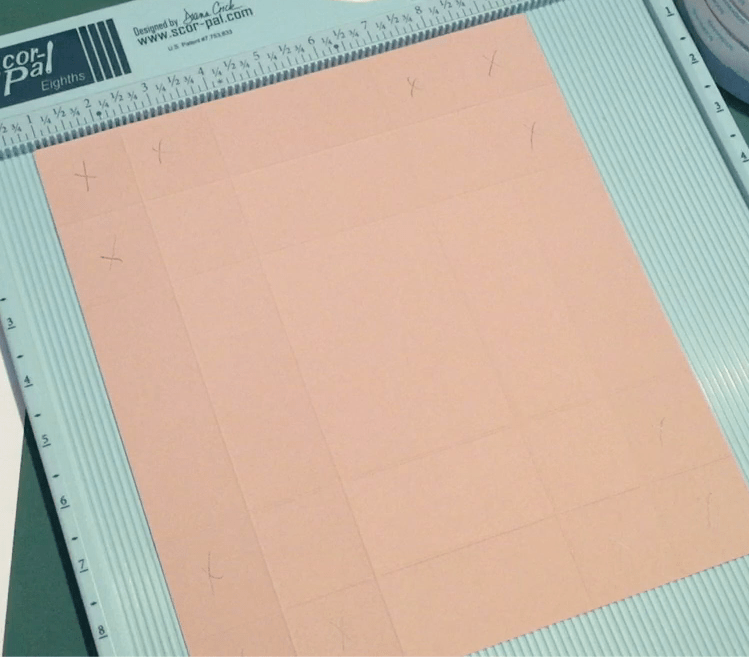
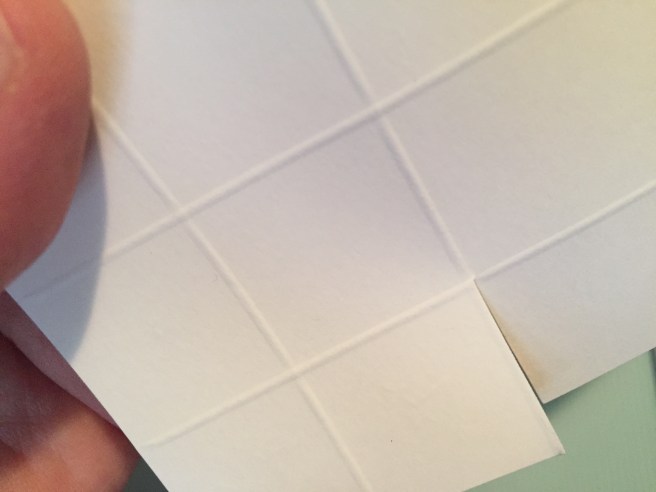
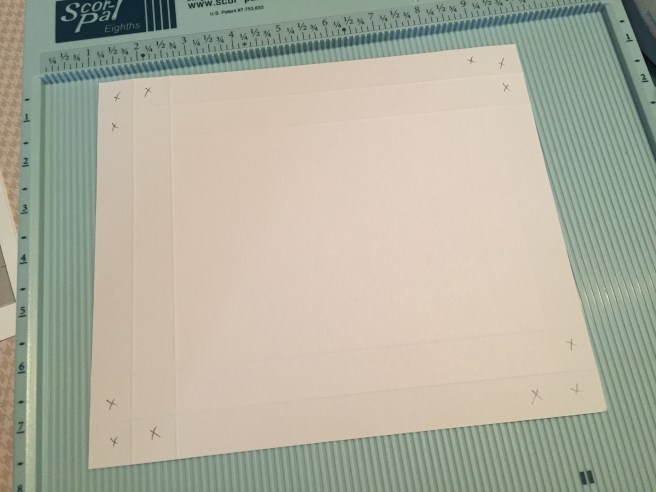
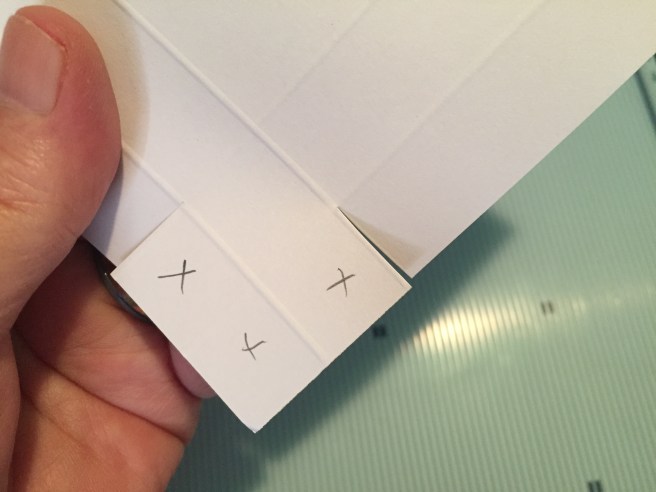
Unlike the single-thickness boxes, we will be cutting away portions of our card stock before we fold. If you have scored twice on all four sides, then you will see 3 square in each corner that you are going to want to cut away. I actually draw an X on the squares that need to be removed.
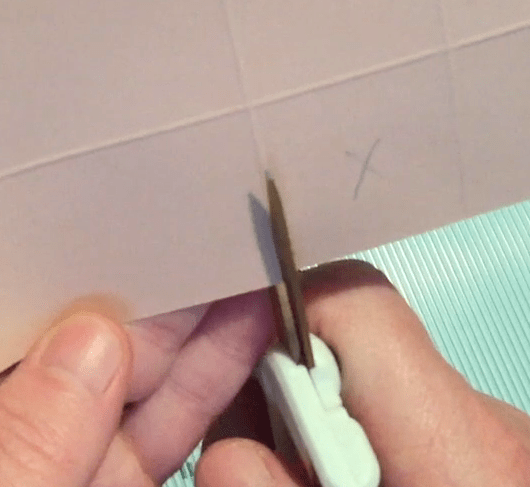
Remember that your Scor-Tool leaves a ‘channel’ on your card stock. When you start cutting away those corner squares, I find that cutting along the inside edge of the score channel (towards the center or middle of the card stock) helps your fold-over side flaps fit inside your box quite nicely.
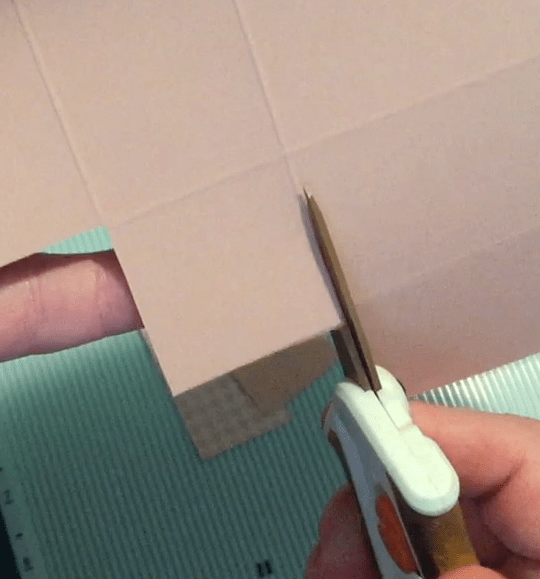
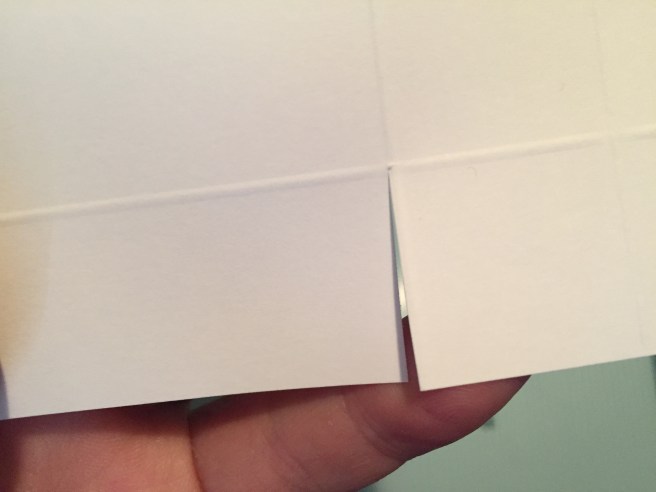
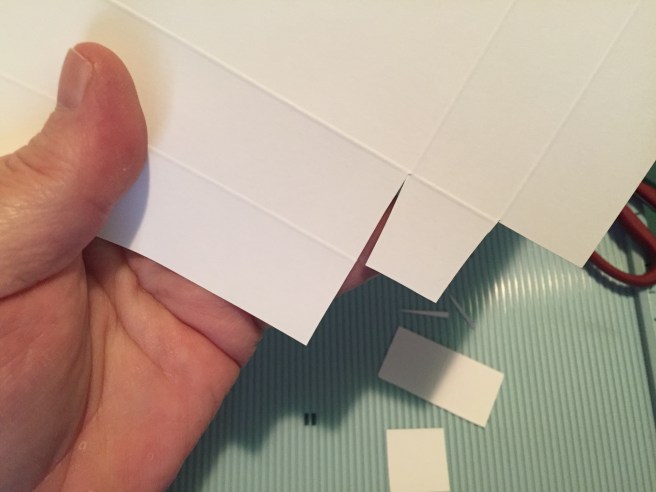
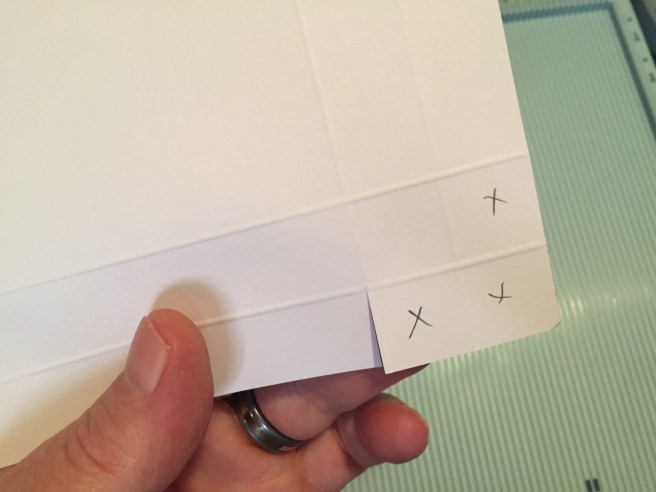
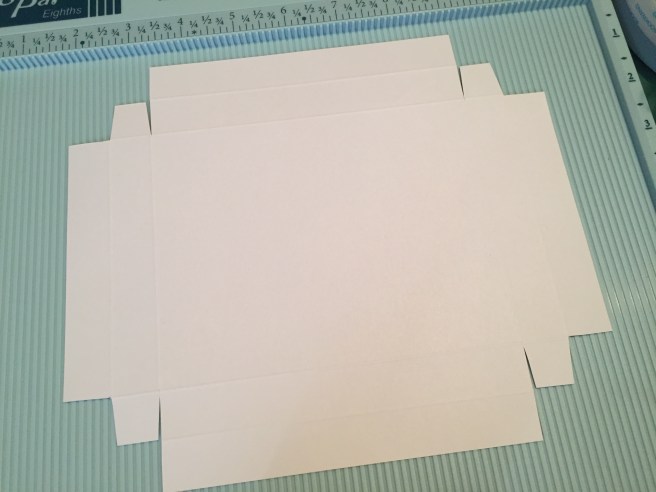
Once your three squares are cut away from the corner, you want to cut your tabs. We generally want the tabs to fold into the long side of the box, so cut your tabs on the 10″ side. Remember to cut to the inside of your score channel to keep the sides nice and square. Basically, anything you cut away, should include the score channels. Any extra channel left on the edges will affect the final assembly of the box.
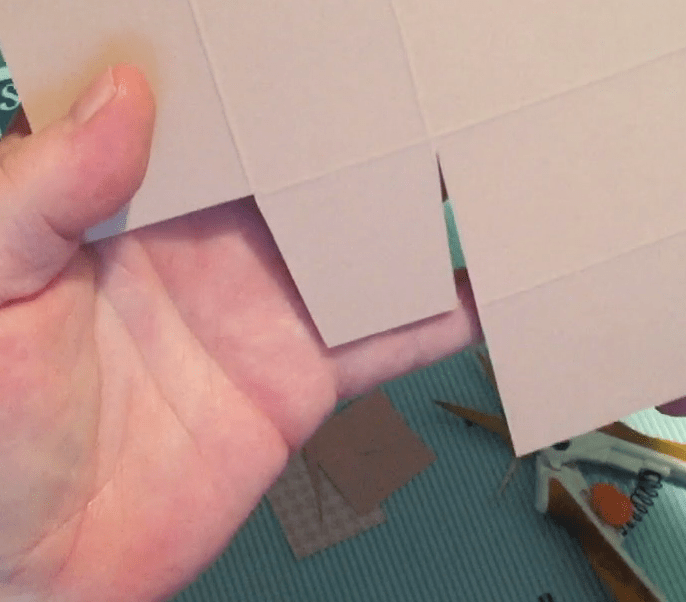
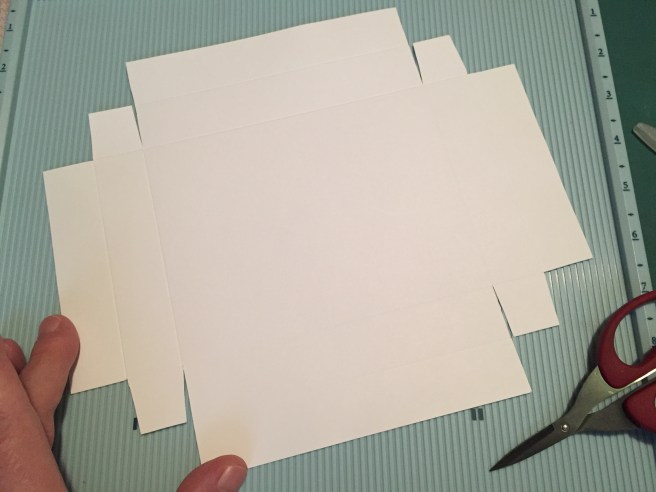
Now, we’re going to mitre the edges of the tab we just cut, by simply cutting away a small triangle on the two sides of the tab. Now, we need to do this same cutting on all four corners of the card stock. Keep the tabs attached to the 9″ sides so they will fold under the longer side. Once everything is cut away, your card stock should look like the template.
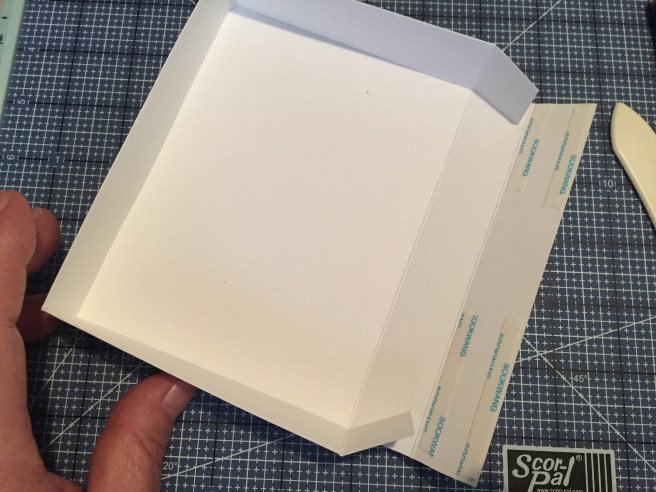
Now we want to commit the creases! I want the patterned side to be on the outside so I fold and crease all the score lines to the plain side of the card stock. Use your Scor-Tool to commit those creases and don’t forget to fold the tabs as well! Once everything is folded, I will usually do a dry-fit to make sure everything will fit together quite nicely.
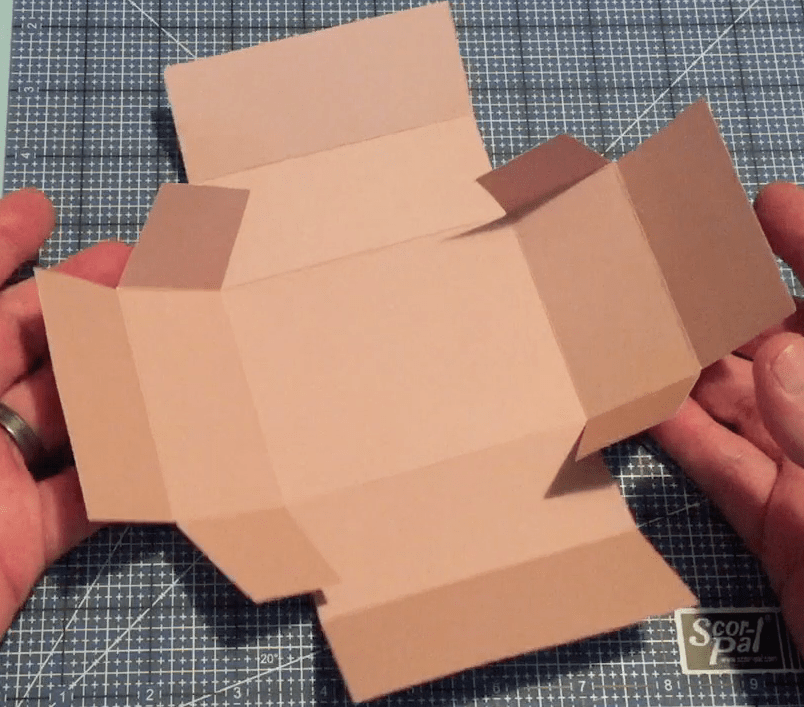
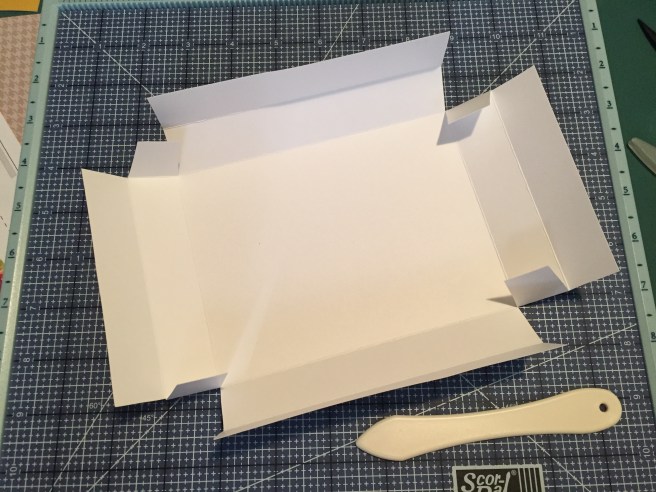
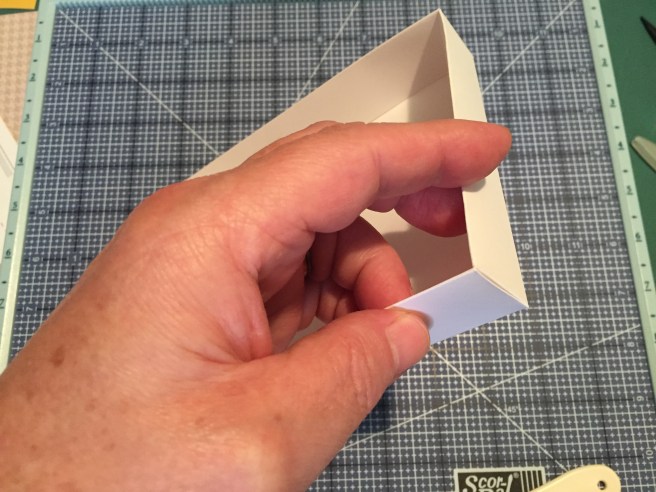
You will see your box beginning to come together at this point. The tabs are going to get captured between the double-thickness walls on the longer side of the rectangle.
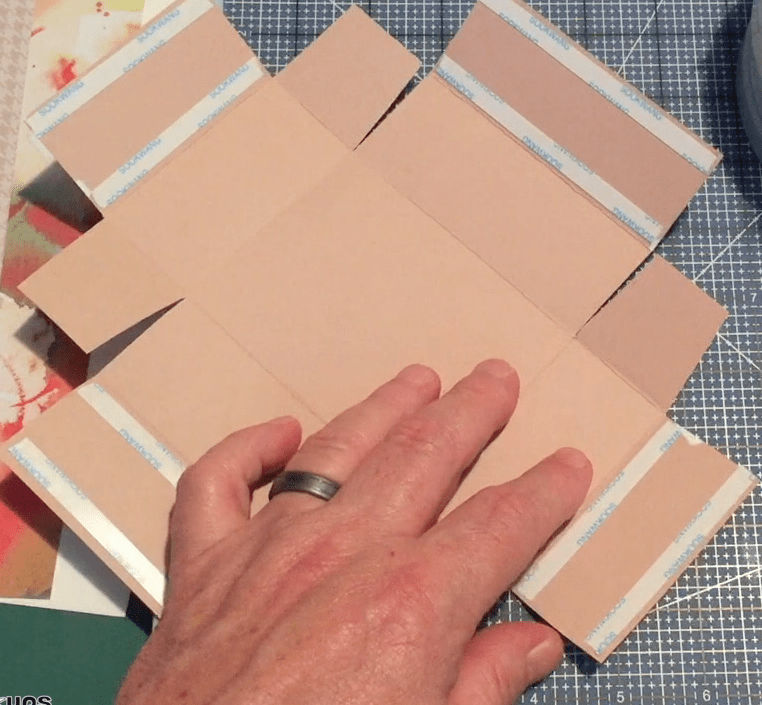
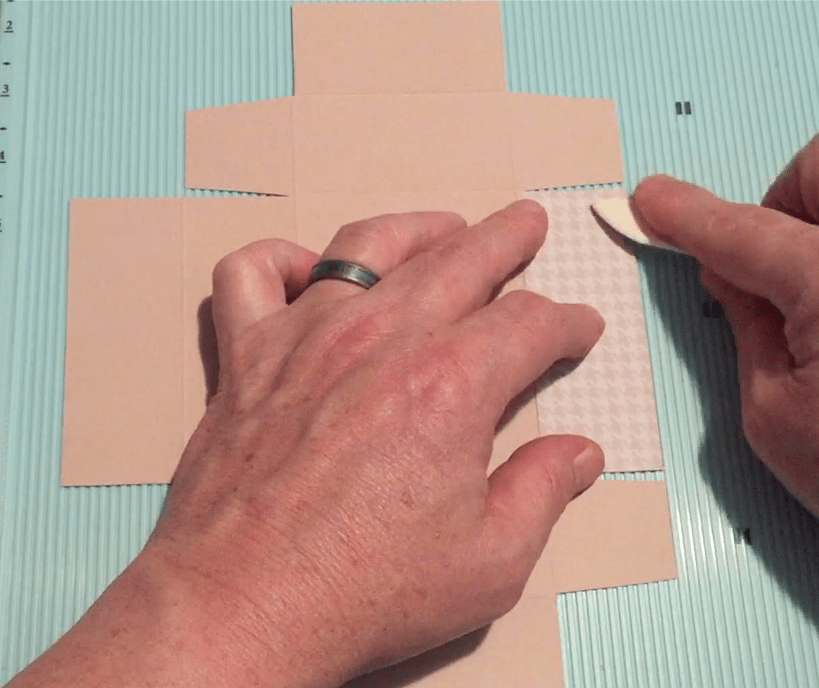
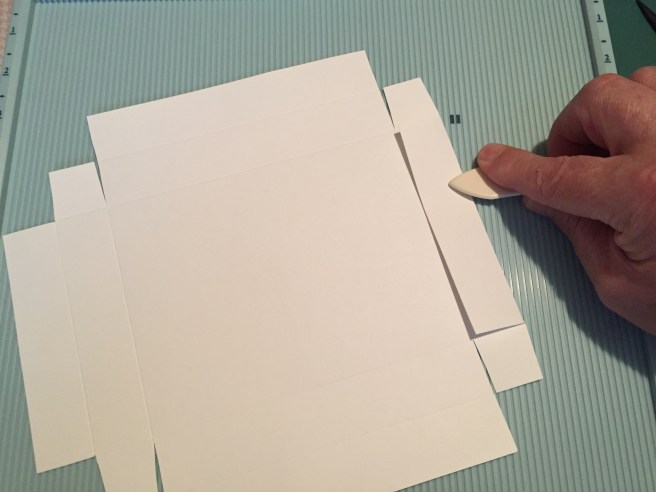
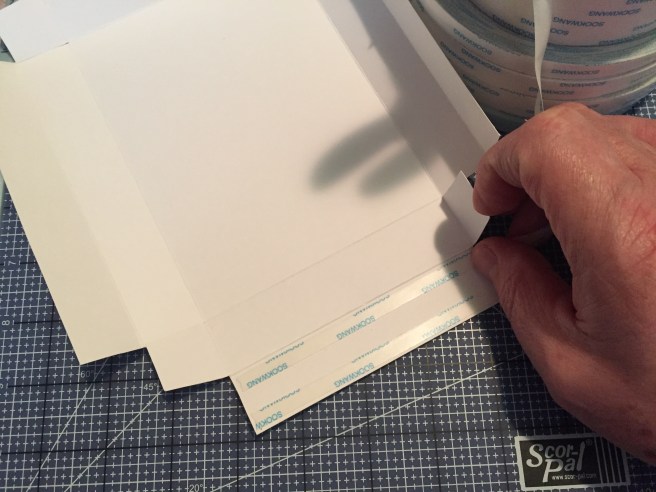
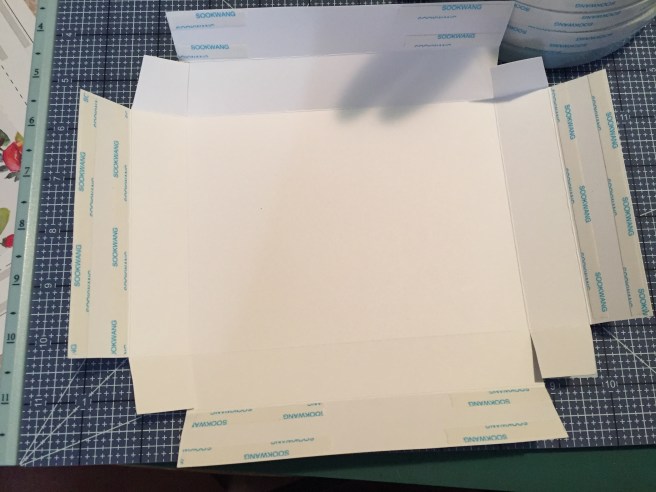
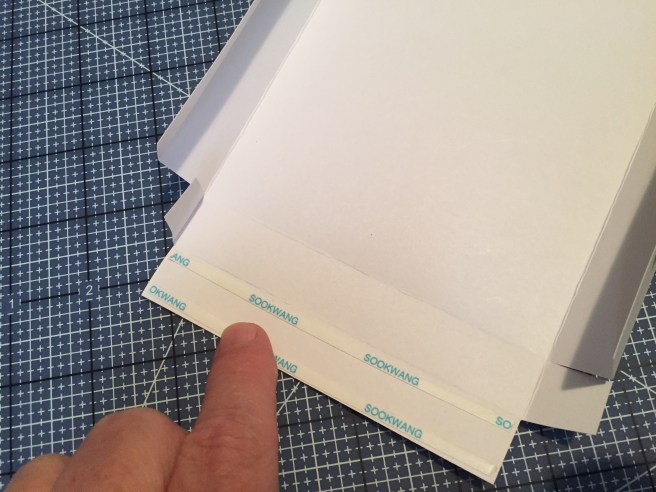
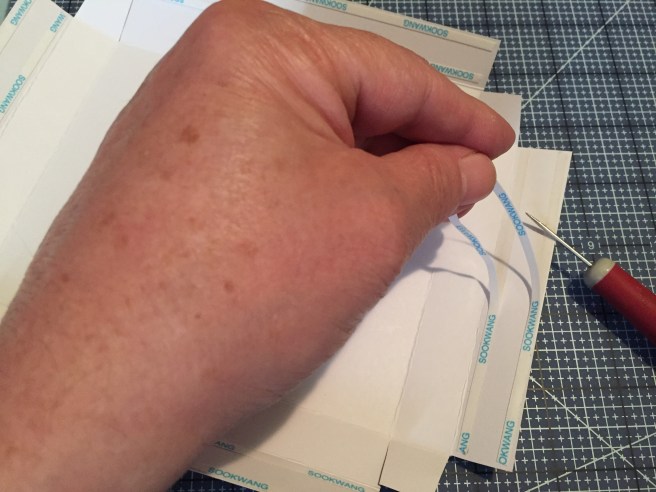
Now we add our Scor-Tape! It’s very easy on these boxes! The tape goes on the top and bottom of the outer flaps on all four sides. Since this box is only 3″ x 4″, I ran my Scor-Tape along the whole length of the flaps, but you can conserve your tape and just cover an inch or so on each side of your flaps. I think we’re ready to start assembling this box bottom!

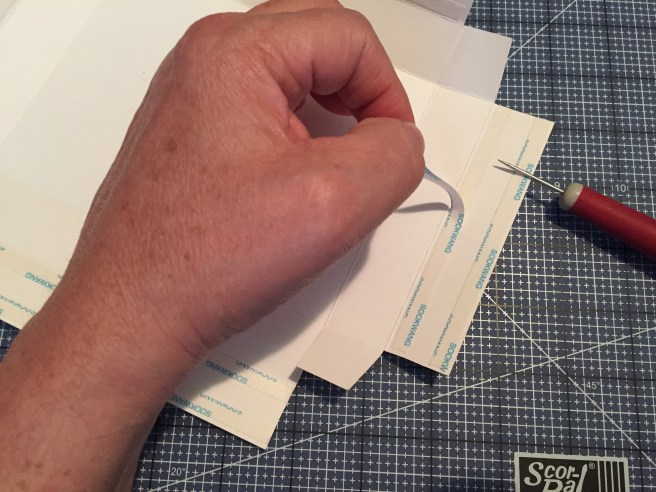
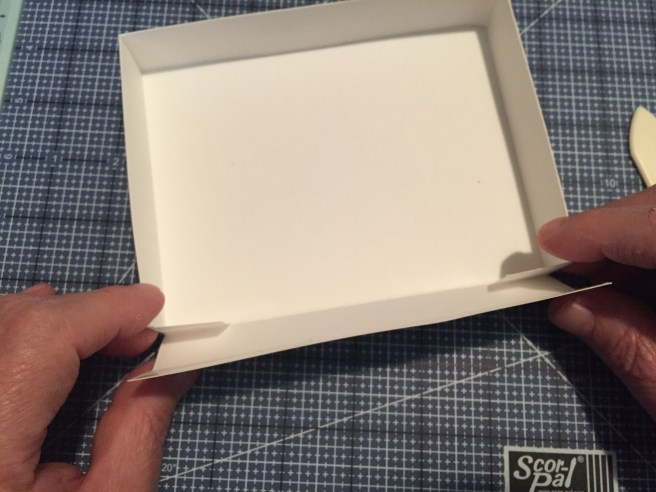
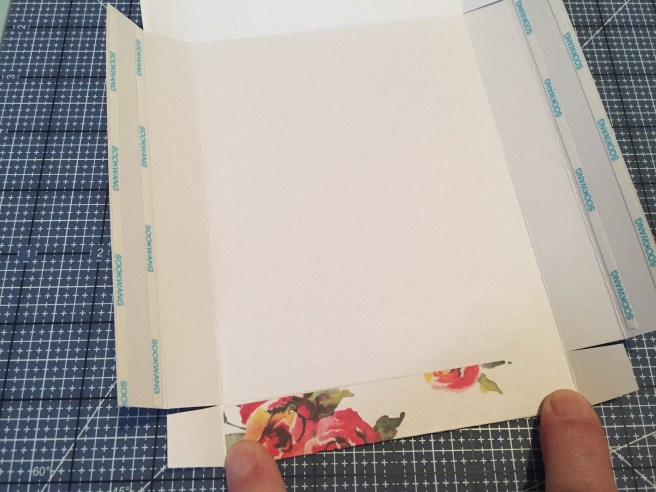
To begin your assembly, remove the liner paper from the Scor-Tape on the two 3″ sides and fold them over on themselves. Then we are going to tuck the tabs between the side walls on the 4″ sides. Remove the tape lined on one of the long sides. fold the tabs in and the side up and then fold the flap over the tabs.
Make sure your corners are nice and tight before you glue the flaps down. If your cuts were accurate, the corners should almost form themselves – you want the corners nice and tight, but not so tight that it will cause the card stock to bunch up in the corners. Attach both corners of this first side and use your Scor-Tool to burnish down the flap and make sure the corners are tucked in tightly.

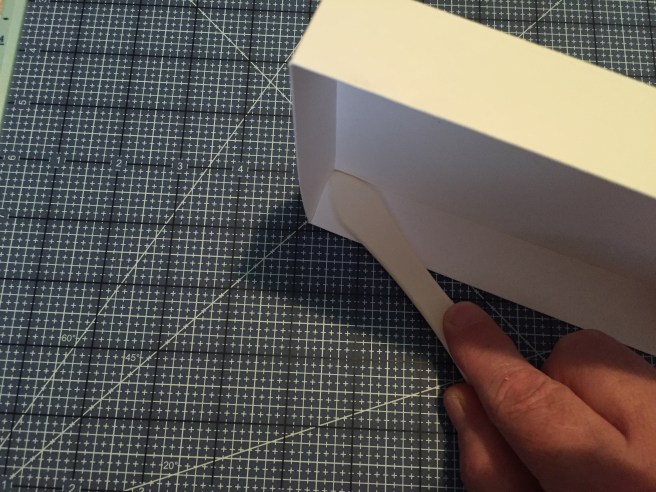
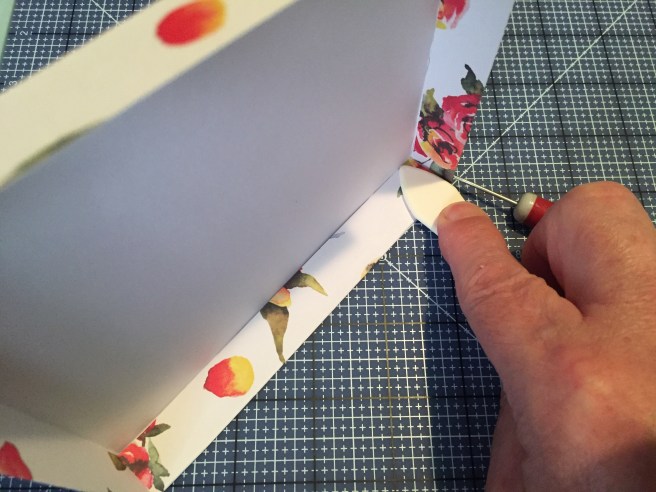
Once you have one side adhered, you can do the other side. Remove the tape liner, tuck in the tabs, fold up the side and fold the flap over, making sure to get your last two corners in there nice and tight.
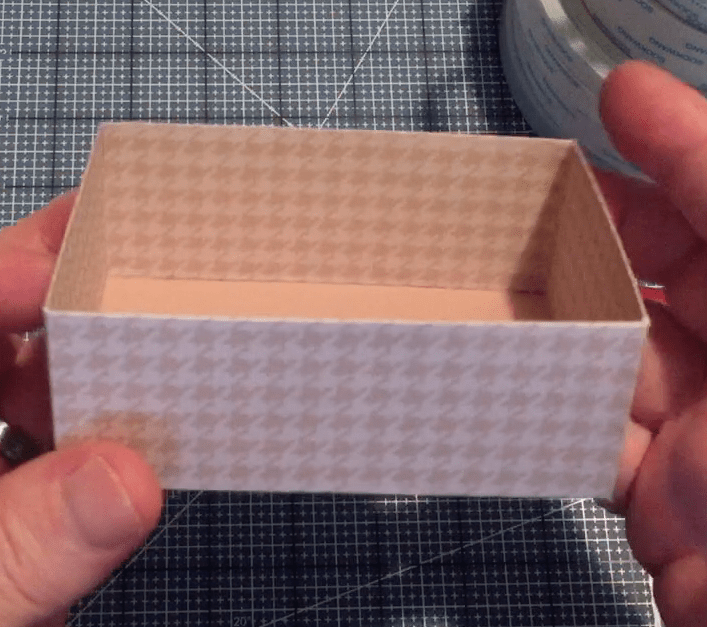
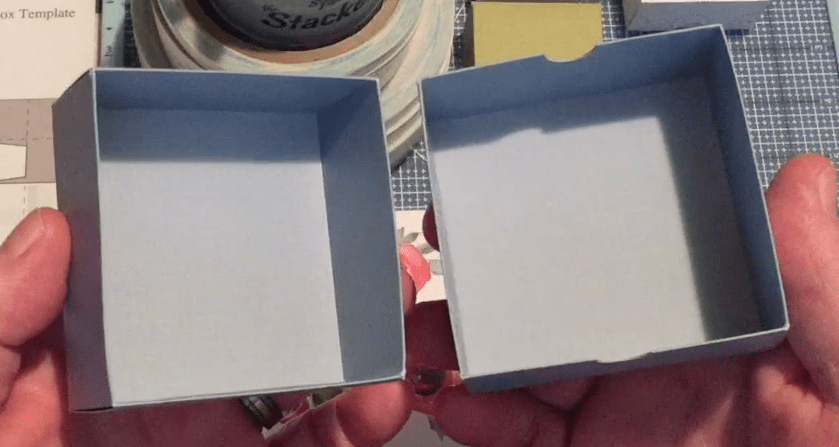
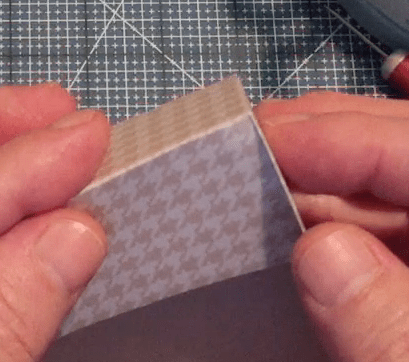
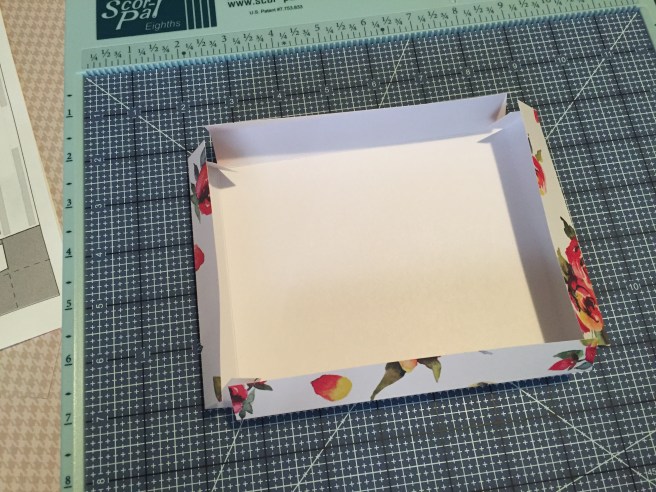
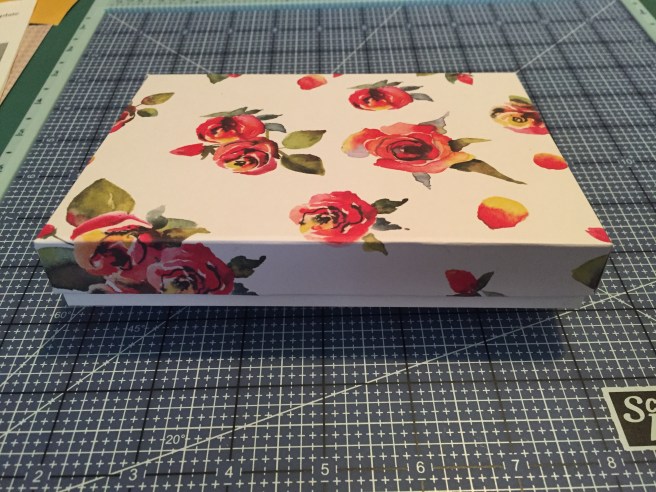
Look at those clean sharp corners and no trace of tabs or anything holding the box together! I love these double-thickness boxes! Really sharp and quite professional looking..!
The top of the box is assembled the exact same way starting with a piece of card stock cut to 9 1/8″ x 10 1/8″. Remember we add 1/8″ to the dimensions of the card stock for the top of the box to make sure that it will fit over the bottom of the box. But we will still score that card stock at 1.5″ and 3″ on all four sides. Assemble just like the bottom and your top will fit beautifully. IF, perchance, you are using an extremely thick card stock, you may have to add 3/16″ of an inch to your starting card stock dimensions, but all the card stock I used (up to 80# Neenah Solar White) fit just fine with only 1/8″ added.
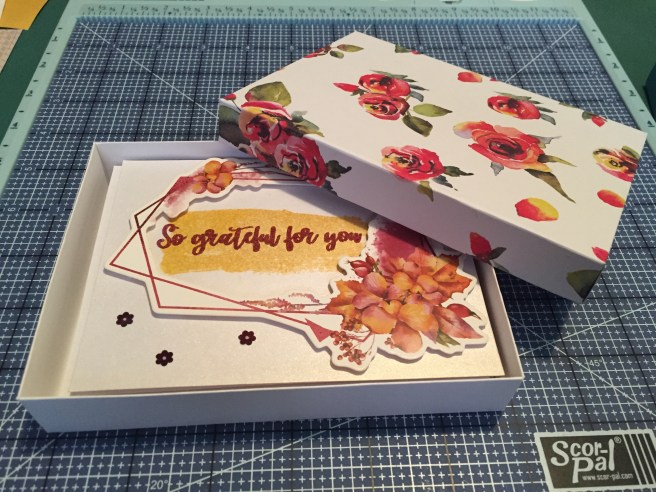
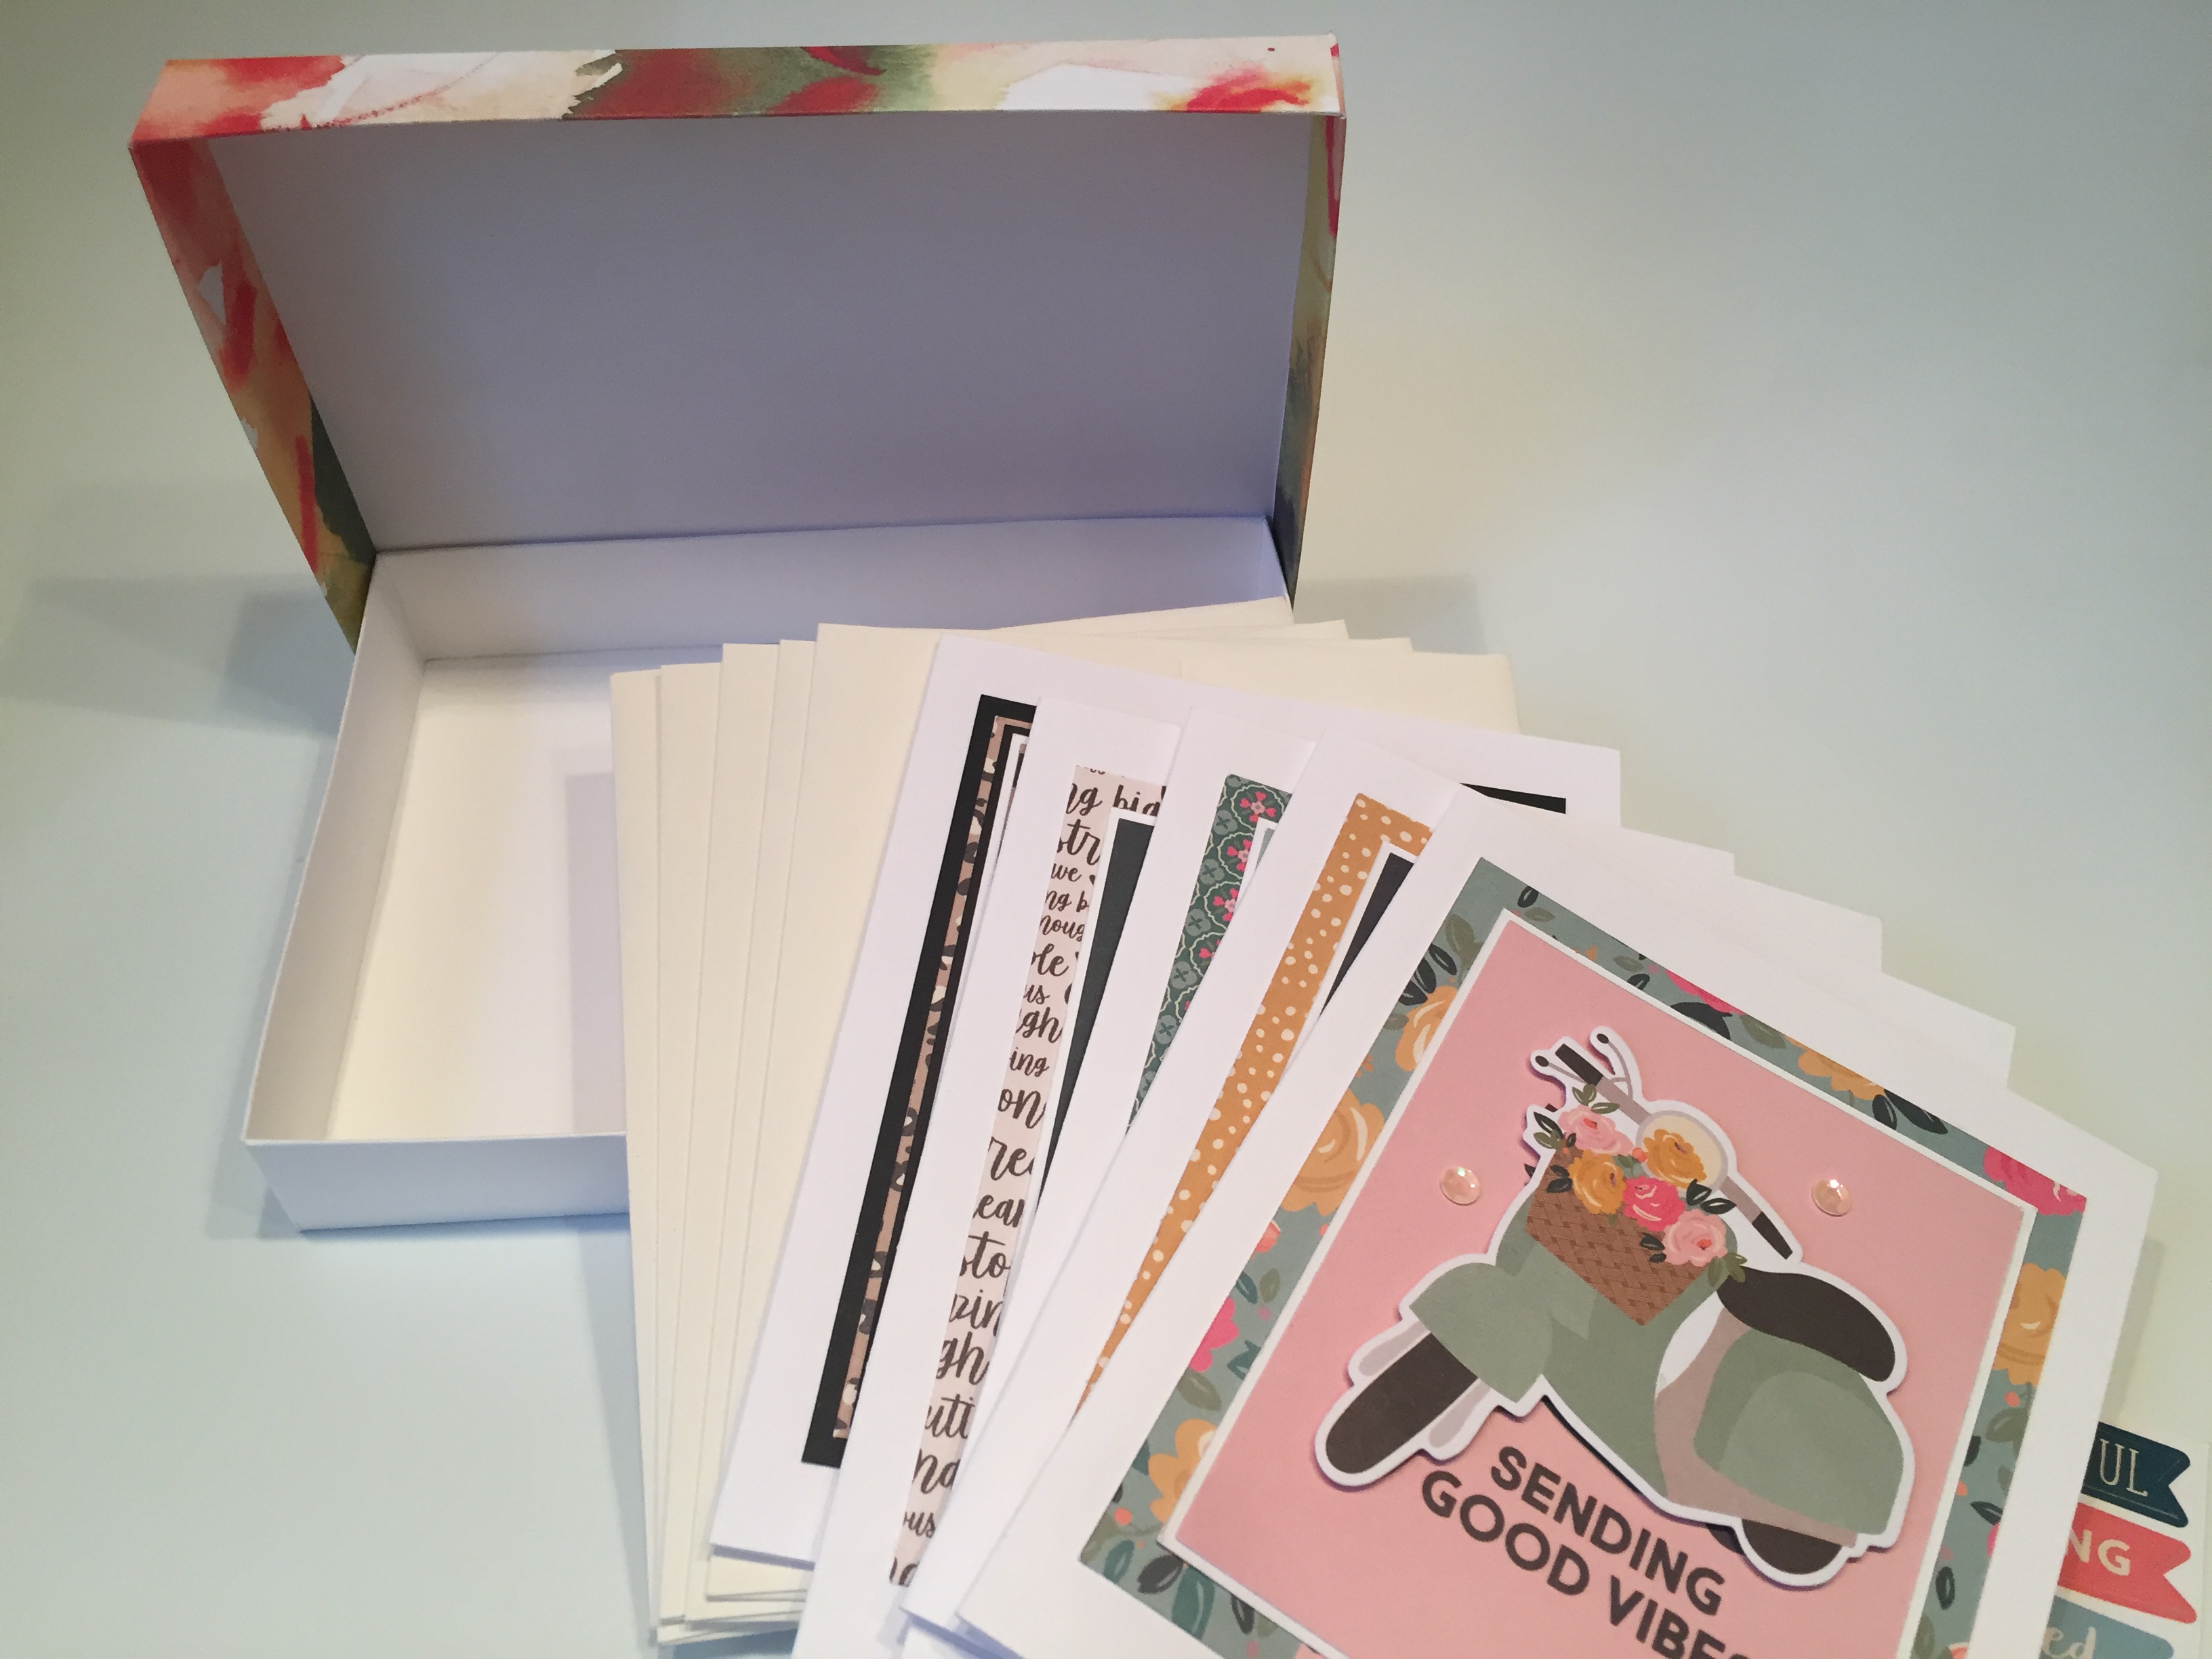
I really love these boxes! Let’s do one more box with a specific function. How about an A2 card box. Perfect for gift-giving, you can fit five to 10 cards (and envelopes) into this lovely gift box.

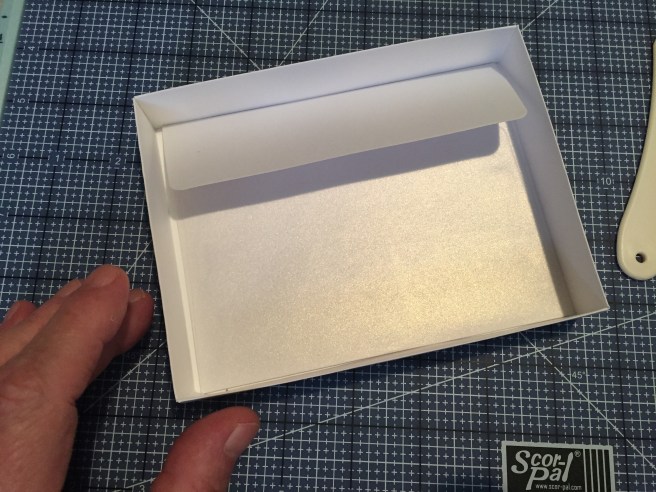
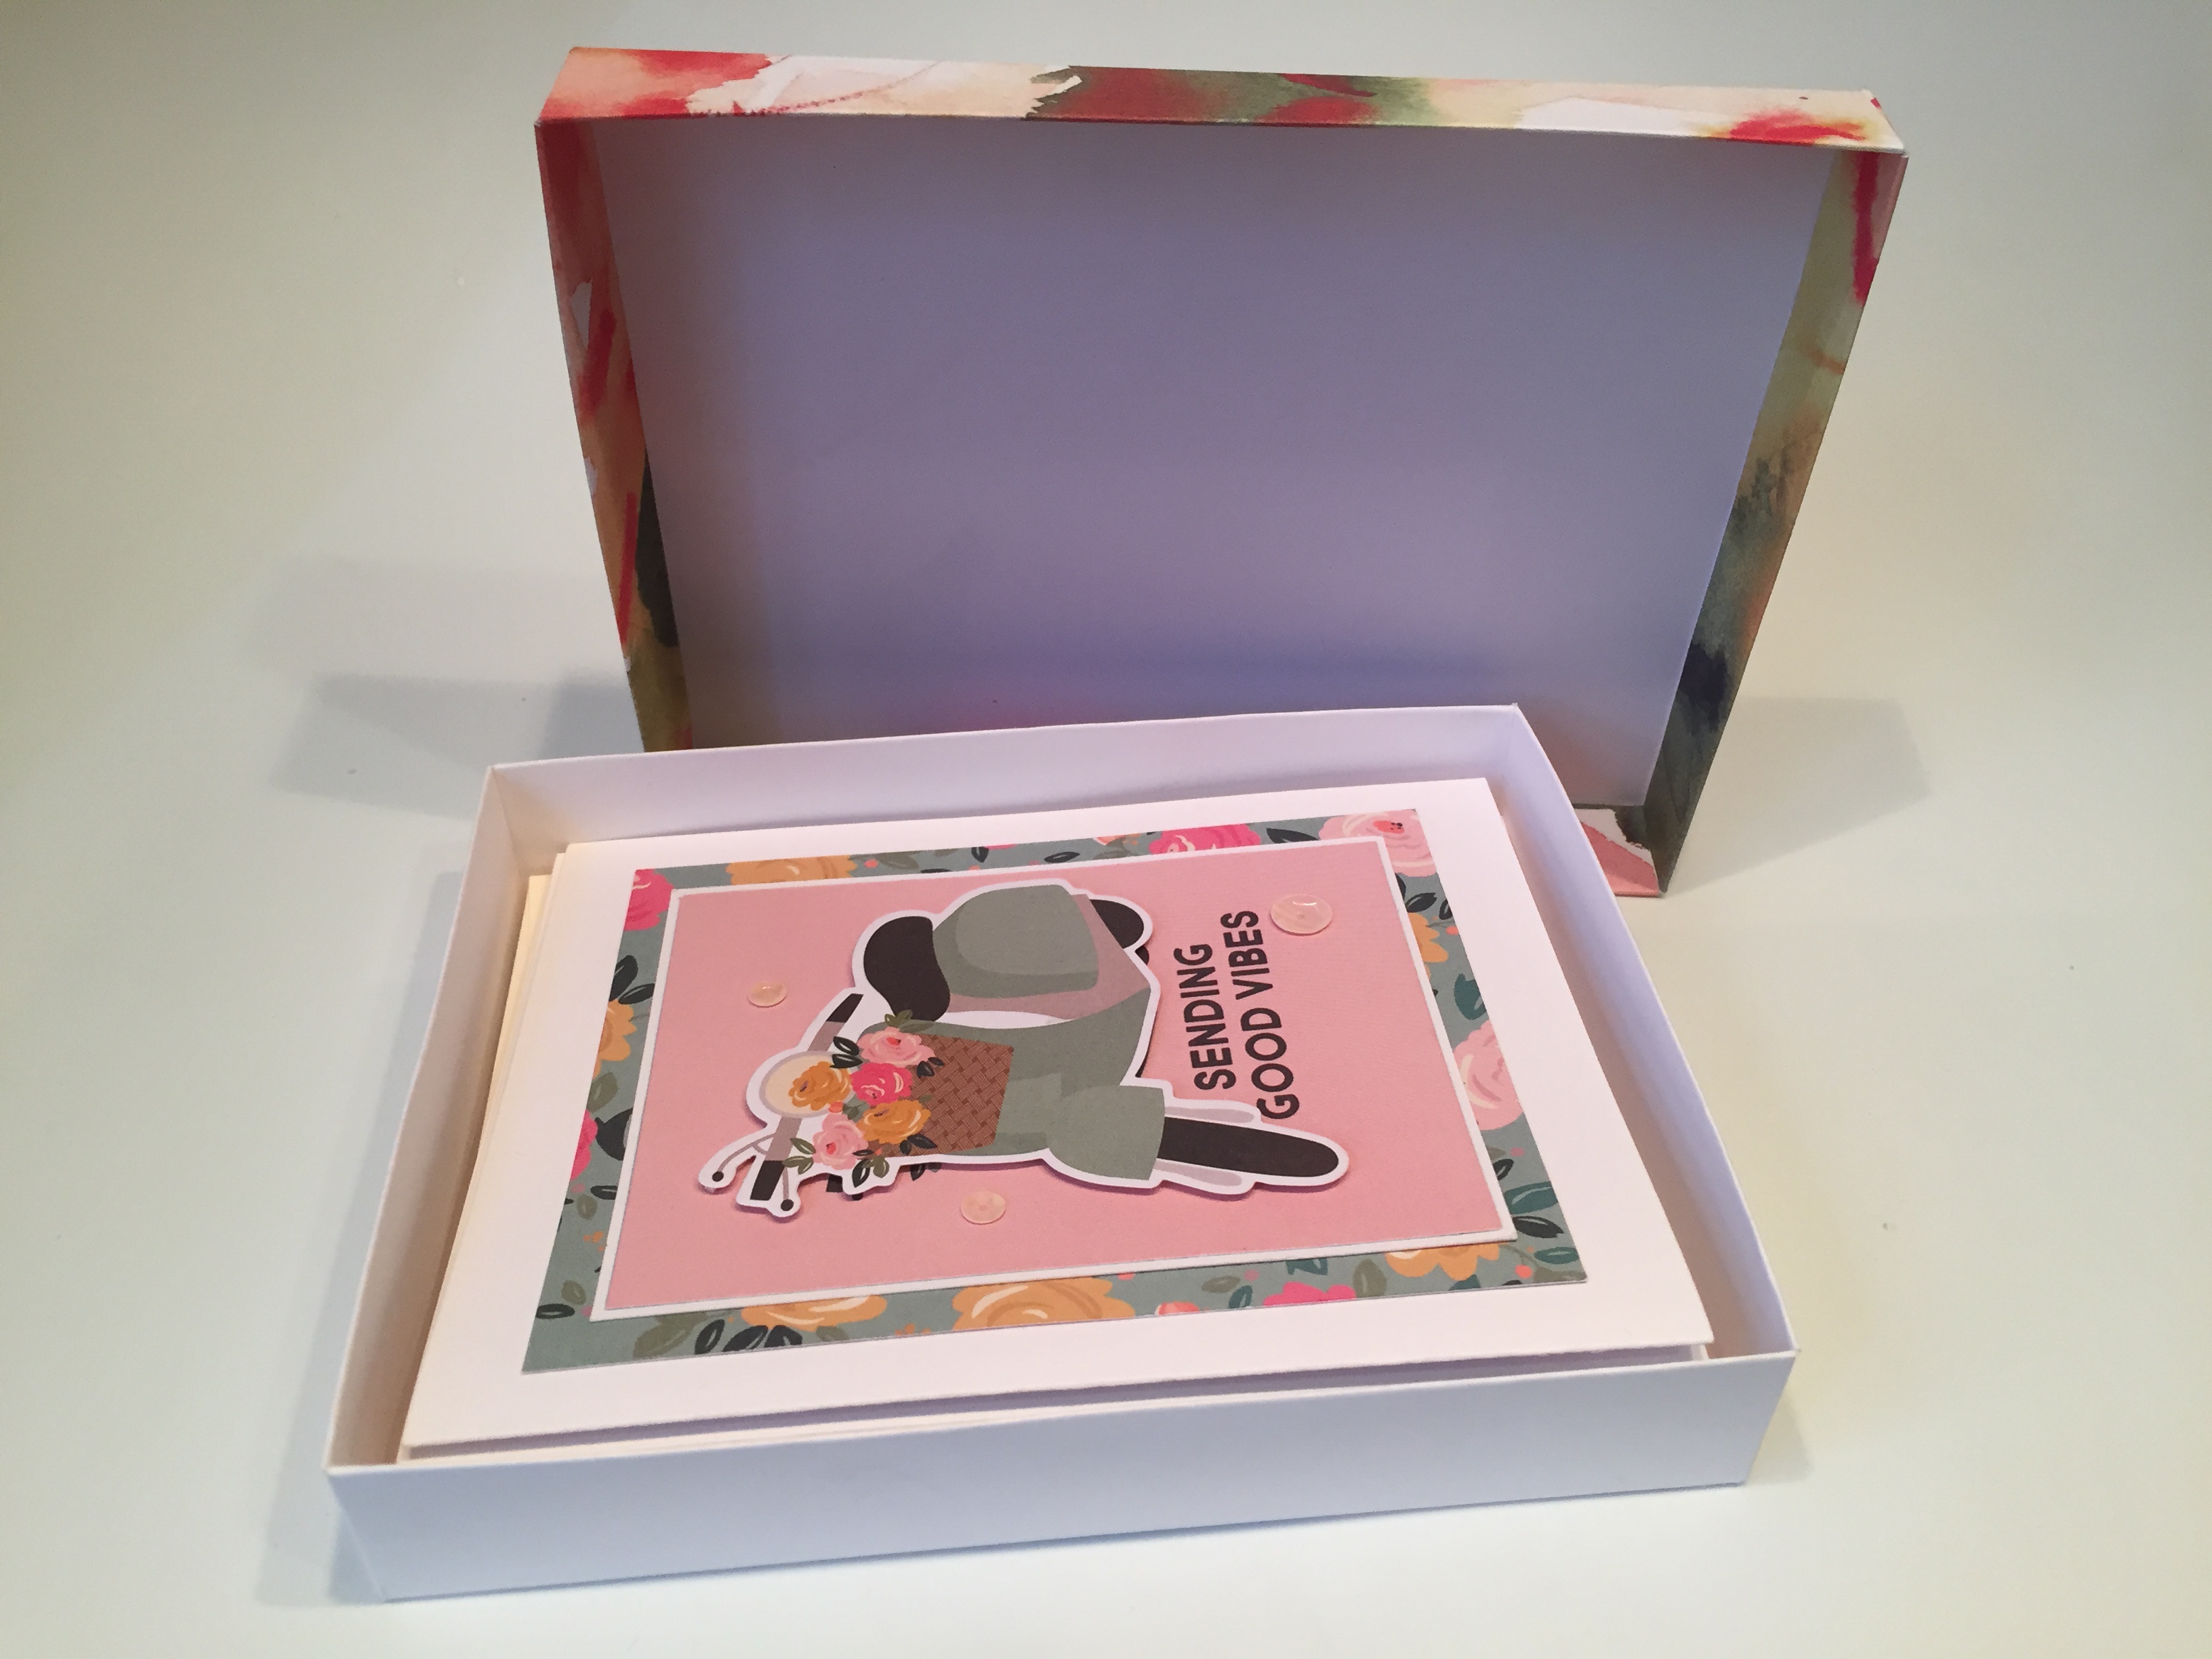
Let’s make this box 4.5″ x 6″ x 1″. If you want to include envelops in your gift box, you’ll need this extra space. Using our formula for the bottom of our box we get 1″+ 1″+ 4.5″+ 1″+ 1″ = 8.5″ for the width of our card stock and, 1″+ 1″+ 6″+ 1″+ 1″ = 10″. For the bottom of our box we start with a piece of card stock cut to 8.5″ x 10″, and you score all four sides at 1″ and 2″. Assemble as before and you’ll see an envelope fits perfectly inside.

For the top of our gift box, let’s make the sides only 3/4″ tall instead of 1″ (4.5″ x 6″ x 3/4″). We won’t have to punch out any finger notches if we don’t make the top as tall as the bottom. SO… for the top of our box we insert the number into our formula: 3/4″+ 3/4″+ 4.5″+ 3/4″+ 3/4″+ 1/8″ = 7 5/8″ wide and 3/4″+ 3/4″+ 6″+ 3/4″+ 3/4″+ 1/8″ = 9 1/8″ long. Our card stock for the top of this gift box should be cut to 7 5/8″ x 9 1/8″. We score all four sides at 3/4″ and 1.5″. Cut and remove the corner sections, commit your creases, dry-fit, add Scor-Tape and burnish, remove tape liner, tuck tabs between sides and assemble.
I really do love these boxes. I gift many card sets every year and I think I will be using these types of boxes from now on! Really, very sharp, clean and special. And you can choose patterned card stock to match the cards within! Perfect!
That wraps up the second part of the Art of Box Making with the Scor-Pal and Scor-Tape! I hope I’ve been able to impart a few tip and tricks to help you in making these terrific boxes. Next month we’ll be doing some specialty boxes and some Christmas themed gift boxes! I hope you’ll join us! If you have any projects you’d like us to tackle, please forward your requests along to me!
Thank you so much for sharing your time with me here, you know how much I appreciate your support! Do let me know if you have any questions, and remember to Like me, List me, Pin me, Post me, Share this post will all interested parties… Don’t run with scissors, and, as always, I wish you and yours Health and Happy Crafting!

I think you have the patience of a SAINT so to speak!! I have enjoyed you for many many years and really appreciate all your lovely and creative cards!! Each time I see an email with your name of it I immediately check it out to find more fun!! Thanks Scott ! Hugs and blessings !
LikeLike
Thanks so much Katherine! That means a lot to me! You just made my day!!! Sending you and yours all my best!!
Scott
LikeLike
Excellent tutorial thank you for sharing
LikeLike
nice clear directions
LikeLike
Thanks Joanne! All my best to you and yours!
LikeLike