
Hello Folks! Scott here with my 10 cards featuring the Love From Lizi October 2010 “Hello Autumn” Card Kit. This month’s kit highlights autumn in all it’s beautiful colors and shapes and patterns, and, as usual with the Love From Lizi kits, features some items I’ve never seen in a card kit before!
As a season, I love Autumn. As a card theme, I’m not quite as enthusiastic. Short of a few Thanksgiving cards, I have never sent an “Autumn” or “Fall” card to anyone. If you have been following me at all over the last year or two, you know I like to have some reason, or at least a little context for my cards, so I tend to avoid vague sentiments. I did hit upon the idea of combining some of the sentiments in this kit together, so I could add one or two of my own sentiments as well. My pun addiction is asserting itself!!
As usual, I did take the five card stock sheets included with the kit and cut and folded them all to make my ten 4.25″ x 5.5″ card bases.
I started out fairly simply this month, and I thought that the “warm tea” and “warm wishes” sentiments would work well together on one card.
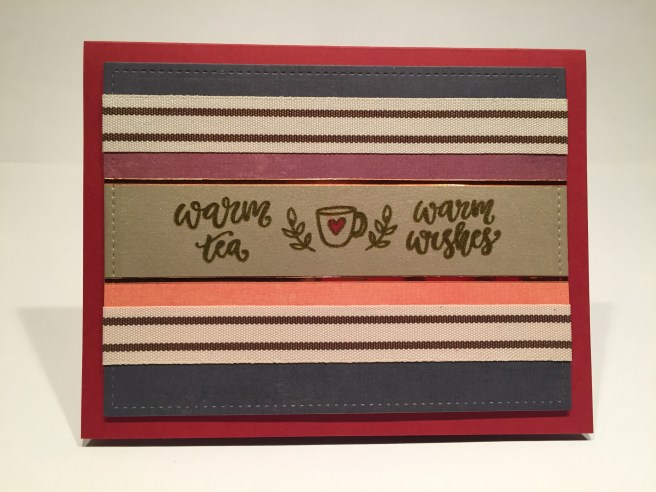
I cut the tea cup and laurels away from the “warm tea” stamp, and lined those up with the “warm wishes” stamp to make a single horizontal sentiment. I stamped those with Archival Acorn ink on a piece of the Antique Gold specialty paper and embossed that with some clear embossing powder. I glued the stamped piece to the striped pattern paper and added the copper peel-offs from the kit on the top and bottom, and cut that all down with a Lawn Fawn Stitched Rectangle die. I decided that this ‘tea’ card should sport some of the Tea Towel ribbon from the kit, so I added that ribbon over two of the stripes and used foam tape to attach the complete card front to a Burgundy Red card base.
 Never content to leave well enough alone, I took a piece of one of the cut apart sheets and fashioned a pouch to hold a tea bag on the inside of this card. I stamped a “Thank You” (from the October 2016 Paper Pumpkin kit) on the front of the pouch, and added the tea cup stamp (Acorn Archival ink for both)
 behind the finger notch so it would be revealed when the tea bag is removed. I added an ephemera heart to the pouch and colored the hearts on both the large and small tea cups with a dark red colored pencil. Here we have a VERY masculine card with a purpose! A ‘Thank You’ card with a tea-time treat on the inside. I like these sentiments combined together, and can see myself actually using this simple Thank You tea-card!
Looking at this stamp set in a new way, I realized that there was a potential pun in another combination of these stamps – It’s never too early to start throwing the puns in!
 On the Peach card base, I added a 3″ strip of the light blue leaf pattern paper down the center, and framed the two sides with an LDRS Creative Basic Background Builder 1 die cut from the Burnt Orange specialty card stock and split down the middle. I bought this die a few months ago on a terrific LDRS sale, and the die set is still available and still on sale! I did add some of the thin copper peel-offs at the seam for a finishing touch of shine.
I stamped this sentiment, and four of the tiny leaf stamps on a piece of my standard Staples Ivory card stock with Acorn ink and clear embossed them all before cutting the sentiment out with a stitched rectangle die. I glued the sentiment to a thin Burnt Orange mat and outlined the sentiment with more of the copper peel-offs before I attached it to the card front with foam tape. I reached for one of the bark leaves from the kit and the blue twine for our focal point here. I coated the twine with glue and wrapped it around a pencil to dry so I could add a bit of ‘tendrils’ to the leaf. I wrapped the twine ‘tendril’ around the stem of the leaf and used foam tape to attach that to the card front. I used one of the iridescent gems on the tendril knot and added a few of the Ripened Pumpkin Nuvo Drops to the sentiment. Pretty straightforward here – where’s the pun? Inside, of course!!
 I dug through my clip-art stash and found this great retro image of a lady on a phone and just had to use her to complete this card! I printed this image on some of my ivory card stock in a brown to black ombre and cut it out with a stitched rectangle die to be the writing surface for this card. I did erase the phone cord from the clip-art and added more of the blue twine (glued and wrapped around a skewer to dry) through a couple of tiny holes on the ivory writing surface before gluing this down to the inside of the card.
I did stamp the “Hello Autumn” sentiment next to this lady with Acorn and Onyx Black ink to mirror the printed ombre and complete this fun pun! I actually know someone named Autumn, and I think that’s what gave me this idea! I laugh every time I open this card, and I am especially pleased at how the leaf ‘tendrils’ hint at the phone cord on the inside! Give me a sentiment that says “Autumn is Calling” and you just know I’m going to take it literally!! LOL! Still makes me laugh!!
I think the little rhyme on the “leaves are falling” sentiment inspired this next card from me. Another Fall poem that gives a little context to the “blessed season” sentiment.
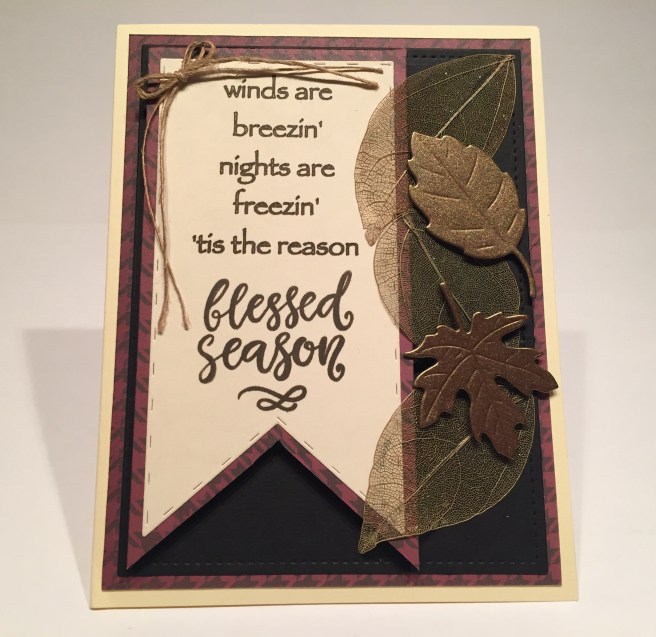
I believe the sentiments in this stamp set are hand lettered, and I hadn’t found a perfectly matching font yet, so I decided to ‘sketch’ this poem (on my Ivory card stock) using my Silhouette Portrait and a brown Pigma Micron pen in the Papyrus font, and adding the stamped sentiment using the Acorn ink. I die-cut the ivory card stock with an LDRS Creative Basic Stitched Flags die (also purchased on sale but no longer available) and cut a mat for that with the red and black houndstooth pattern paper. I cut a piece of my black card stock with a stitched rectangle die and another houndstooth mat for that, and glued those to a Vanilla card base and mounted the sentiment ‘flag’ to the card front with foam tape.
I die-cut the two leaf dies from the Antique Gold specialty card and, arranged them on the right side of the ‘flag’ along with three of the skeleton laves from the kit. I tried the leaves alone and the die- cuts alone and thought they worked better together. I tied a double bow using the tan twine from the kit and attached that to the top left of the ‘flag and glued the ends down to the card front. I think that black background really shows off those skeleton leaves to their best, and I did add Spectrum Noir glitter pen to them for a little touch of sparkle.  Of course I knew I could use another sentiment on the inside of this card and grabbed the “Autumn Blessings” to stamp (Acorn ink) on my ivory card stock, and die-cut that and a houndstooth mat with my stitched oval dies. I thought these two sentiments worked perfectly together, and wrap up this fun little poem very nicely!
I continued my search for a passably matching font for this stamp set and finally came up with the Brushgyo font that is a very good simulation of the handwritten sentiments in this stamp set. It helps if you use it in small doses, but finding it opened up a couple of new ideas for me.

My fourth card this month is actually on the Burgundy Red card base, but I did do a little ink blending on the edges to tone it down to a better match for the red pattern paper. I used Distress Oxide inks in Faded Jeans, and Vintage Photo and covered all four edges of the card base. I die-cut another piece of that Antique Gold specialty card with a stitched rectangle die and sent that through my Cuttlebug in the embossing folder from the kit for a nice knitted texture. I glued that to a thin mat of the Mirror Gold specialty card stock and glued both down to the card base.
I cut the pumpkin oval from the cut-apart sheet with a Gina K. Designs Large Oval die, and created the second half of this sentiment using my Silhouette Software and the Brushgyo font. I printed that on my oval and stamped the “Cozy Days” above the printing with my Acorn ink. I used the Gina K. Oval Small Set to die cut the double-stitched houndstooth mat and another large oval die to cut the thin black mat. I colored the stamped mushrooms with my Zig Clean Color Real Brush Markers, glued all the ovals together and mounted them to the card front with foam tape. I die-cut two of the oak leaves from the Gold Mirror specialty card and added those with the ephemera mushroom to cover up the pumpkin and the flowers at the bottom of the oval. A few sequins (the red ones are from the LFL Spec. Ed. Thanksgiving kit from last year) add a little sparkle and flourish. I thought “Cozy Days” was a particularly vague sentiment but I really like the suggestive sense you get when you combine that with “snuggly nights”!
There are five little leaf stamps in the stamp set and I thought they might work well for creating a wreath using my homemade wreath builder template, and I was itching to do a little coloring with this kit wherever I could!

On some of my ivory card stock I stamped all the leaves using my wreath template and the Acorn ink and I left a space for the pumpkin stamp at the very bottom. I colored everything with my Zig markers and then realized that the “Here Comes Fall” sentiment fit perfectly in the middle of this wreath (more acorn ink here!). I guess it kind of fills it up a little too perfectly and we lose a little bit of that wreath feeling without an empty center… c’est la vie! Every card kit teaches me more and more! I did die cut the stamping with a stitched rectangle die and added a strip of the chevron ribbon along the bottom before attaching a thin Chocolate Brown specialty card mat and gluing both down to the card front.
I took my micro applicator brushes and the SSS Fresh Fruit ink pads (and some acorn ink too!) and added all the colorful dots in and around the leaves. I added some sequins from the kit and a few Nuvo drops to finish up the wreath and tied a bow with the chevron ribbon for the final touch – that’s pretty thick ribbon so it makes a very chunky bow! Call me childish, immature or juvenile, but I just couldn’t resist adding this old joke on the inside of this card! This is printed on my ivory card stock in the Brushgyo font, die cut with a LFSRD, and matted to the fun orange polka-dot pattern paper (also die-cut with my LFSRD). This is a lovely, lighthearted card that gave me a chance to do a little coloring and get some more practice with my homemade wreath builder template.
We did receive a huge assortment of ephemera pieces this month and I was drawn to the pun-ny “Nuts about you” sentiment. There is the same sentiment on one of the cut-apart sheets but it is quite large and would take up an entire card front, so I opted to go with this smaller one and pair it up with the acorn pattern paper and the ephemera acorns.
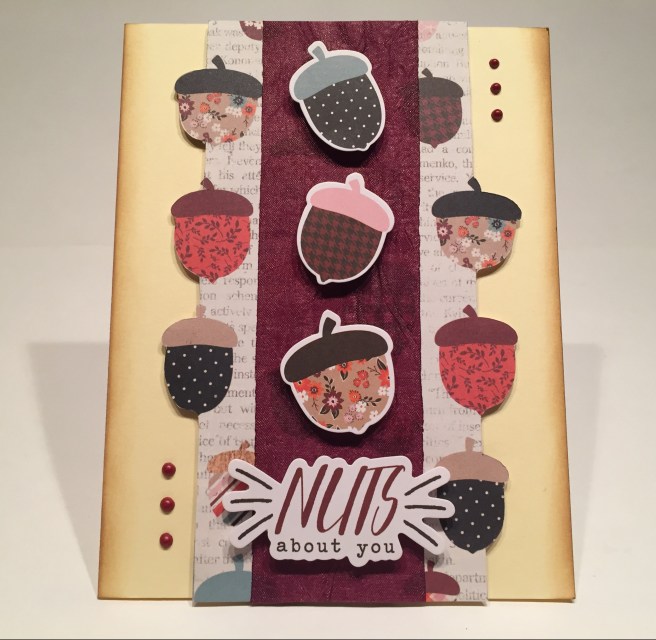
I detected a bit of a repeating pattern on that acorn pattern paper and fussy-cut this piece to use as the center panel on this card. I distressed the sides of the Vanilla card base with my ink blenders and some Vintage Photo Distress oxide ink and wrapped a piece of that crushed silk ribbon down the center of the pattern paper panel. I found it much easier to use this ribbon when I stopped trying to find a perfect match for the color and just used it as an accent. I think it works well with the acorns! I foam taped the panel to the card front and added the ephemera sentiment and acorns with an extra thick layer of foam tape. I did reach for my Autumn Red Nuvo Drops (from the LFL August 2017 Card Kit) for the embellishments here. Now THAT matches the silk ribbon PERFECTLY and adds a nice touch of shine. Fairly simple card here highlighting the ephemera nuts!! LOL!
I still had my eye on a few cut-apart pieces and I really liked the flowery burgundy cut-apart with the circle in the center. At first I was thinking about making a shaker card but instead turned to a stamp set that I got a while ago and hadn’t used yet.

I stamped this sentiment with Onyx Black ink using the MFT Mini Well-Connected Alphabet and Numbers stamp set in the middle of the circle on the cut-apart panel. Since this was my first time using this stamp set, I did practice a couple times before committing to my pattern paper. I really like these stamps, and will use them more for simple sentiments like this. I was digging around in my old LFL leftover stash and found this Chocolate Brown Glitter paper (form the LFL August ’17 Card Kit) that matched this pattern paper perfectly! This is some of the sparkliest glitter paper I have ever seen!
I added a thin mat of the glitter paper to the back of the cut-apart piece and foam taped those to a panel of the matching pattern paper and glued to the Chocolate Brown card base. I added two thin strips of the glitter paper to the sides of the pattern paper and used a combination of my stitched circle dies and a nesting circle die to cut the thin glitter frame to go around the sentiment circle. I have to admit, I LOVE that glitter paper!

I took the ephemera wreath that had a banner on it, and cut away the banner to make these two laurels to frame out the sentiment. I used foam tape to attach those around the sentiment and added two of the ephemera leaves as well. A few Nuvo Drops at the bottom for a touch of contrast on this card front and we’re almost done with this card. But why the “Autumn Leaves” sentiment… you gotta go inside to finish this thought…
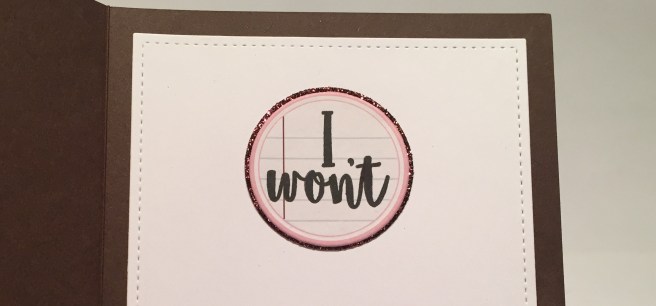
Autumn leaves…. I won’t… LOL! I think I still had my friend Autumn on my mind when I made this card! I used the MFT stamps and the onyx black ink to stamp this on one of the round ephemera pieces, and I just had to add a thin mat of that glitter card stock before attaching this to my white writing surface. An interestingly serious pun here on a card that kind of knocks my socks off! I love the matching pattern paper and that glitter paper is truly stunning!
Okay… pun-ny though that was, I had this indescribable urge to try something silly. No, not something “Hello Autumn” silly. Something Seriously Silly!

I took the other half of the blue leaf pattern paper and printed up this sentiment using my Silhouette Software and my favorite Brady Bunch remastered font. I glued that to my Sky Blue card front and framed the two sides (again) with an LDRS Creative Basic Background Builder 1 die cut from the Burnt Orange specialty card stock and split down the middle. This time I added that die-cut on the inside of the blue instead of the outside, but I did go ahead and add some peel-offs to the edges. That gave me enough room to add lengths of the copper ribbon to the top and bottom – I think that covers all the ribbons in this kit! I took two of the ephemera pumpkins and drew little faces on them with a fine point Sharpie, and attached them to the card front with foam tape. I love this double entendre pumpkin sentiment, and enjoy this silly diversion from the somber Fall theme.
Other than those bark leaves, we also got the unexpected embellishments of those wood slices that I was particularly interested in figuring out some use for. This is it!

I die-cut a piece of the black flowery pattern paper with a LFSRD and added a thin white mat before gluing both to the Chocolate Brown card base. I dug around in my stamp stash and found 3 different sizes of heart stamps to stamp on the wood slices using the Hero Arts red reactive ink (from the July 2018 MMH kit). If you’re looking for a small heart stamp grab any Simon Says Stamp set you may have and chances are pretty good that there’s a small heart included!!
I turned to my Sillhouette Portrait to print and cut this sentiment using the Brushgyo font. I cut 3 extra shapes to glue together for a chipboard-like feeling for the sentiment and added that to the card front with more foam tape. Those wood slices are thick enough to warrant some extra dimension on the front of this card. I glued those slices down to the card front using my Multi Medium Matte and put some weight on them while they dried. I wasn’t really sure about this card when I glued everything together, but when everything was dry and I took the weight off, I was pleasantly surprised at how attractive this card is! LOVE that pun, and those wood slices are so very unique!
Now I still have 3 stamps from the stamp set still waiting to be used, and I got the fun idea to combine sentiments again for something a little different.
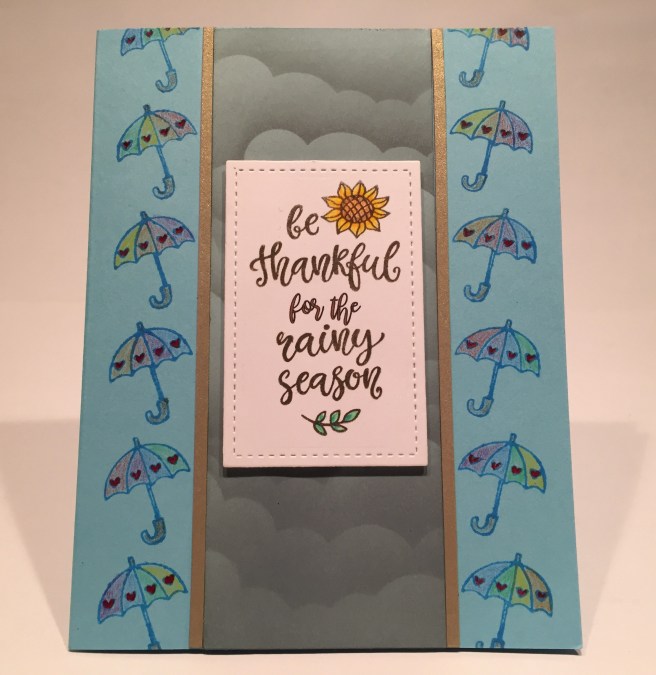
I admit, the “be thankful’ sentiment is useful, but I had no idea how to make the “rainy season” sentiment work. With the simple addition of “for the” between these stamps (Brushgyo font using my Silhouette Software) we have a totally different sentiment! I stamped both sentiments in acorn ink on a scrap of white card stock that had the “for the” already printed on it. I die cut that with a LFSRD and colored the small images with my colored pencils. I stamped the umbrella stamp on both sides of the Sky Blue card base using the Hero Arts Summer Sky ink pad and lightly colored them all with my colored pencils. I grabbed the MFT Mini Cloud Edges Stencil, my Tim Holtz Ink blending brushes and some Distress Oxide Iced Spruce ink to create the cloudy sky on a scrap of my light blue card stock. I did try to create a bit of an ombre effect with the clouds being darker at the bottom and lighter towards the top. I glued the cloud strip to the card front and added two thin strips of the Antique Gold specialty card on either side. I attached the sentiment right in the middle with foam tape and turned to the inside of this card.
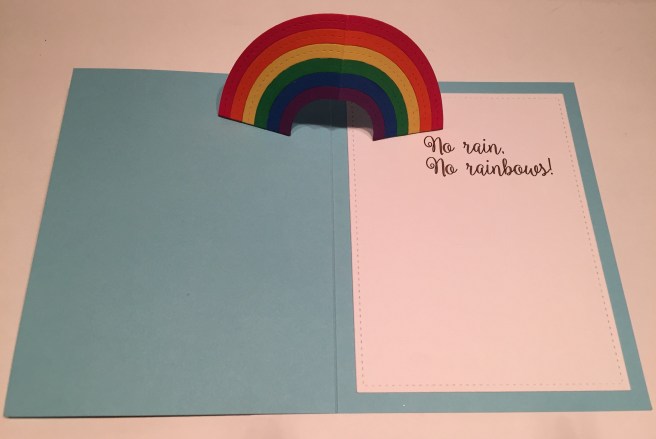
YAY! A pop-up rainbow on the inside! It’s been a while since I did a pop-up card for everyone. This one was actually quite simple. I used my Stitched Rainbow die to cut out six rainbows from some scrap card stock in purple, blue, green, yellow, orange and red and glued those together on a piece of blue stationary paper. I trimmed the paper a touch smaller than the rainbow and left tabs longer at both ends. I printed up this sentiment on some white card stock using my Silhouette Software and the Ballerina Script font and used a LFSRD to cut it to size before gluing it down to the inside of the card. I scored and folded the rainbow right in the middle, folded the blue paper tabs back and glued it down to the center of the card just above the sentiment. I arranged the rainbow to fold forward instead of backward so I could attach it to the top portion of the card and it wouldn’t stick out when the card was closed. I like this simple sentiment, and I love the big color pop of the bright rainbow – especially after all these Autumn themed and colored cards. Rainbows are certainly worth a rainy season!
Those are my 10 cards from the Love From Lizi October Card Kit. These may have been a bit of a challenge for me, But I am very pleased with the masculine originality here.

I DID manage to use EVERY SINGLE STAMP from the “Hello Autumn” stamp set, and I also managed to use (at least a little bit) everything included in this kit. Of course I have oodles of extras left over (as is always the case with the LFL kits) and they will find loving homes in my stash. I did try to push the envelope a little bit with this kit and come up with some ideas that might not be readily apparent. I hope this sparks some ideas of your own and encourages you to try to think outside-the-box with your creations! I always appreciate the time you share with me and any comments or questions you may have. Please share this post with anybody who has a serious addiction to all things Autumn, pin me, post me, don’t run with pumpkins (they’re a bad lot), and, as always, I send you and yours heartfelt Autumn blessings and… Happy Crafting!!

I know I’m a little late to the party, but great post!
LikeLike
Never too late!!
Thanks!
Scott
LikeLiked by 1 person