
Hello Folks! Scott here with my 10C1K post of the Love From Lizi October 2017 Card Kit!

This month’s kit is loaded with all sorts of Halloween oriented goodies and a unique stamp set featuring skeleton bones and pun-y (you heard me right) sentiments! I was thrilled at the masculine qualities of this card kit – no pink in sight – and was eager to dive in!! Lizi’s kits feature European-sized card stock (always 5 sheets) and I usually begin by trimming down the 11.7″ x 8.3″ cardstock to 11″ long, and can then divide the sheets into two card bases measuring 5.5″x 4.125″ – just an eighth of an inch narrower than a standard A2 card. As usual, I start with the stamps to get the juices rolling…
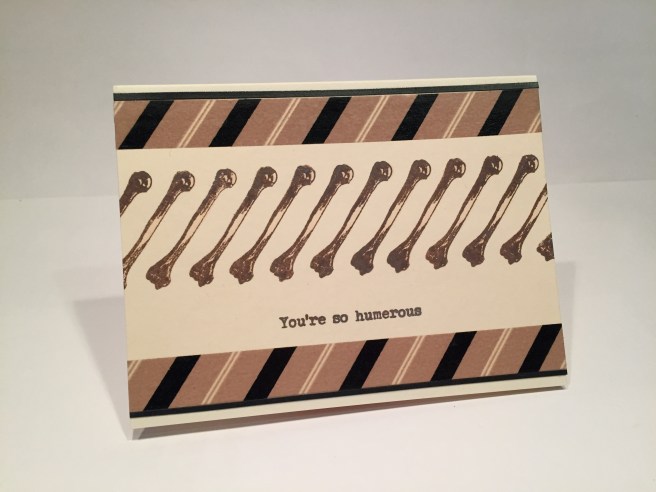
This was possibly the most obvious pun in the stamp set..! I dug out my (what’s turning out to be invaluable) Staples Ivory cover stock to do my stamping on (you can see how closely that Staples cardstock matched the off-white card base from the kit). I used Tim Holtz’ Distress Oxide ink in Walnut Stain to stamp the humerus bone stamp in a bit of a parade across the card. I wanted to match the angle of the washi tape that was included in the kit, so I used my Tim Holtz Stamp Platform to help me line everything up correctly. I scooted the cardstock over a 1/2″ between stamps. I lightly colored the bones with the Chameleon Pen included in the kit (in BR1 Taupe), and stamped the sentiment in the same Walnut Stain ink. I used that great washi tape from the kit to frame the stamping and added little strips of the black shimmer specialty paper to the edges of the tape. All of this is glued down flat to the off-white card base from the kit. I am really struck at how sharp and masculine this card turned out, and it really doesn’t have to be used for Halloween – I believe that’s the most interesting thing about this stamp set – what one would think of as Halloween images but NO Halloween sentiments! I liked this so much, I decided to continue the theme through a few more of the stamps and sentiments.
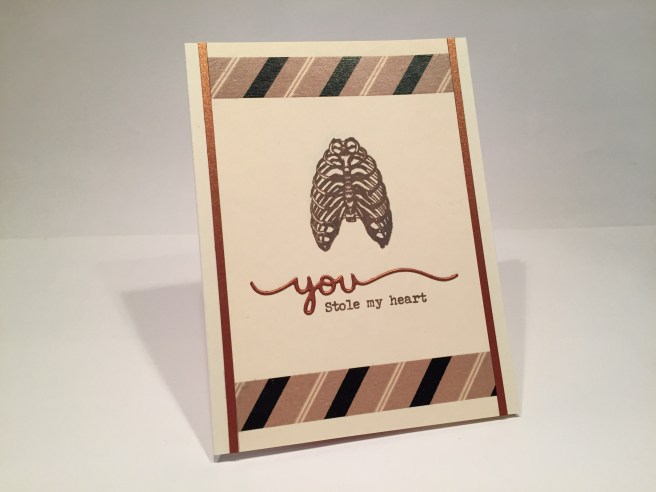
I think I was just so pleased to be able to make a pure unabashed masculine card with lots of style, that I wanted to run with it for little bit..! Here I used the rib-cage stamp and the ‘Stole my heart’ sentiment on the Ivory cover stock and added a die-cut ‘you’ (trimmed from a Lawn Fawn I Love You Border die) cut from the bronze shimmer specialty paper. Again, using the washi tape to frame things up and I repeated the bronze shimmer paper in strips down both sides. Again, everything glued flat to the off-white card base and VOILA another hyper-masculine card. No sequins or sparkles, but the specialty paper adds a nice shine to the card. I could do a whole set of cards like this..!

So I shall!! Here I’m using the pelvis stamp and thought I could clarify the sentiment by adding the “Hip” “Hip” die-cut from that same bronze specialty paper. I used a text die from my stash – “Marker Micro” from Die-Versions – to die-cut the letters, added the strips of washi tape, two strips of the bronze paper and a couple strips of the black satin ribbon from the kit. Here, all was glued down to the chocolate card base, and I completed the sentiment on the inside of the card. 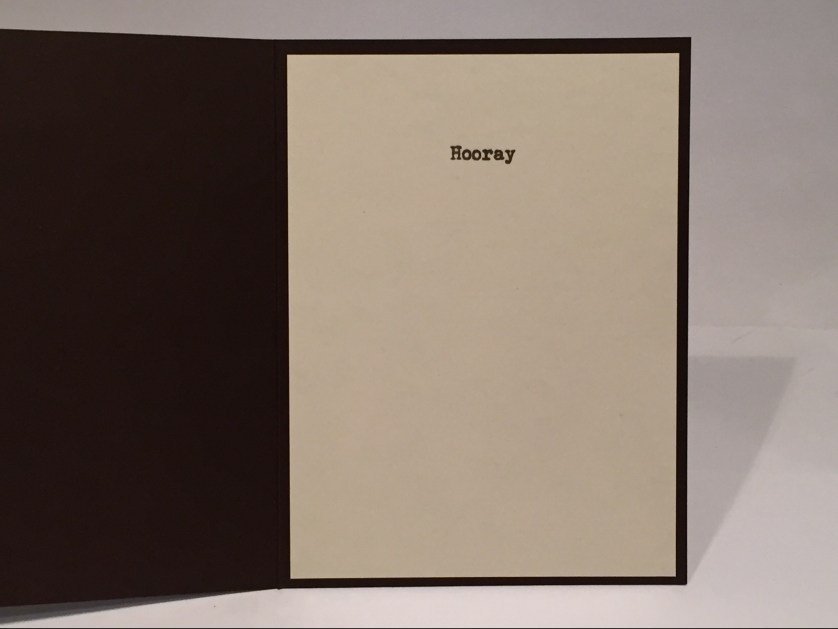 I thought it was great fun to have to open the card to finish the sentiment! Again , that Staples Ivory cover stock was used for the inside, (trimmed down to 5.25″x3.875″) and it makes me giggle to see the simple “Hooray” all alone inside. I suppose if the ‘Hooray’ was on the outside, you wouldn’t have to clarify things with the ‘Hip Hip’, but I really liked the ‘you’ on the last card and wanted to continue along with that same feeling. Well, three cards do not make a complete set, so I had to do one more masculine card.
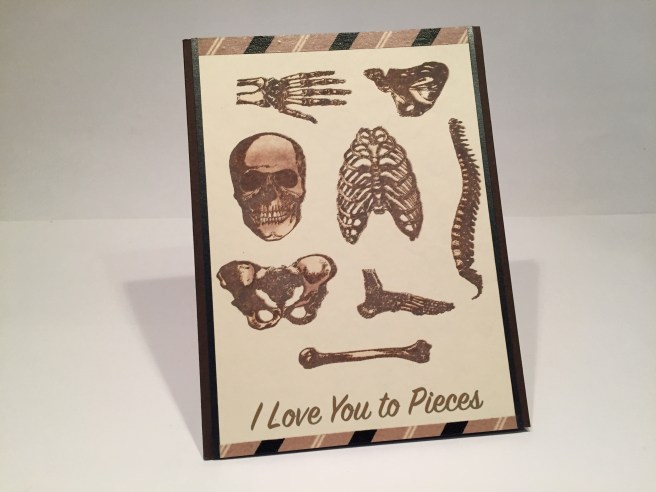
What better way to represent ‘I Love You to Pieces’ than with all of the bone pieces from the stamp set! (Though I almost ran out of room!!) I did color the stamps with the Chameleon pen from the kit (almost got the skull too dark) but it does add a nice dimension to the stamps. I printed the sentiment using my Silhouette software in Sign Painter font on the bottom of the Staples Ivory cardstock, and had enough room to add some (thin) washi tape to the top and bottom, and strips of the black shimmer specialty paper along the sides. Once again, all is glued down flat to the chocolate card base, and my sojourn into masculine, non-Halloween cards is complete. I do like the fact that you don’t HAVE to make Halloween cards from this kit, and think it was very smart to have different non-Halloween sentiments featured with the stamp set. I wasn’t finished with these stamps yet, and wanted to see if the seemingly innocuous sentiments could be manipulated into something that WAS Halloween oriented.
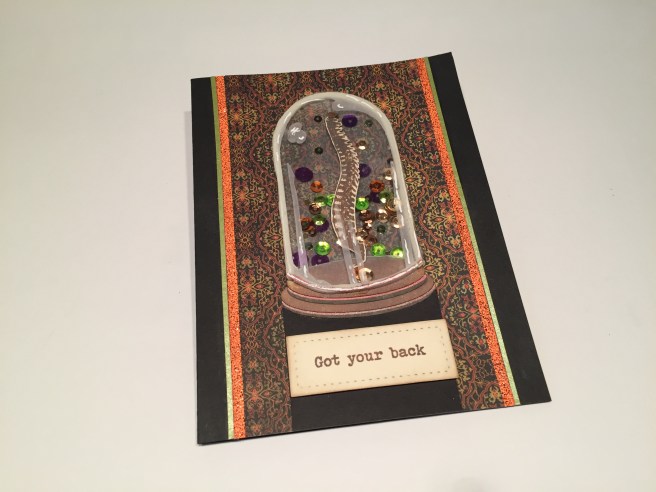
Here’s my shaker card for this month. I thought it a little macabre to have someone’s spine on display in a bell jar, and that certainly adds another (darker) dimension to the ‘Got your back’ sentiment! Instead of creating a frame for the shaker, I used vellum to create ‘reflections’ around the edge of the acetate and that did a pretty nice job of hiding the foam tape. I also used a bit of my white gel pen to add more highlights on the vellum. There is also vellum behind the spine to add to the illusion, and the spine is stamped, fussy cut and mounted on foam tape to kind of ‘float’ in the bell jar. A few ovals cut out with my Silhouette creates a nice base for the bell jar on top of a black cardstock ‘table’ and mounted to that intricate pattern paper that looks like wallpaper. I stamped the ‘Got your back’ sentiment in Walnut Stain oxide ink on a scrap of the Staples Ivory cover stock and die-cut with a Lawn Fawn Stitched Rectangle die. The sentiment is attached with foam tape and the whole assembly glued down to the black card base. I added stripes of the Pumpkin Pie embossing powder on either side of the pattern paper, and thin strips of the green specialty shimmer paper to add some pop! I pulled all the smaller sequins out of the sequin mix to use for the shaker bits, and added a Halloween  sentiment from my image stash to the inside. This is a fun card though rather subtle in its scare value… certainly a double entendre in any case! The embossing powder is very interesting and gives you a glitter-y textured effect when heat-set – not shiny and smooth. I think the bell jar is very old-fashioned and a little reminiscent of Frankenstein’s laboratory, and I had a great time creating a (seemingly) frame-less shaker element. This bell jar shaker concept is something I will have to experiment with some more – Maybe with some colored vellum?
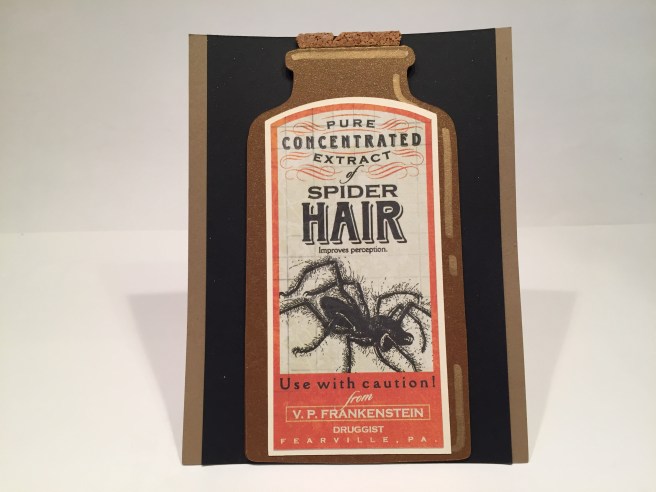
When I first saw Lizi’s unboxing, I knew I wanted to make bottles for the large extract labels included in the kit. It took a little finessing (the labels were a little larger than I anticipated) but I was able to come up with a decent apothecary bottle shape that would fit the labels. I created the shape and cut it out using my Silhouette and some core-dinations Auburn Pearl cardstock that I have had in my stash for years – it has a nice glass-like shimmer to it. My favorite part of these labels is the description of what each extract is for – the Spider Hair “Improves perception” and so on…! You could easily personalize these ‘treatments’ based on the descriptions. I really wanted the bottle to actually be the card for this design so the surprise with this card is how it opens – the


bottle itself flips up to reveal the Happy Halloween inside. Some thin cork sheeting from my stash adds just a touch of a stopper to the bottle top and the assemblage is mounted to some black and kraft cardstock from my stash. I did Shimmer Spritz the black for a good bit of sparkle (the close-up shows the sparkle), and added some highlights to the bottle with a gold sharpie. I loved these labels quite a bit and had a blast picking out ‘concentrates’ for friends and family. 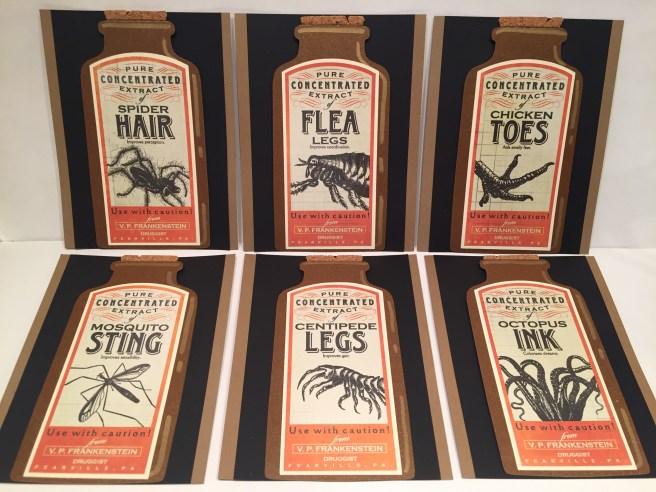
I knew I was going to make a whole set of these bottle cards (I will probably turn the other 6 labels into cards as well..!) so I didn’t really include these on my 10 card count so on we go with some real Halloween Greeting card fun..!
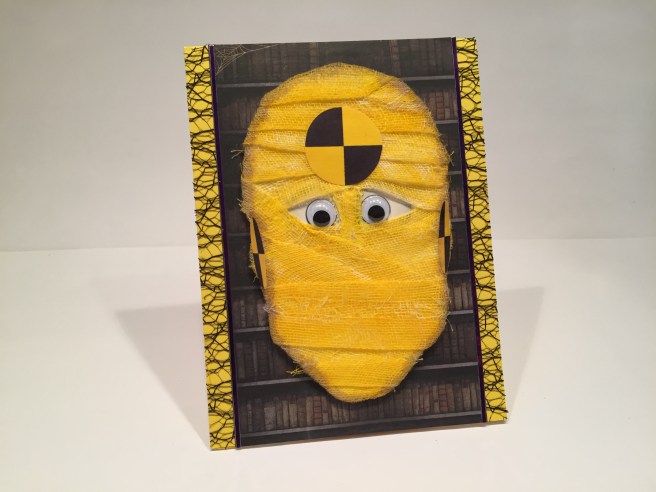
This card makes me laugh just looking at it. Yellow card base, strips of that groovy black lace from the kit down the sides, purple mirror peel-offs on the edges of the bookcase pattern paper, and the focal image. I cut out a head shape on my ivory cover stock, and colorized the gauze in the kit with a CT4 Spectrum Noir marker, printed and cut a couple of eyeballs out of the same Ivory cardstock to glue to the head shape, and then I started wrapping! There are at least 2 layers of gauze on this head. I did find that folding over an edge of the gauze helped to define the ‘wrapping’ and soon I had a pretty convincing mummy head. But why the yellow?  Surely you saw this pun coming from a mile away..! I couldn’t resist the bright colors and I concluded that Lizi expects us to make mummies with her inclusion of surgical gauze in the kit. I fount the yellow and black calibration circles on-line and, after sizing them, printed and cut them out with my Silhouette and glued them to the appropriate spots on my mummy’s head. The medium size googly eyes from the kit fit my printed eyeballs perfectly, leaving a touch of color around their edges. I added a touch of shading around the head with a Spectrum Noir GB2 marker and just left the stray threads of the gauze as they were. This fellow looks like he has been through one too many crashes, and tickles my funny-bone to no end!
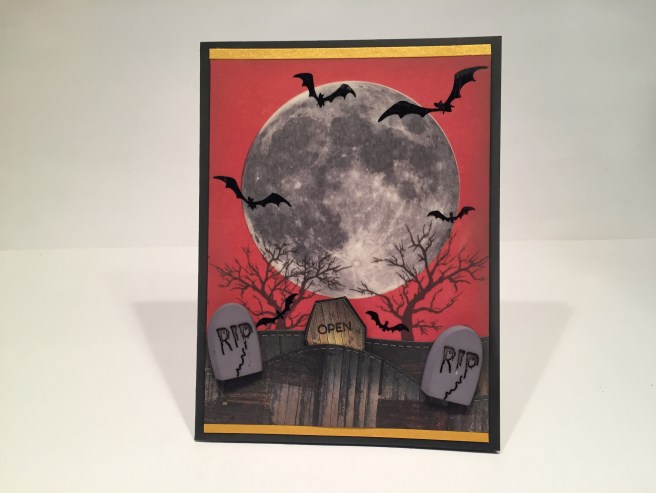
This month Lizi included another 12″x12″ sheet of vellum images and I loved the bats with the moon and the trees. I found a pic of the moon on-line and printed that on my Staples Ivory cover stock, ran the vellum through my Zyron sticker-maker and mounted them together to create this background. I cut some of the ‘woven wood’ pattern paper with a couple of stitched hillside dies and inked them up with the Walnut Stain oxide ink and some Black Soot Distress Ink to give them a little more of an earthy feel. The coffin pattern paper caught my eye and I immediately wanted to try something with the idea of opening the lid of a coffin. I cut out a single coffin from the pattern paper and glued it to some scrap black cardstock to make a little ‘mini-card’ that I could add some surprises to on the inside.  I fiddled around a bit and came up with a simple pop-up that says ‘BOO” (there’s that Brady Bunch Remastered font again!) with a little trick-or-treat graphic as well (all highlighted with a little stardust glitter pen). I did stamp a simple ‘OPEN’ on top of the coffin with a MFT ‘Interactive Labels’ stamp that I recently bought. I also broke down and purchased a Versafine Onyx Black Ink Pad to use with these little fine stamps and I’m pleased to say the ‘OPEN’ stamped perfectly on the front of the coffin. I trimmed the back attachments from the gravestone buttons and added them to the hillside as well as a couple of thin strips of the yellow shimmer specialty paper to the top and bottom to complete this scene on the front of this black card base.
  Of course, I can’t leave well enough alone, and had to add a bit of a pun on the inside of this card as well. Again, printed up with my Silhouette software on the Staples Ivory cover stock in the Typewriterhand font. Just another little bit to drive this card home and give an appropriate Halloween wish to the recipient. I have to admit, I love the moon here, and the coffin that you can pull up out of the ground with a little pop-up action. Add a simple pun, and you have an interactive card anyone would enjoy.
As far as my personal Halloween craft stash goes, I literally have only 3 stamps and 1 die in my collection that are Halloween oriented. I was thrilled to be able to finally use my Darice Spider Web Background die with this kit. With the inclusion of the spider sequins, the plastic spiders, the decorative webbing, and the spider web pattern paper this was my chance to bring it all together for a fun Halloween card.
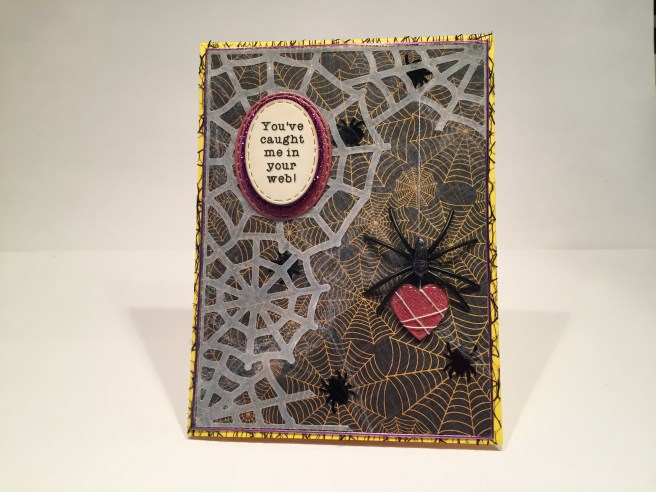
I die-cut the spiderweb from vellum and trimmed off the bottom right corner. I added a few spider sequins here and there on the spiderweb pattern paper, and covered them all with light layer of the webbing. I die cut a heart from a scrap of red shimmer cardstock and topped it with a good layer of Glossy Accents. A single strand of grey DMC embroidery floss wraps around the heart and attaches to a bit of the web on the top right. I did (again) cover the edges of the yellow card base with the black lace, and glued my assemblage on top with the smallest purple peel-offs for a frame. I printed the sentiment (Typewriterhand font again) with my Silhouette on Ivory cardstock, cut with a stitched oval die and layered that with foam tape on a piece of the purple glitter ribbon and then on a scrap of shimmer red cardstock that matches the heart. The inside of this card sports the same Happy Halloween sentiment as the shaker card. I did cover the plastic spider’s back with the Nuvo Glitter Drops from the kit, and used my stardust glitter pen to draw fine lines on the vellum webs. I got the spider to glue down to the card fairly easily using Ranger Multi Medium Matte for glue, and weighing the spider down with a jar of jelly while it dried. I was a little worried that this card might turn out to be overly busy, but was actually surprised at how pretty this is. On to Card #9 (or #10, or #15) depending on how you’re counting!

Pretty self-explanatory here…!! I actually traced the hand image from an old AllState Insurance logo I found on-line using my Pigma Micron pens on Bristol smooth cardstock and colored with my Zigg Clean Color Real Brush Markers. Appropriately Frankenstein-y! I found the bloodshot eyeballs on-line and topped them with some Glossy Accents for a little dimension and shine. I cut the fingertips to be able to slide the eyes behind, and mounted it all on foam tape to the miniature Extract Label pattern paper. I edged the labels with strips of the diamond pattern paper, and the medium purple peel offs. I printed the sentiment on the extra strip cut away from the off-white pattern paper in the kit using Lucida Blackletter font and added a spot of the Nuvo Glitter drops on the ends. The inside of the card has the same Halloween graphic as the shaker card, and this is about as ghoulish as I could manage while still keeping my tongue firmly in my cheek…! I haven’t used the door die included in this kit, yet so let’s wrap this month up with that.

I love this card! I die cut the door die twice from some old dark blue and dark red Recollections textured cardstock from my stash, and swapped the inlays between them. I did die-cut the windows from my Ivory cover stock and added a touch of alcohol markers to add a little life to the light behind the doors and I also die-cut the doorknobs from some gold cardstock. I found this ghost image on line, and managed to add some tie-dye patterns to his sheet and a peace sign to his bag (using my Silhouette software, of course). Everything is foam taped to the glimmer black specialty paper that I scored to suggest siding and a curb. I did use the peel offs for a frame on the orange card base – love the shine on these purple peel offs!!  If you haven’t jumped to the pun yet… here it is… “Hippy Halloween!” LOL! This probably dates me way more than I would like to admit, but I adore this fun Halloween Card. The sentiment is printed on my Ivory cover stock in the Brady Bunch Remastered font – I think that font is going to get the prize for ‘Most Used Font’ this year! I really enjoy the colors that the tie-die introduced with this card and I really like the simple ‘scene’ created with the doors and scored shimmer paper. I think this little trick-or-treat-er is coming to your door next! WOW! That’s 16 cards for this month! I tried to create as much variety as possible with this kit and I hope I was able to inspire you to reach beyond the obvious and create cards that are usable all year round! Thank you so much for joining me here – if you have any questions please don’t hesitate to send me a comment here. THANK YOU and Happy Halloween!! – Scott

Sir, you are a genius. Thank so much for sharing.
LikeLike
Thank YOU, Grace!!
Scotty
LikeLike
Wonderful set of cards Scott. You definitively made a good use of the kit.
LikeLike
Thanks Eric!
Much appreciated!
Scott
LikeLike