
Hello Folks! Scott here with my 10 cards created with the November 2026 My Monthly Hero and My Monthly Super Hero Kits! We are going full steam ahead into Christmas with this month’s offerings:
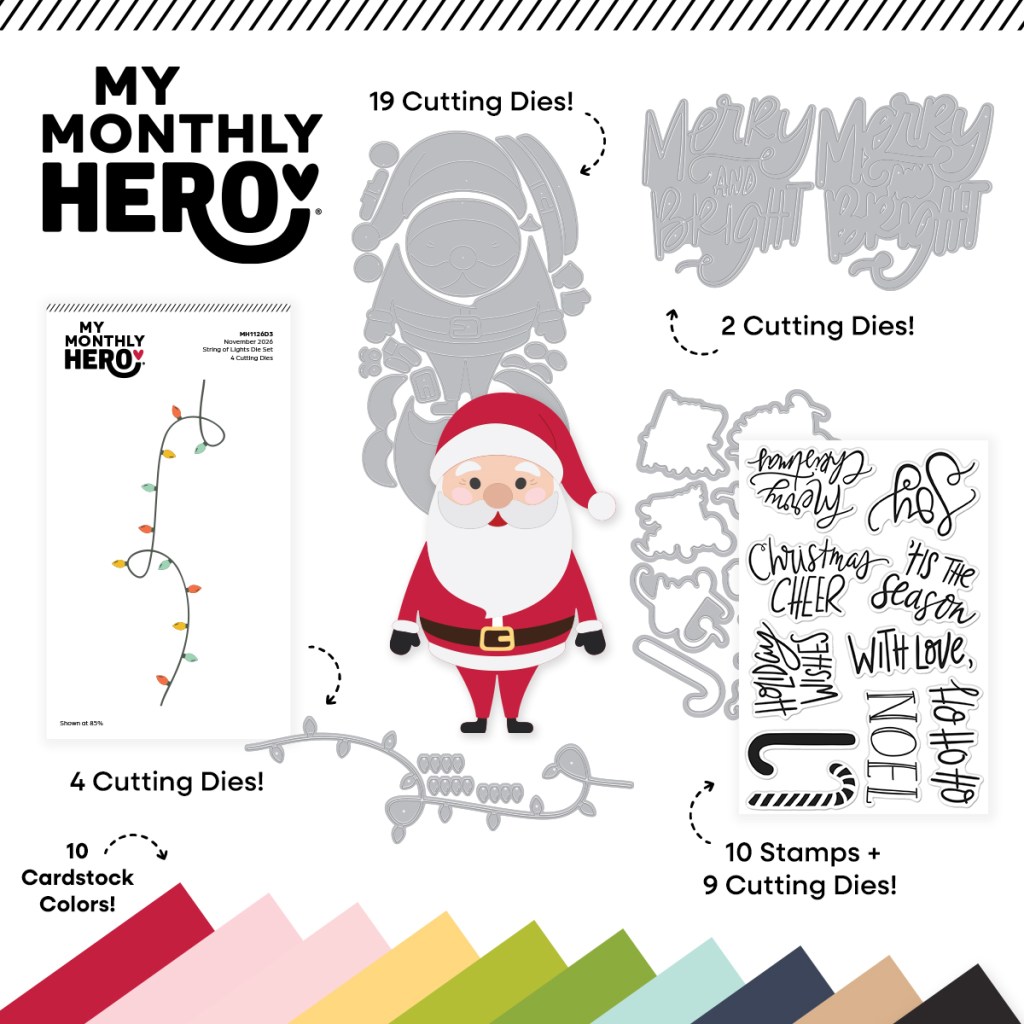
The My Monthly Hero Kit includes the Christmas Cheer Stamp and Cut, then the Big Santa Die Set (that’s an understatement!) then the Merry & Bright Die Set, the String of Lights Die Set, and 10 sheets of 5.5″ x 8.5″ ColorWheel Card Stock in Pomegranate, Blush, Chiffon, Beeswax, Peridot, Rainforest, Mint, Indigo, Fawn, Raven.
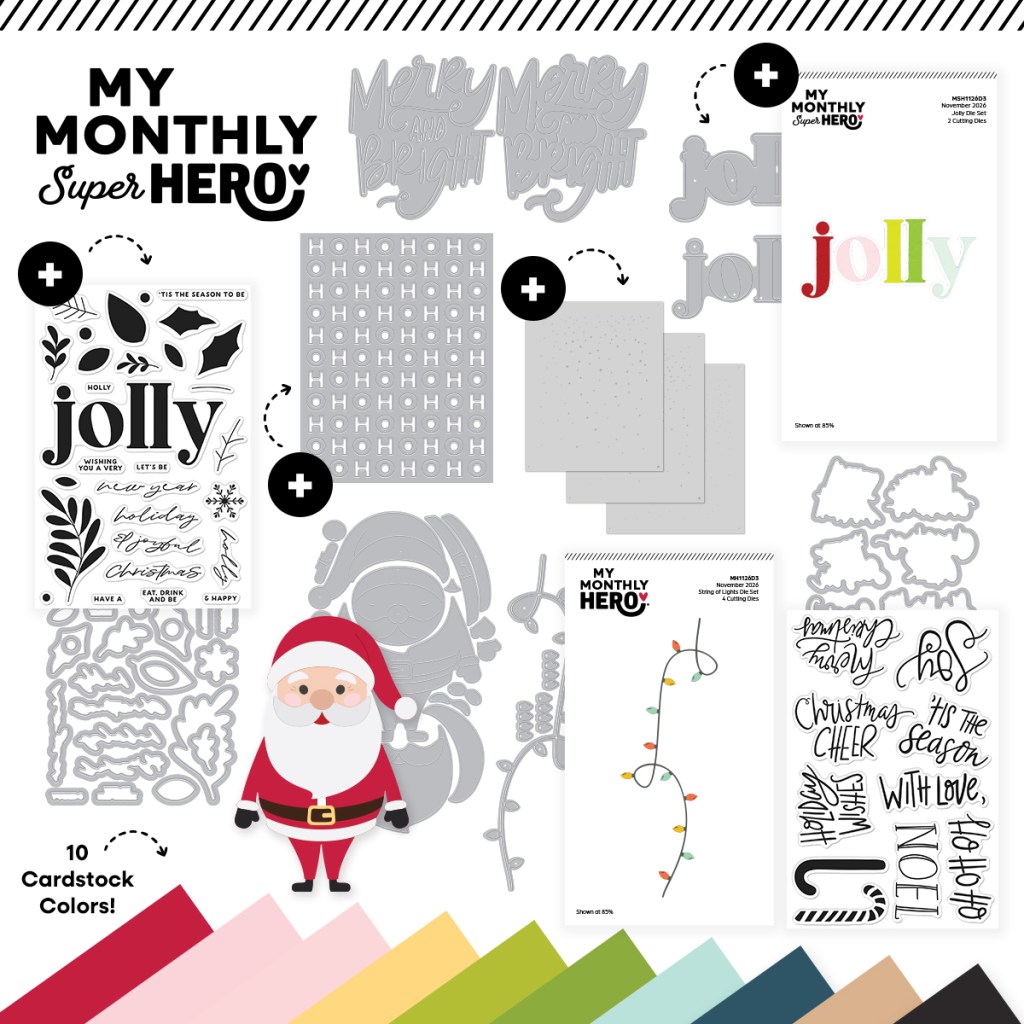
The My Monthly Super Hero Kit includes everything in the My Monthly Hero Kit plus the Let’s Be Jolly Stamp and Cut, the Ho Ho Ho Cover Plate Die, the Jolly Die Set, and the Snow Day Layering Stencil Set
Not a lot of stamped images in this kit, so I guess I won’t be doing a lot of coloring this month! The Big Santa Die Set is BIG! Almost 7.5″ tall and 4.75″ wide – too wide for a Slimline card… and too tall for a 5″x7″ card… I tend to do mostly A2 (4.25″ x 5.5″) cards but I’m not a complete stranger to 5×7 cards…!
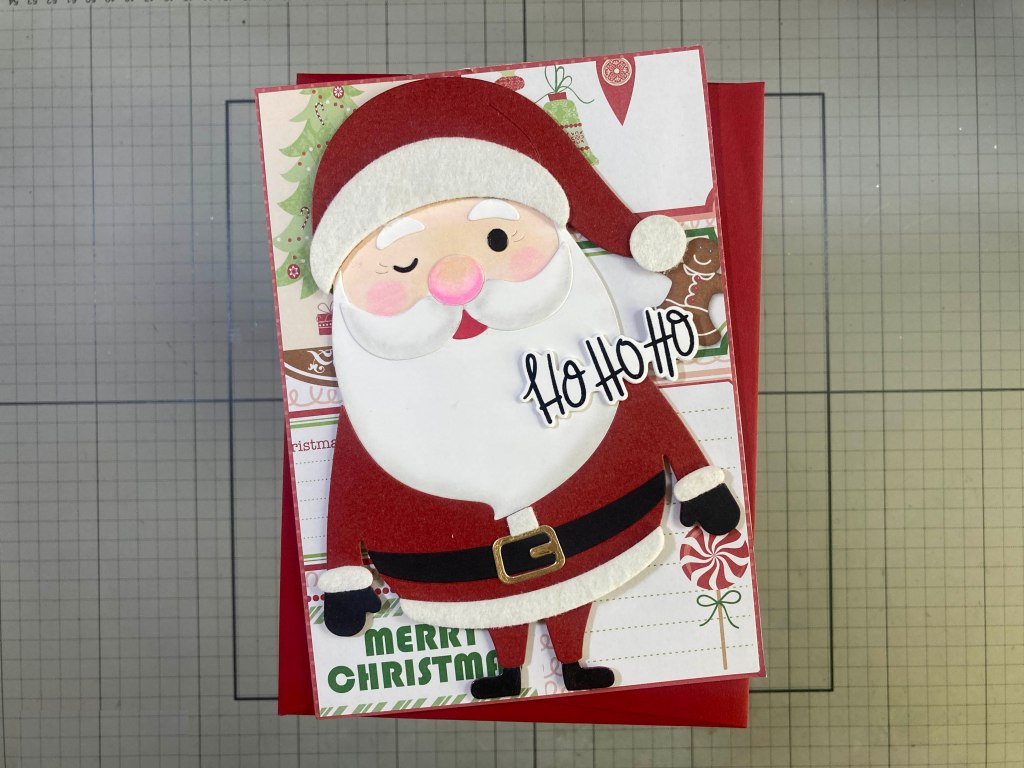
This is a 5″ x 7″ card and I still had to shorten his legs to get all of Santa on this front!! Since his legs are cartoonishly small compared to his body, I figured shrinking them up a little works fine! All of Santa’s Red is die-cut from the back of some old Core’dinations Red Ruby Gemstone card stock for a nice sheen but no pearlescence. I die-cut his face and nose from plain White card stock and colored them with my Ohuhu Alcohol markers.
I found some White felt already attached to card stock in my stash, and die-cut all his fur pieces from that – great texture! His hair pieces are all cut from White card and I added a little shading to his beard and mustache with my Pebbles Chalk Pallet. His belt and gloves are die-cut from plain Black card stock (buckle from Gold) and I cut his boots and eyes from Black card stock topped with packing tape for some shine.
The packaging for this die set shows Santa with “TWO facial expressions!” (eyes open or closed) but if you combine them, you can get THREE facial expressions! A saucy Santa wink is fun! The background is some old pattern paper from my stash – the red (around the edge) is cut to 5″ x 7″ and glued to a White card base, and the top piece is cut to 4 7/8″ x 6 7/8″ and glued on top. That gives me just enough room to squeeze Santa onto the front of this card with some foam tape.
I stamped the sentiment on White card stock with VersaFine Onyx Black ink and embossed it with Clear embossing powder. I die-cut that with the matching die – along with 3 blanks – and glued them all together. I added a spot of foam tape behind the third HO and glued the first two HOs flat to Santa’s beard. This Santa reminds me of the classic Rudolph the Red-Nosed Reindeer stop-motion Santa! Once he’s fattened up! And I love the Merry Christmas on the pattern paper peeking out from behind Santa’s legs. A Big card for a Big Santa! HO HO HO !
Surely Santa’s head isn’t too big to fit on an A2 card!
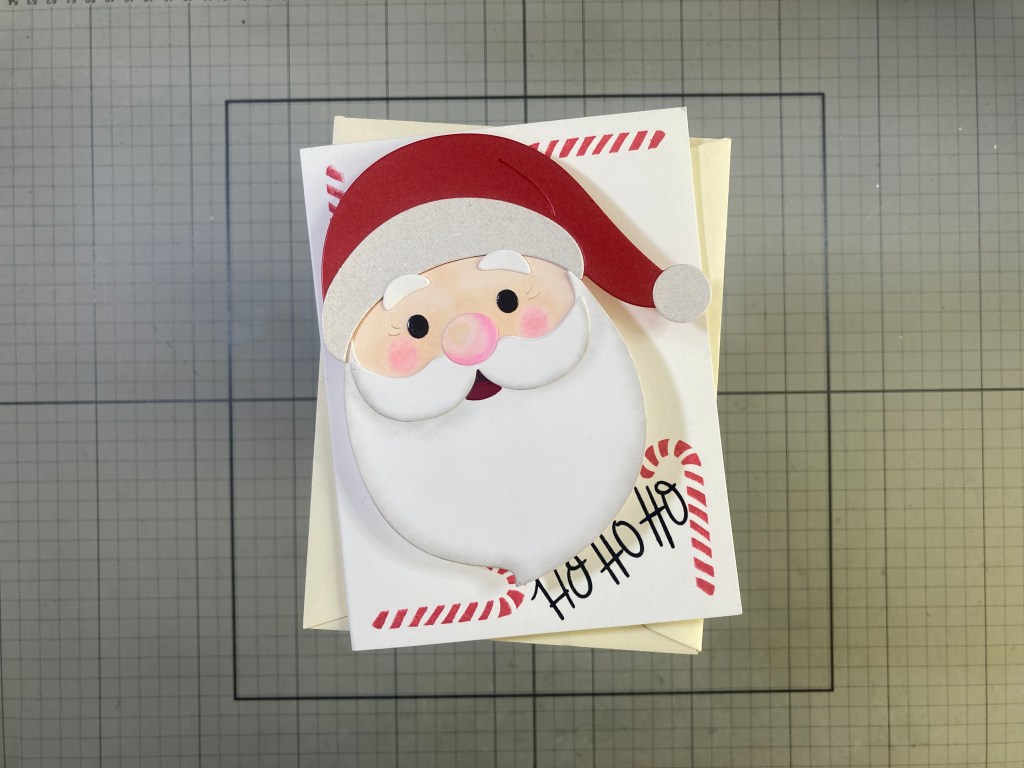
Barely! HA! I assembled Santa the same as in card one but used a Glitter White card stock for his fur accessories and left both eyes open! I also added a touch of Dark Grey at the tip (back) of the mouthpiece – that adds a lot! I also raised his eyebrows onto his hat a bit – reinforcing the cartoony aspect of this Santa. I stamped the candy cane stripes on the four corners of an A2 card base using Hero Hues Cherry Core ink and stamped and embossed the sentiment as usual.
I did attach Santa to the card front with an Action Wobbler or “Giggle Springs” as they are known at Spellbinders. I attached that right behind Santa’s nose, and the little bit of extra weight in his beard makes him wobble by just shaking the card back and forth!
I did stamp the “Merry Christmas” sentiment on the inside of the card for a final touch – and those wobblers are a great interactive embellishment to have in your stash! HO HO HO!!
I took me till this third card to realize that there were actually die-cuts for Santas cheeks – and for some reason, I got this wacky idea in my head…!
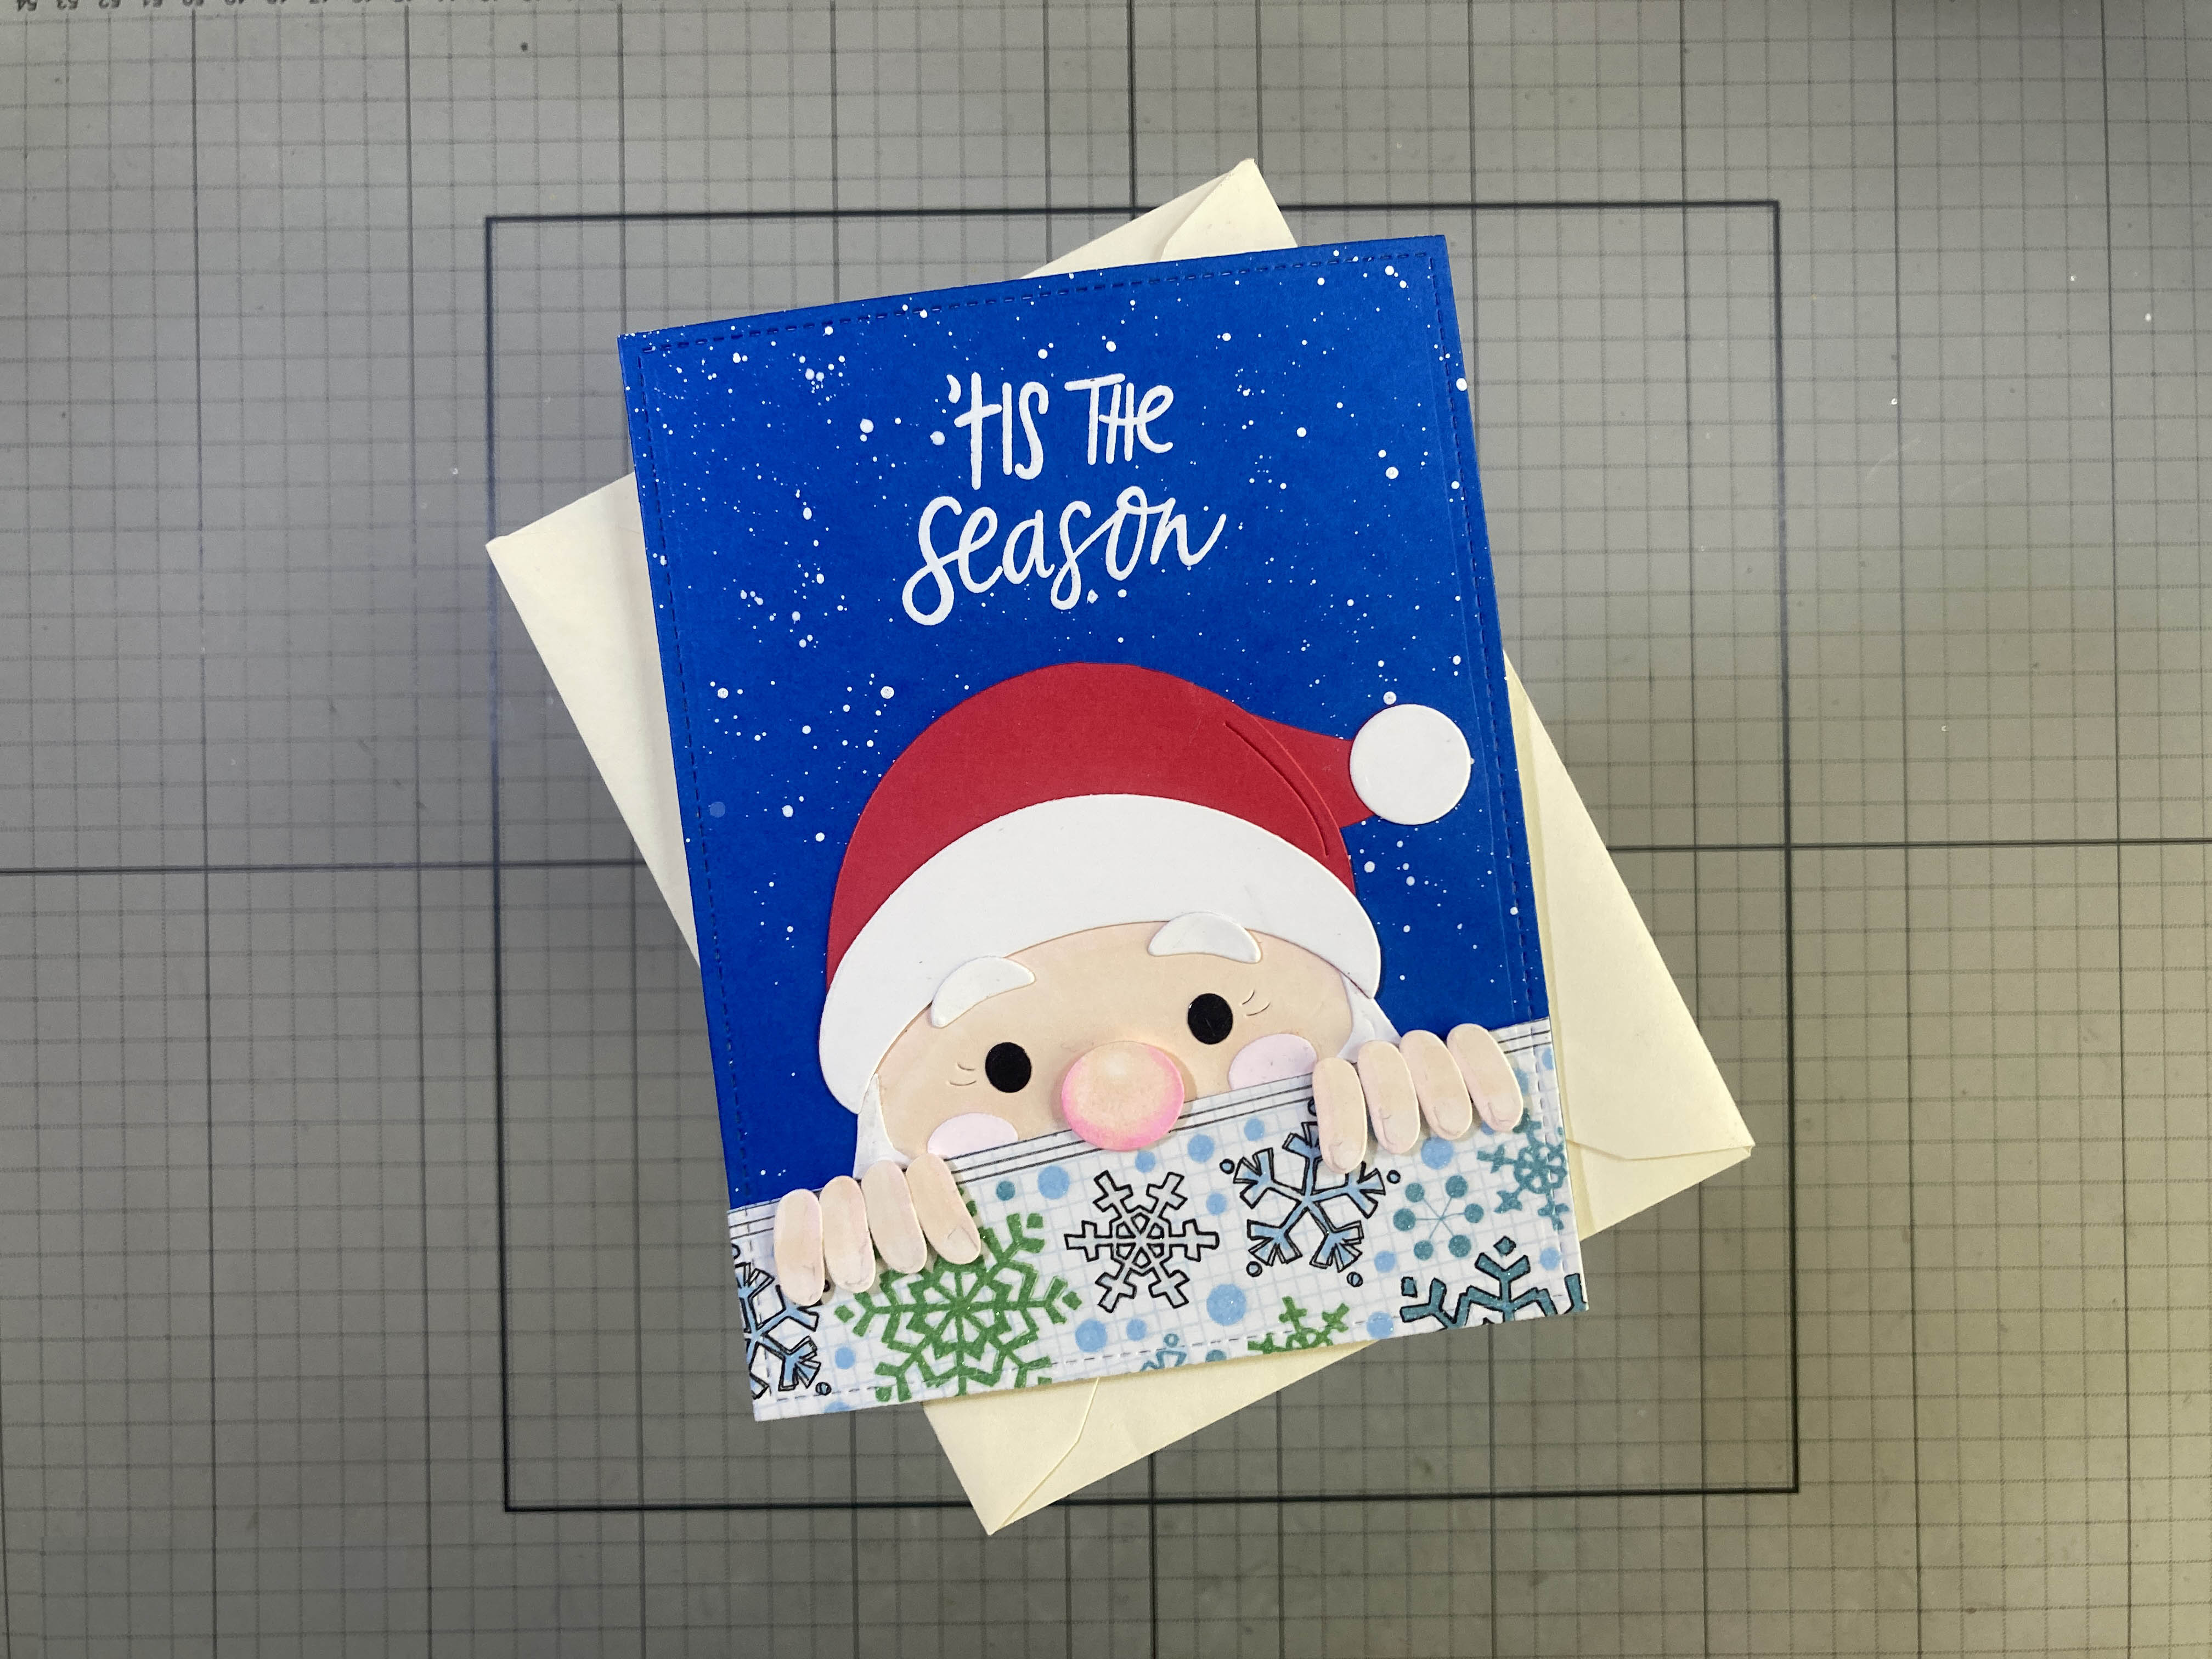
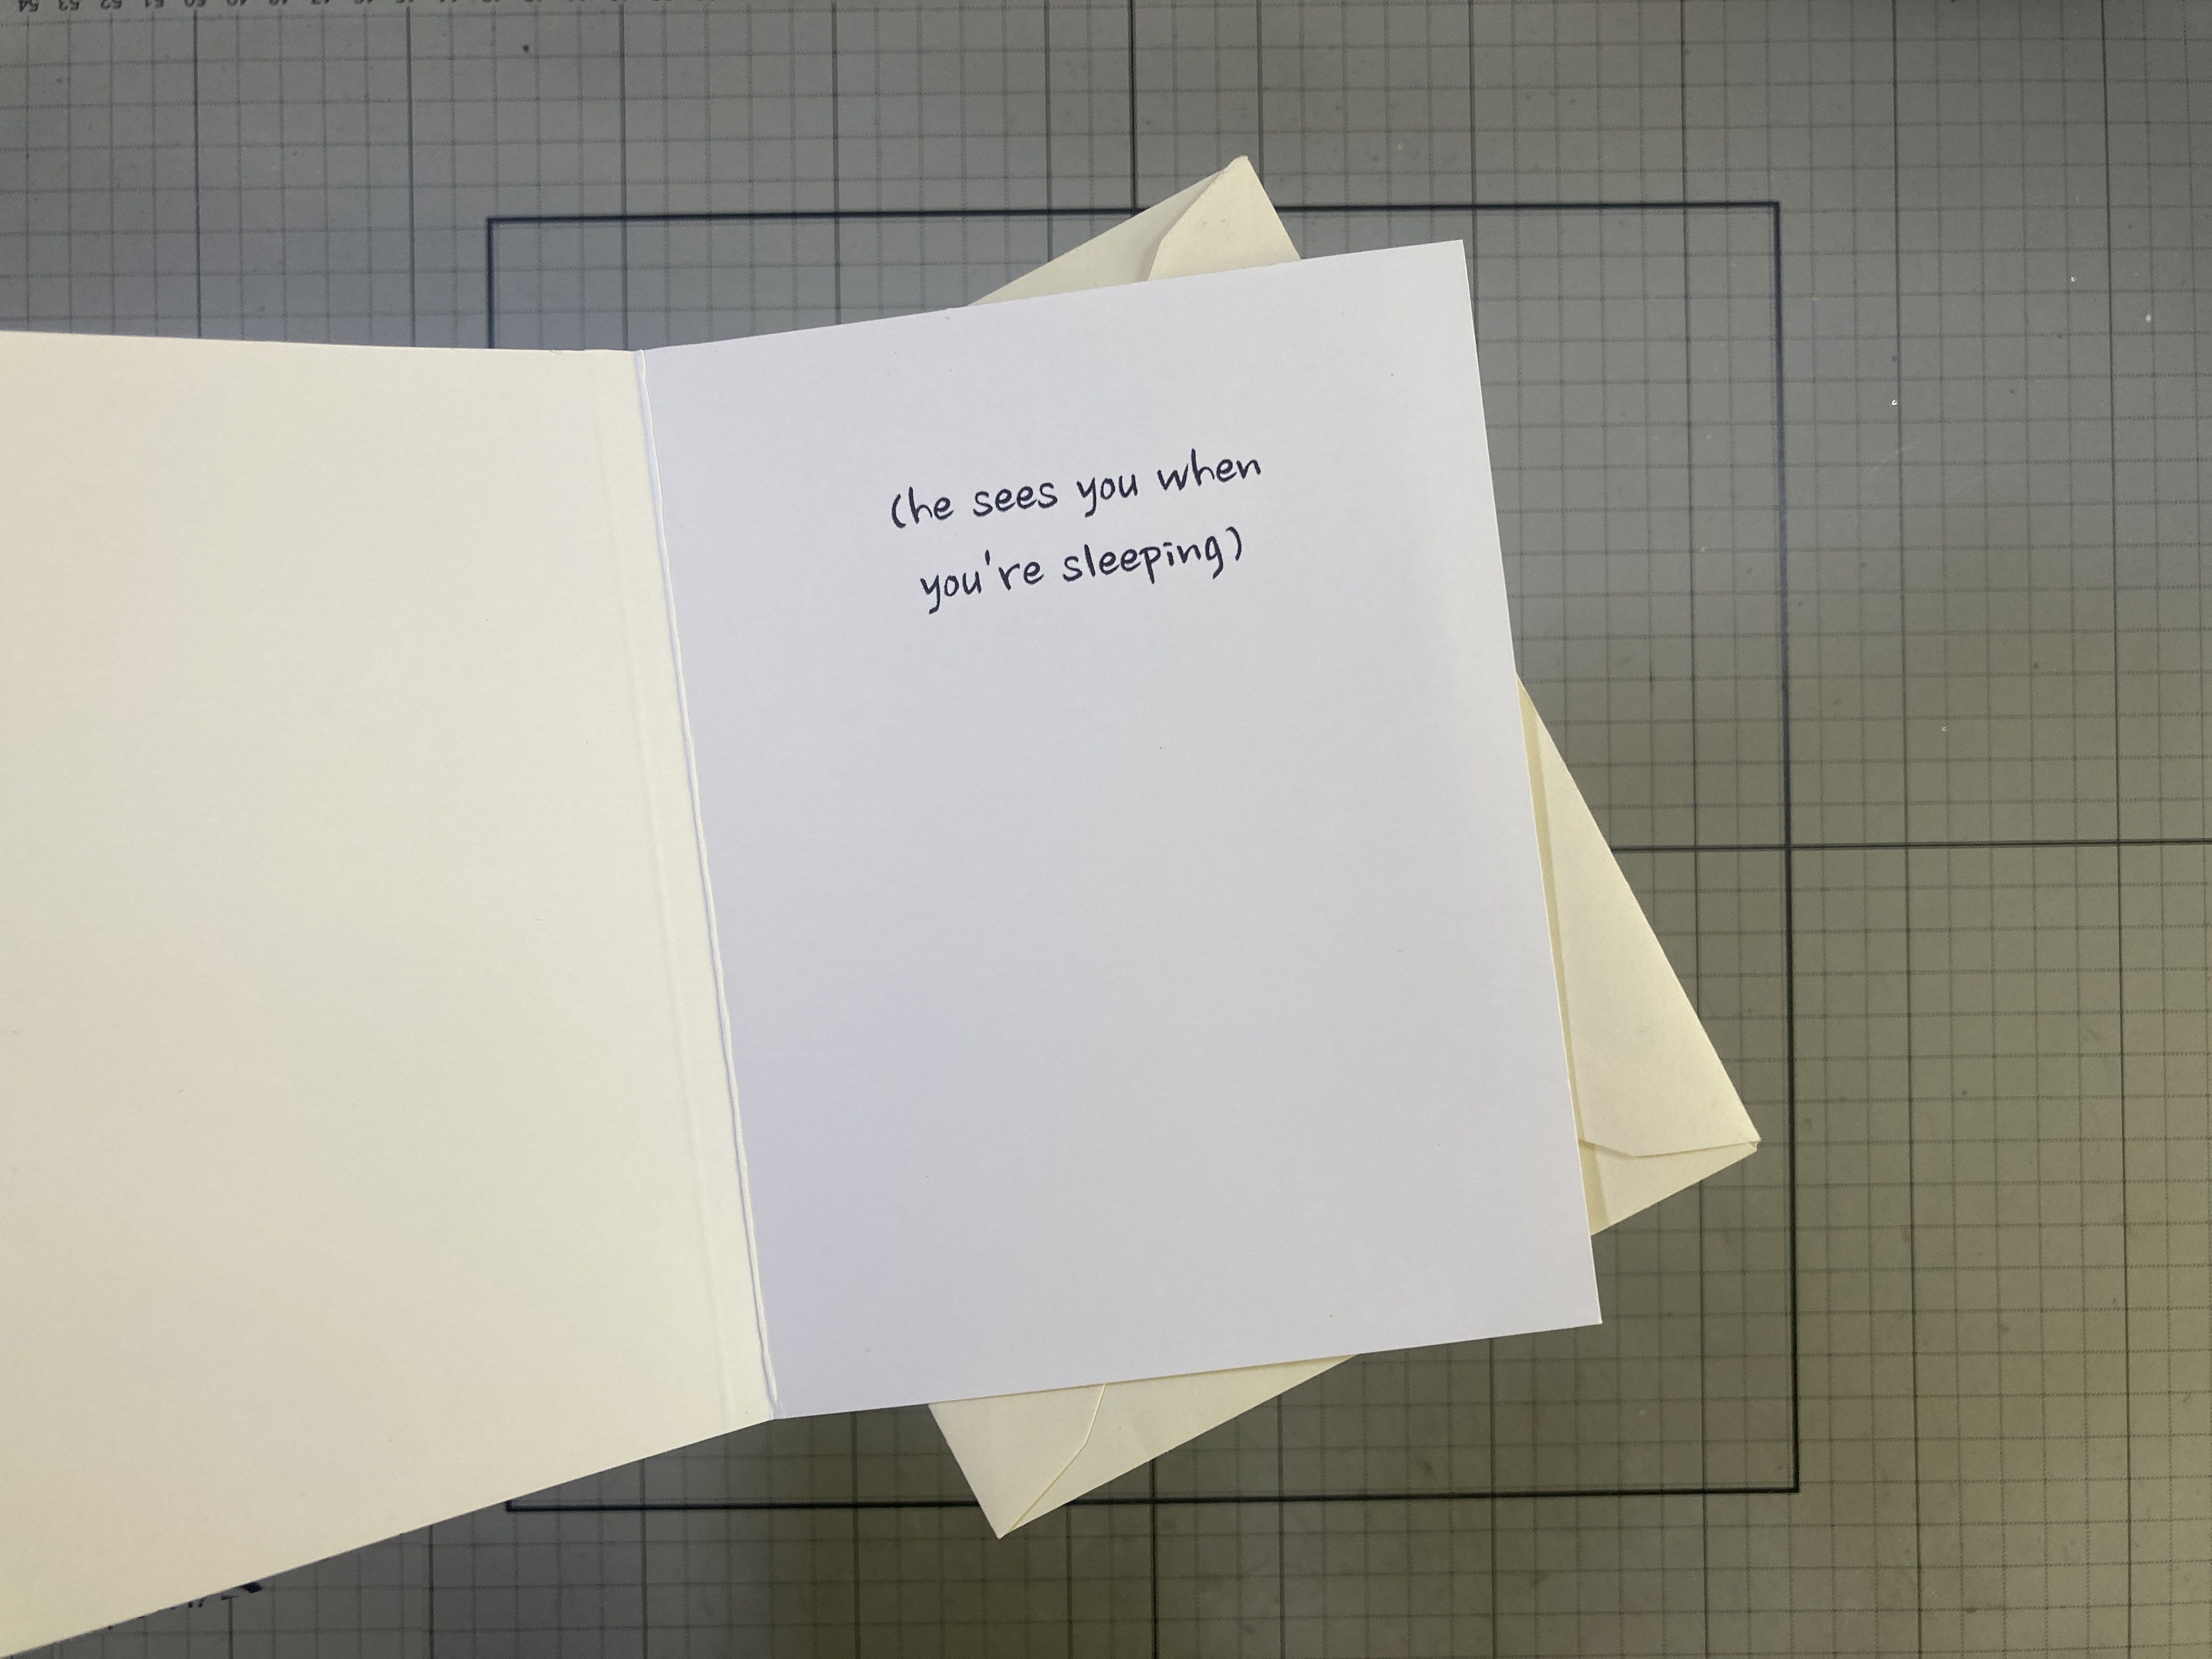
Santa was here!! I assembled this Santa with plain Red and White card stock with his face (and cheeks!) colored with Alcohol markers (packing tape shiny eyes) and his fingers are just his die-cut Jacket cuffs! Fingers are colored the same with a little hint of nails. You may notice that I trimmed the top of his hat to be shorter. Instead of just cutting off the top knot at the die-cut crease line, I copied the right side of the die to the left side of his hat and cut along that line. Then it’s easy to tuck the extra top knot of his hat behind.
The background is thin Blue card stock spattered with Bombay White India ink and cut to 4.25″ x 5.5″ with a Lawn Fawn Stitched Rectangle die and glued to a A2 White card base. (I printed the inside sentiment using my Silhouette software and the Nanum Pen font).
The pattern paper I found in my stash has some good sparkle and I liked the double lines defining the edge. I cut that to size with the LFSRdie as well. I stamped the cover sentiment using VersaMark Embossing ink and embossed that with White embossing powder. I glued Santa’s head flat to the card front, glued the pattern paper flat to that and attached the fingers and nose with foam tape. This one gave me a good giggle!!
Enough with the Santa’s already! Though he is an admittedly cute die, let’s move along to the next die sets…
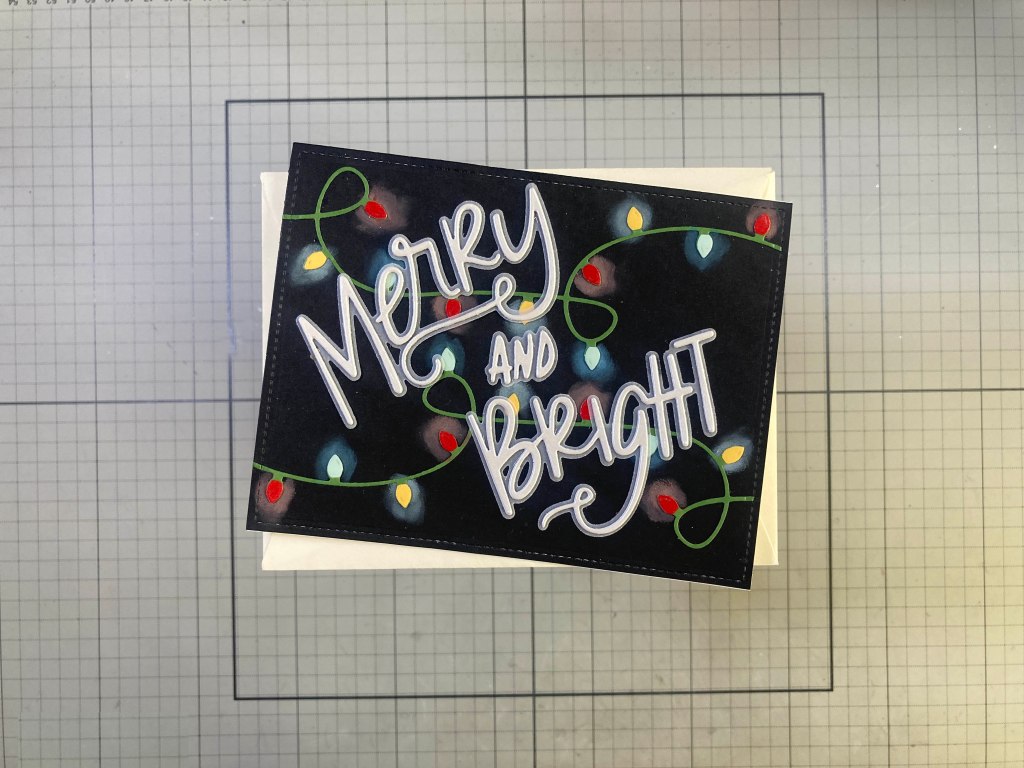
Here we have plain Black cardstock cut to size with a LFSRdie and glued to an A2 White card base. I die-cut the light strings from ColorWheel Fern card stock (darker than the greens in this kit) and die-cut the bulbs from Pomegranate, Mint and Beeswax card stock all covered with some packing tape for shine! I laid the light strings on the card front and noted where each bulb would land and then, using Spellbinders Mini Blending Brushes, I blended on Candied Apple, Broken China, and Squeezed Lemonade Distress Oxide inks to give a little glow behind each bulb. I glued the light strings in place and gave everything a light sparkle with a spray of Iridescent Shimmer Mist.
I die-cut the sentiment from some pearlescent White card stock from my stash and glued that to its shadow, die-cut from some thick Vellum. I didn’t care for the square arrangement of this sentiment according to the die-cut shadow, but fortunately the words are all held together by a thin piece of vellum attaching the “and” to the other words. Very easy to cut away and separate all three words! I glued them at my pleasure flat to the card front. I do love being able to use Distress Oxide inks on Black card stock!. And there’s lots of shine and sparkle here for a Black card!!
I really like the style of the “NOEL” sentiment in this stamp set. It appears the formal Noel means Christmas and the plain noel is a Christmas carol. So the classic carol The First Noel thus means the first Christmas… right? I’ll think I’ll just stick to the carols!
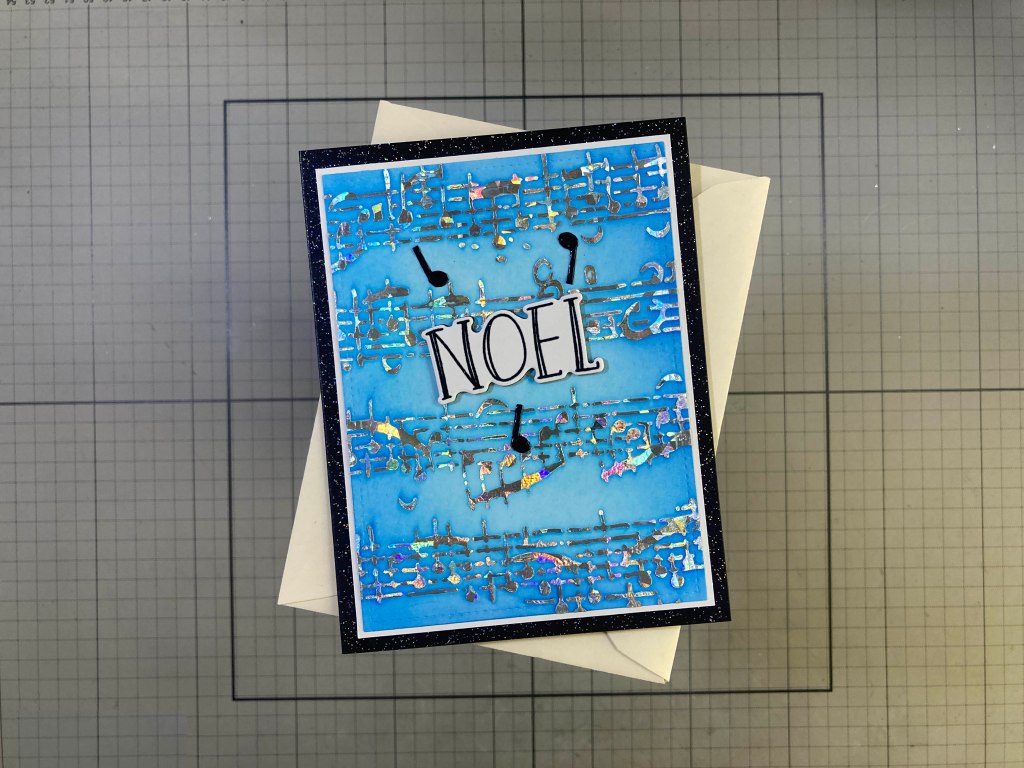
It appears I don’t have any Music Background stamps, but I did find this TCW Mini Sheet Music Stencil in my stash. I was looking for some sparkle, so I used DecoFoil Transfer Gel through the stencil onto White card stock. When that was dry, I sent it through my laminator with Silver Shattered Glass Deco Foil. I die-cut the foiled piece to 3.75″ x 5″ with a LFSRdie and ink blended HA Splash and Blue Hawaii Reactive inks over the whole panel. Interestingly enough, because the transfer-gel foiling adds some thickness, it also catches a little more of the ink blending than flat foiling would. I glued the foil panel to an 1/8″ white mat and then down to a Black Glitter card base.
I stamped the NOEL with VersaFine Onyx Black ink on White card stock and embossed that with Clear Embossing powder. I die-cut the sentiment with the matching die and cut two more blanks from Black card stock and glued them all together. The music notes are die-cut from some Metallic Black card stock with an old Darice Music Notes die that I fussy-cut for the individual notes. The sentiment and notes are glued flat to the card front.
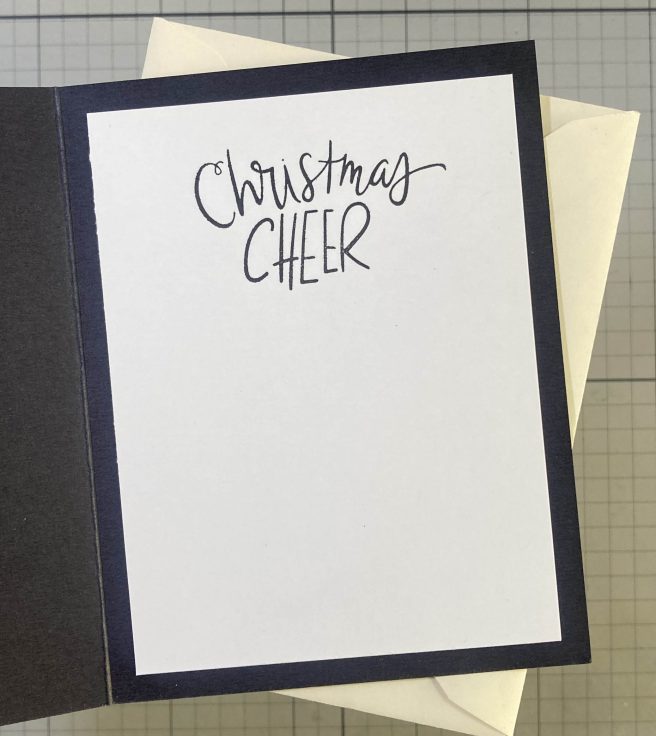
Since we’re working with a Black card base, I added a 3.75″ x 5″ White writing surface on the inside and stamped the Christmas Cheer sentiment with Onyx Black ink. I’m always cheerful when I hear carols! This whole card simply sparkles and shines!
That covers all the sets included in the My Monthly Hero Kit – I even used five of the eight sentiments in the Christmas Cheer Stamp & Cut set. But now we get to stretch our wings a little and delve into the Super Hero additions!
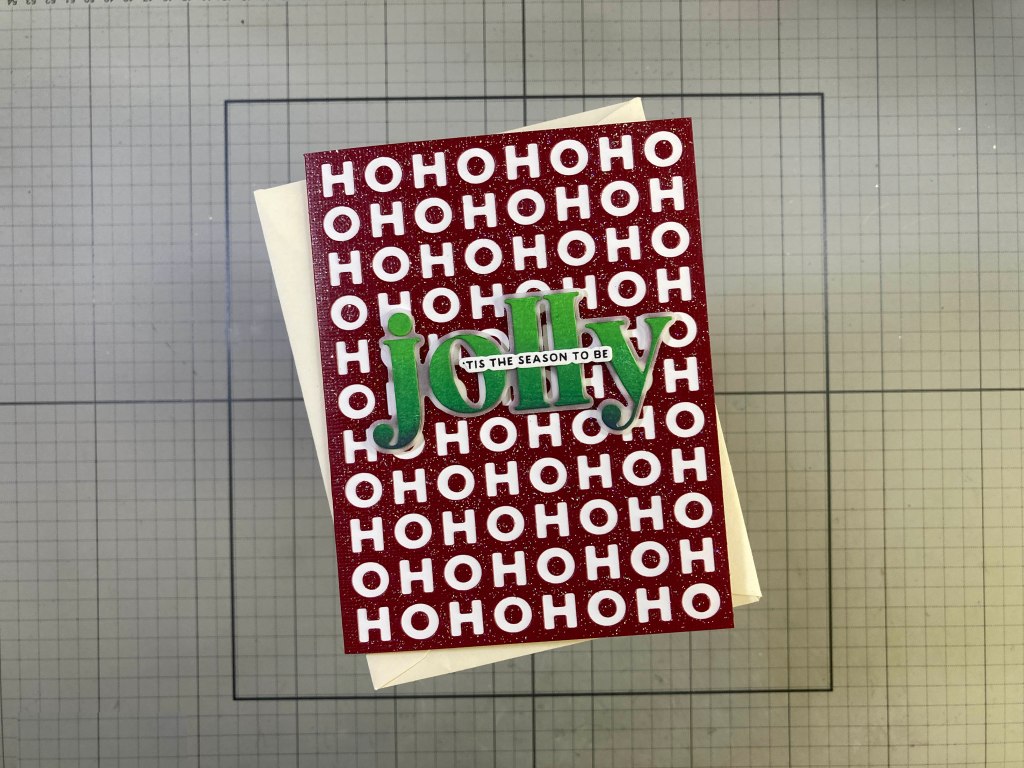
I stamped the “jolly” sentiment on a scrap of White card stock using the Earth Palette Reactive Ink Pad (from the December 2019 MMH kit) for a really nice ombre effect. Then I took the “jolly” letters die and created a template on a piece of White card stock. Place the template over your stamped sentiment, and you can line up the letters die perfectly. I also die-cut the “jolly” shadow die from some thick vellum and glued the ombre letters on top. I stamped and embossed the small sentiment with Onyx ink and die-cut it with its matching die.
I die-cut the cover plate die on the front of a Core’dinations Red Ruby Gemstone card base. I trimmed a piece of White card stock to glue behind the cover, and, yes… I bit the bullet and fastidiously glued all 44 centers into each “O”! It really looks kind of spectacular! I added a 4″ x 5.25″ White writing surface to the inside, and mounted the “jolly” on front with thin pieces of foam tape. Lastly, I glued the small sentiment in place. I did flirt with the idea of adding some glitter to the “jolly” but the Glitter Red card base is so sparkly, I didn’t think any extra was needed. I do love that ombre ink pad too!!
That card used three of the four sets we get in the Super Hero additions… the Let’s Be Jolly Stamp and Cut set, the HO HO HO Cover Plate Die and the Jolly Die Set. But there are more stamps than just “jolly”!
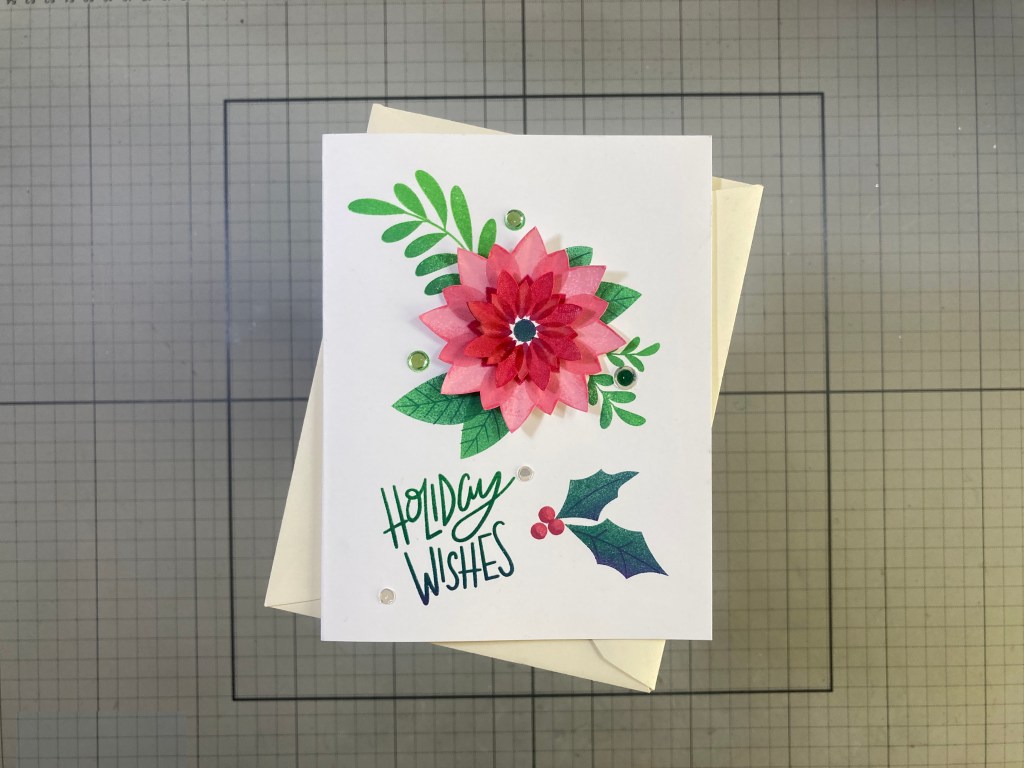
This card uses all of the foliage stamps in the Jolly stamp set! I can often feel a little intimidated (and un-inspired) with a bunch of individual silhouette stamps – and you know I am not a big fan of die-cut stampings, but after a while I noticed that there were four stamps of a similar leaf in four sizes. Might those give us a passable poinsettia? Using my 4″ Gina K Wreath Builder Template, I stamped a “wreath” of 8 leaves in all four sizes – I used HA Raspberry Jam, Cherry, Crimson, Pale Tomato, and Cotton Candy (inside out, small to large) and then fussy cut the “flower” out. I wanted more dimension, so I stamped the center again (the two small “leaves” and first three colors) and fussy cut that out. I used a ball stylus to add a bit of curl to the petals and attached them together with a spot of foam tape. Poinsettia – Voila!
I arranged the foliage stamps and the sentiment on the front of an A2 White card base and stamped them all using the Earth Palette ink pad (Cherry and Raspberry Jam for the berries). I did emboss the sentiment with Clear embossing powder. A few SSS Moonshine Confetti Sequins adds some sparkle to finish this card! Who knew you could get a poinsettia out of this stamp set!! Sweet!!
There is also another word that is appropriate to the season that you can make out of the “jolly” stamps and dies…
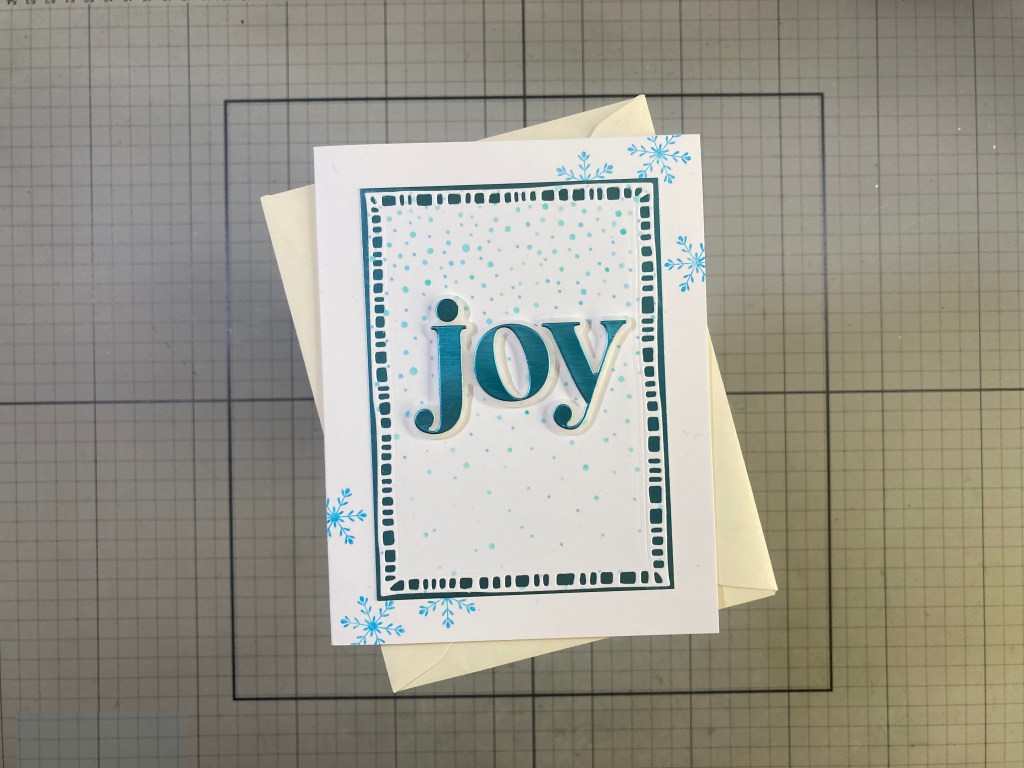
I die-cut the “jolly” die from some Silky Sky Satin Mirror card stock from Tonic and discarded the two l’s. I died-cut the “jolly” shadow from thick Vellum and trimmed the l’s away from the o and y. I glued the letters to their shadows – the j and o are still attached together but the y is floating free. Perfect!
On a panel of White card stock I ink blended HA Pool Party, Splash and Blue Hawaii Reactive inks through the Snow Day Layering Stencil set. I die-cut that panel to about 3.25″ x 4.5″ with a Moda Scrap Framed Rectangle die and glued that to a 3.25″ x 4.5″ piece of the Silky Sky card stock. I stamped the snowflake stamp on the corners of an A2 White card base using Splash Reactive ink and glued the die cut snow panel flat. I added the sentiment with small pieces of foam tape. I was going to add a Merry Christmas sentiment on the inside when I realized this could be a great Hanukkah card too!
Something about that “jolly” die just hits me the right way… is it the size, the font, the sentiment itself? I’m not sure!
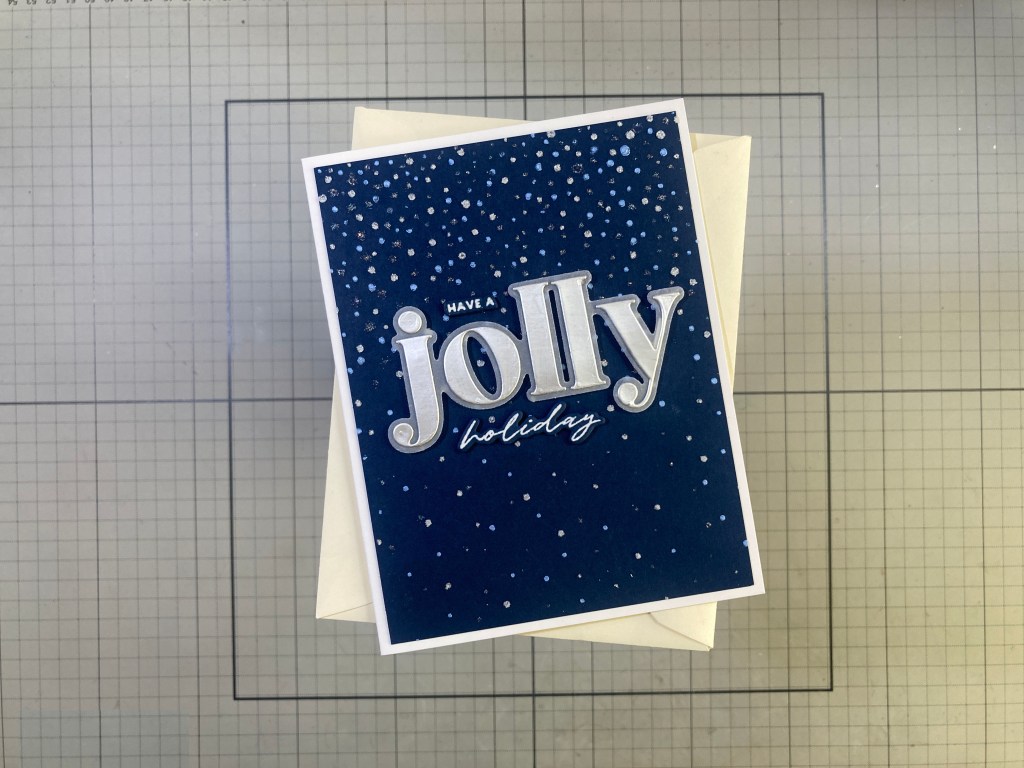
But I am sure that I love this card! I took a panel of Hero Hues Nautical card stock and the Snow Day Layering Stencils and used three different mousses and gels for the snow – I started with my thickest medium for stencil 1: Gina K. Glitz Glitter Gel in White. I let that dry then used Nuvo Embellishment Mousse in Cornflower Blue for stencil 2. When that was dry I used my Gina K. Starlight Sparkle Gel for stencil 3. Because each layer of gel adds a little thickness, you have to really press in for stencils 2 and especially 3, but I am very pleased with how the snow turned out! I cut that panel to 4″ x 5.25″ and glued it to an A2 White card base.
The “jolly” is die-cut from Frosted Silver Satin Mirror card stock from Tonic, and glued to its shadow die-cut from more thick vellum. I stamped the small sentiments on more Nautical card stock with VersaMark ink and embossed them with White embossing powder. I die-cut them both with their matching dies and cut two more blanks for each and glued them together. “Jolly” is mounted with thin spots of foam tape and the small sentiments are glued flat to the card front. I love how the background behind the small sentiments disappears on the matching background. Perfectly Jolly!
I had a hard time coming up with my last card this month… but I did have an idea combining different sentiments…
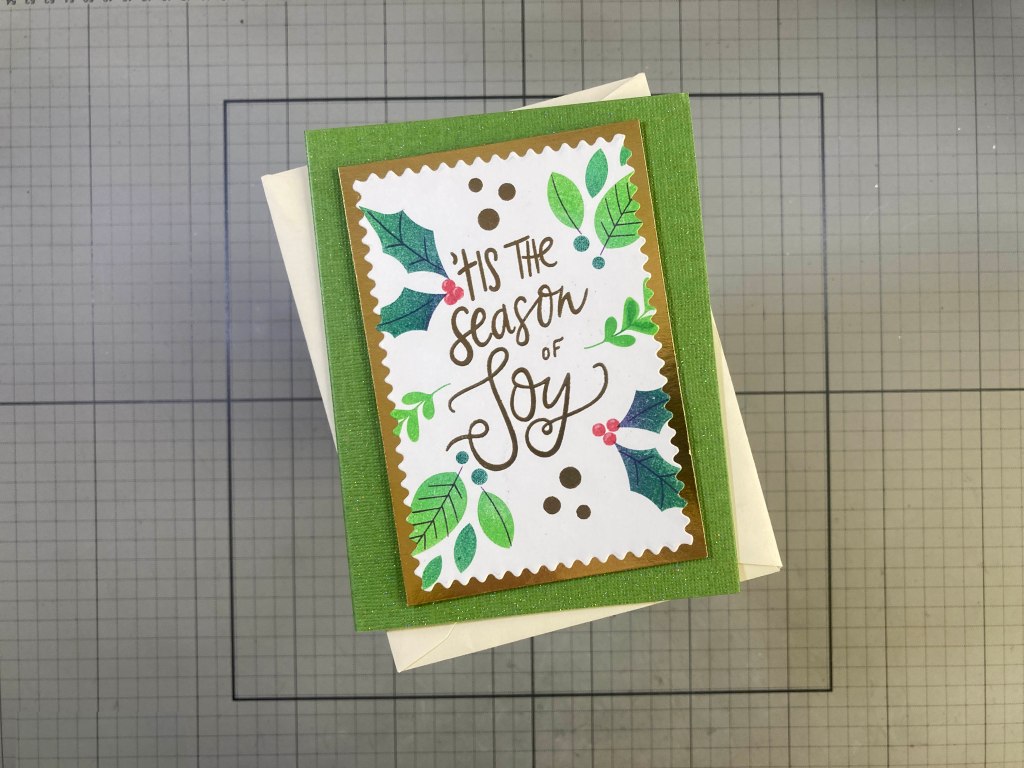
I was dying to do something with the fun “Joy” stamp in the Christmas Cheer Stamp set, so I paired it up with the “’tis the season” stamp and embossed them both on a panel of White card stock with Gold Embossing powder. I figured if I couldn’t find an “of” stamp that would work, I could just write it in with a Gold Gel pen! Well, Gold gel pen doesn’t match Gold embossing powder at all! So I dug through my past MMH kits and found this “of” in the Super Hero kit from February of this year – in the sentiment “Thinking of you”. It was the right size and feels hand-written, so I masked off the “thinking” and the “you” and stamped just the “of” with VersaMark ink and embossed it with Gold Embossing powder too. Perfect match!
I stamped the foliage around the sentiments using the Earth Palette Ink Pad again (Cherry ink for the berries) and three Gold embossed dots above and below. I die-cut the panel with the largest SSS Modern Postage Stamp Rectangles die, and glued that to a 3.25″ x 4.75″ panel of Gold Metallic card stock. I mounted that on a Light Green Glitter card base with foam tape and added a 4″ x 5.25″ writing surface on the inside. I really like this assembled sentiment!
And there’s 10 new holiday cards using the My Monthly Hero and My Monthly Super Hero Kits for November 2026.
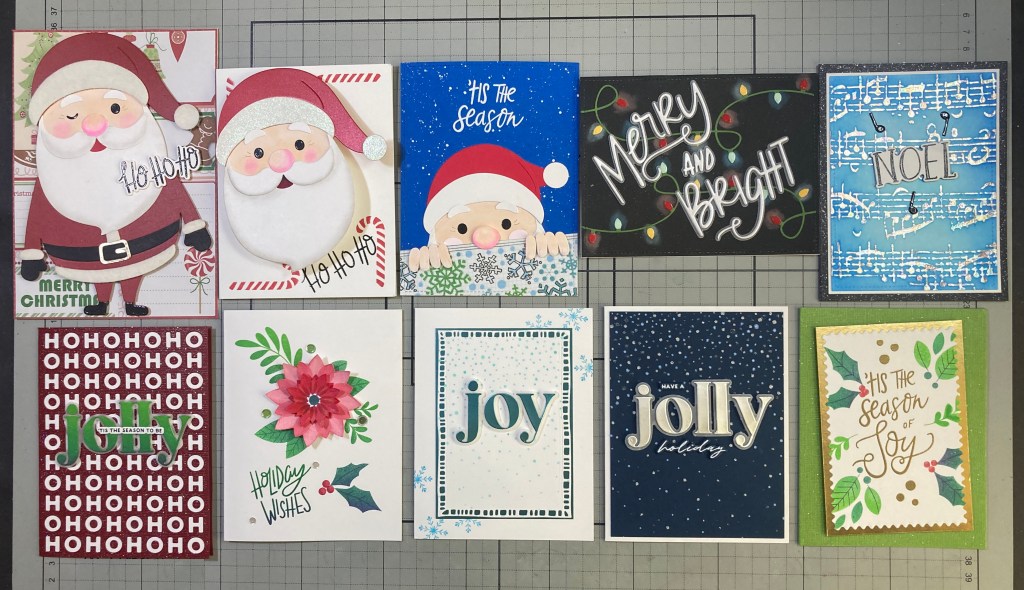
Though I’m not quite sure where I’m going to store the Big Santa Die Set, he is pretty adorable, and I guess his size makes him adaptable to a variety of different uses! I’m loving his “cuff” fingers! The String of Lights Die set is handy, and I actually used every sentiment in the Christmas Cheer Stamp set except for the “”with love,”. Of course you can use the Ho Ho Ho Cover Plate Die without having to glue the center of every o back into place. I really love my improvised poinsettia and am very fond of the “jolly” stamp and die set – my eye keeps getting drawn to the simple “joy” card! I always try to think of a few unique takes on these kits and share them here with you. Which one(s) is your favorite?
If you have room in your life for a BIG SANTA and consider yourself even a little JOLLY adjacent, then you should grab one of these great holiday kits for yourself. If you do go shopping at Hero Arts, please use my links listed below. I do get a small commission from whatever you buy (at no cost to you) and it is always gratefully appreciated!
My Monthly Hero: https://www.dpbolvw.net/click-101337132-16962401?url=https%3A%2F%2Fheroarts.com%2Fproducts%2Fmy-monthly-hero
My Monthly Super Hero: https://www.jdoqocy.com/click-101337132-16962401?url=https%3A%2F%2Fheroarts.com%2Fproducts%2Fmy-monthly-super-hero
Hero Arts: https://www.jdoqocy.com/click-101337132-16957493
Thank you so much for spending some time with me today. Here come the holidays!!!! If you enjoyed this post, please click the Like Star at the bottom of the page, and if you wish to be notified when a new post comes out, just click the Follow Me button at the top of the page. Don’t hesitate to send me a note if you have any questions, comments or just to say Hi!. Please take a moment to Like Me, List Me, Pin Me, Post Me – just share this post with all your crafty friends – And remember… Don’t run with scissors! As always, I send You and Yours Love and Light and Happy Crafting!!
DISCLOSURE: This site contains some affiliate links to products. I may receive a commission for purchases made through these links (at no cost to you). As an Amazon Associate I earn from qualifying purchases. Thank you!


