Hello Folks! Scott here with another mid-month tangent introducing the NEW Parade Day Collection from Hero Arts! Since we create our own Christmas cards each year, I don’t tend to get extra Christmas kits beyond the My Monthly Hero offerings. BUT! Since I do live in New York City, I couldn’t resist this collection featuring large character balloons floating over the city…!
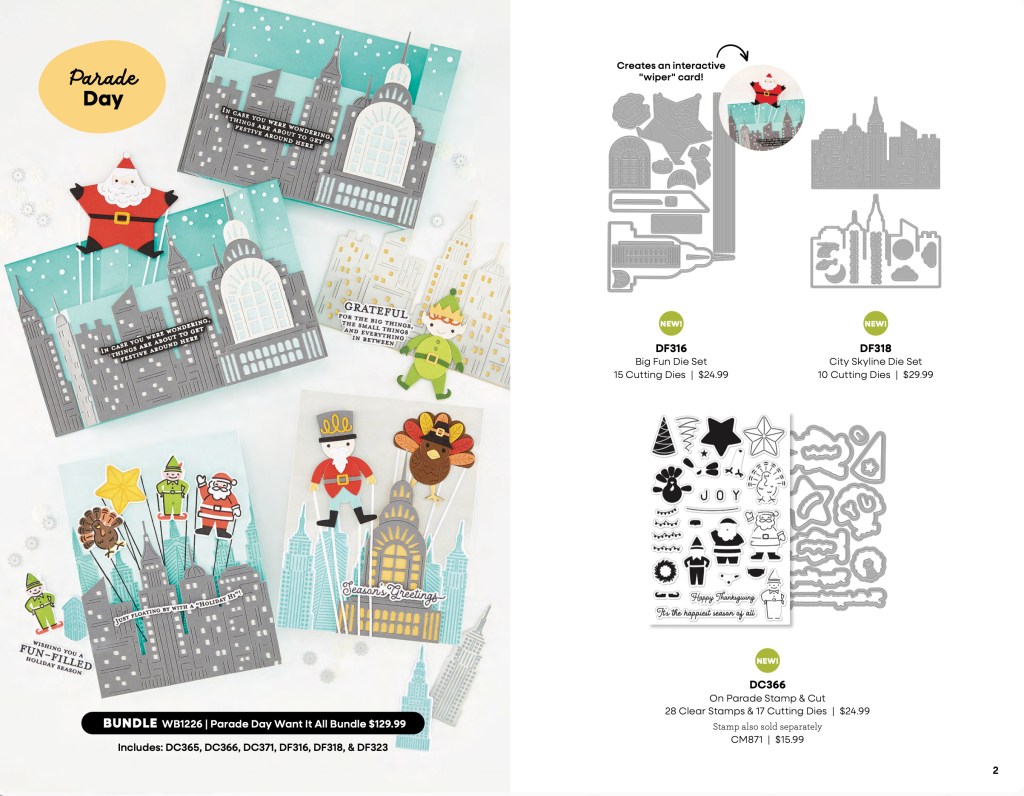
To be specific, I couldn’t resist the Big Fun Die Set that creates an interactive “wiper” card, and the City Skyline Die Set – what Big Apple crafter doesn’t need as many NYC skyline dies as possible?
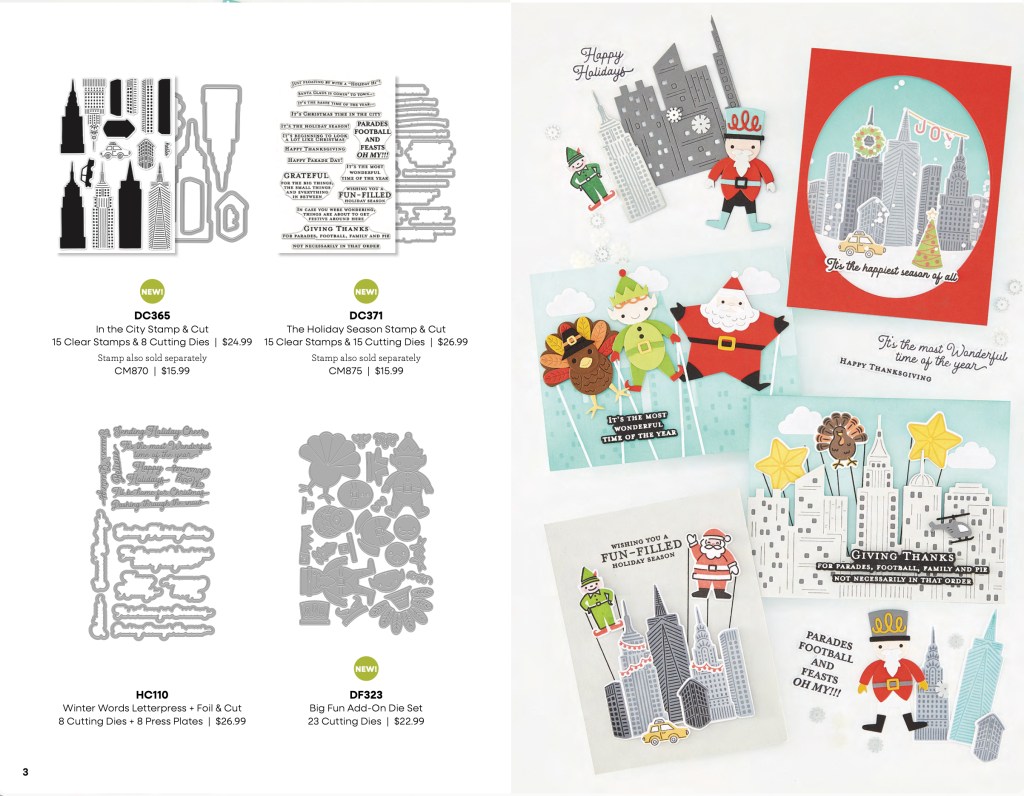
And for a little more variety, I grabbed the Big Fun Add-On Die Set which gives us more character balloons – an Elf, a Nutcracker, and a Turkey to float above the city. There are other stamp & cut sets and a Press & Foil & Cut that I didn’t get mainly because I have gobs of Christmas sentiments in my stash already – and I was mostly interested in creating the interactive “wiper” cards!
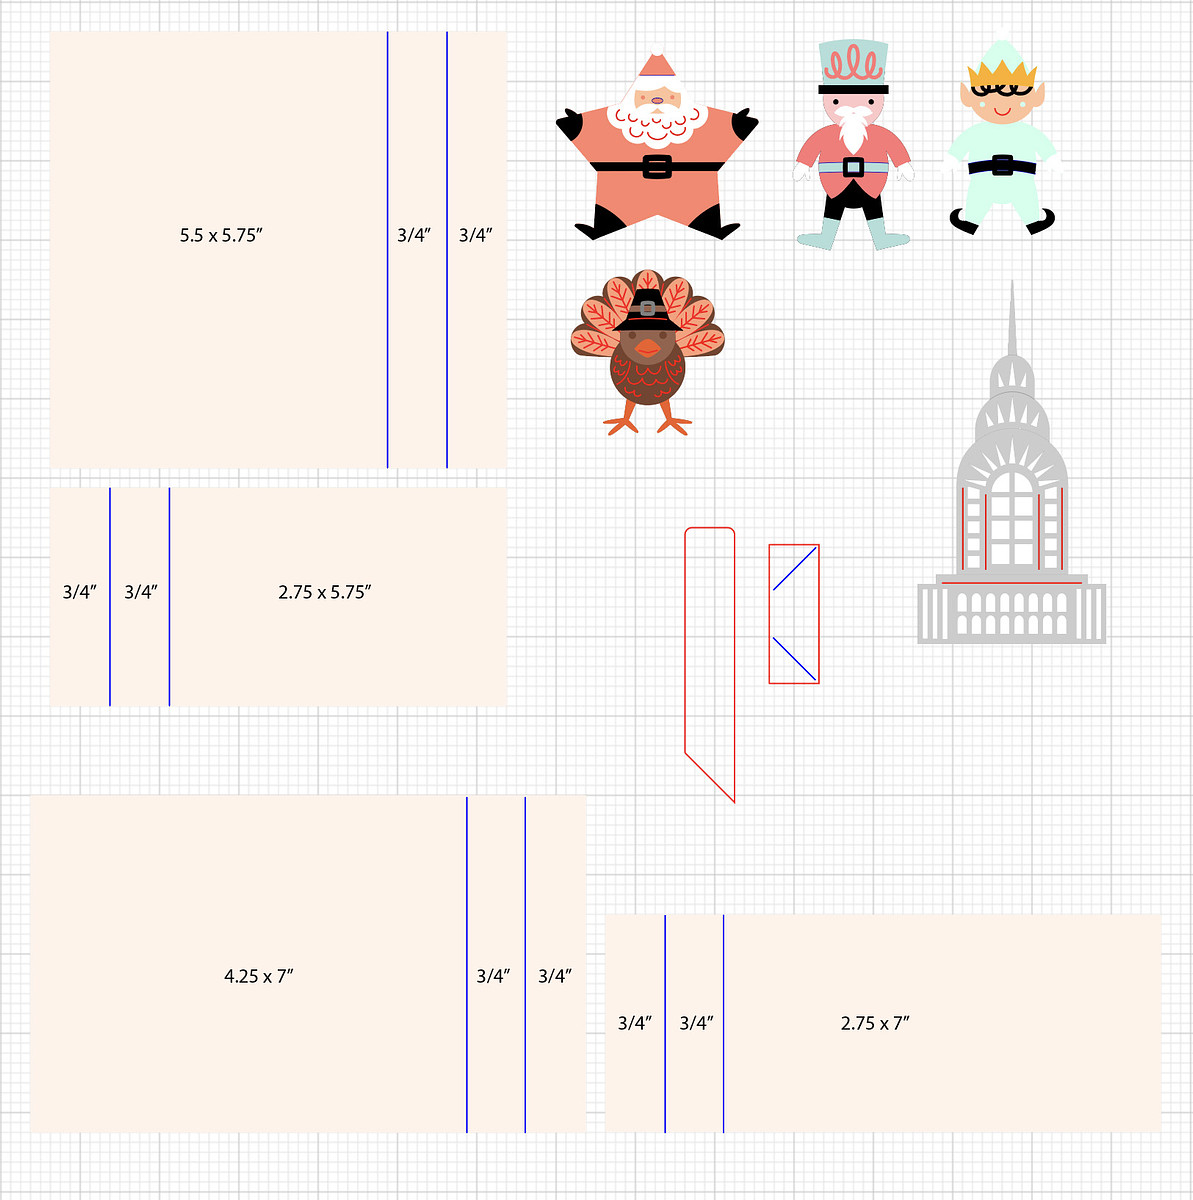
Here is a downloadable file from Hero Arts that has dimensions for cutting and scoring the two pieces to create a card base for the pop-up wiper card. The top two pieces create a Portrait card, and the bottom two diagrams are for a Landscape card.
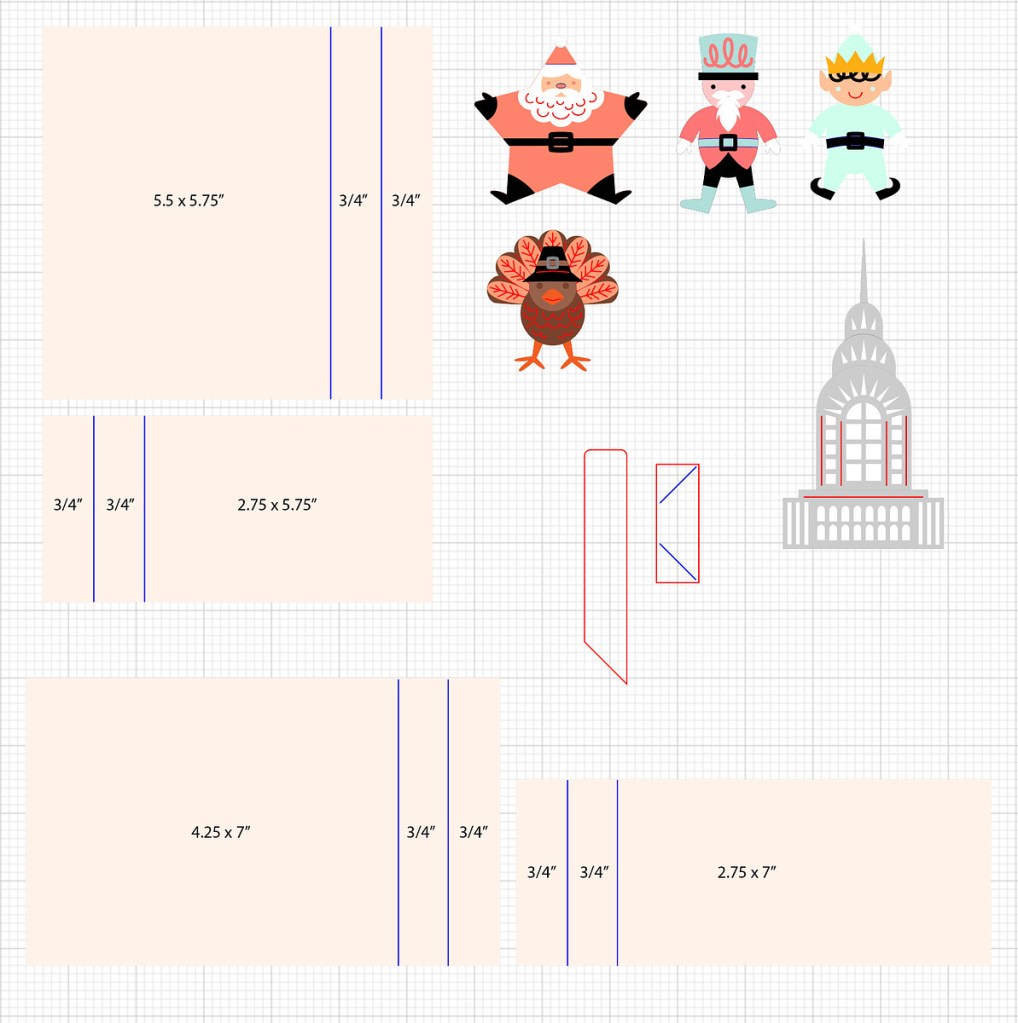
The shorter pieces are the fronts and the taller pieces are the background. Make a z-fold on both pieces and put them together to make a little expanding box:
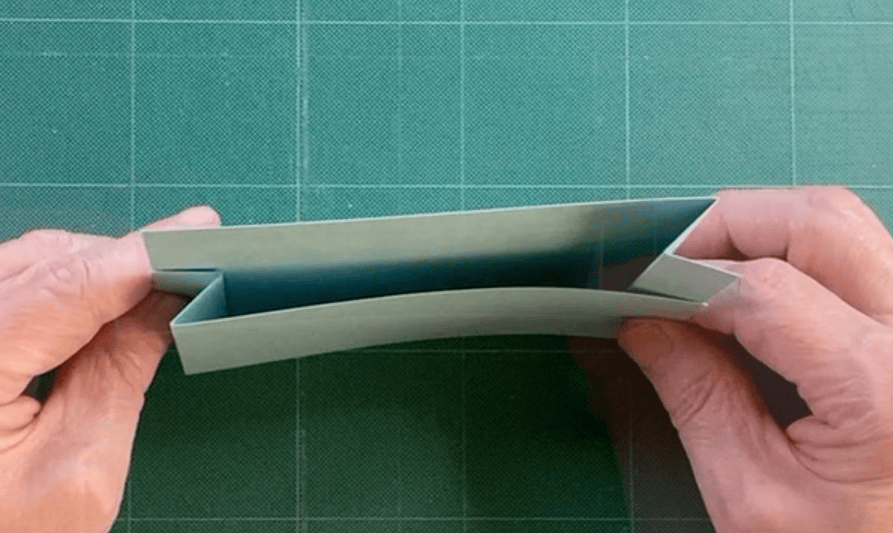
The rectangle with score-lines die and the long rectangle die with an angle on one end (in red on the measurement page) make the action piece that will carry the balloon and make it pop up. Cut the short scored piece from the same card stock as your base, then fold and reinforce the creases making a little volcano shape.
Cut the long angled piece from acetate and glue that to one end of the action piece matching the angle of the acetate to the angle of the crease – the acetate and action piece should make a right angle. The triangle on the other side of the action piece is glued to the card base behind the fold-over – either on the right side or the left side – depending on your preferences – and makes your balloon pop-up when the card is expanded.
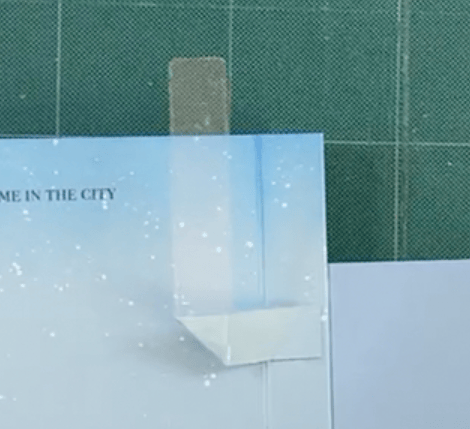
I have a detailed assembly how-to on my CardCutups channel at YouTube, and I’m sure Hero Arts will have other assembly videos out around the same time too. I have a few personal differences to the way Hero Arts creates their assembly, but I’ll do my first card using the Hero Arts assembly instructions (basically). HA!
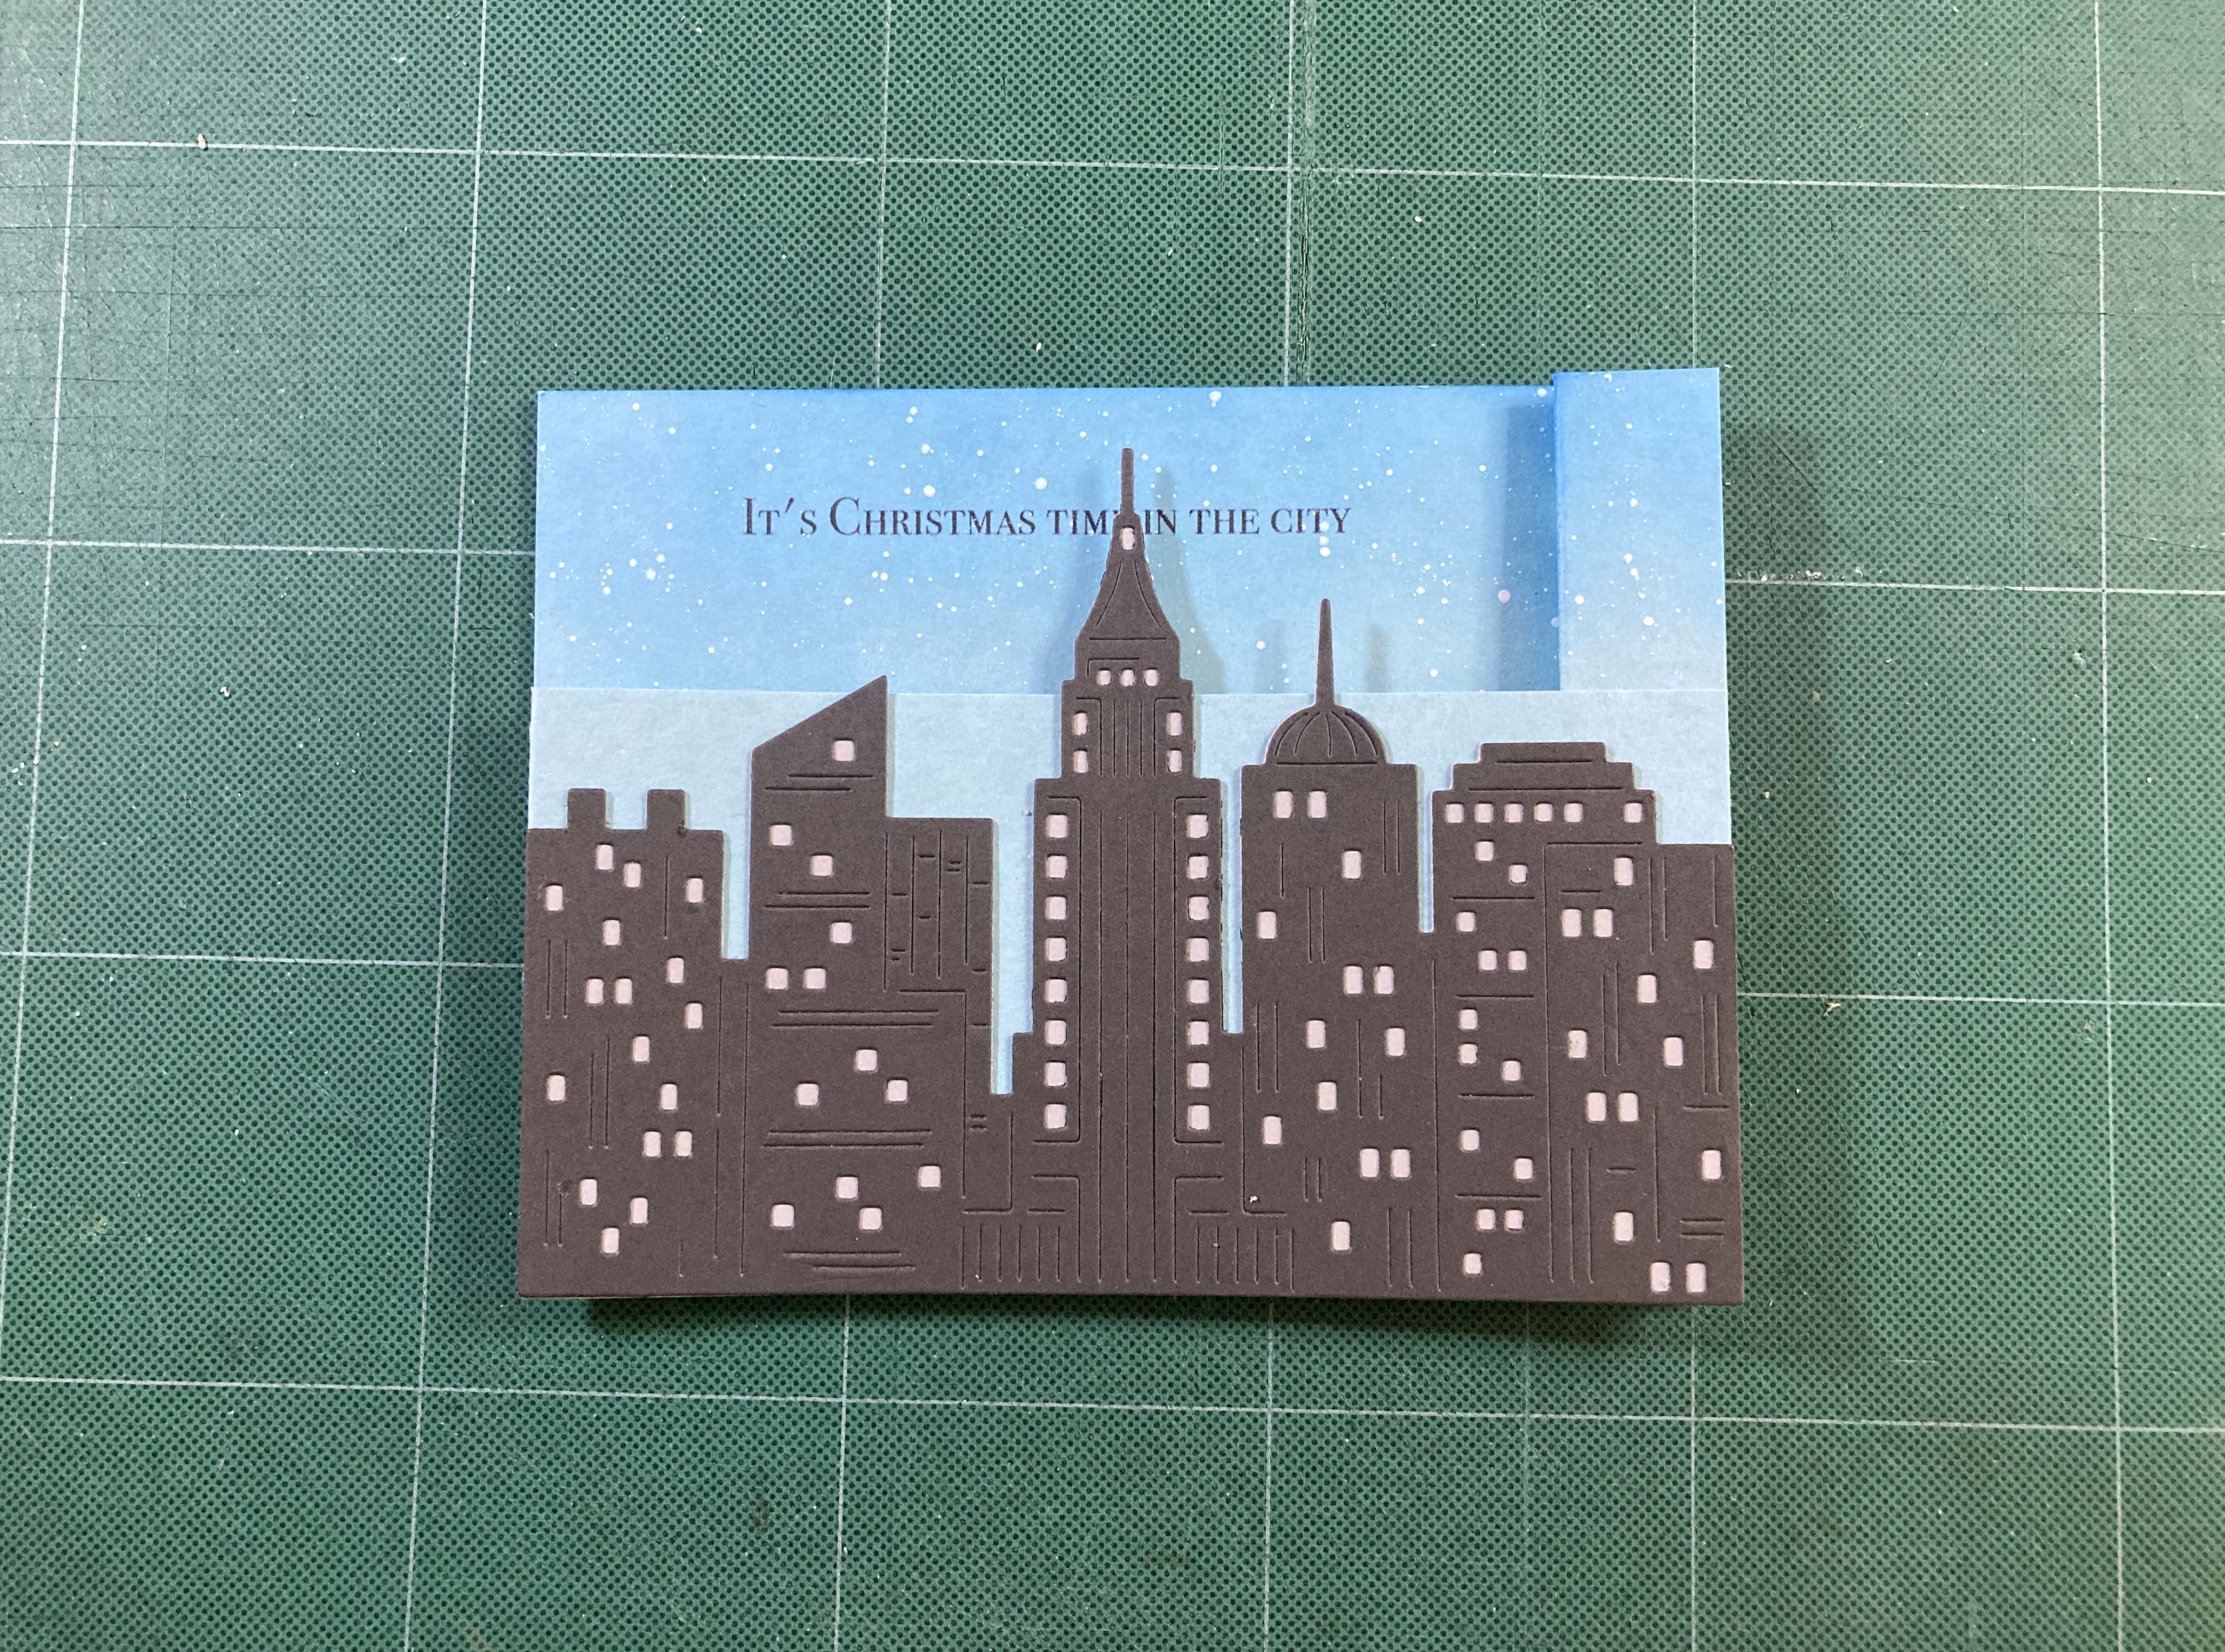
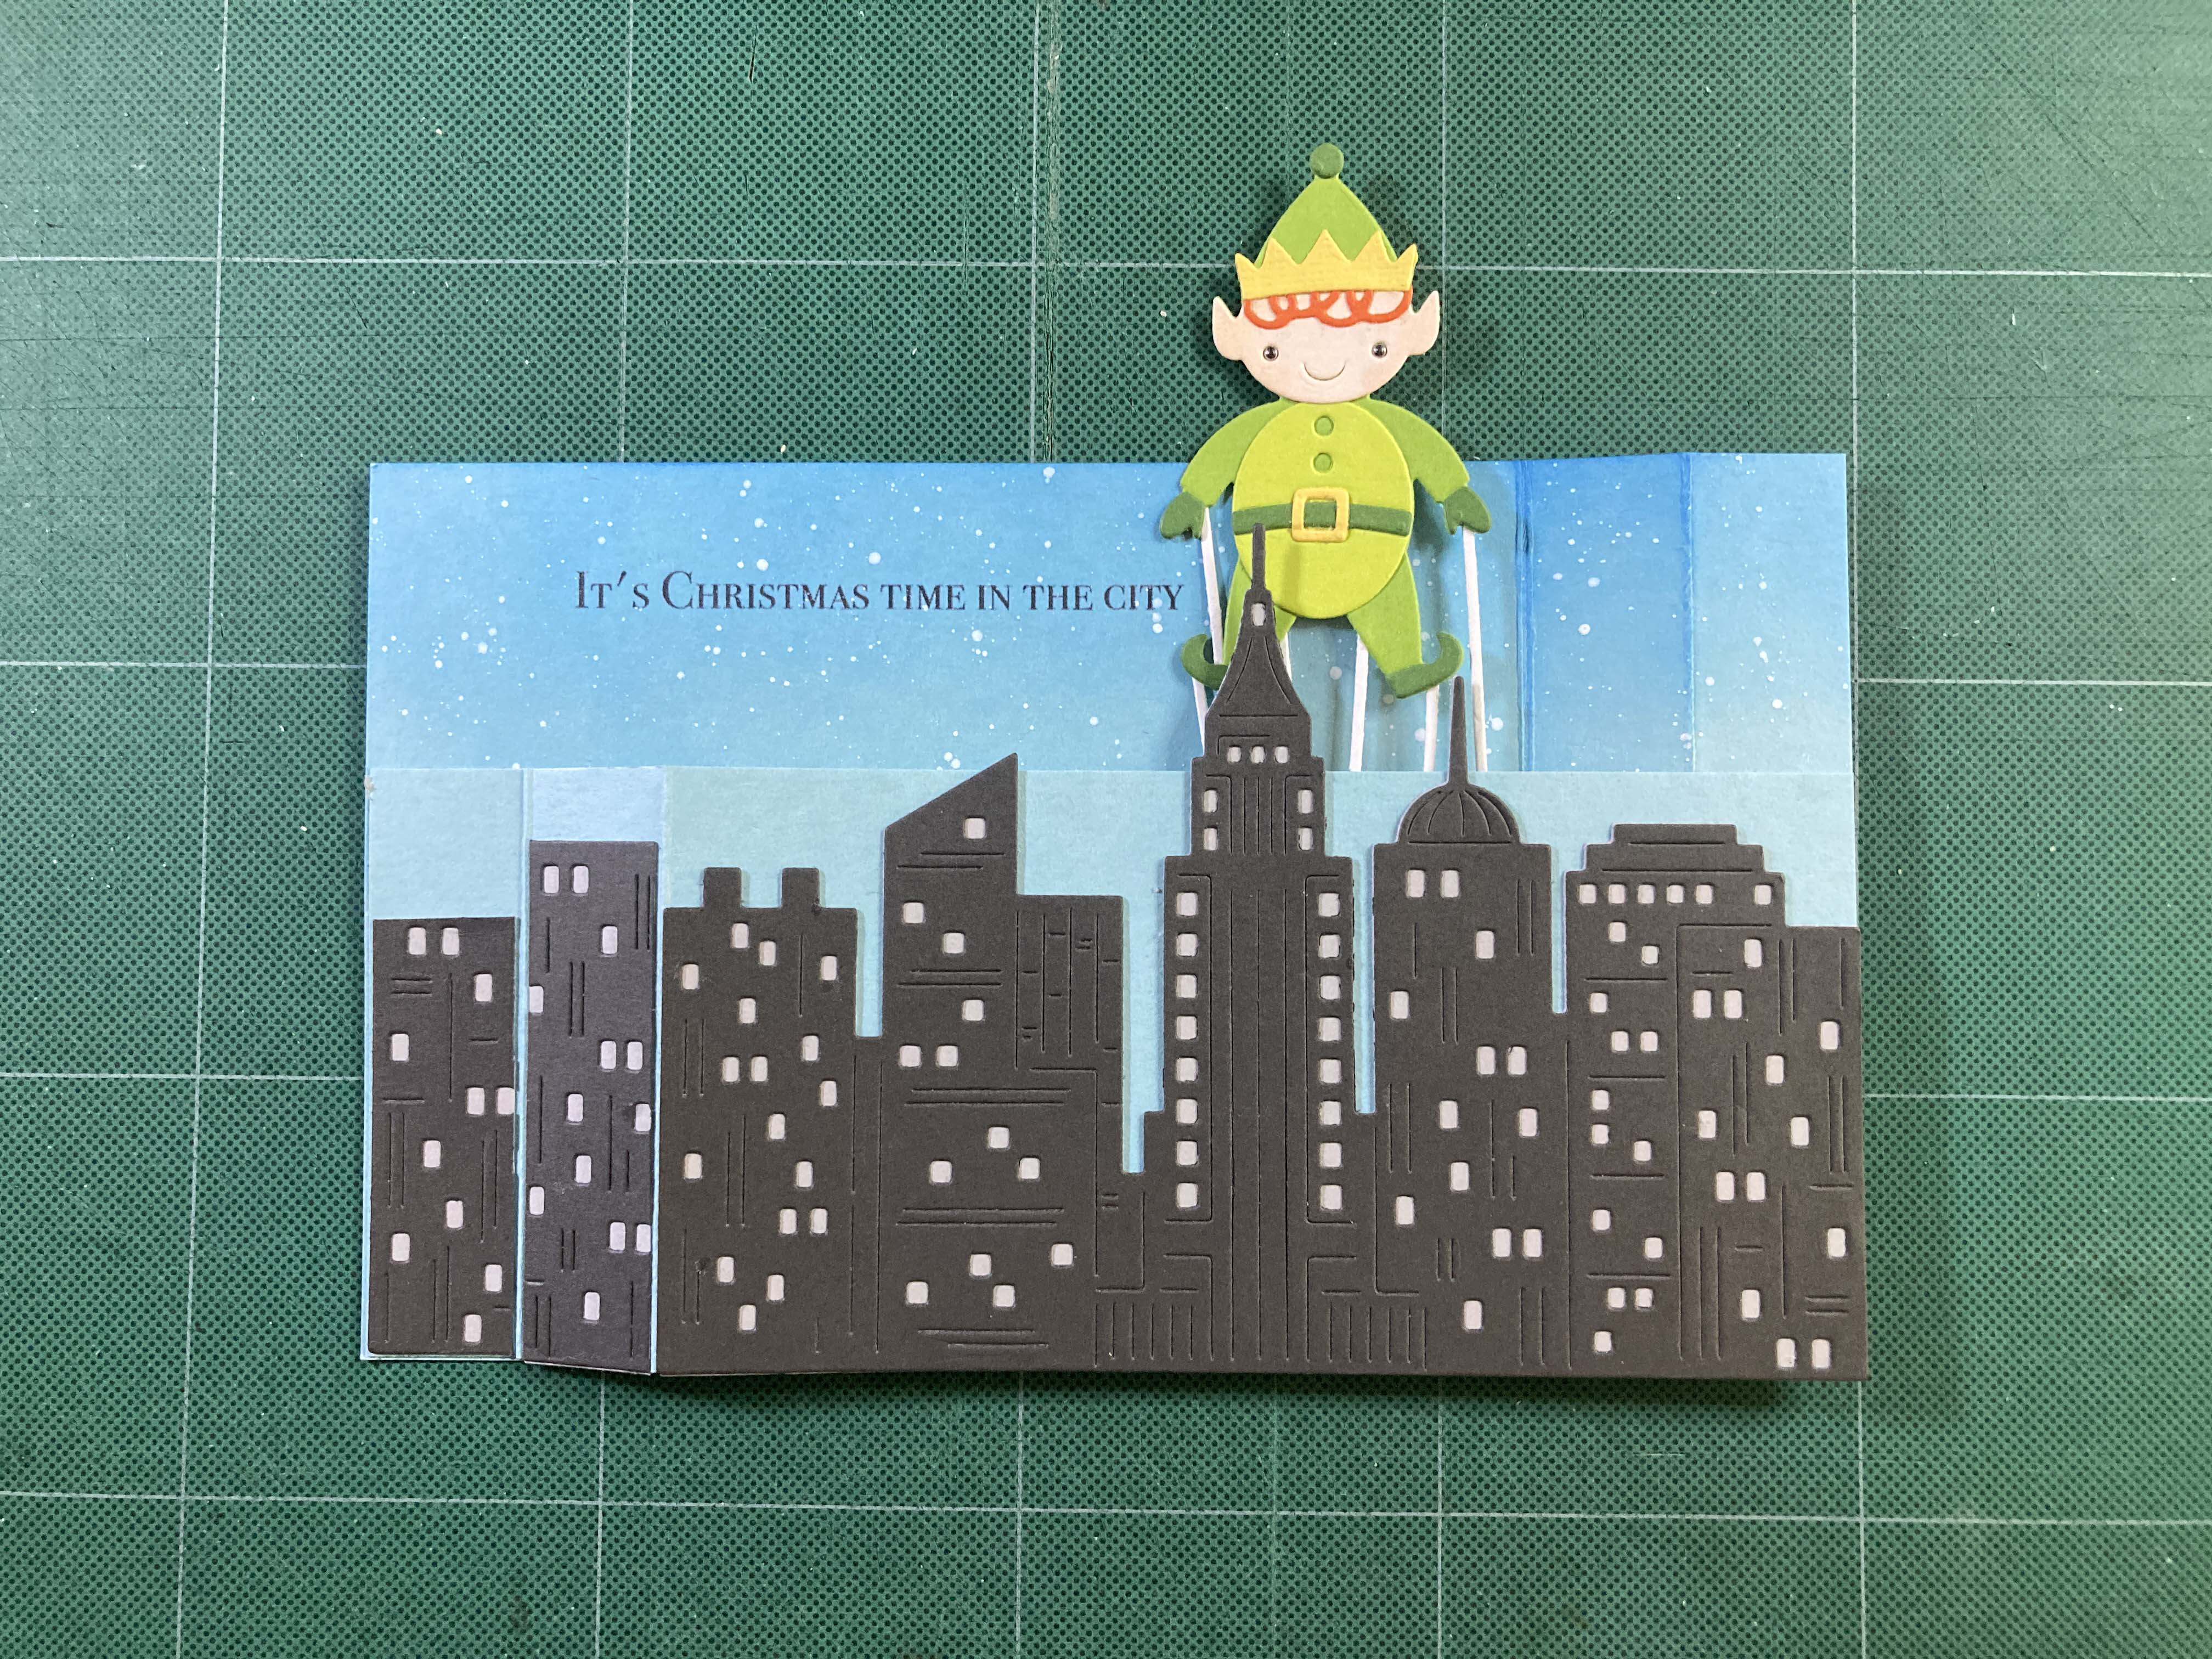
I used Hero Hues Mist card stock for the front and back pieces. I ink-blended HA Blue Hawaii Reactive ink on the top of the background panel, added some snow spatters with Dr. PH Martin’s Bombay White India Ink and stamped the sentiment in place before scoring and making the z-folds. Then I glued the right side of the front piece to the right tab of the background piece. My big difference here is I attached the wiper mechanism to the fold on the right side of the card where Hero Arts attaches their mechanism to the fold on the left side of the card. That is one of the most interesting things about wiper cards – you can create a wiper that pops up or pops down or pops sideways, the options are almost endless!
I assembled the Elf from the add-on die set using Color Wheel card stock in Fern, Rainforest (background), and Peridot with some Yellow and Red from my stash. I cut his face from White card stock, added color with Alcohol markers, and when complete, glued him in place on the acetate flag. I added strings to the back of the Elf, using them to camouflage the edges of the acetate flag, and sandwiched all that with a blank Elf die-cut glued on the back. Once I verified that the wiper was working properly, I glued the left tab on the front piece to the left side of the background. Now all we have to do is decorate the front.
The City Skyline Die Set cuts a 5.5″ long skyline – just under 4″ tall. I cut the background from Light Grey card stock and the foreground (with the windows) from Dark Grey card stock and glued them together and then to the front panel of the card. I die-cut more of the right side of the skyline die to create a couple of buildings to add between the folds on the left side of the card – so when open, the buildings continue. A fairly simple and straight-forward assembly of this interactive wiper card!
However, I don’t particularly care for the straight line of “sky” (the front piece) running across the card. And I have a slightly different scoring set-up that adds little tabs to the right and left of the card for pulling. Instead of scoring at 3/4″ and 3/4″ I score at 1″ then 3/4″. That doesn’t change the original dimensions of the card stock or the finished dimensions of the whole card – it just adds a quarter inch tab on each side. I also want to try a portrait wiper card:
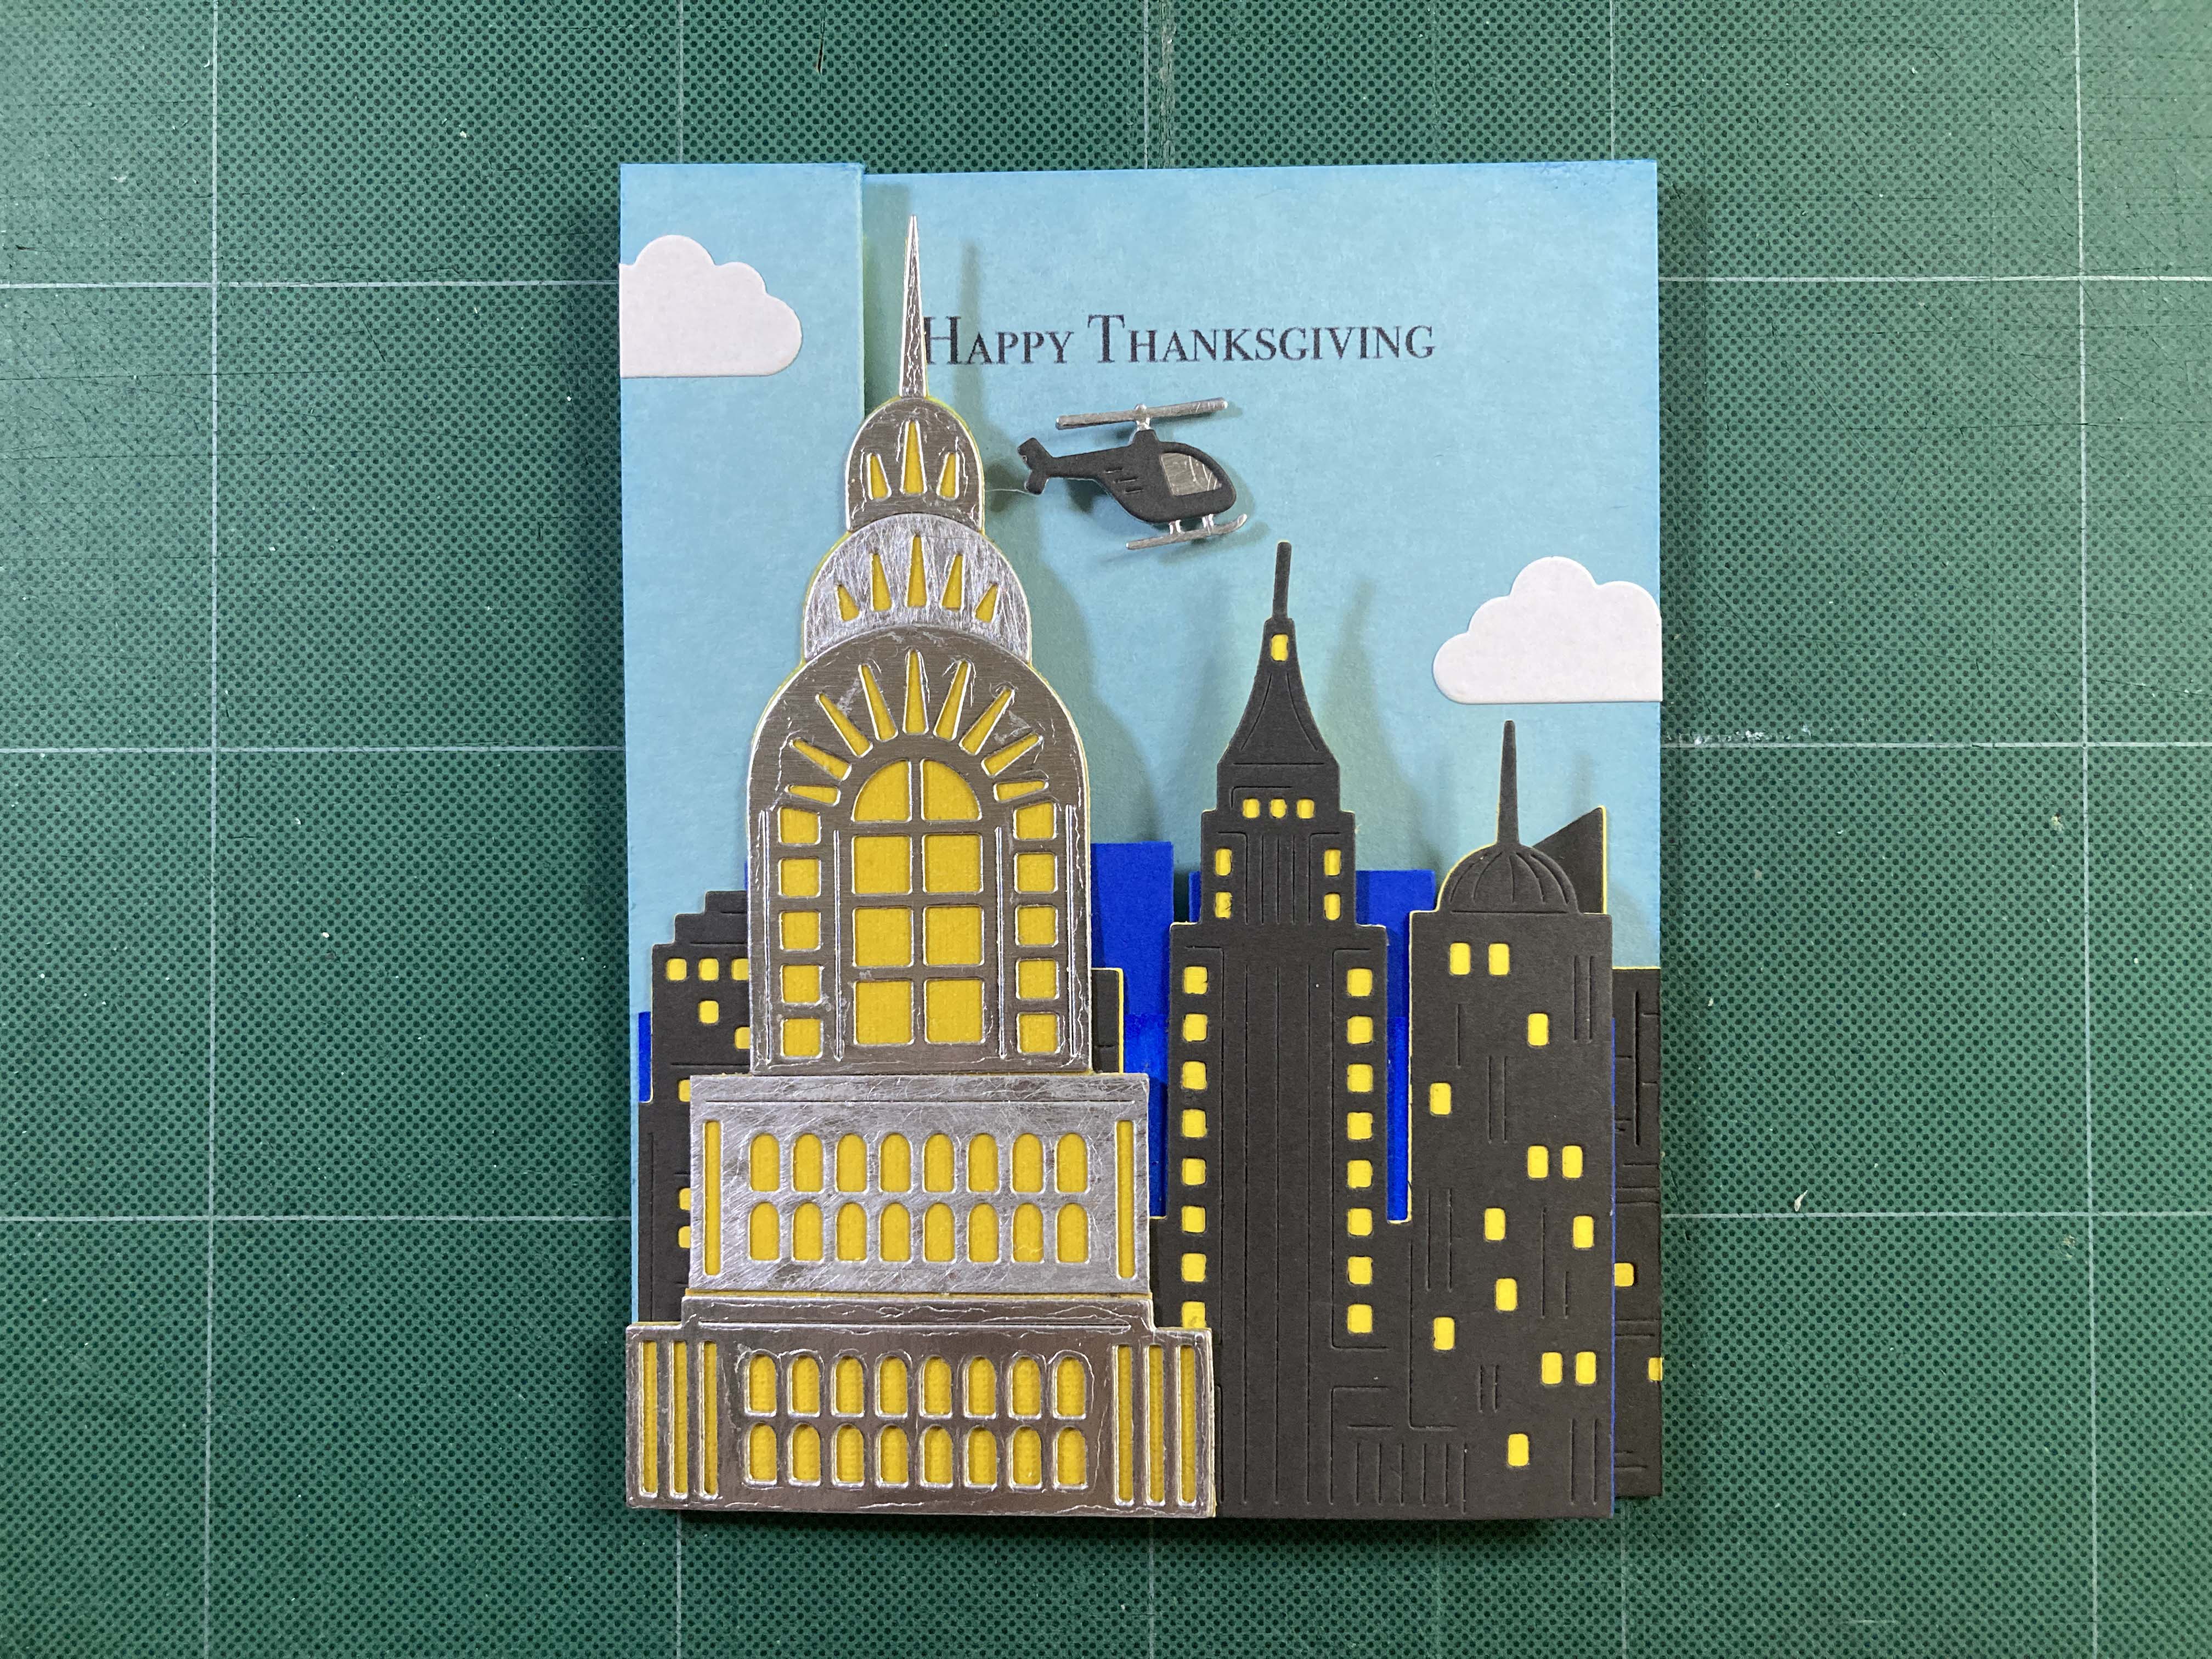
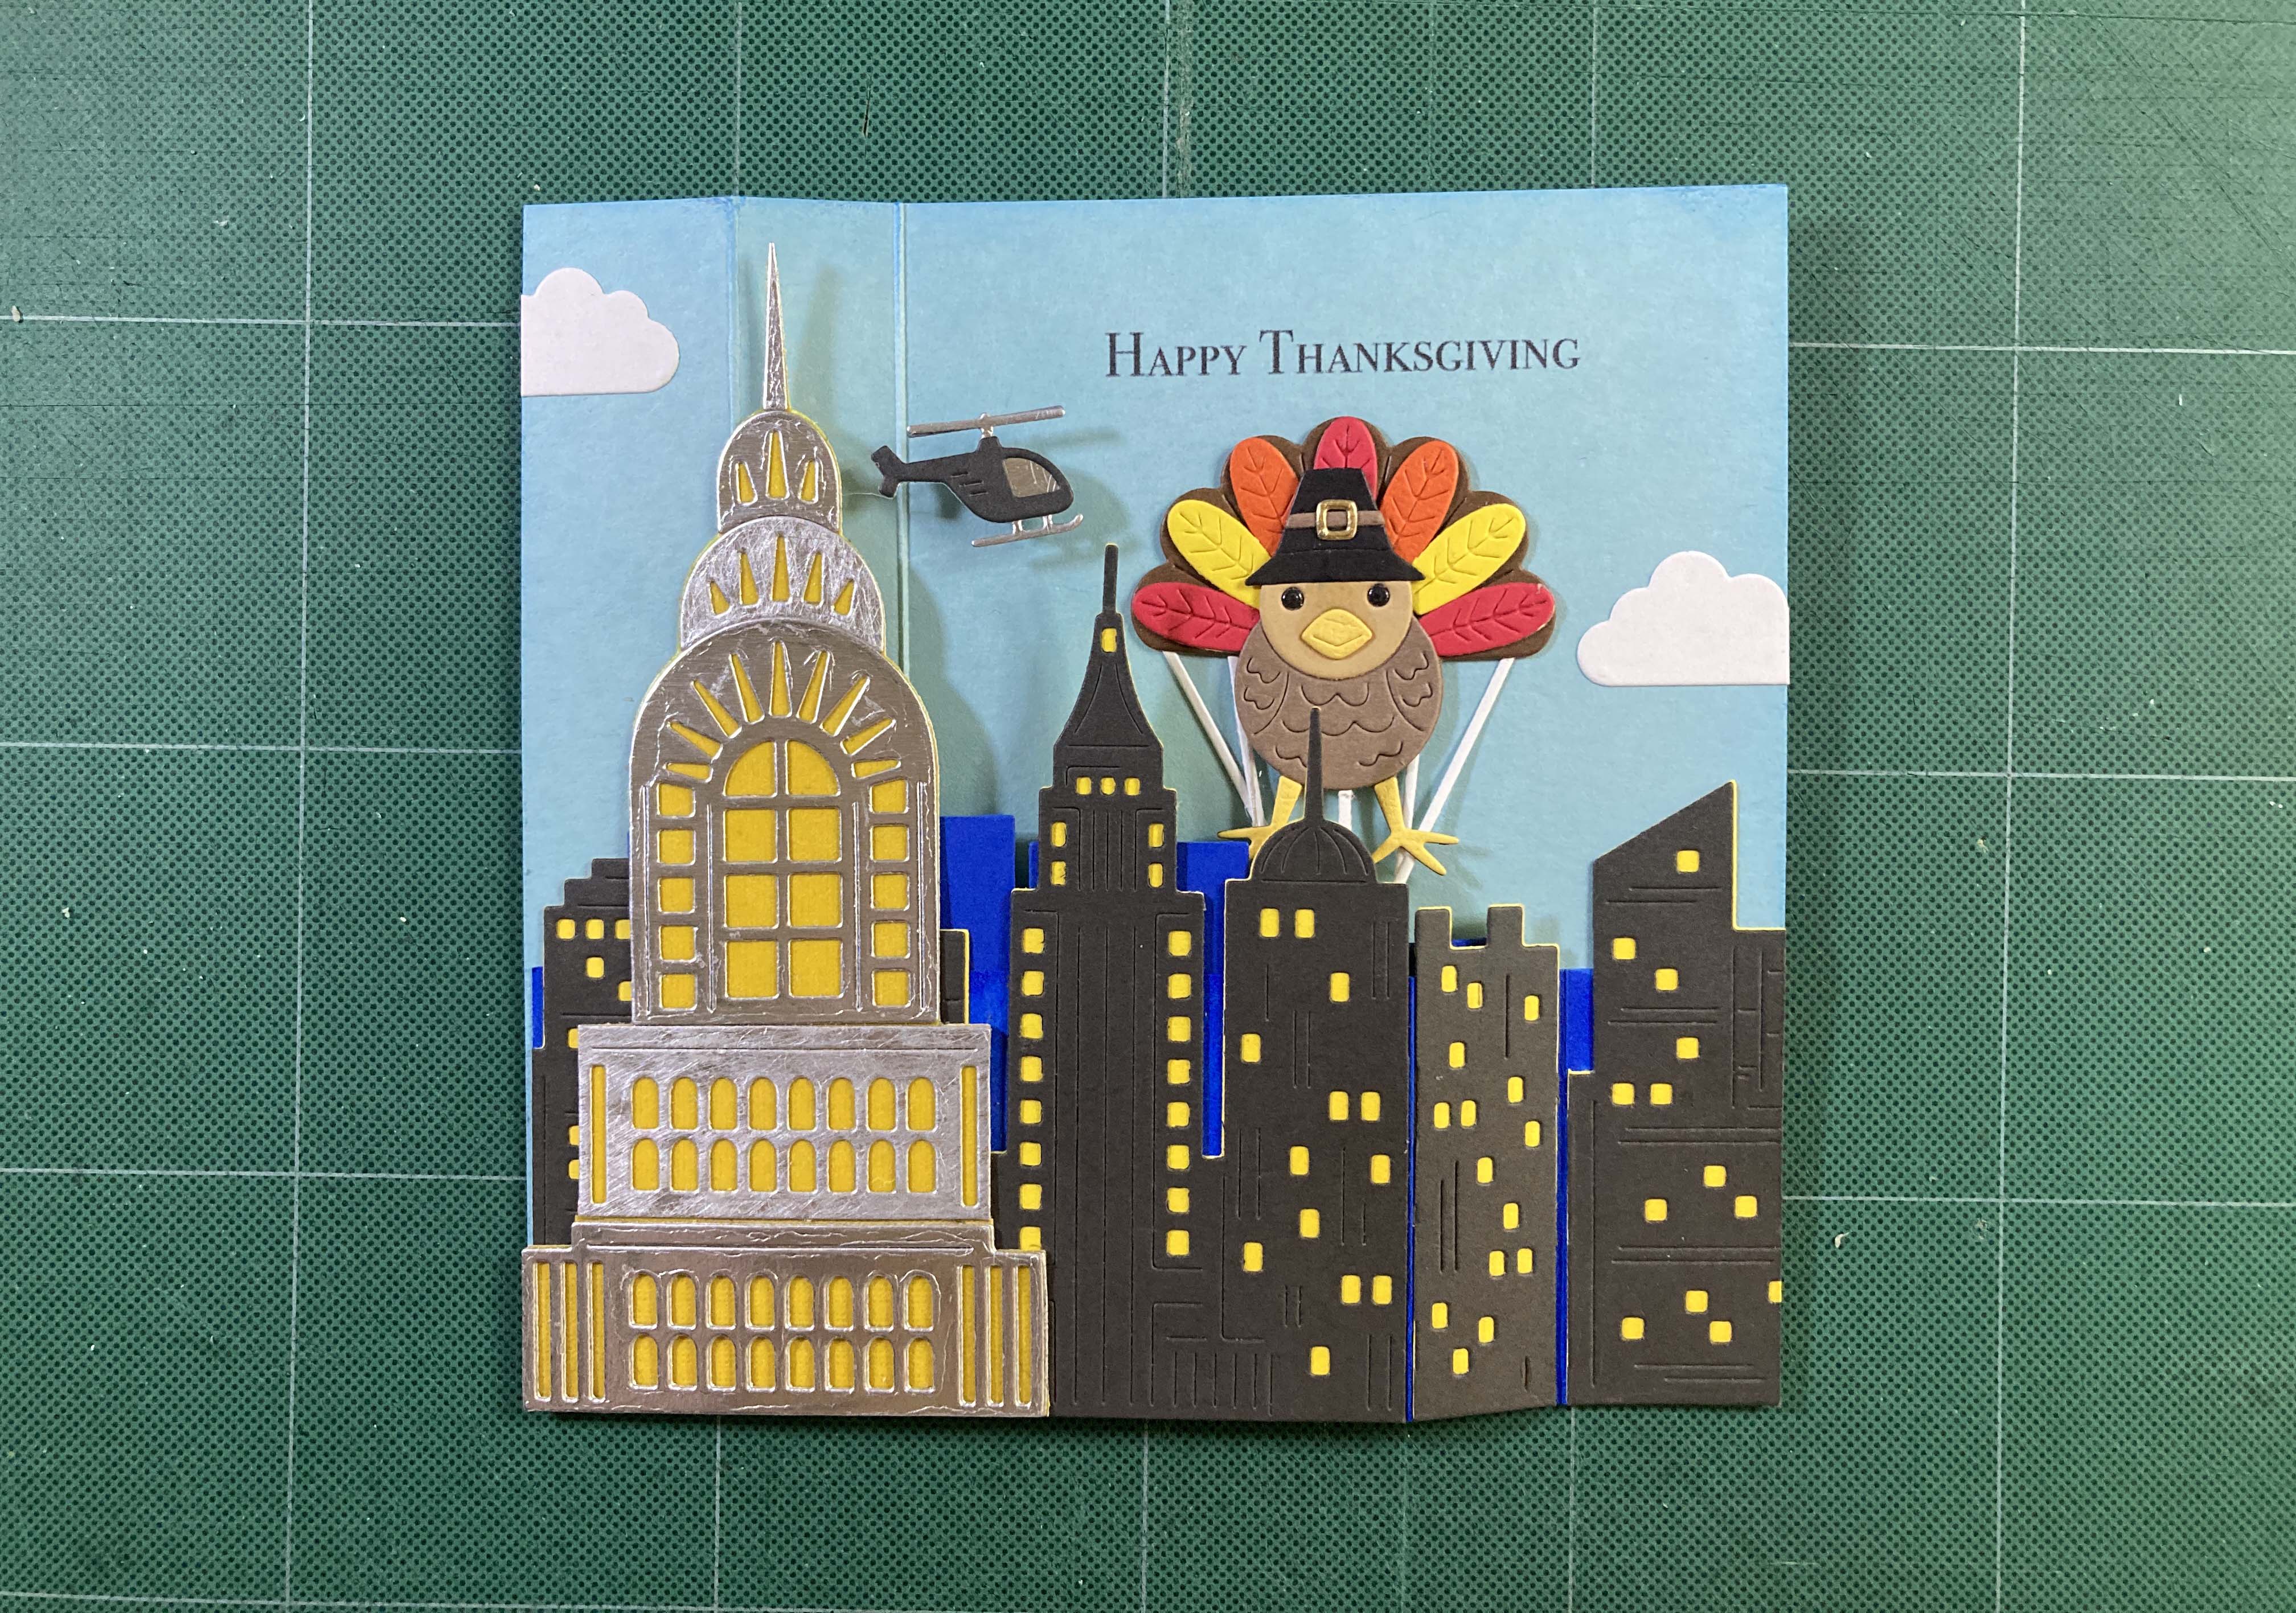
Instead of cutting my front piece from matching card stock at 2.75″ x 5.75″ I used some Dark Blue card stock from my stash and I die-cut that with the skyline background die – stopping the cut before the end to make the die-cut 1/4″ longer (5.75″). Then I cut off the identifying tops of the towers and scored the right side at 1′ then 3/4″ to make my z-fold – you can see the quarter inch tab peeking out on the right side of the card. I die-cut another skyline from Dark Grey and Yellow card stocks and with a little trimming here and there, glued that on top of the Dark Blue die-cut. Remember to keep the folds on the right free to bend! Secret Tip: the buildings do not go completely behind the Chrysler Building.
I die-cut the Chrysler Building from Silver Card stock and lightly sanded the bottom piece, and the medium arch piece and the tower. Then I decided I wanted it a little taller, so I die-cut another bottom piece, and trimmed the first (sanded) bottom piece a little narrower (cut off two of the die-cut verticals). Attach them all together for a taller tower! I partially die-cut the background from some yellow card stock stopping before the bottom so I could add my extra floors. I trimmed that to fit, and then covered the Yellow card stock with some Yellow Glassine (kite) paper for a touch of luminescence in the windows.
The background is Mist card stock again scored and z-folded on the left with the sentiment and clouds added. The Turkey is assembled from card stocks in my stash (I try to use thinner card stocks for multi-layered assemblages) and the action piece is glued to the fold on the right side of the card. Because a portrait card is narrower than a landscape card, you can’t get as much height out of your pop-up but it still works perfectly well! For a final touch, I die-cut the helicopter from Silver and Dark Grey card stock, glued those together and did some partial die-cutting of Acetate with the helicopter background die and stopped the cut just before the tail. I trimmed the rest away to make a clear tab that’s glued to the back of the building. I love that the helicopter backs away as the Turkey balloon rises! That’s Tom Turkey!!
Of course you don’t have to make a wiper card.. These die sets will make lovely un-interactive cards as well!
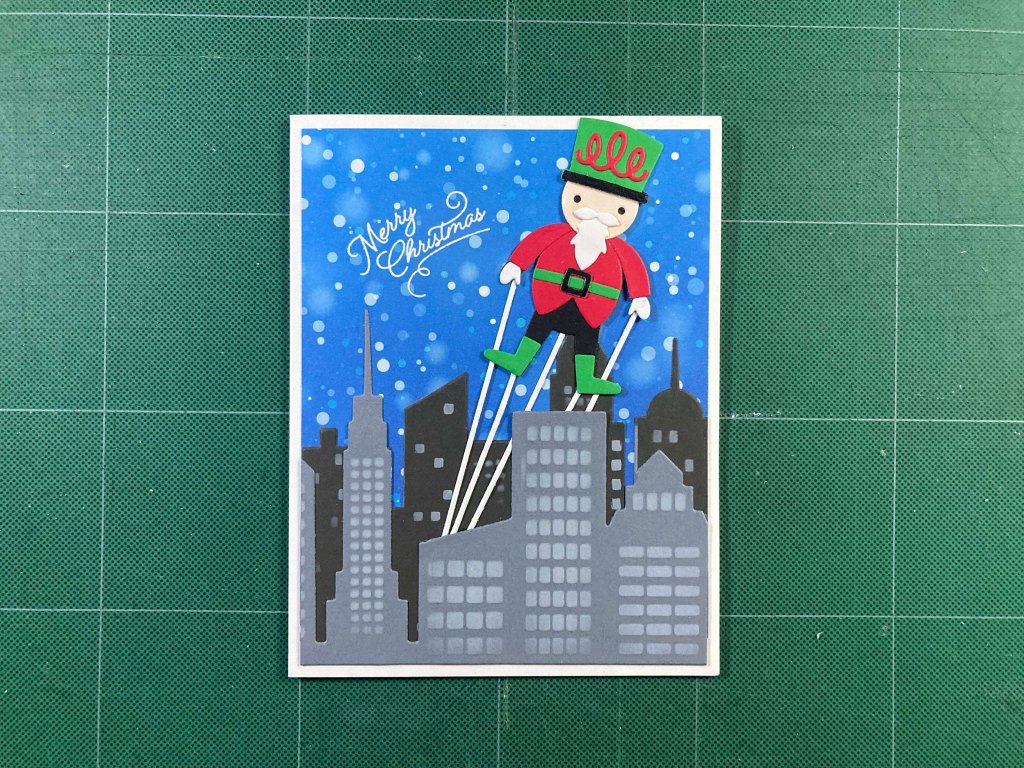
Here’s the cute Nutcracker from the Big Fun Die Set! Now, I do have other “skyline” dies in my collection. The light grey card stock is die-cut with an old Darice Cityscape Background Cut & Emboss die – I didn’t emboss, but I did ink blend Unicorn White ink through the window openings directly on to the Grey card stock. I die-cut the HA City Skyline background die from Black card stock, and die-cut the front window piece from plain card stock. Then I used the window die cut to stencil Unicorn White ink onto the Black die cut – Looks just like the front row of buildings!.
The background snowy pattern paper from my stash is cut to 4″ x 5.25″ and glued to a White card base. Both building strips are trimmed to 4″ wide and the Black layer is glued flat to the card front. The sentiment is one of my favorite small Merry Christmas stamps from a way old My Paper Pumpkin kit stamped with Versa Mark ink and embossed with White embossing powder.
I assembled the Nutcracker on a Black base with some thinner card stock from my stash (coloring his face with Alcohol markers) and glued strings to his arms and legs and back. I glued him over the black buildings and glued the Grey building strip over the strings. I do love the bright pops of color the balloons provide – especially when teamed up with Black or Grey buildings.
Of course I have other NYC crafty paraphernalia in my stash including this terrific Stamperia New York City Mixed Media Stamp. This skyline appears to be a vintage pic of lower Manhattan on the east side! How perfect!
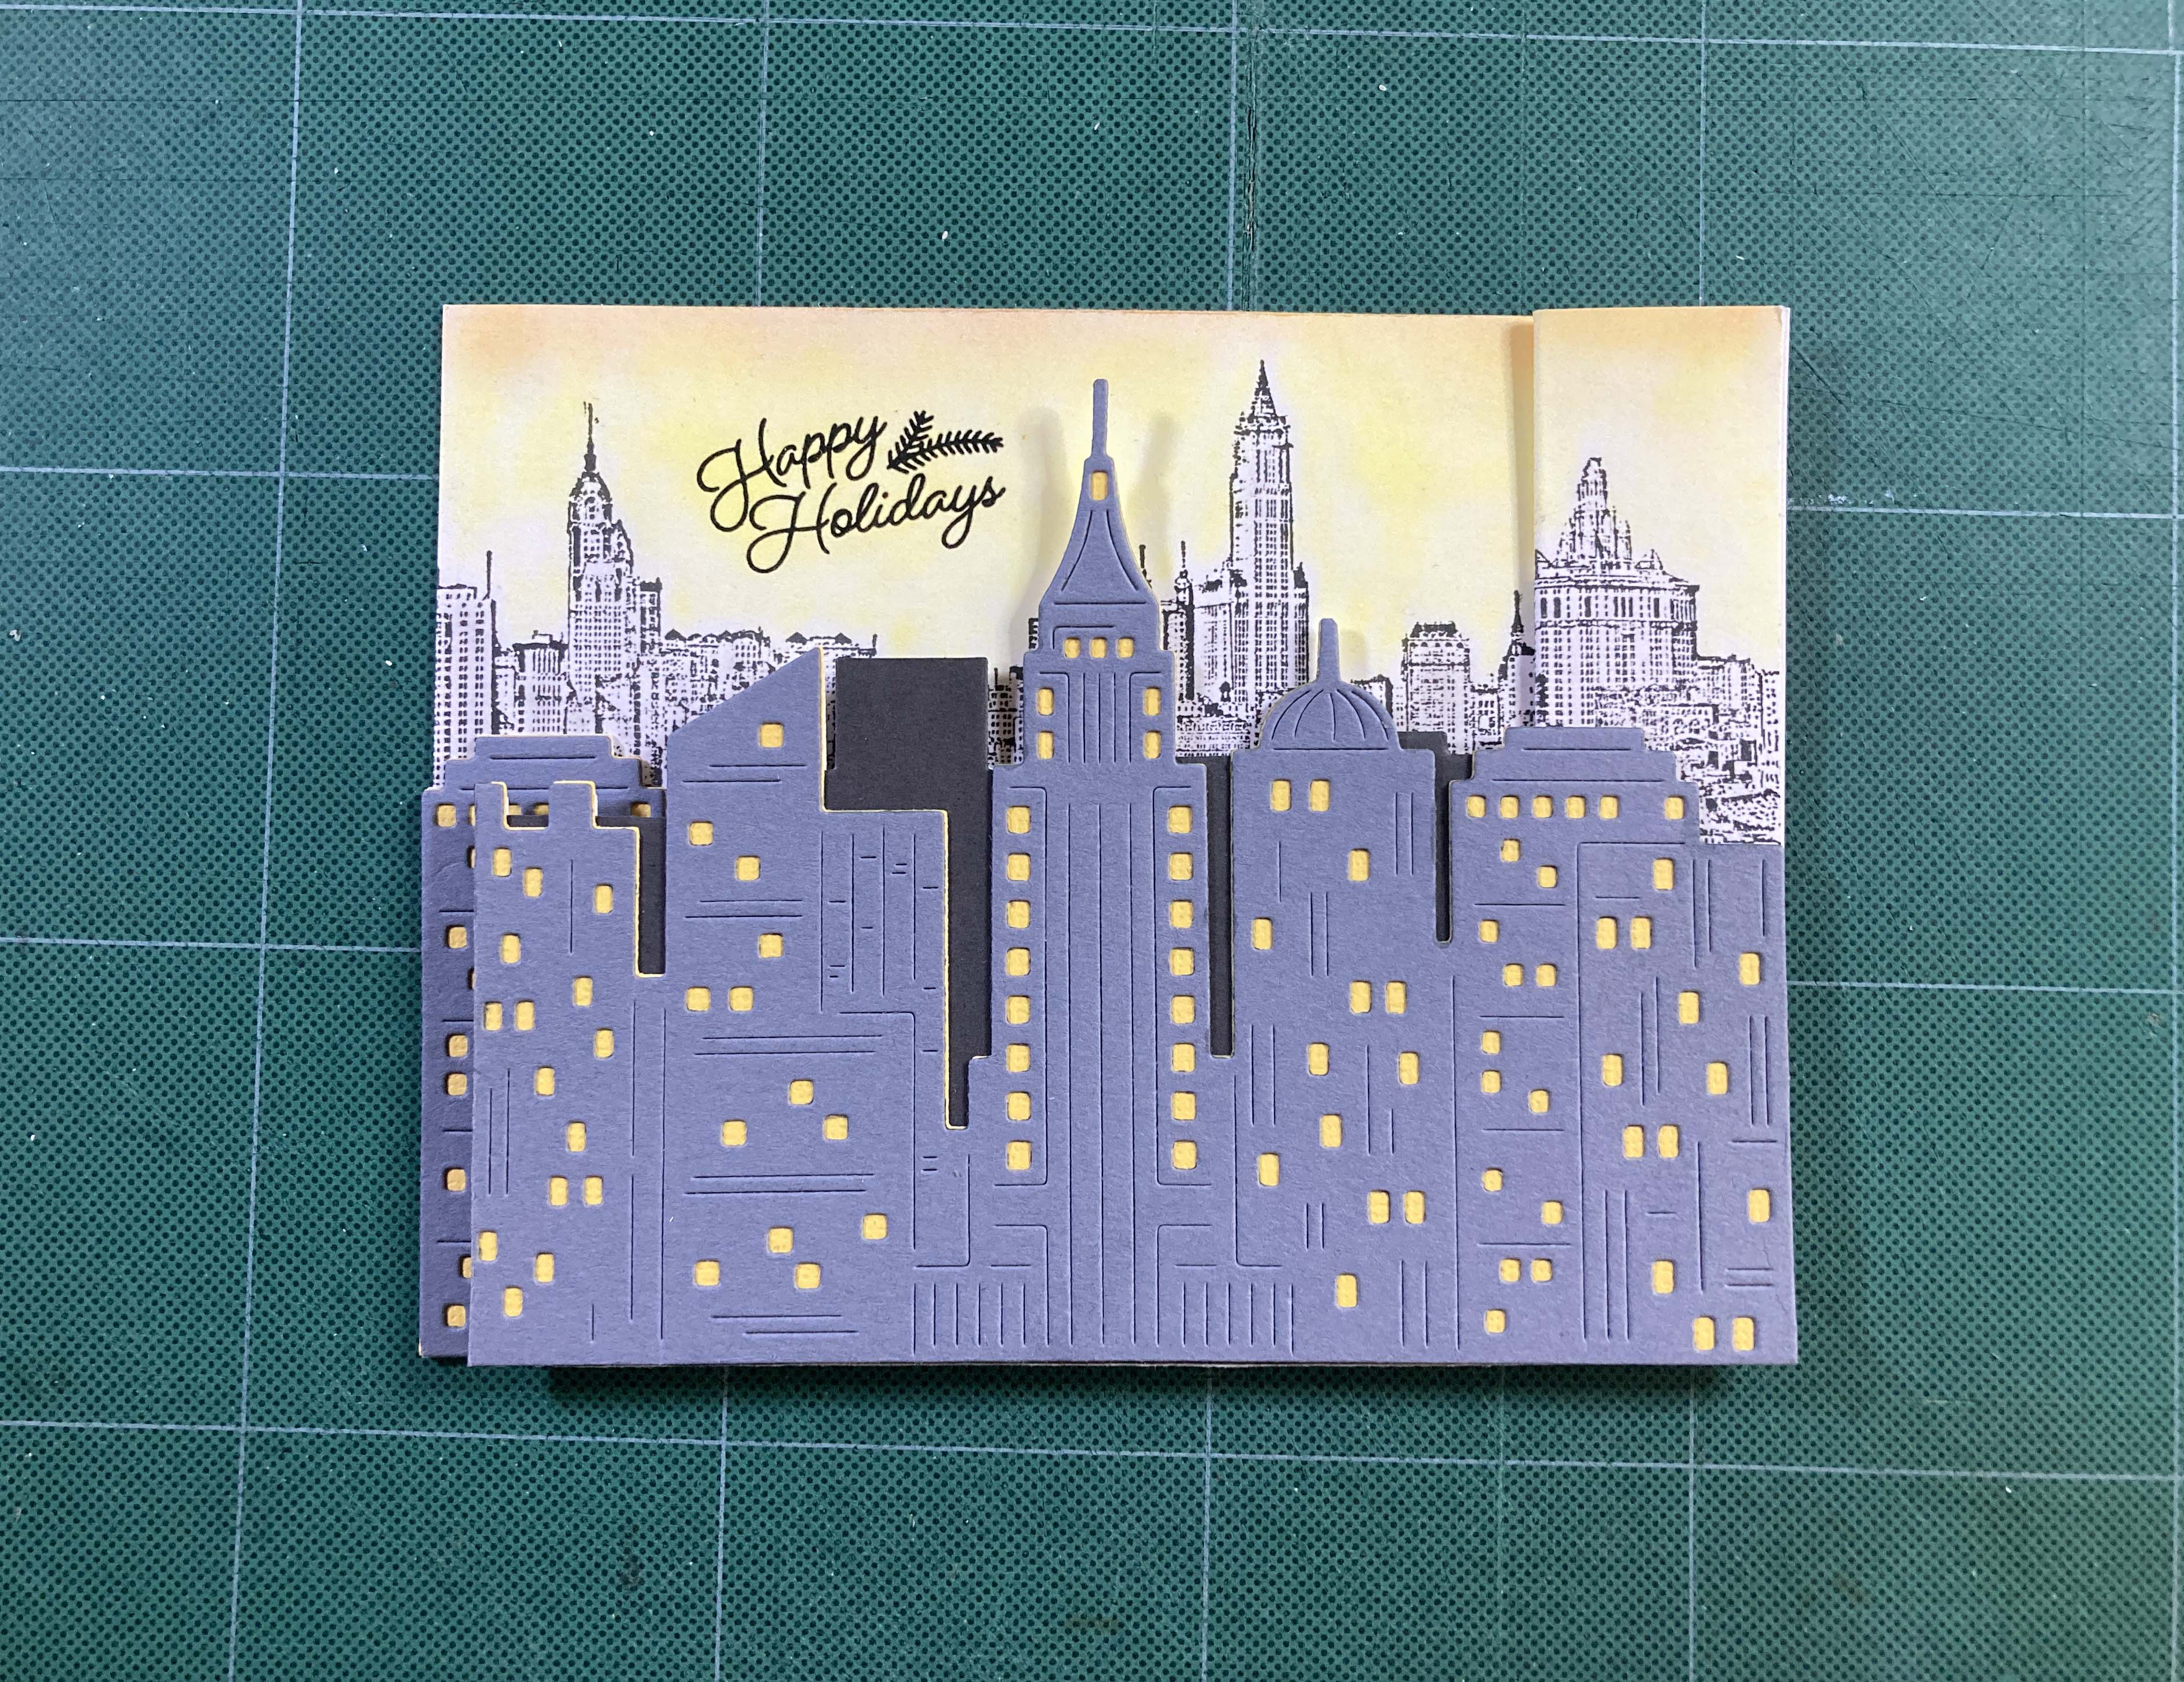
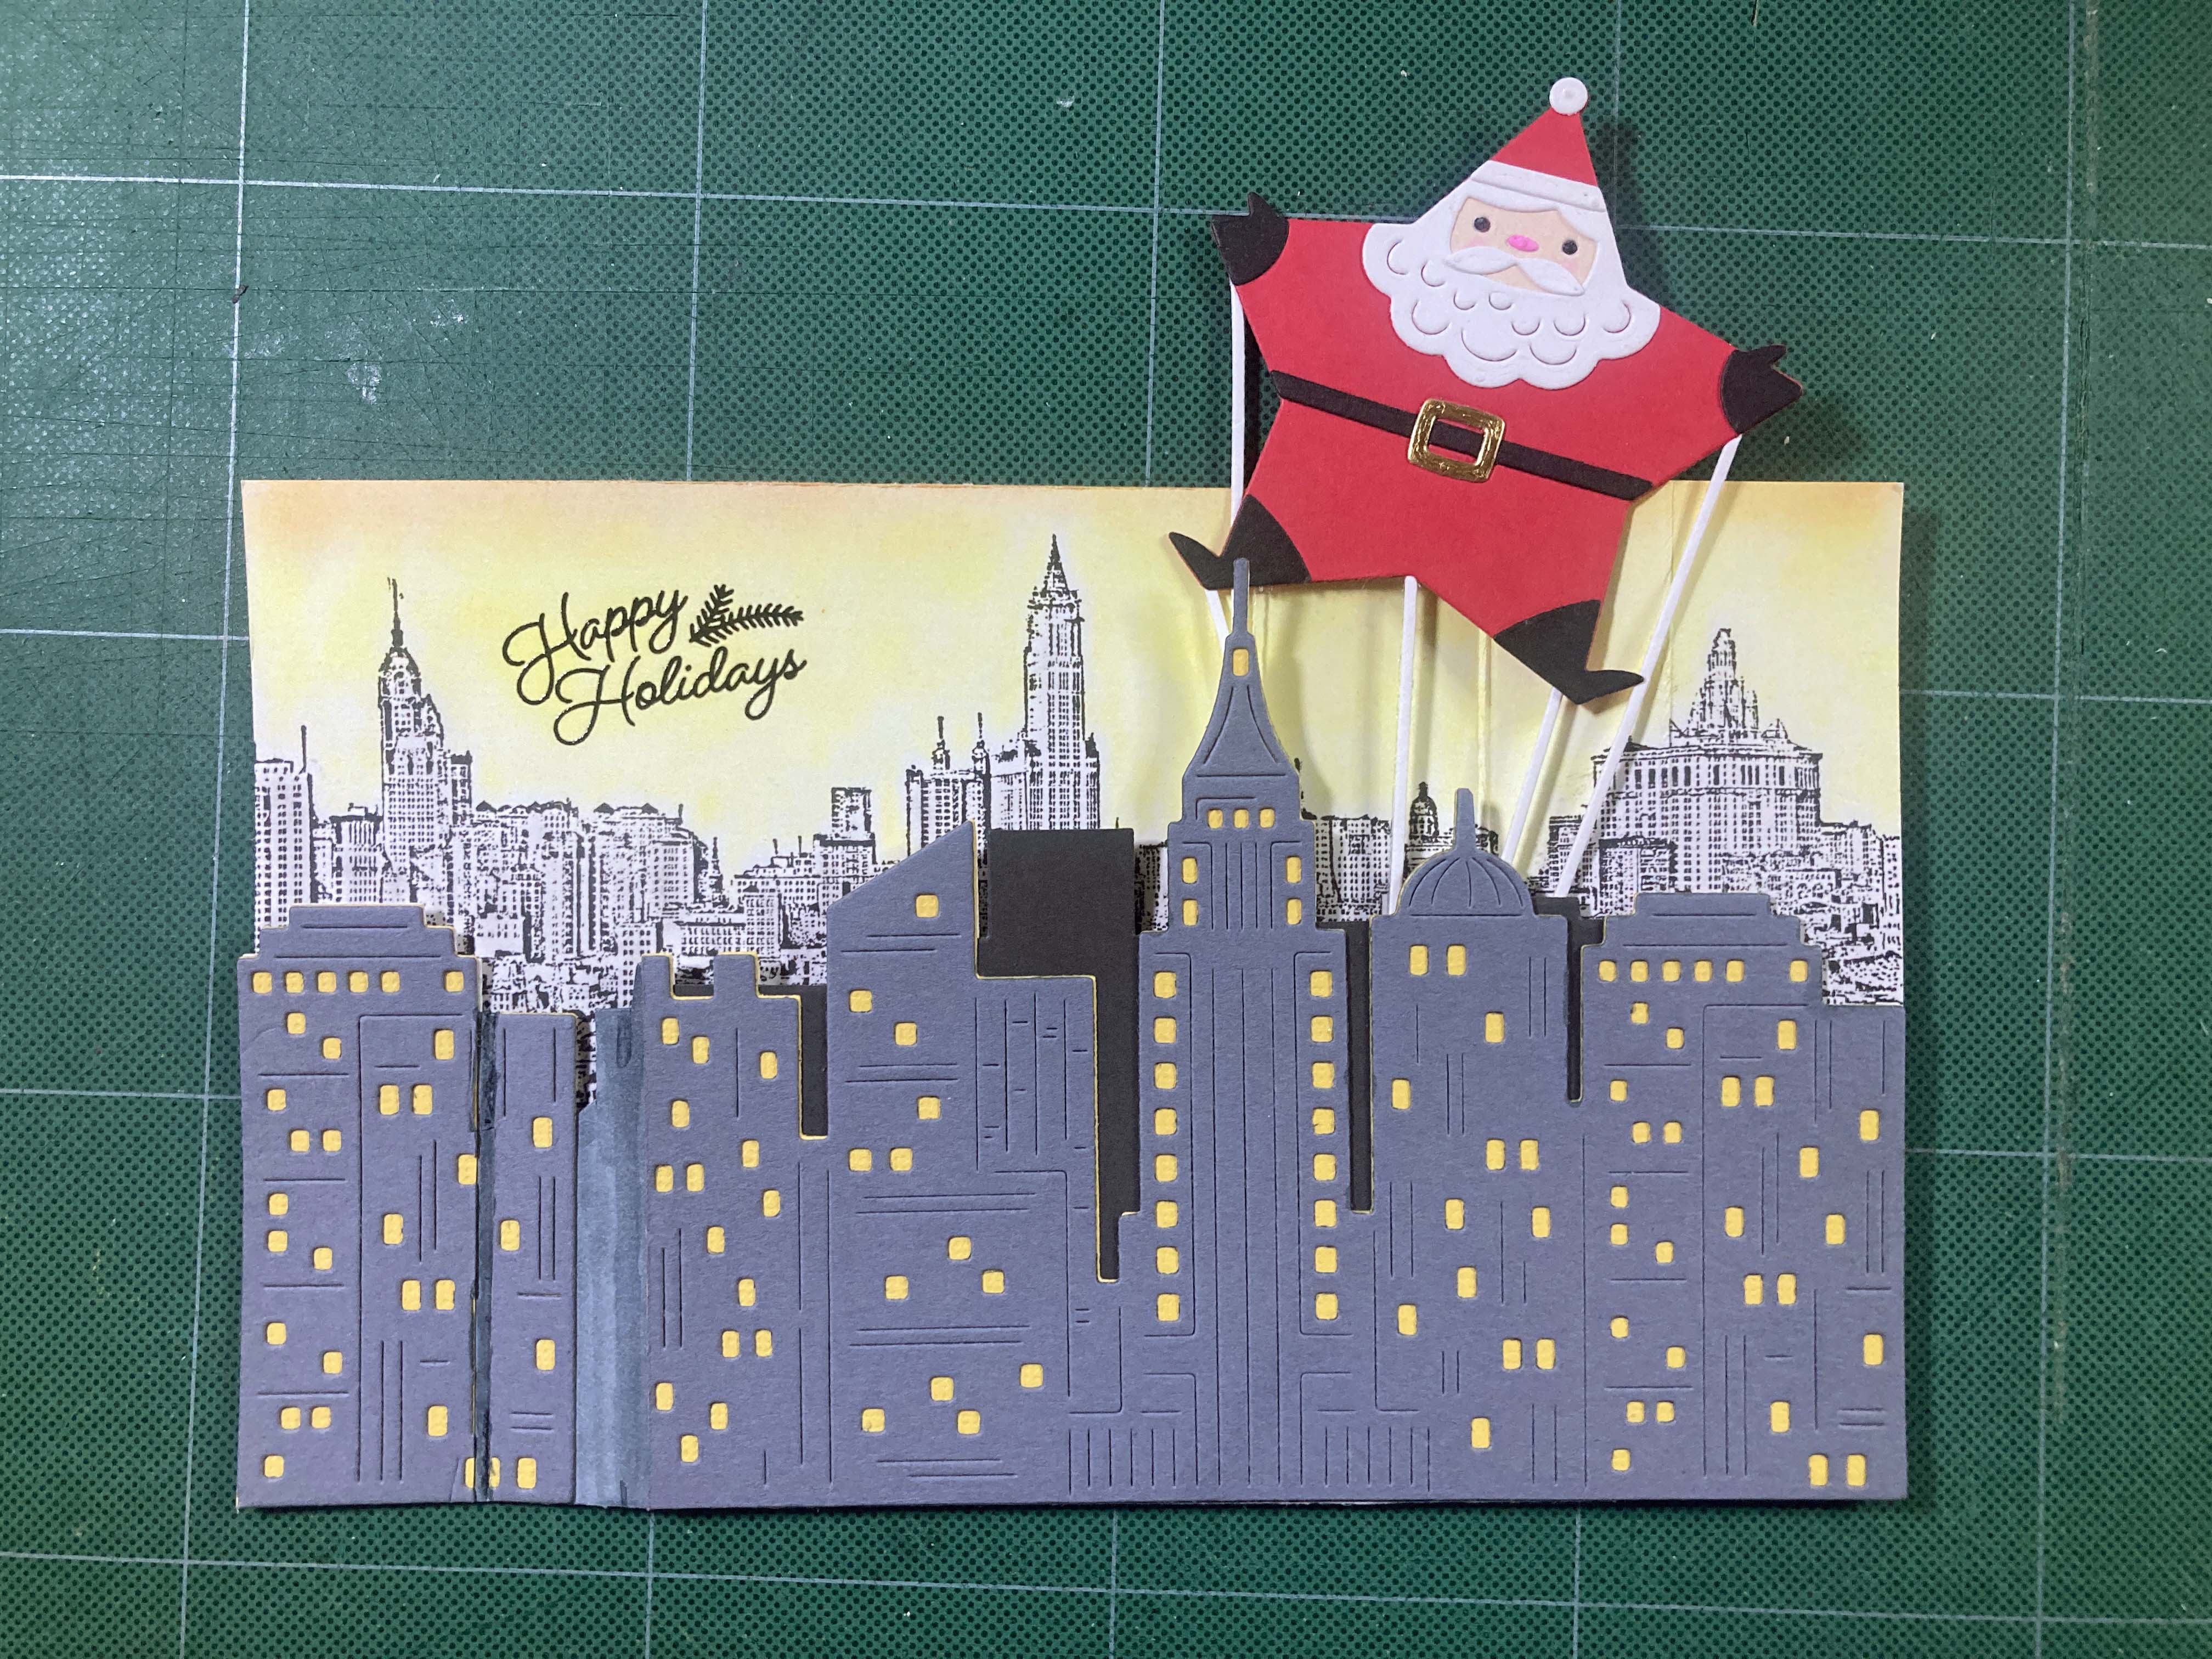
Love that stamp in the background! And it’s 7″ long so it works perfectly on a wiper background! I stamped that on White card stock and used small blending brushes to add a touch of Grey to the buildings and some color to the sky. I stamped and embossed the sentiment as usual and scored the background on the right (1″ from the right side then 3/4″ more) and creased the z-fold. I die cut the City Skyline background die from plain White card stock stopping before cutting it at 5.5″ and then trimming it to be 7″ long. I scored that piece on the left (1″ then 3/4″) and completed the z-fold. Then I die-cut a piece of Black card stock with the same die, cutting off the identifying toppers and gluing that on top of the White piece so it covered all the spaces between the buildings (up to the folds). The tall black building next to the angled roof building is important for balloon cover-up.
Santa is assembled as usual, attached to the acetate flag, strings added (conveniently camouflaging the acetate) and the action piece is glued to the reverse fold on the right side. Here’s a pic of where Santa will pop-up:
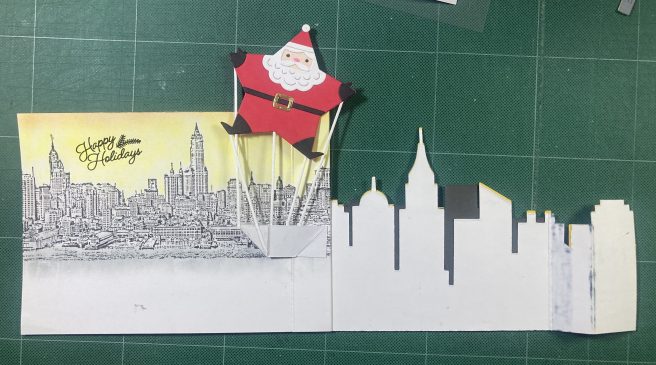
And another showing him in his “hidden” position – note that he stays inside the outer edges of the front skyline piece, and his top “arm” is hidden behind the Black building. I did add another blank Santa star background die cut to sandwich everything together.
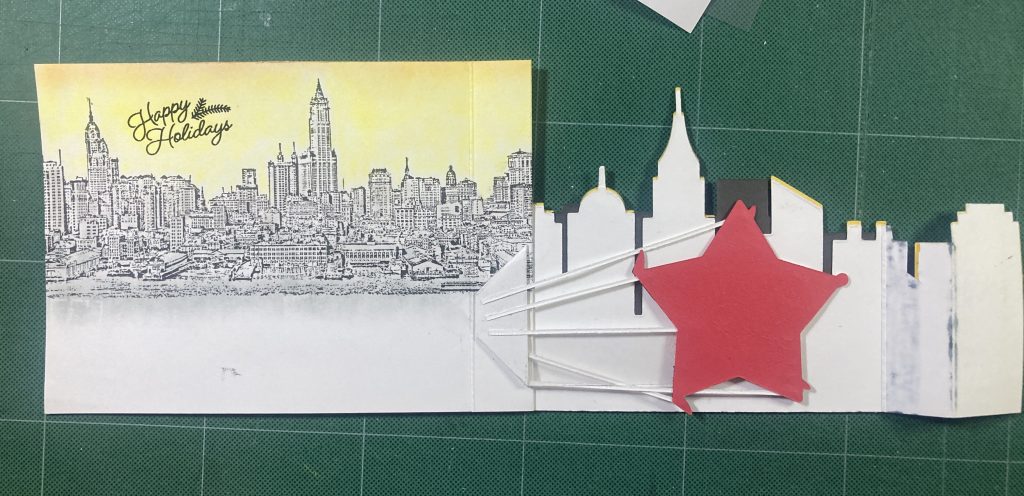
Once the Santa piece was affixed, I glued the tab on the right of the front panel to the left side of the background panel. All that’s left is to add the City on front! Cut from Yellow and Medium Gray card stock, I glued the City Skyline die cut to the front (matching the similarly cut white card base – sandwiching the Black buildings between) and trimmed off a quarter of an inch on the left side. (With my adjusted score lines, they make the front panel only 5.25″ wide before the folds). I die-cut the right two buildings again from the Skyline die and trimmed them to fit on the folds.
Using that background stamp added so much dimension to this cityscape card! I was lucky that the scale of all my NYC stash seemed to match this new collection quite well! And it’s hard to resist that star-shaped Santa balloon!
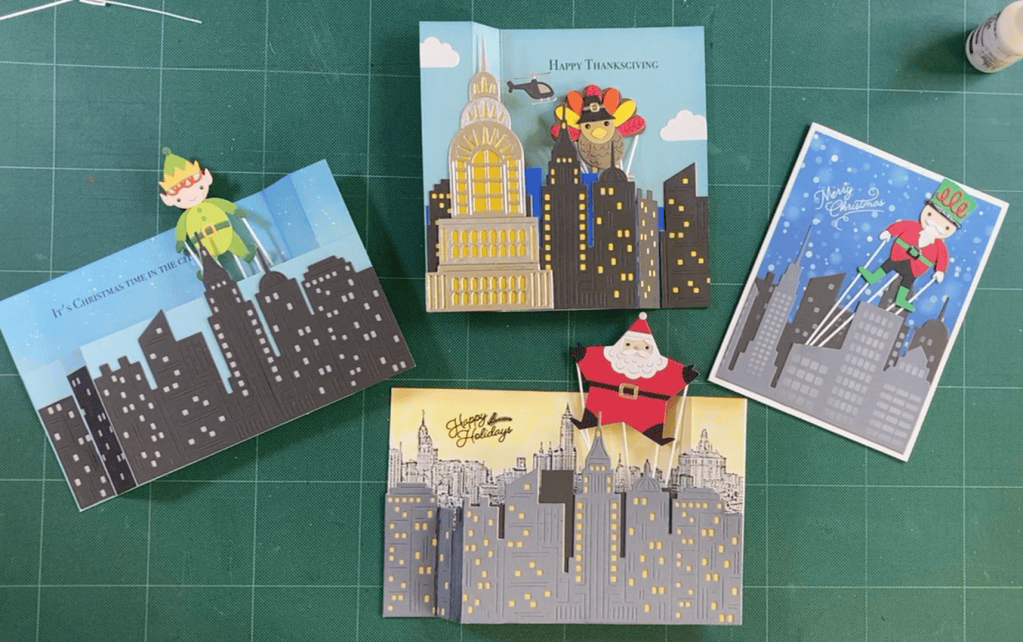
I had a great time creating these holiday cards… It was enlightening to play with the whole “wiper” card pop-up and I do think the action die-cuts are great to have in your stash! If watching the Macy’s Thanksgiving Day Parade first thing on Thanksgiving morning is a tradition in your household, you might want to grab some of this collection to add to your own stash and share in some joyful balloon action! If you do go shopping at Hero Arts please use my links listed below! I do make a small commission from anything you buy using these links, and it is genuinely appreciated! Thank you!
PARADE DAY COLLECTION:
City Skyline Die Set: https://www.jdoqocy.com/click-101337132-16962401?url=https%3A%2F%2Fheroarts.com%2Fproducts%2Fcity-skyline-die-set
On Parade Stamp & Cut: https://www.dpbolvw.net/click-101337132-16962401?url=https%3A%2F%2Fheroarts.com%2Fproducts%2Fon-parade-stamp-cut-set%3F_pos%3D1%26_psq%3Don%2Bparade%26_psid%3D4e1e74463%26_ss%3De
In the City Stamp & Cut: https://www.dpbolvw.net/click-101337132-16962401?url=https%3A%2F%2Fheroarts.com%2Fproducts%2Fhero-arts-in-the-city-stamp-cut-set%3F_pos%3D25%26_fid%3D97ea978d8%26_ss%3Dc
The Holiday Season Stamp & Cut: https://www.dpbolvw.net/click-101337132-16962401?url=https%3A%2F%2Fheroarts.com%2Fproducts%2Fthe-holiday-season-stamp-cut-set%3F_pos%3D2%26_psq%3Dthe%2Bholiday%2Bseason%2Bstamp%26_psid%3D0022ca59f%26_ss%3De
Winter Words Letterpress & Foil & Cut: https://www.dpbolvw.net/click-101337132-16962401?url=https%3A%2F%2Fheroarts.com%2Fproducts%2Fwinter-words-letterpress-foil-cut%3F_pos%3D1%26_sid%3Da30ec94cc%26_ss%3Dr%26_fid%3D1816919f7
Big Fun Add-On Die Set: https://www.anrdoezrs.net/click-101337132-16962401?url=https%3A%2F%2Fheroarts.com%2Fproducts%2Fbig-fun-add-on-die-set%3F_pos%3D1%26_psq%3Dbig%2Bfun%2Badd-on%26_psid%3D6ff8e2c25%26_ss%3De
Parade Day • I Want It All Bundle: https://www.dpbolvw.net/click-101337132-16962401?url=https%3A%2F%2Fheroarts.com%2Fproducts%2Fhero-arts-parade-day-want-it-all-bundle%3F_pos%3D24%26_fid%3D97ea978d8%26_ss%3Dc
Thank you so much for sharing your time with me today. It is truly appreciated! If you enjoyed this post, please click the Like Star at the bottom of the page, and if you wish to be notified when a new post comes out, just click the Follow Me button at the top of the page. Don’t hesitate to send me a note if you have any questions, comments or just to say Hi!. Do take a moment to Like Me, List Me, Pin Me, Post Me – share this post with all your crafty friends -especially those who haven’t decided on their Holiday cards for this year! – And remember… Don’t run with scissors! As always, I send You and Yours Love and Light and Happy Crafting!!
DISCLOSURE: This site contains some affiliate links to products. I may receive a commission for purchases made through these links (at no cost to you). As an Amazon Associate I earn from qualifying purchases. Thank you!