Hello Folks! HAPPY NEW YEAR!! And a big WELCOME BACK to the new Hero Arts My Monthly Hero kits! Hero Arts has retired their assorted monthly subscription kits and I am pleased as punch to get back to the My Monthly Hero! I’ll have more information about the subscription changes towards the end of this post but let’s dig right into this month!
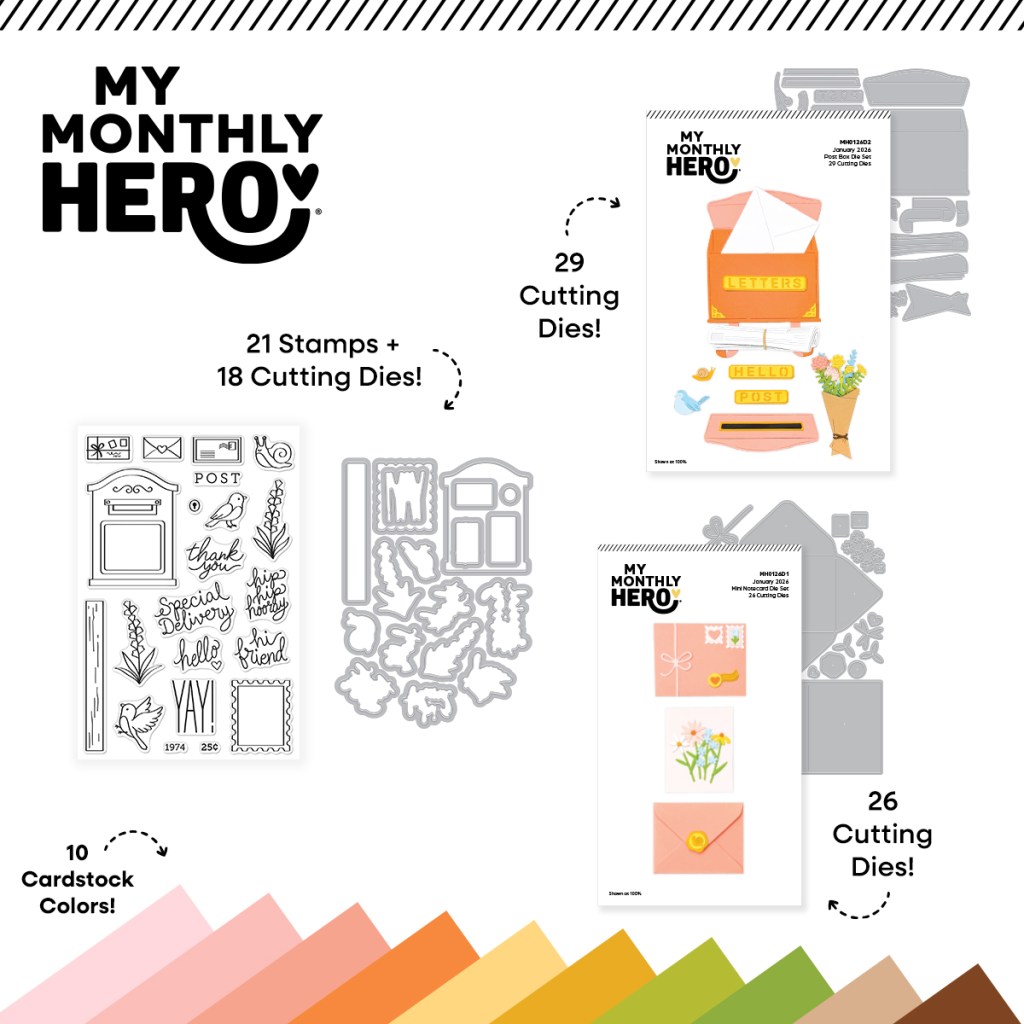
| My Monthly Hero Includes: • Mini Notecard Die Set • Post Box Die Set • Special Delivery Stamp & Cut • 10 Sheets of Cardstock- 1 of each color, 5.5″ x 8.5″ (Chiffon, Bellini, Coral, Carrot, Beeswax, Tuscan, Peridot, Rainforest, Fawn, Truffle) |
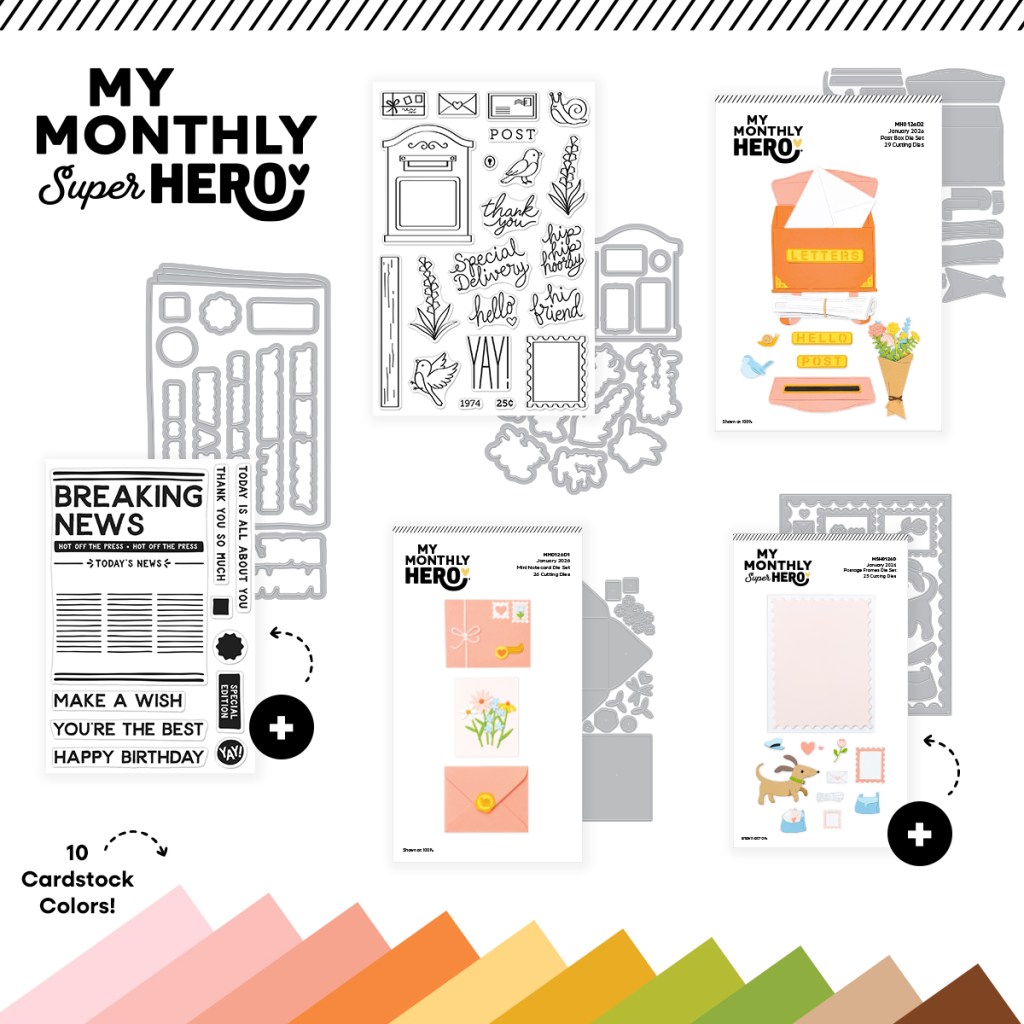
| My Monthly SUPER Hero Includes everything in the regular MMH above, plus: • Front Page Stamp & Cut • Postage Frame Die Set |
Much like the last year (or so) of the original My Monthly Hero, we are now offered two levels – The My Monthly Hero kit and the My Monthly Super Hero Kit (love the re-naming!). SO MUCH STUFF! Especially with the Super Hero kit! At $45 for the main kit and $75 for the Super kit, this feels like Hero Arts is giving us even better overall value this year! YAY!
Though the old MMH kits tended to be stamp forward, this kit seems a little more die forward – we get a lot more dies this month than we get stamps… so how should I start? I decided to take each set alone and in order to see where that takes me. I got this wild idea to see if I could use all of the die cuts from the Mini Notecard Die set on one card!
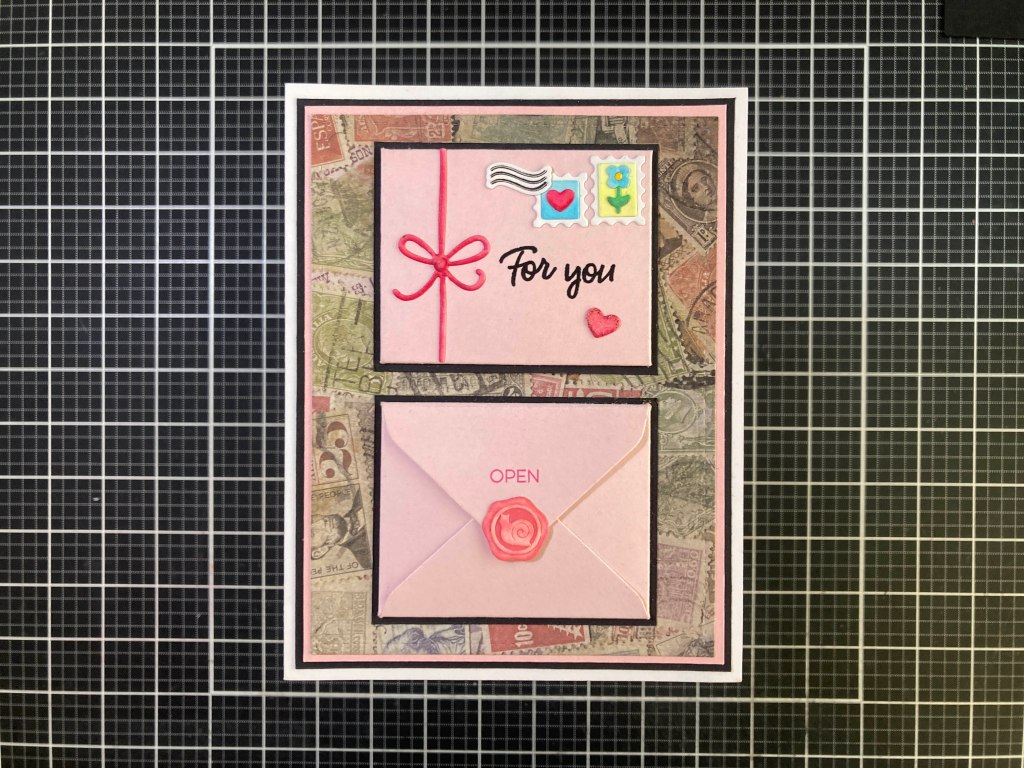

SUCCESS!!! We have gotten small envelope dies in our MMH kits before – the MMH January 2020 kit in particular – but I’m always in the mood to be a little meta and put a mini card on the front of a normal card!
I die-cut the two envelopes from Hero Hues Peony card stock and die-cut everything else in the set from 80# Neenah Classic Crest Solar White card stock. I used Ohuhu Alcohol markers to color all the white die cuts. I decorated the top envelope with the bow, the 2 stamps (3 die cuts each), the postage cancellation swoop (detailed with a Black Pigma Micron pen) and the second heart. The sentiment is from the Love From Lizi “Fairy Garden” card kit from March of 2019 stamped in VersaFine Onyx Black ink and embossed with Clear embossing powder.The back of the envelope has the snail “wax seal” (I used the two circle dies to make the ring around the snail). The “open” sentiment is stamped in HA Taffy Reactive ink using the MFT Interactive Labels stamps. I use a Zots Removable glue dot to close the envelope.
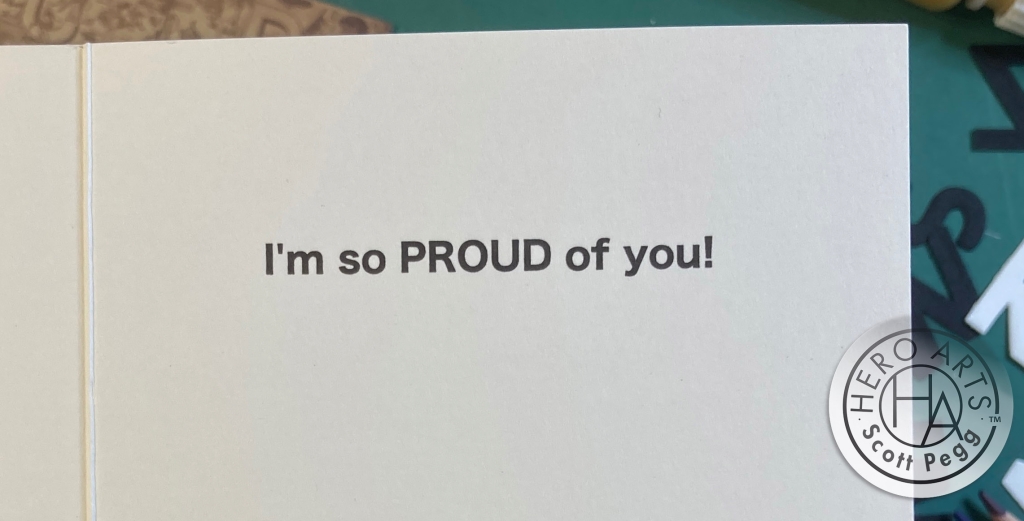
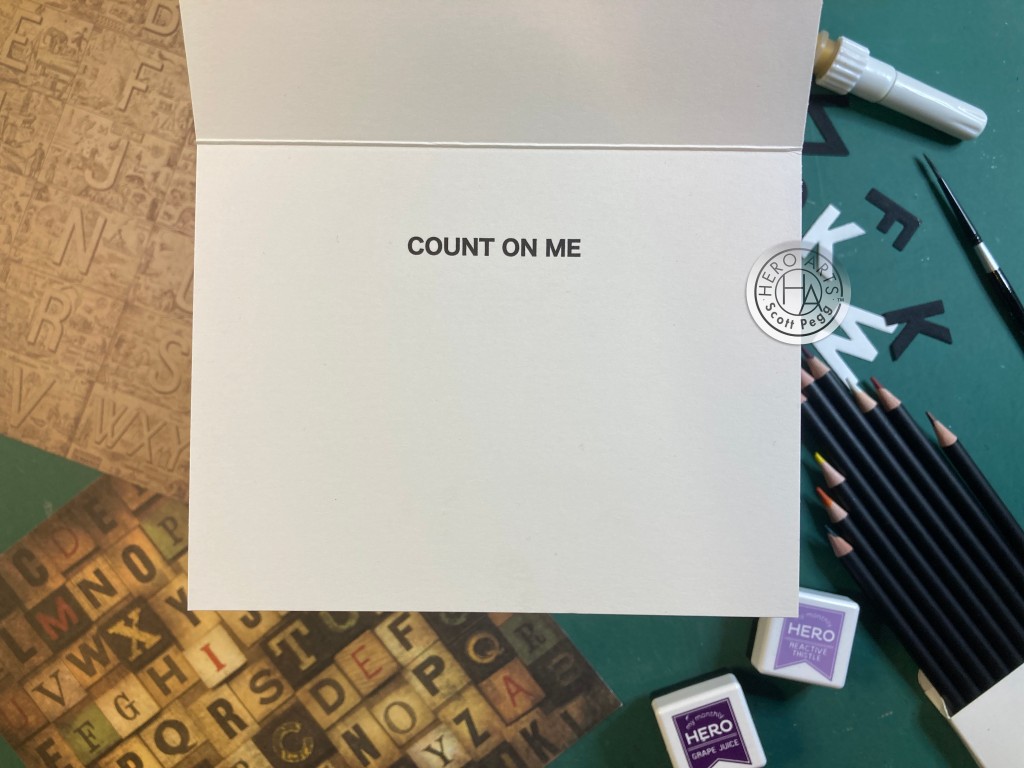
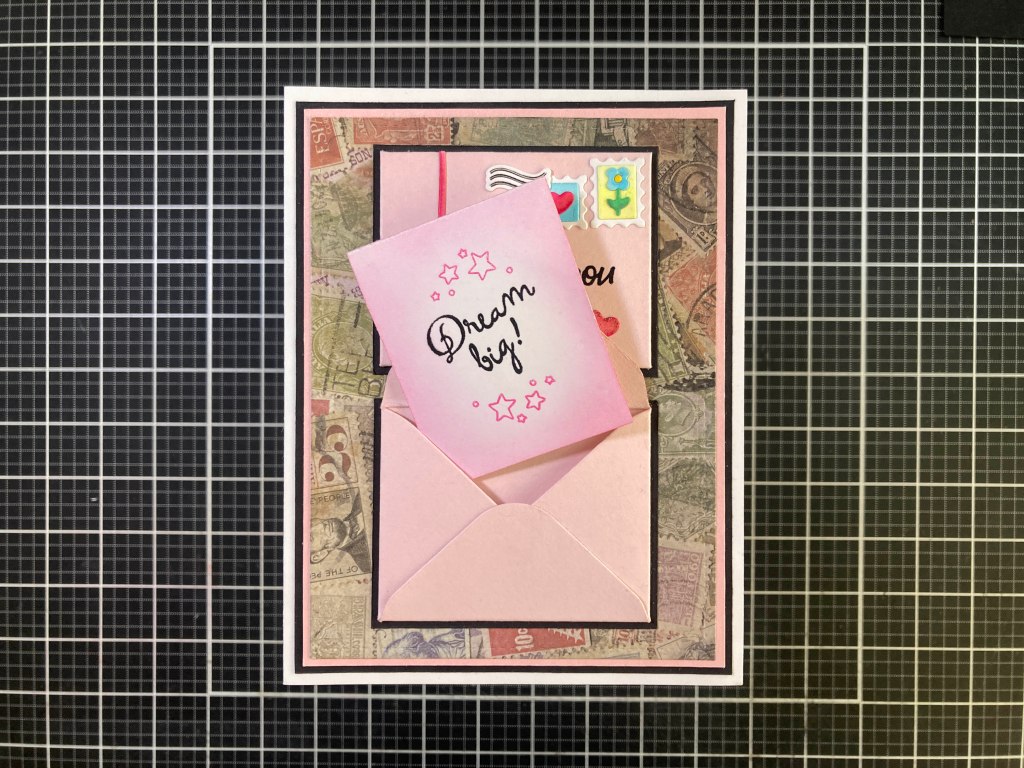
You open the envelope and pull out the card cut from some plain White card stock to 4+5/8″ x 1+7/8″ then scored and folded at 2+3/8″ to make a top-folding card that matches the size of the note card die (which is a side-fold). The sentiment (yuck! yuck!) is from the MMH February 2022 kit stamped with VersaFine Onyx Black ink and embossed with Clear embossing powder. The stars (from the same kit) are stamped with Taffy Reactive ink and embossed with Clear embossing powder as well. I finished up the front of the mini note by ink blending more Taffy ink around the edges.
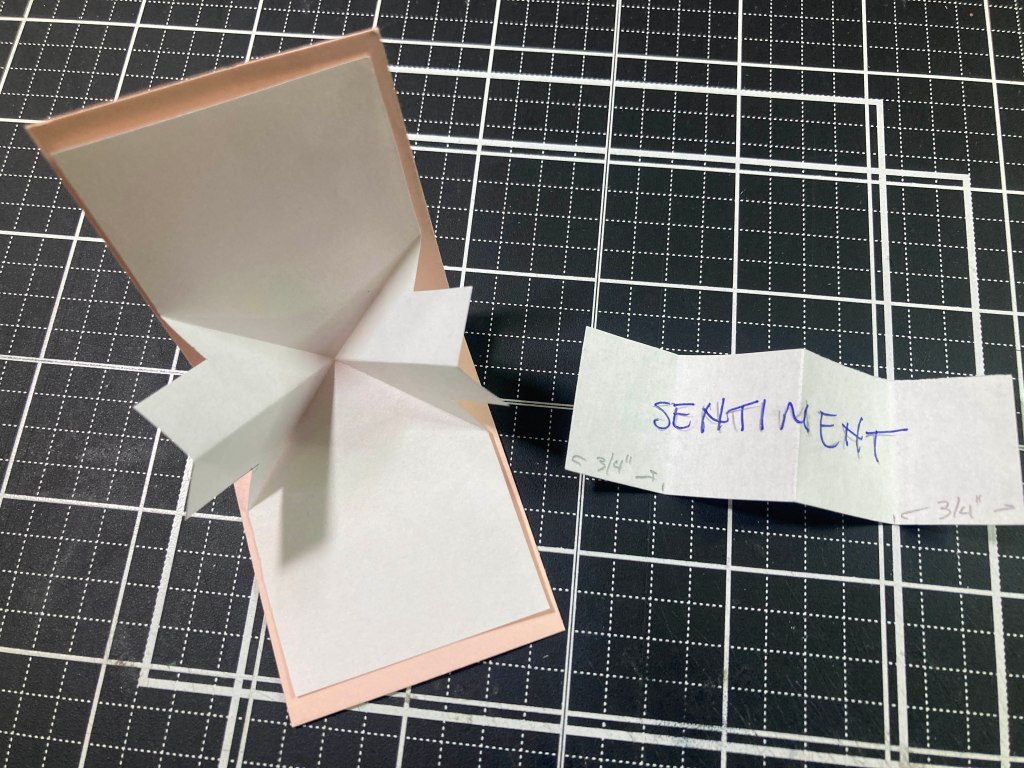
I couldn’t resist doubling-down on the mini-mayhem and made a Twist-and-Pop-up for the inside of the card. The mechanism and the sentiment are both done on simple printer paper to conserve on thickness.

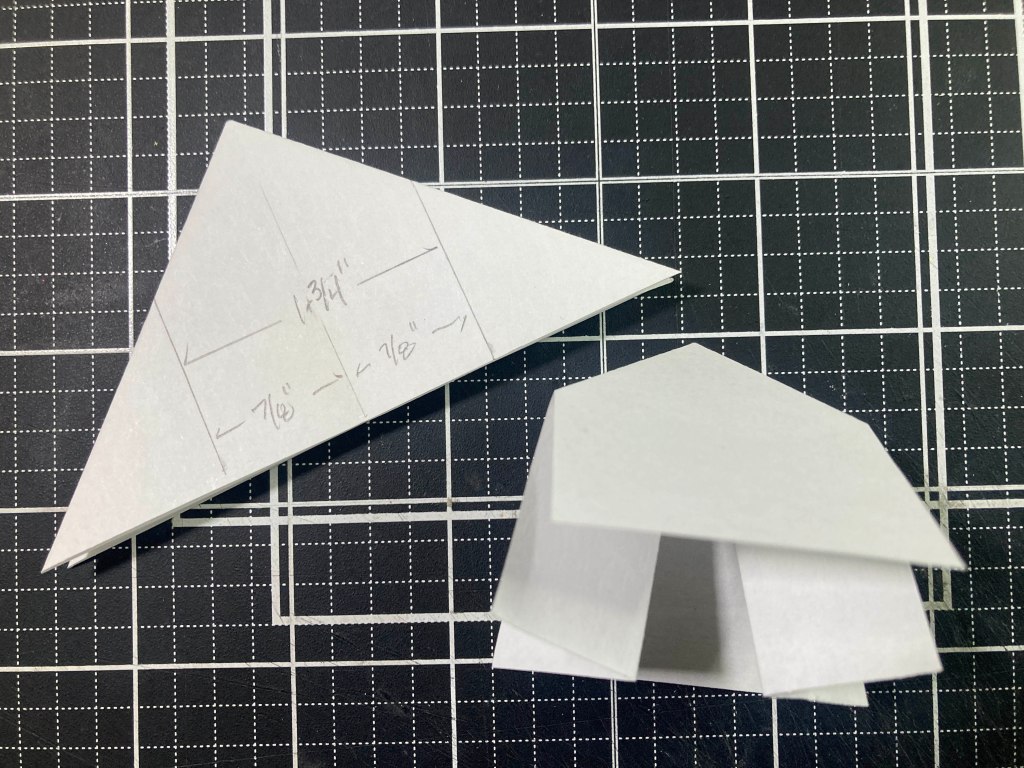
First I cut a 4.25″ square of paper (that’s the full height I wanted to fit this mini card) and folded it diagonally in both directions and then folded it in half in the other direction – this folds in on itself to make a triangle – the point of the triangle will be in the center of the fold in the card base.
So we have to cut it down to the width of the card – 1+7/8″ in this case, so let’s cut it to 1+3/4″ to leave a little border on the sides. This means we have to cut 7/8″ to the right and the left of the center line (the point). Once cut, this is our basic mechanism. Now is the perfect time to decorate the mechanism however you like. I stamped the text on the background using the text cling stamp from the MMH March 2023 kit with Taffy Reactive ink. Then I ink blended the whole mechanism with the same ink.
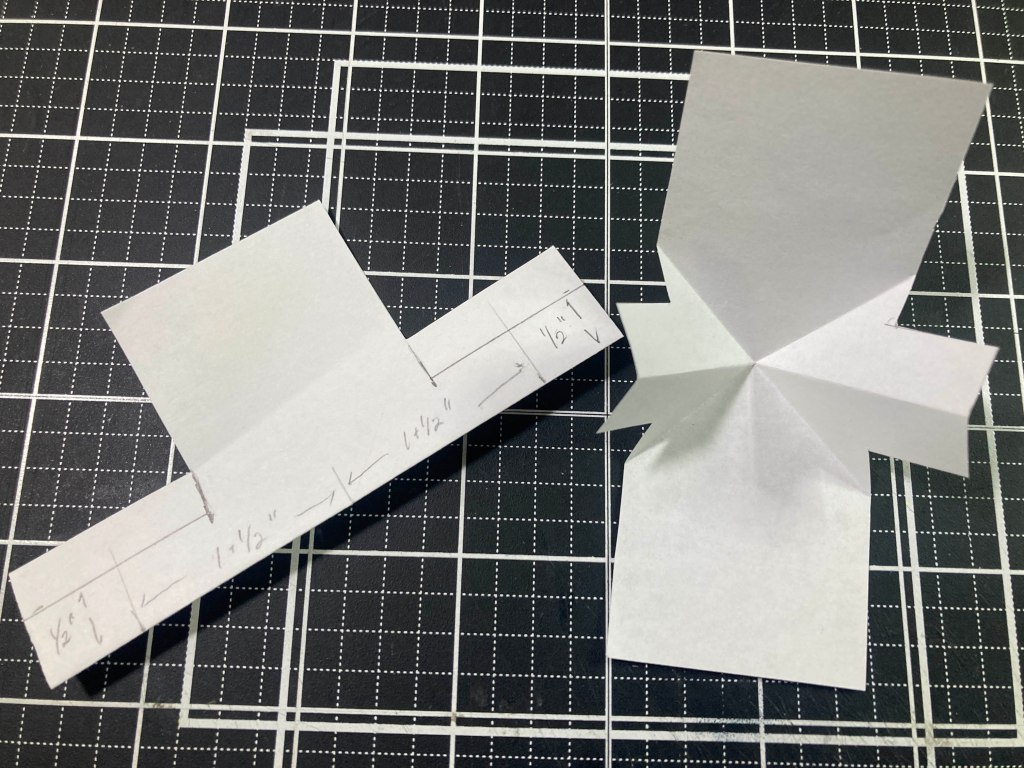
Now we have to refine the pop-up to fit our sentiment (or whatever you want to twist and pop)! First, the pop-up has to be shorter than the height of the mechanism. My sentiment is trimmed down to 3+1/4″x1″ – that’s all the longer the pop-up part needs to be. So fold the mechanism in half and trim off 5/8″ from either side (both sides of the pop-up) – the leftover tab should be 3″ wide in total. Since my pop-up piece is only 1″ wide, we’ll trim the width of the pop-up to 1″ as well (that’s only a HALF INCH on the folded side). REMEMBER this trimming of the width has to stop at the edges of the vertical portion of the pop-up. This is our final mechanism.
I stamped the sentiment (from the MMH December 2021 kit) on a piece of copy paper that’s 3+1/4″x1″ and ink blended Taffy ink over the background. Fold the sentiment strip in half to the back and then fold 3/4″ of each end back towards the center fold – accordion style. The left end of the sentiment attaches to the bottom half of the left pop-up, and the right end of the sentiment attaches to the top half of the right pop-up. Sometimes it’s easier to attach the sentiment strip to the mechanism before gluing it to the card base.
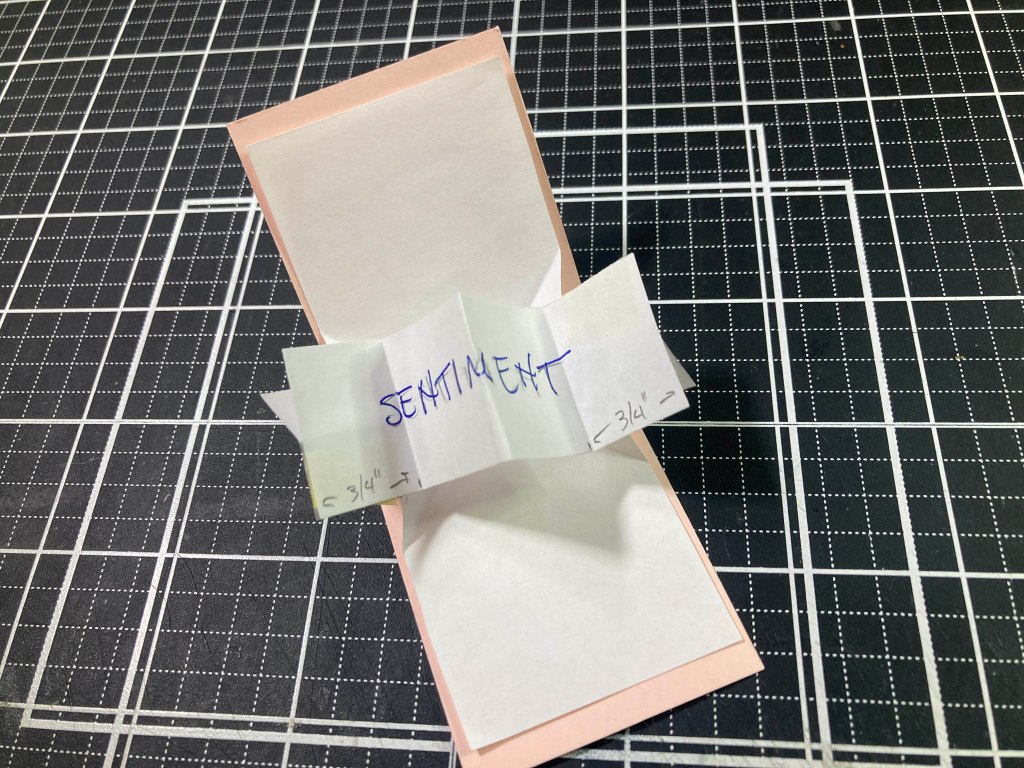
Once the pop-up is working smoothly, you can attach the whole mechanism to your card base and decorate as you like. I colored the rest of the flowers with Ohuhu Alcohol markers, assembled them together, and attached them to the sentiment strip – being careful that they hide appropriately when the card folds up.
Alas, I still had two of the smaller circle die-cuts left… the original die-cut, and the piece left over when I die-cut the ring from the larger circle for the “wax seal” on the front of the card. I glued those dots to the top and bottom panels of the pop-up mechanism and added die-cut exclamation points (cut from an old “marker Micro” alpha die and colored with alcohol markers) to the center of the circles. THERE!! Now I have used every single die in the Mini Notecard Die set on ONE card!! Well… technically I didn’t use the actual notecard die because it was a side-fold card, but for all intents and purposes, this card used all the dies in that set!
To finish up the front of the card, I cut a panel of Tim Holtz pattern paper to 3.75″ x 5″ with a Lawn Fawn Stitched Rectangle die, and added a thin Pearlescent Pink and a plain Black mat behind that, and glued those to a white card base. I added thin black mats behind the two envelopes and glued those to the card front. I also added a touch of glitter around the heart with some Stickles glitter glue. It’s not often that I spend this much time on my first card in a kit, but I had a blast playing with this mini notecard set and love my final, surprising result!
Moving right along… I set aside the Mini Notecard Die Set, and reached for the Post Box Die set for my next card.

Some might think I’m a little bit too literal, but I love this mailbox! I die-cut the box and lid and the front highlights of the paper hooks from some Tim Holtz Onyx Metallic card stock, the backgrounds of the HELLO and the mail slot and the corner filigree as well as the full paper hooks are die cut from MemoryBox Glossy Black card stock. I used Tim Holtz Champagne Metallic card stock to die-cut the golden highlights and the box is glued together. SO CUTE!
The bird and snail and rubber band are die-cut from scrap White card stock and colored with Ohuhu Alcohol markers. The newspaper is die-cut from some Ivory card stock with Antique Linen Distress Oxide ink blended around the edges. I die-cut the snail shell from the background paper and did a little ink blending with the Antique Linen ink on all the animal parts before gluing them together. The background is pattern paper from an old Tim Holtz paper pad embossed with an even older Darice Brick embossing folder. I did ink up the “mortar” lines on the embossing folder with Walnut Stain Distress Oxide ink to darken up the “mortar” lines. I trimmed the bricks to 4″ x 5.25″, added a thin Black mat and glued those down to a White card base.
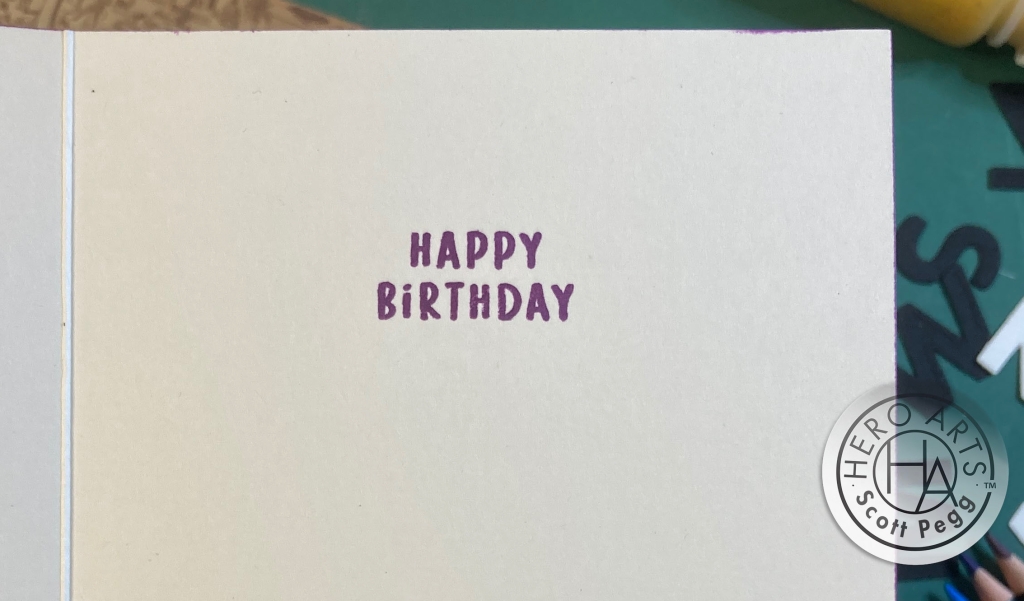
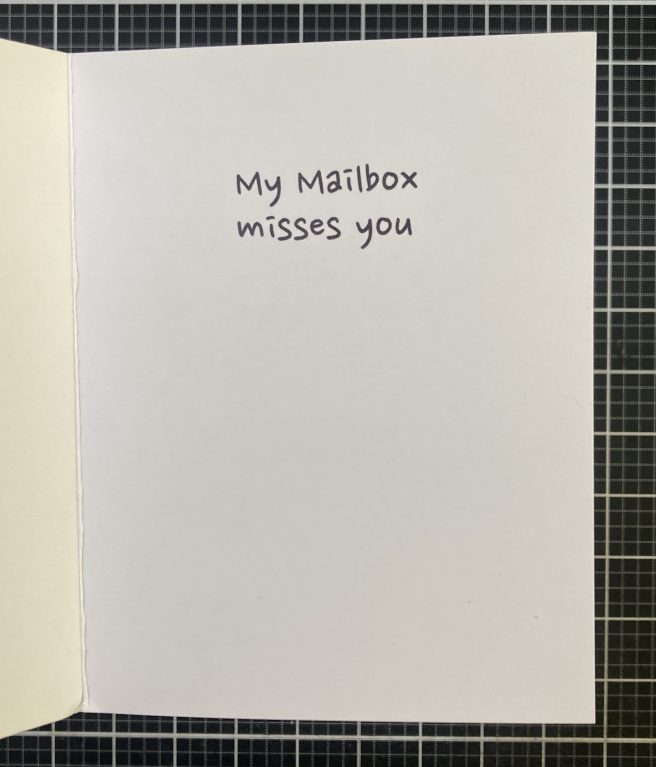
Of course I couldn’t leave well enough alone and had to add this cute sentiment on the inside of the card. Using my Silhouette software and the Nanum Pen Script font, I printed this sentiment on the inside of the card base (before adding anything to the front) using my “piggy-back printing” method. Makes me smile…!
I put the paper in the hooks and attached the whole mailbox to the card front with thin foam tape and perched the snail and the bird on top of the mailbox with foam tape as well. I love how realistic this die cut mailbox is!
Of course you could be fanciful and decorate this mailbox with all the flower die cuts in this set, but I’m not the type to stuff a bouquet into a mailbox! And we do have a “bouquet wrapping” die in this set… I’m so literal, I know!!
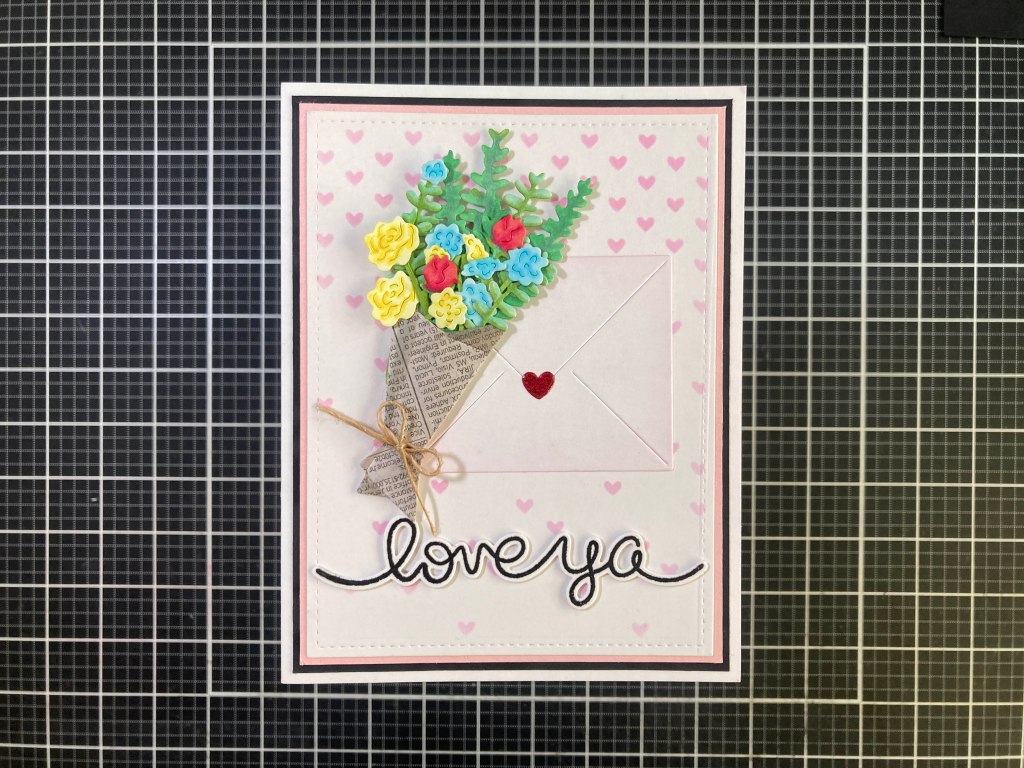
A sweetly casual valentine! I die-cut all the flowers and foliage from more Solar White card stock and colored them with Ohuhu Alcohol markers. I attached a piece of newspaper (the want ads are appropriately tiny) to a scrap of card stock and die-cut the wrapping from that. A little shading with Alcohol markers gives the wrap a little dimension. The flowers and greenery are assembled and arranged in the wrap, and I used a small piece of thin twine to wrap around the gather.
The background is a panel of White card stock stenciled with Taffy Reactive ink and a SSS Falling Hearts stencil. I cut that panel to 3.75″ x 5″ with a LFSRdie and added a Pearlescent Pink and Plain Black mat before gluing all down to a White card base. I die-cut the envelope die in this set (same size as the Mini Notecard dies) from a scrap of white card stock and lightly blended more Taffy ink around its edges. I glued the envelope flat to the card front and added the bouquet with foam tape.
The sentiment is from the Lawn Fawn Big Scripty Words stamp and die set (one of their earlier sets I still find quite useful)! I stamped that with VersaFine Onyx Black ink on White card stock and embossed it with Clear Embossing powder. I die-cut the sentiment and two blanks (this was also one of the earlier die-cut sentiments available in those days) then stacked and glued them together and then down to the card front. Finally, I added a red glitter heart to the envelope for a touch of sparkle. Valentine’s Day is just around the corner!
So those two cards used 95% of the Post Box Die Set… Let move along to the Special Delivery Stamp and Cut set. Finally I get to color some stamps!

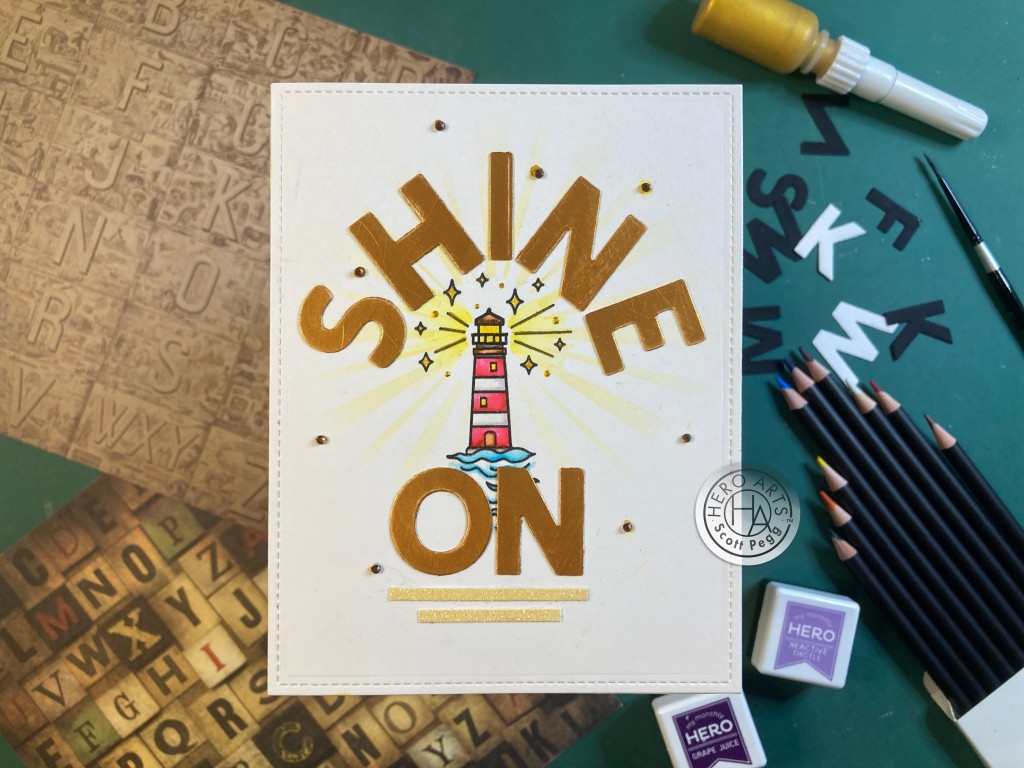
I couldn’t resist using some masking to create this little vignette! And I really wanted to have a window in the box so you can see the letters shake around inside! I stamped this scene on some Bristol Smooth card stock using Versafine Onyx Black ink and some simple masking at the base of the pole. I colored everything with my Zig Clean Color Real Brush markers. After so many die cuts, I was totally immersed in painting this vignette. I did use a Gold Gel pen for the trim around the window and the envelope slot, and then I fussy cut away the window opening.
I stamped and embossed “POST” on a piece of heat resistant acetate using Versa Mark ink and HA Gold Embossing powder. I trimmed that to size and attached it to the back of the window opening. Using a MFT Mini Cloud Edges stencil and some Pebbles Chalk pastels, I blended in the clouds as well as the hillside using a Lawn Fawn Simple Hillside stencil. I die-cut the panel with a full-size 4.25″x 5.5″ Lawn Fawn Stitched rectangle die. I stamped and embossed the sentiment as usual on White card stock, die-cut it and two blanks with the matching die and glued them together.
I stamped the two envelopes and package twice on some scrap White card stock and colored them all with Prismacolor colored pencils and fussy-cut them out. I used some 1/8″ thick foam strips to outline the the back of window opening – allowing more room at the top (mail slot you know) and decided I could only get 4 envelopes to actually shake around effectively in there. I added the envelopes and covered the back of the window with a scrap of the TH Onyx Metallic card stock.
I added 1/8″ foam tape along the edges of the whole panel and attached it to an A2 White card base, and then glued the stacked sentiment into place. Absolutely adorable!! I really like that the shaker window is “embedded” in the card front and not an extra level on top!
We can’t ignore that great snail stamp (every set has had a snail so far!) and, of course, the postage stamp stamp…
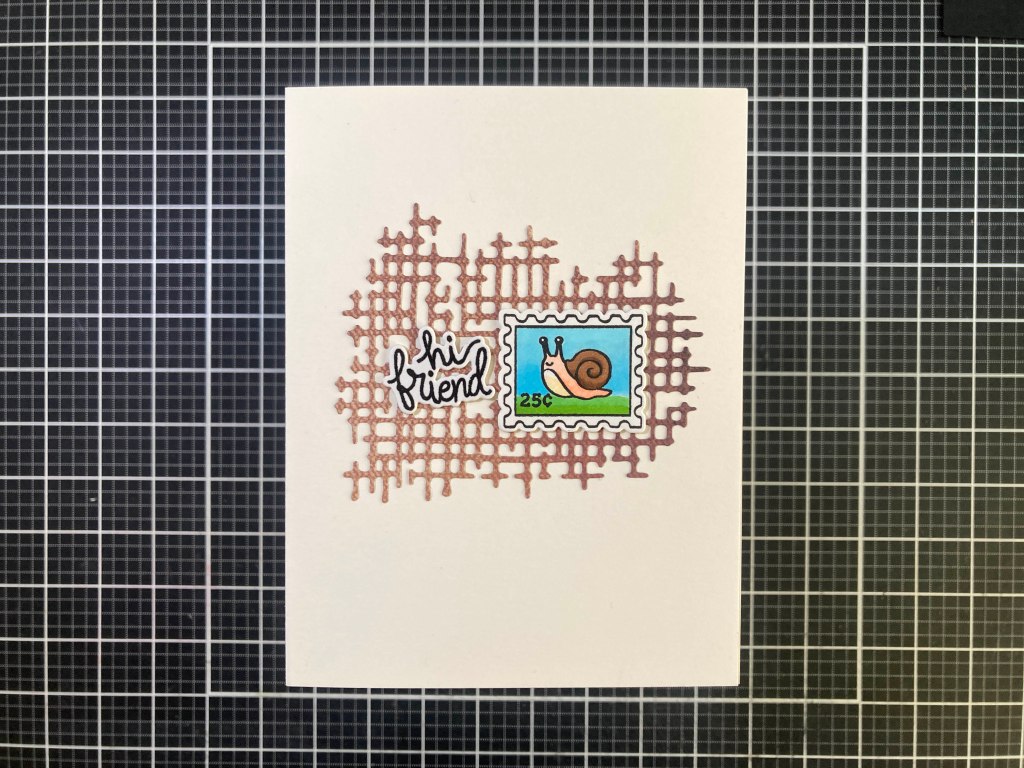
The whole “snail mail” thing is delightful and makes me giggle. I stamped the postage stamp and the snail with VersaFine Onyx black ink on a scrap of Neenah Solar White card stock and colored it with my Ohuhu Alcohol markers then added the “25¢” stamp, and die-cut it (and two blanks) with the matching die. The sentiment is stamped and embossed as usual, then die-cut (along with two blanks), then both sets of die cuts are stacked up and glued together.
I was looking for a background for this card when I came across this old Stamping’ Cut die in the Chic Die set. I die-cut that from the same TH background paper that I used for the bricks. I made an A2 card base from Hero Hues Antique Ivory card stock, glued the background in place and added the stamped (and stacked) pieces. A little bit adorable!
SIDE NOTE: Hero Arts is discontinuing their Hero Hues card stock line (EXCEPT for their Pitch Black card stock) and are shifting to the Spellbinders ColorWheel card stocks. The Spellbinders ColorWheel card stocks are what we’ve been getting in the monthly card kits for the last year or so. So I figured I should try and use my Hero Hues card stock and start stashing my ColorWheel card stock. What do you think?
There is one more sentiment in this stamp set that caught my eye – it may have been the matching die that did it!
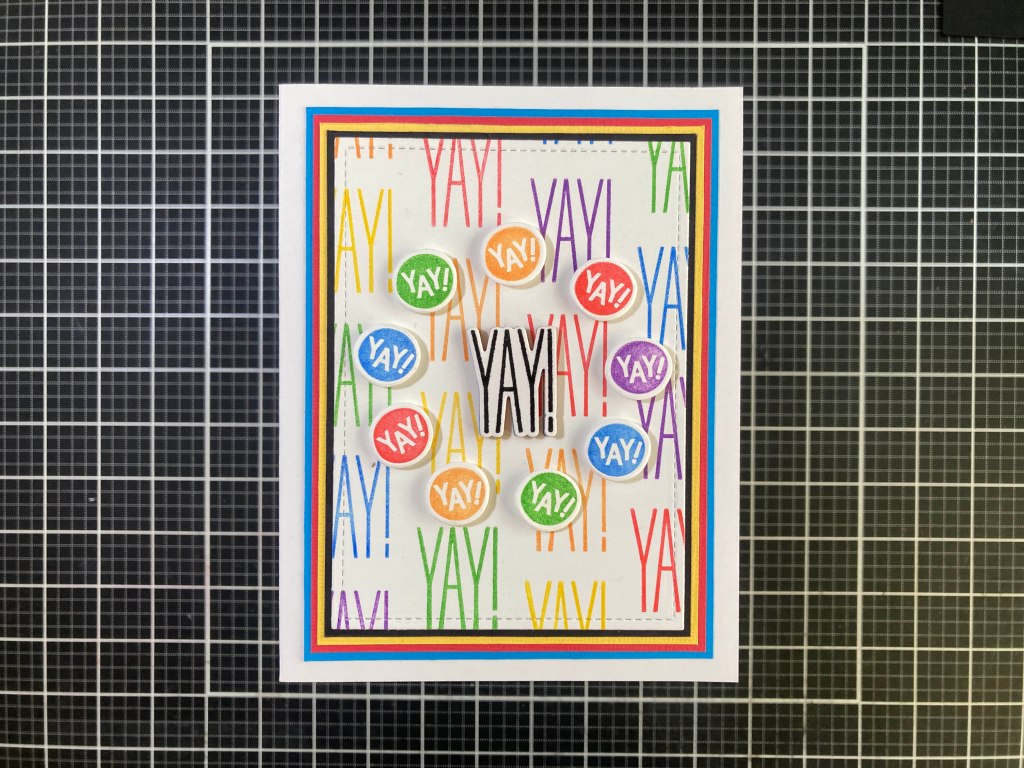
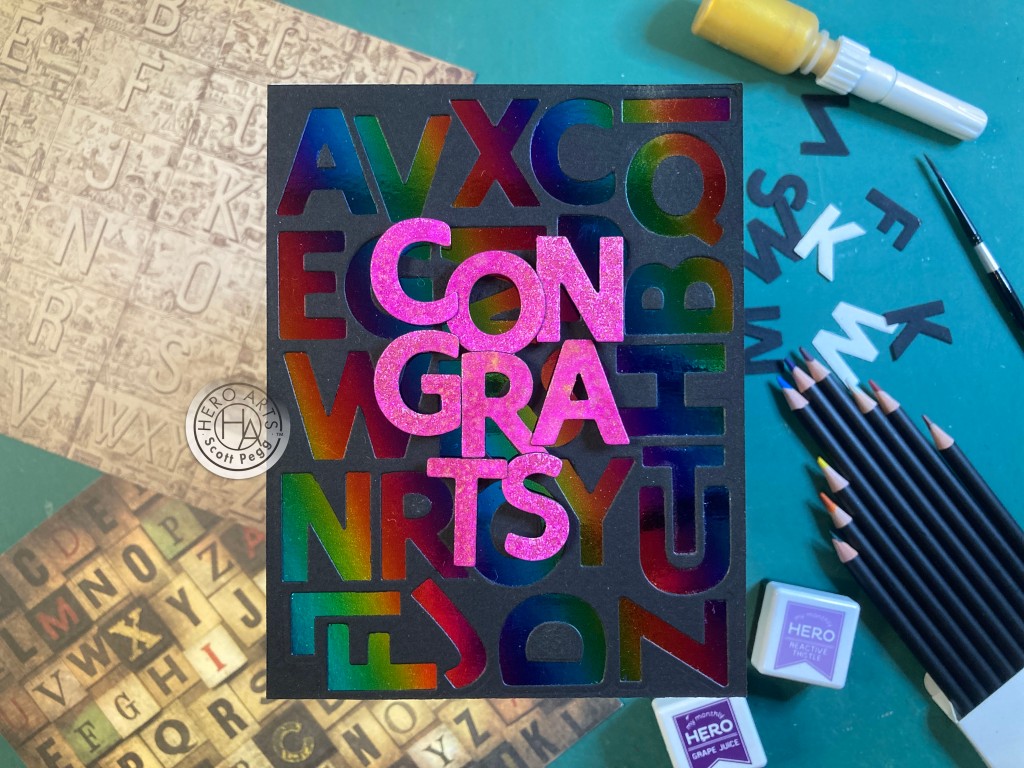
YAY! I stamped the YAY! stamp in a simple pattern on a panel of White card stock using Hero Hues Purple Galaxy, Blue Hawaii, Green Apple, Lemon Drop, Creamsicle, and Fruit Punch Reactive inks. I also stamped the small YAY! dot in the same colors (no Lemon Drop (too light)) and die-cut them with their matching die. I stamped and embossed the big YAY! as usual, and die-cut it out along with 6 blanks in Purple, Blue, Green, Yellow, Orange and Red. Those are all stacked and glued to the back of the stamped YAY!
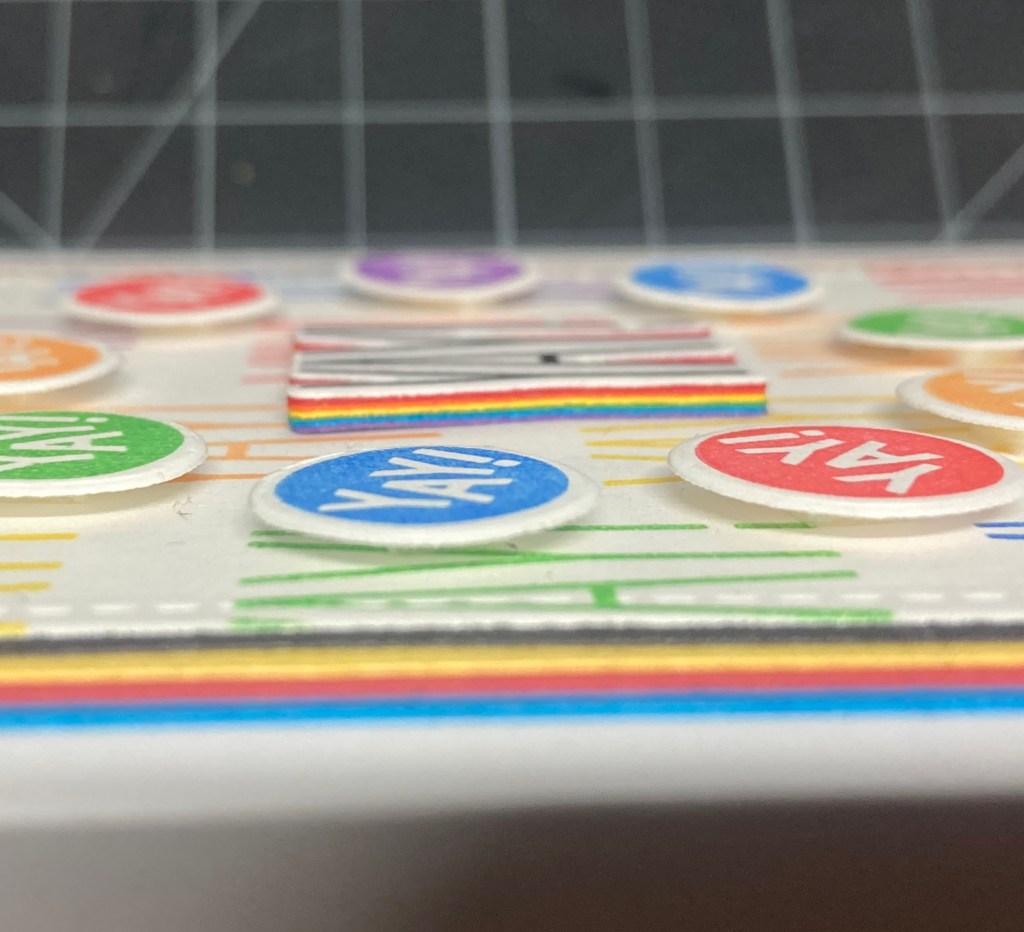
I die-cut the background to 3.25″ x 4.5″ with a LFSRdie and added thin mats of Black, Yellow, Red and Blue behind and then glued them all to a White card base. I glued the big YAY! in the center and added the YAY! dots with thin foam tape. I was going to add a qualifying sentiment to the inside of this card but decided to leave that option open for any occasion that might deserve a hearty YAY! Or a lot of them!!
That really covers most all of the My Monthly Hero kit… Let’s look at the extras in the SUPER Hero Kit!

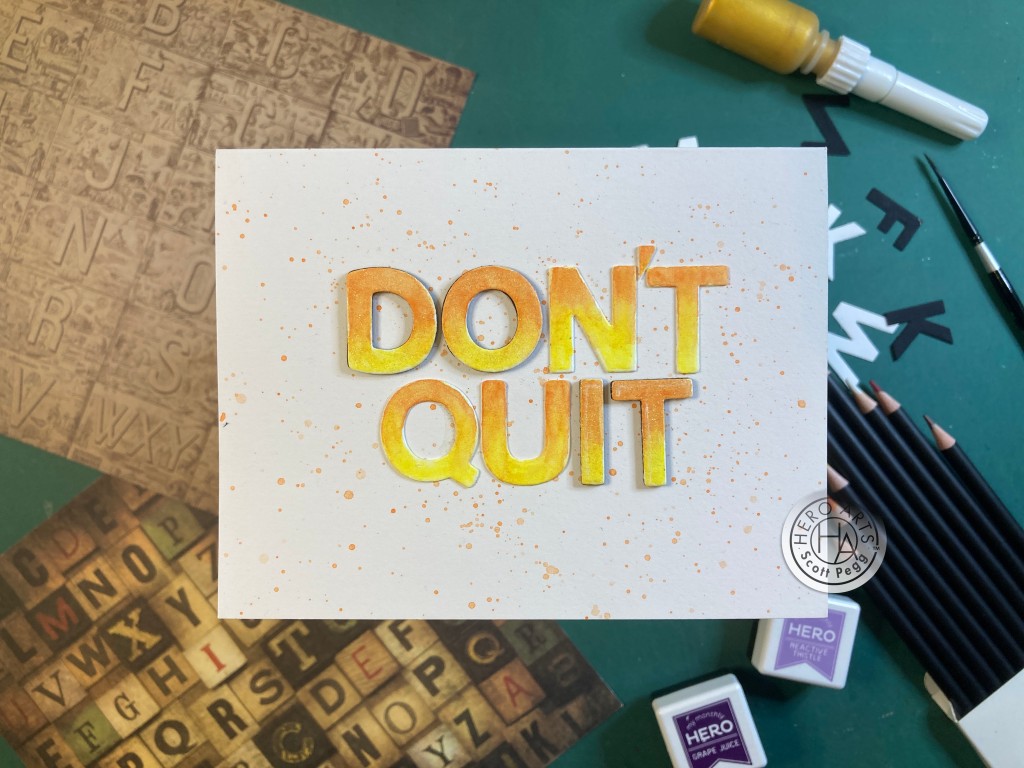
The Front Page Stamp and Cut set is quite unique and gives you lots of flexibility for celebrating any Breaking News in your circle of family and friends. I dug out an old Meade Acade´mie Sketch pad which had some nicely aged papers and stamped everything with VersaFine Onyx Black ink and Fruit Punch Reactive ink. I glued the stamped panel to another layer of the sketch paper for some added thickness, and die-cut the pair with the matching die.
I created a Gray A2 card base and used the Hero Arts Newspaper Bold Print cling stamp to stamp the background using HA Granite ink. That’s the perfect background stamp to use with this stamp set! I attached the “paper” to the card front with thin foam tape and I added a 4″ x 5.25″ panel of the same sketch paper to the inside of the card to carry the newspaper theme all the way through! It would be easy to create some personalized sentiments to use with this stamp!
This set also includes dies for all of the sentiments… even the “Breaking News” on the main newspaper stamp…
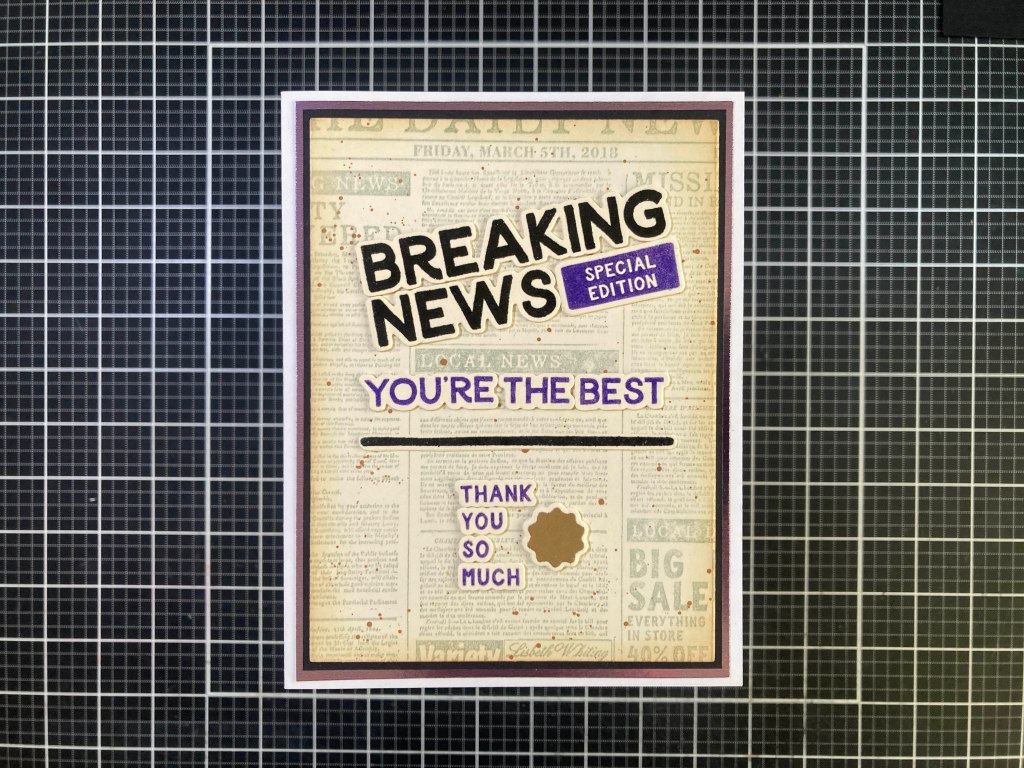
I started with some of my plain old Staples Ivory card stock and stamped the top of the “paper” stamp with Versafine Onyx Black ink and embossed that with Clear embossing powder. I die-cut the “Breaking News” sentiment along with one blank and glued them together. I also glued the black strip to another layer of the Ivory card stock and fussy cut that dividing line out. I stamped the other sentiments with Purple Galaxy Reactive ink and embossed those with Clear embossing power before die-cutting them along with one set of blanks and gluing them together. The “seal” is stamped with VersaMark ink and embossed with HA Gold embossing powder, then die-cut and layered with a second blank.
The background is the same Newspaper Bold Print cling stamp stamped in Granite ink on Ivory card stock and die-cut to 3.75″ x 5″ with a HA Infinity Rectangle die, and ink blended with a little Vintage Photo Distress oxide ink around the edges and splattered with the HA Brown Acrylic Speckle from last month’s card kit. The background is matted with a thin Black mat and a thin Purple Metallic mat before gluing down to an A2 White card base. I arranged all the die cuts on the card front and glued them down flat. There’s a lot more versatility with this stamp set when you can use the sentiments individually! The possibilities are almost endless!
Feels like that’s about all there is to the Front Page Stamp and Cut set… What does the Postage Frame Die Set give us!?
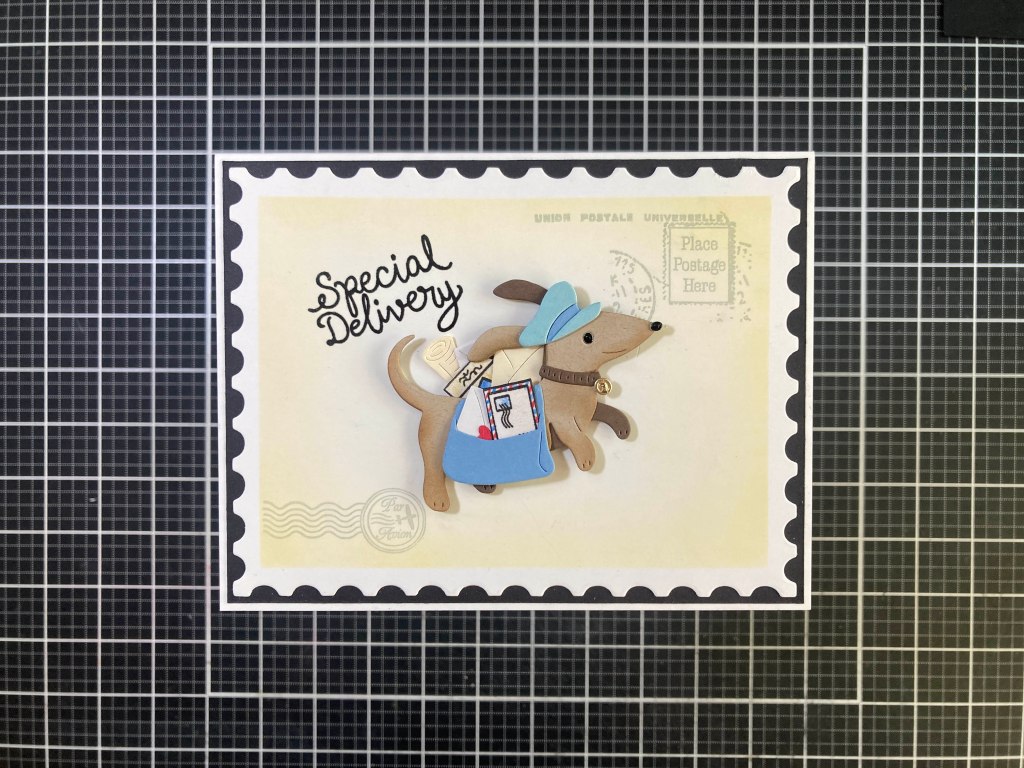
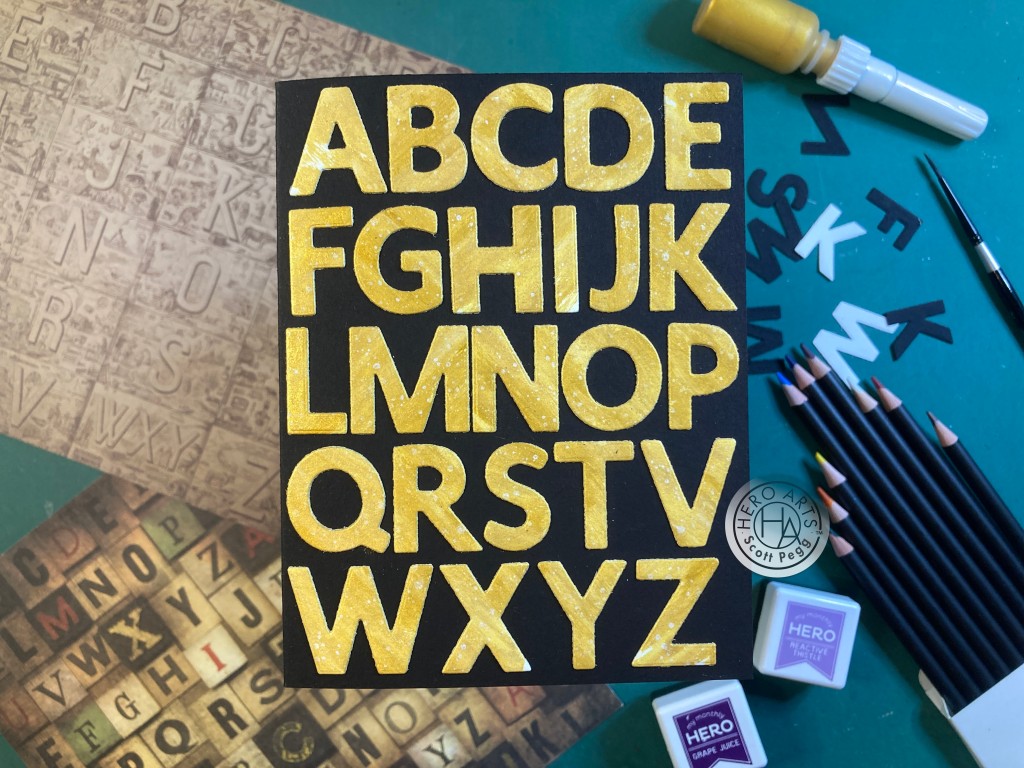
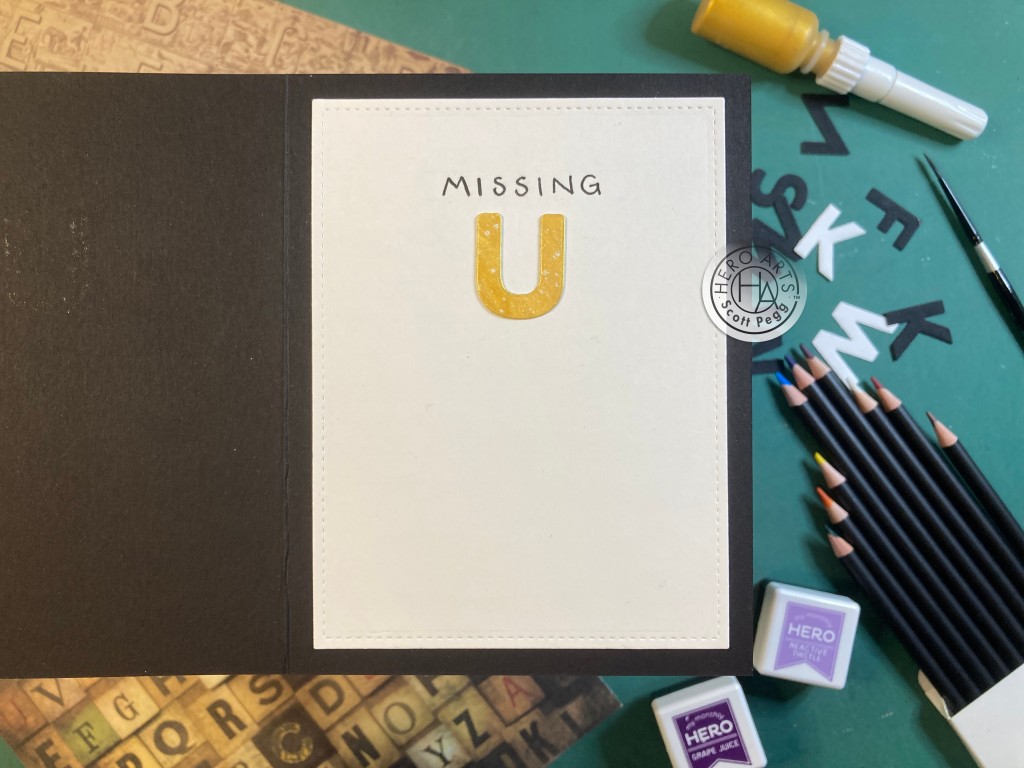
It’s a Postal Pup!!! How Cute! I used Hero Hues Sand and Chestnut card stock for the dog, and Hero Hues Periwinkle and Mist for the postal accessories. I did ink blend Vintage Photo Distress oxide ink along the bottom edges of the dog before assembling him, and I die-cut his nose and eye from Glossy Black card stock. The letters and newspaper are die-cut from more of the Ivory card stock and then supplemented with some extra letters left over from the Special Delivery shaker card before arranging them in the postal bag on both sides of the dog!
I die cut the Postage Frame from some White card stock and masked off the edges with 1/4″ strips of masking paper and then ink blended on some Antique Linen Distress oxide ink for a soft background. I stamped the “postage” details on the background with more Granite ink using a stamp set so old I have no idea where it came from…! I stamped and embossed the sentiment as usual right on the background and added a Black mat behind the postage frame before gluing that down to a White card base. The postal pup and his load is attached to the card front with foam tape. That little doggie displays such great dimension that he (or she!) practically leaps right off the card! Special Delivery indeed!
There are two sizes of stamp dies in this set and each of the two sizes has a background die and a matching frame die! Since I am assembling this cards during the week of Christmas, I couldn’t resist making a Holiday card!

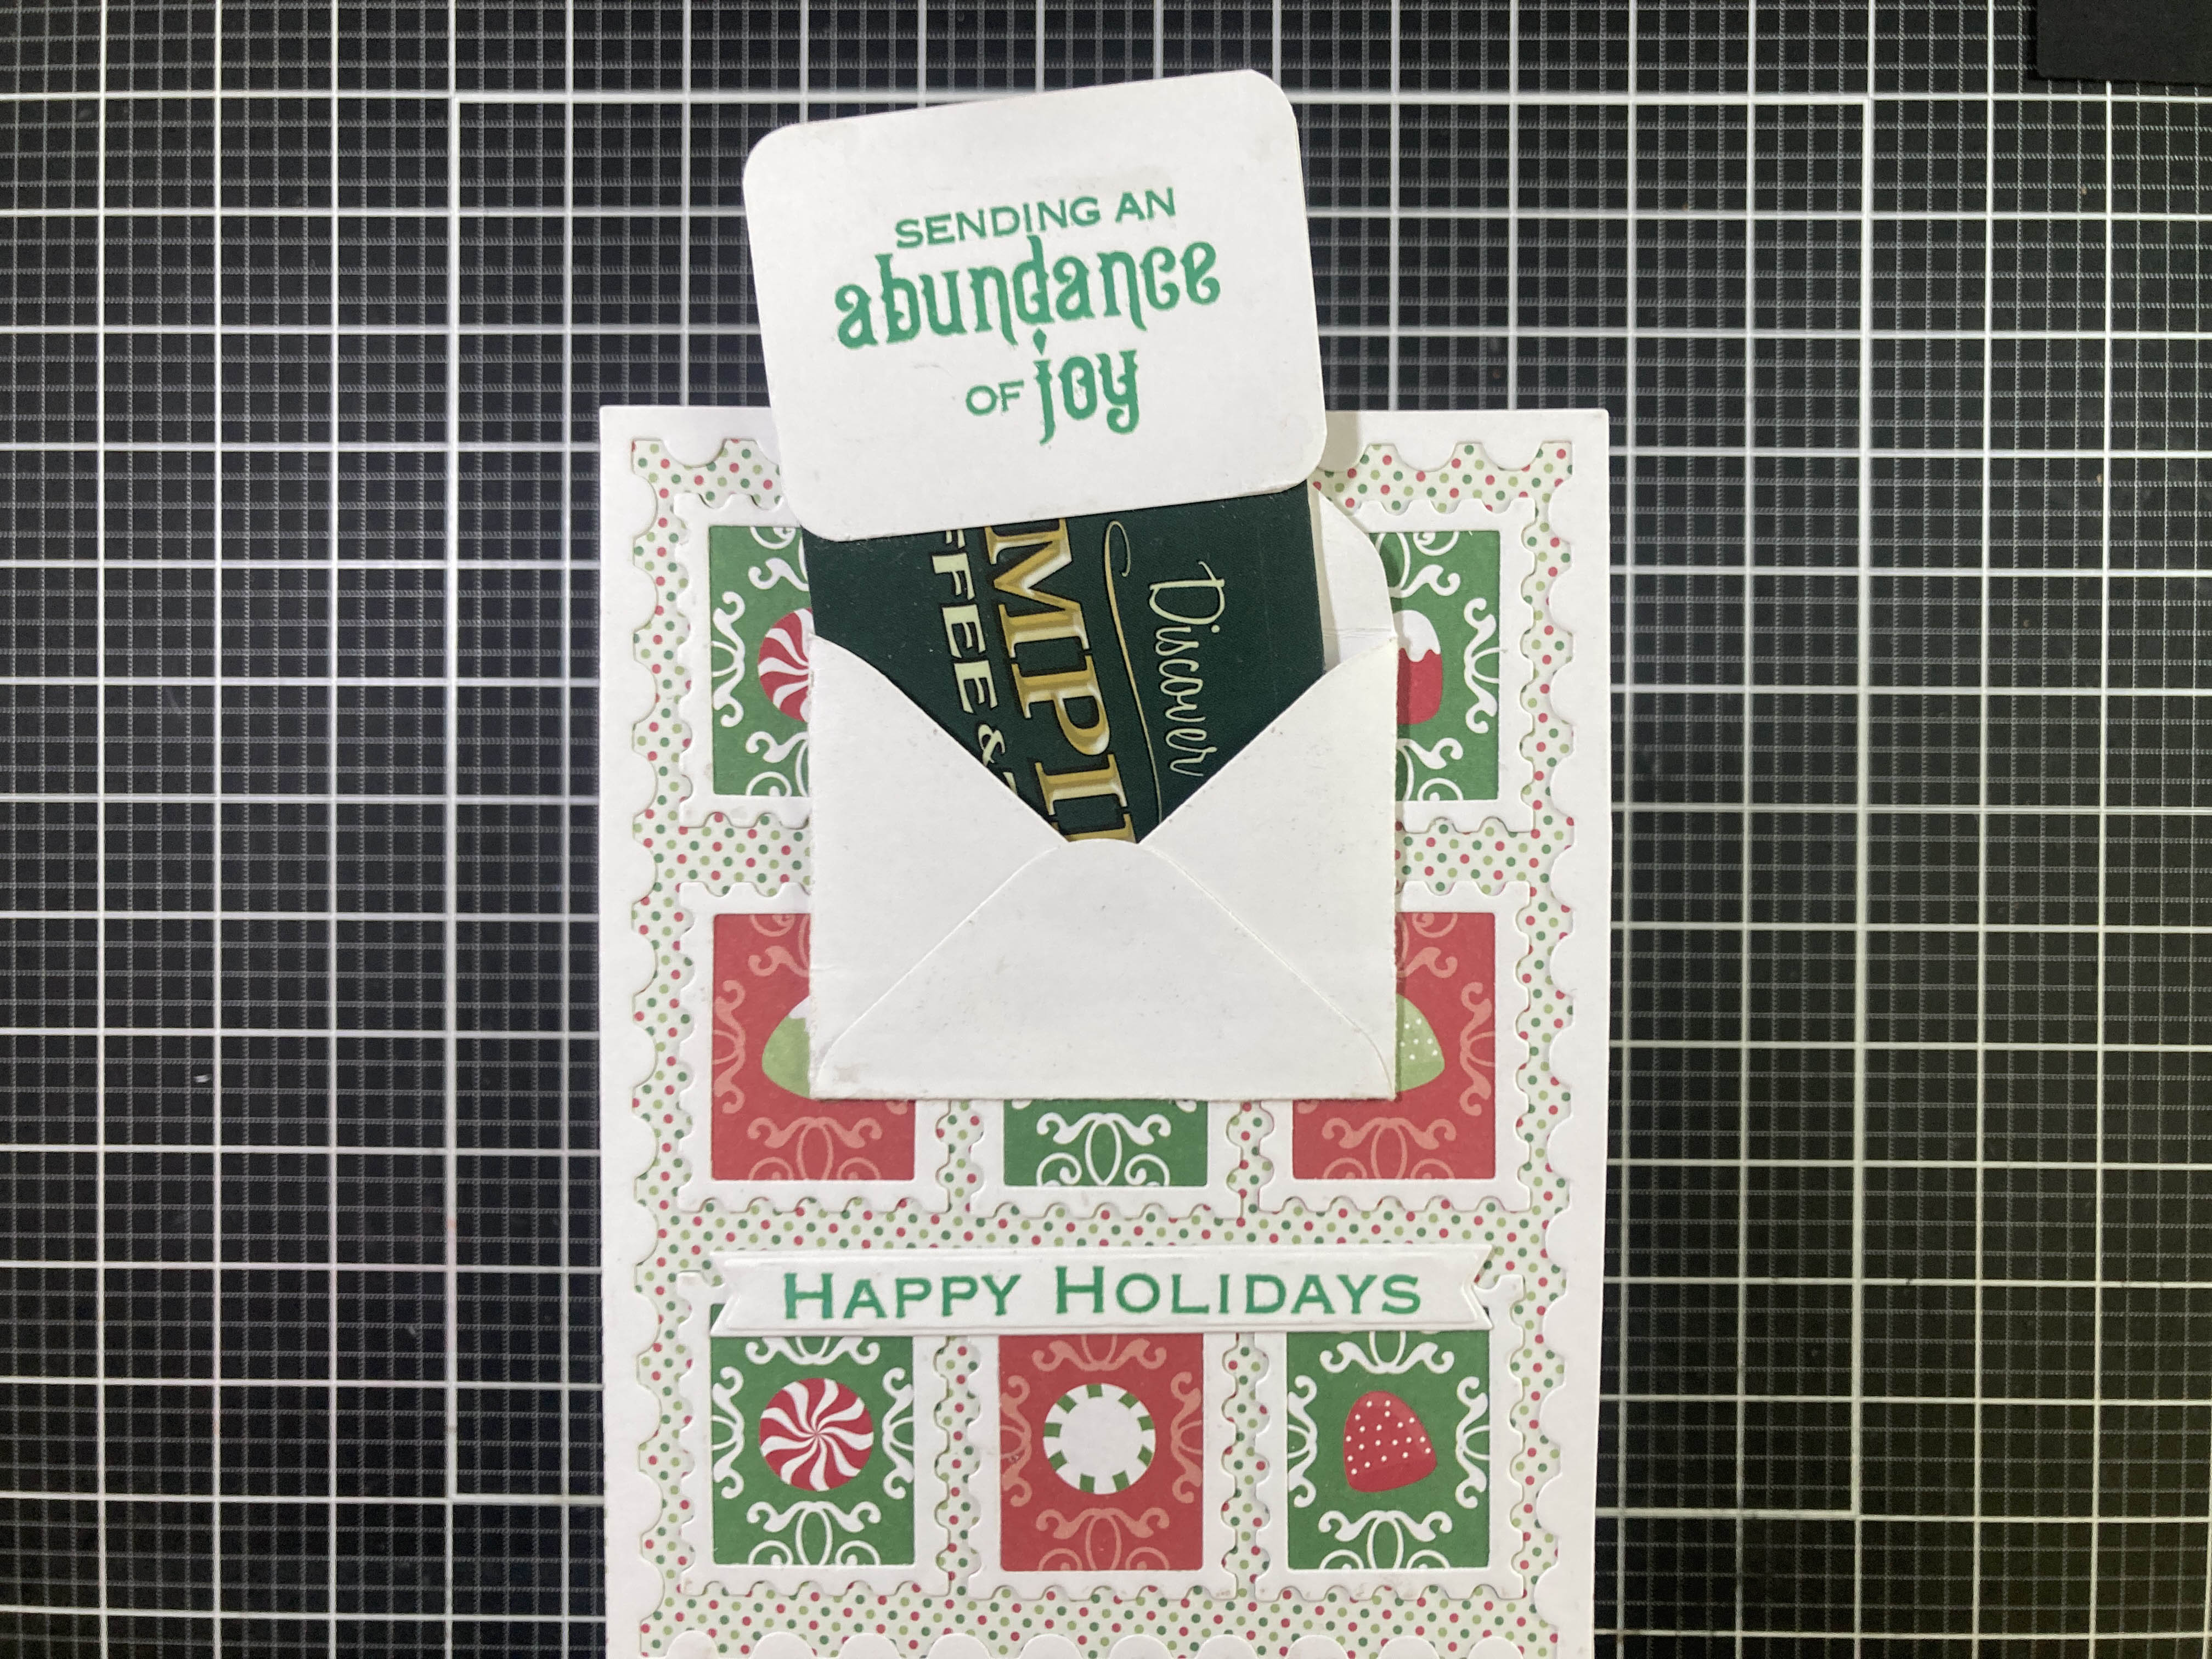
I dug around in some old Holiday Pattern paper and found these sweet treats in both red and green colors and perfectly sized for the larger stamp die! I die-cut 4 sweets from the red pattern paper and five sweets from the Green pattern paper and glued those to 9 frame dies cut from plain White card stock. I took a piece of matching polka-dot pattern paper and glued that to a 4.25″ x 5.5″ panel of White card stock. I added the negative die cut from the Postage Stamp Frame die around the edges and glued the 9 stamps in place.
I stamped both sentiments (from the MMH October 2021 Kit) on White card stock with Green Apple Reactive ink and embossed both with Clear embossing powder. I die-cut the Happy Holidays sentiment with a LF Many Everyday Messages die and the “card” sentiment to 2.25″ x 1.75″ and rounded the corners with a Corner Chomper. I took a white Mini Notecard envelope (from the first set) and created a slot in the lower part of the back to hide our gift card. I decided where I wanted the envelope to go on the front of the card and cut a matching slot through the background.
I glued the envelope in place on the front of the card matching up the slots and then assembled the envelope. I attached the gift card to the back of the sentiment card with a piece of tape and slid those through the slot of the envelope. Then I added double layers of card stock to the back side of the card front to give us a channel for the gift card to slide into. Then I could attach the whole background to an A2 White card base being careful not to put any glue in the gift card channel. I have always loved being able to hide a gift card inside a card… and the Abundance sentiment is perfect to go along with a gift card!
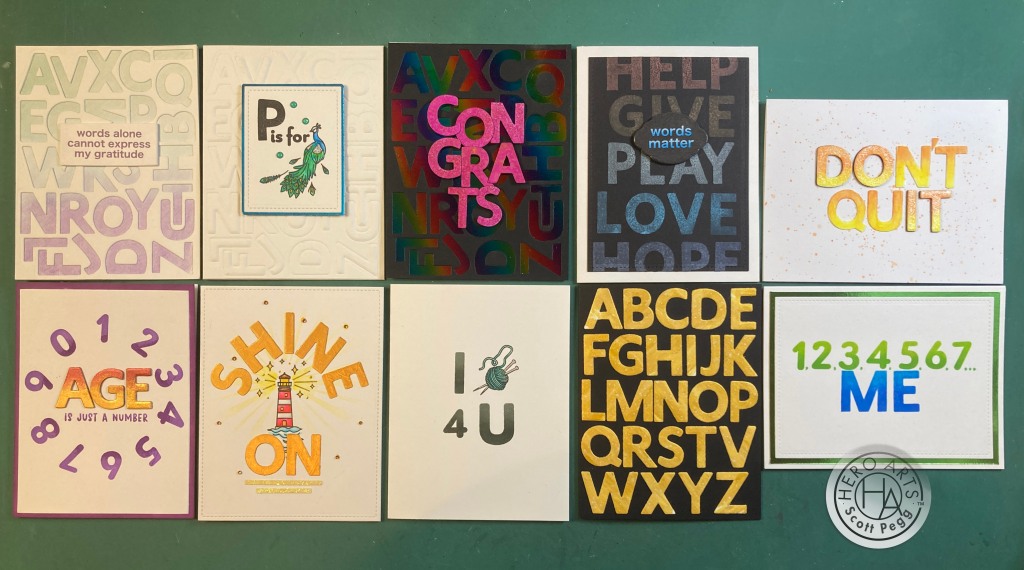
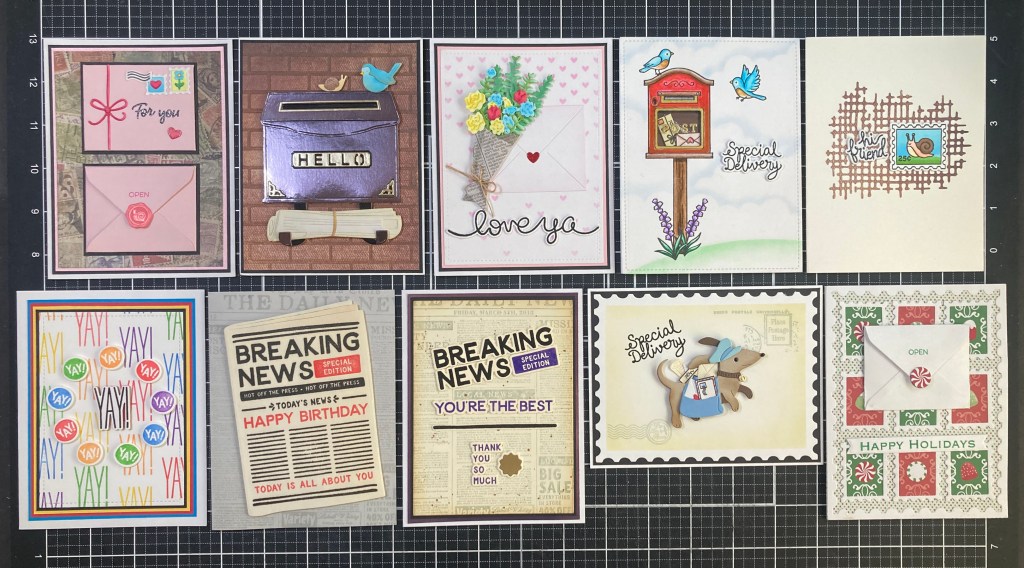
And there we have all 10 cards created with the NEW My Monthly Super Hero kit for January of 2026! Happy New Year indeed! We have a nice variety of cards in many different styles and a few surprises as well!
I do hope Hero Arts gets back to featuring a few more stamp sets in their card kit, and can come up with some more exciting extras to keep us jonesing for more! I did use the vast majority of everything offered in this kit and had quite a good time discovering the myriad of uses this set inspires! And I even got to do some much needed coloring this month!
Here are details about the new My Monthly Hero subscription plans – there are 2 SUBSCRIPTION OPTIONS: My Monthly Hero – $45 • My Monthly Super Hero – $75 • HOW IT WORKS: Monthly Reveal: Each kit is revealed on the 1st of the month, with sneak peeks starting a few days before. • Subscription Window: Sign up between the 1st–27th of each month. • Easy Billing: After the first kit, subscriptions are billed automatically on the 3rd of each month. • Flexible & Hassle-Free: Subscribe, switch plans, or cancel anytime. • SUBSCRIBER PERKS: My Monthly Super Hero Subscribers: 15% off purchases • Free shipping coupon every month. My Monthly Hero Subscribers: 10% off purchases.
If you are excited about My Monthly Hero coming back and want to grab a subscription for yourself, please use my links below – I do get a small commission from anything you buy at HA (at no cost to you!) and that helps keep the wheels turning and the inspiration coming! As always it is supremely appreciated!
My Monthly Hero Subscriptions: https://www.kqzyfj.com/click-101337132-16957481?url=https%3A%2F%2Fheroarts.com%2Fpages%2Fsubscribe
Hero Arts: https://www.jdoqocy.com/click-101337132-16957493
Happy New Year! Happy My Monthly Hero return! Thank you so much for sharing some time with me here today! I hope I was able to inspire you and maybe show you something new! Let me know which cards are your favorites If you enjoyed this post please click the “Like” star at the bottom of this page, and if you wish to be notified of new blog posts click the Follow Me button at the top of this page. Please, take a few moments to Like Me, List Me, Pin me, Post Me, Basically, just share this post with everybody you can, and remember… Don’t run with scissors!! As always, I send you and yours Love and Light, and Happy Crafting!