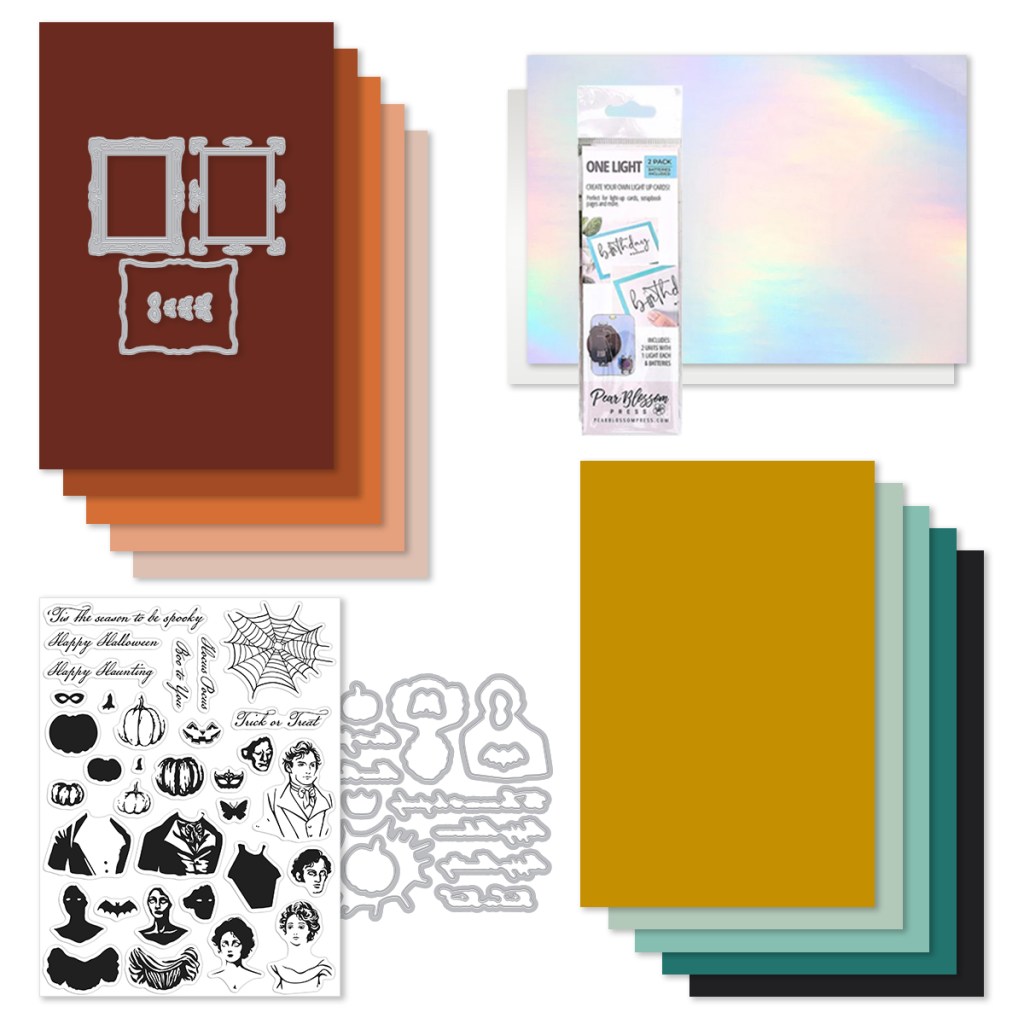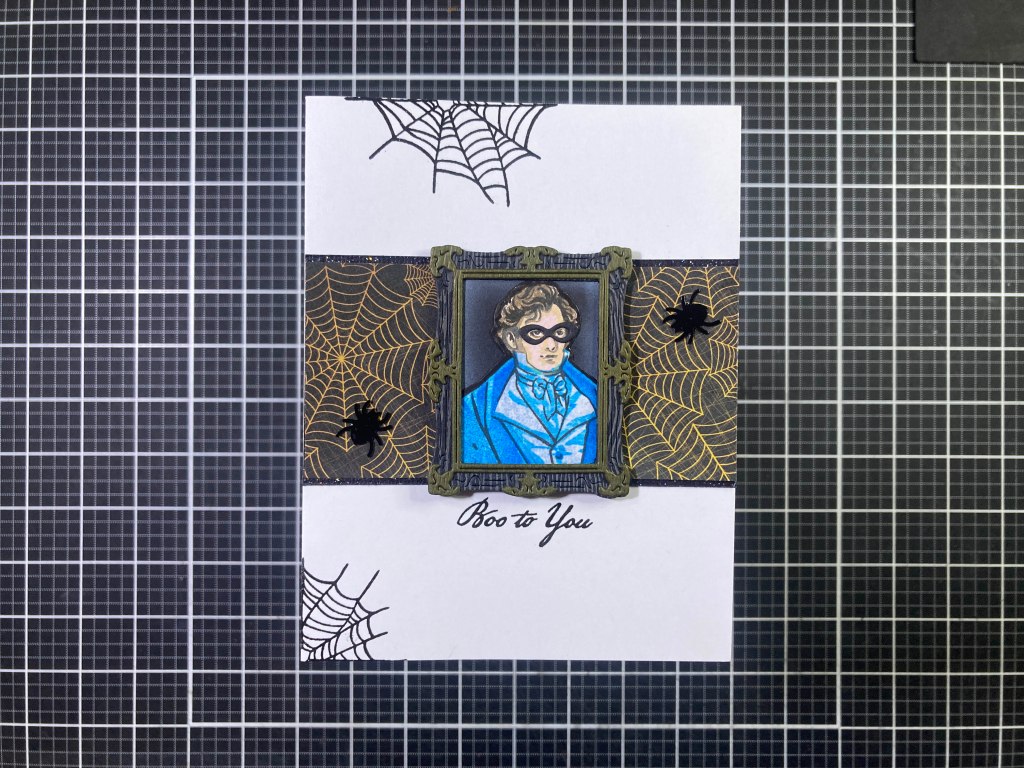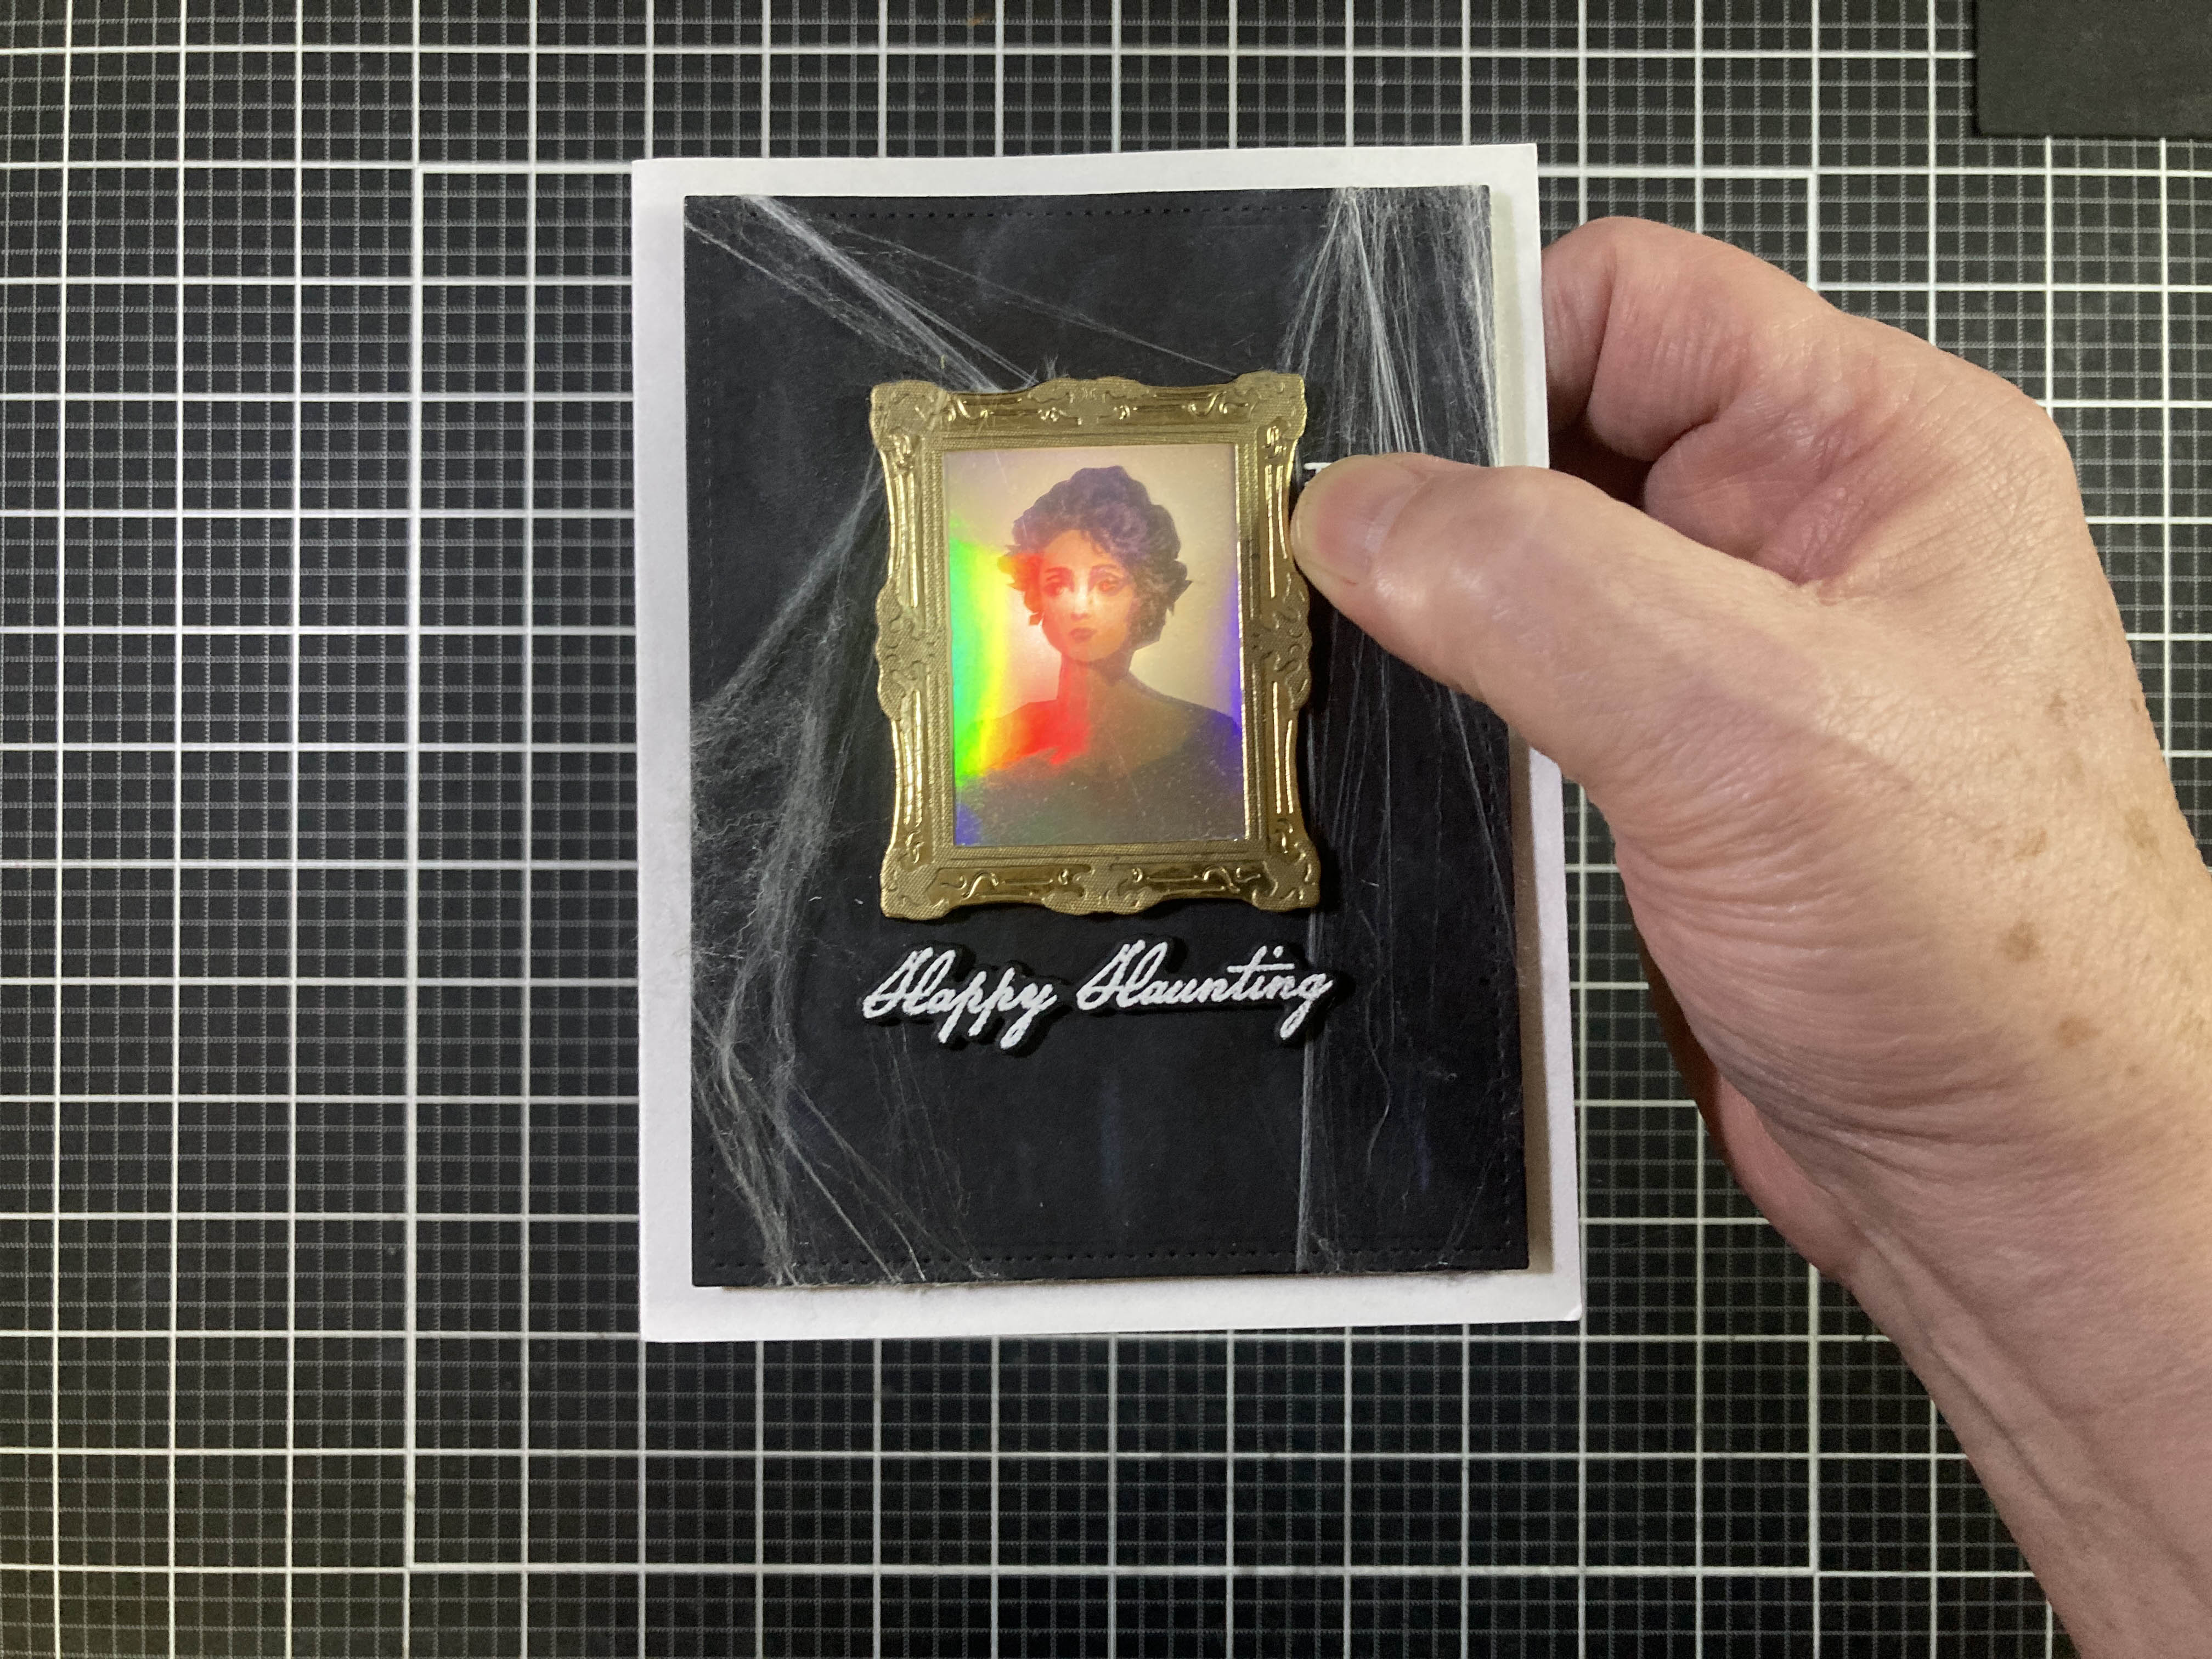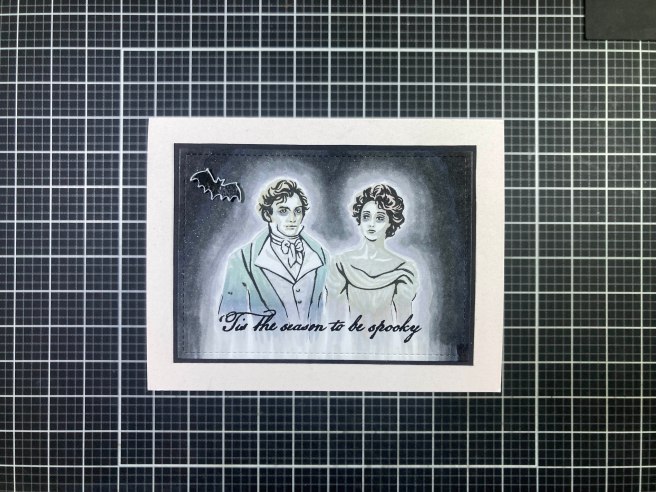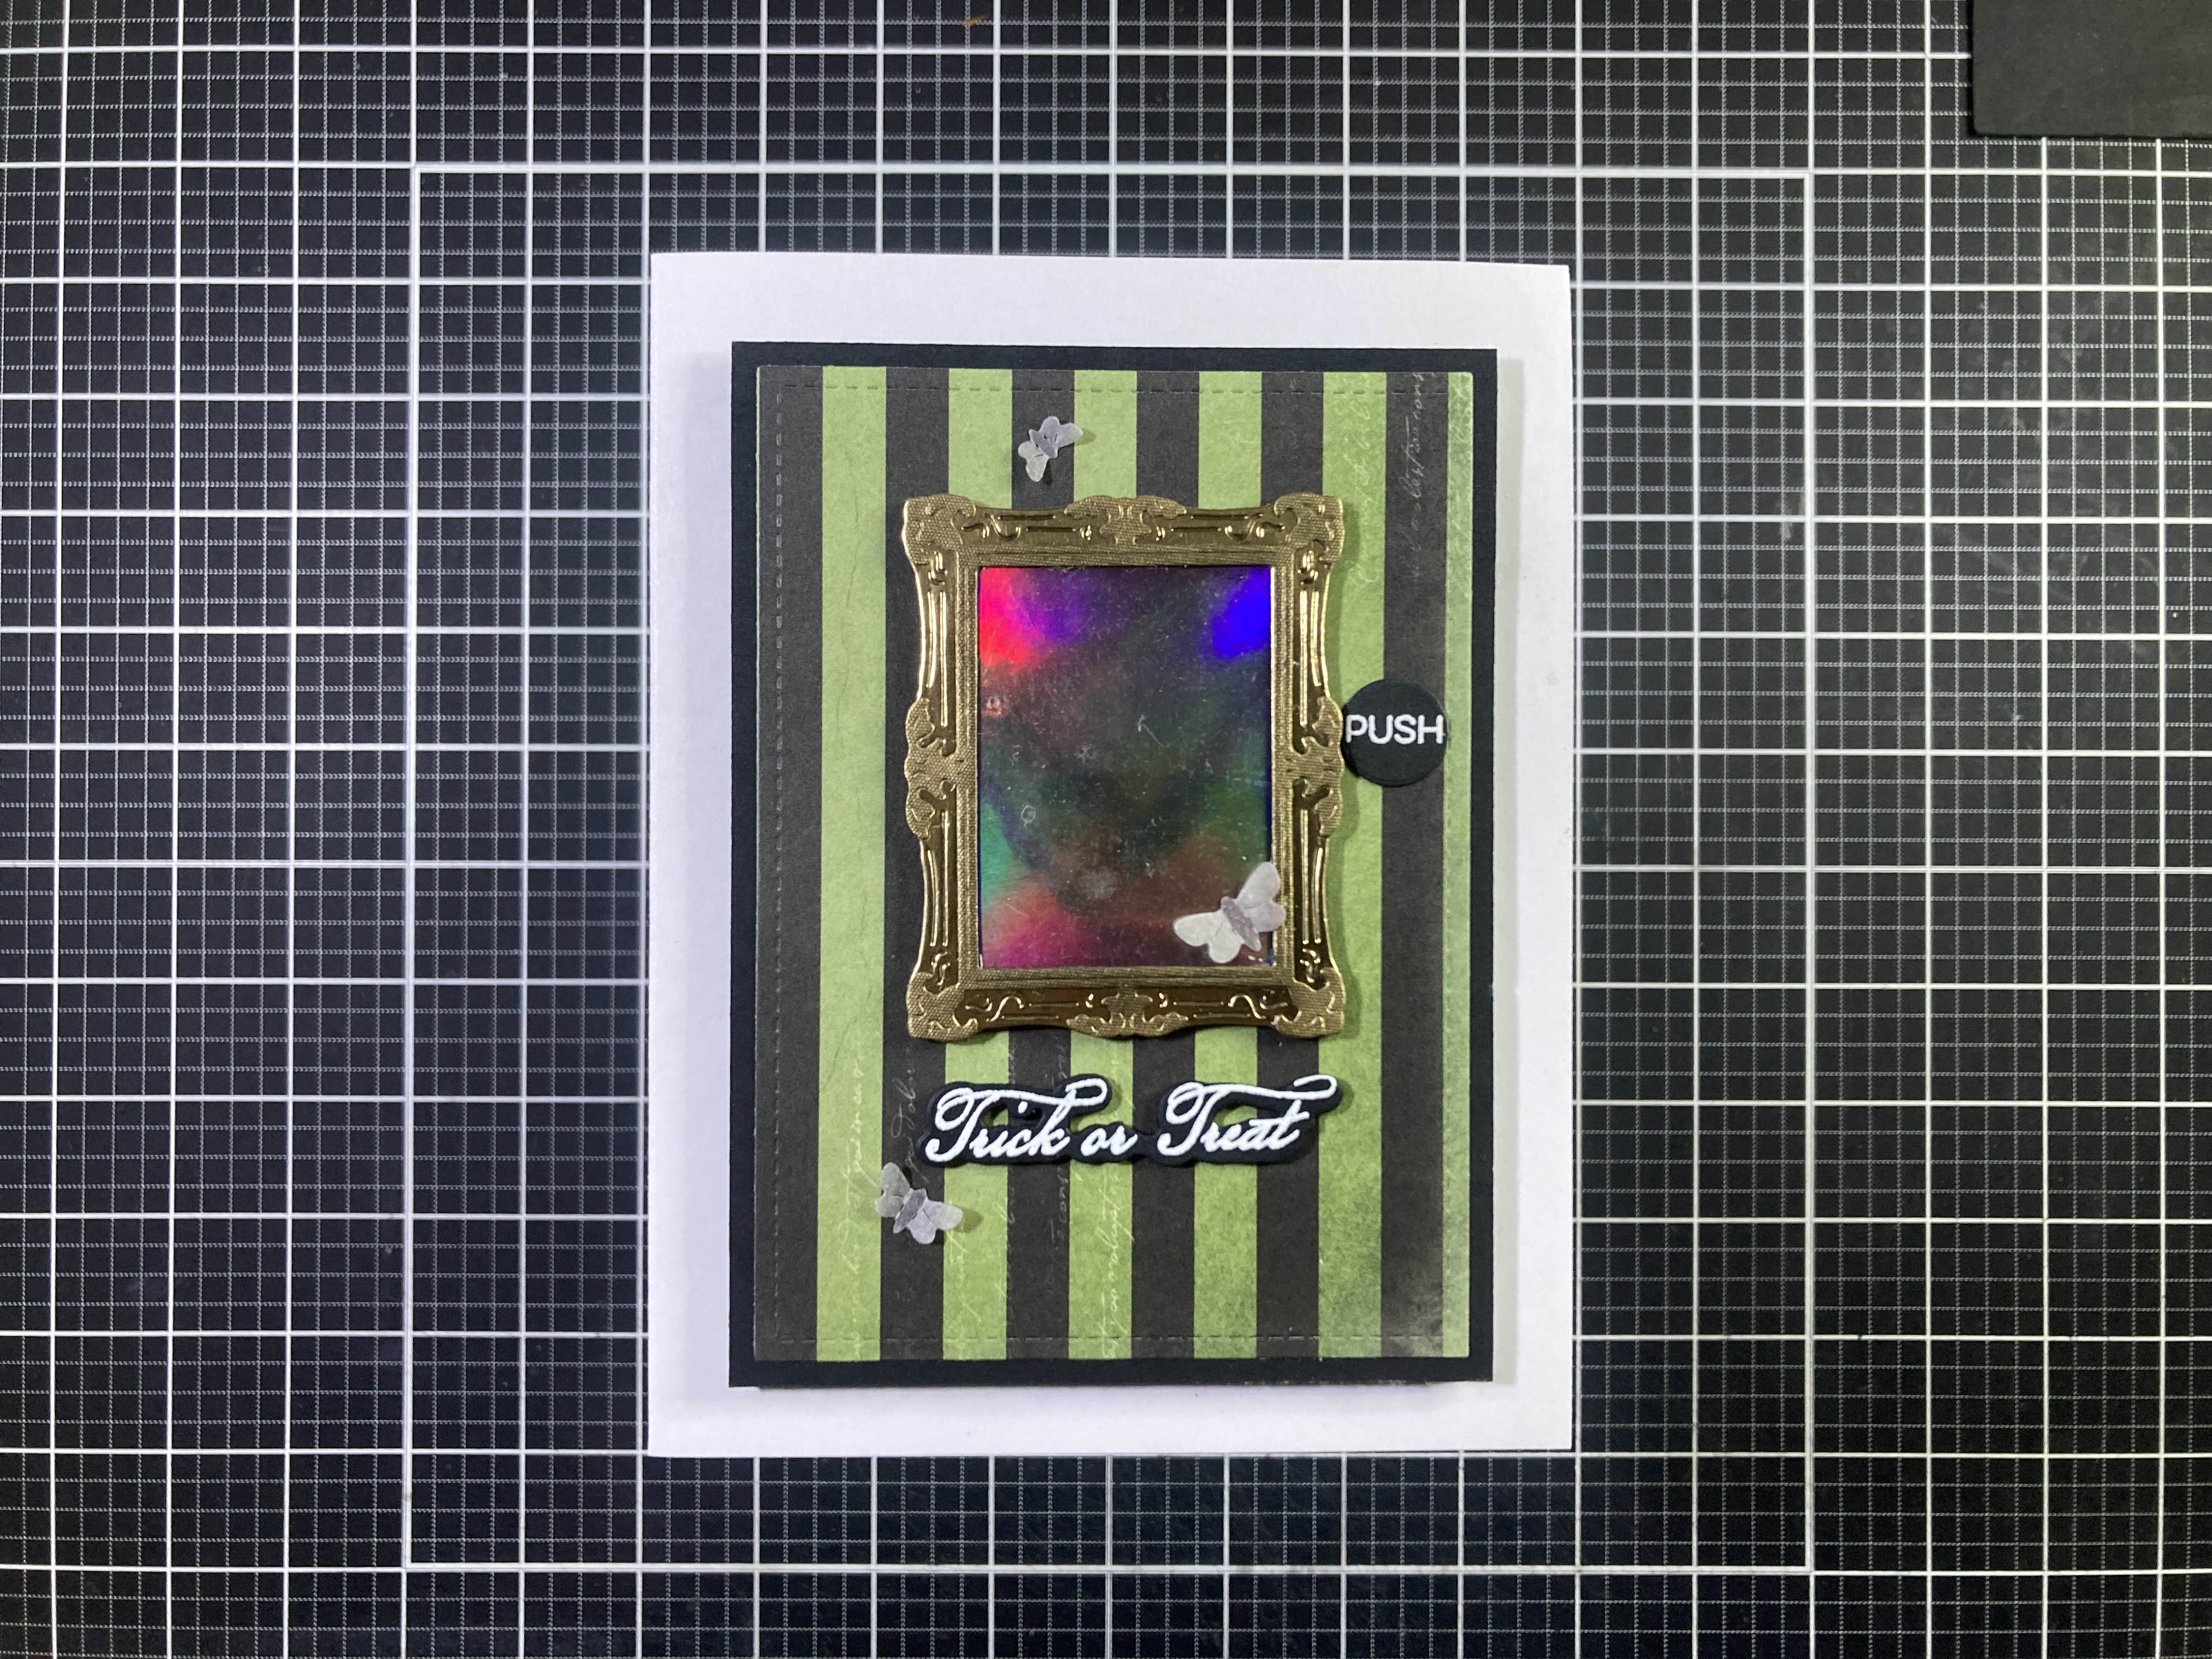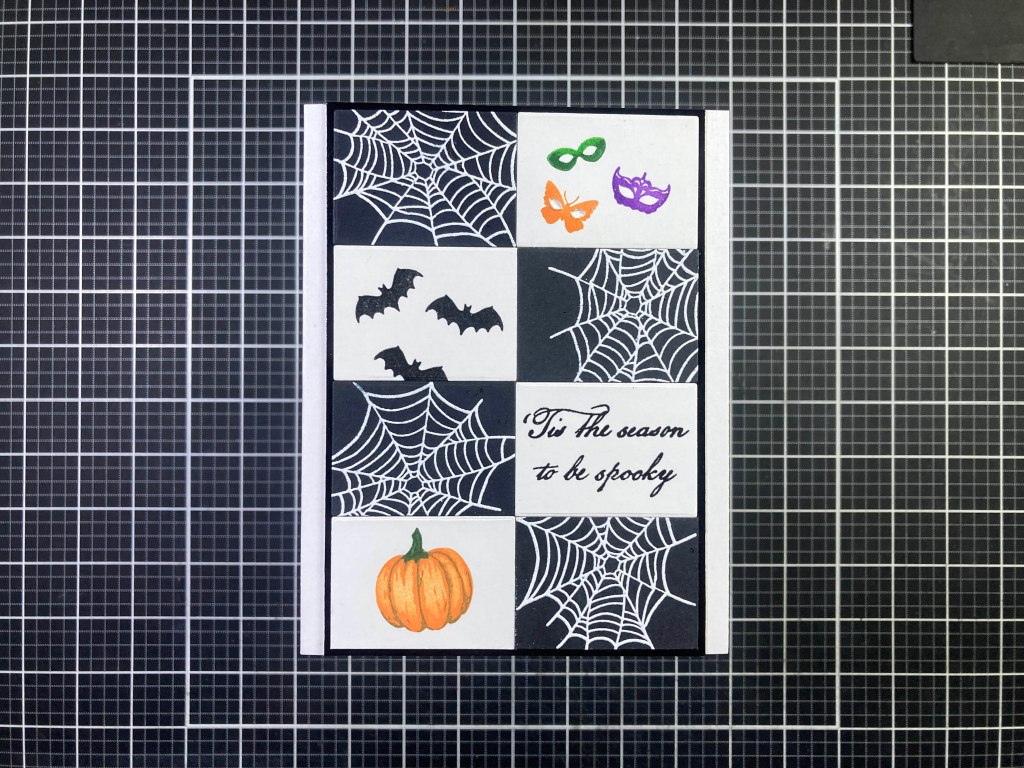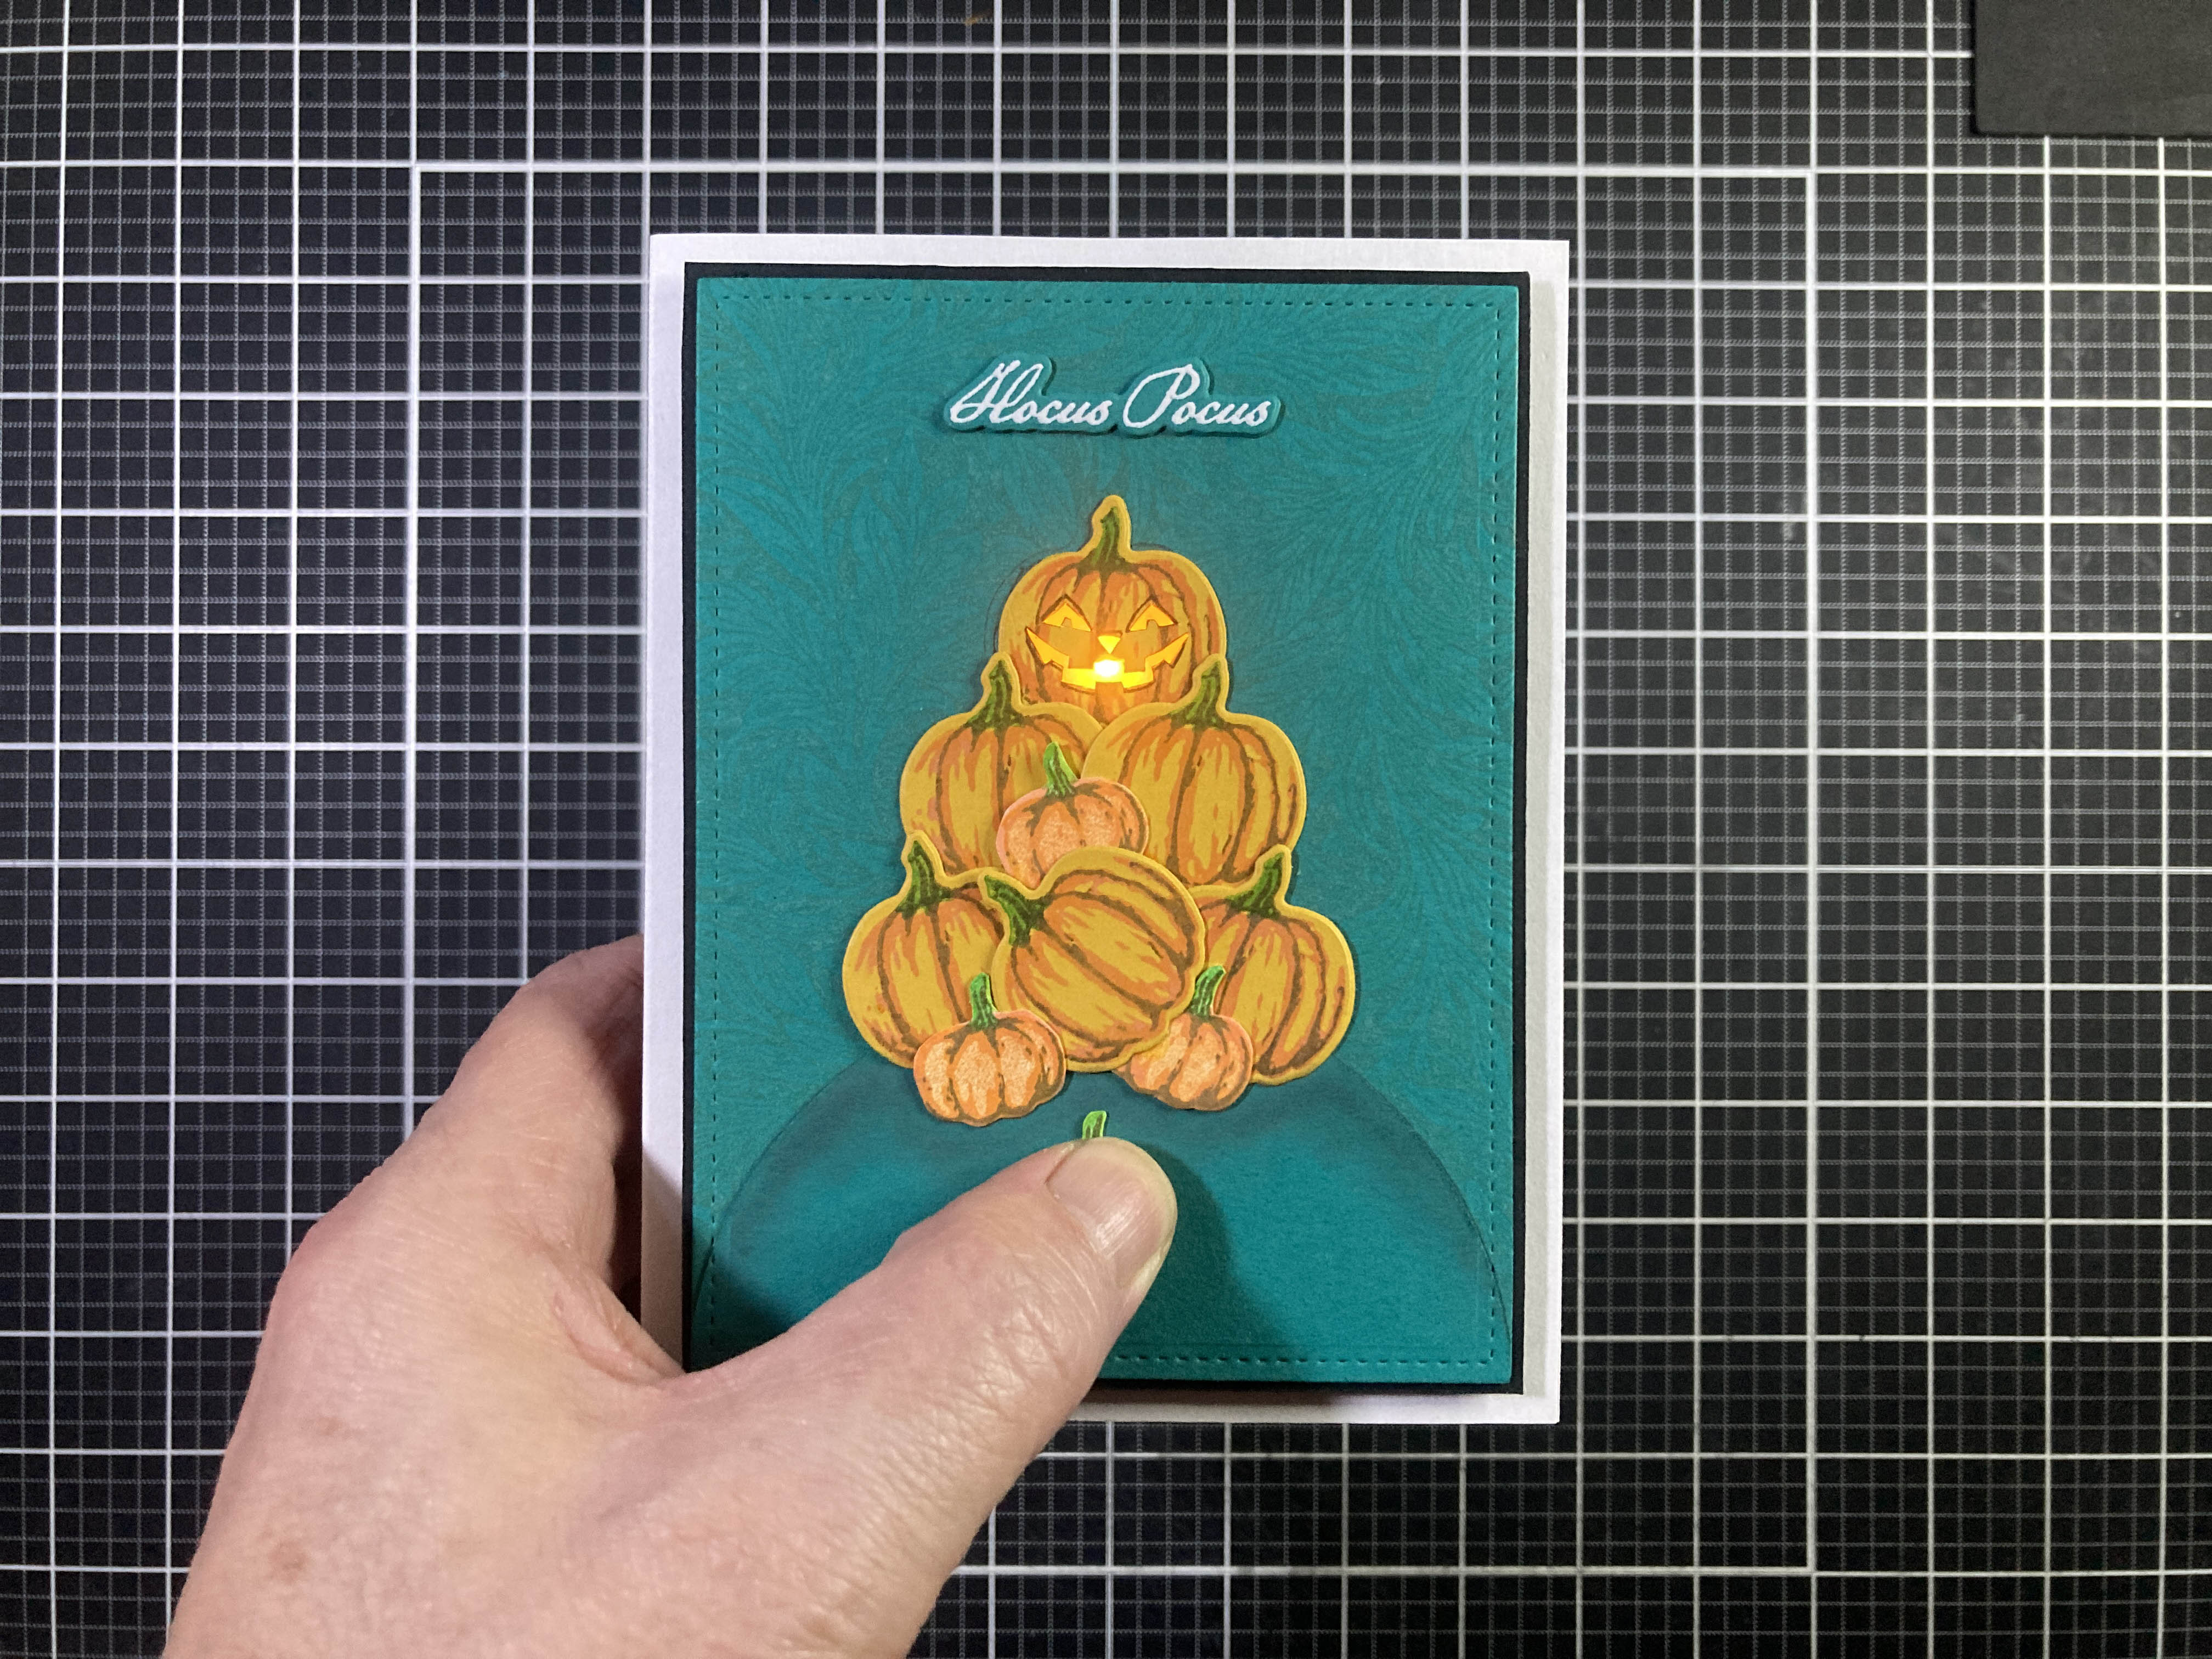
Hello Folks! Scott here again and I’m still on a Halloween binge with the new My Monthly Hero and My Monthly Super Hero kits for September 2026! Halloween is right around the corner and Hero Arts is fulfilling our spooky needs with this “Wicked Good” theme!
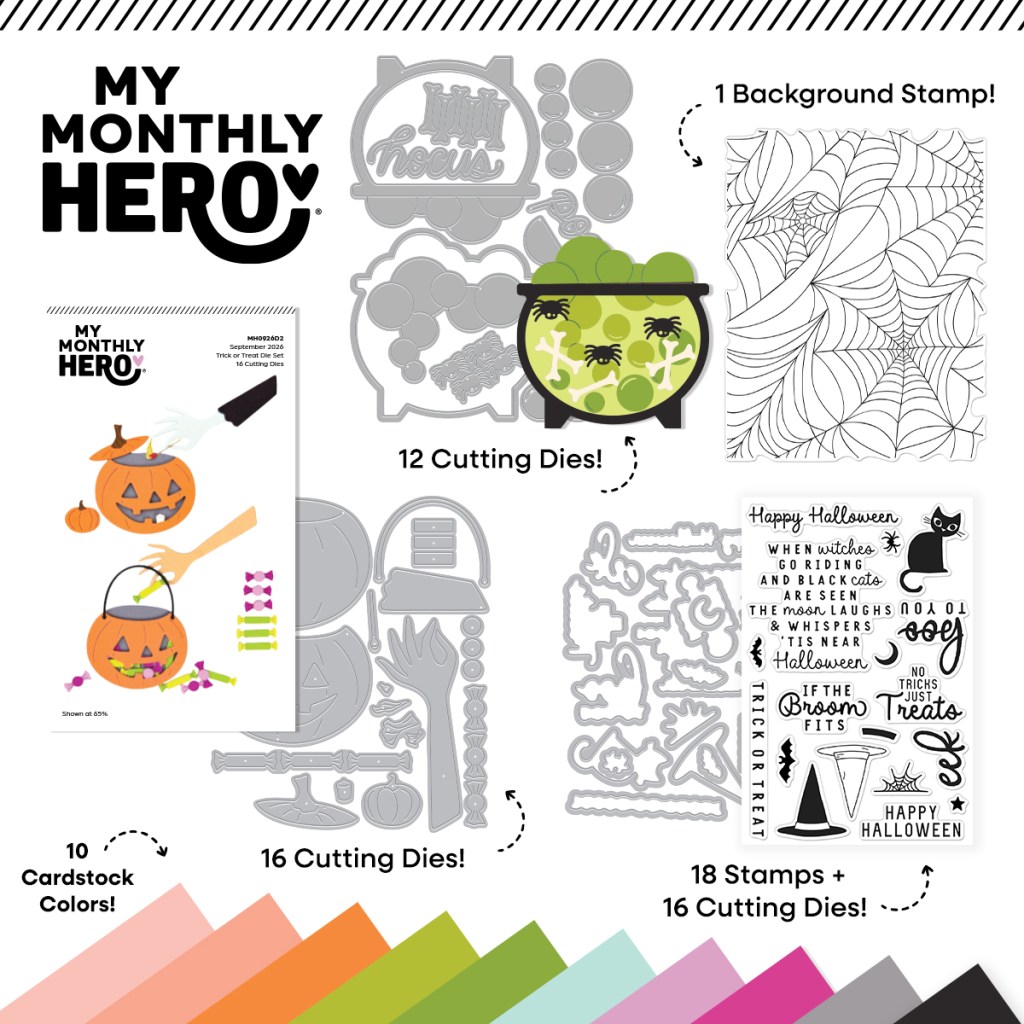
The My Monthly Hero kit begins with the Cauldron Shaker Die Set (a cauldron makes perfect sense for a shaker card!). Then there is the Trick Or Treat Die Set featuring a couple variations on a pumpkin – then we get the ‘Tis Near Halloween Stamp & Cut set with lots of sentiments and a couple of image stamps, followed by the Web Background Stamp (love it!) and 10 Half-sheets of card stock in Bellini, Coral, Carrot, Peridot, Rainforest, Mint, Orchid, Mulberry, Anchor and Raven.
The My Monthly Super Hero kit includes everything in the Hero kit plus the If The Broom Fits Die Set – a broom – and the Miss Witch Die Set featuring a modern and stylish peeking (peek-a-BOO?!) witch and finally, the Spooky Brew Stamp & Cut set. Finally a few stamps we can color! I was starting to worry!!
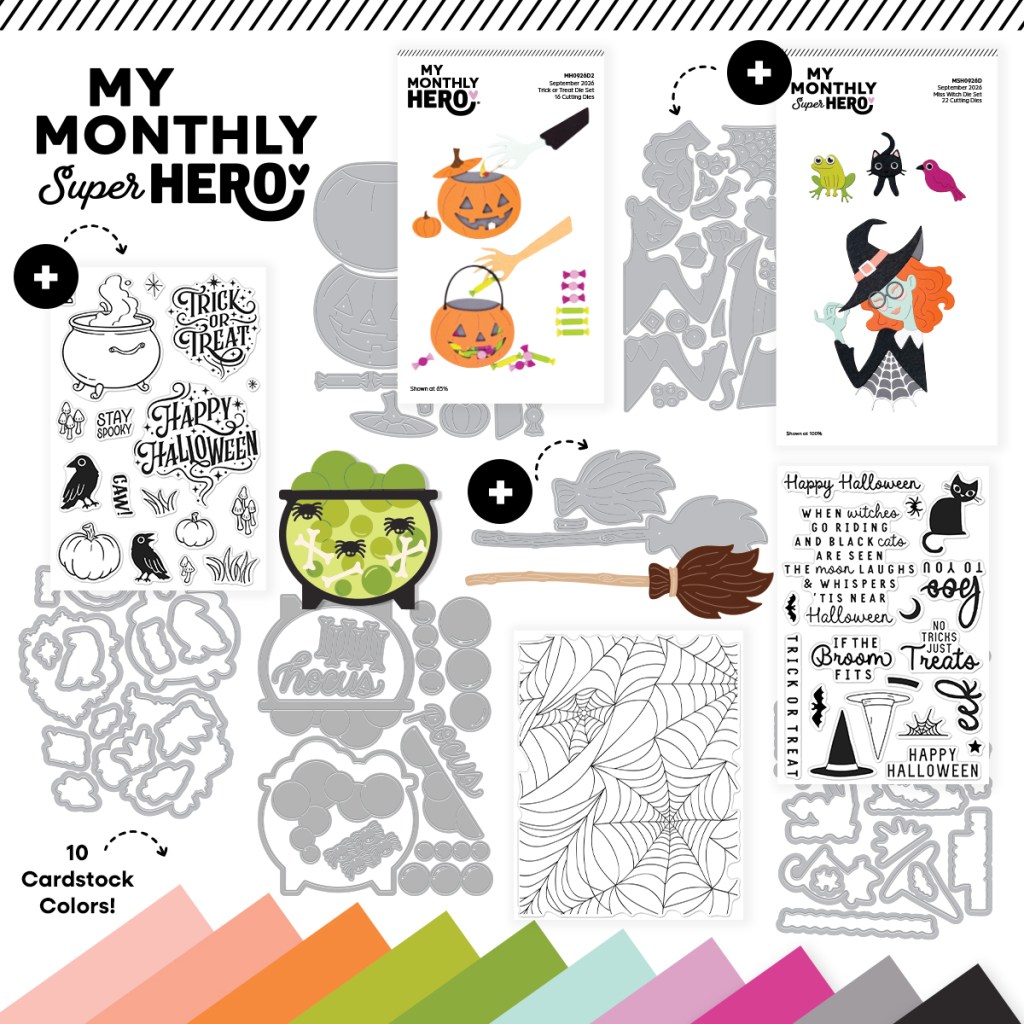
We seem to get shaker window dies almost every other month these days… I know people love to receive them (who can actually put one down??) and a cauldron shaker card should be fun!
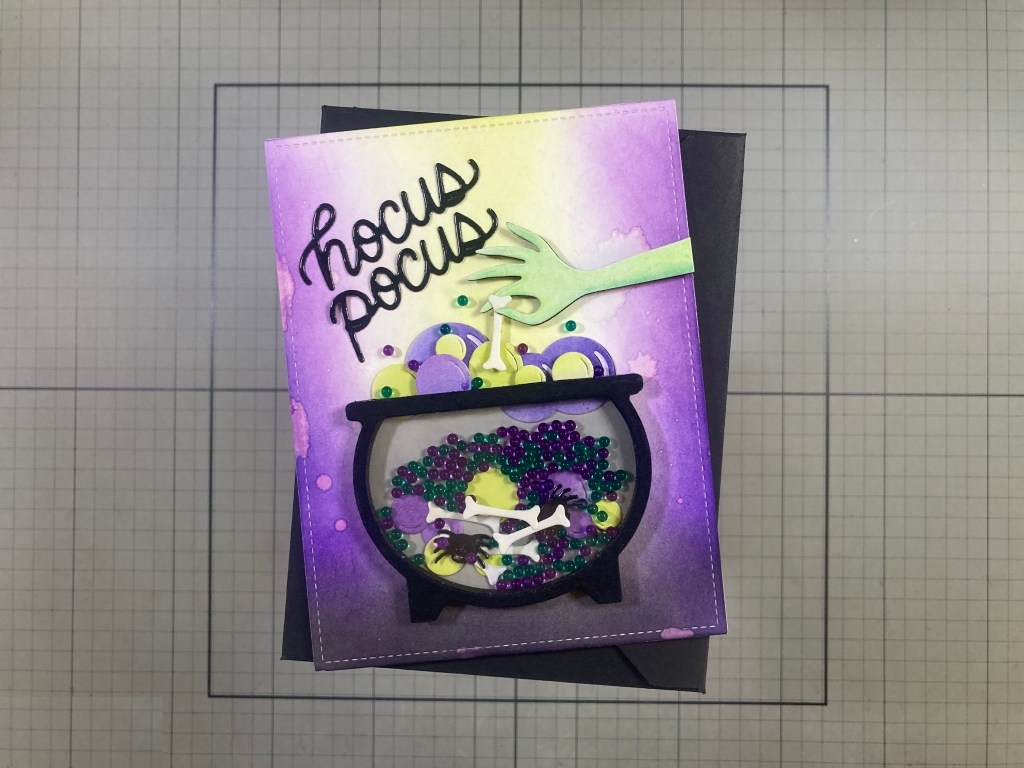
I have some old Queen and Co. Tiny Bubbles Toppings that I thought would work really well in a cauldron! But… if I want anything else in the shaker mix, then I will have to make a fairly deep well in the cauldron! I ended up die-cutting seven layers of the window die from Pitch Black card stock (I did cut off the bubbles along the top of the window die). I glued 6 layers of the shaker frame together and topped that stack with a piece of acetate, and then glued the last shaker frame on the top. I cut the background for the cauldron out of plain Grey card stock and set it aside.
I ink-blended some scraps of White card stock with Grape Slush and Key Lime Fizz Reactive inks and die-cut all the bubbles from those. I did save the “highlight” pieces from the large bubbles and lightly inked their reverse with the same color before inserting them back into the large bubbles. I glued five of the bubbles to the Grey background piece. I die-cut some bones and spiders and added them along with more die-cut bubbles and the Tiny Bubbles Toppings in Green and Purple to fill up the cauldron. Then I glued the Grey background piece to the back of the cauldron. There’s our shaker!
That is certainly a big cauldron! It’s 3″ wide by 2.25″ tall – takes up almost half of an A2 card! I ink-blended a panel of White card stock with Key Lime Fizz, Purple Galaxy, Grape Slush, and Licorice Reactive inks – keeping the purples and black to the sides and bottom while inking over the cauldron opening with the Key Lime Fizz. I dropped a few splats of water on the inking to add a touch of distress. I die-cut the background to 4.25″ x 5.5″ with a Lawn Fawn Stitched Rectangle die and glued it to a White card base. I added four more inked bubbles on the top of the cauldron with foam tape for a little dimension and glued the cauldron shaker to the card front.
I grabbed the hand die from the Trick or Treat Die set and cut one from a scrap of White card stock and one from Pitch Black card stock. I colored the white hand with my Pebbles Chalk Palette and glued the black layer behind. I added one of the die-cut bones between the fingers and attached that to the card front with foam tape. The sentiment is die-cut from some Glossy Black card stock and glued flat to the card. Some extra Tiny Bubbles above the cauldron finish out our shaker card – I love using the hand from the Trick or Treat set to add ingredients to the bubbling cauldron!
Now you don’t HAVE to make the cauldron a shaker… you can use the background die to make a simple flat cauldron!
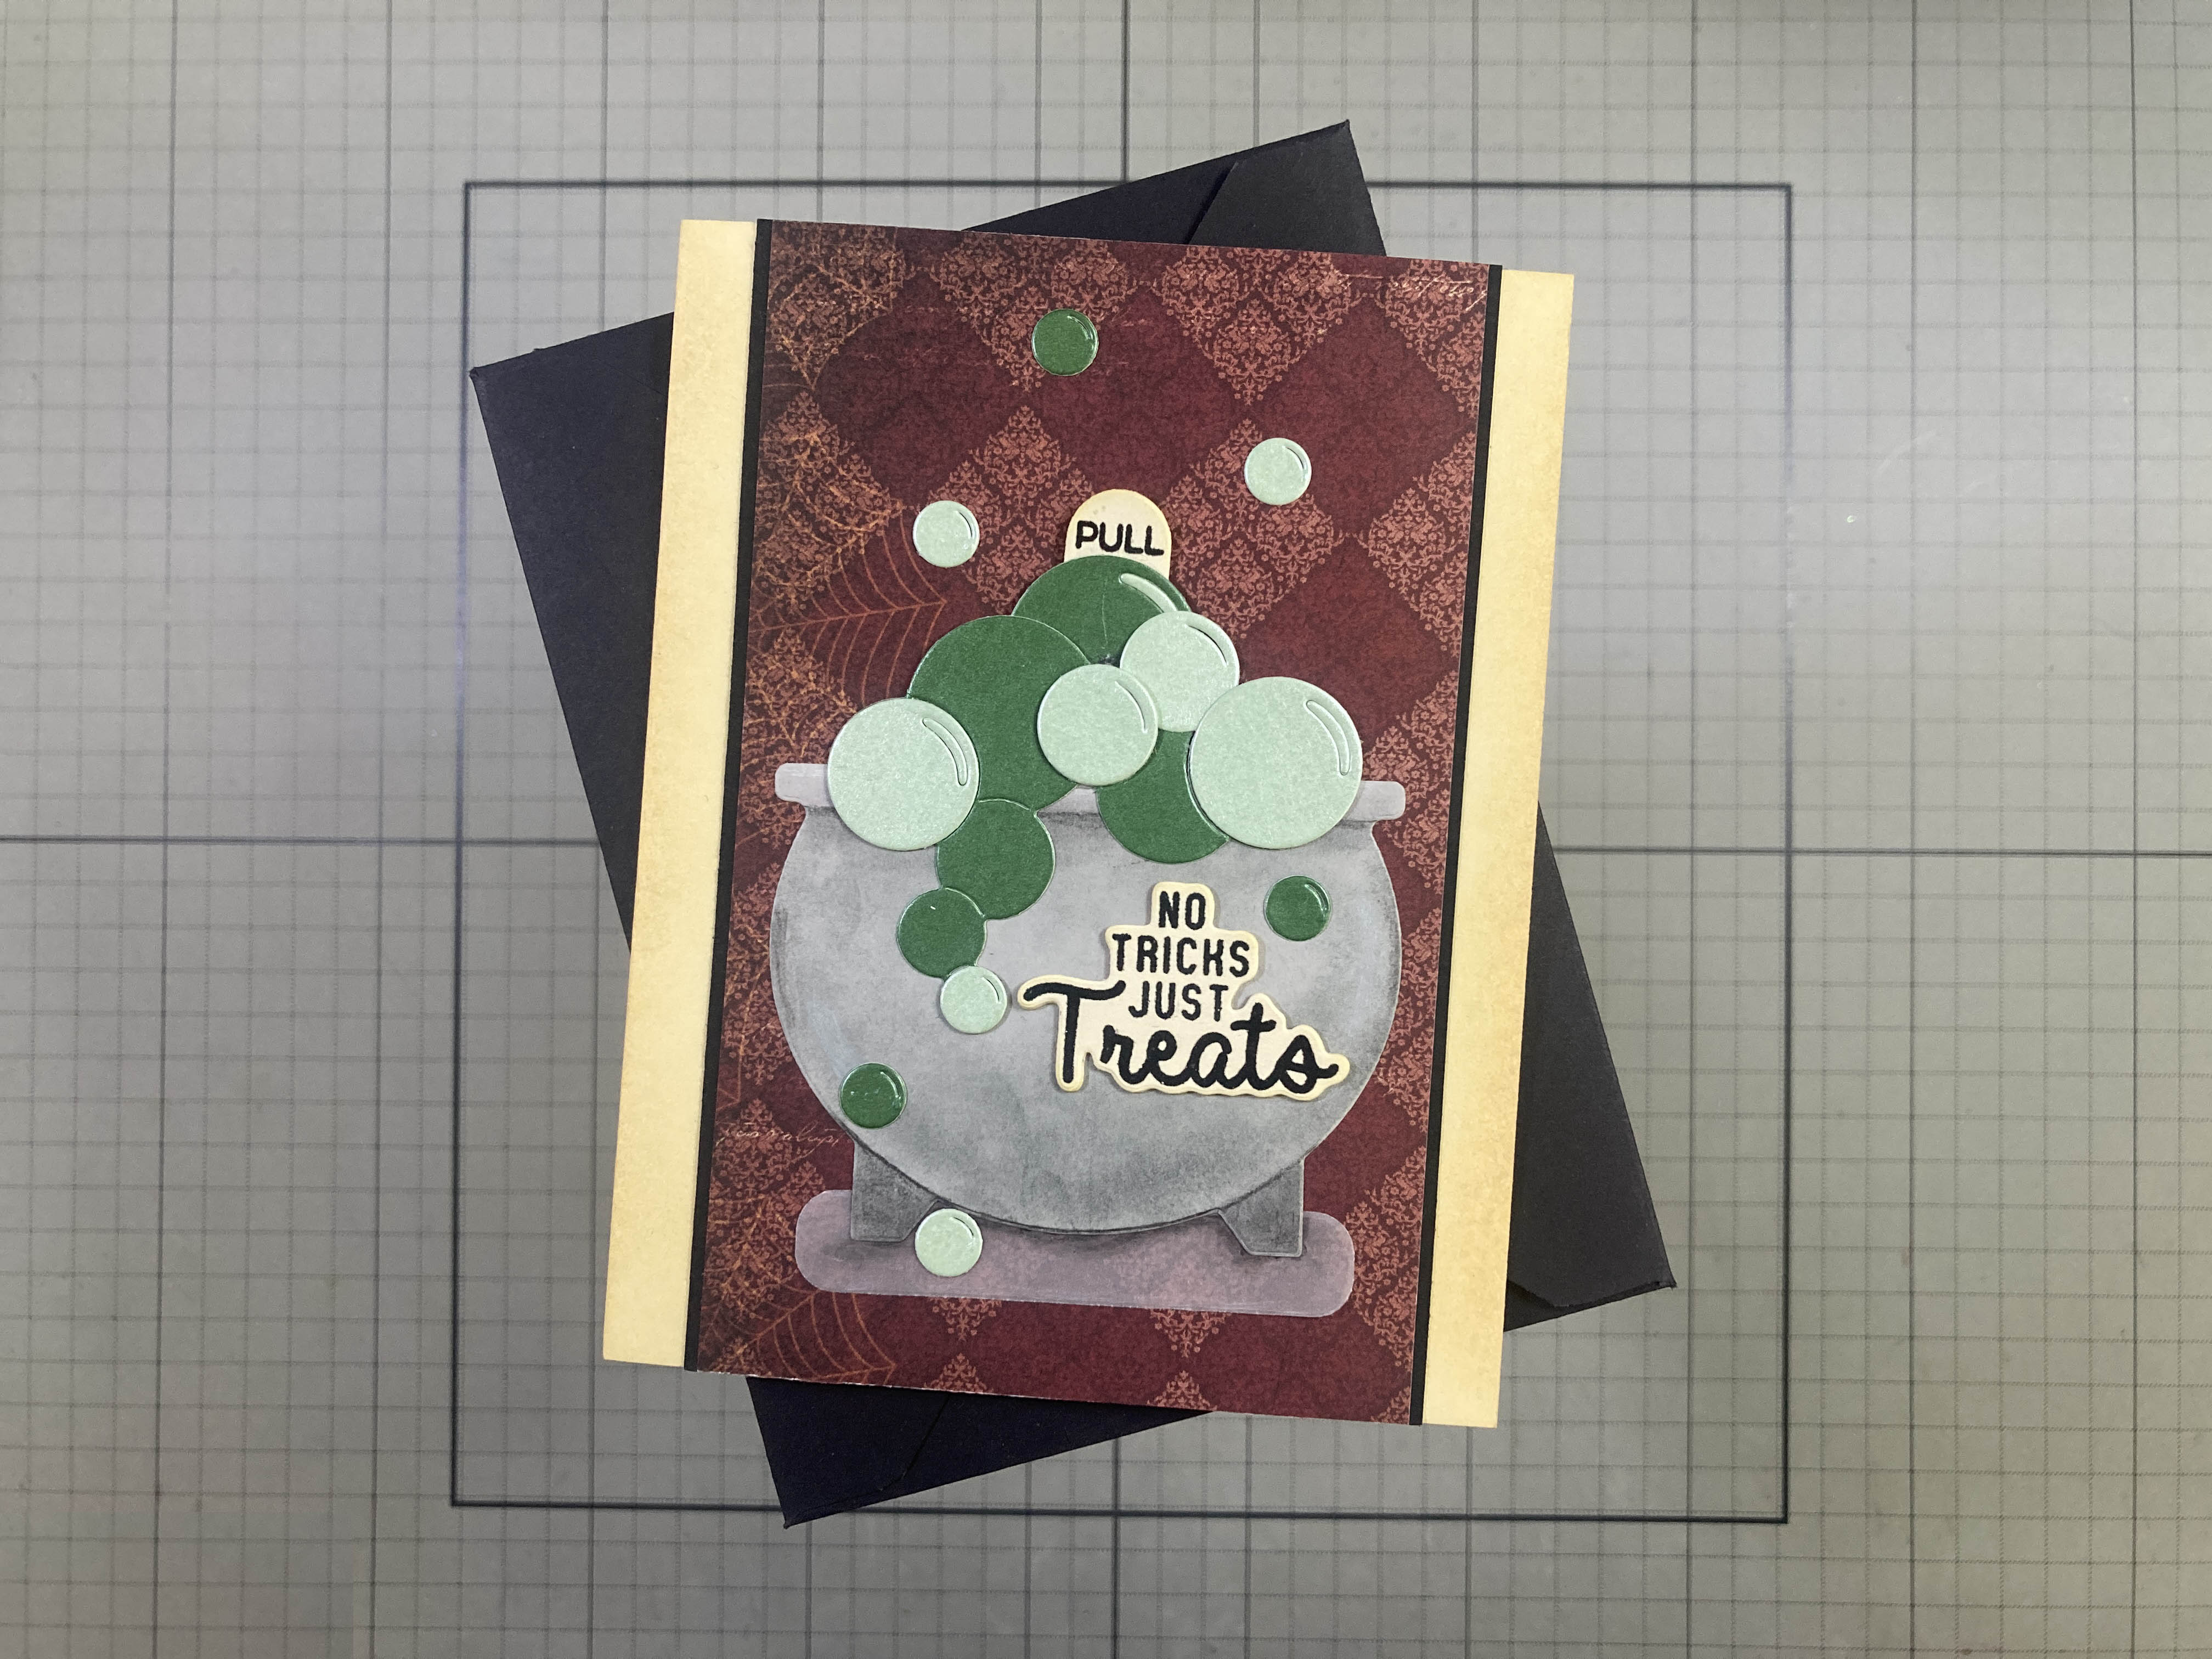
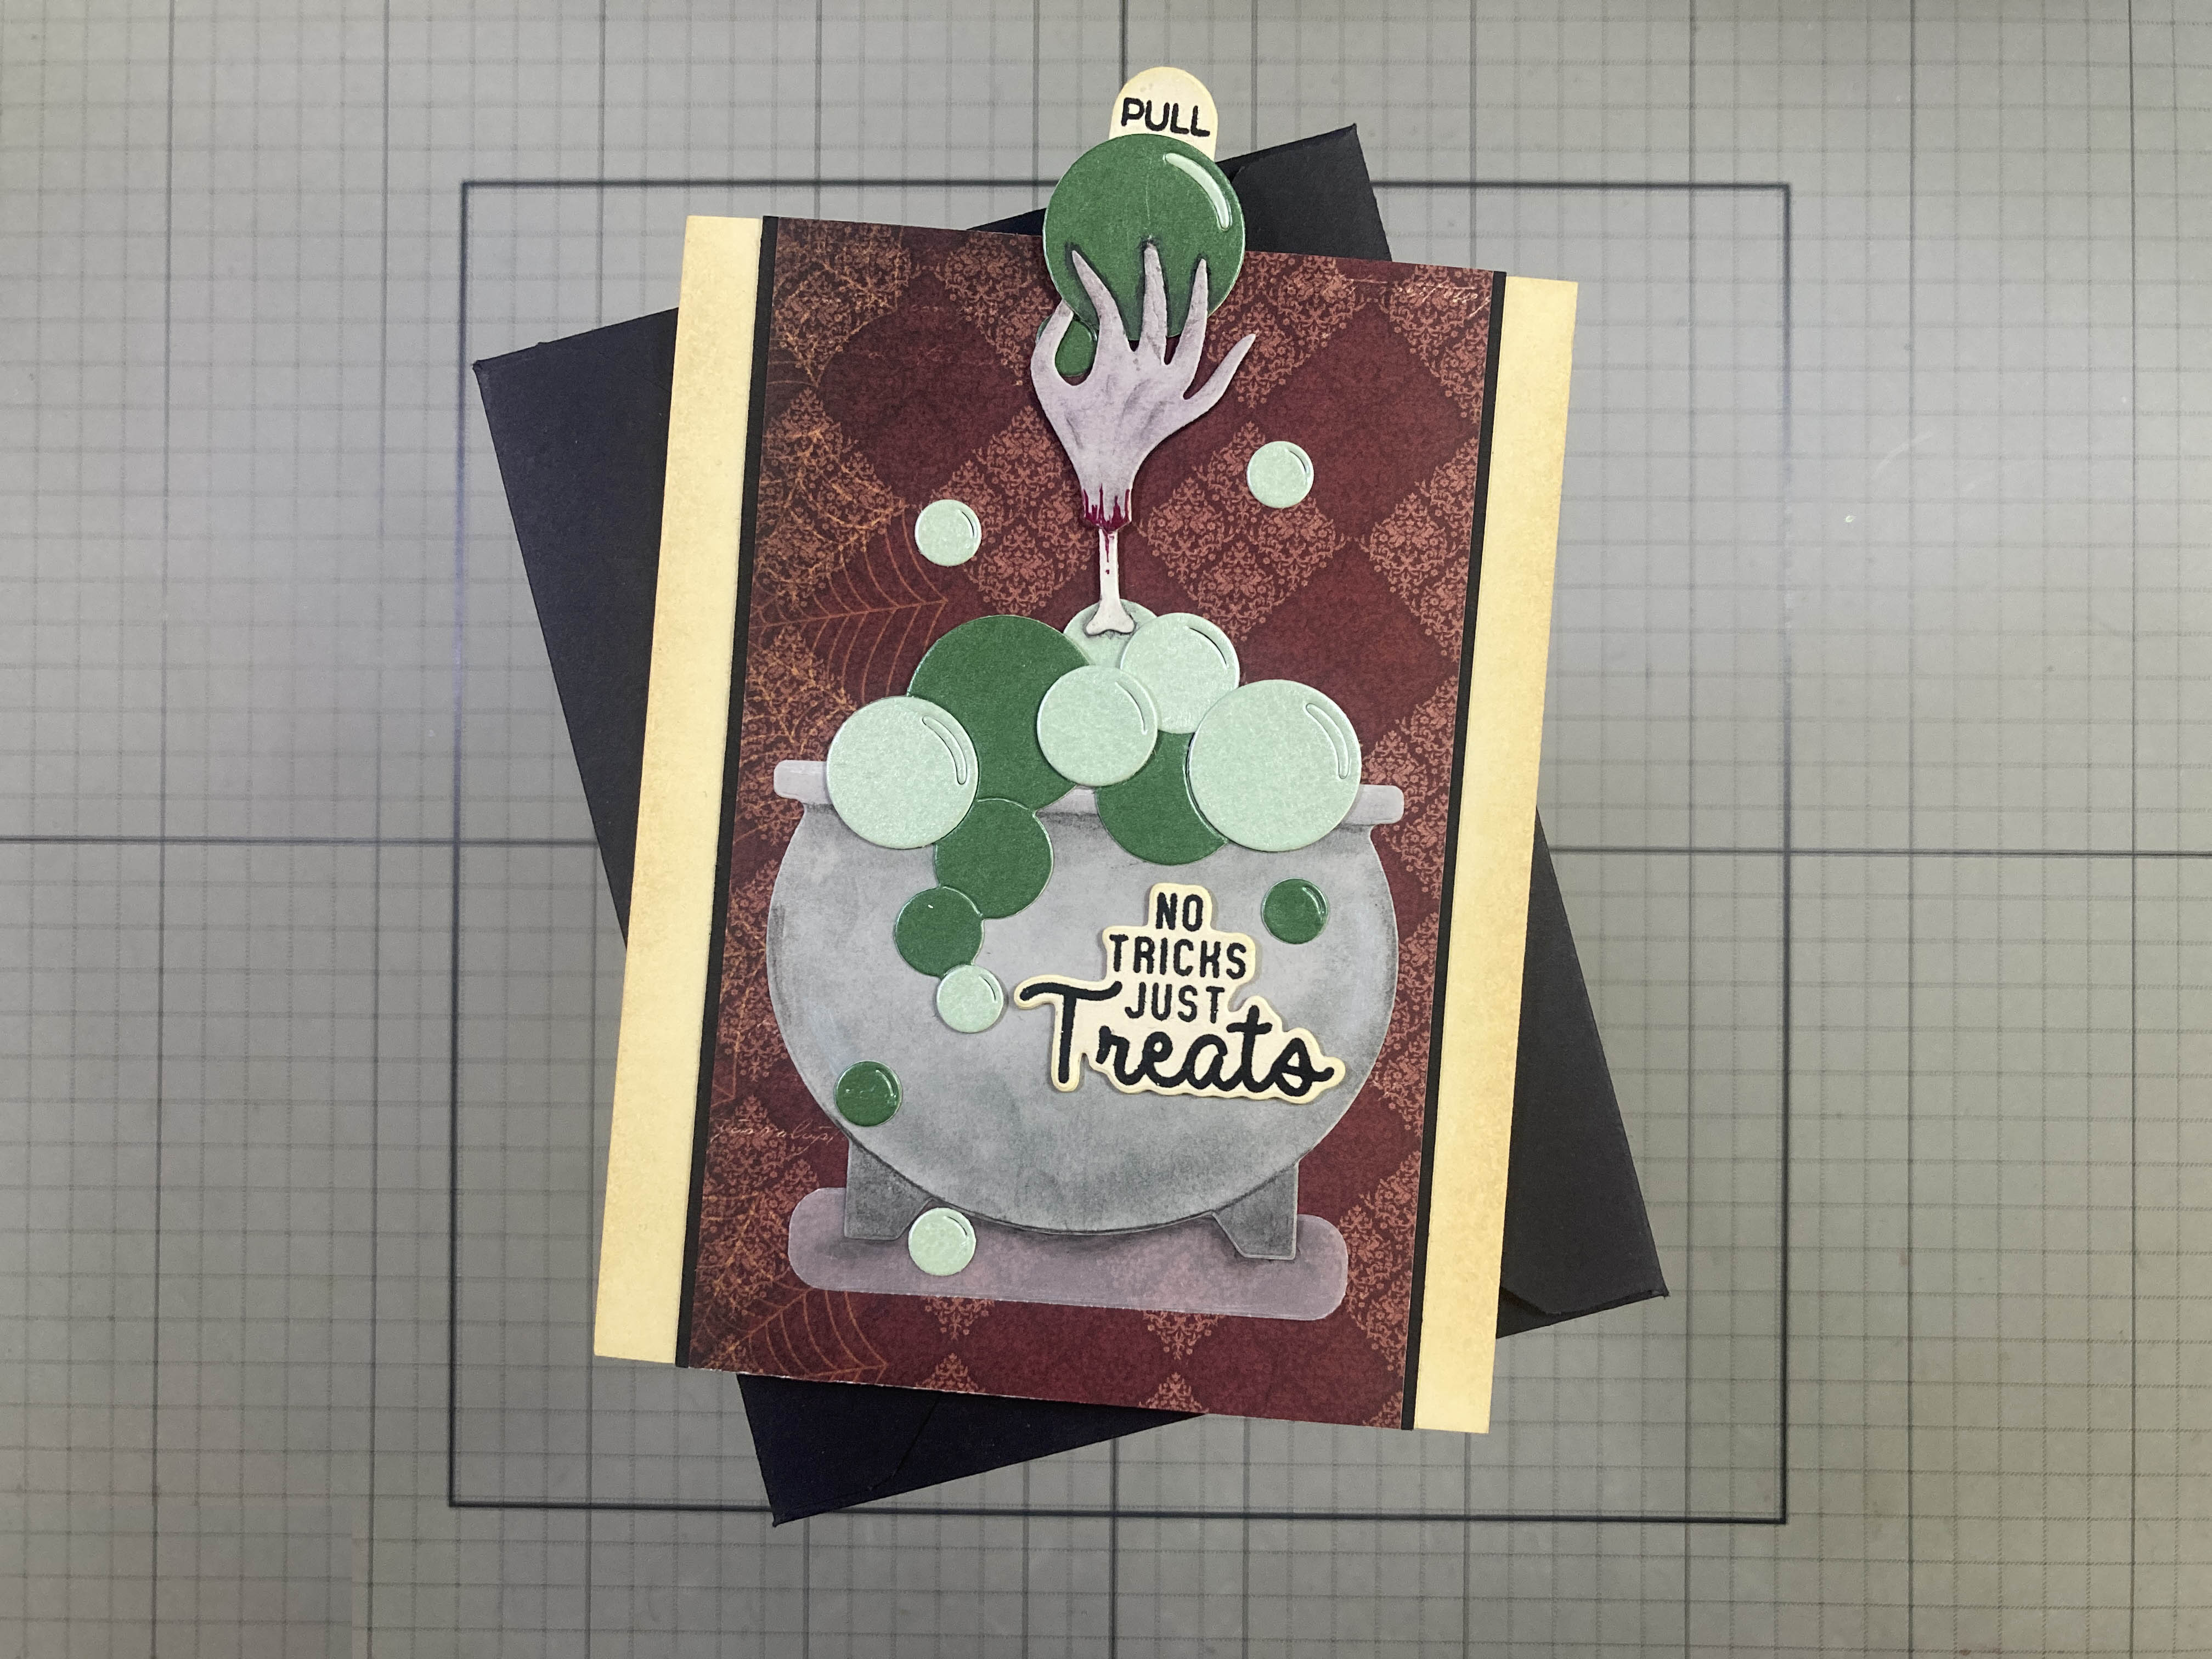
This may be a little gruesome, but it tickles me to no end!. I die-cut the cauldron from plain Grey card stock and colored it with my Pebbles Chalk Palette and some Charcoal pencils I found in my stash. I die-cut a bunch of bubbles from a light Green and dark Green Pearlescent card stock (replacing the highlights on the big bubbles) and glued those in place. I die-cut an extra hand from Grey card stock and another bone from White card stock, added some shading with my Charcoal pencils and some blood with a red Pigma Micron pen, and glued the hand to a big bubble and the bone to two smaller bubbles and a wider scrap of card stock to stop the pull-tab from coming all the way out. Then I added an Ivory tab stamped with PULL from the My Favorite Things Interactive Labels Stamp set.
I made an A2 card base with some plain Ivory card stock and inked the long edges with Antique Linen Distress Oxide ink. The background is an old piece of pattern paper from my stash cut to 3+3/8″ x 5.5″. I cut a slit through the pattern paper (wide enough for the hand but thin enough to stop the tab from pulling out) right where the rim of the cauldron will be. I used the Black mat behind the background to provide some space for the pull-tab to travel. I cut two pieces of Pitch Black card stock to 1″ x 5.5″ and glued those to the back of the pattern paper with a little showing out the sides. Then I cut two more pieces of Black to 1/2″ x 5.5″ and glued those on the inside edges of the first black strips. A strip of black card stock at the bottom of the “mats” keeps the pull tab from falling all the way through.
I slipped the pull tab through the slit in the pattern paper and glued the cauldron into place. I die-cut a piece of vellum with the smallest Essential Modern Ovals die (making it a little shorter than the die) and glued that under the legs of the cauldron. I stamped the sentiment (from the ‘Tis Near Halloween Stamp and Cut set) with VersaFine Onyx Black Ink on a scrap of Ivory card stock, embossed that with Clear Embossing powder, and die-cut it with the matching die before gluing it flat to the cauldron. I added a few more Green Pearlescent bubbles around the card front and called it a day! A fun pull-tab card takes a bit of a dark turn here!
That’s a couple of cards with the Cauldron Shaker Die Set (with a little hand (yuck yuck) from the Trick Or Treat Die Set). Let’s look at those pumpkins now!
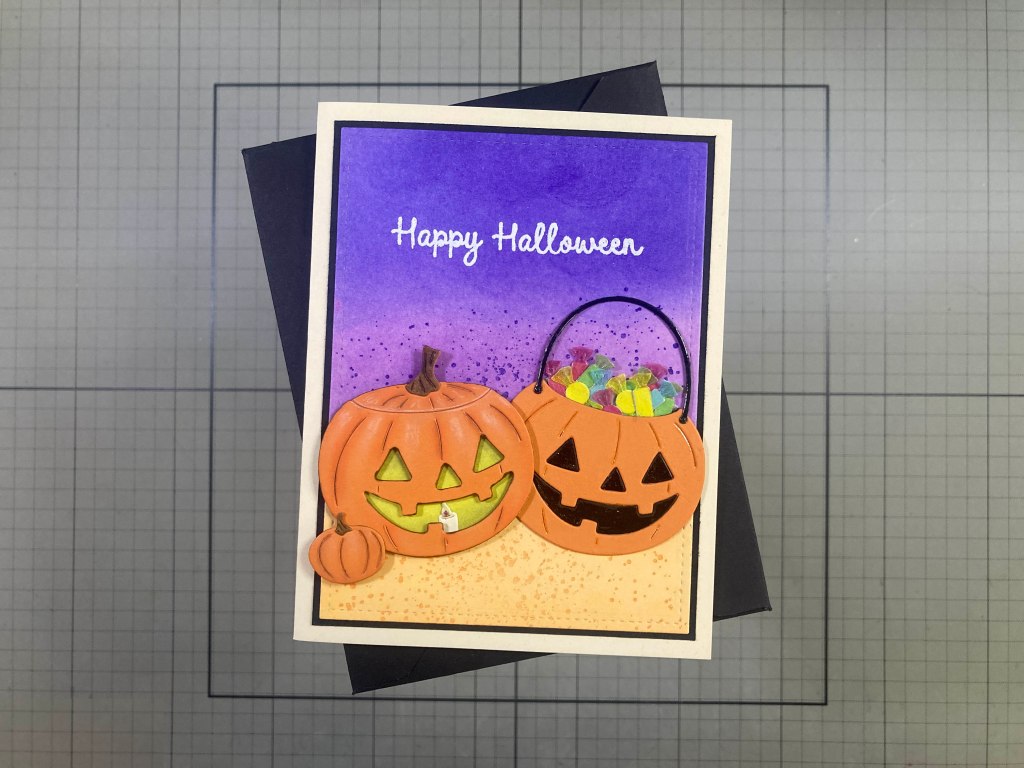
No hands here!! I die-cut the two pumpkins from the included Carrot card stock. I cut a background for the lit pumpkin from some Yellow Pearlescent card stock, and added two layers of die-cut Black card stock behind the pumpkin face for some dimension. I added a bit of shading around the edges of the yellow insides and added the (lit) candle towards the bottom. I glued all those layers together and added the stem and a little shading with my Charcoal pencils.
For the trick or treat bucket, I die-cut the pumpkin face from some Black card stock and inset those into the Carrot cut pumpkin face. I added some Clear Glaze pen to the black face pieces so it reads a little more “plastic”. The handle is cut from Glossy Black card stack and glued in place. The candy wrappers are all cut from some Glassine Kite paper (red, yellow, blue, and green) and the candies are cut from plain White card stock and glued behind the wrappers with tape runner. Then all the candies get glued into the bucket opening. Looks like quite a haul!
The background is a panel of White card stock ink-blended with Creamsicle, Grape Slush, and Purple Galaxy Reactive inks. I spattered more Creamsicle ink on the orange part and more Purple Galaxy ink on the purple part. I trimmed that panel to 3.75″ x 5″ with a Lawn Fawn Stitched Rectangle die, added a thin Black mat and glued those to an Ivory card base. I stamped the sentiment (again from the ‘Tis Near Halloween Stamp and Cut set) with VersaMark ink and embossed it with White Embossing powder. I glued the pumpkins in place (just breaking the frame a little bit) and added the small die-cut pumpkin (a little shading here too) with a spot of foam tape. Pumpkin two ways – no embellishments needed!
I’ve already used the ‘Tis Near Halloween stamps for the last two sentiments – let’s look at the Web Background stamp!
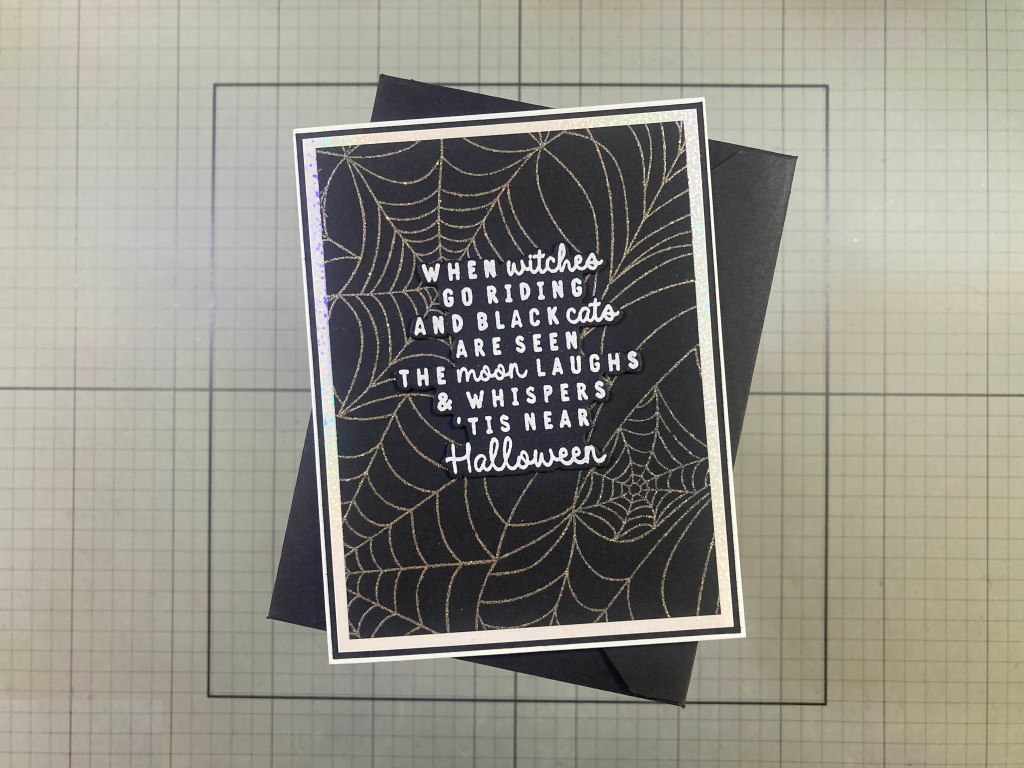
This is by far the BEST Web Background Stamp I have in my stash now!! I stamped that on a panel of Black card stock using VersaMark ink and embossed it with some WOW! Cloud 9 Embossing Powder. WOW! INDEED! The perfect sparkle for a cobweb! And that stamp has such precise, fine lines… love it! I trimmed that panel to 3.75″ x 5″ and added a 4″ x 5.25″ Iridescent White Sparkle mat behind and then added a thin Black mat behind both before gluing them down to a White card base.
I really like this cute little poem sentiment.. I stamped that on plain Black card stock with Versa Mark ink and embossed it with White Embossing powder. I die-cut the sentiment and two blanks with the matching die and glued them all together before gluing the stack down to the card front. Simple and sweet but that embossing powder just sparkles!
There is only one outline stamp in the whole My Monthly Hero kit… though I guess you could color the Web Background Stamp if you wanted to…! I’m ready to color almost anything at this point!
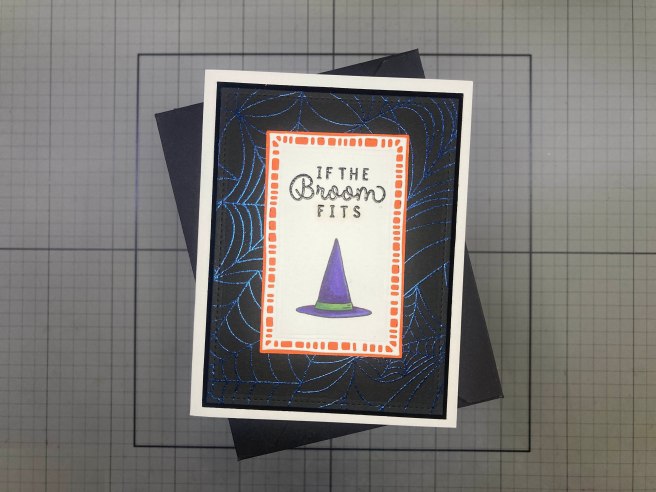
OOOOH! There’s that Web Background Stamp again – this time embossed with Iridescent Embossing Powder from the MMH June 2023 kit – it doesn’t really show on black card stock unless the light hits it just right – another cool cobweb effect! This background is cut to 3.75″ x 5″ with a LFSRdie and matted on a thin Glossy Black mat and glued to an A2 White card base.
I stamped the hat on a piece of 80# Neenah Solar White card stock and colored it with my Ohuhu Alcohol markers. I stamped the sentiment with VersaFine Onyx Black ink and embossed it with Clear Embossing powder. I die-cut the panel with the second smallest Moda Scrap Framed Rectangles (just under 2.25″ x 3.5″) and glued it to a piece of Orange card stock cut to the same size with a LFSRdie. I mounted those to the card front with foam tape. Now this sentiment is in the MMH kit, but there’s no broom in that kit. But there IS the If The Broom Fits Die Set in the Super Hero Kit. I just can’t resist breaking into the Super Hero kit a little early to finish out this card.
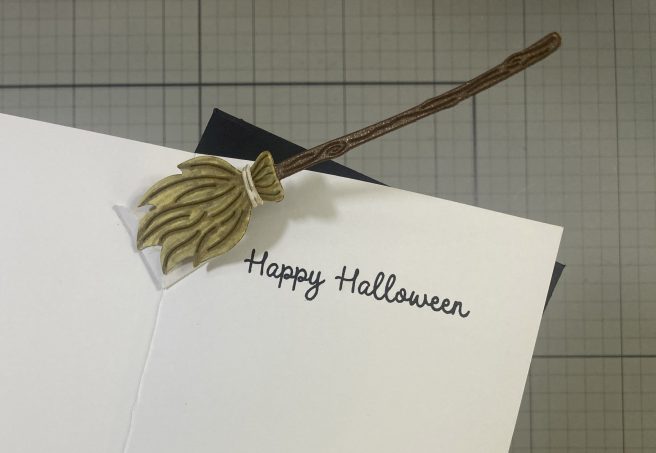
Open the card and the broom pops up all set to take off! I die-cut the broom from some Auburn Pearl card stock and cut a second handle from Pitch Black card stock and glued them together for strength. I cut the Bristles and tie from Ivory card stock and colored them with my Ohuhu Alcohol markers before gluing the broom all together. I also stamped the sentiment on the inside with VersaFine Onyx Black ink.
The pop-up mechanism is a 1″ x 1.5″ piece of thin card stock folded in half (3/4″) and then both halves scored and folded from the center fold to the corners. That gives us a pop-up triangle that you glue over the fold on your card base. I trimmed my corner tabs to fold behind the triangle but you can glue the tabs in front if you don’t mind. Then you can just glue the broom on the left side of the pop-up – just make sure it’s hidden when the card is closed and pops up into the position you want when open. Really a fun surprise – that broom die set is a perfectly useful prop all year round!
The If The Broom Fits Die Set brings in the My Monthly Super Hero kit and is followed by the Miss Witch Die set. Hero Arts has created a number of these “peeking” die sets… I have a couple of “peeking” stamps from old MMH kits, but no die cuts! My first “peeking” die-cut set then!
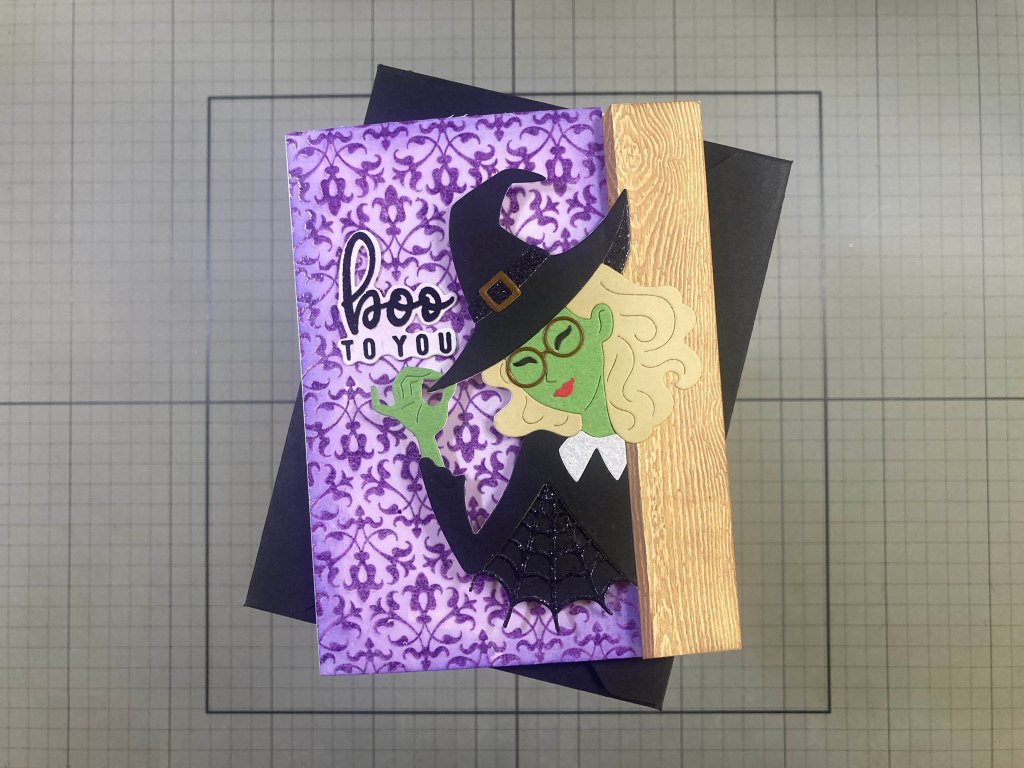
I die-cut Miss Witch from some lightly textured Green card stock and Vanilla card stock for her hair (both from my stash), and Pitch Black card stock for her clothes, hat and eyelashes. I used Core’dinations Glitter Silk card stock in Black for the web detail on her sleeve, her hat band, and inside the back edge of the hat, and the Glitter Silk in White for her collar. Her glasses and hat buckle are cut from Auburn Pearl card stock, and her lips are cut from Red card stock with packing tape on top – I swear that is the best hack ever for giving die-cut lips the perfect shine.
Her clothes and accessories are the only parts of the die set that layer on top of other pieces… her hat and hair match up to the edges of her head – I just taped everything together from the back to assemble her. I did die-cut her body again from a scrap of White card stock and stopped the die cut before cutting her body off… that gave me an extra tab to anchor her body to the card. I glued that to the back of the taped-together witch.
The card base is 8.5″ x 5.5″ and scored at 3.25″ and 7.5″ for an extra flap for the witch. I cut a 1″ x 5.5″ piece of Altenew Woodgrain card stock and ink blended Antique Linen and then Vintage Photo Distress Oxide inks to bring out the woodgrain. I masked off about an eighth of an inch on the left side and darkened it (the edge of the door(?)) with more Vintage Photo ink. Then I glued that on top of the 1″ flap on the card base.
I stamped the purple part of the card front on a panel of White card stock using Grape Slush Reactive ink and the Cling Background stamp from the MMH September 2022 kit and embossed that with Clear embossing powder. Then I cut that panel to 3.25″ x 5.5″ and ink blended more Grape Slush ink over the leftover white parts and then intensified the edges with Purple Galaxy Reactive ink. I glued that panel to the left panel of the card base. I lightly ink-blended more Grape Slush ink on a scrap of White card stock and stamped the Sentiment with VersaFine Onyx Black ink and embossed that with Clear embossing powder. I die-cut the sentiment with one blank and glued them together. I stamped one crow and the CAW! sentiment (from the Spooky Brew Stamp & Cut set) on more of the ink blended card stock and die-cut them out with their matching dies.
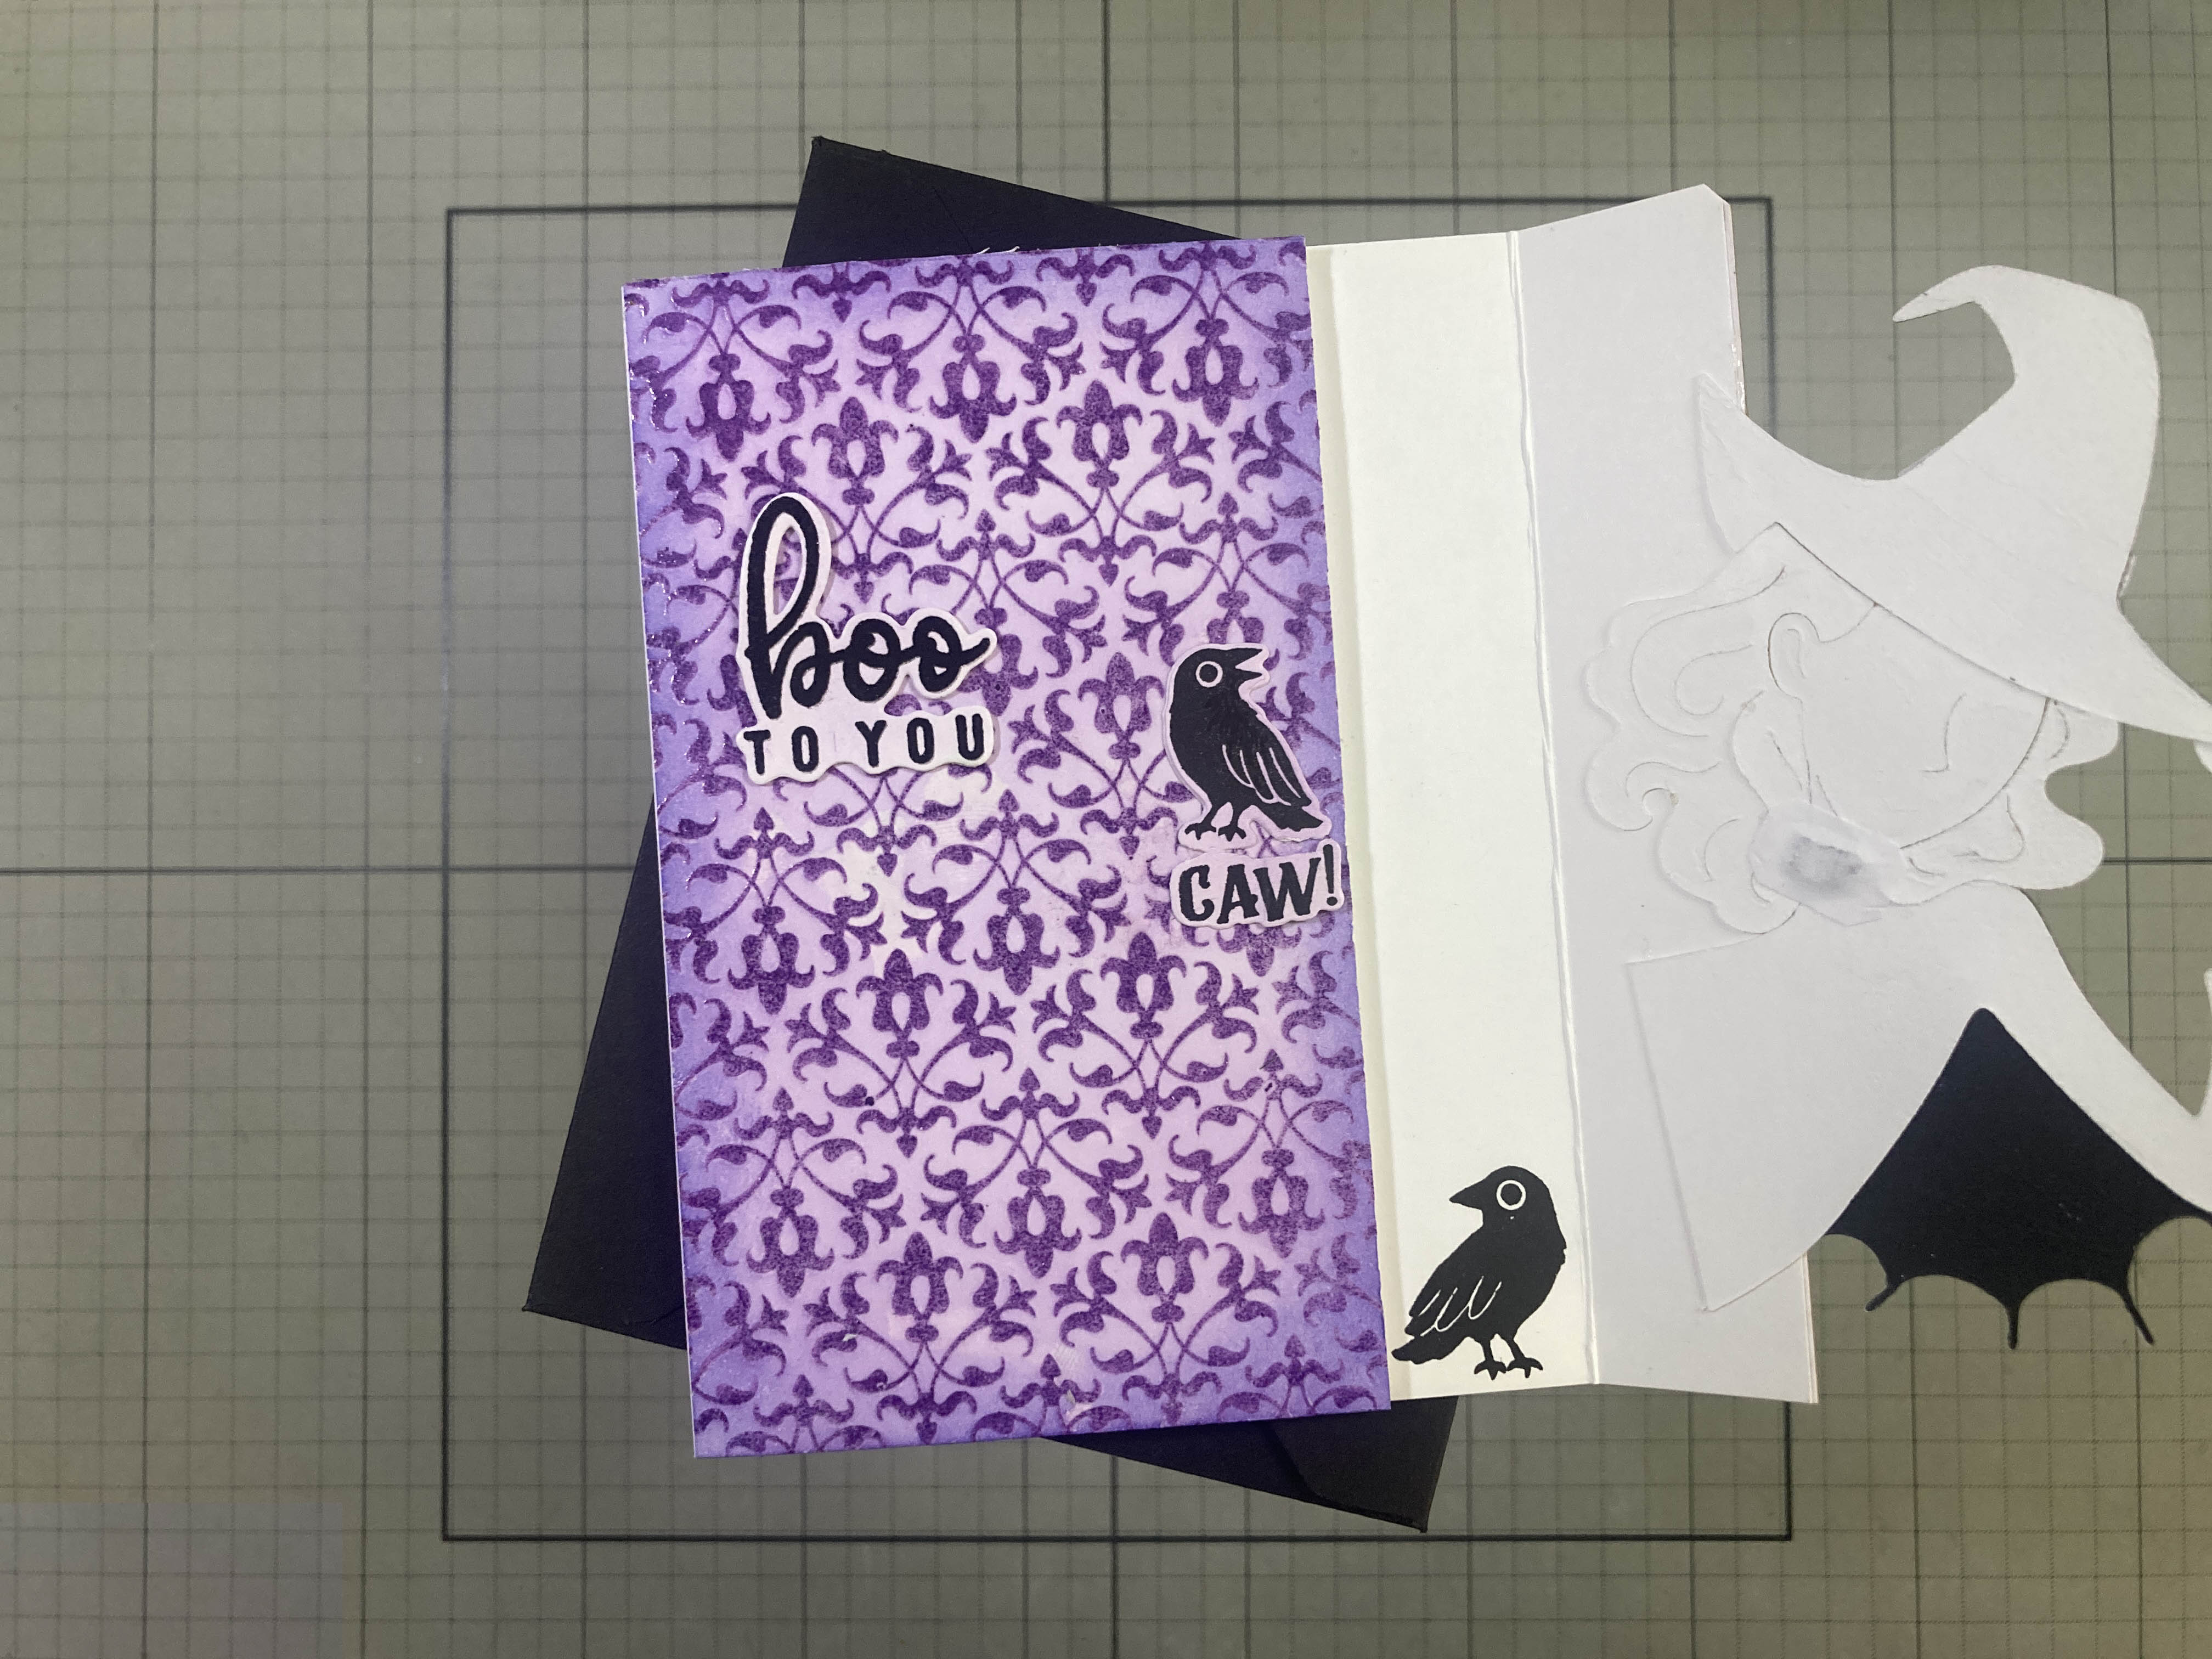
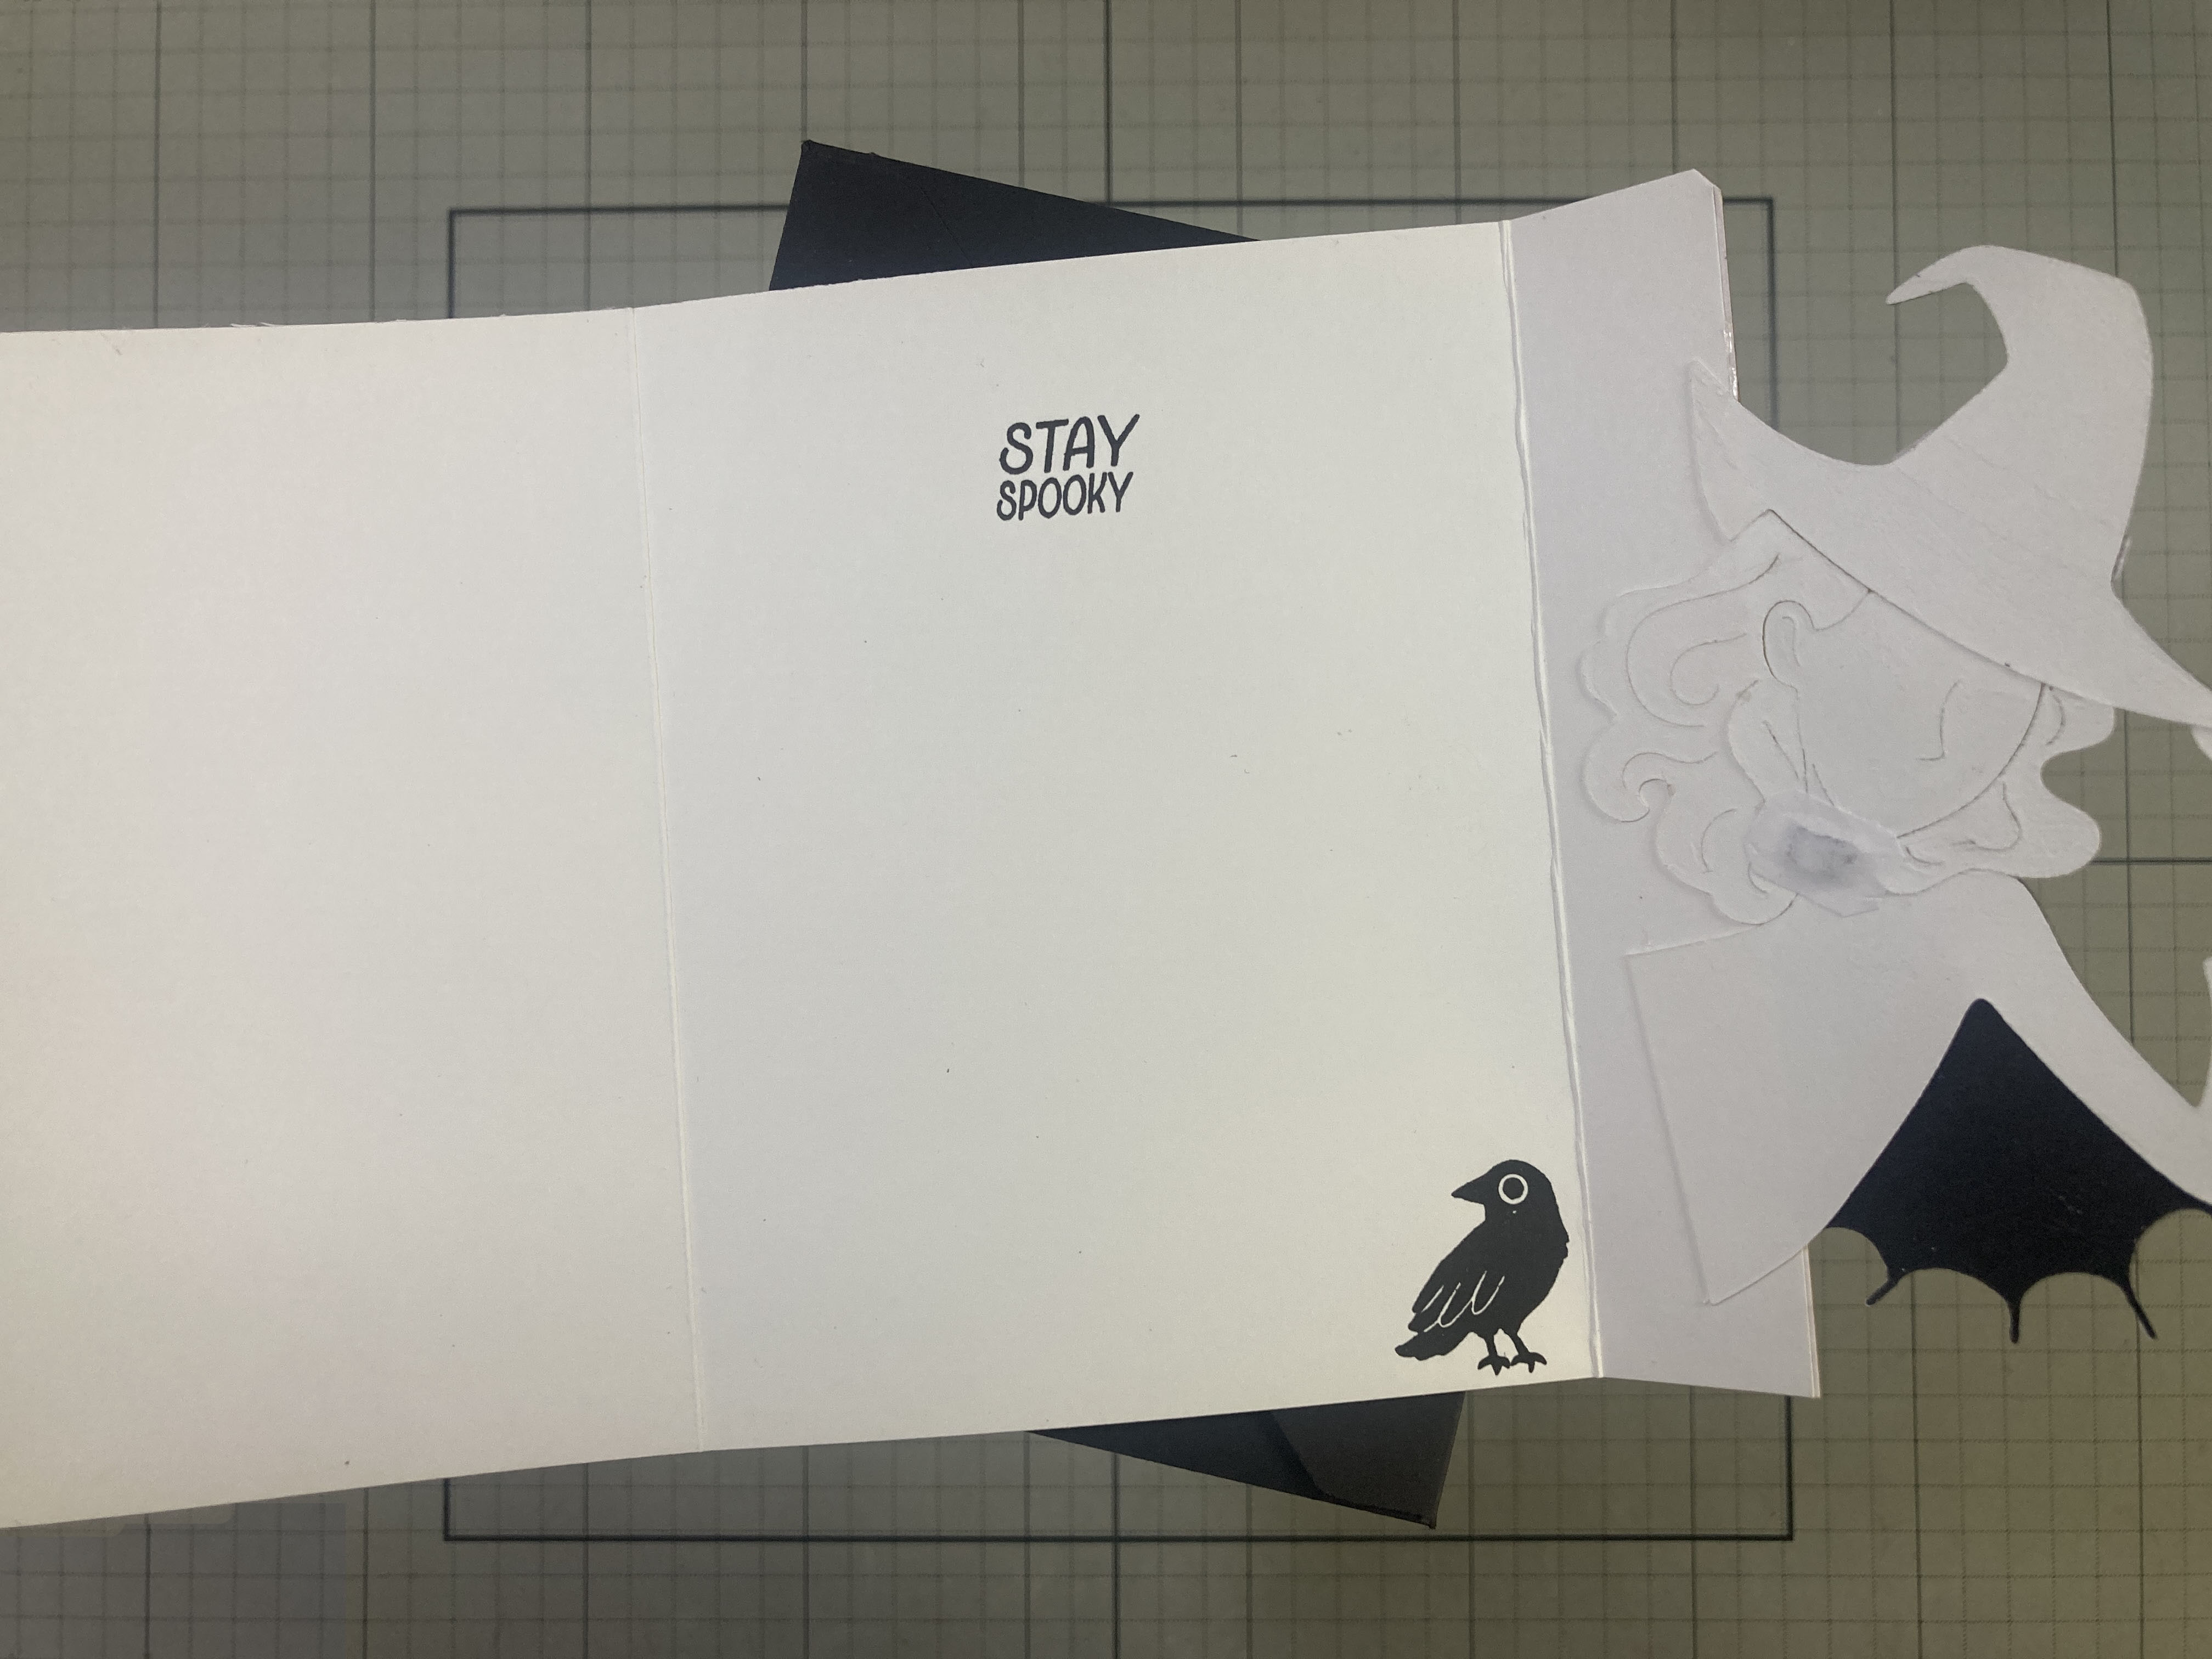
I glued Miss Witch in place behind the “door” and added her hat and hair (die cut from more plain White card stock) to the back of the assembled witch. I glued the stacked sentiment in place and hid the crow and “caw!” behind the witch. I glued the crow flat and added a small piece of thin magnet behind the “caw!”. I glued the other piece of magnet behind the witch and covered that with some plain white paper. Those hold the card closed without the aid of a belly-band… There is a perfect space at the bottom of the inside to stamp the other crow and I added the extra sentiment on the inside both stamped with more Onyx Black ink. Just some little surprises each time you open a panel!! I really like this card… and I didn’t even TRY to make Miss Witch a Mister Witch!
And that brings us fully into the Spooky Brew Stamp and Cut set. Finally, I get a couple of images to color!!!
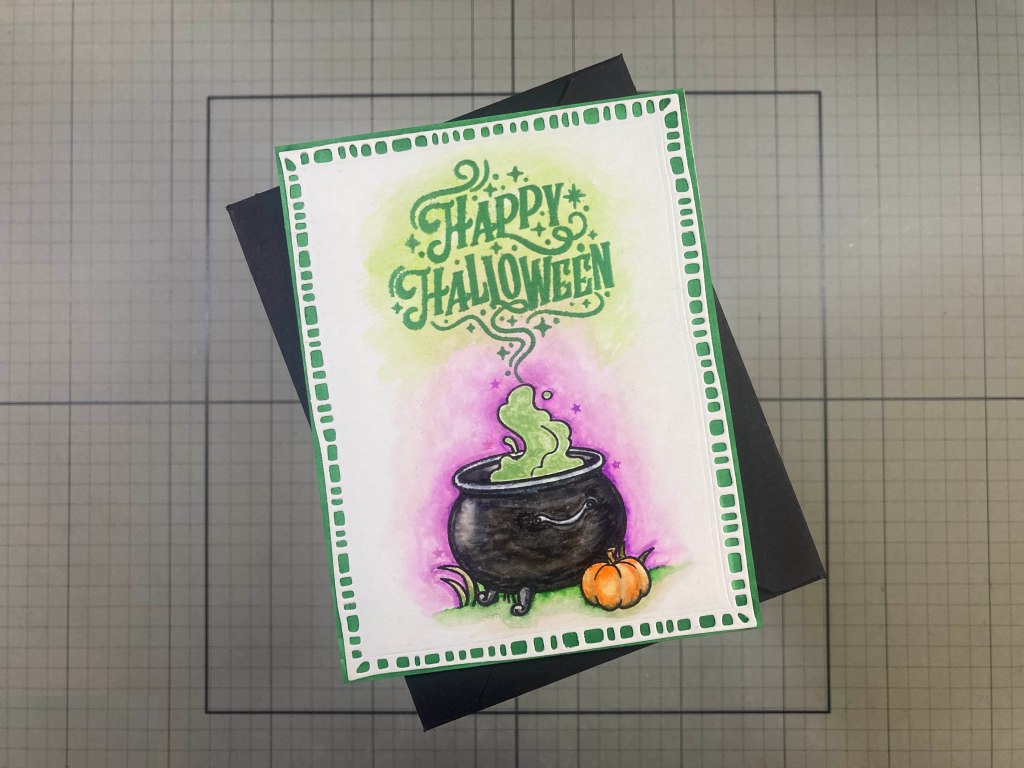
I stamped this vignette on some Canson MultiMedia card stock using VersaFine Onyx Black ink. I masked off the pumpkin before stamping the cauldron, and masked off the bottom of the cauldron before stamping the grass. I colored everything with my Zig Clean Color Real Brush markers, but I used some Green Pearlescent paint for the bubbling liquid, and a touch of Purple pearl around the cauldron. I stamped the sentiment with VersaMark ink and embossed that with some Love From Lizi Emerald City Embossing powder – that’s got to be my FAVORITE Green embossing powder ever!
I die-cut the painted panel to just under 4.25″ x 5.5″ with the largest Moda Scrap Framed Rectangles die, glued that to an A2 panel of Green card stock and then down to a White card base. That Moda Scrap Rectangle die is practically perfect for Halloween cards! I added a few pieces of starry glitter around the cauldron, and called it done. Is that goo alive?!?
I didn’t use any of the “familiars” (the critters) in the Miss Witch die set but I did have plans for at least a couple of them!
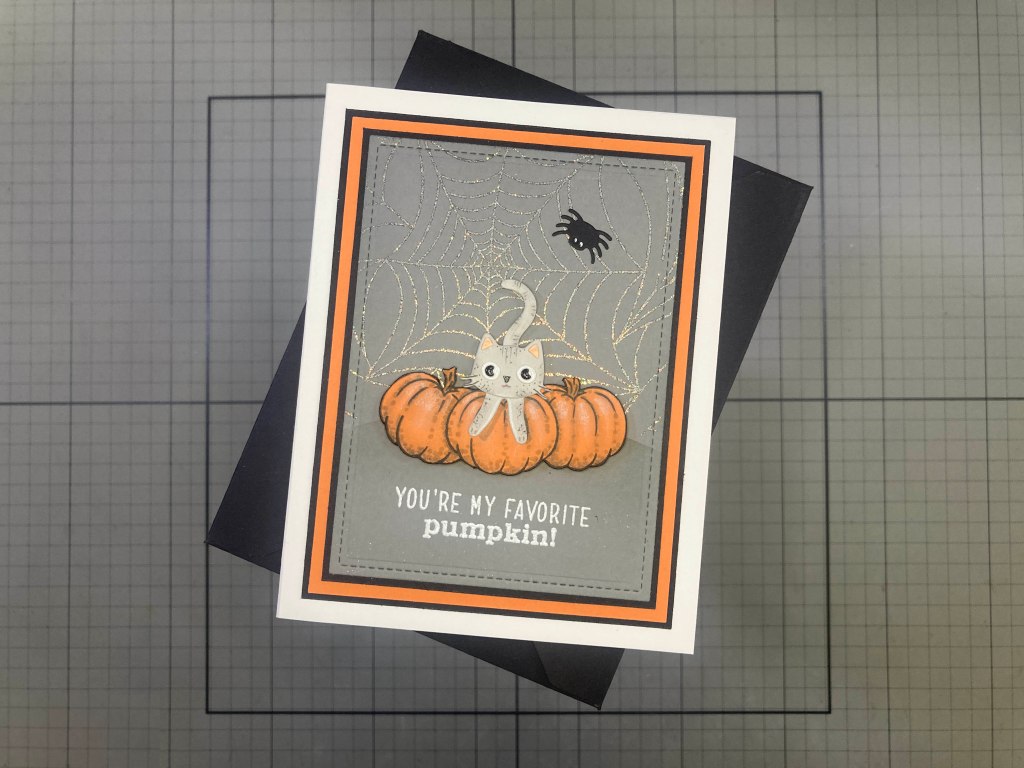
I stamped the large pumpkin three times on Carrot card stock with Onyx Black ink (masking off the center pumpkin to stamp the side pumpkins). I proceeded to shade and color the pumpkins with my charcoal pencils and some Alcohol markers before fussy-cutting them out. I die-cut the cat from plain Grey card stock and did a little shading and detailing with my charcoal pencils and a Pigma Micron Pen. I did give my cat two of the “frogs” larger eyes – I like those better than the wide open eyes on the cover art – cut from white and black card stock covered with packing tape for shine (almost as effective on the eyes as on lips!). I did add a nose to my cat as well, and then assembled her and glued her down on the pumpkins. I guess a cat nose die wasn’t included thinking it would only be a black cat..?!
I masked off a bit of a hillside on a panel of Anchor card stock from the kit, and stamped and embossed the Web background stamp on the top half of the panel with VersaMark ink and the Cloud 9 Embossing powder. I reversed the mask and ink blended Concord & 9th Mushroom ink along the top edge of the hillside. I die-cut that panel to 3.25″ x 4.5″ with a LFSRdie, and added a 1/16″ Black mat, a 1/8″ Orange mat, and another 1/16″ Black mat before gluing them down to a White card base.
I stamped the sentiment (from the MMH September 2020 kit) with VersaMark ink and embossed it with White embossing powder. I mounted the pumpkins and cat with foam tape and added a spider from the Cauldron die set on the web. I did inset the die cut spider eye and just added a dot of White gel pen for his eyes. There is a matching “Happy Halloween” sentiment in this 9/20 stamp set, so I stamped that on the inside of the card for the secondary greeting.
I really like the cute little frog die in the Miss Witch die set… remember that fable about putting a frog in boiling water?
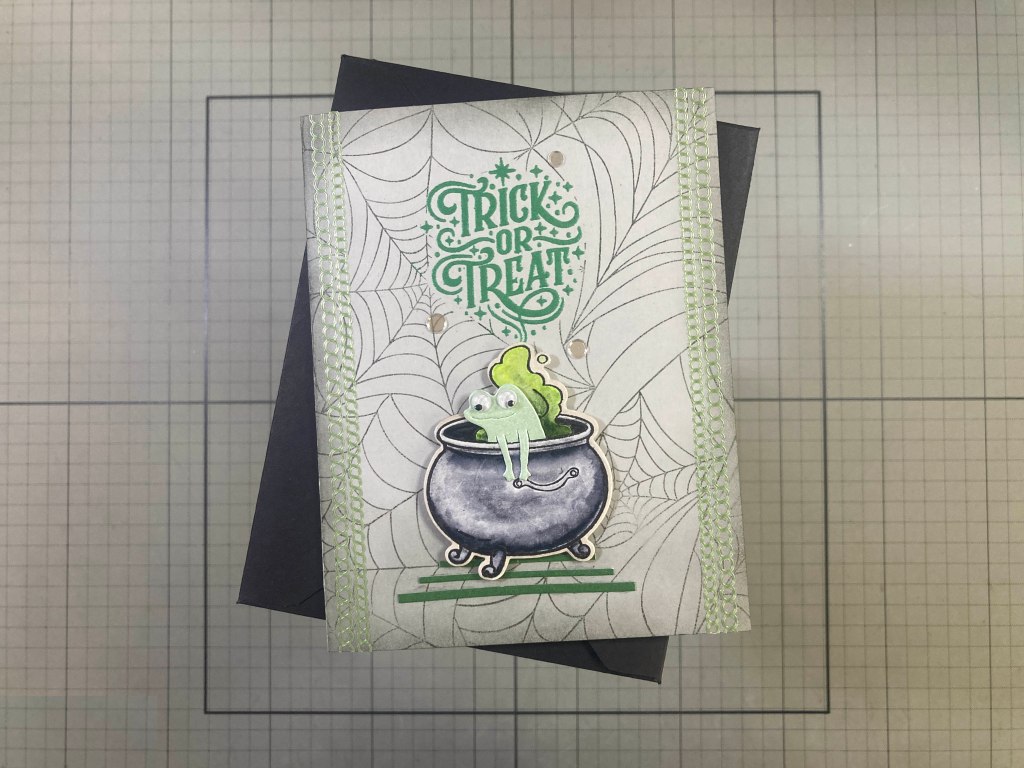
This makes me giggle! First I stamped the cauldron on some Bristol Smooth card stock and colored it with my TomBow watercolor markers. I used the matching die to cut it out, and colored the White die cut border Grey with an Alcohol marker. I die-cut the frog from some Light Green Pearlescent card stock and cut his arms free. I cut a slit behind the rim of the cauldron and slipped the frog into the pot with his arms hanging over the side. He seem perfectly happy!
I die-cut a piece of masking paper with the Trick or Treat die and put that in place on the front of an A2 Grey card base. Then I stamped the Web Background stamp using Concord & 9th Mushroom ink and ink blended more Mushroom ink around the perimeter of the card front. When you take the mask off you have a perfectly clean place to stamp the sentiment which I did with VersaMark ink and embossed that with LFL Emerald City Embossing powder.
I added a few thin strips of Dark Green Pearlescent card stock to anchor the cauldron and attached the pot with foam tape – I also added a thin piece of foam tape behind the frog’s head. I trimmed the long edges with two strips of Love From Lizi Bubble Apple Green Peel-Off stickers and added a few Moonshine Confetti sequins (from the Simon Says Stamp July 2017 card kit) for more sparkle. I was going to add the normal die-cut eyes but realized my googly eyes fit really well! Just a little extra goofy for this fun card!
Since I didn’t pair up the Broom die cut with the Miss Witch die cut I decided I needed one more broom card…
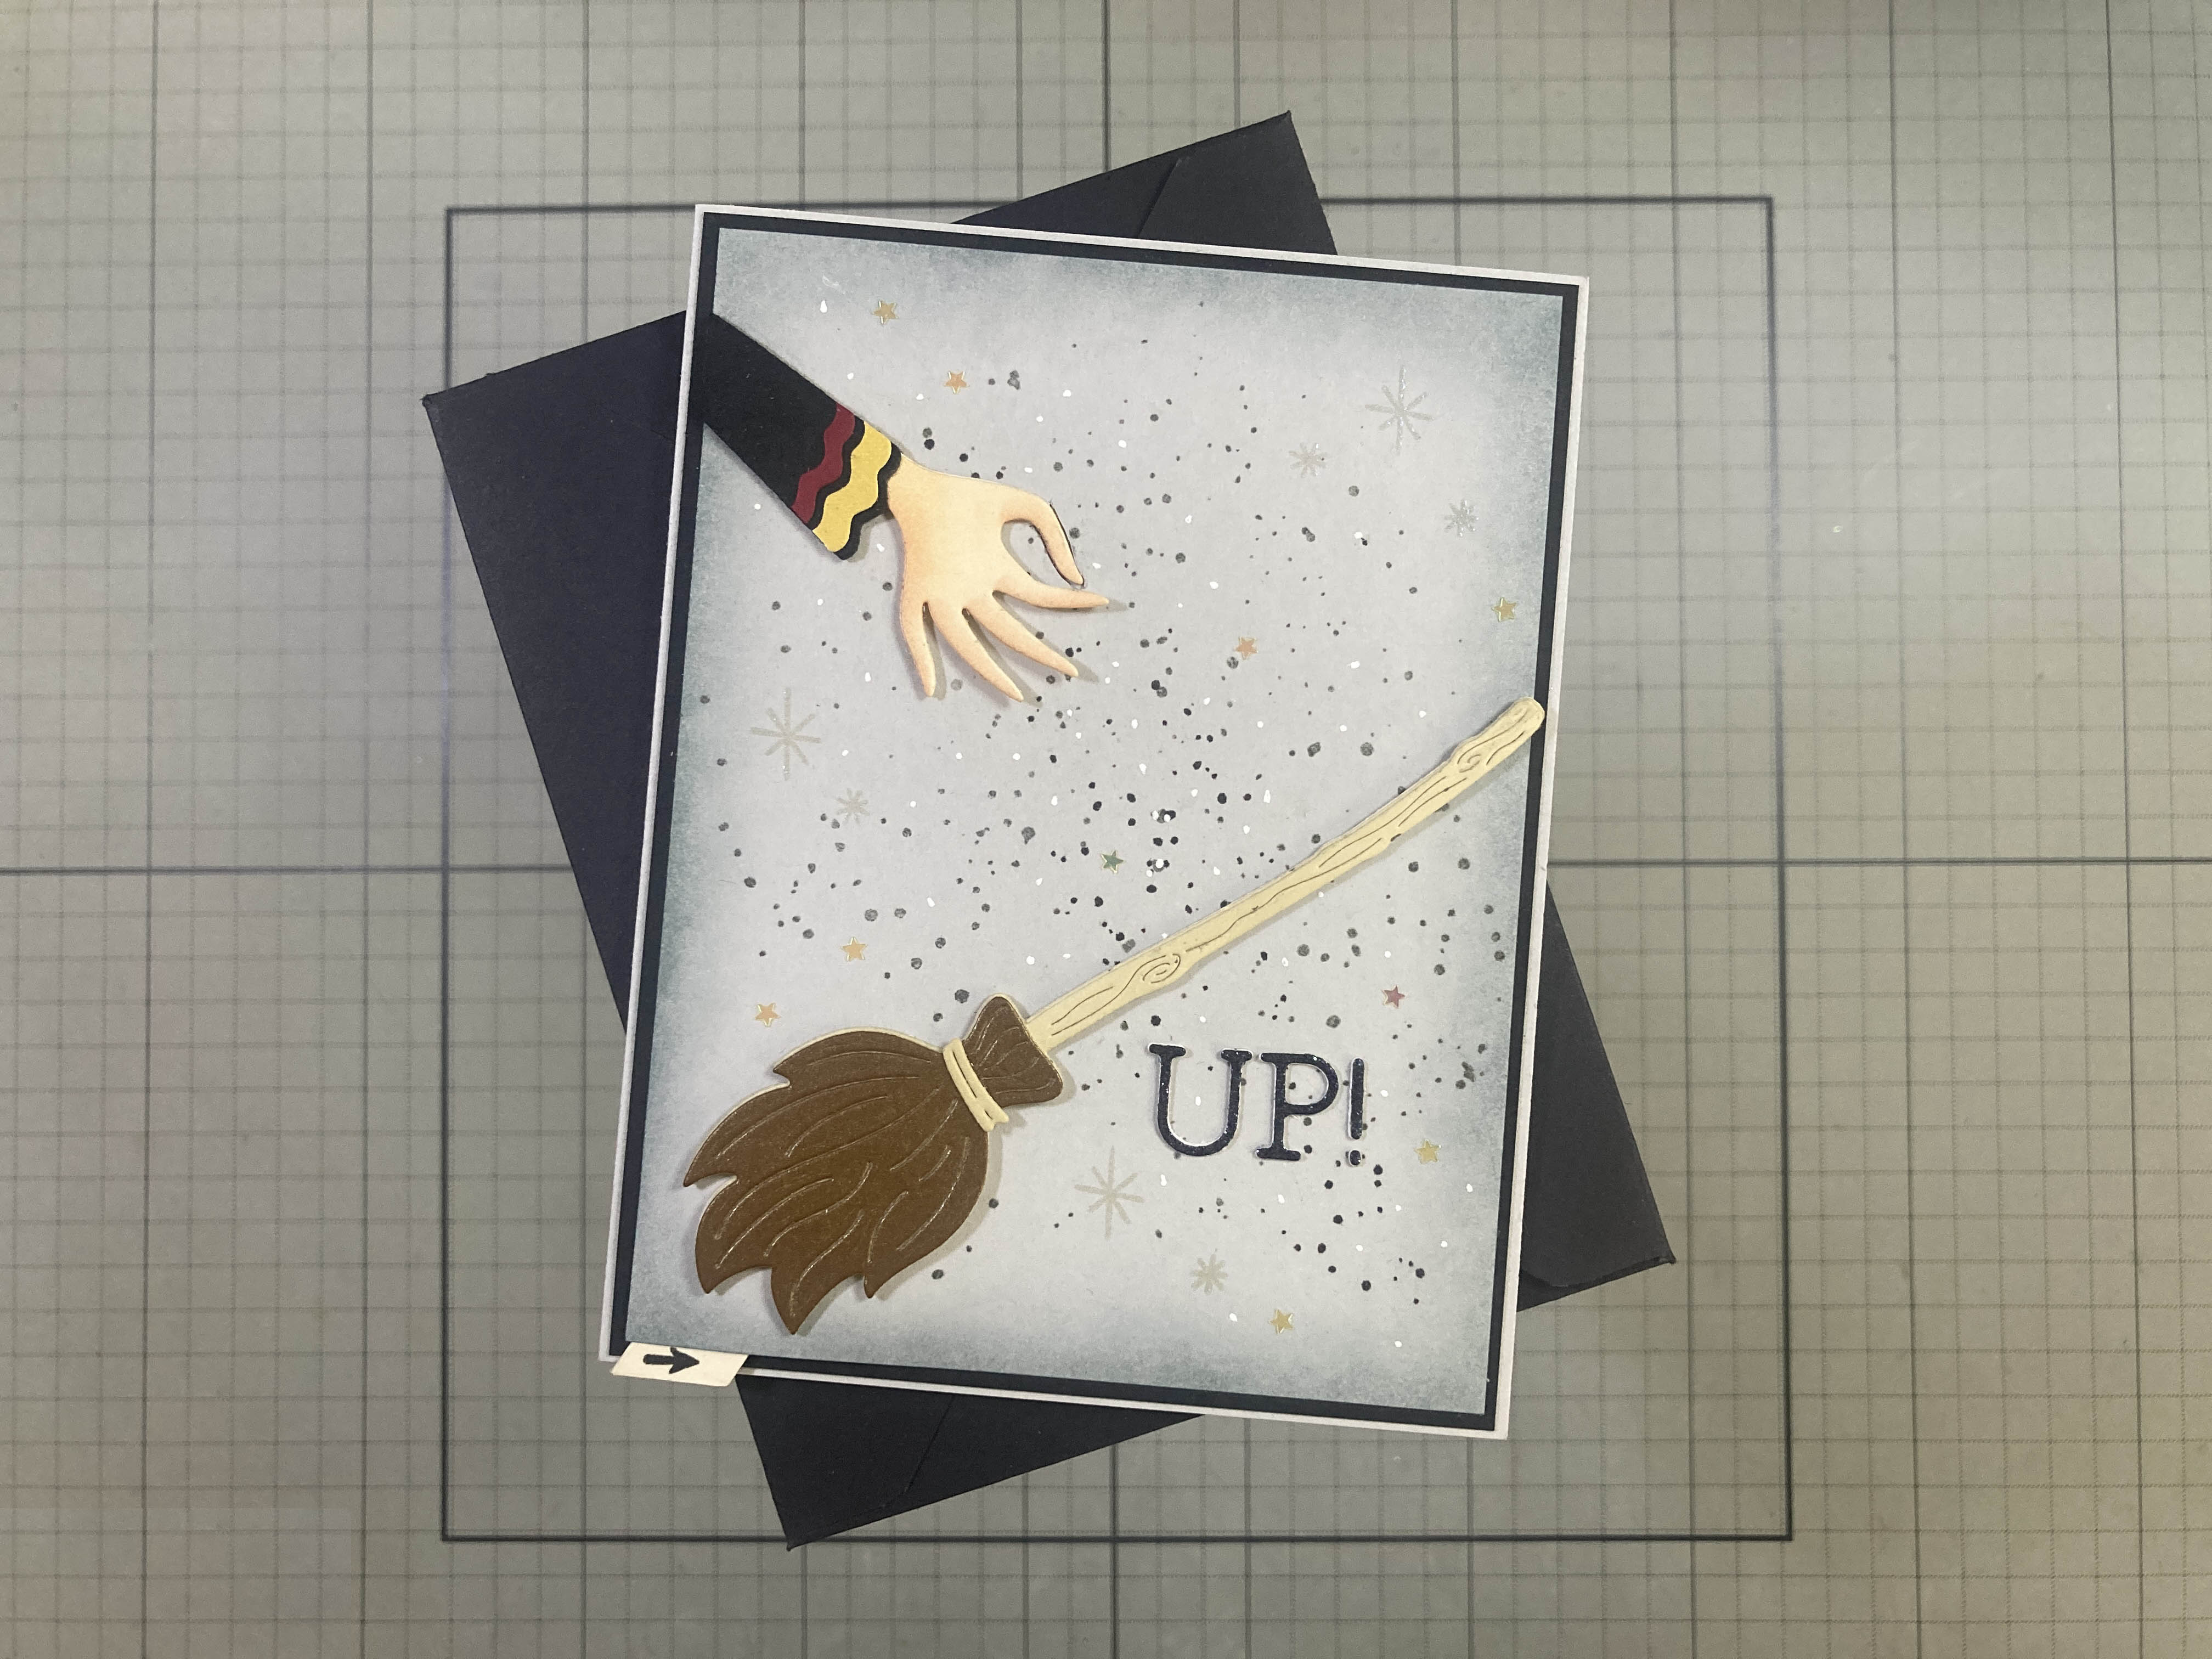
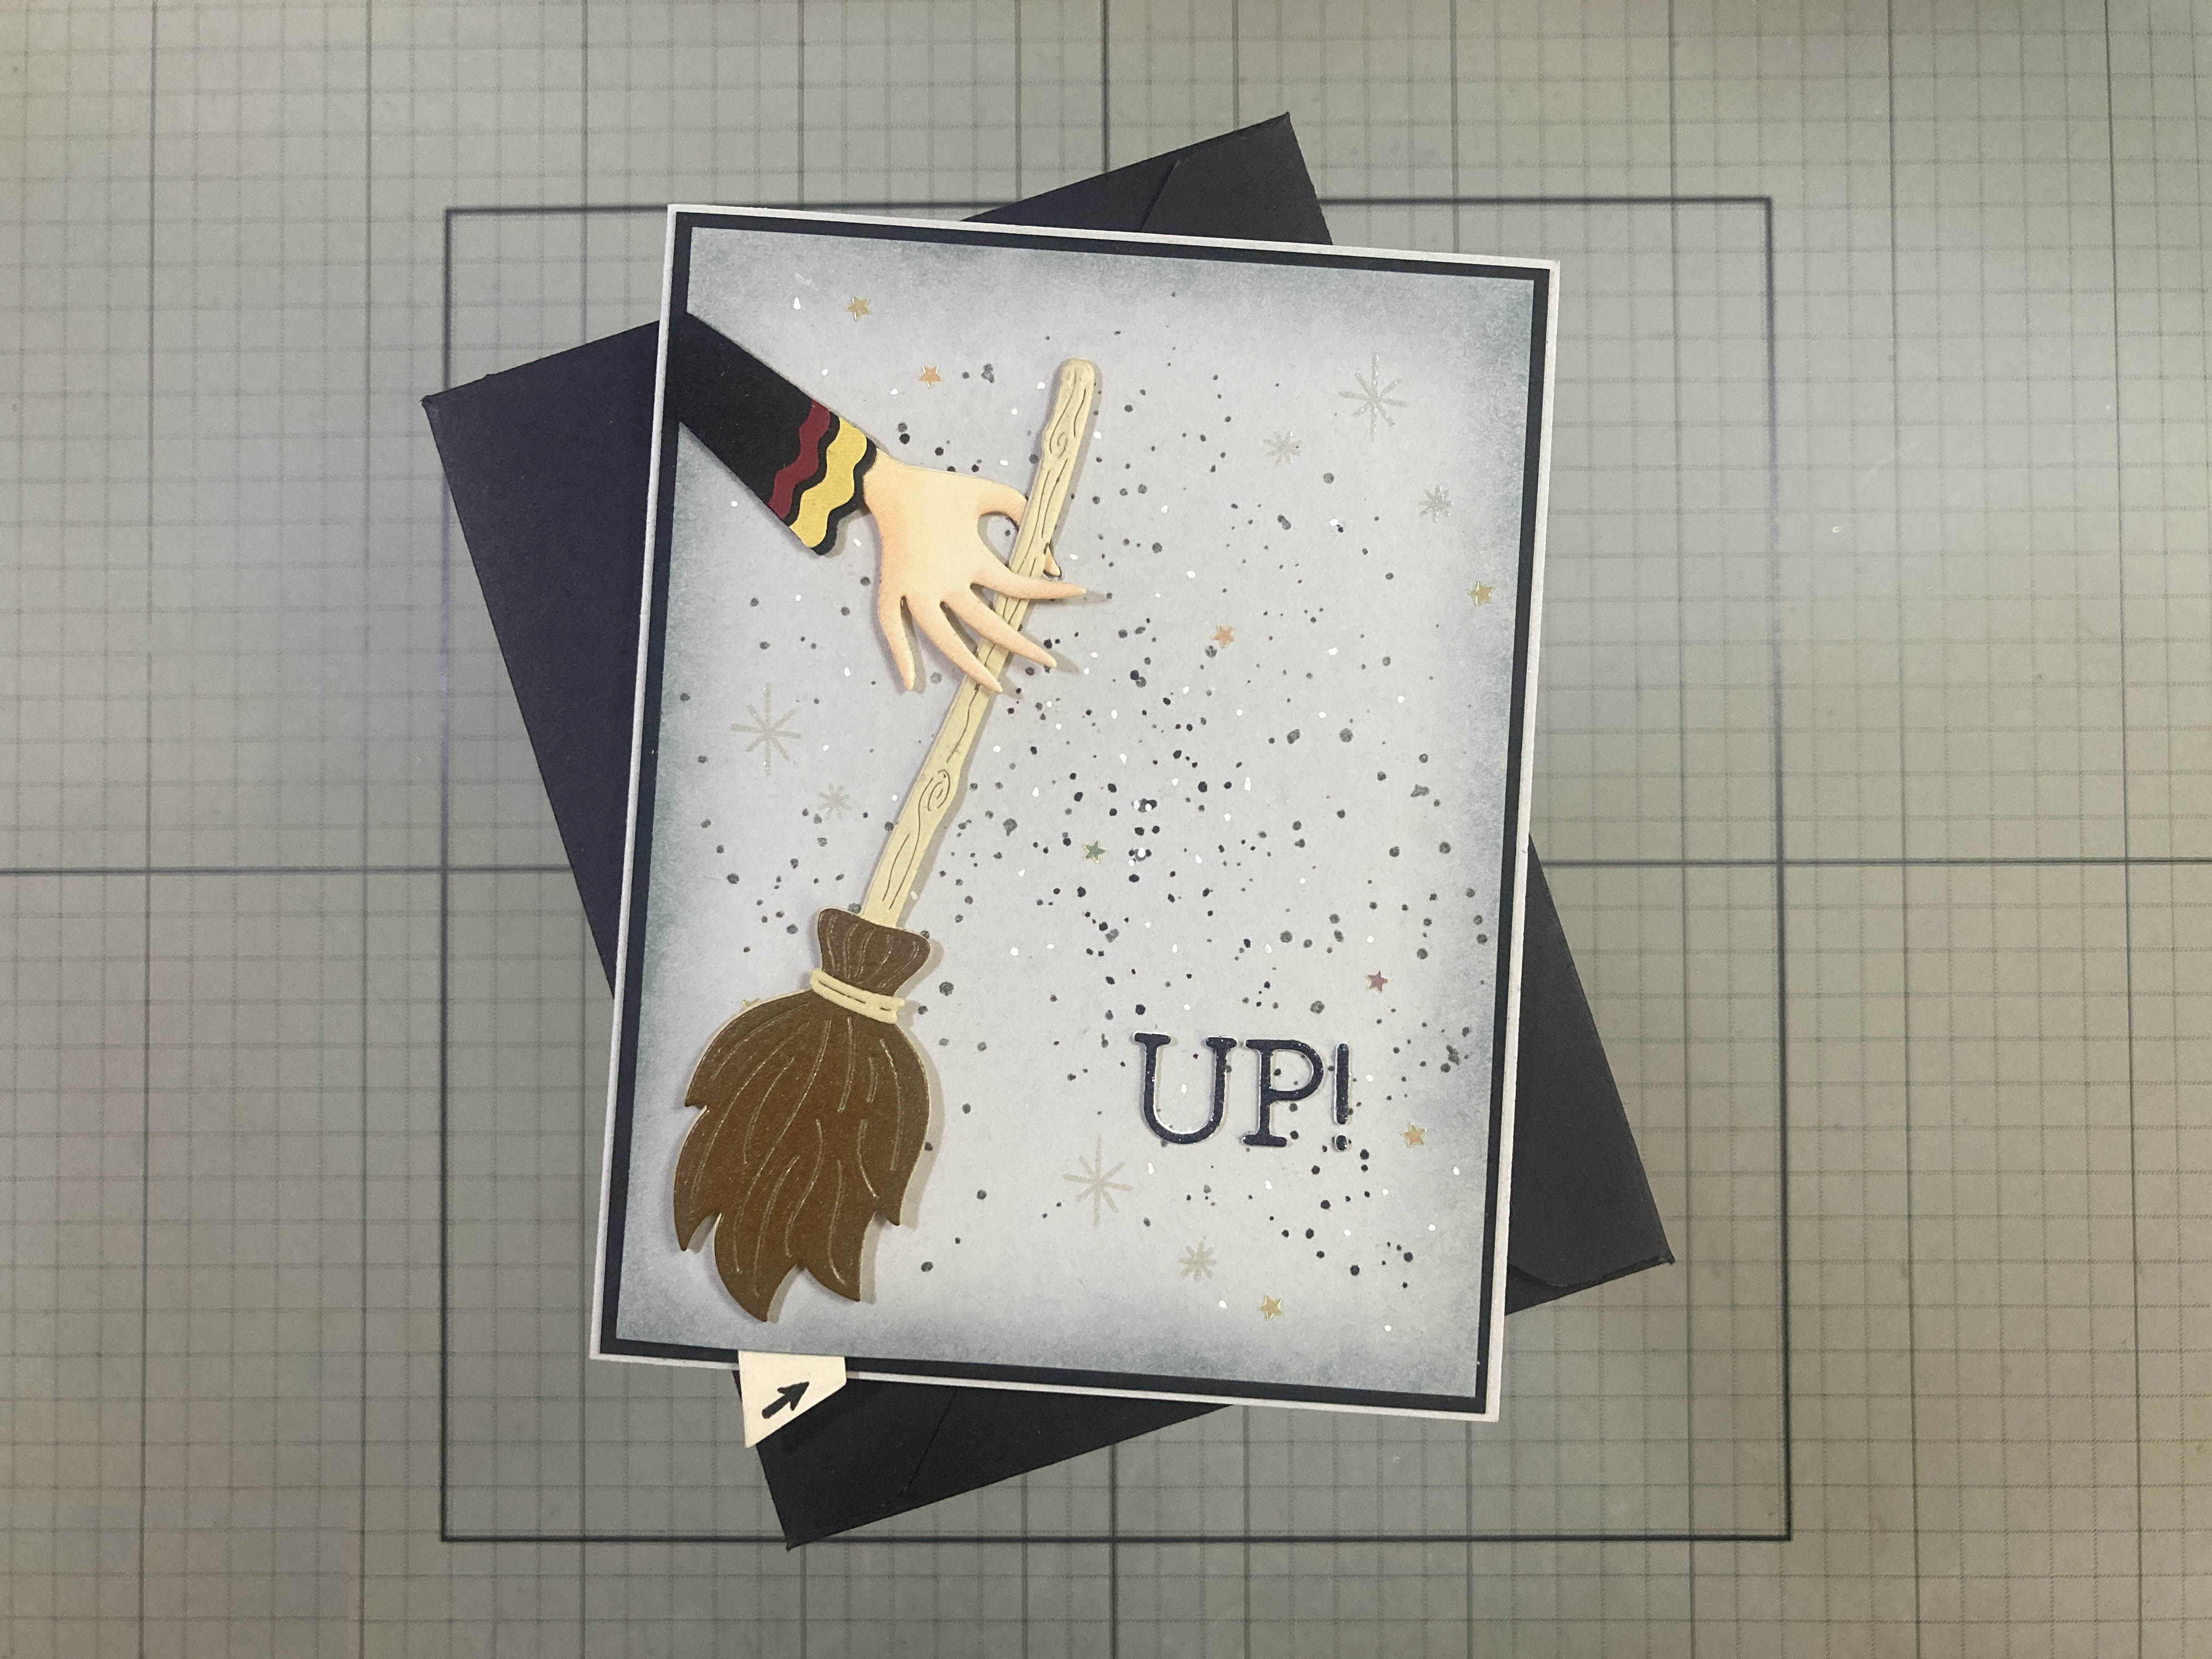
I took an A2 panel of Grey card stock and spattered Black Grey and White ink all over and ink blended some Altenew Cloudy Sky ink around the edges. I cut a broom from Grey card stock and used a panel of white card stock to plan out the movement. I traced the bristles on the panel in both positions. Then I poked a hole through the broom and panel to be the pivot point and threaded a small brad through the two pieces. Then I poked another hole in the broom on the right side at the thickest part of the bristles – about 3/4″ up the broom from the pivot hole. Then I used a pencil to trace the arc through that hole onto the panel. We don’t want to see any mechanism so I cut a slit following the arc but between the two position marks – so the slit is always covered by the broom.
I made a lever from a 1″ piece of Ivory card stock folded in half and glued together for strength. I set the tab behind the panel and attached it to the pivot brad. I fed the top of the tab through the curved slit, and had to fuss around a little bit to get as much movement out of the lever as possible – basically I just trimmed the top of the lever (the part that comes through the slit) to be narrower than the 1/2″ lever (the curved slit is only about 5/8″ wide). Then I taped the lever to the back of the broom to make sure it worked – when I was satisfied with the movement, I took everything apart and transferred the pivot hole and arc slit to the Grey card front.
The broom (and tie) is cut from some Beige card stock and I took the Grey card stock template I made to plan out the card, and glued it to the back for strength. I popped the brad through the broom and glued the bristles (Auburn Pearl card stock) over the top. I trimmed the background to 4″ x 5.25″ (cutting opposite the mechanical corner). I stamped the arrow on the lever and attached the lever to the brad and then fed it through the slit and glued it to the back of the broom. I’ll try to explain this a little more completely on my video for this kit… but ultimately it’s fairly simple – once the mechanism was assembled I glued it to a Black mat (no glue around the movement!). That hides all the mechanicals!
The hand is die cut from White card stock and colored with Alcohol markers and then two more layers are glued behind for strength. I did curl up the three fingers a tiny bit while they dried. The sleeve is cut from Pitch Black card stock and I used the sleeve die to cut the Gold and Scarlet stripes for the sleeve. (Gryffindor!) I did die cut one more hand and cut the thumb and 3 fingers off and glued that to the back of the hand – adding a little more height to the fingers. The big secret making this mechanism work is insetting the thumb into the background – I decided on the placement and traced around the thumb (just to the knuckle) and then cut the background and mat away to allow room to inset the thumb. I glued the assembled background to a white card base and glued the arm flat to the card front insetting the thumb into the background – the broom can slide across the surface and over the thumb without getting caught up on the die cut.
I die-cut the UP! from Glitter Silk Black card stock using an old “Gatsby” alpha die and glued that in place. I stamped seven sparkles from the Spooky Brew Stamp set around the background with VersaMark ink and embossed them with Iridescent Embossing powder. A nice sprinkling of star glitter adds a last touch of shine.
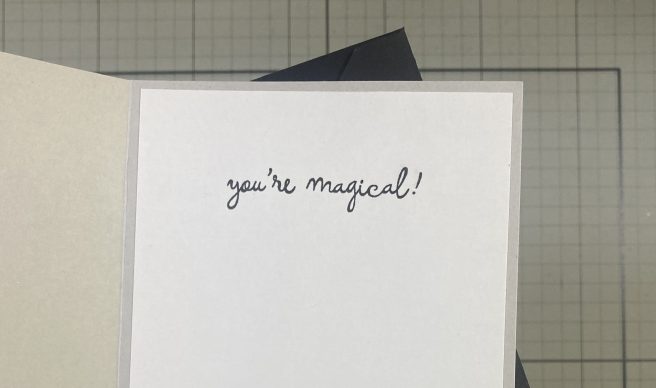
I couldn’t resist adding this sentiment on the inside – this is from the My Monthly Hero February 2022 kit and is stamped with Onyx Black ink on a 4″ x 5.25″ White writing surface. This is a great encouragement card that has nothing specific to do with Halloween! I like that a lot!
That wraps up my ten cards! Phew! I am certainly all Halloween’d out! I’ve never been much of a Halloween card sender, but I really do adore all these cards… and this kit certainly inspired me to create a few interactive cards as well!
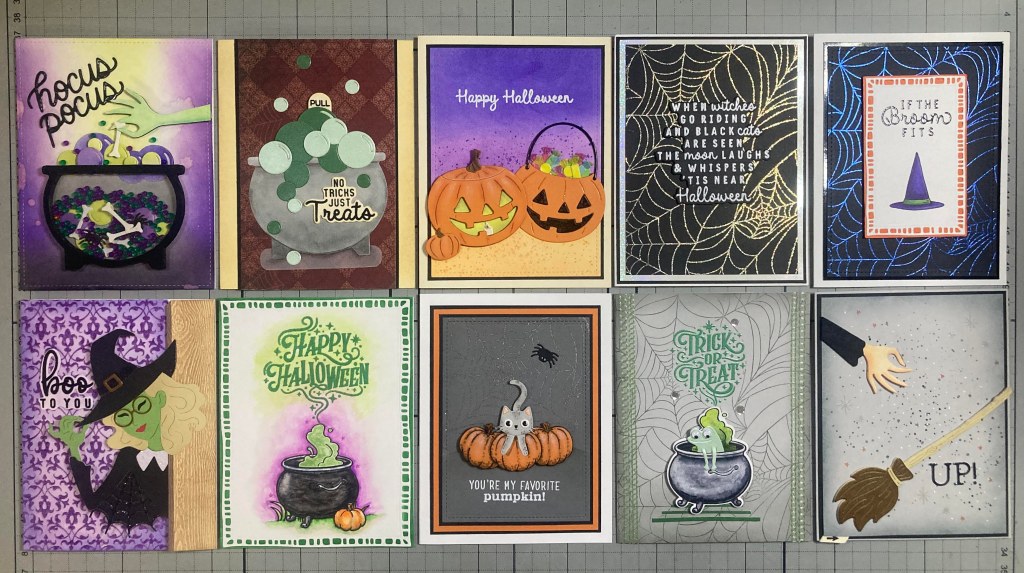
We certainly have a handsome batch of cards this month! I believe I used all of the dies in the Cauldron Shaker Die Set, and the Trick or Treat die set (except the match!). I didn’t use the cat or bat stamps in the ‘Tis Near Halloween stamps but I did use five of the sentiments. I used the Web Background Stamp four times (Love it)! I only used the Carrot and Anchor card stocks included but I used all the broom dies and all but the parrot dies in the Miss Witch Die set. And I did use most everything in the Spooky Brew Stamp set other than the mushrooms…Though I do love cream of mushroom soup!!! Let me know what cards are your favorites!
Both the My Monthly Hero and My Monthly Super Hero Kits have already SOLD OUT for September! AARRGGHH!
I know it’s frustrating not to get a spot — so Hero Arts created a waitlist. You may not get in this month, but sign up and we’ll get you into My Monthly Hero as soon as a space opens.
How It Works
Choose My Monthly Hero or My Monthly Super Hero waitlist
Pay a $5 Spot Hold to save your place — check out like any other order
You MUST check out with just the waitlist, no other items in your cart
When your spot opens up, your subscription begins automatically and your $5 Hold goes toward your first kit
No risk you can cancel to get off the list if you change your mind.
If yo’d like to get on the waitlist, please use my links below when you go shopping at Hero Arts. I do get a small commission from whatever you buy through my links (at no cost to you) and I am alway supremely grateful!
My Monthly Hero: https://www.dpbolvw.net/click-101337132-16962401?url=https%3A%2F%2Fheroarts.com%2Fproducts%2Fmy-monthly-hero
My Monthly Super Hero: https://www.jdoqocy.com/click-101337132-16962401?url=https%3A%2F%2Fheroarts.com%2Fproducts%2Fmy-monthly-super-hero
Hero Arts: https://www.jdoqocy.com/click-101337132-16957493
Thank you so very much for spending some time with me today. Your attention is always appreciated! If you enjoyed this post, please click the Like Star at the bottom of the page, and if you wish to be notified when a new post comes out, just click the Follow Me button at the top of the page. And don’t hesitate to send me a note if you have any questions, comments or just to say Hi!. Please take a moment to Like Me, List Me, Pin Me, Post Me, share this post with all your crafty friends and Halloween Fans. And remember… don’t run with scissors! As always, I send you and yours Love and Light and Happy Crafting!!
DISCLOSURE: This site contains some affiliate links to products. I may receive a commission for purchases made through these links (at no cost to you). As an Amazon Associate I earn from qualifying purchases. Thank you!