
Hello Folks! Scott here with my ten cards inspired by the October 2025 Hero Studio Card Kit of the Month – “Merry Era”. Disco balls or, mirror balls if you like, are the main icon in this kit, with touches of holiday theming…

| Card Kit of the Month Includes: • Deck the Halls with Disco Balls 6×8 Stamp Set • Deck the Halls with Disco Balls Coordinating Dies • Have a Ball Die Set • Gold Embossing Powder .5 oz • 10 Sheets of Cardstock- 1 of each color, 5.5″ x 8.5″ (Poppy, Dahlia, Tutu, Blush, Alabaster, Beeswax, Tuscan, Fern, Seaside, Waterfall) • Two Sheets of Gold Matte Paper, 5.5″ x 8.5″ |
I have to admit I’m not all that current on the slang use of “era” to define particular moments (generally fleeting) in a person’s life… I always thought “era” was used to refer to an epochal period of time, as in the Paleozoic Era, but I suppose in this age of constant navel-gazing, we have adopted “era” to mean any length of time marked by any sort of change in one’s personal life. Hmm. I admit I do like the “Deck the Halls With Disco Balls” sentiment, and as someone who was actually alive and participating in the Disco Era, I do love the assorted “Disco Balls” in this kit.
I reached for the stamp set and the layering disco ball stamps to begin with – one outline and three filler stamps…
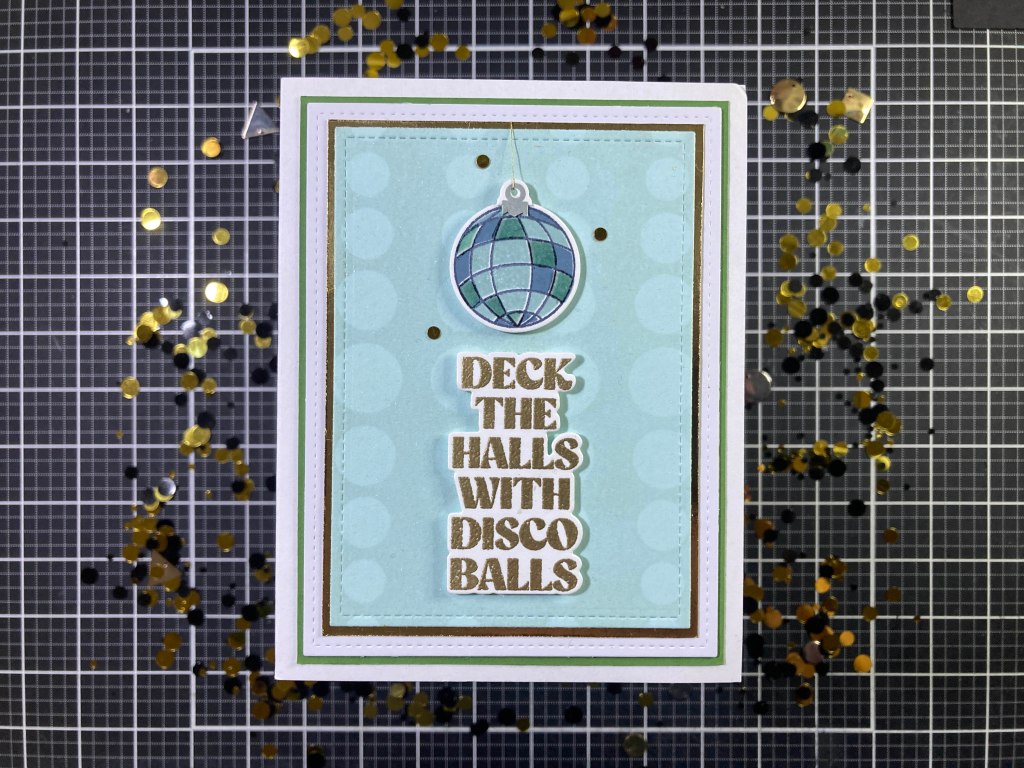
I used Altenew Dark Night ink for the Mirror ball outline, then Misty Morning, Cloudy Sky, and Nimbus for the filler tiles. These inks came in a set from Altenew with matching grays from light to dark. This set of inks does lean into more of a Teal Gray which I thought would work well for a mirror ball. To add a bit of reflection to the ball, I used a VersaMark pen to color in some tiles, and embossed them with Clear embossing powder. That turned the shiny tiles more Green! I stamped the ornament cap with HA Granite ink and die-cut that and the ball with their matching dies. I trimmed away the white border on the ornament cap where it overlapped the ball, punched a tiny hole in the opening, and glued that to the top edge – ready for a hanging cord!
The background is a panel of Seaside Card stock from the kit stamped using layers of HA Contour ink with a very old graduated circles rubber background stamp. I die-cut that panel to 3.25″ x 4.5″ with a Lawn Fawn Stitched Rectangle die and sprayed some Sheer Shimmer Sparkle to bring that background to life. When the sparkle was dry, I added a thin Gold mat behind. I die-cut a panel of White card stock to 3.75″ x 5″ with a LFSRdie and added a thin mat of Fern card stock (from the kit) behind, and glued that to a White A2 card base.
I stamped the sentiment on a scrap of White card stock with VersMark ink and embossed that with HA Gold embossing powder (from the kit). I die-cut that with the matching die and added it to the card front with foam tape. I added a piece of Gold thread through the ornament cap, glued that behind the Gold mat, and attached the mirror ball to the card front with foam tape. I glued that to the card front and added a few Gold sequins for some extra sparkle. That is quite the versatile mirror ball stamp set… you can let your crafty spirit explore any combination of colors!
Of course, I’m just looking for some sparkle on my mirror ball, so I gathered all the sparkly metallic inks in my stash…
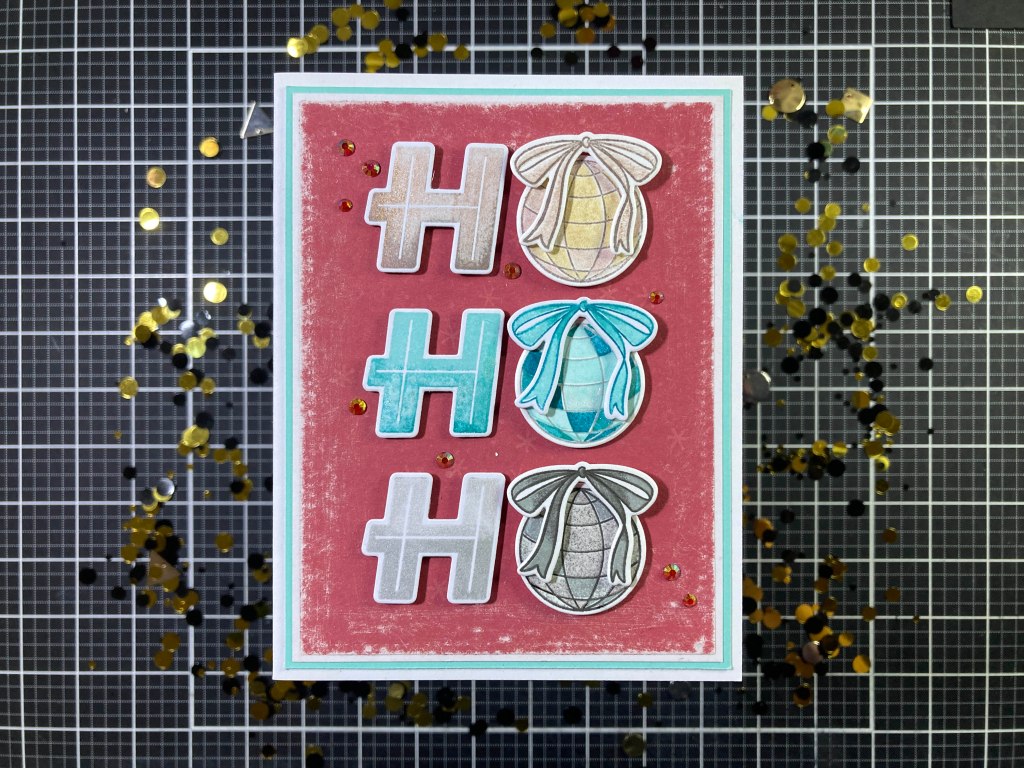
And I guess I have to surrender to the HO HO HO at least once! The Gold HO outline is stamped with Hero Hues Rose Gold Pigment ink, and filled in with Golden Glitz, Celestial Copper, and a touch of Bronze Burst Delicata inks from Tsukineko. I stamped the H and the bow in the same colors. Very interesting shine for a subtle sparkle! The Silver HO outline is stamped with HA Granite ink and filled in with Delicata Silvery Shimmer ink, and Concord & 9th Dove ink and HA Contour ink. Again the H and bow are stamped in the same colors. For the center HO I stamped the outline with Dove ink and filled it in with Concord & 9th Peacock, Oceanside, and Aqua Sky inks. The bow outline is stamped with the Peacock ink and filled in with the other two inks and the H. uses all three. There’s no glitter in these inks so I used a Spectrum Noir Sparkle pen to add some glitter to the stampings. The silver set is the least glittery of the three…
The background is a piece of pattern paper from my stash die-cut to 3.75″ x 5″ with a LFSRdie and I sanded the edges for a bit of distressing. I glued that to a thin white mat and a thin teal mat hoping to match with the center HO. Close! I glued the stacked background to a White card base.
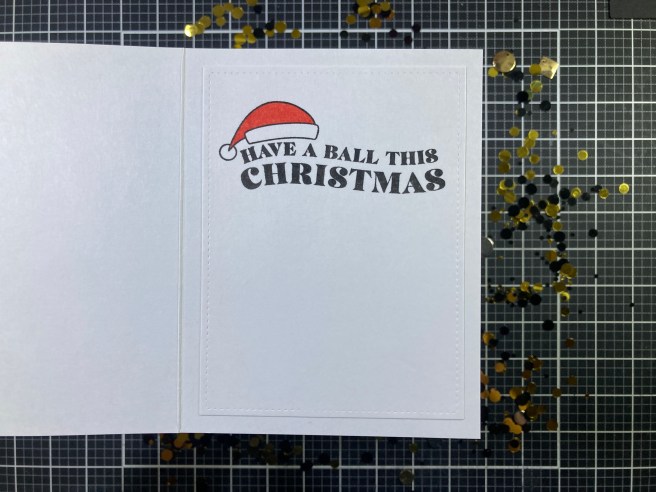
I added the three HOs to the card front with foam tape. Because of the slant on the H’s, it was a little tricky to line these HOs up…! I used my gridded mat to line them up and transferred them to the card front with low-tack tape. Some Red/Gold crystals adds extra sparkle and more Red! I did add a panel (3.75″ x 5″) to the inside of the card with the Have a Ball sentiment and Santa hat using VersaFine Onyx Black ink and Concord & 9th Poppy ink for the red. The curve of the hat fits the curve of the sentiment quite nicely. I do think you need all three HOs for this combo to make sense…!
Most mirror balls are silver (plain mirror) for maximum reflectivity. Though I suppose any color of mirror tiles would work since they are actually reflecting what ever color of light is projected on them… I’m just shooting for classic silver!
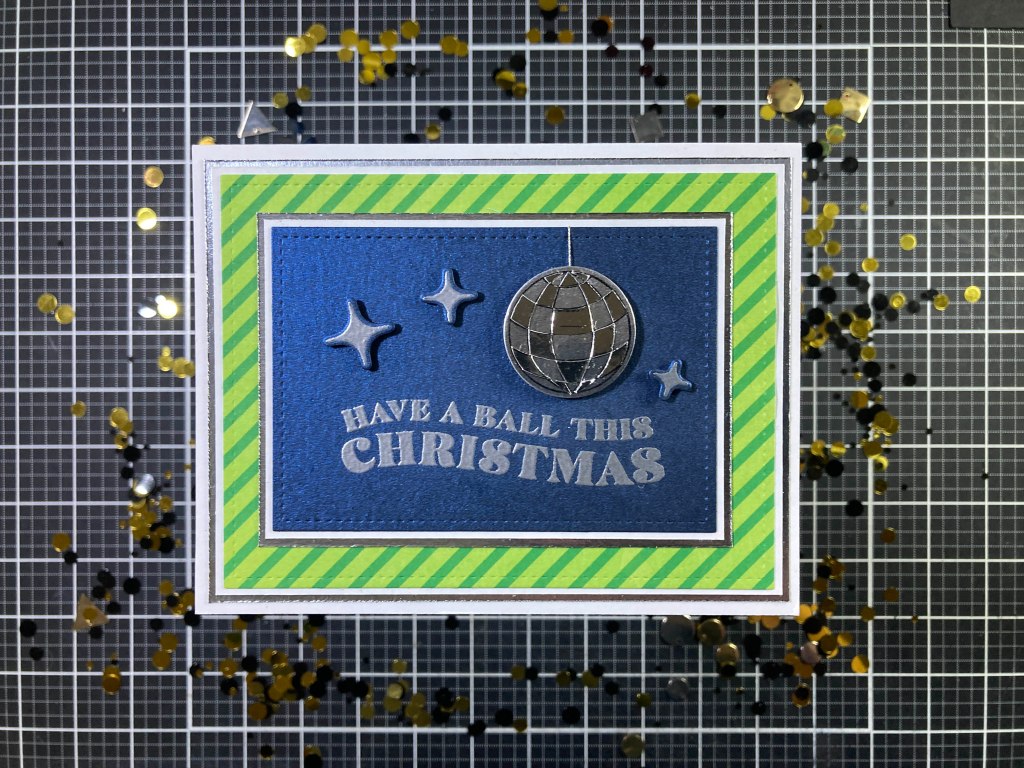
I think this comes pretty close! I wanted to stamp on metallic card stock so I reached for my StazOn Jet Black Solvent ink to stamp the mirror ball outline on some Silver Matte card stock in my stash. Then I stamped the same on some Silver Mirror card stock and proceeded to fussy-cut all the mirror tiles. I die-cut the matte ball and glued the mirror tiles on top – alternating the mirror tiles with the matte background. That feels like a real era-defining mirror ball!
The background is Dark Blue Pearlescent card stock from my stash die-cut to 4″ x 2.75″ with a LFSRdie and the sentiment is stamped with VersaMark ink and embossed with HA Silver embossing powder. On a scrap of the same card stock I stamped, embossed and die-cut the three sparkles with the same Silver embossing powder. I added a piece of silver thread to the back of the mirror ball, added the ball over the sentiment with foam tape, and wrapped the silver thread over the top of the Blue background and glued it behind. I added a thin mat of White card stock and a thin mat of Silver Matte card stock behind the blue and attached the sparkles with foam tape.
The Green striped pattern paper is from my stash and die-cut to 5″ x 3.75″ with a LFSRdie and the same White and Silver mats are glued behind. Those are glued to an A2 White card base and the matted Blue panel is glued on top. This may be my favorite mini Mirror Ball!
Once I broke out that StazOn Jet Black Solvent ink I knew my metallic card stocks were going to get a bit of a work-out!

This is about a simple as you can get with these mini mirror balls! I stamped these on some Red and Green Tim Holtz Metallic Jewels card stock and some Mirrored Holographic card stock from my stash… StazOn ink dries perfectly and no filler tiles needed! I die-cut the balls with the matching die and added silver thread to hang them from.
Back to my pattern paper stash for this Green Striped paper with White Glitter snowflakes down one side. I die-cut that to 3.75″ x 5″ with a LFSRdie and stamped the sentiment with VersaMark ink and embossed it with HA White embossing powder. I decided on an arrangement of the mirror balls, attached them all with thin foam tape, and taped their strings over the top of the pattern paper. Then I added a thin Black mat and a thin Silver mat before gluing all down to a White card base. Some small silver snowflake sequins add more sparkle, and this is a terrifically shiny Christmas card! And I do think this sentiment is kind of a hoot! Especially for anyone who actually participated in the Disco Era.
Okay… I can’t bring myself to use the “said no one ever” sentiment but I will brave the Merry Era sentiment…!
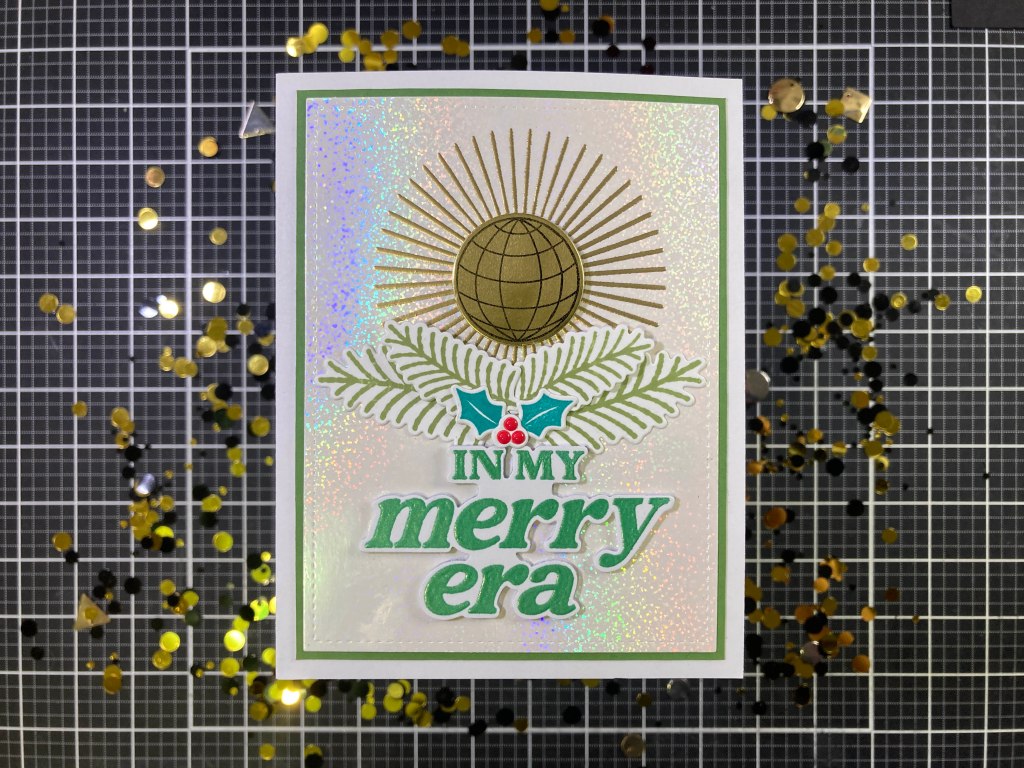
“In My” seems a little odd on a card front… why am I sending you a card about me being in my “merry era”…? Similar to sending someone a card that says “I’m having a Merry Christmas”!? But I guess I understand that’s kind of the vernacular now… but I digress…!!! I wanted to use the pine branches and holly stamps in the set and I haven’t used the sunburst stamp yet either. And, of course I’m going for as much sparkle as possible! I grabbed this great White Holographic Glitter card stock from my stash and did a quick experiment on a scrap to see if I could emboss on its shiny surface. It worked! I do like using a white(ish) background when I use die-cut stampings. I think it helps the white borders on the die cuts appear less obvious.
I stamped the pine branches with Hero Hues Byzantine Green Reactive Glitz ink (touches of sparkle there!) the holly leaves with the C&9th Oceanside ink and the berries with C&9th Poppy ink. I die-cut everything with their matching dies. I stamped the sentiment on a scrap of white card stock with VersaMark ink, embossed it with LFL Emerald City embossing powder, and die-cut it along with three blanks and glued them all together. I stamped the sunburst on the White Glitter card stock die-cut to 3.75″ x 5″ and embossed it with HA Gold embossing powder. I stamped another mirror ball on Gold Metallic card stock with StazOn ink and die-cut that out as well.
I added a thin mat of Fern card stock (from the kit) behind the White Glitter background and glued those to a White card base. I attached the mirror ball with foam tape and the pine branches with glue and a bit of foam tape on the ends of the short branches. I glued the holly and berries in place and glued the sentiment on top. I found a pack of Enamel stickers from the MMH Premium Kit of April 2023 and the small red stickers fit on the berries perfectly! Just a little more shine for this sparkly declarative Christmas greeting.
Short of the “said no one ever” sentiment, I have used all the stamps in the kit. Time to look at the Have a Ball die set!

This Disco Ball die is 4.25″ in diameter! When I get a die this large my first thoughts often turn to shaped cards! Who could resist a fun Disco Ball card! I grabbed some Gold Metallic card stock and some Gold Glitter card stock from my stash and die-cut the big ball from both. I die-cut two scraps of White card stock with a 4.25″ HA Circle Infinity die (if you have the HA dies the next to the largest die fits perfectly), and I glued the outline die cut to the white base. Then I could paper piece in the tiles – Metallic tiles on the Glitter outline and Glitter Tiles on the Metallic outline. Two for one!
I folded a piece of White card stock in half and die-cut the 4.25″ circle leaving an eighth of an inch (or so) of the die over the folded edge to give me a round folding card base. I glued the assembled mirror ball on top. I die-cut the bow from the Tim Holtz Red Metallic Jewels card stock, and the underside of the loops from some dark red card stock in my stash. I glued the bow pieces together and glued that to the top of the ball. The sentiment is stamped on the Dark Red card stock with versaMark ink and embossed with the Gold embossing powder. I die-cut the sentiment and two blanks with the matching die and glued them together before gluing them to the face of the mirror ball. I trimmed about a quarter of an inch off the bottom of the back of the card (parallel to the fold line) so the card will stand for display! No embellishments needed!
And here’s that two-for-one option – –
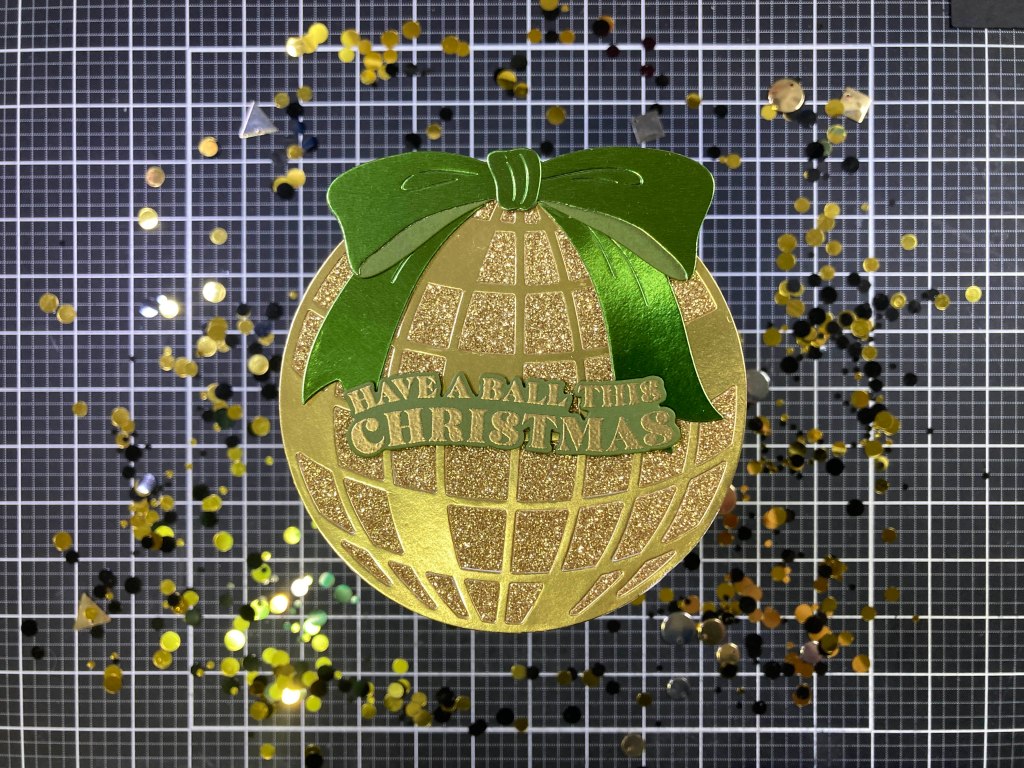
This is the Gold Metallic outline with the Gold Glitter tiles. It’s interesting how the Metallic outlines look thinner than the glitter outlines – some kind of optical illusion I suppose! The ball is glued to a die-cut card base just the same and the bow is die-cut from the Tim Holtz Green Metallic Jewels and the loop shadow is cut from Hero Hues Palm card stock. I glued the bow together and down to the mirror ball. The sentiment is stamped on the same Palm card stock and embossed with Gold embossing powder and then die-cut along with two blanks. Those are glued together and then glued down to the card front. These shaped cards are glorious and I’m sure anyone would be thrilled to receive one!
But you know me… I gotta have my Silver Mirror Ball…!

I grabbed some Matte Silver Metallic card stock and some Silver Mirror card stock from my stash and die-cut the big ball from both, glued the outlines to two white 4.25″ circles and paper-pieced the tiles into the openings – Matte tiles into the Mirror outline and Mirror tiles into the Matte outline. For this card I did add the die-cut ‘tag loop’ to the top of the mirror ball. I tied a green striped bow from some wired ribbon and slipped some Silver cord into the knot so I could tie the bow to the top of the Mirror Ball and have some cord left over for hanging!
I stamped the sentiment on the Matte Silver card stock with VersMark ink and embossed that with the LFL Emerald City embossing powder. I die-cut the sentiment and one blank with the matching die and glued those together for a little more rigidity. I also stamped a “to:” and “from:” on the backside of the mirror ball (which is white) using stamps from the Hero Studio CKM from October 2024. I attached the mirror ball to a plain White A2 card base using Zots removable clear adhesive dots. The recipient can then remove the whole mirror ball and use it as a tag or an ornament… or a tag AND an ornament! I love that a the ribbon is sparkly and a little see-through – doesn’t feel like too much here!
And another two-for-one… I was interested in trying to imitate the mirror ball reflections on the background…

To give me more background area, I cut the assembled mirror ball in half. I looked for a stencil that had an irregular pattern of dots and picked the Concord & 9th Confetti Dots Turnabout stencil for these random reflections – since the stencil is created to be stamped four times in rotation, doing it only once makes for a very random distribution. I pounced VersaMark ink through the stencil and embossed the dots with LFL Silver Glitz embossing Powder – very sparkly! I die-cut the background to 3.75″ x 5″ with a LFSRdie and added a thin Silver Metallic mat behind and glued them to a White card base.
I stamped the Pine boughs with the Byzantine Green ink on plain Green card stock and added some veining details with a Brown Pigma Micron pen before die-cutting them with their matching dies. I stamped the sentiment with VersMark ink on the same Green card stock, embossed that with HA Silver embossing powder, and die-cut it and two blanks with the coordinating die. I glued those together and weighted them down to dry. I added the mirror ball with thin foam tape, the pine boughs glued at their ends and foam taped at their tips, and glued the sentiment to the mirror ball with some thin foam tape on the right side. I think the sparkly dots are very reminiscent of a mirror ball’s reflections twirling around!
OKAY! Enough with the Holiday Balls! LET’S GO TO THE DISCO!

Ahhhhhhhhhh! That feels amazing!!! A disco-licious all-purpose encouragement card!
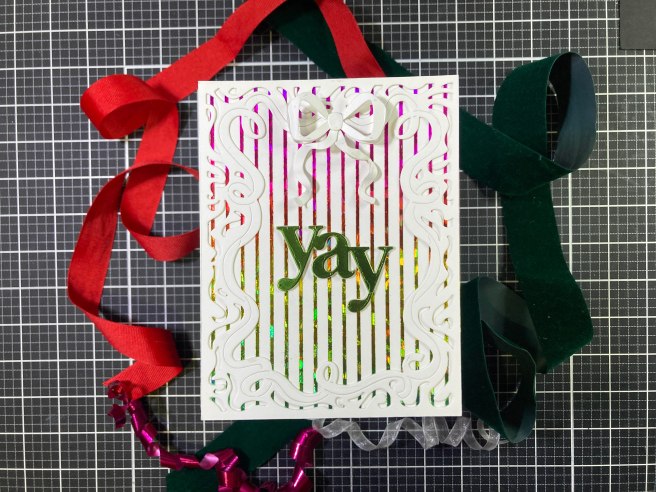
I actually created the background I’m using here, when I was making this card using the Hero Studio CKM from March of this year. I used the Thin Stripes Stencil in that kit to make the Deco Foiled background on this “YAY” card, and I immediately took the leftover foil and laminated it to a panel of Black Toner card stock. So I had an extra panel of that foil with thin Black stripes instead of the thin foiled stripes. This is the DecoFoil Rainbow Shattered Glass transfer sheet. This panel has been sitting on my desk since March… time to use it!
I die-cut the foiled panel to 3.75″ x 5″ and added a thin White mat and a thin Black mat and glued them to an A2 White card base. I created this sentiment using my Silhouette Software and the Phosphate font and I printed it on some glossy photo paper. I die-cut the printed sentiment with a 1.5″ Infinity Circle die along with three blanks, and glued them all together. I attached the (other) half Disco Ball with thin foam tape (a little closer to the top to leave room for the sentiment) and die-cut the ‘sparkles’ from the same White Holographic Glitter card stock used on card five, and attached those to the Disco Ball with thin foam tape. The sentiment is glued down comfortably in the lower left corner. I can practically feel the base pounding and hear the diva’s wailing with this card. Keep On Dancn’ INDEED!
And thanks to some two-for-one assemblages, that’s my ten cards for this month. You do have to hand it to Hero Arts – their card kits are definitely unique and continually offer something that I’ve never seen before. I had a great time trying to emulate an actual mirror ball, and it’s nice to be able to feature some metallic card stocks for a change!

This is a shiny and extra sparkly set of cards this month! I used all but the “said no one ever” stamps and most of the coordinating dies, I used all of the Have A Ball die set and a good amount of the papers and lots of the Gold embossing powder. Though I don’t think I’m going to be making a Disco Christmas theme for my actual holiday cards anytime soon, I do like the small stamped Disco Balls and the large Disco Ball die, and that big ribbon die is terrific… there are lots of uses for the items in this kit throughout the year for many non-holiday greetings. Let me know which cards are your favorite!
As usual, if you’d like to get this kit for yourself, you will need to Subscribe to the Hero Studio Card Kit of the Month by October 27th. If you do go shopping at Hero Arts, please use my links listed below… I make a small commission from whatever you buy (at no cost to you) and that helps support this page and keeps a little inspiration coming your way!
Hero Studio Card Kit of the Month Subscription: https://www.kqzyfj.com/click-101337132-16959232?url=https%3A%2F%2Fheroarts.com%2Fproducts%2Fhero-studio-card-kit
Hero Studio Monthly Subscriptions: https://www.tkqlhce.com/click-101337132-16959232
Hero Arts: https://www.jdoqocy.com/click-101337132-16957493
Thank you so very much for sharing your time with me here today… Your attention means so much to me! If you enjoyed this post please click the “Like” star at the bottom of this post, and if you wish to be notified of new blog posts click the Follow Me button at the top of this page. Please, take a few moments to Like Me, List Me, Pin me, Post Me, Share this post with all your crafty friends, and remember… Don’t run with scissors!! As always, I send you and yours Love and Light and Happy Crafting!
