
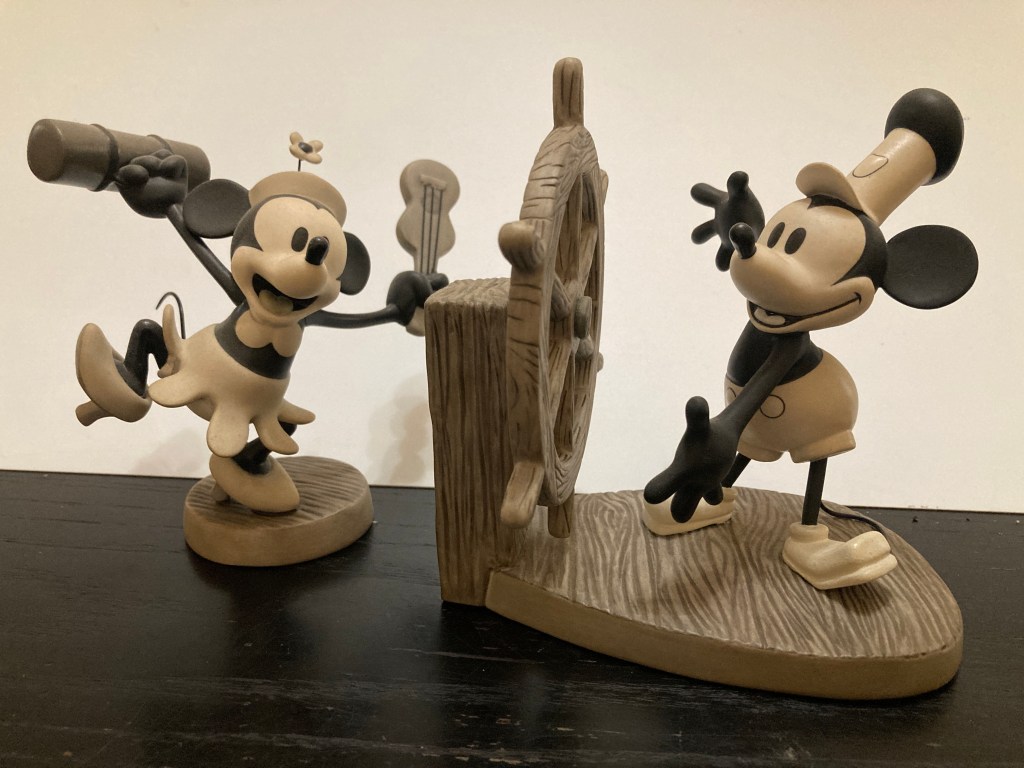
Hello Folks! I have something new for you today! I was watching Tim Holtz on a Saturday morning a while ago and fell in love with a new Spellbinders die set – the Classic Mouse Steamboat Willie Duo – both Minnie and Mickey!! Though I don’t think of myself as a devoted die-cut card maker, I decided I had to have this set… I actually have some prized porcelain sculptures of Mickey and Minnie from Steamboat Willie!
This is the Spellbinders bundle I had to have for myself:
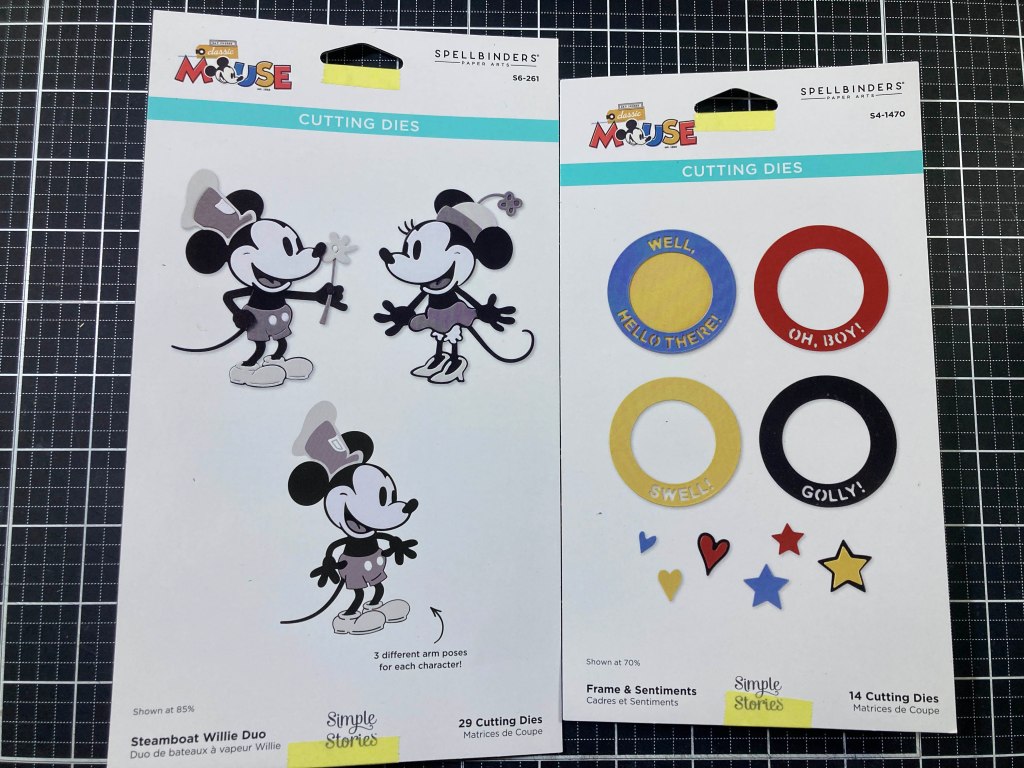
It was pretty big news when the Steamboat Willie version of Mickey Mouse (and Minnie!) became Public Domain in January of 2024… at least it was big news to us Disney junkies!! Of course I couldn’t wait to put these guys together…

FREAKING ADORABLE!! I love how the top layers of the die cuts still allow for the black outline. The heads, bodies and arms are all separate so you can pose them in a variety of ways. These were cut from HA Pitch Black card stock and a pack of Gray Ombre card stock from Core’dinations (been in my stash for a while)! LOVE THESE DIE CUTS!!!
Spellbinders reached out to me (because I bought these original dies?) and asked if I’d like to check out the Classic Mouse Holiday release… newly available on September 10th!

Well, of course I said YES! The embellishments add a little bit of holiday delight and who could resist these charming cartoony wreaths? Naturally, Spellbinders asked me to post my playtime results on my socials… No Problem!!
I was intrigued by the possibility of doing a “Classic” Christmas card and keeping everything in the “Classic Mouse” black & white color range…
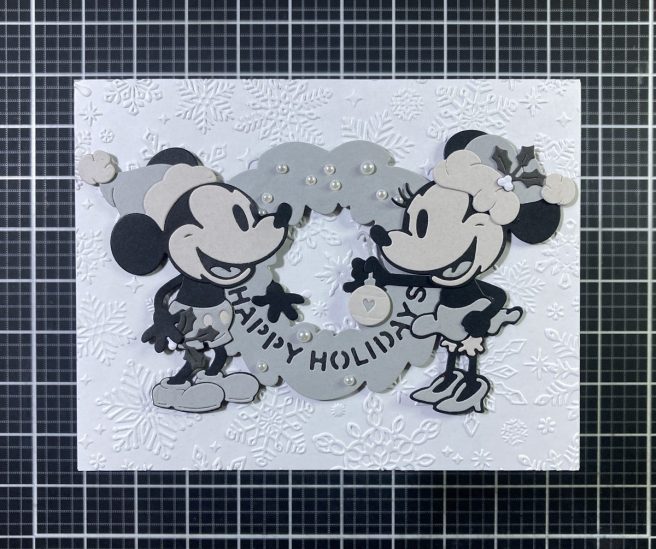
I couldn’t be happier with how this came out! I did have to separate Mickey’s arms to get his left arm wrapped around the wreath, but it looks totally plausible! I also trimmed back the points of both their hats and moved the pompoms to make this arrangement a little narrower so it would fit on an A2 card. I die-cut the Happy Holidays! sentiment on the bottom half and the berry holes on the top half of the wreath and filled them in with Pearl dots… and added a few more in other sizes for good measure. The background is a Gina K Designs Snowflakes embossing folder (perfect – and White!) On the inside I would say “Hope your Holidays are Classic!”. I DO think the end result is worth it, but these assembled die cut images are certainly time-consuming to assemble… if I was sending out more than 5 or 10 Christmas cards I would probably avoid this one!
The wreath is kind of in the background with Mickey and Minnie, and I did want to explore the various wreath options… Before making cards, I die-cut all the wreath pieces in a variety of combinations and colors…
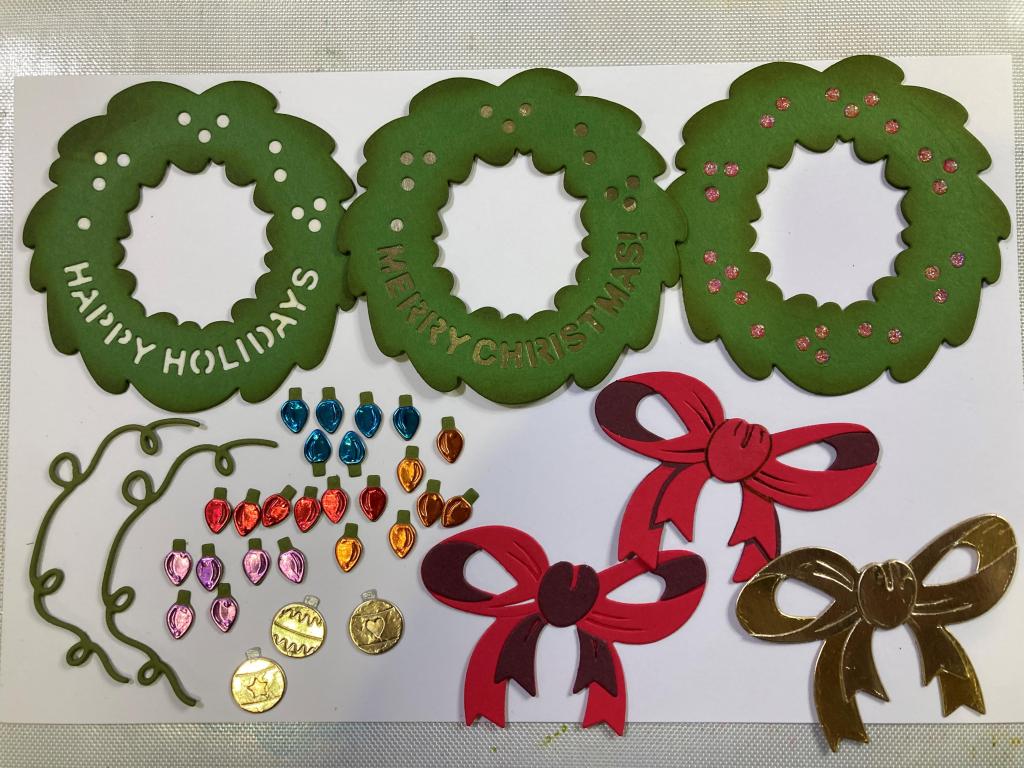
I do love the Christmas lights cut from colored metallic card stock! But I wasn’t completely happy with how the the bow pieces layer together… all the examples of this bow I saw on-line used extremely close color combos… but I was looking for a little more contrast…! While the inside of the bow loops should be in shadow, the same doesn’t hold true for the knot and the front tails… (bottom left bow) so I adapted my layered bow (center) to have the main bow cut from both the shadow color and the highlight color, and then trimmed away the highlight color, and trimmed the back highlight tails to show a little shadow where they overlap the back tails. The knot is the only piece die-cut from the highlight color. A little touch of a Brown Pigma Micron pen helps define the knot and where the tails are behind the bows. I like this!

I die-cut this wreath with the berry holes from some medium Green card stock in my stash, and backed the berry holes with Red card stock. I added another wreath (no holes) to the back to give a little rigidity, and did some light ink blending on the edges (inside and out) with Forest Moss Distress Oxide ink. Also, I added drops of Sparkle Lacquer in each red berry hole.
The light bases and the light strings were die-cut from some slightly darker Green card stock and I doubled up the strings for more depth and strength. I glued the metallic Bulb pieces on to the bases and attached them to the strings (two of the lights cover up the seams between the two strings and I glued those to the wreath. I placed the bow on the bottom of the wreath with thin foam tape.
The background is some old pattern paper from my stash die-cut with a 3.75″ x 5″ Lawn Fawn Stitched Rectangle die with a thin Black mat glued behind. I stamped the sentiment (from the My Monthly Hero November 2020 Kit) with VersaFine Onyx Black ink and embossed it with Clear embossing powder and glued the background to a White card base. Lastly, I affixed the wreath to the card front with thin foam tape. I really like that the “shadows” on the bow are behind the highlights (not glued on top of), and due to the thinner nature of this Red card stock, my die-cutting machine completely removed (with a little help from me) the embossed wrinkles where the bow is knotted. Lovely holiday wreath with bright shiny lights!

I decided to go all Gold for this wreath… I die-cut the wreath with the Merry Christmas insert and the berry holes insert, glued some Gold metallic card stock behind the openings (there is a die for this) and added another plain wreath on the back. The bow is layered just like the first bow using Gold Metallic card stock for the back (shadow) and Champagne Gold Metallic card stock for the highlights – nothing fancy on the tails… i just trimmed away the back tails from the front highlight piece, and did I die-cut the knot from the highlight color.
The back of the ornaments (with the cap) is die-cut from Gray card stock and the balls cut from more Gold Metallic card stock, glued together, and then I added some Silver Gel pen to the caps. The background pattern paper is cut to 3.25″ x 4.5″ with a LFSRdie with a thin Gold Glitter mat glued behind. Both are glued to an A2 White card base, and the wreath and accessories are attached with thin foam tape. Green and Gold are terrific compliments and this card really shines!

This Classic Mouse Holiday Wreath die set is certainly versatile, and is quite fetching even when done simply! The wreath is die-cut with the Happy Holidays and berry holes inserts and backed with some Holographic White card stock and another plain wreath glued to the back as well as some Forest Pine ink blended on the edges. I found some little red gems that fit in the berry holes perfectly, so I added them and then tied a double bow with some 1/8″ satin ribbon and glued that to the wreath.
I found this perfectly sized pattern paper for my background and cut it to 3.5″ x 3.5″ and added a thin Holographic White mat behind and glued those to a 4.25″ x 4.25″ card base. All that’s left is adding the wreath with thin foam tape. For a fairly simple set of dies, the versatility these wreaths is so vast, that it feels like I’m just scratching the surface – not to mention using the wreaths with the Classic Mouse characters…! Plenty of sparkle and shine on this card too!
Now you didn’t think I would leave you without doing a Mickey and Minnie in color…!

I didn’t think these dies could get any cuter, but you have to love these guys done up in the requisite reds and yellows!

And it just keeps getting even more adorable!! I used the Frame and Sentiment dies to cut the Hello There! and Oh Boy! circle frames from a medium Gray card stock, and backed those letters with some Black Tie Glitter card stock. I arranged Mickey and Minnie inside the circles and trimmed off their legs (ouch!) and tails (no, I am NOT a farmer’s wife!). I die cut the three hearts (2 large and 1 small) from the same Gray and Red card stocks and glued them together.
I took a panel of White card stock die-cut to 5″ x 3.75″ with a LFSRdie and ran it through the Spellbinders Heart Swag embossing folder (5.5″ x 8.5″!). I colored the raised embossing with a small brayer and Picked Raspberry Distress Oxide ink and blended more of that ink around the edges. I glued the background to a thin Black mat and then down to a White card base. I glued the character circles together in the center and glued them directly to the card front. Lastly I added the three hearts for a little cartoony detail. This is a great Friendship card or even a Valentine’s Day card for all your friends who may be Disney (or just Mickey) Fans!
That will wrap us up for this little mid-month tangent post! If you’d like to grab some of these Classic Mouse die sets from Spellbinders. please use the links listed below – I make a small commission from whatever you purchase (at no cost to you!) and that really helps this page and keeps some card-making inspiration coming your way.
Classic Mouse Steamboat Willie Duo: https://www.kqzyfj.com/click-101337132-15849009?url=https%3A%2F%2Fspellbinderspaperarts.com%2Fproducts%2Fsteamboat-willie-duo-etched-dies-from-the-say-cheese-classic-mouse-collection%3F_pos%3D8%26_sid%3D66e1f894a%26_ss%3Dr
Classic Mouse Christmas Embellishments: https://www.jdoqocy.com/click-101337132-15849009?url=https%3A%2F%2Fspellbinderspaperarts.com%2Fproducts%2Fclassic-mouse-christmas-embellishments-etched-dies-from-the-say-cheese-classic-mouse-christmas-collection%3F_pos%3D2%26_sid%3D66e1f894a%26_ss%3Dr
Classic Mouse Holiday Wreath: https://www.dpbolvw.net/click-101337132-15849009?url=https%3A%2F%2Fspellbinderspaperarts.com%2Fproducts%2Fclassic-mouse-holiday-wreath-etched-dies-from-the-say-cheese-classic-mouse-christmas-collection%3F_pos%3D1%26_sid%3D66e1f894a%26_ss%3Dr
Spellbinders NEW Products: https://www.tkqlhce.com/click-101337132-15849009
Thank you so much for sharing your time with me… I hope you enjoyed this little mid-month diversion and a trip to Disneyland! If you enjoyed this post click the Like Star at the bottom of the post, and if you wish to be notified when a new post comes out just click the Follow Me at the top of the page. Please take a moment to Like Me, List Me, Pin Me, Post Me, Share this with all your crafty Disney Fans… remember… Don’t run with scissors… and, as always, I send You and Yours Love and Light and Happy Crafting!!
DISCLOSURE: This site contains some affiliate links to products. I may receive a commission for purchases made through these links (at no cost to you). As an Amazon Associate I earn from qualifying purchases. Thank you!

One thought on “Spellbinders “Classic Mouse Christmas” and “Holiday Wreath” September ’25 Release”