
Hello Folks! Scott here with my 10 cards inspired by the Hero Studio Card Kit of the Month for September 2024. It’s Halloween time with all sorts of unique items all ready for creating greeting cards for the coming spook-tacular! It’s been a few years since we got a Halloween themed kit from Hero Arts!

• Haunted Scenic Clear Stamp Set, 6” x 8”
• Animal Eyes Clear Stamp Set, 3″ x 4″
• 20 Coordinating Dies
• Moon Window Die
• White Pumpkins Decorative Tape, 1 inch x 10 yards
• Black Crows Decorative Tape, 1 inch x 10 yards
• 2 Sheets Halloween Hero Transfers (Rub-ons), 6″ x 8″
• Glow-in-the-Dark Lacquer Pen
• Unicorn Pigment Ink Cube
• 10 Sheets Black Watercolor Paper, 5.5″ x 8.5″
Lots of fun images this month! I thought I’d start out fairly simple and see what that Moon Window Die was all about.

Before I dove in to this new kit (silhouette stamps often work best with a good background) I did a couple of experiments with some Distress Oxide spray. I got a nice spotty coloring using Wilted Violet and Iced Spruce Distress Oxide spray on plain White card stock sprinkled with drops of water for more ‘craters’. That should work for a Moon! I die cut the Moon Window Die from the colored card stock and glued the Moon itself on a panel of the Black watercolor card stock cut out with a LDRS Fancy Rectangle die.
I stamped the witch on the moon with VersaFine Onyx Black ink and stamped the ghost and sentiment with Unicorn White pigment ink and embossed those with White embossing powder. I took a White A2 card base and did a little ink blending on the edges with Wilted Violet Distress Oxide ink. I glued the assemblage to the card front and we’ve got an simple evocative Halloween card. I like the black witch and the black branch…!
Time to tackle all those silhouette stamps. The “Haunted” House is a gloriously detailed stamp with tons of windows…

I stamped the house with VersaFine Onyx Black ink on a panel of White card stock a few times so it was nice and black and set it aside to dry. Since the black ink is so very black I thought I could ink blend over the top without altering the black too much. So… I stamped the house on a piece of masking paper and cut around the windows keeping both the negative and positive masks for inking. I put the negative mask (showing the windows) over the dried stamping and, using a blending foam, pounced Lemon Drop Reactive ink over all the windows. I removed that mask and added a simple circle mask for the moon, and then, when the Lemon Drop ink was dry, placed the positive mask over the windows and inked the background sky with Purple Galaxy and Licorice Black Reactive ink. Again, I used a blending foam for a little more control and the ability to pounce instead of rub.
Once the sky was dry I ink blended the ground with Frayed Burlap Distress Oxide ink. I stamped the fence on the right of the house and the gravestones on the left defining our horizon, then the bats in the sky and the trick-or-treaters in front with VersaFine Onyx Black ink. I stamped the sentiment with the same ink and embossed that with clear embossing powder. I added some shadows to the moon and the trick-or-treaters using my Pebbles Chalk Palette. For a final touch, I added some stars in the sky using a White gel pen. I glued the panel to the front of an A2 card base and called it done! These stamps are delightfully detailed, and I love this one-layer card – no die-cutting necessary! I think the shadows from the kids really sells this scene.
Lets go back to the Moon Window Die and actually use it as a window die…

I die-cut the Moon Window Die on a 4″ x 5.25″ piece of the Black watercolor paper, and cut a matching panel from some Grey card stock. I have an old Tim Holtz Moon Mask Stencil and centered the largest stencil behind the die cut moon and ink blended through that stencil with Concord & 9th Dove ink. That stencil is one of the easiest ways to make a quick effective moon – in 3 different sizes!
I lined up the layers to see where I should stamp the owl, and used VersaFine Onyx Black ink to stamp the owl on the moon – I also embossed the owl with Clear embossing powder. I stamped the eyes and the sentiment on the black panel using Unicorn White ink. I did try thinning out the Glow-in-the-Dark Lacquer pen to paint on the eyes, but anything less than full strength doesn’t give you hardly any glow. Lesson learned! I glued the two panels together and down to a White card base. I did stamp the “Happy Halloween” sentiment on the inside of the card with Onyx Black ink. Finally I took my Dr. Ph. Martins Bleed Proof White opaque watercolor and gave our owl a bright white highlight right in the center of its eyes. The owl looks like it’s perfectly perched on the branch and I love the random eyes in the darkness.
I took the Hero Transfer sheets out and lo, and behold, there are two different sets of rub-ons! One Black and one White! And both have completely different images!
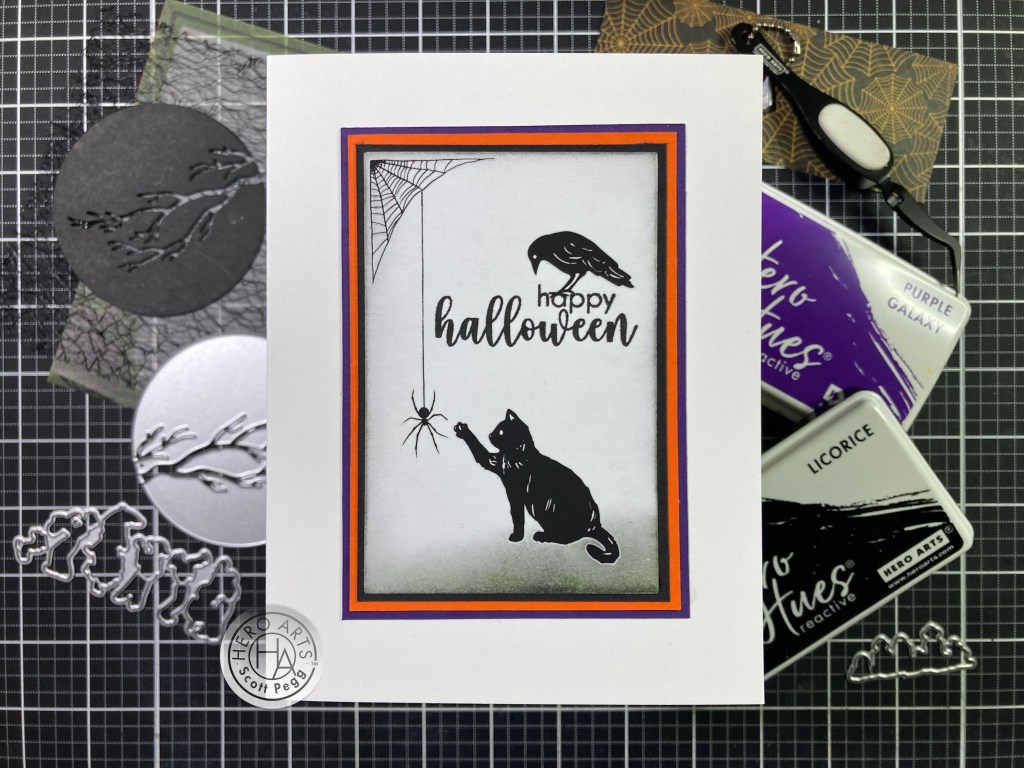
The black rub-ons caught my eye – specifically the cat with its paw out – so I created a little vignette with the rub-ons and a stamped sentiment. On a 2.5″ x 3.75″ panel of White card stock I put the cobweb in the top left corner and used a Pigma Micron 02 pen to draw a line coming down from the web – I did use a t-square to make sure it was nice and straight and square to the panel. I added the spider at the end of the line and that showed me where to put the cat transfer. I stamped the sentiment with Onyx Black ink and added the crow perched on the sentiment.
I ink blended the edges of the white panel with Hickory Smoke Distress Oxide ink adding a little more under the cat to suggest a little grounding. I added a thin Black mat, a thin Orange mat and a thin Purple mat to the inked panel and glued all to an A2 White card base. Great little halloween vignette here… the cat is going after the spider, but the crow is standing by to go after the cat! Kind of a Hunter vs. Hunted card!
One of my favorite stamps in this set has to be the Skeleton Band – obviously a riff on the Dia de los Muertos holiday.
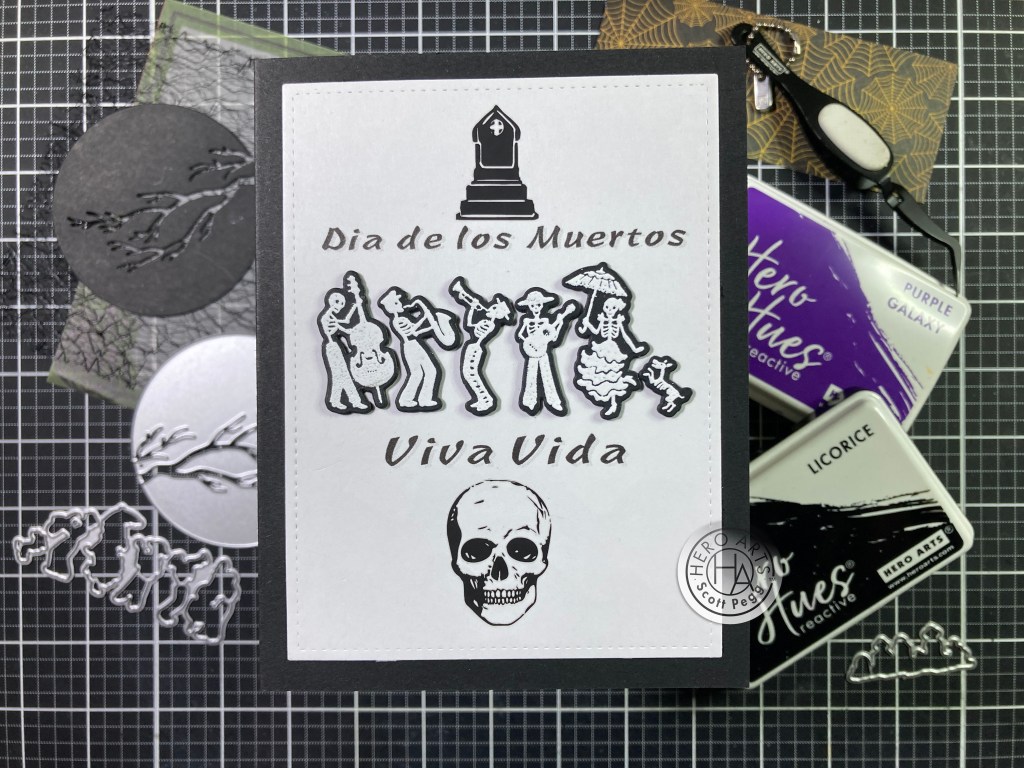
I couldn’t resist goin all in for this Mexican heritage greeting card. I stamped the musicians on a piece of Black card stock using Unicorn White ink and embossed them with White embossing powder. Beautifully detailed stamps again! For an added bonus, the matching die cuts all the musicians out individually! I die-cut two more blanks from Black card stock and glued them all together so I wouldn’t have to fuss with foam tape. Using a Lawn Fawn Stitched Rectangle die, I trimmed a panel of White card stock to 3.75″ x 5″ and, using my Silhouette Software, printed the sentiment using the Baoli TC font. I added the Skull and Gravestone rub-ons to the printed panel, and glued our musicians in place.
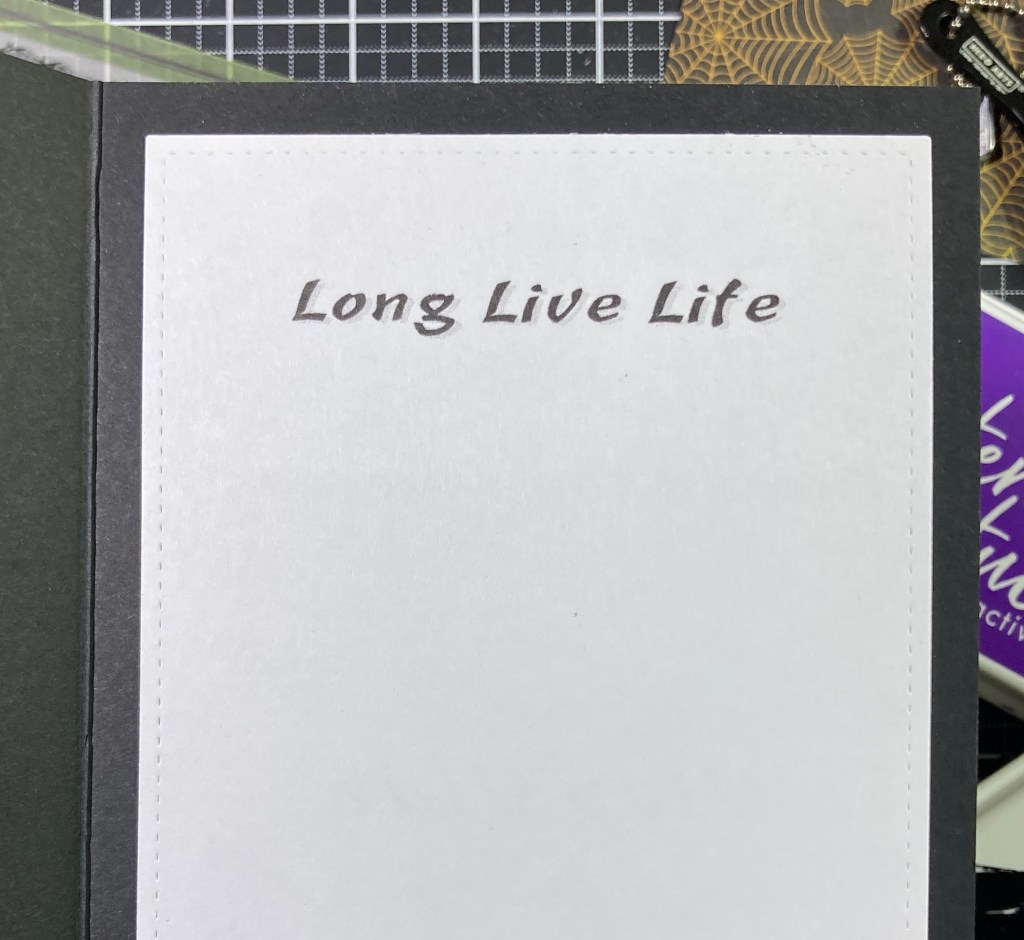
I glued that panel to a Black A2 card base, and I also printed the translation of “Viva Vida” on a panel of White card stock for the writing surface in the inside. I went back and forth a couple times over using “Viva la Vida” or just “Viva Vida” for this card. The first is a little more conversational, and the second is more declarative. I decided to forego the “la” mostly because of a small Mexican bodega in my Neighborhood that is called Viva Vida – Long Live Life! I considered decorating the skull rub-on with gems but decided to stick with the very appropriate black and white color scheme. Gotta love those stamps!
Maybe it’s because of the impending holidays, but I’ve been seeing a lot of “stamp” cards around lately… so…
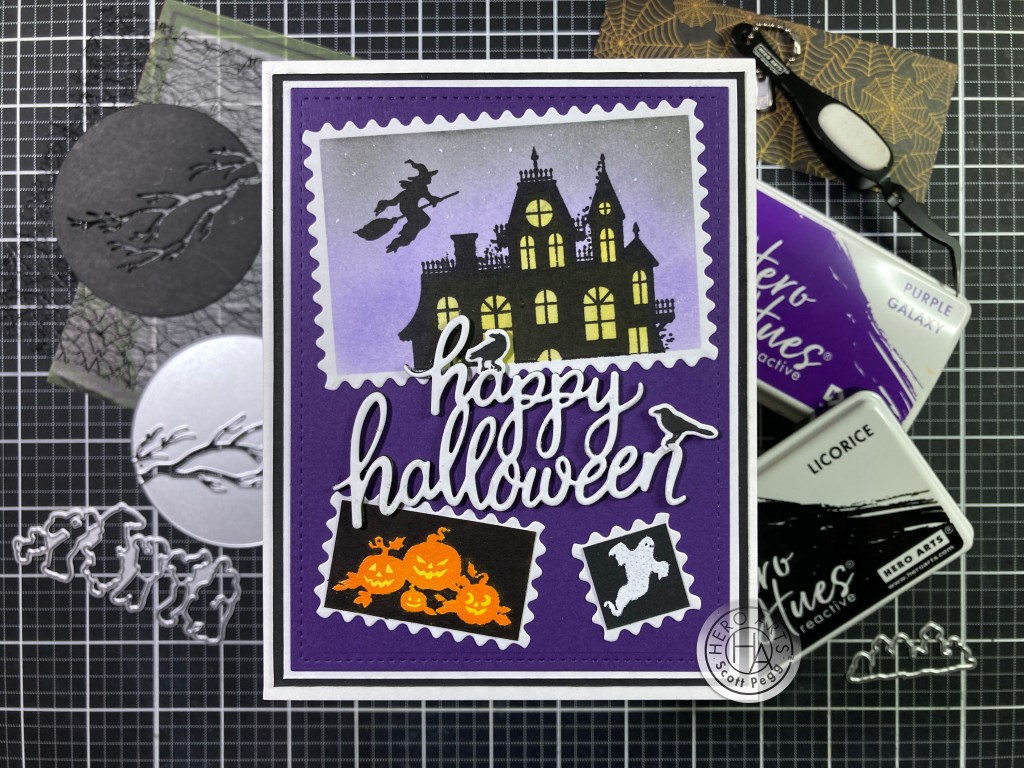
I do have the SSS Modern Postage Stamp Rectangles die, so I die-cut the three smaller rectangles from some 80# Neenah Classic Crest White card stock. These dies don’t cut a frame, just the whole “stamp”, so I masked off a “frame” on the larger rectangle and stamped the upper portion of the house on that with the Onyx Black ink. I used my pre-cut masks to color in the windows and the sky just the same as card number two, and added the witch stamped in Onyx Black in the sky. For a final touch I added some stars with a White gel pen.
The pumpkins are stamped on some Yellow card stock using Creamsicle Reactive ink and embossed with Clear embossing powder. That makes it easy to color the background using a Black TomBow watercolor marker – wipes right off the embossing! I cut that to size (1 and 5/8″ by 15/16″) to fit on the medium Postage die cut. I cut a piece of card stock to a 3/4″ square, stamped the ghost on that with Unicorn White ink and embossed that with White embossing powder. I glued the ghost to the center of the small Postage die cut.
I was digging through some old MMH kits looking for some more sentiment options when I came across this die-cut sentiment from the MMH September 2019 Kit. I die-cut that twice from White card stock and twice from Black card stock and glued them all together for a chunky sentiment. I stamped the crows on a scrap of White card stock with Onyx Black ink and then die-cut them with their matching die. I added them both perched on the sentiment. The Dark Purple background is cut to 3.75″ x 5″ with a LFSRdie and matted to a thin White and Black mat and glued to a White card base. I arranged the “stamps” and the sentiment and glued them down to the front of the card.
I realize why there are so many “stamp” images and dies out there… a greeting card is generally mailed, therefore images of stamps are always appropriate! This is a great collage of images and the half-house is almost as good as the whole house! And I love those pumpkins with their “candle-lit” features!
After my glow-in-the-dark lacquer fail on card number three, I decided to create some lacquer “dots” to dry on a craft mat. I do this a lot with enamel dots – it helps avoid mess-ups directly on your card front – just pop the “dots” off of your craft mat and glue them directly to your card front.
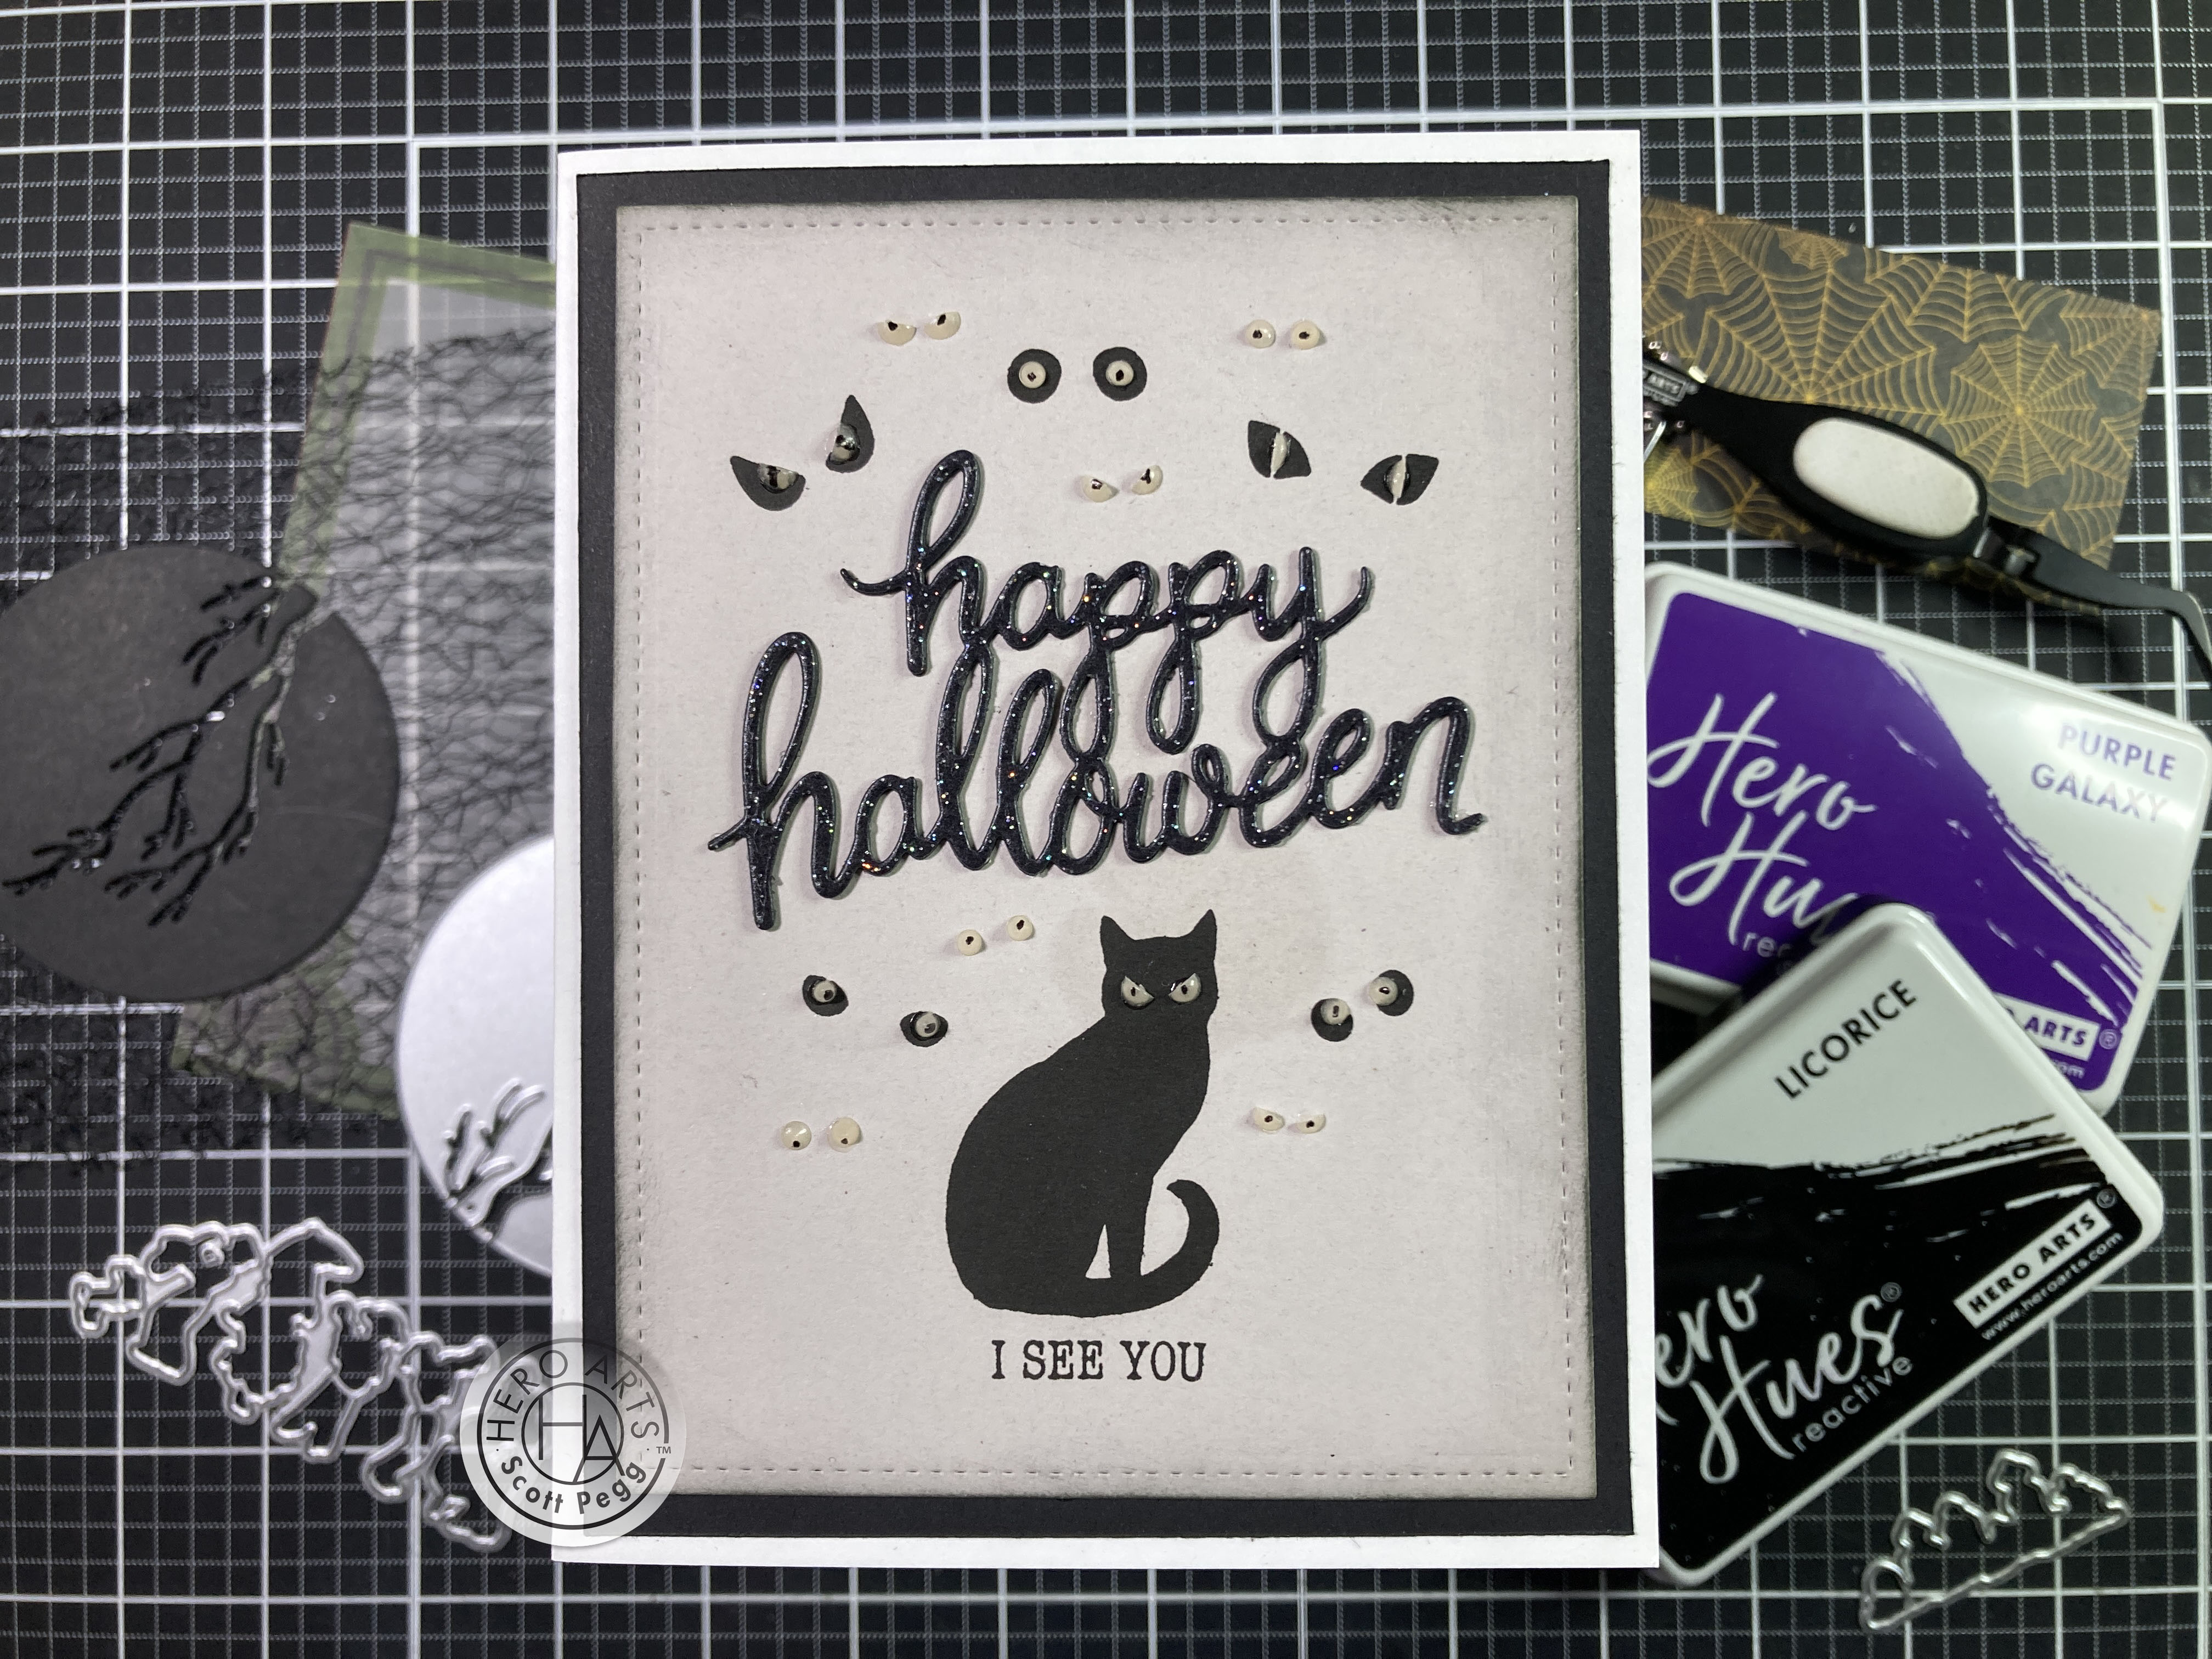
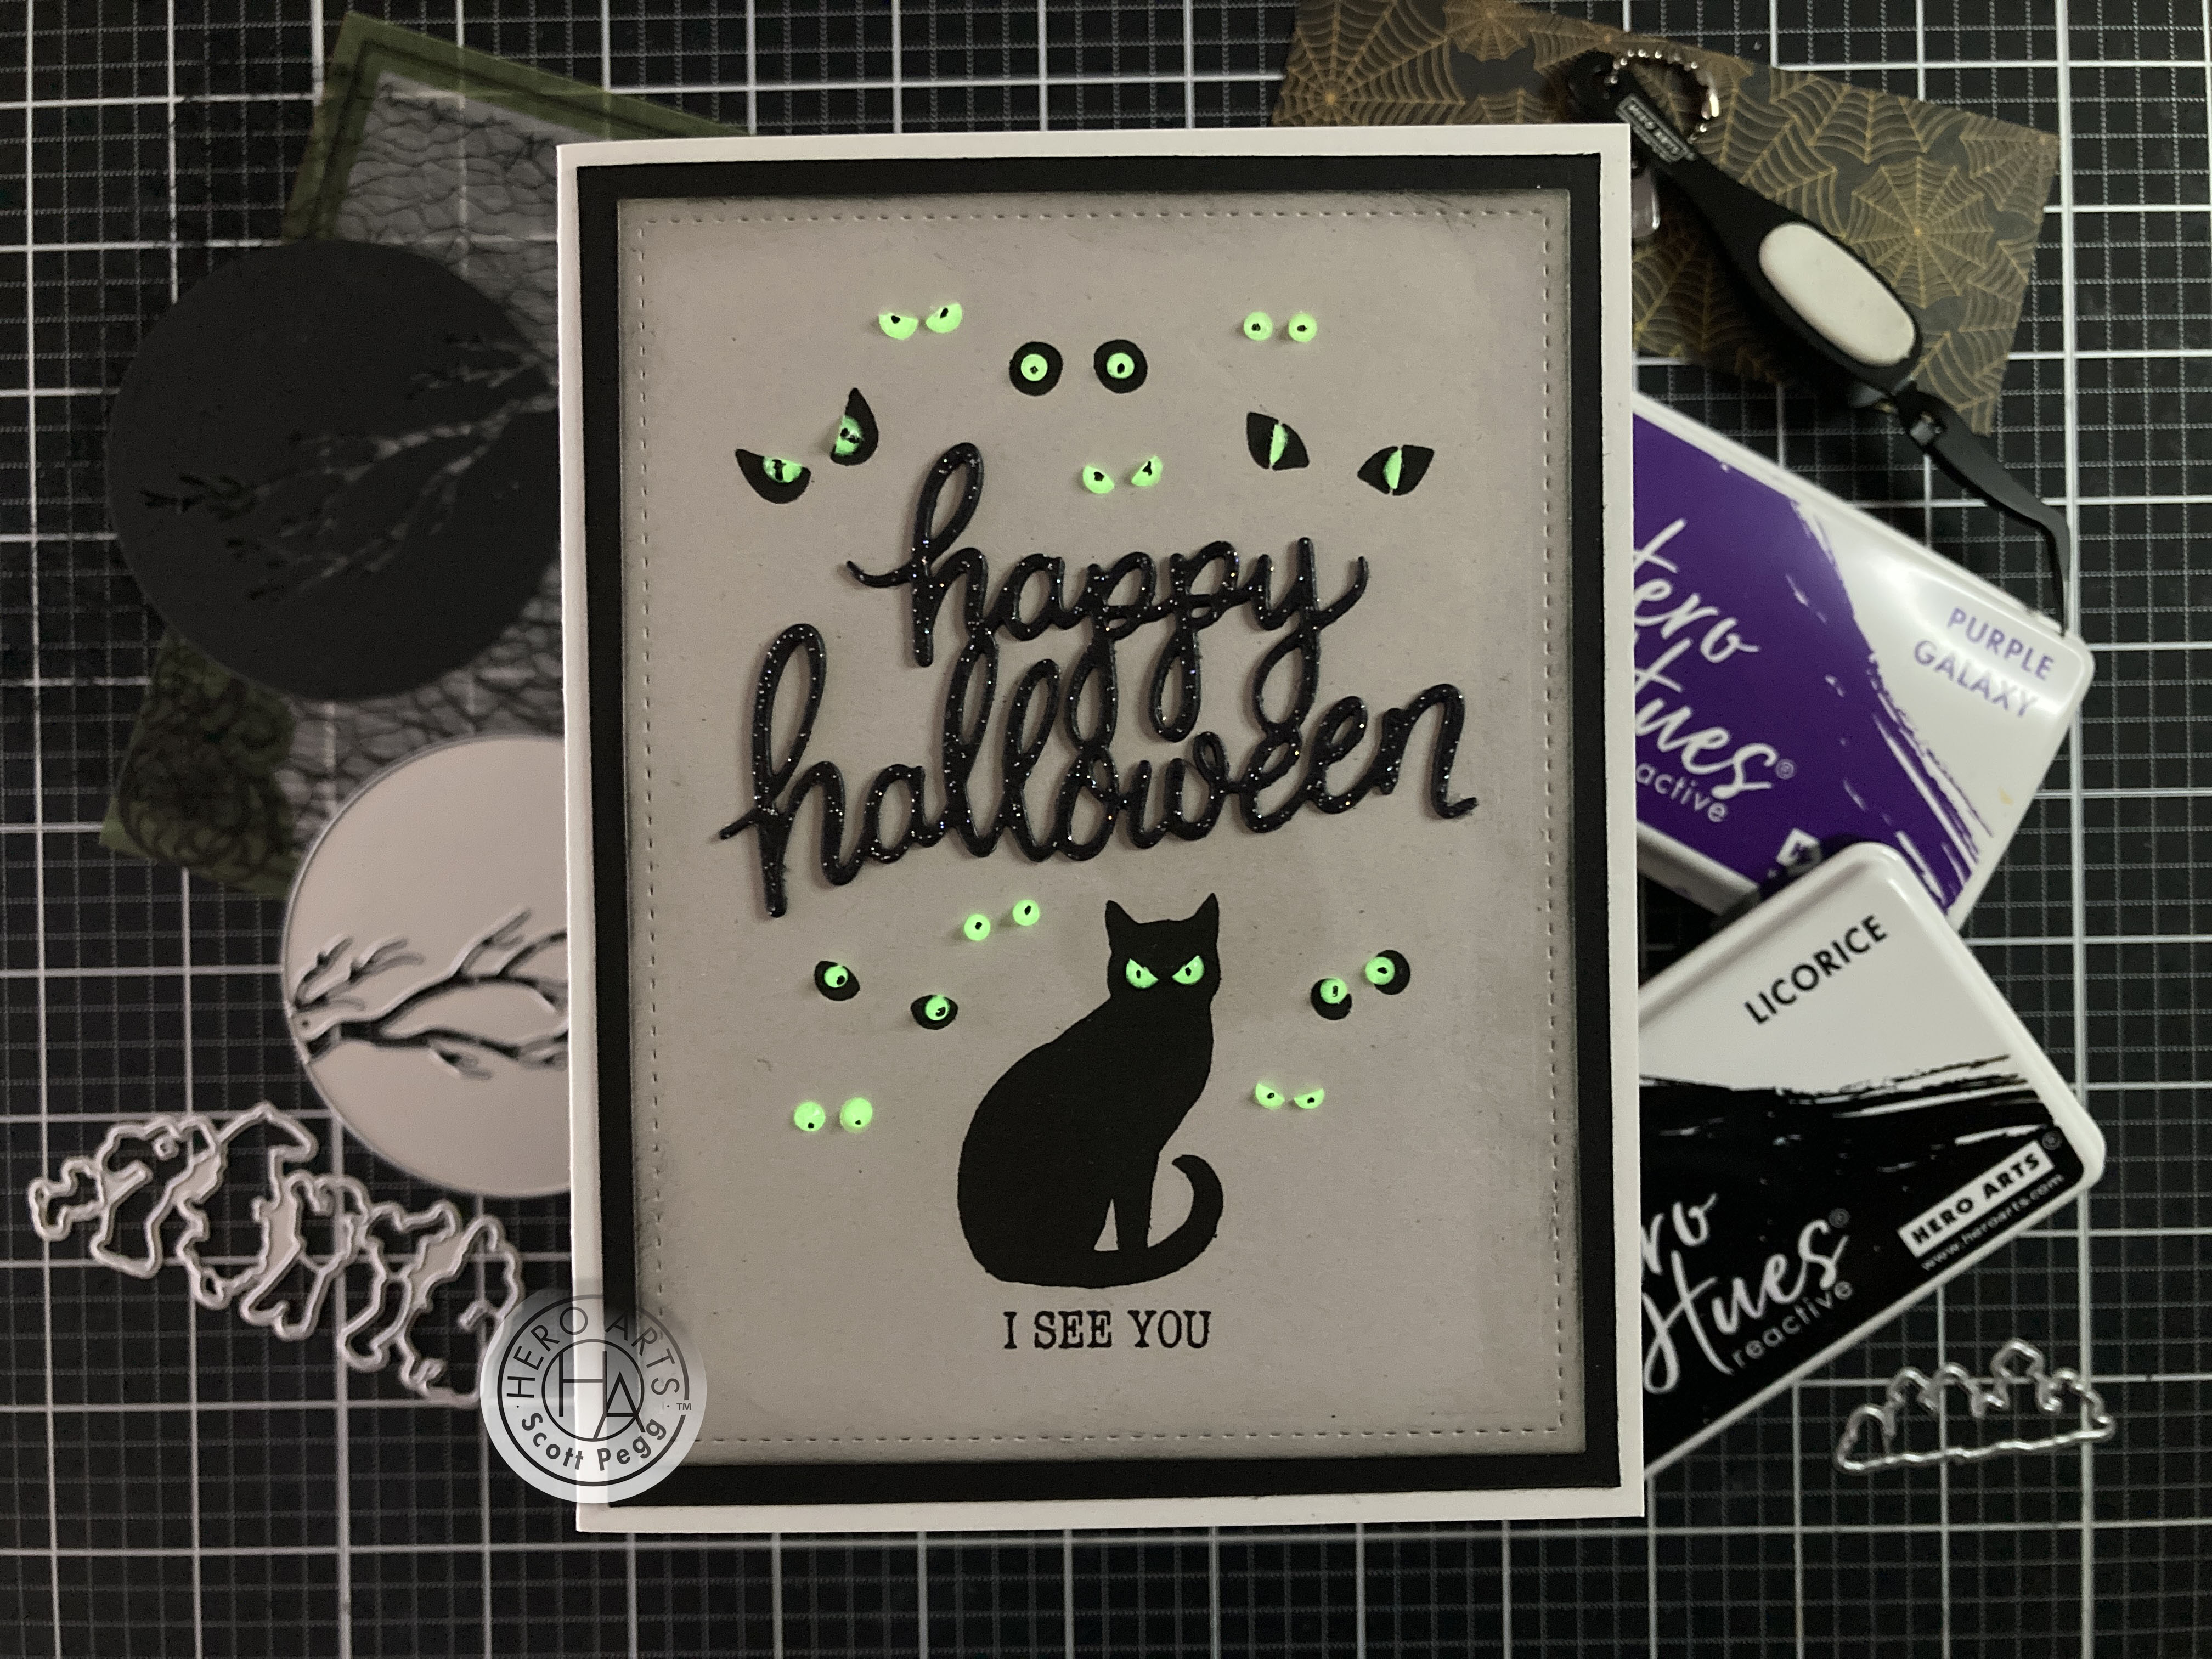
I planned this whole card around that MMH Sept. ’19 die-cut sentiment cut once from Black Tie glitter paper and once from plain Black card stock and glued together. I die-cut a panel of plain Grey card stock to 3.75″ x 5″ with a LFSRdie, and stamped the cat (from the Animal Eyes stamp set) and all the eyes (and the sentiment) using Onyx Black ink. I added a little ink blending on the edges of that with Hickory Smoke Distress Oxide ink. I grabbed my dried glow-in-the-dark dots and cut some of them in half with a craft knife. Using a black alcohol marker, I added pupils to the glow-in-the-dark dots – for the cat-eyes on the upper right, I just cut slivers off the sides of a dot. Here we have some real glow-in-the-dark action! A quick charge under a bright light and the eyes glow nicely without having to be in the complete dark! You can even get the eyes looking in different directions depending on where you put the pupils. I love the scowl on the cat and even the eyes without the stamps work well especially when glowing!
There was one image on the White Transfer sheet (rub-ons) that caught my eye…
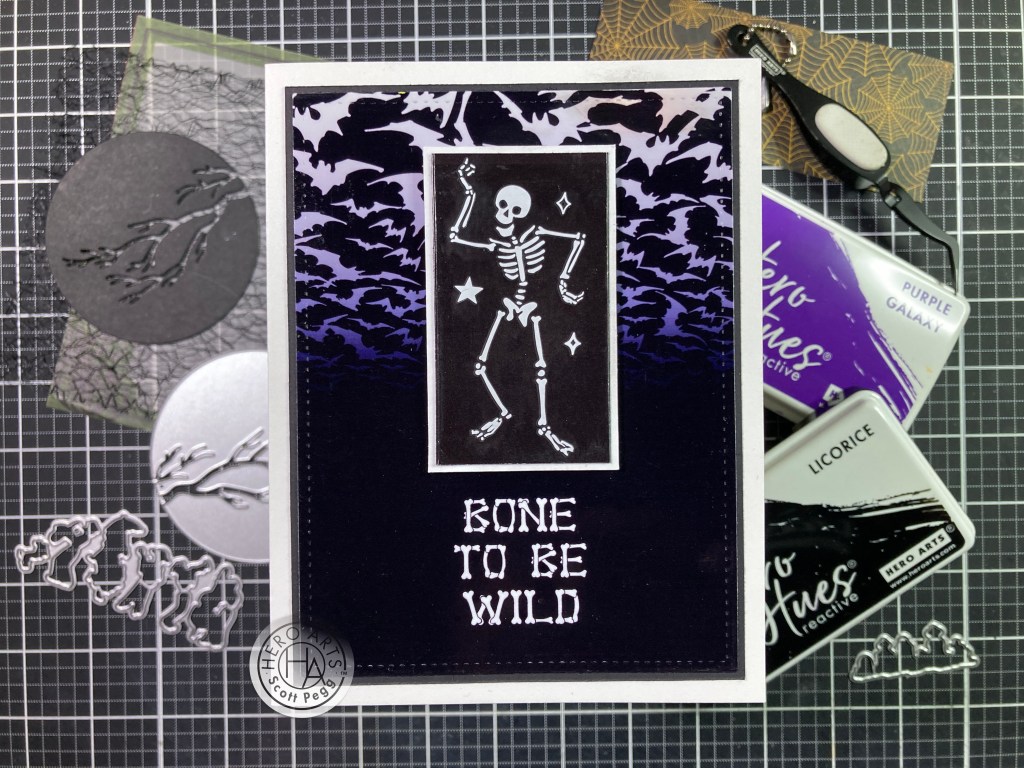
I cut out the skeleton along with the stars that were right next to him and rubbed them on to a scrap of Glossy Black card stock. It took a little extra rubbing to get the skeleton to adhere to this glossy card stock – the white print kept trying to separate from the clear adhesive layer. I was finally able to get everything to adhere to the glossy card stock and trimmed that to 1.5″ x 2+5/8″ and added a thin White mat behind. What to do for a background? I knew I would have to print this sentiment, so I figured I could match the Glossy Black card stock by printing on glossy photo paper.
I had this background of bats in my image files and used my Silhouette software to lay out the bats and sentiment using the Bones font. I printed that on a piece of photo paper and once it was dry, I trimmed that to 3.75″ x 5″ with a LFSRdie. I added a thin plain Black mat behind the background and glued them to an A2 White card base. I added the skeleton panel to the card front with foam tape. I did also stamp “Happy Halloween” on the inside with Onyx Black ink. There are lots of Halloween puns out there, but I don’t think I’ve ever used this pun! All the better when you can relate it to a song! Recorded by Steppenwolf in 1968, Born To Be Wild was famously featured in the 1969 movie Easy Rider. Perfect!
When I was trolling through my stash for sentiments, I came across this one from the MMH September 2020 kit. I thought trick-or-treating alone was a pretty scary prospect… especially in this neighborhood.
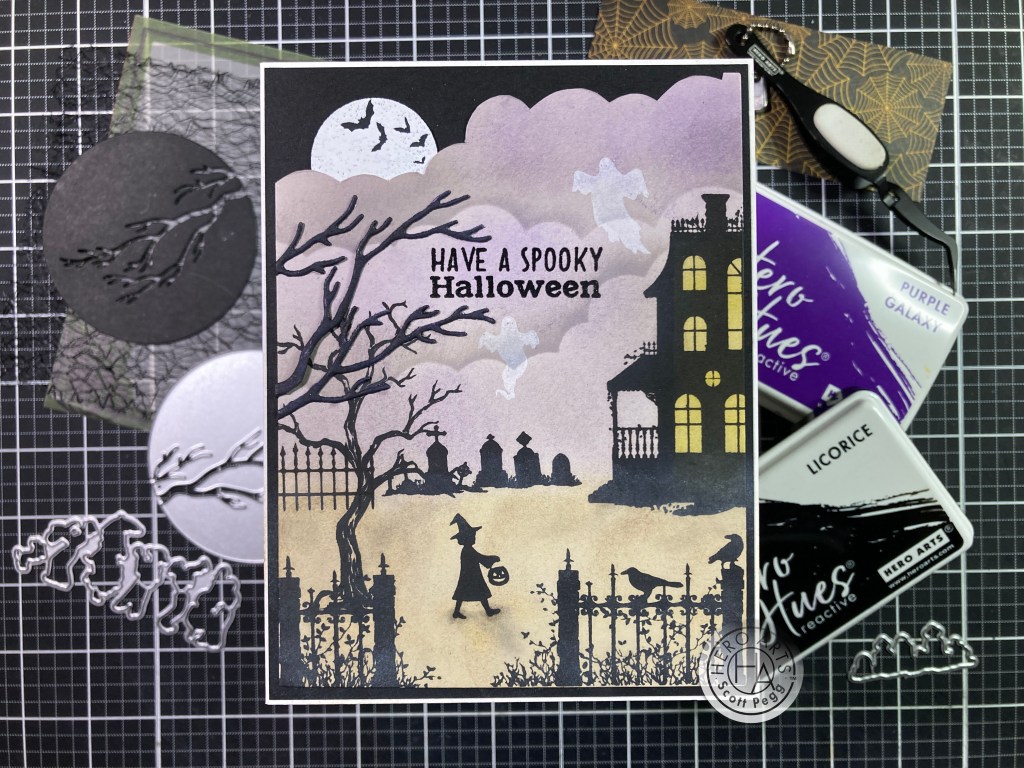
I stamped and colored this card just like card number two but used Grey card stock instead of White. I stamped the tree, gravestones, and house first using Onyx Black ink. When dry, I used my pre-cut mask to add Lemon Drop ink in the windows, and then used a My Favorite Things Mini Cloud Stencil and Hickory Smoke Distress Oxide ink (and some touches of Purple Galaxy Reactive ink) to add the clouds in the sky. I used Antique Linen Distress Oxide ink for the ground and blended in touches of Frayed Burlap ink for a little variety. When that was dry, I stamped the gate (with the crows) and the fence and our trick-or-treater. I did blend in a touch of SeaSalt Reactive ink at the base of the gate and house and gravestones to suggest a bit of a misty atmosphere, and added a bit of a shadow to our trick-or-treater with my Pebbles Chalk palette. I die-cut the inked and stamped panel with a 4″ x 5.25″ HA Rectangle Infinity die.
I stamped the moon on a scrap of Black card stock using Unicorn White ink and embossed that with some clear embossing powder. I fussy-cut the moon and was considering sliding it between the inked clouds when I realized you wouldn’t have clouds in front of AND behind the moon. I decided to fussy cut the top row of clouds and put the moon behind that. I cut more black card stock to 4+1/8″x5+3/8″ to fill in the night sky and provide a mat around the whole panel. I glued the black mat to a White card base and glued the card front on top being sure to add the Moon behind the clouds.
I stamped and embossed the sentiment as usual, and stamped the ghosts using Unicorn White ink. I didn’t emboss or over-stamp the ghosts leaving the ink to stay transparent… like ghosts! That tree stamp felt a little skimpy all by itself there so I grabbed the die-cut branches from card number one, colored them Black with an alcohol marker and glued them to the card front – effectively expanding the tree and helping to highlight the sentiment as well. SPOOKY!
Already at card number 10 and I haven’t used the Frankenstein Monster or Bride stamps… they do suggest movement…

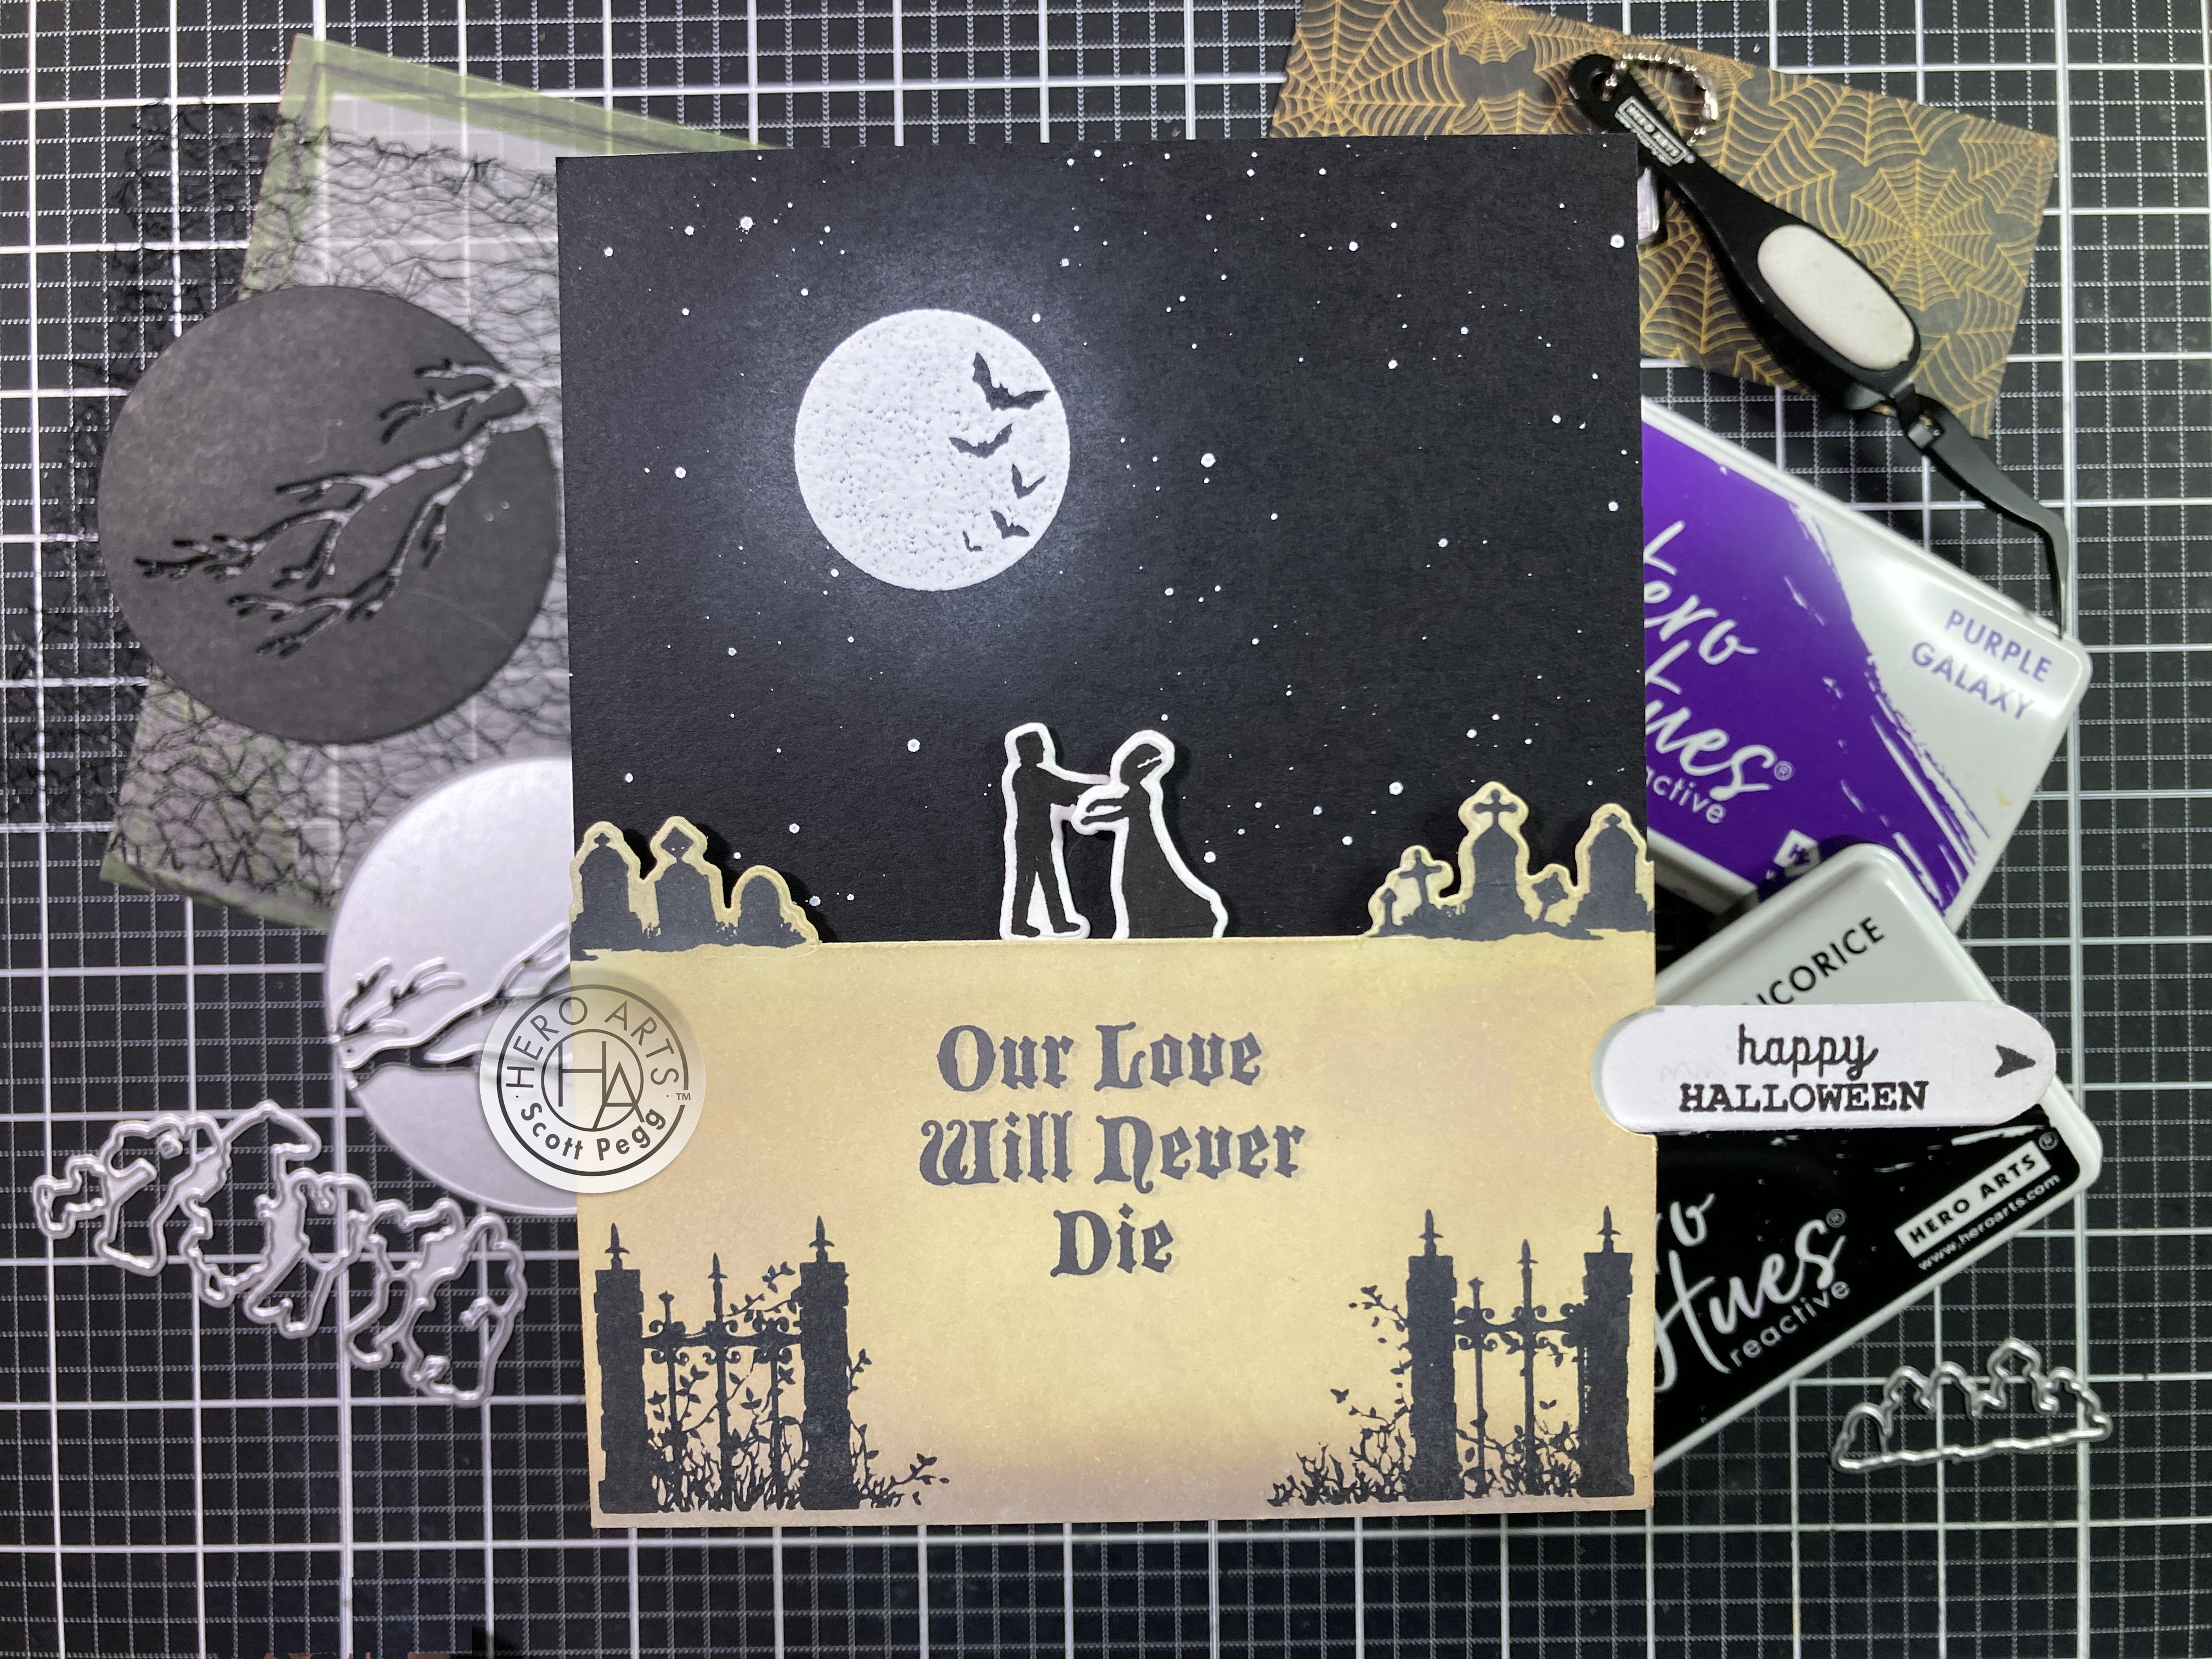
It’s been a while since I’ve made a pull-tab magic slider card! I actually have a how-to for this mechanism on my 10C1K video over on YouTube (link at the bottom of this post). I also have instructions for two different magic slider cards on my 10C1K MMH video for July 2019 if you’d like to check those out as well.
I stamped the gravestones on the right and left sides of an A2 panel of White card stock about 2+3/8″ up from the bottom edge. I used the matching die to do some partial die-cutting on those (don’t cut the bottom edge) and connected the die cuts to each other in a straight line with my craft knife. I colored that panel with Antique Linen and Frayed Burlap Distress Oxide inks and then stamped the gate. The left gate is the full stamp. for the right gate I masked off and stamped the end pillar on the right, then shifted the left side of the stamp to complete the shortened gate. I printed the sentiment directly on the panel using my Silhouette software and the Blackmoor LET font.
I took an A2 panel of black card stock and stamped the moon in Unicorn White ink and embossed that with White embossing powder. Then I spattered in the stars with my Dr. Ph. Martin opaque White watercolor. Our monsters are stamped on White card stock with Onyx Black ink and die-cut with their matching dies. I stamped the arrow (MFT Interactive labels stamp set) and the sentiment (from the MMH September 2019 kit) on the pull-tab and assembled the whole card together. (see video!)
I think this interactive card was a great way to showcase those monster stamps and a perfectly spooky love sentiment. Happy Halloween indeed!
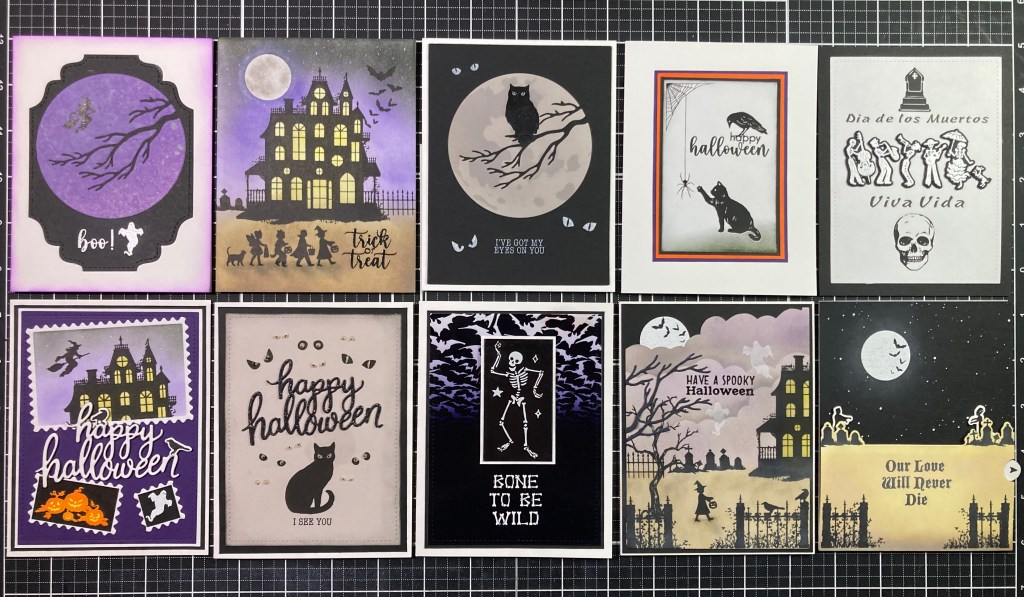
That wraps up all ten of my cards using the Hero Studio Card Kit of the Month for September 2024. Now, I’m not a huge fan of Halloween, and I rarely send out Halloween Cards, but I had a really great time creating these cards! I used all but the “happy fall” sentiment in the main stamp set, and all the eyes and a couple of the animals in the Animal Eyes stamp set. I used some of the White AND Black rub-ons, we’ve got two Moon Window die cards, three cards with that great Haunted House stamp, two bona fide scene cards. I didn’t get to the Decorative Tapes (nothing screams “graphic” in this batch of cards) but those will go right into my Washi tape collection. Looks like a fun Halloween this year!
This kit is still available at Hero Arts! If you’ve gotten bit by the Halloween bug and want to grab this kit for yourself, please use my links below. It really helps support CardCutups here on my website and on my YouTube channel as well – at no cost to you! Thank’s for all your continued support!
Hero Arts: https://heroarts.com?sca_ref=6639489.ubrhdU2VDFY73qx
Hero Studio Card Kit of the Month September 2024: https://heroarts.com/products/ck0924-september-card-kit-of-the-month?sca_ref=6639489.ubrhdU2VDFY73qx
If you enjoyed this post, please click the LIKE Star at the bottom of this post, send me a comment or a question, and consider sharing this with all your friends on your Pinterest, FaceBook and Instagram pages. Thank you so much for spending some of your time with me today… your encouragement and support keeps me motivated! Let me know which cards are your favorites… don’t run with scissors… and I send you and yours Love and Light and Happy Crafting!
DISCLOSURE: This site contains some affiliate links to products. I may receive a commission for purchases made through these links (at no cost to you). Thank you!
