
Hello Folks! Happy New Year! Scott here with another 10 cards 1 Kit post featuring the new My Monthly Hero January 2024 Classic and Premium Kits. Valentine’s Day is right around the corner and we have lots of spring-y floral options with these kits!
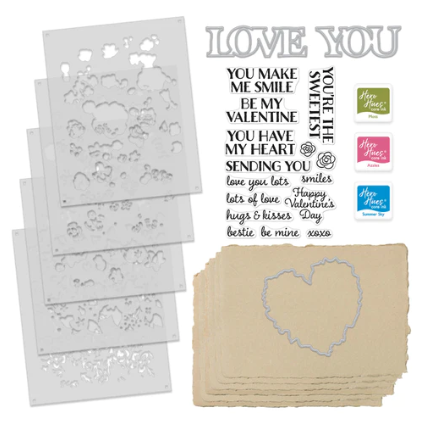
CLASSIC KIT INCLUDES:
• 5 Color Layering Floral Background Stencils, 5.25″ x 6.5″
• Coordinating Heart Window Frame Cut
• Love You Fancy Dies
• Love Messages Clear Stamp Set, 4″ x 6″
• 6 Sheets of Camel Watercolor Paper, 5″ x 7″
• 3 Core Ink Cubes (Moss, Azalea, Summer Sky)
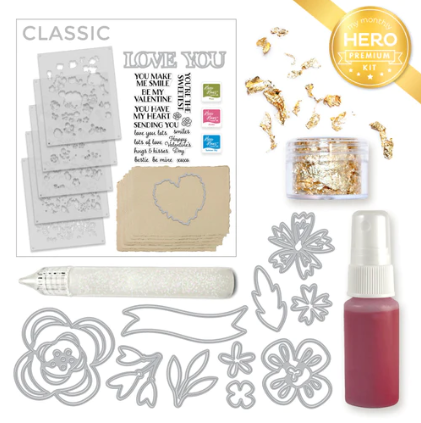
PREMIUM KIT INCLUDES (Premium elements in bold):
• Everything in the Classic Kit AND:
• 10 Floral Fancy Dies
• Gold Leaf Flakes
• Sparkle Clear Lacquer Pen
• Pink Gold Metallic Spray, 1 oz.
The Color Layering Floral Background stencils and the coordinating Heart Window Frame cut is a unique combo that gives us the option of getting two cards out of one background!
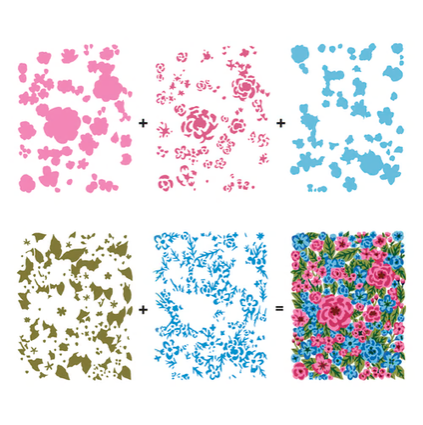
The coloring guide for the stencils is on the Hero Arts website – Azalea ink for stencils 1 and 2 (lighter and darker); Summer Sky ink for layer 3; Moss ink for layer 4, and back to Summer Sky ink (darker) for layer 5. Almost complete coverage for a beautiful floral background!
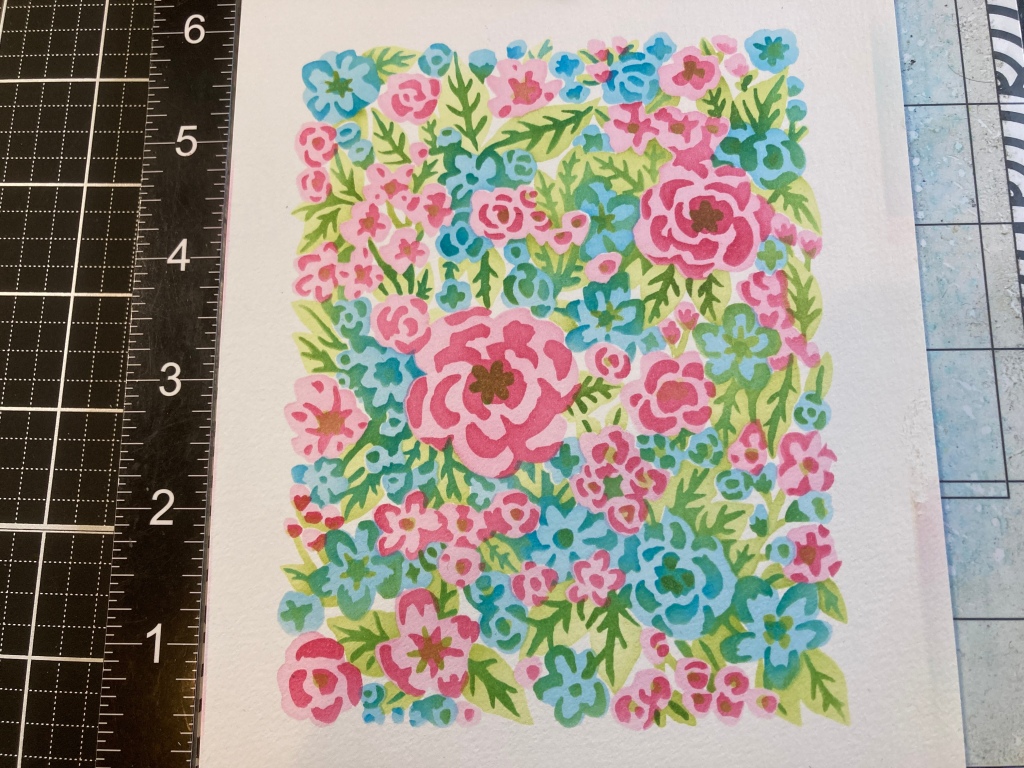
As usual, I will make my first five cards using just the supplies included in the Classic Kit.
I basically followed along with my first stenciling on some Canson Multi Media card stock. I did use both the Summer Sky and the Moss ink with the fifth stencil, trying to keep the Summer Sky ink blending on the flower parts and the Moss ink blending on the leafy parts. I believe I had a lighter hand on this whole stencil than what was represented on the website and the backer card. Quite lovely!
I did want to cut out the Heart Window fancy die from this panel, but wasn’t too sure exactly where it should line up… I took a panel of 40# vellum and die-cut the Heart Window from the middle of the vellum. Now I could line up the vellum window on the inked card panel and figure out exactly where to place the Heart Window fancy die. I felt total confidence cutting out the Heart window from the inked panel, and it appears I got it in the right place!
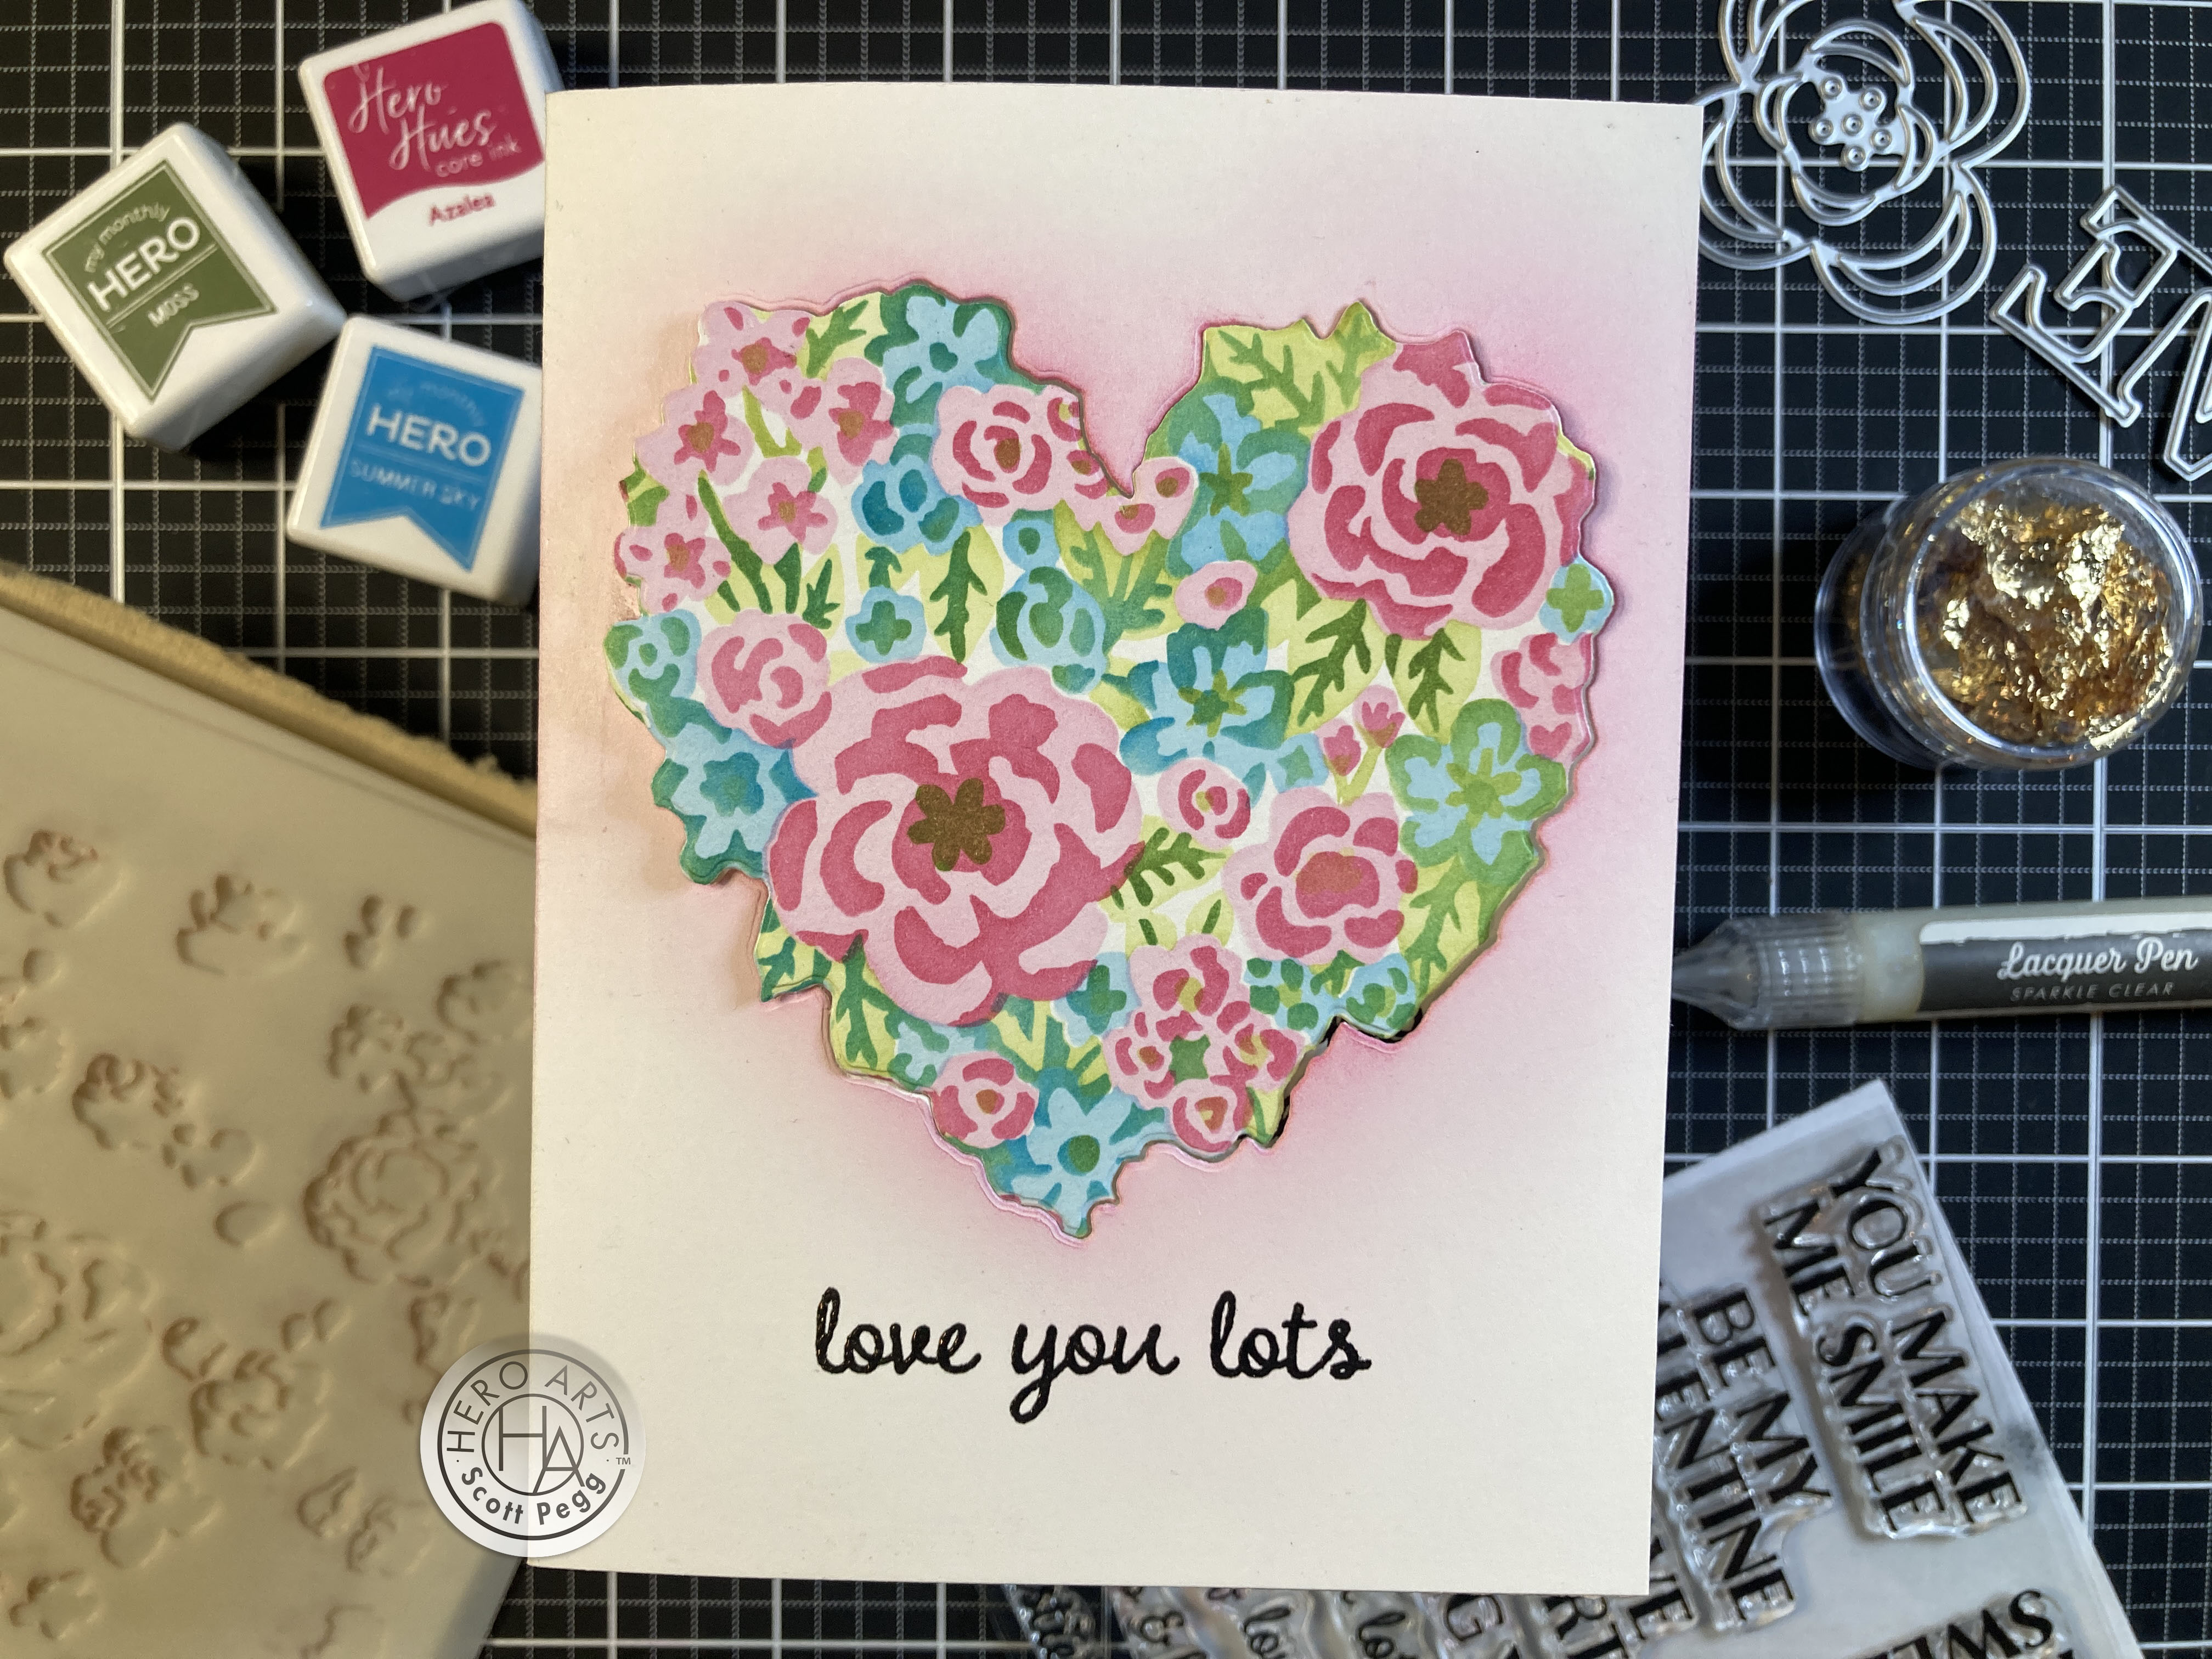
I had been watching a Jennifer McGuire live video (https://www.youtube.com/watch?v=6AmQiIAQu2U) where she was making “Swivel cards” with Gregory from Concord & 9th, so I thought I would try her swivel technique for my first card.
I die-cut the Heart Window from the front of an A2 card base and ink blended a light layer of the Azalea ink around the edges. I cut a scrap of White card stock to 1″ x 3.5″ and scored it at .75″, 1.75″, 2.5″, and 3.5″. This will be our swivel mechanism moving our heart from the front of the card to the inside. I stamped the sentiment on the front with VersaFine Onyx Black ink and embossed that with Clear embossing powder.
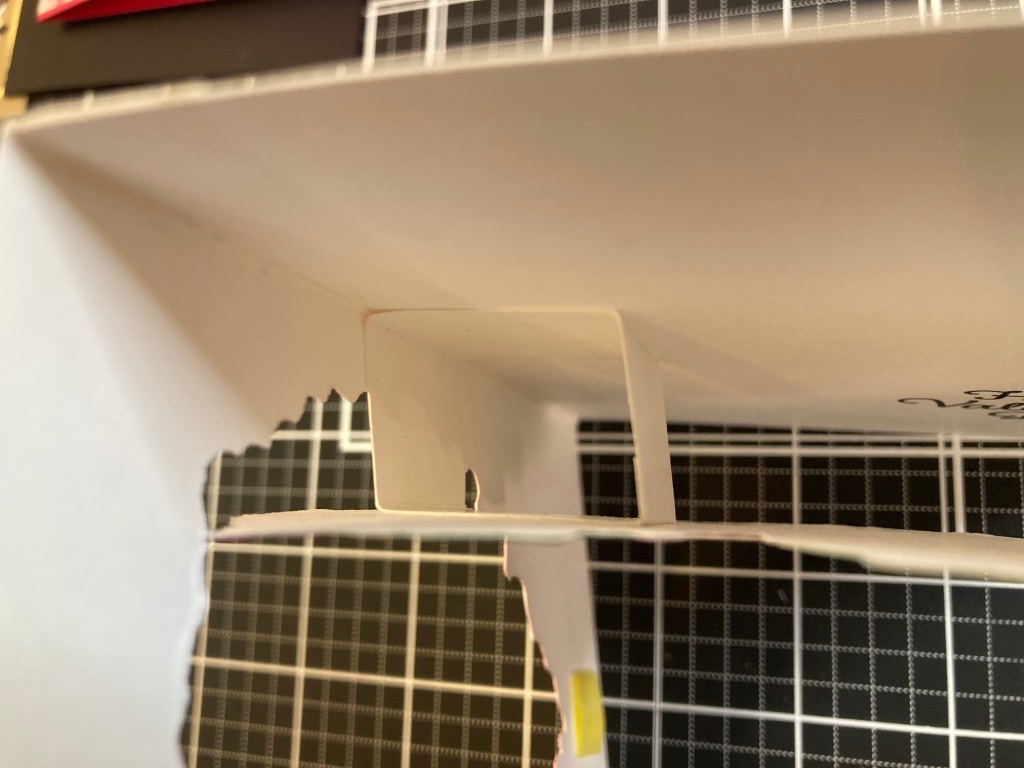
I glued the 1″ tab at the end of our mechanism to the back of the inside of the card at the widest point of the Heart Frame die cut. Then, folding the mechanism in half, applied glue to the back of the card front where it matched up with the mechanism, and, folding the card flat, attached the mechanism to the front of the card base making a little pop-up box when the card is unfolded. That’s where we’ll attach our Heart!
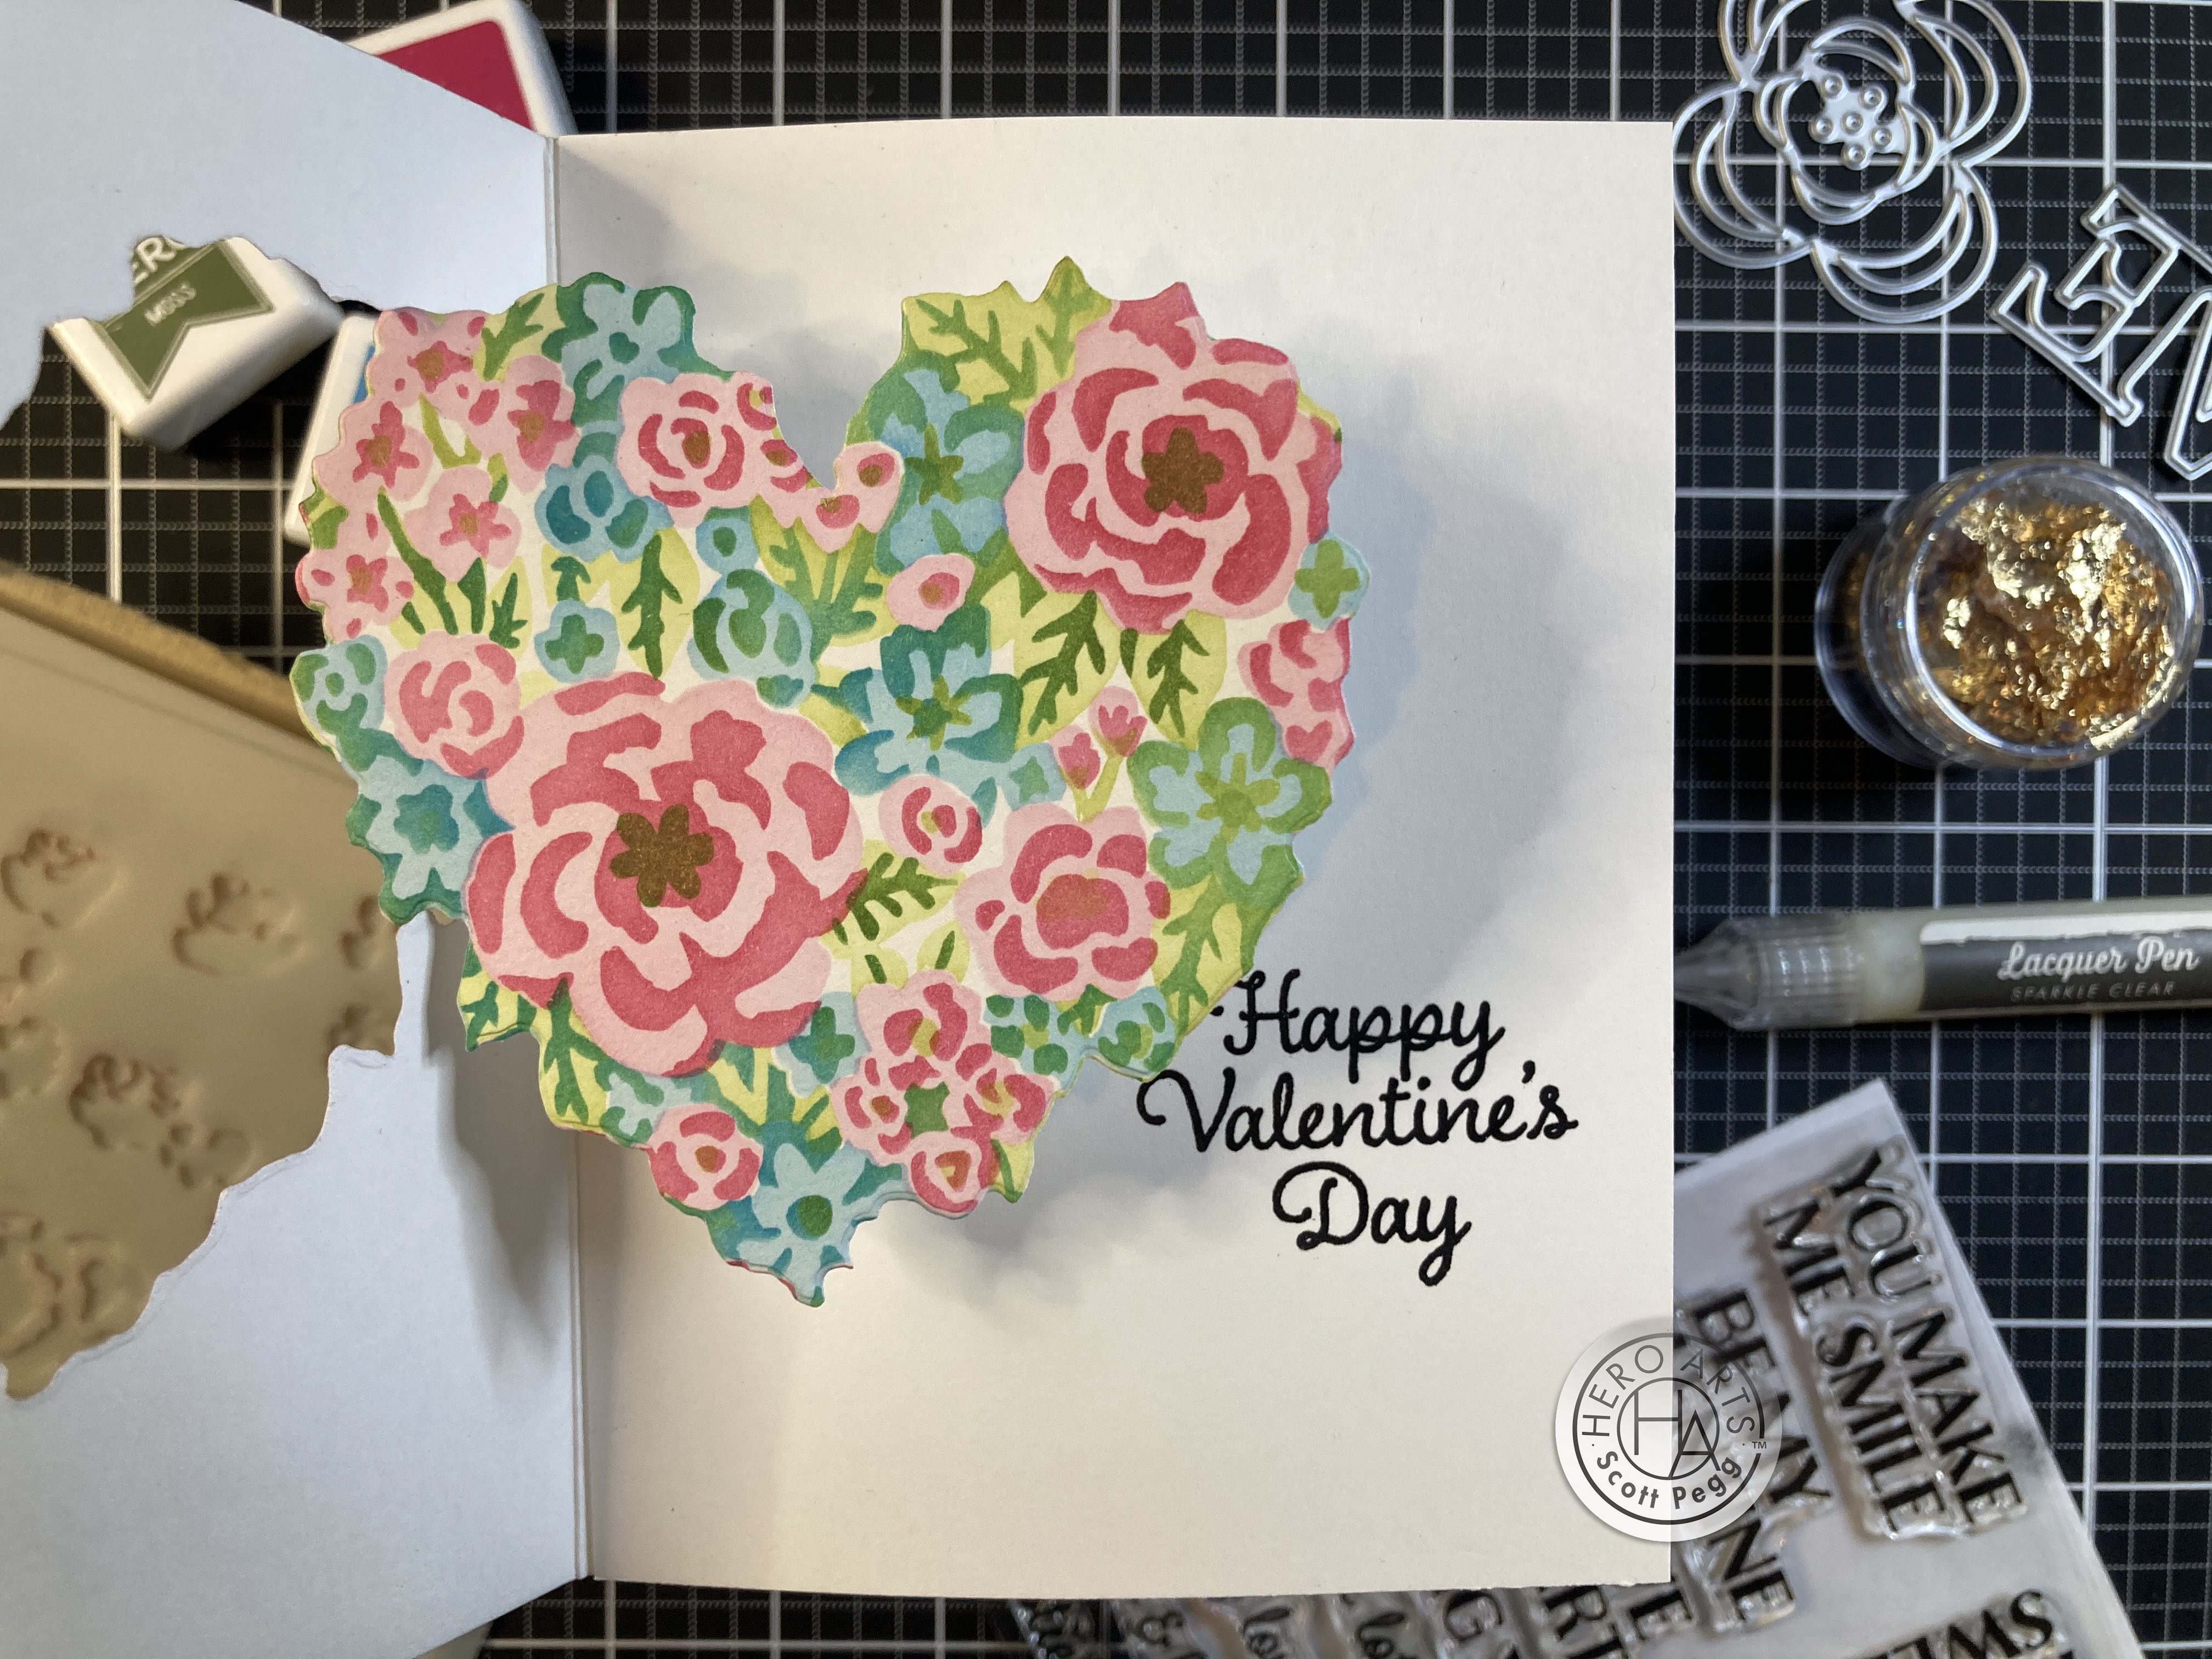
I temporarily attached the heart to the mechanism to decide where my inside sentiment should go. I stamped and embossed the Happy Valentine’s Day the same as the sentiment on the front of the card. All that’s left is to close up the card and glue the Heart in place on the mechanism. I was a little concerned that the variegated edge of the die cut would get caught up on the card front, but the mechanism works really well! This is kind of a pop-up card… I think “swivel” is a good way to describe this fancy surprise of a card!
Now I have the rest of that stenciled panel to use on a second card! Two for one is always a bonus!
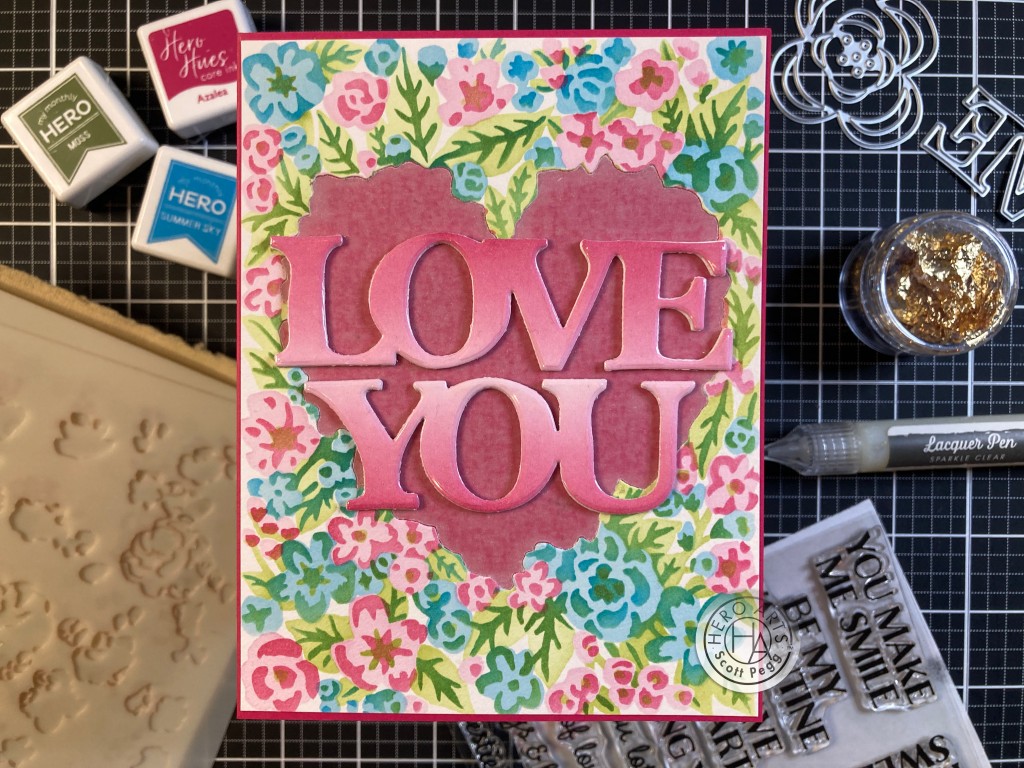
I began this card by ink blending Azalea ink on the two ends of a White card panel going darker at the edge and lighter towards the center. I let the ink blending dry, then taped over the blending with some clear packing tape. Then I lined up the Love You Fancy dies and cut them out right through the packing tape – that gives us beautiful shiny die-cut letters without having to use any Clear lacquer or Glossy Accents! I die-cut two more blanks of the Love You Fancy dies from White card stock and glued them together for a thicker sentiment.
I trimmed a tiny bit from the edges of the inked panel to make it 4 1/8″ x 5 3/8″ and glued that to a Hero Hues Azalea card base – giving us a thin Azalea frame around the edges. I thought the Azalea card stock was a bit too bright behind the Love You sentiment, so I toned that down with the vellum cut-out of the Heart I had left from cutting the vellum guide with the first card. I ran the vellum heart through my Xyron Sticker Maker to coat the back with adhesive and pieced it in to the die-cut opening on the front of the card. That toned down the Azalea card stock nicely! I finished by glueing the stacked Love You Fancy dies on the front. I love all the Azalea colors on this card and the easy shine on the sentiment!
I am not sure what possessed me to do this next card, but at the time I thought it was a very cool idea!
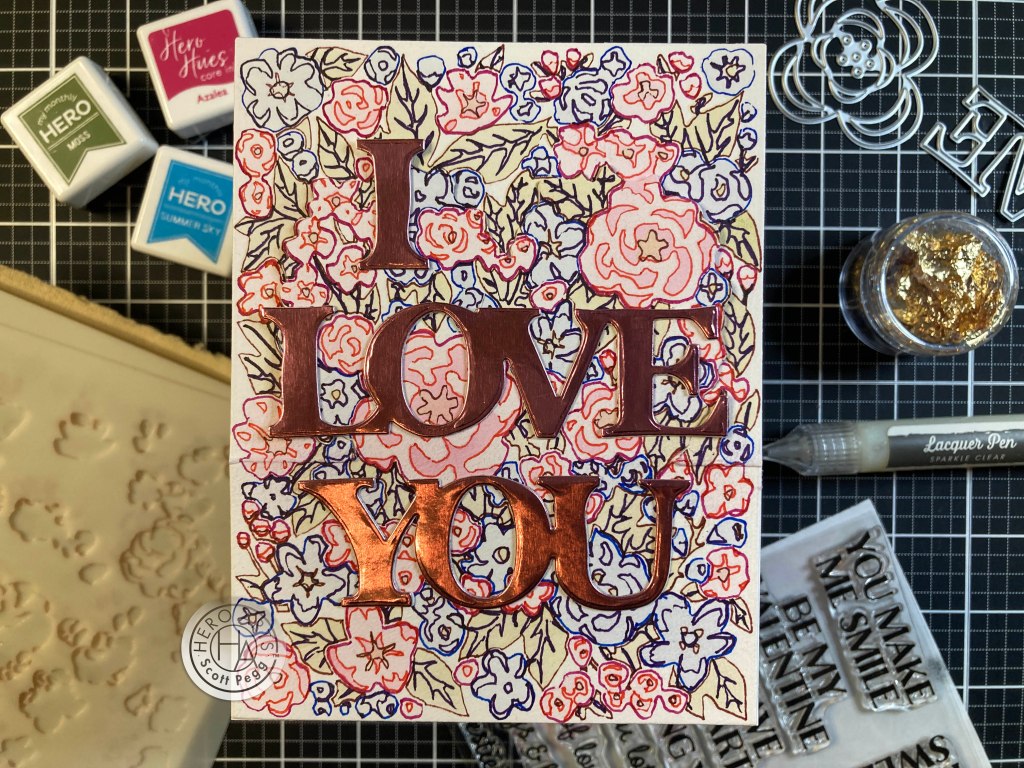
Yes! I actually traced all the stencils using some colored Pigma Micron Pens (permanent ink!). Unfortunately, I don’t have a Green pen, so I made due with a light brown… Very interesting effect… almost looks hand-drawn… in fact, it almost looks like one of those line-art drawings where you don’t lift the pen from the paper. Ultimately, I did think that it was a little too stark, so I lightly blended the inks over the pen lines (using the stencils) for a hint of color. That helped!
I realized that you can make a capital “I” from the “L” in the Love die so decided to make the declarative “I Love You” my sentiment. I die cut that from some Metallic Pink card stock, and once from some plain white card stock and glued those together for strength. I thought this background plus the Heart Window Frame cut would make a good easel card.
I did a partial die-cut of the heart on the background and scored the sides of the panel where I stopped the die cut (2 1/8″ up from the bottom). I took a top folding A2 card base and scored the front panel at 2 1/8″ and glued the die-cut panel (all but the Heart cut out) to the card base. The Heart popping out of this background is actually a surprise… you can’t tell it’s there till you open the card! I stamped the “xoxo” sentiment on a scrap of white card stock with VersaFine Onyx Black ink and embossed that with Clear embossing powder.

I trimmed the sentiment to size and added three layers of White card stock for thickness, and glued that to the inside of the card to provide a holder for the easel front. The metallic sentiment is all the shine we need here! Love this!
The bold, all-capital sentiments in the clear stamp set are pretty large, and I noticed that many of them are about the same size as well… hmmmmmmm…
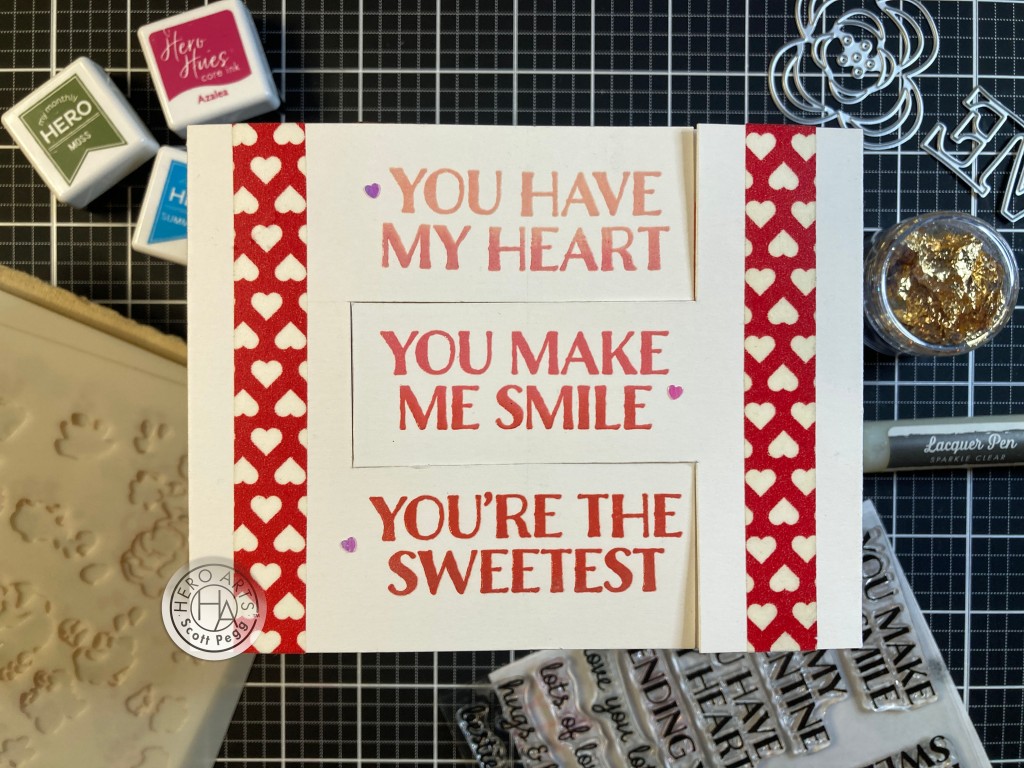
Quite the interesting ladder cut for a gate-fold card! I stamped the sentiments in the center of a 4.25″ x 11″ panel using Distress Oxide inks in Tattered Rose, Worn Lipstick, Fired Brick, and Candied Apple (from top to bottom) and embossed all with Clear embossing powder. I scored the left and right sides of the panel at 2.75″ (5.5″ total!) and sketched out my ladder cuts around the sentiments using a T-square ruler. I cut those lines carefully with a metal ruler and craft knife and erased all my pencil guidelines. I added some Heart Washi tape (from my stash) down the two sides of the card front and turned my attention to the inside of the card.
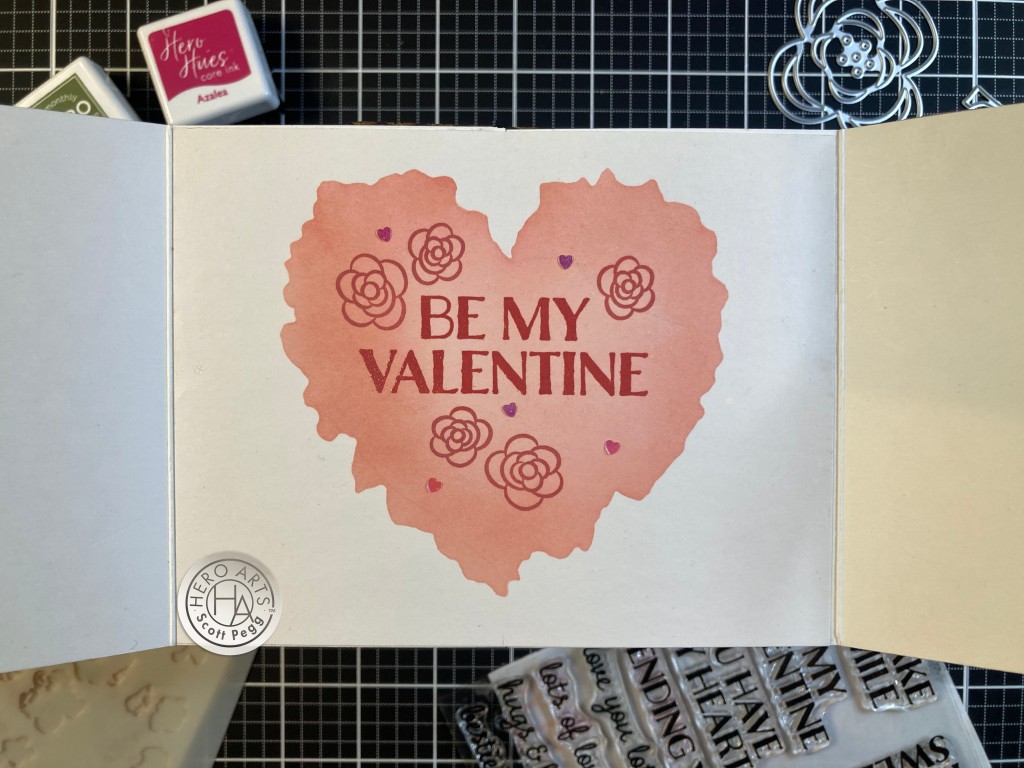
Since I only have half of a card base attached to the two sides of my gate-fold front, I cut another panel of white card stock to 4.25″ x 5 3/8″ wide (to allow for the side folds). Using my vellum guide from the first card, I ink blended the heart using the Azalea ink and stamped the sentiment and flowers with the Candied Apple Distress Oxide ink. I did add some Clear embossing powder to the sentiment, and glued some small Heart sequins to the front and inside sentiments.
I glued the two front panels to the completed inside panel – that does give me a seam in the center of the back of the card, but it’s almost unnoticeable. Gate-fold cards are nothing new, but I think this is a fun and unique design.
We also have that incredibly soft, torn edge Camel Watercolor paper in the Classic Kit that really caught my eye.
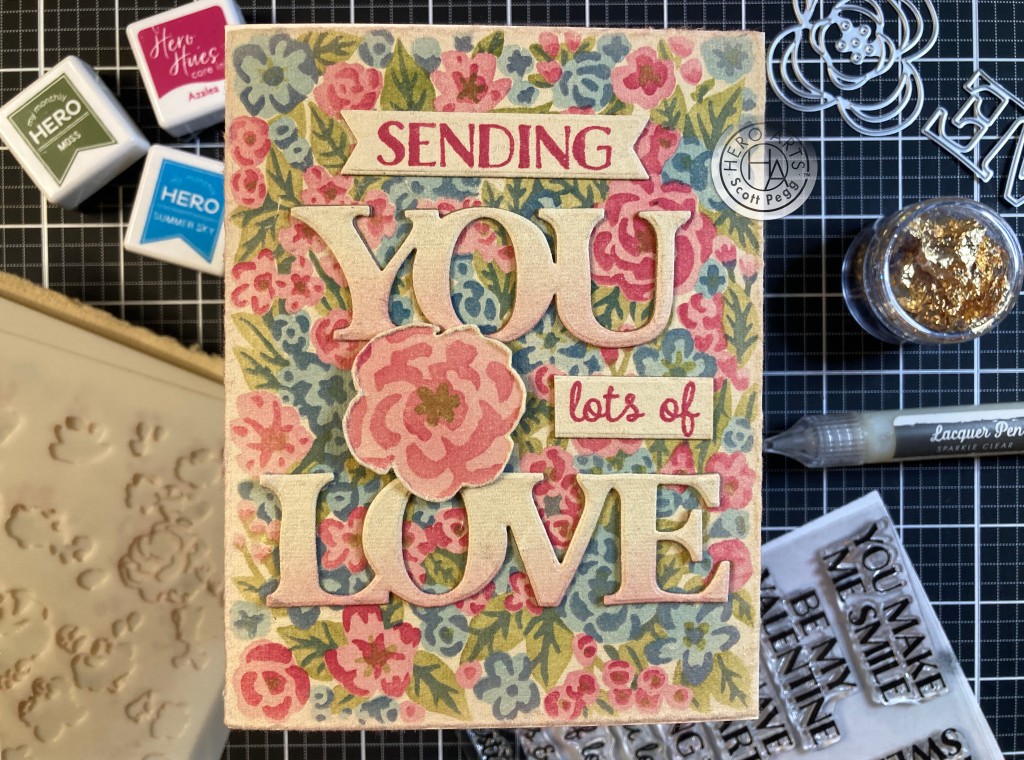
I decided to try stenciling on the watercolor paper… it took the ink nicely, but is fairly fragile… soft blending brushes are the best! This background is created with the Kit inks in the order recommended. I measured out the background to be 4.25″ x 5.5″ and tore the edges using a metal ruler. That really highlights the hand-made quality of this watercolor paper and gives this card an extra vintage feel. I die-cut the Love You Fancy dies from the watercolor paper, glued another die-cut of Kraft card stock to the back for strength, and blended a little Azalea ink on their bottoms. Then I gave both a light dusting of Sheer Shimmer Mist for a little sparkle.
I stamped the “Sending” and “lots of” (both partial stamps) on the watercolor paper using Azalea ink and die-cut those with a Lawn Fawn Everyday Sentiment Banners die. I did add a layer of Kraft card stock to the back of both for strength – that watercolor paper is so soft and seems like it could just fall apart – though it really isn’t that delicate. I stenciled the big flower one more time on the watercolor paper, fussy-cut it out and glued another layer of Kraft card stock to the back.
I glued everything to an Ivory A2 card base using a little foam tape on the flower to pop it above the sentiment. I’m not sure the watercolor paper was included in this kit for this purpose, but I really love the Vintage vibe that paper provides.
That’s five cards using the Classic Kit items… with three fancy fold / interactive cards, and I even used almost all the stamps in the stamp set as well! But now I get to add on the Premium supplies too!
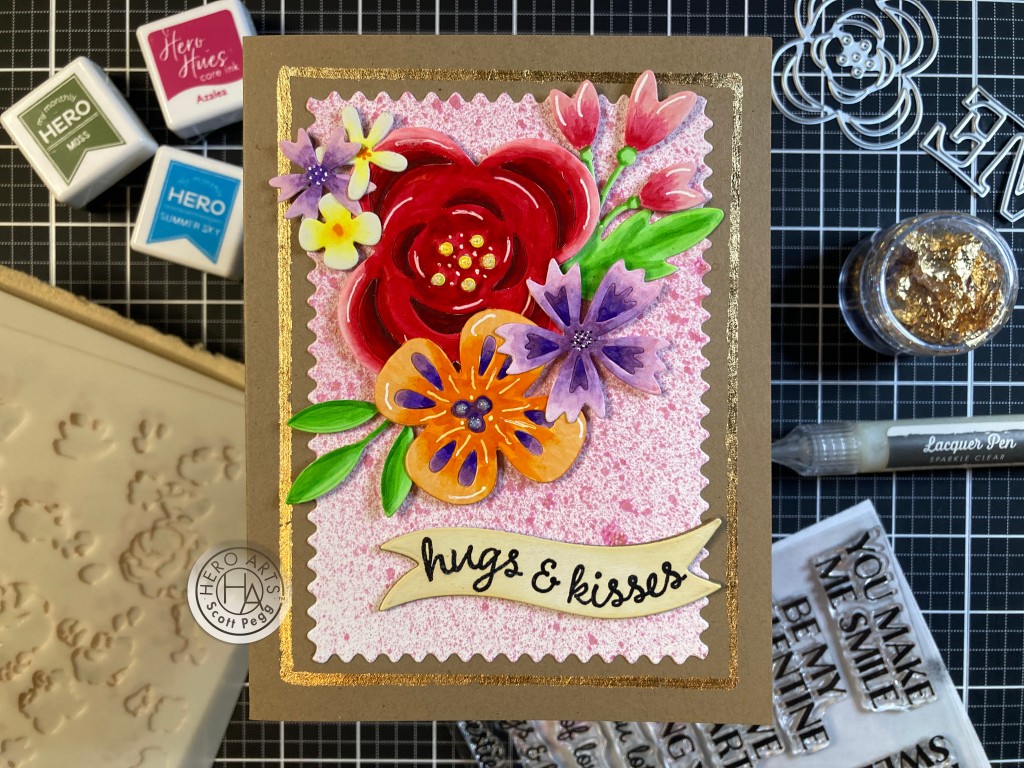
This card makes me Happy! First, I sprayed the Pink Gold Metallic spray on a 8.5″ x 5.5″ panel of Canson Multi Media card stock and let that dry. I die cut all of the Floral Fancy dies from some White card stock and colored all the pieces with my (Happy Birthday!) new Ohuhu Alcohol Markers. I paper-pieced all the die-cut pieces together using some thin Micropore Surgical tape, added drops of the Sparkle Clear Lacquer pen to the center dots of the two big flowers, and added some highlights with a White Gel pen. I stamped the sentiment on the banner die-cut with the help of my MISTI using VersaFine Onyx Black ink and embossed that with Clear embossing powder, then ink blended a little Antique Linen Distress Oxide ink onto the banner.
I die-cut the Pink Gold background with a Simon Says Stamp Modern Postage Stamp Rectangle die, and picked a larger Hero Arts Nesting Rectangle die to be a guide for the Gold Leaf frame. I love using a Zig 2 Way glue marker when working with foil flakes. I dries tacky so it becomes the perfect medium for foiling. I taped the rectangle die to the front of an A2 Kraft card base, and used my 2 Way Glue pen (chisel tip) to trace a square of glue around the inside of that frame. I let that dry then added the gold flakes on top, burnished the gold into place, and then used a stiff paintbrush to clear away the excess foil.
I glued the background panel to the card front and added all the flowers and sentiment with foam tape and glue. Lots of color on this card, and, believe it or not… I actually used every die and all the extra supplies from the Premium Kit on this one card! I guess that wraps it up then! HA!
I do have more of the Pink Gold Metallic spray card stock left… let’s see how the Gold Leaf Flakes pairs up with that.
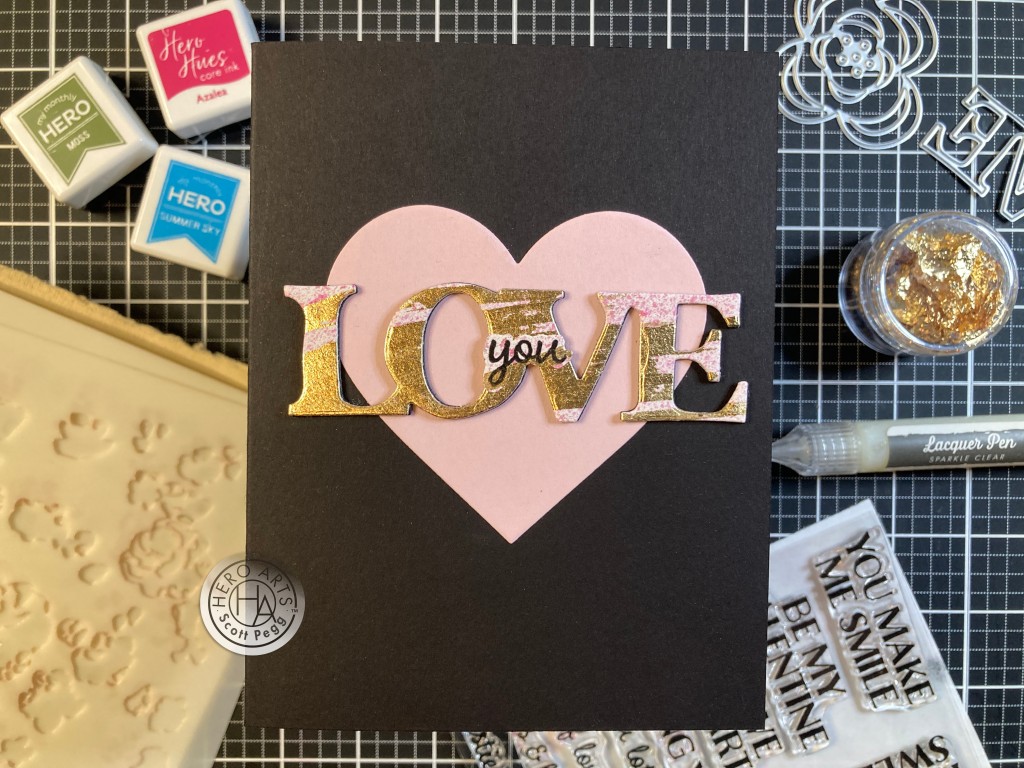
I used my Zig 2 Way glue pen on top of the Pink Gold sprayed card stock, making sure to leave the glue a little streaky. When dry, I added Gold Leaf flakes to the glue, burnished it down and brushed away the excess. I die cut that with the “Love” Fancy die, and cut two more ‘blanks’ from Pitch Black card stock to glue behind. I stamped the “you” sentiment (partial stamp) on more of the foiled Pink Gold card panel with VersaFine Onyx Black ink, embossed it with clear embossing powder, and fussy-cut it out.
I die-cut a Hero Arts Nesting Heart die from Hero Hues Peony card stock, and glued that to an A2 Pitch Black card base. The sentiment is glued on top and the “you” sentiment is glued in the middle. With the foiling, the two sentiments almost seem like one! I did add a writing surface on the inside using the same Peony card stock. Love the stark Black and Pink and Gold on this card… very simple yet very striking!
After that mostly Black card, I started wondering about the possibility of creating a background with the color layering stencils using only shades of Grey…
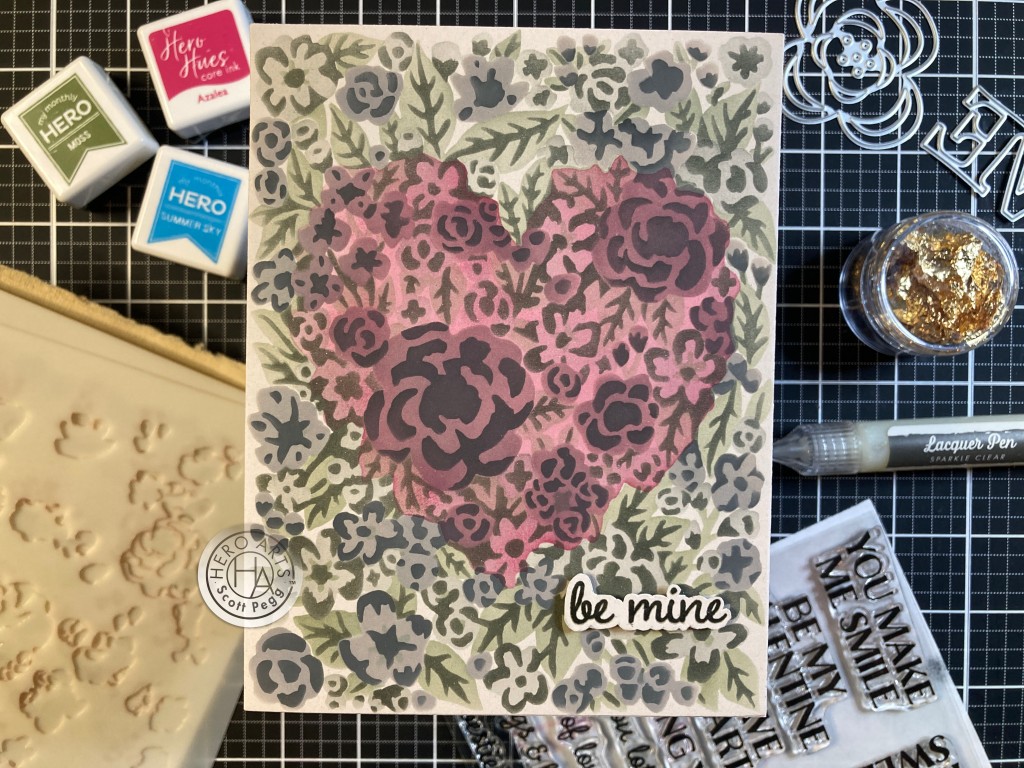
On a panel of light Grey card stock I ink blended the stencils using Hickory Smoke Distress Oxide ink for stencils 1 and 2, Concord & 9th Mushroom ink for Stencil 3, Concord & 9th Mushroom ink for stencil 4 (there is a slight green cast to that ink!), and Black Soot Distress Oxide ink for stencil 5. Very interesting, but not particularly inspiring… I wondered about cutting the Heart Window out of this, or stamping a sentiment right on top, when I remembered the heart stencil I did on the inside of Card number four – the gate-fold card. I let all these inks dry overnight.
The next day, I grabbed my vellum stencil of the heart and lightly ink blended Azalea ink on top of the inked background. Just the pop of color this card was begging for! I really like this! I stamped the sentiment on a scrap of the light Grey card stock using Onyx Black ink and embossed that with Clear embossing powder, and fussy-cut it out. I cut the ink blended panel to 4.25″ x 5.5″ and glued it to a White A2 card base. The sentiment is attached to the front with some foam tape and here we have another fun way to use those stencils and Heart Window Frame Cut. Other than the sentiment, this is actually a one-layer card! Might be a little “goth” but I like it a lot!
There’s still some mileage to get from those Floral Fancy dies… they are perfect for cutting from colored card stock!
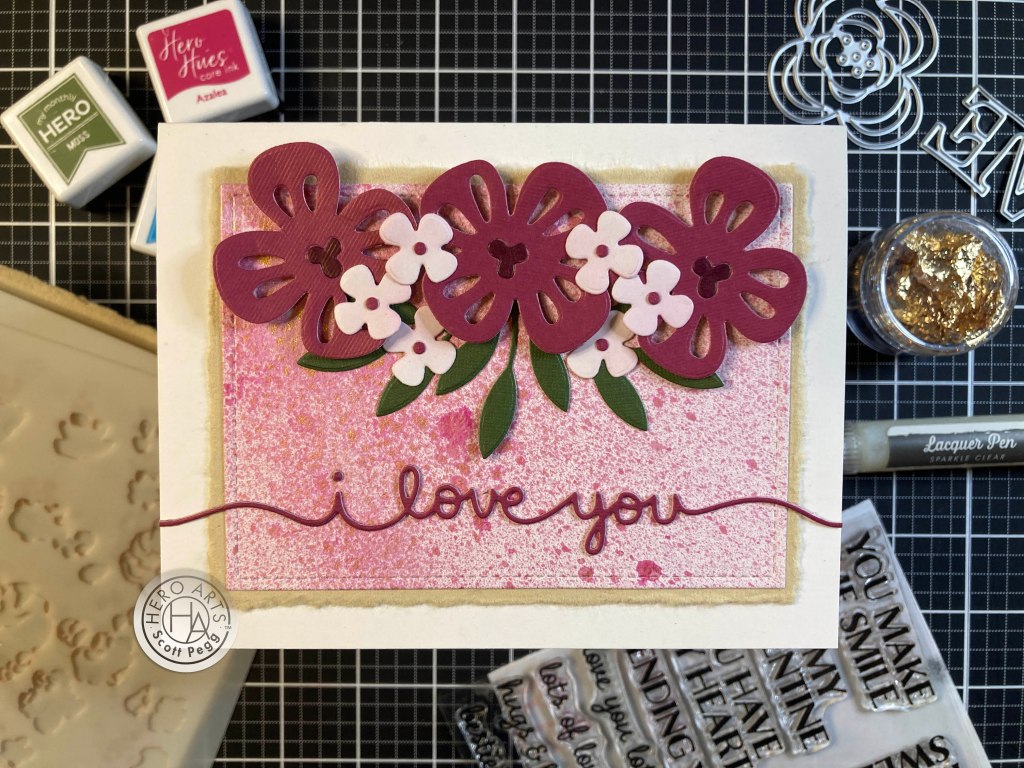
I found some textured card stock in my stash to use for the flowers on this card. I die-cut one last panel from my Pink Gold spray card stock with a Lawn Fawn Stitched Rectangle die. I measured out a mat using the watercolor paper and tore the edges with a metal ruler. I glued the background to the mat and then to an A2 White card base. I die-cut the flowers and leaves three times and the small white flower six times. I colored the centers of the large flowers with an alcohol marker and paper-pieced them in place using Micropore tape.
I did a VERY light blend of Azalea ink on the White flowers, and their centers are die-cut from the middle of the large flower die. I attached the flowers with foam tape and glue to the top edge of the background. The sentiment is an old Lawn Fawn Scripty Borders die that I die-cut twice from matching Magenta card stock and glued together. The sentiment is glued to the card front and trimmed at the edges. I thought the Magenta card stock went well with the Pink Gold spray, and there is plenty of sparkle there so no embellishments needed!
I have avoided creating a shaker card since I thought everyone would be making them with this kit… but after looking at the Hero Arts Blog and other posts, I don’t see many shaker cards… reason enough…!
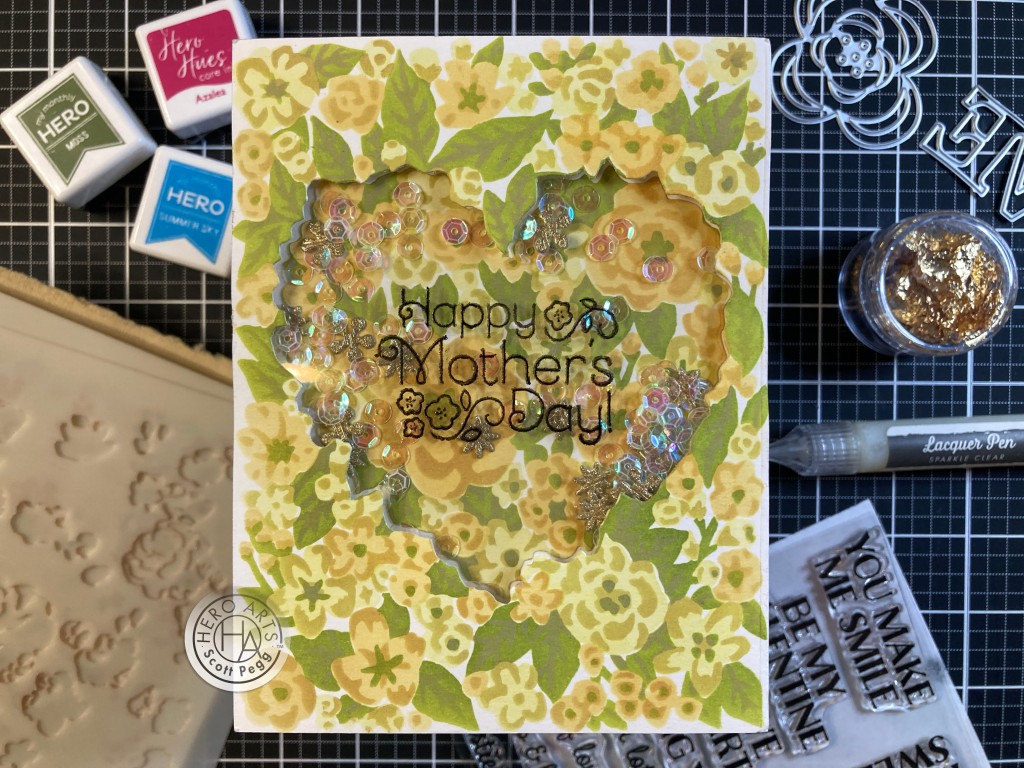
My Mom loves flower cards and I don’t think I’ve ever made her a shaker card…! The stencils are inked in Spiced Marmalade Distress Oxide ink for stencil 1, Carved Pumpkin Oxide for stencil 2, Lemon Drop Reactive ink for stencil 3, Moss ink for Stencil 4, and Fossilized Amber Distress Oxide for stencil 5. Mom loves yellows and oranges..! I trimmed the panel to 4.25″ x 5.5″, die-cut the Heart Window from the center and glued that to the front of an A2 White card base. I stamped this sentiment (from a years-old Paper Pumpkin stamp set!) on acetate with VersaFine Onyx Black ink and embossed it (carefully!) with clear embossing powder. The flowers on this stamp match the background perfectly!
I glued the acetate behind the opening, and added a double layer of foam tape around the heart and edges of the panel. I filled the shaker with a lot of crystal sequins and a bunch of tiny golden flowers die-cut with a couple of Dress My Craft mini flower dies. I lined up the foam tape panel with the card base and glued them together! Flowers aren’t just for Valentine’s Day! I think my Mom will like this a lot!
Of course you can use any color combination you can think of with the Color Layering Floral Background Stencils. That makes this kit truly versatile. And there we have it!! That wraps up my ten cards for this MMH January 2024 Kit!
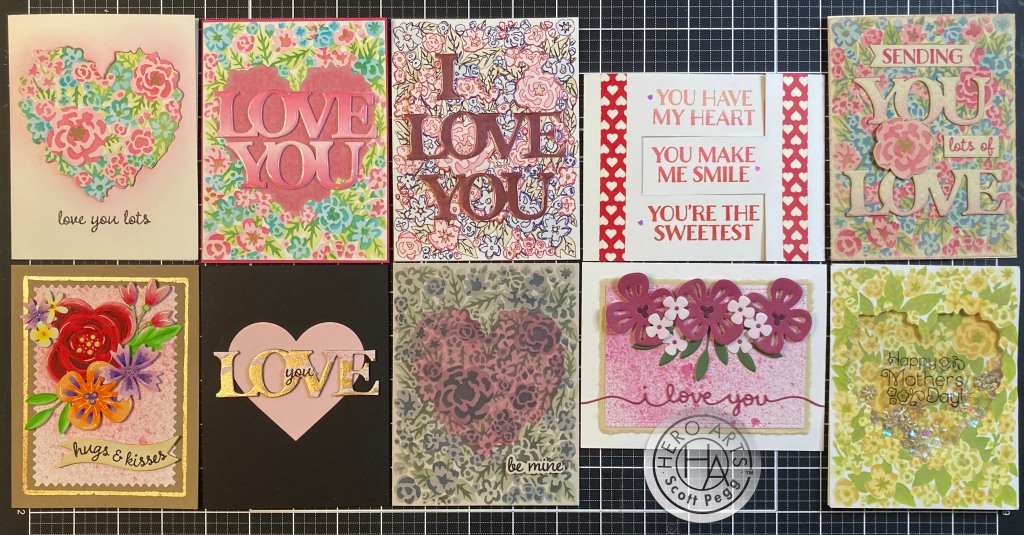
What a fun variety of cards this month… a swivel card, easel card, gate-fold card, shaker card… Lots of valentines… and even a Mother’s Day card! Though I mostly stuck to the colors included in our kit (especially on the first five cards) I do think there’s a good variety of looks and styles and even some fun techniques! Which ones are your favorites??
At first I wasn’t very inspired by this kit, but after putting it to some good use, I discovered that there were actually lots of options for card making – the stencils and Heart frame cut alone are a terrific pair of tools for interesting backgrounds and a wide variety of card styles. And I’m always game for more flower and leaf dies! Also… if foil flakes intimidate you, I recommend the Zig 2 Way Glue Pens – they make it so easy! I had much more fun with this kit than I thought I would!
Both the Classic and Premium Kits are still available at Hero Arts – as well as the Premium Elements and the whole January Release! If you like what I’ve shown you today and want to try some of these cards for yourself, please use my links below when you go shopping at Hero Arts. Doing so helps support me and this page so I can continue to bring you my takes on the new My Monthly Hero Kits as they come available. Your support is always supremely appreciated!
My Monthly Hero January 2024 Classic Kit: http://shrsl.com/4dxzk
My Monthly Hero January 2024 Premium Kit: http://shrsl.com/4dxzm
My Monthly Hero January 2024 Premium Elements: http://shrsl.com/4dxzp
My Monthly Hero January 2024 Release: http://shrsl.com/4dxzr
Thank you so much for sharing some of your precious time with me here today! I am always thrilled to hear from you! Remember to Like me, List me, Pin me, Post me, Share me will all your crafty friends… don’t run with scissors… and as always I wish you and yours Love and Light and Happy Crafting!
DISCLOSURE: This site contains some affiliate links to products. I may receive a commission for purchases made through these links (at no cost to you). As an Amazon Associate I earn from qualifying purchases. Thank you!

Gorgeous cards, Scott. I love every single one of them, in fact, I will make similar of your cards, if you allow me, please. Thank you for sharing them. Blessings in 2024 and always.
LikeLike
Thanks Florie!
CASE away!!!
https://www.catherinepooler.com/2021/11/19/what-does-case-a-card-mean/
Scott
LikeLike