
Hello Folks! I’m just back from a lovely vacation on Cape Cod and have my 10 cards inspired by the My Monthly Hero May 2022 kit all ready to go! We’re moving into the kitchen this month with a unique kit featuring a Kitchen Cover Plate die, a cling background stamp grid, and lots of cooking and baking themed sentiments – including some puns!

KIT INCLUDES:
• 4″ x 6″ Clear Stamp Set
• Cover Plate Fancy Die
• 6 Additional Fancy Dies
• Cling Background Stamp (4.625″ x 5.875″)
• 12 Sheets of Cardstock – 4 each of Pink, Baby Blue, White (5.5″ x 8.5″)
• Watermark & Embossing Ink Cube
• Cast Iron Embossing Powder (0.5 oz.)
• Blue Baker’s Twine (10 yards)
For some reason, my mind immediately went to paper piecing as a fun way to colorize the Fancy Kitchen die. I do bemoan the fact that I think my Spectrum Noir Alcohol markers don’t have a small enough point to accurately color tiny little appliances, necessities and adornments, so, instead of coloring, I opted to paper-piece!
I do have to mention from the outset that I do not care for open shelving in a kitchen. They are a nightmare to keep clean – not to mention keeping everything stored on them clean – open shelving is just more countertops to clean! I guess that concept is reflected in my goal to get all my craft supplies stored away behind closed doors…! I do live in NYC… and it’s a dirty town…!!! And I am definitely NOT the most avid of dusters…! (Aye! There’s the rub!)
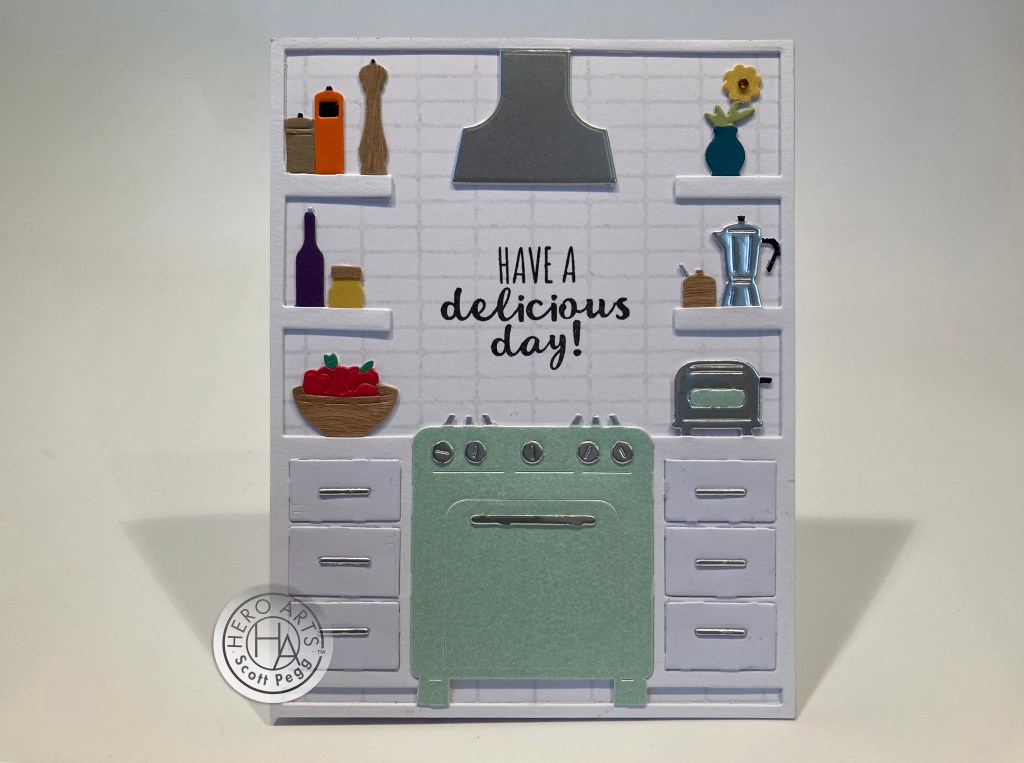
I thought it would be fun to play with a little dimension with this big kitchen die, so I die-cut it from a 4.25″ x 5.5″ 110# White card stock (the die does not cut the perimeter). I colored the handles and knobs on the toaster and coffee pot, and the knobs on 3 items on the top left shelf with a black gel pen. I colored the ‘cork’ on the purple bottle, the ‘spoon’ in the sugar bowl, and the stove ‘grates’ with a silver gel pen. Then I grabbed my collection of paper scraps, and it was s simple matter of putting small pieces of card stock behind the individual items on the die, then die-cutting and trimming them to glue on top of the original white die-cut. I just trimmed away the handles and knobs from the colored card stocks to expose the handles and knobs on the original layer. The pepper grinder, lid, bowl, and sugar bowl were cut from real wood sheets from my stash – love that detail! I did die-cut another hood from matching silver card stock and glued that to the original layer as well.
I die-cut another 4.25″ x 5.5″ complete kitchen from 110# White card stock, trimmed away the hood and everything on the shelves (and the ‘grates’ on the stove), and glued that to the original layer. I do think that helps the items on the shelves look like they are ON the shelves… again my obsessive need for layers with these cover plate dies! I die-cut the oven from some Mint pearlescent card stock from my stash, trimmed off the ‘grates’ and glued that on top. I die-cut and trimmed out six more drawers, glued them in place, and die-cut all the handles and knobs from silver card stock and glued those last pieces on top.
I stamped the cling stamp on an A2 card base using Hero Arts Contour ink to give us a subtle tile wall for the background, and stamped the sentiment using Hero Arts Intense Black ink. Finally, I glued the layered die cut assemblage on the front of the card base. I considered adding some shadows or other type of coloring to the paper-pieced objects, but decided that they were completely charming without any added fuss. The die details and layering were plenty! Surprisingly, the paper-piecing actually feels a little retro as well… perfect match!
I put that Cover Plate Fancy die to some hard labor with that first card… let’s do something with the cling stamp!

My paper-piecing groove is still going strong! You might think that I embossed the cling stamp on five different colors of card stock, then trimmed and attached them together… Oh, no… I had to make it more complicated. I trimmed five pieces of card stock to 15/16″ x 5.5″, taped them all together and THEN stamped (the Embossing and Watermark ink cube) and embossed (HA Fine Detail White Embossing powder) the cling stamp. I did trim the stripes to size with a Lawn Fawn Stitched Rectangle die and glued them to a 4″ x 5.25″ Pitch Black mat and then down to a White A2 card base.
I stamped and embossed the sentiment on a scrap of Pitch Black card stock, die-cut it with another LFSRdie, added a thin white mat and mounted that to the card front with foam tape. A few small primary colored crystals around the sentiment adds a little bling, and we have a colorful birthday greeting! I was really pleased that I managed to get that cling stamp lined up on the strips of card stock almost perfectly…! If you can cut consistent 15/16″ strips, then this is a pretty quick and easy card – in ANY color!!
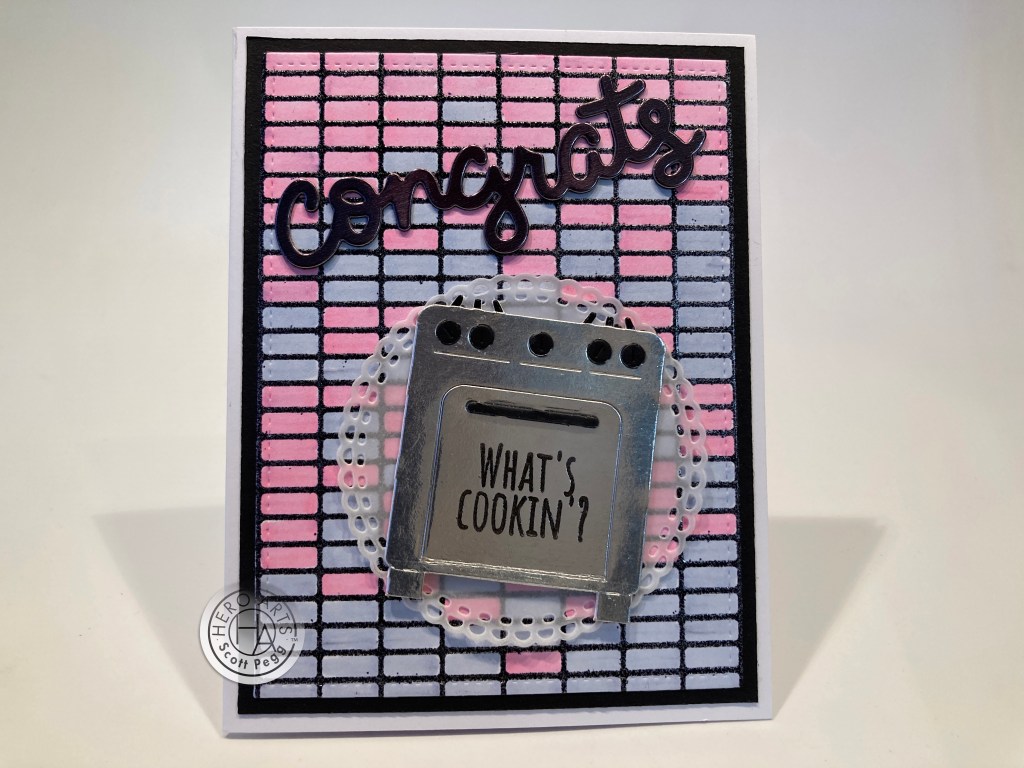
Okay… back to that Kitchen die! One of the more unique items I have in my craft stash is Aluminum HVAC tape. Tape it to card stock and it embosses like a dream! I kept thinking of the diamond-plate walls in a professional kitchen…!
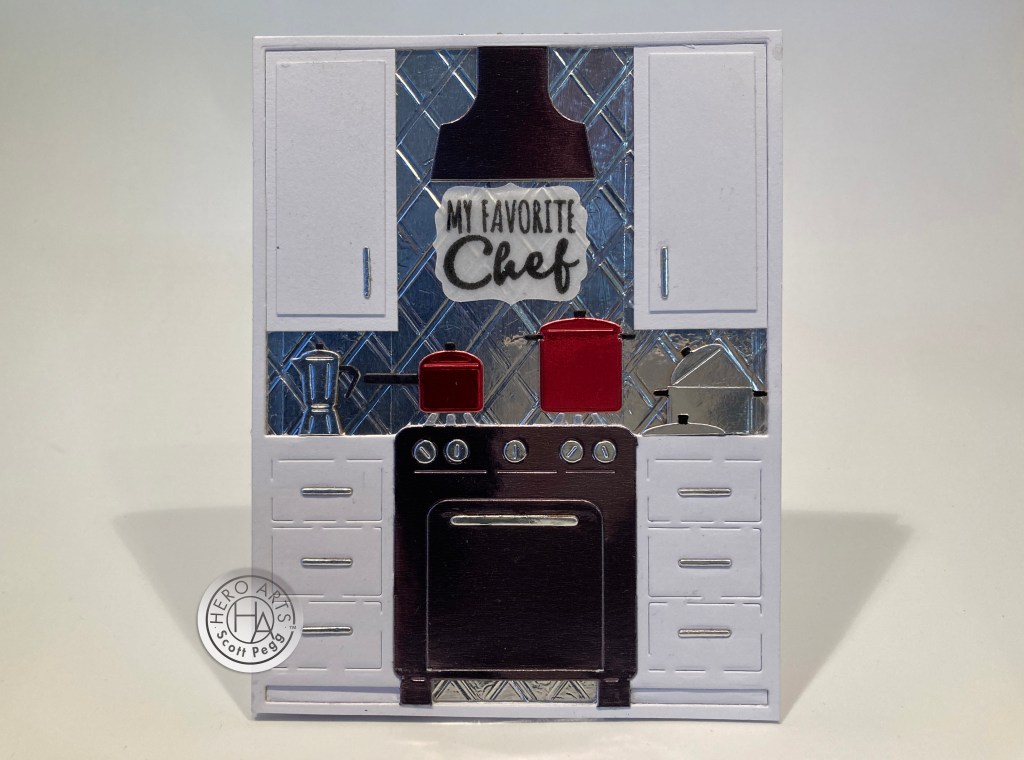
I wish my Aluminum Tape was wider than 2″… but since it’s not, I do have to take a little care in lining up the edges as cleanly as possible… And then just a simple diamond embossing using my Score-Pal gives us a nice diamond plate feel for our background. I die-cut the Cover Plate die and trimmed away all the shelves and glued that to the embossed background. I made cabinets to replace the shelves… 1″ wide by 2.25″ tall, glued them in the open corners and added doors cut an 1/8″ smaller. The pots and pans are paper-pieced just like the first card, I die-cut one more Cover Plate die and trimmed the shelves away and added that layer to set the cabinets back a touch. The hood and oven are die-cut from some Black Mirror card stock and glued in place, and the handles and knobs are die-cut from silver card stock and attached.
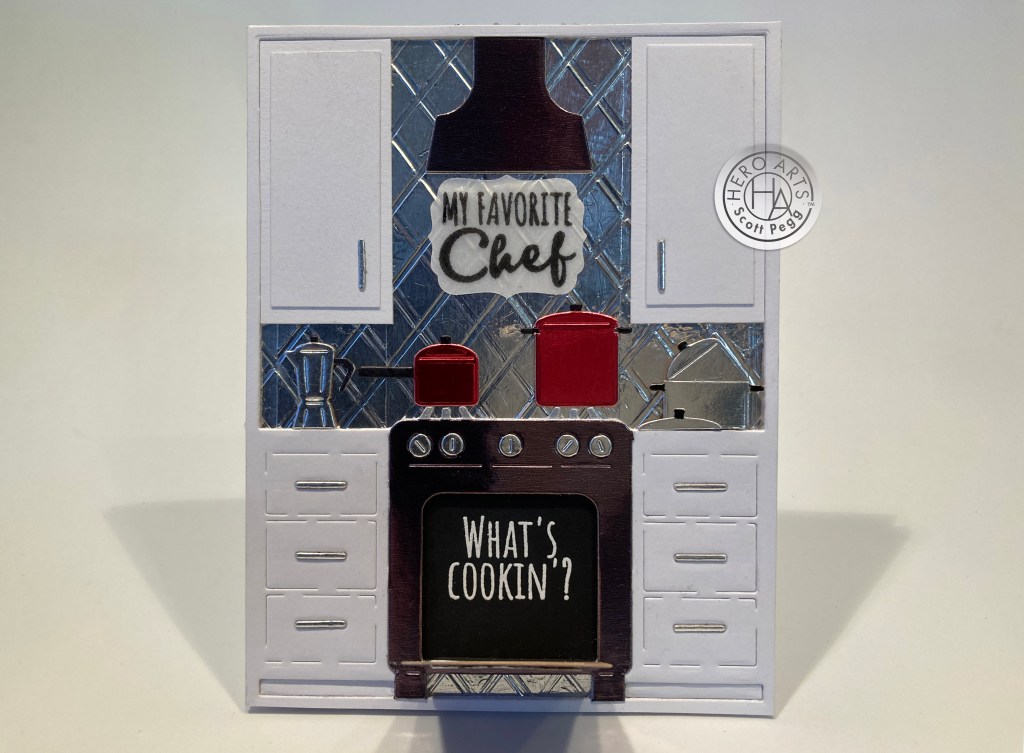
The sentiment is stamped and embossed on 40# vellum and die cut with a Hero Arts Tag Frame Infinity die, run through a Xyron sticker maker to add adhesive to the back, and mounted under the hood. This oven door does open! The sentiment is stamped on Pitch Black card stock and embossed with White embossing powder. Of course that was glued to the background before any of the die cut layers, and the die-cut oven on the two previous layers had to have their oven door removed as well. I LOVE being able to replace the shelves with actual cabinets (so easy!). I really like the feel of this card! Very shiny! “Chef” seems to denote a bit of professionalism… and I like the contrast with the casual “What’s Cookin’?”
When we get a Cover Plate die in our MMH kit that has a specific orientation (this die is a ‘portrait’ orientation) I like to see if it’s possible to change the orientation of the die for some variety – can we use this die for a landscape card?
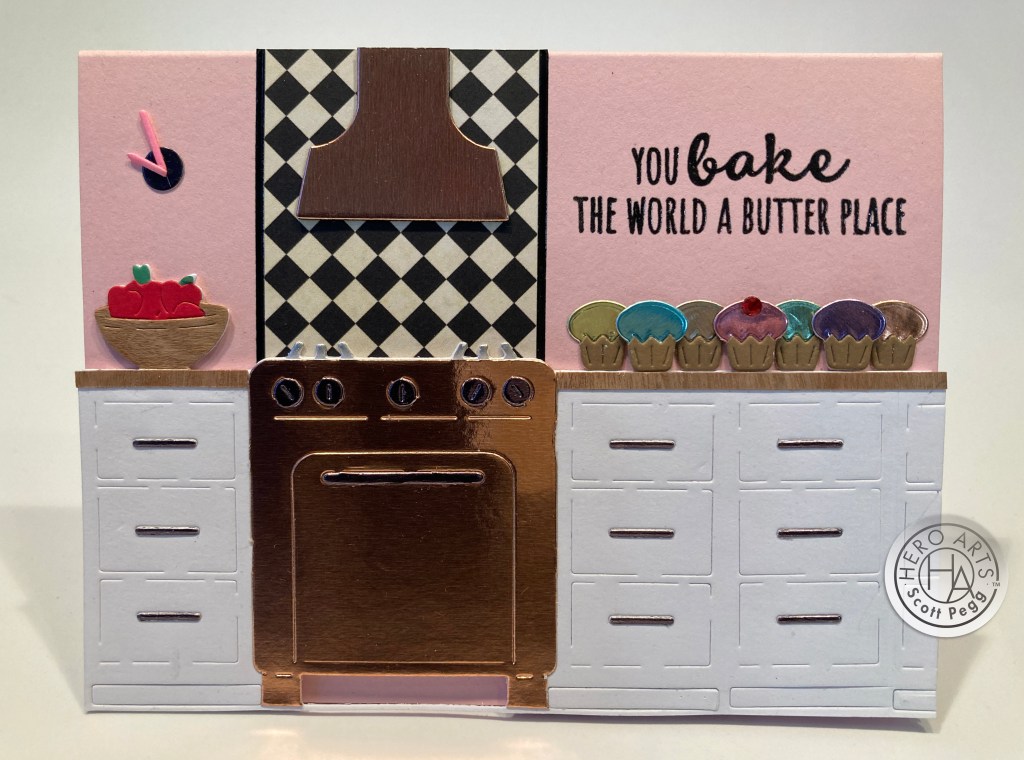
Sure!! With some simple partial die-cutting, and the fact that this die doesn’t cut the perimeter, it’s easy to add a couple lower cabinets to our kitchen. This is four layers of 110# White card stock cut to size and glued together with the extra cabinet piece(s) die-cut on top.The backsplash is cut from a piece of pattern paper from my stash and glued in place to the Pink card base, and lined with a couple Love From Lizi Peel Offs. the cabinets are glued in place, the bowl of apples and the cupcakes(?) are paper-pieced, the oven and hood cut from Rose Gold metallic card stock (an extra black hood glued behind the gold hood), and the handles and knobs are die-cut from the Black mirror card stock. The counter is just a strip of that thin wood sheet from my stash glued to the top edge of the cabinets.
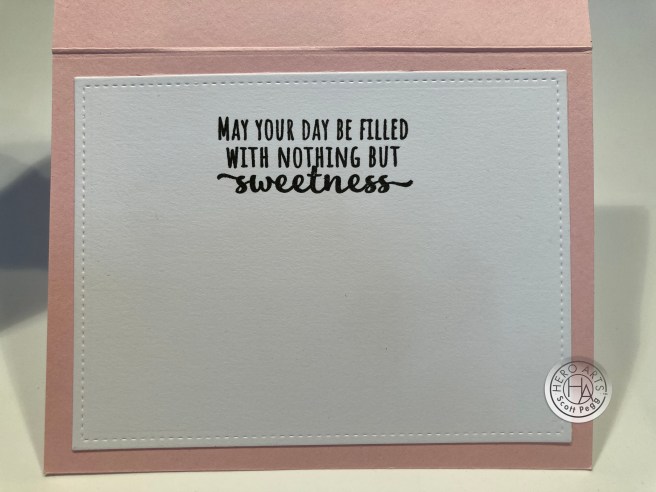
The sentiment is stamped directly on the card base with Intense Black ink and embossed with Clear embossing powder. I needed something in the top left corner so I fashioned a little kitchen clock using a couple of die-cut handles colored pink for the hands and a simple black dot for the base. I did add this second sentiment to the inside of the card as well. Very appropriate! This is quite a fun pun! the ‘bake’ is a good pun, but to top that off with a ‘butter’ place is a nice surprise and the perfect icing on the cupcake!
We do have a “Bun in the oven” sentiment (and a ‘bun’ die-cut) so I figured we should do a congratulations card!
I stamped the Cling Stamp using the Embossing and Watermark ink on some white card stock and embossed that with the Cast Iron Embossing powder included in the kit. I colored the pink and blue spaces as randomly as possible with Spectrum Noir Alcohol markers and tried to keep the ratio the same between the pink and blue (no predictions, here)..! Using a LFSRDie I cut out the background, added a Pitch Black mat and glued those to a White card base.
The “congrats” is an old Lawn Fawn “Scripty Congrats” die cut from one piece of Pitch Black card stock, and one piece of Black Mirror card stock and glued together. I die-cut the oven three times – twice from 110# White and once from Silver card stock. I colored the stove ‘grates’ on the first white one, removed them from the second white one and the silver one, removed the oven door on the two white ones, and glued them all together. Yes… another opening oven here!
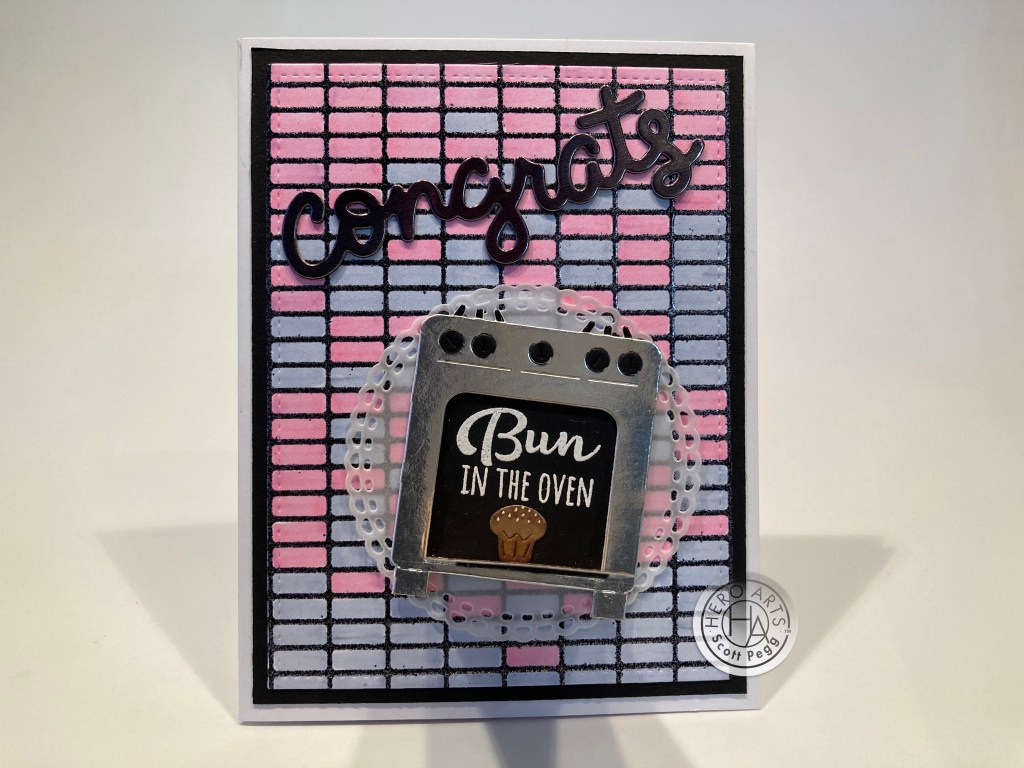
I stamped and embossed the sentiment on a scrap of Pitch Black card stock, and added a Kraft paper ‘bun’ colored with light touches of alcohol marker and some white gel pen highlights. I glued those in place in the oven opening. I die-cut the circle doily from 40# vellum using a die from my stash, and glued the assembled oven on top. The handle and the knobs are cut from scraps of Pitch Black card stock, glued in position, and the whole assemblage is glued to the card front. A playful Congrats card for any newly expecting friend(s)!
Okay… I need a little break from the kitchen… and I’m starting to yearn for some good old-fashioned white space…!
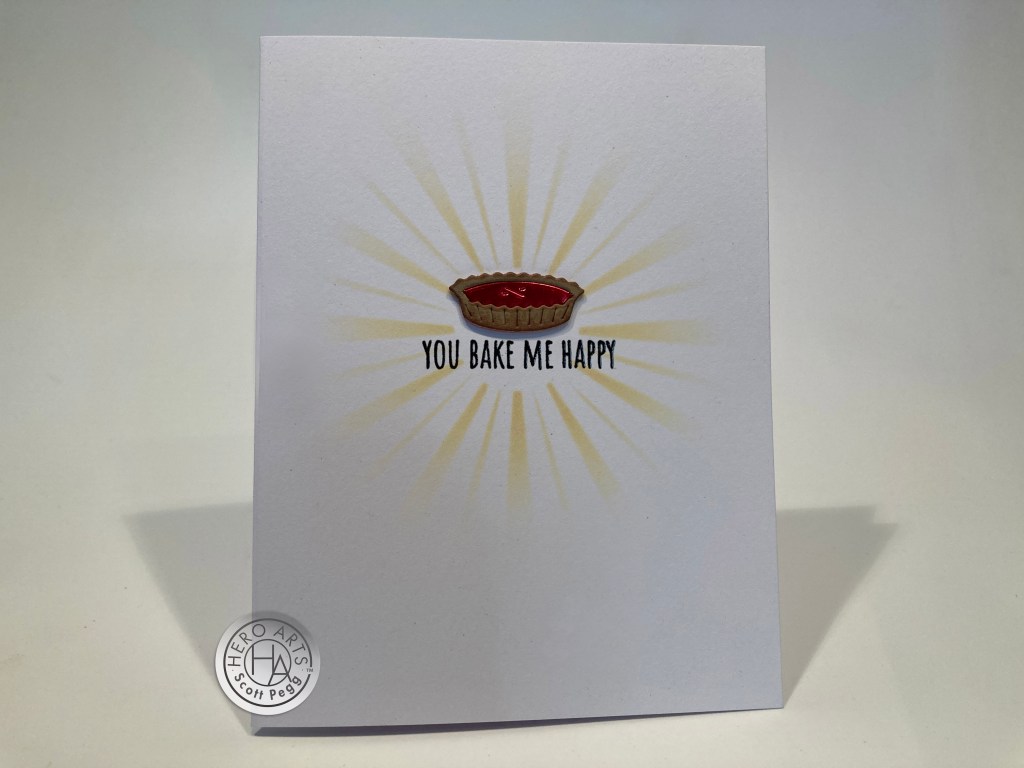
Ahhhhhh… A bit of fresh air! On a White card base (using the card stock included) I ink blended the sunburst using my own sunburst stencil and some Lemon Drop Reactive ink. I stamped the sentiment and embossed it with clear embossing powder. The pie is paper-pieced with Kraft card stock for the crust and Red metallic card stock for the filling – love that shine! I did manage a light touch of shading on the crust with alcohol markers. Great pun! Great White Space!
I turned the Cover Plate die on it’s side, what happens if I turn the Cling stamp on it’s side! I’m loving this one!
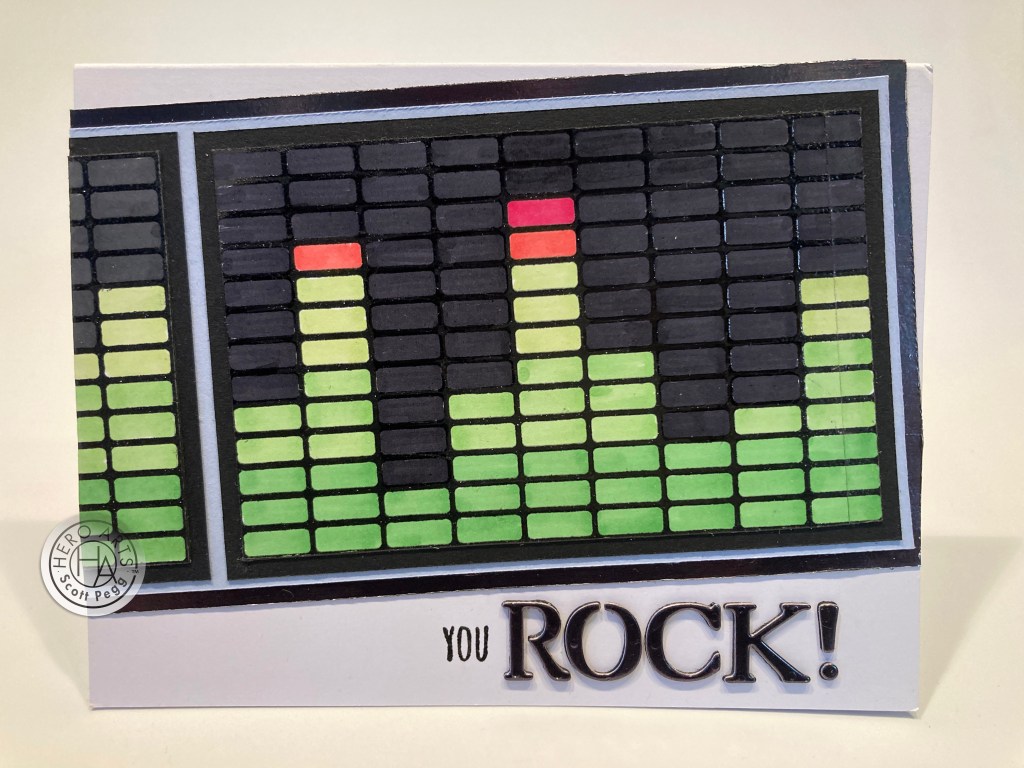
An old-school LED Audio Level Indicator! The Cling stamp is stamped with Intense Black ink on 110# White card stock and embossed with Clear embossing powder. I trimmed that in half and colored both panels with alcohol markers. There are only eight full rectangle rows on the stamp (and two half rows) so I added one of the half rectangle rows to the right side of one panel to give us nine columns (odd numbers are more visually appealing) (I know I’m crazy!). I trimmed the ‘indicators’ to size, added black mats behind both and a a Baby Blue mat to unite the two, and then a Black Mirror card stock mat behind all. I glue those to a white card base (included) at a jaunty angle and trimmed off the excess.
The “YOU” is stamped using the “You bake me happy” sentiment and embossed with clear embossing powder. The “ROCK” is die-cut once from Pitch Black card stock and once from the Black Mirror card stock using an old alpha die in my stash, and glued together for a little dimension. Add that text to the card front and we have a terrific encouragement card for almost any occasion… and especially suited to any audiophile on your list!
I’m still on my paper-piecing tear… and still looking for new ways to use this Cover Plate die… This card was inspired by one of the sentiments in our stamp set, and is yet another interesting way to use the cover plate die in this kit!

Once again, since this Cover Plate die doesn’t cut the edges, you can die-cut two kitchens back-to-back! I marked the center of a 4.25″ x 5.5″ panel of white card stock and lined up the left side of the die to the center – die-cut that – and then lined up the right side of the die to the left side of the panel and die cut that half. Of course, I got rid of the open shelving…! Some pattern paper from my stash provides the backgrounds for our two kitchens – both cut 2 1/8″ x 5.5″ and glued to another White card base. I paper-pieced everything in exactly the same fashion with the cabinets settling in at 1″ x 2″ and I fashioned a different “hood” for the wooden kitchen. I even added a piece of toast to the toaster! I realize this sentiment may be more applicable to a gift tag accompanying some delectable goodie than a card, but who says you can’t include a whole card with your kitchen treats!? I think this is the PERFECT illustration of this sentiment!
I haven’t use the Turkey Fancy Die yet… and wasn’t too keen on just shoving it into an oven – how bout more puns!?
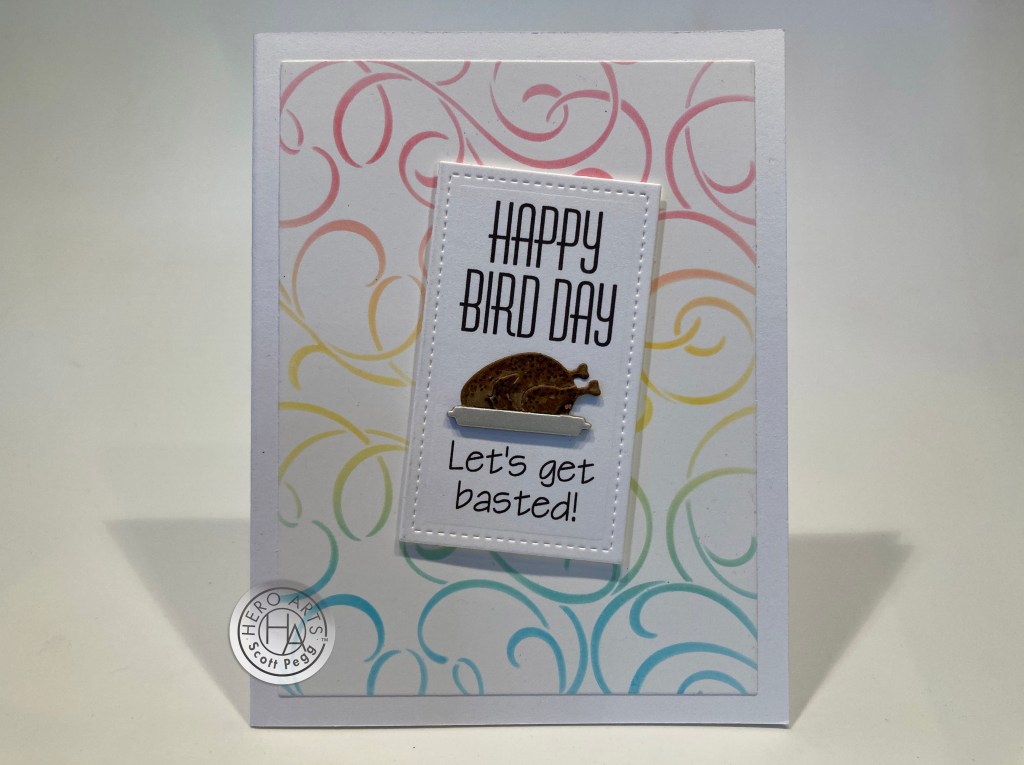
Another double pun! And another Birthday card! the background is ink blended using Splash, Lemon Drop and Fruit Punch Reactive inks blended through an old Stampendous “Flourishes” metal stencil. You can see the green and orange bits where those terrific HA inks blend together. This is one of my favorite multi-purpose stencils in my stash! I trimmed that panel to 3.75″ x 5″ and glued it to a White A2 card base. I die-cut the turkey a few times from Kraft card stock (and silver tray) added some color with my alcohol markers, and layered all the pieces together for a bit of added dimension to the simple turkey die-cut.
I created the sentiment using my Silhouette software and the Huxley Vertical BT font for the “bird day” and Architect font for the “basted”. I printed the sentiment on a scrap of White card stock and die-cut it out with another LFSRDie and added it to the card front with foam tape. Another fun double-pun just begging for a roasted bird! A little Glaze Pen on that bird adds some juicy shine as well!
I used a lot of the Tim Holtz Metallic card stocks this month… I thought they worked especially well on the ovens…

Red, Blue, Orange and Black ovens for our last card. Each oven is die-cut twice – once from 110# white with the stove ‘grates’ colored in silver gel pen. And the second time in the metallic colors with the ‘grates’ cut off. The handles and knobs are die-cut from grey pearlescent card stock and glued in position. I split all the ovens in half and glued them in position with the black one in the center.

Since there’s no visible sentiment on this card, I did decide to stamp the “open” and the arrow to direct the recipient to open the oven door. The sentiment is stamped and embossed on Black card stock with some Candied Apple Distress Oxide ink blended on the edges. This card tickles me… warm wishes, indeed! And the colorful ovens are quite graphic and super shiny!
And just like that we’ve covered all 10 cards I created with the My Monthly Hero May 2022 Kit. I really enjoyed all the paper-piecing and that Kitchen Cover Plate die held up to some rigorous use! It is also really easy to convert the open shelving into cabinets if you don’t want all the fuss…! (and dust!) I used ten of the thirteen sentiments in the stamp set, I used all the White card stock and one of the Pink and part of a sheet of the Baby Blue. I didn’t make any foodie gift tags, so I didn’t use any of the bakers twine, but I did use all the dies and some of the embossing powder. Almost everything..!
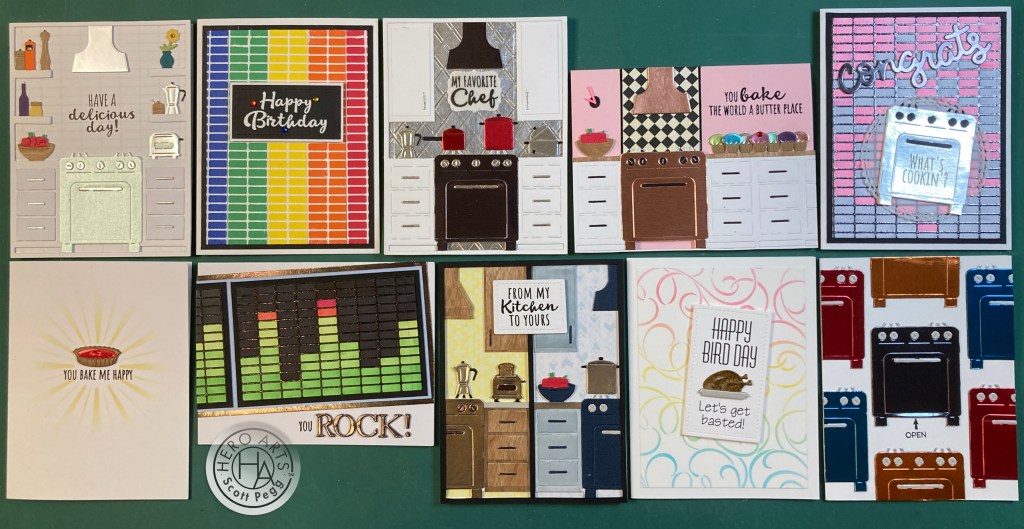
Certainly a colorful bunch of cards! I think I gave this kit a good work-out and was actually impressed with the versatility of these stamps and dies! Always a good thing when you can stretch your supplies in a few directions…!
This kit is still available at Hero Arts… that surprises me..! If I’ve managed to give you some ideas or captured the closeted kitchen designer in you and you want to grab a kit for yourself, please use my following links! It is always supremely appreciated and it actually helps support this page!
My Monthly Hero May 2022 kit: http://shrsl.com/3iylq
My Monthly Hero May 2022 Collection: http://shrsl.com/3iylt
Thank you so very much for joining me here today! Your support continues to inspire me! Keep an eye out for a new video tour of my new craft cabinet set-up in our ever-evolving Office/Craft Room/Guest Room. You might be surprised at how much we can stuff in one little room…! Please remember to Like me, List me, Pin me, Post me, Share me with all your crafty friends… don’t run with scissors, and as always, I send you and yours Love and Light and Happy Crafting!
DISCLOSURE: This site contains some affiliate links to products. I may receive a commission for purchases made through these links (at no cost to you). As an Amazon Associate I earn from qualifying purchases. Thank you!

Great Job with a difficult set! And, I agree no open shelves in may kitchen!!!!
LikeLike
AMEN!! Thanks Cindy!
LikeLike
You’re just so Clever – I just had to have it! Great job on your makes! I can’t wait to get the kit and try it out! Delina Aberle dmaberle@earthlink.net
LikeLike
WOO-HOO! Thanks Delina!
LikeLike
As usual, your cards are AWESOME! Love your originality in using the supplies. You have inspired me!
LikeLike
Thanks Laurie!!
LikeLike
I concur; amazing cards with a difficult set.
Glad you enjoyed a nice trip!
LikeLike
Thanks Victoria!! Always appreciated!
LikeLike