
Hello Folks! Scott here with my 10 cards inspired by the My Monthly Hero October 2020 Kit. This month we have a Christmas kit featuring the Folk Art of Scandinavia!
Our 6″ x 8″ stamp set features a large ornament stamp and lots of icons perfect for creating patterns and scenes and 10 sentiments. We also get 12 coordinating frame cuts, one Ornament Shape die, and two Inner Ornament dies. We do get some extras this month including a new Watermark and Embossing ink cube and three embossing powders in Red, Glacial Blue and White Sparkle. Lots of supplies to kick start our Holiday card making!
I reached for the large ornament stamp to start off my exploration of this month’s kit.

This card is relentlessly cheery and oh, so, Christmasy! I was originally looking to make this a one layer card but ended up with a little more dimension than I intended. I stamped the ornament with the embossing ink and used the Glacier Blue embossing powder to create this shiny blue ornament. I die-cut a piece of Inkadinkado stamping mask paper with the matching ornament die, laid it over the embossing and stamped the striped background using a Love From Lizi Candy Stripe Background stamp and Fired Brick Distress Oxide ink. I stamped and embossed the sentiment in the center of the ornament with the Red embossing powder, and added a Glacier Blue ‘star’ on the right.
I was particularly pleased to discover that the two Inner Ornament dies would create this fun trim around the open part of the ornament. Pretty easy to line up if you start with the smooth oval die and then cut the scalloped die around the oval. I cut this trim piece from a piece of scrap card stock colored with Mermaid Lagoon Distress Oxide ink and glued it to the ornament. I trimmed the stamped panel to 4″ x 5.1/4″, glued that to a thin Dark Red mat and then down to a white card base. I embossed the two birds on the same red card stock using the White Sparkle embossing powder, die-cut them with the matching dies, and added them to the card with some foam tape. A double bow tied with some red and white bakers twine adds just the right finishing touch. The Mermaid Lagoon Distress Oxide ink goes quite well with the Glacier Blue embossing powder! Nothing quite like a red and white candy-stripe background to make a truly cheerful holiday card!
Other than the ornament stamp, I was really thrilled with the Santa and reindeer stamp!

I ink blended Mermaid Lagoon and Faded Jeans Distress Oxide ink on some white card stock, and trimmed that down to 1.3/4″ x 5.1/2″. I stamped Santa using VersaFine Onyx Black ink and embossed that with some clear embossing powder. The HO HO HO is embossed on that panel with the White Sparkle embossing Powder. I glued that stamped panel to the center of a white card base and lined the edges with some Love From Lizi Black Glitter peel off stickers. The other two sentiments are stamped with VersaFine ink and embossed with clear embossing powder. Some tiny stars added with a white gel pen finish out this simple scene. I really like the ink blended background and simple graphics on this! I just might start using Mermaid Lagoon more often for my skies!
I did spend some time doing a little research on Scandinavian Folk Art, and was very interested to learn that it is fairly simple, and very graphic, with lots of symbols and icons often arranged in mirror-image patterns. Now I understand all the small icon stamps!
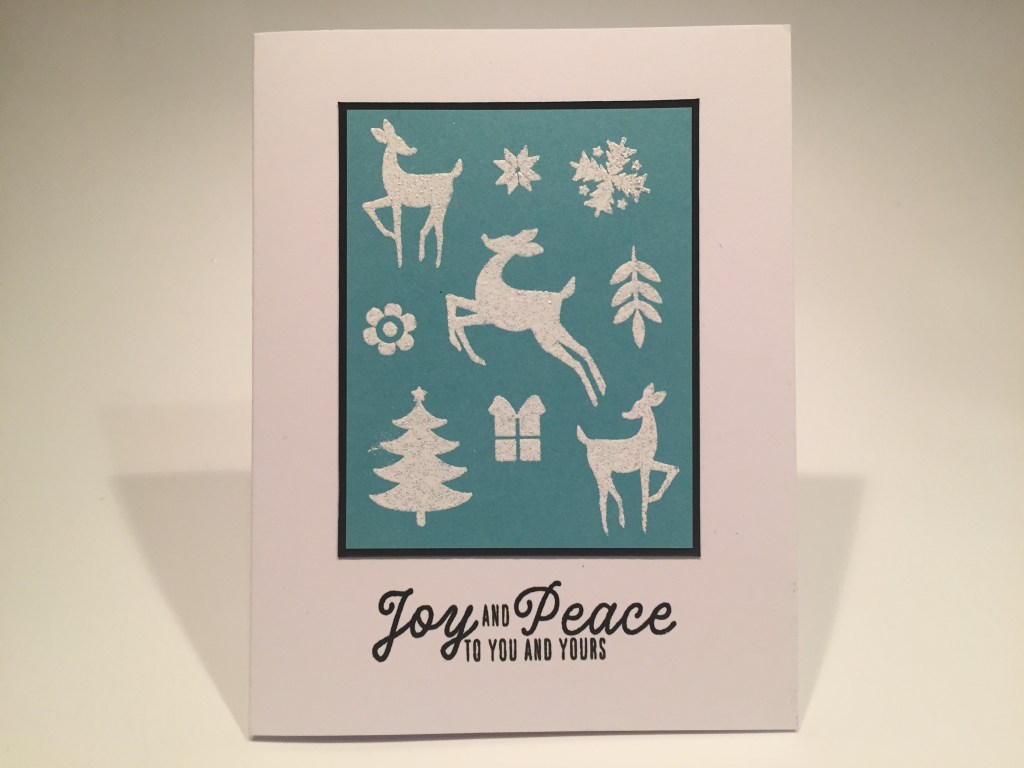
I came up with this nice arrangement featuring the three deer stamps and embossed all on some light blue card stock with the White Sparkle embossing powder. I really like that embossing powder – really good coverage with plenty of glittery sparkle. I trimmed the stamped panel to 2.3/4″ x 3.1/2″ and glued that to a thin black mat and then to a white card base. The sentiment is stamped with VersaFine Onyx Black ink and embossed with clear embossing powder. I thought the light blue (and non-denominational sentiment) would make this card perfect for Hanukkah – and I seem to remember seeing a lot of blues in my Scandinavian Folk Art research!
I was so taken with this little arrangement that I decided to expand on that same design.

These three just happened to fit perfectly on a 4″ x 9″ slim line card! Dark Red, the same light Blue, and Dark Green card stocks all embossed with more of that terrific White Sparkle embossing powder. Thin black mats behind each, and then down to a white card base. That gives us this fun triptych holiday card. I didn’t want to cover any of this with a sentiment so I stamped that on the inside of the card.

The sentiment is stamped with VersaFine Onyx Black ink and I added a thin strip of the blue card stock to anchor that sentiment on the left of the inside. This card feels very Scandinavian to me… the repetitive pattern with the deer and trees, snowflakes and a gift.
Let’s tackle those Ornament dies now… it’s been a while since I did a shaker card…!
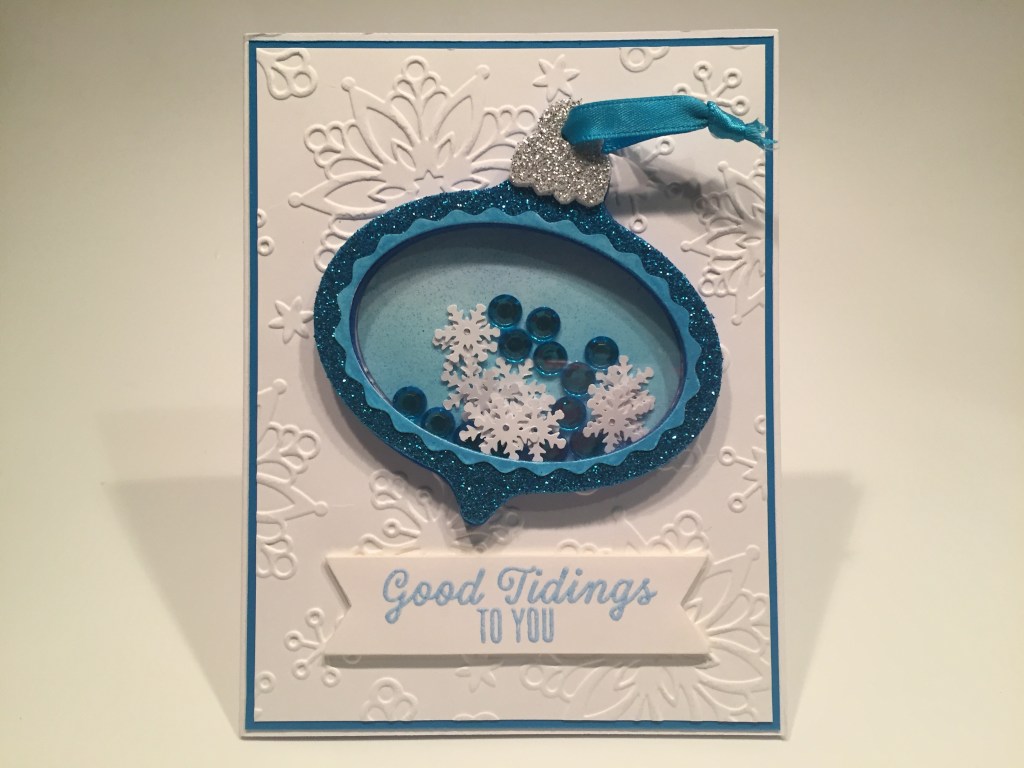
I die-cut the ornament die with the oval cut-out from a piece of dark blue glitter fun foam and glued a piece of acetate to the back of that. I added two more die-cut plain blue pieces of fun foam behind the acetate. I cut the top of the ornament die from some silver glitter foam and hand cut the scalloped edge for the ornament topper. I die-cut another scallop trim piece from Mermaid Lagoon colored card stock and glued that around the opening. For the back of the shaker, I took a die cut oval and gave it a quick spritz with some Mermaid Lagoon Distress Oxide spray.
I dry embossed a piece of white card stock with an old Darice snowflake embossing folder, and trimmed that to 4″ x 5.1/4″ before glueing it to a thin mat of Gina K Designs Blue Raspberry card stock and down to a white card base. I tied a short piece of blue ribbon through the ornament topper, glued my inked oval to the card front, placed some blue gems and white snowflake confetti on the oval and glued the ornament over the top. The sentiment is embossed with Glacier Blue embossing powder on a scrap of white card stock and die cut with a Lawn Fawn Everyday Sentiment banners die and mounted to the card front with foam tape. This is a fun shaker card and could be easily adapted to an actual shaker ornament! And still non-denominational too!
I wanted to play with those ornament dies and try using them on a slim line card with a little less dimension.

I originally thought about lining these three ornaments up on a landscape card but after some fiddling around thought they would work better in portrait mode! I die cut three ornaments with the oval cut-out from some Gold card stock and the topper portion from some silver card stock. The red ornament is the same background pattern used on cards 3 and 4, and I had two more of the same pattern on a plain red card stock that I initially put in the top and bottom ornament… turns out I didn’t care for that very much, so I took some Auburn Pearl card stock and embossed the double deer and star with the Red embossing powder. Love how dark the card stock made that Red embossing powder!
I cut a piece of dark green card stock to 3.1/2″ x 8.1/2″, glued that to an Auburn Pearl mat. I attached some gold cord to the bottom two ornaments and glued all three to the panel. I also cut three scalloped trim pieces from the Auburn Pearl card stock and added those around the ornament ovals. I wrapped the cords over the top of the panel, trimmed off the overhanging ornament bits and glued all down to a 4″ x 9″ card base. I embossed the sentiment with plain White embossing powder, and added the snow with some gel pens. This is really an impressive card! I’ve done a vertical slim line card before (LFL March ’19 kit) but I think the large ornaments really make this stand out! That’s 2 slim line cards!
I was playing around with some of the small stamps in our kit, trying to come up with some kind of pattern that would be large enough to use as a background, when I got the idea to create a homemade turnabout stamp using our small stamps. That should cover a lot of real estate!

This is the pattern I came up with using 15 of the small stamps in our kit. This is set up on a 5.1/2″ square piece of card stock. The idea behind turnabout stamps is you stamp this pattern on a piece of 5.1/2″ square card stock, rotate your card stock 90 degrees, stamp again with another color, rotate the card stock another 90 degrees, stamp a third color, and then rotate your card stock square one more time and stamp the fourth color. This is what I got using this pattern:


This is stamped with Fired Brick, Broken China, Fossilized Amber and Evergreen Bough Distress Oxide inks. I also stamped one using Hero Hues Reactive inks in Blue Hawaii, Splash, Pool Party, and Blue Raspberry – all different blues, and I did one stamping using only Splash Reactive ink and one using only Fired Brick and Evergreen Bough. I am totally into this design – it feels VERY Scandinavian to me – I can’t wait to make these panels into cards. You can download my pattern for this turnabout stamp right here:
I started with the pattern stamped in the HA blue inks and came up with another Santa.

I die-cut the patterned background with a Lawn Fawn Stitched Rectangle die and matted that on a piece of blue card stock and glued this to a white card base. I stamped the sentiment and Santa on white card stock using Blue Hawaii Reactive ink and embossed it with some clear embossing powder. I die-cut the stamped piece with another LFSRD and added a blue mat behind that and mounted it to the card front with foam tape. I guess I’m really getting into the blues with this kit! I do think blue is a great color for Christmas – everything doesn’t have to be red and green!
More Blue to come! I figured if this was a Scandinavian Folk Art Christmas kit, then maybe we should try saying Merry Christmas to the Scandinavians!

This one uses the Splash ink background and is die-cut with a smaller LFSRD with the pattern running straight up and down instead of diagonally. That’s glued to a blue foam glitter mat cut with another LFSRD, and then down to the white card base. GOD YUL (goad yuul is a good approximation of how to say it) is die cut from the same glitter foam using the Lawn Fawn Quinn’s Capital ABCs dies and glued in the center of the card front. I know I’m getting carried away with the blue here, but I love this card! The turnabout stamp works great straight up and down, and the sentiment fits so well in the center!
Okay… enough with the blue!! Let’s use the four-color background stamp!
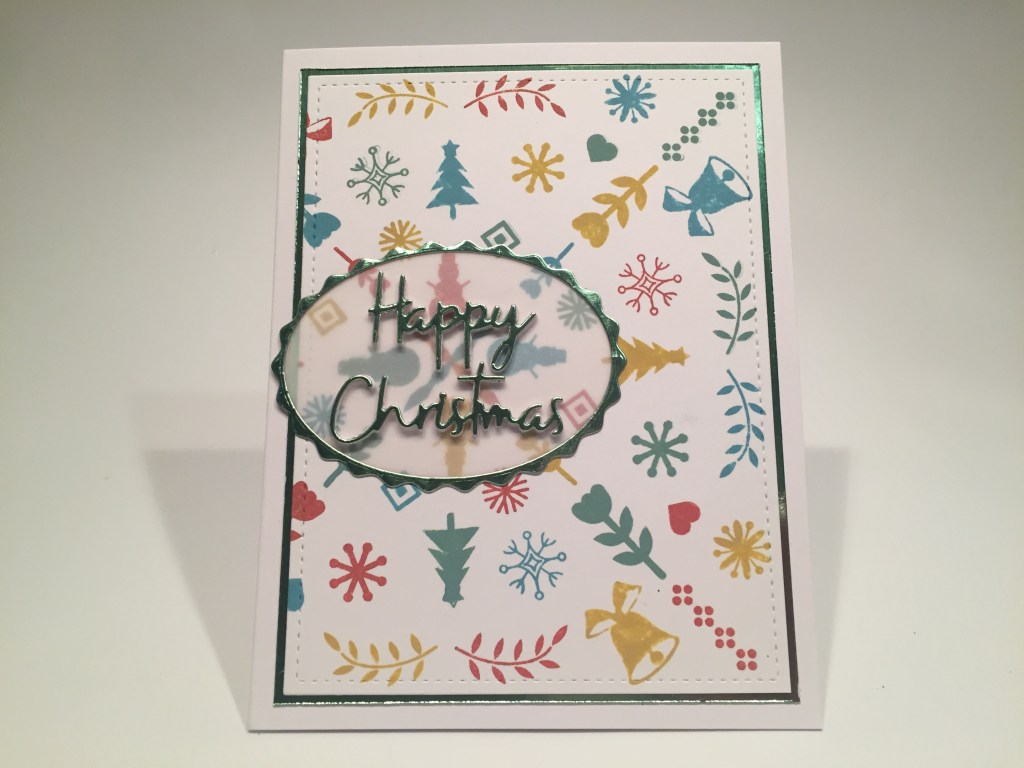
This one I die-cut (LFSRD) off-center so as to include the far right edge of the pattern on a standard A2 card. I found the perfect green mirror color in the Tim Holtz Metallic Confections Kraft-stock pad. I matted the stamped background to a thin mat of that mirror card stock, and down to the white card base. I die cut the Happy Christmas using a die from the Crafter’s Companion 2019 Advent Calendar (Thank You Lisa!) and layered that with three white die cuts for a thick dimensional sentiment. I die-cut a piece of heavy weight vellum with the scallop die and another scallop trim piece from the green metallic card stock, and glued those together and down to the card front. Finally I glued the chunky sentiment on top of the vellum. Here’s another card that feels like I picked it up at a street fair in Oslo! I’m loving my turnabout pattern!
I have one more sentiment from our stamp set to use, and it’s perfect for my red and green turnabout pattern.
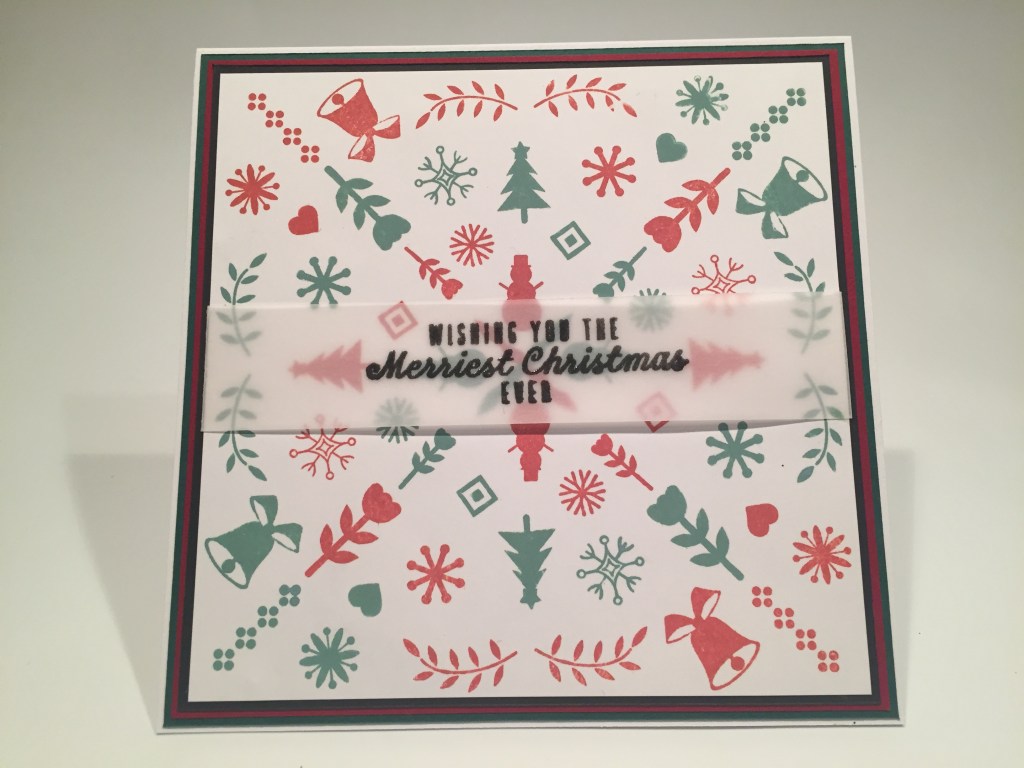
AND I made it a square card too! I wanted one card that utilized my entire turnabout stamp pattern! I trimmed that down to 5″ x 5″ which still keeps all the images intact! I stamped the sentiment on a long piece of 1″ wide vellum with VersaFine ink and embossed that with some clear embossing powder. I wrapped the vellum around the center of the stamped panel and attached the ends on the back. Then I matted that on thin black, dark red and dark green mats, and then down to a 5.1/2″ x 5.1/2″ card base. I so very rarely make a square card, and this seemed like the perfect opportunity to do so! The red and green are very Christmas-y and the Folk Art pattern plays well with this sentiment. I hope I was able to show you a number of options for using this turnabout pattern as a background for cards made using this kit!
I had a few ornament die cuts left over, and thought they would make perfect picture ornaments for family and friends this year.
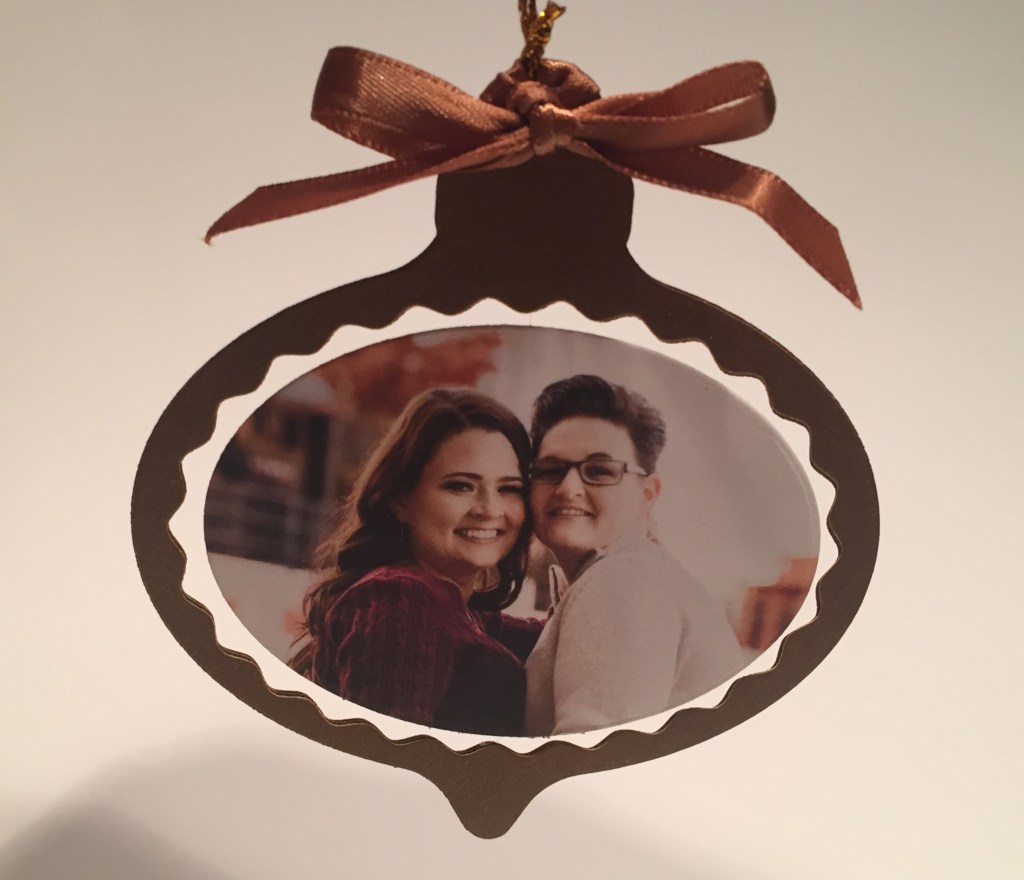
I die-cut the ornament with the scallop die three times, and the photo (and a backing) with the oval die. Some invisible thread suspends the photo panel in the center, some gold cord for a hanger, and brown satin ribbon for a bow and you have a beautiful Christmas ornament to commemorate a special occasion or just mark the passage of the year! This ornament is light and airy and the photo spins all they way around – use TWO photos!
That wraps up my 10 Cards 1 Kit post inspired by the My Monthly Hero October 2020 Kit! I did manage to use every single stamp in the stamp set this month! WOO-HOO!

WOW! What a unique assortment of holiday cards! Two slim line cards, one square card, a shaker card, and a terrific photo ornament! I really love the GOD YUL card, and the Santa flying through the sky card, and the candy stripe card, the shaker card, and both the slim line cards… Let me know which card(s) are your favorite! I really like all the ornament dies in this kit, and the embossing powders are terrific – especially that White Sparkle embossing powder. Though it’s not even Halloween yet, this kit definitely puts me in the mood for Christmas!
The My Monthly Hero October 2020 Kit is still available at Hero Arts! If I’ve managed to inspire you, or spark your imagination, and you’d like to grab this kit for yourself, please use my links when you do go shopping at Hero Arts! It helps support this page and really helps keep my head above water these days!
My Monthly Hero October 2020 Kit: https://shrsl.com/2kig5
Hero Arts: https://shrsl.com/1f7qx
Thank you so very much for sharing your time with me here! It truly means the world to me! Please keep yourself and your loved ones safe. Happy Halloween! Get out there and VOTE! Remember to Like Me, List Me, Pin Me, Post Me, Don’t run with scissors, and, as always, I wish you Happy Crafting!

Another fabulous unboxing. The cards you have created are amazing. Love how you made your own turnabout stamps. Those cards are my favorites. Thanks for the wonderful inspiration.
LikeLike
Thank YOU, Judy! Much appreciated!
LikeLike
Hey Scott! I don’t get this kit anymore, but have some similar dies that I can use to CASE your gorgeous cards! Thanks! Jeanne
Sent from my iPad
>
LikeLike
Thank you, Jeanne! You know I love hearing from you! I’ve made my own Christmas Cards for the last 20+ years so I actually don’t have that many holiday sets in my stash! However, I do like that Santa sleigh stamp a lot!
LikeLike
Scott I look forward to your monthly hero cards and your video. Love your cards, puns and instructional videos. Thanks for sharing the template.
LikeLike
Thank YOU, Betty! Truly appreciated! Always nice to hear from you! Happy Holidays!
LikeLike
I love your homemade turnabout design. Very clever!
LikeLike
Thanks Kathy! Always appreciated!
LikeLike
Hello! I chanced upon your Youtube channel recently and I feel like I’ve found a kindred spirit! I often tie myself up in knots trying to think of clever wordplay, visual puns, some sort of visual narrative, thematic backstory, etc., etc. for the cards I make and people sometimes think I’m a bit kooky (i.e., “obsessed” LOL) as a result. I just love your eye for design and your way of thinking outside the box to really explore all the looks to be gotten with a stamp set. I enjoy the way you share your process both on video and in writing — and we definitely have the same sense of humour. Keep on doing you!
LikeLike
Thank you SO VERY MUCH Carol! That means a lot to me! Many think I’m crazy obsessed too…! I’ve been in a little bit of a funk lately so it’s extra special to come across this! Challenging myself to do 10 cards with one kit kinda helps keep the juices flowing (mostly!) So nice to hear from a kindred spirit! Don’t be a stranger..! Health and Happiness to you and yours!
LikeLike