
DISCLOSURE: This site contains some affiliate links to products. I may receive a commission for purchases made through these links (at no cost to you). As an Amazon Associate I earn from qualifying purchases. Thank you!
Hello Folks! Scott here with a bit of a diversion for you (and me!!) Due to the pandemic and lockdown restrictions, Hero Arts and Love From Lizi are falling behind with their ability to ship their kits out to us. Hero Arts is coming back to work (in limited numbers) this week, so kits should start moving from there, and Lizi is having supply problems, but she hopes to have her release and begin shipping by the first of June.
So, with no new kits on my desk, I thought I would play around with some new product I bought from Altenew and see what I could come up with!
Last year, 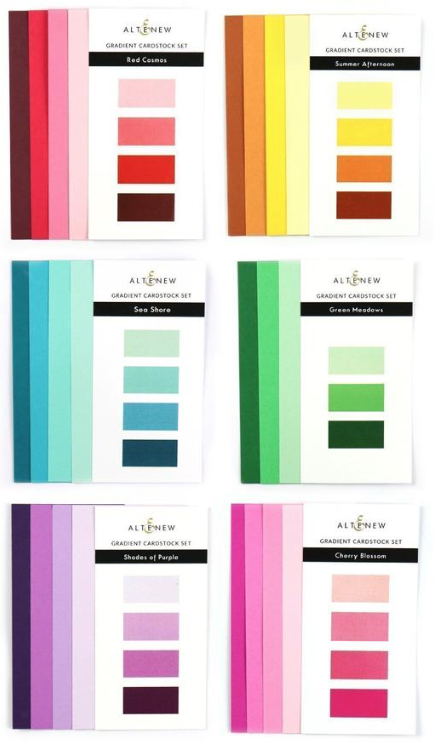 Altenew came out with six Gradient Cardstock Sets – eights 3″x 6″ sheets of each color grouped in gradient sets. Now, I’m not a big collector of cardstock, and don’t have bunches of colors in my stash, but these sets really caught my eye when they were released. Naturally, they sold out almost instantly, so, I dutifully asked to be notified when this set was back in stock, and lustily bought the whole set as soon as it was available!
Altenew has aways been known for their beautiful layered floral stamps, and I believe these packs were created to compliment Altenew’s growing collection of “3D Die sets“. I didn’t have any of those in my stash, , so when I bought the cardstock, I sprung for the Open Bloom 3D Die Set.

I liked this die set quite a lot and thought it would be pretty versatile in the long haul! I dug right in and created a card right away! This card features two Shades of Purple blooms and one Summer Afternoon bloom along with the leaves cut from the Green Meadows set.  The sentiment is from the Altenew Penned Rose Stamp Set stamped on a piece of the lightest Summer Afternoon cardstock using Versafine Onyx Black ink, die cut with a Lawn Fawn Everyday Sentiment Banners die, and lightly inked on the edges with Fossilized Amber Distress Oxide ink. Let’s do one more card like this and I can show you some details and tips!

Looking closely at the layering instructions included in the packaging, I realized that there are actually seven dies that make this bloom. The bottom, smaller three assemble to make the front petal, and are thus cut from the same colors. The first and last die here (largest and (almost) smallest) are the same color, so I thought I might be able to die cut the single petal piece from the middle of the large background piece,  and have the resulting hole covered by the second layer of card stock.
  Sure enough, that worked beautifully, and that little trick will help me conserve on cardstock!
Here are my seven pieces of the die cut from the Cherry Blossom Gradient Cardstock set.

The top four pieces were very easy to glue together – matching their edges makes for perfectly aligned die-cuts. The three petal pieces were a little different.

The smallest piece will fit most anywhere on the bottom curve of the petal, but the illustration did show the right side of that piece tucked up under the top-most (lightest piece). So that’s where I glued the middle piece – with the two left ‘prongs’ just below the edge of the petal, and the right side tucked underneath.
 Here’s my completed bloom all glued together. The position of the front petal is also a little ambiguous, but I just had to refer to the illustration for proper placement. I think these blooms are kind of amazing! If your are not in the mood to color, then these Altenew 3D dies can certainly provide some beautifully colored blooms without ever picking up a paintbrush, a marker, an ink pad, or any other medium you might have in your stash!
I also die-cut a bunch of the leaf dies in this set. The leaves only have two layers, and are ultimately very simple to line-up.  I did some with the medium and darkest Green Meadows card stock and some with the medium and lightest colors as well. For the top right leaves I used some plain green card stock from my stash instead of the medium green from the Green Meadows set. You can see a slight difference, but that works very well and is extremely close color-wise! That should be enough leaves!
Now that I have these cardstock sets in my stash, I’ve already started worrying about not using them up too quickly! I’m such a hoarder!! So I did go looking through my stash of card stock for other options that might work with this die – I need matching gradient colors in groups of four. 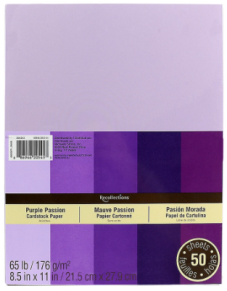 I did come across this pack of Recollections card stock from Michael’s – Purple Passion. That would work terrifically – in fact, it actually gave me an extra color I didn’t need! I went ahead and made two more blooms using this card stock.

These are very close to the Shades of Purple blooms on my first card. The Altenew cardstock is a little bit darker and a little bit lighter, but I think the Purple Passion blooms look just as nice! Let’s put this card together!
Now, these are fairly big blooms – a little over 3″ wide and more than 1.5″ tall. Most of the card examples for this die at Altenew feature only a single bloom. I was determined to make a little bouquet on my cards, but I had a hard time figuring out an arrangement for all three blooms on a card front without them seeming to ‘float’. Hmmmmmmmmm… STEMS! That’s what any good bouquet needs! I cut some thin strips of the dark green card stock to use as the flower stems for this card.  That should provide an “anchor” for my blooms and keep them from feeling unmoored! These strips are a little less than 1/8″ wide, and they certainly don’t have to be all exactly the same. I glued the stems to my card front and (since they are so thin) was able to get a nice curve to the stems as I attached them. Liquid glue adds some moisture to the card stock and enhances their flexibility! Now I can assemble the rest of this card!

I used my liquid glue and strategically placed foam squares to attach the blooms, and glued all the leaves flat to the card front. I stamped and die-cut the the sentiment on the lightest Cherry Blossom card stock and inked the edges of that die-cut with some Worn Lipstick Distress Oxide ink. Some Studio Katia Cupid’s Kiss crystals adds a little touch of sparkle to this card. I think this bouquet of blooms is downright gorgeous!
When digging around in my card stock stash, I found some grey colors that I thought might work to give me a white bloom, so I made another card with only a single bloom.
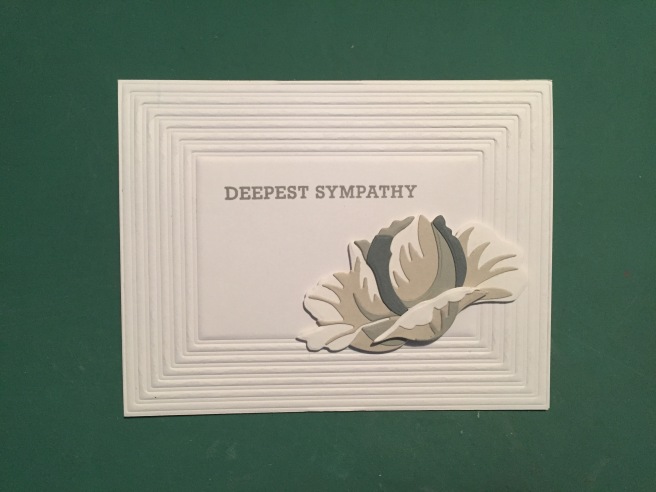
This card front is dry-embossed with Altenew’s Fine Frames Cover Die. That die cuts out 13 thin frames but I love using it to emboss with. The sentiment is from the My Monthly Hero January 2020 kit and is stamped using Hero Arts Soft Granite ink. I thought the ‘white’ bloom came out very nicely, and I attached that to the card front using foam squares. I even attached the front petal with foam squares to add a little more dimension. Very simple, very pretty sympathy card! I think I’m going to like these dies!
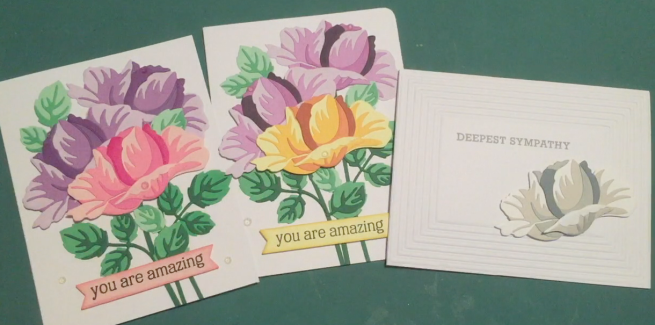
That’s my three cards made with Altenew’s Open Bloom Dies and Gradient Cardstocks. I think I like the yellow and purple bouquet better than the pink and purple one! Must be my pink allergy! I promise I will not hoard these Gradient Cardstock Sets and will look for more ways to use them on my cards!
I hope this was a nice diversion and a helpful How-To for you beyond my regular 10C1K posts! Thank you so much for sharing your time with me here today! Your support means the world to me! Please stay safe and healthy! As restrictions are lifted, I hope you continue to wear a face mask in public, wash your hands regularly, and please send some prayers to all of us in New York City. Remember to Like me, List me, Pin me, Post me, Share me with all your friends, Don’t touch your face…! And as always, I wish you Happy Crafting!

I love it, Scott! Beautiful!
LikeLike
Thanks Debbie! Always appreciated!
LikeLike
Three gorgeous cards!
LikeLike
Scott….
Thank you for the update on Altenew Open Bloom Die Set. I really liked the white card with the Gradient background. Have a similar set of dies and was wondering if I could do the same without purchasing another set of dies and “viola” they worked fine. You have the bestest ideas. Take care and remember to cover up, wash down and hug someone you trust. You will both feel better.
Terry
LikeLike
Thank you so much Terry! Always happy to provide a little inspiration! Be Well!!
LikeLike
Thanks so much for the ideas on this “Open Blooms” die set. I have this set and just love it but have only used it as a single bloom along with other embellishments on my cards. The three blooms together with stems added is a great touch to make the die set fresh and new again!!! I found your site a few months ago but wasn’t able to locate you again until now! Do I just look for your new videos through cardcutups or what??? Would love to follow you!!! Keep up the good work!!!
LikeLike
Thank so much Joy! You can subscribe to CardCutups on YouTube and if you click the “FOLLOW” button on my website you’ll get an email whenever I post something new! So nice to hear from you! All my best to you and yours!
LikeLike