
Hello Folks! Scott here with my 10 Cards from the My Monthly Hero November 2018 Kit. This month we received a very unique kit that featured an A2-card sized Advent Calendar stamp and die collection. I never would have thought you could get 24 little windows on the front of an A-2 card!
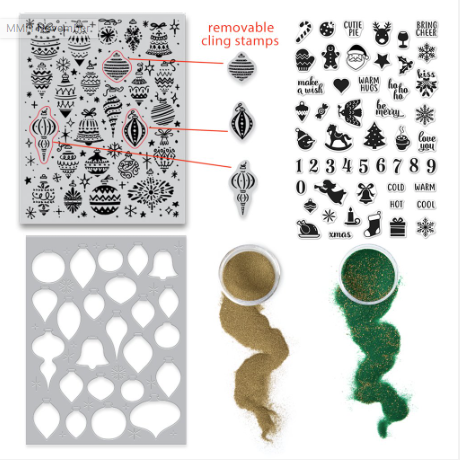
The 4.25″ x 5.5″ background cling stamp is the centerpiece of this collection and features 3 removable ornament stamps for a little added versatility. To go along with that cling stamp we got a 4.25″ x 5.5″ Ornament Flap Fancy Die that cuts out all the background ornaments while leaving a scored fold line at the top of each. To complete your Advent Calendar, we get a 4″ x 6″ clear stamp set with 41 small holiday icons and sentiments and a complete set of number stamps from 0 to 9. Finally, we are treated to two .5 oz. pots of Hero Arts embossing powder in Gold and Green-gold. At first glance, it seems like the options with this kit may be pretty limited, but after spending some time playing with these supplies, I discovered some interesting ways to create with this kit!
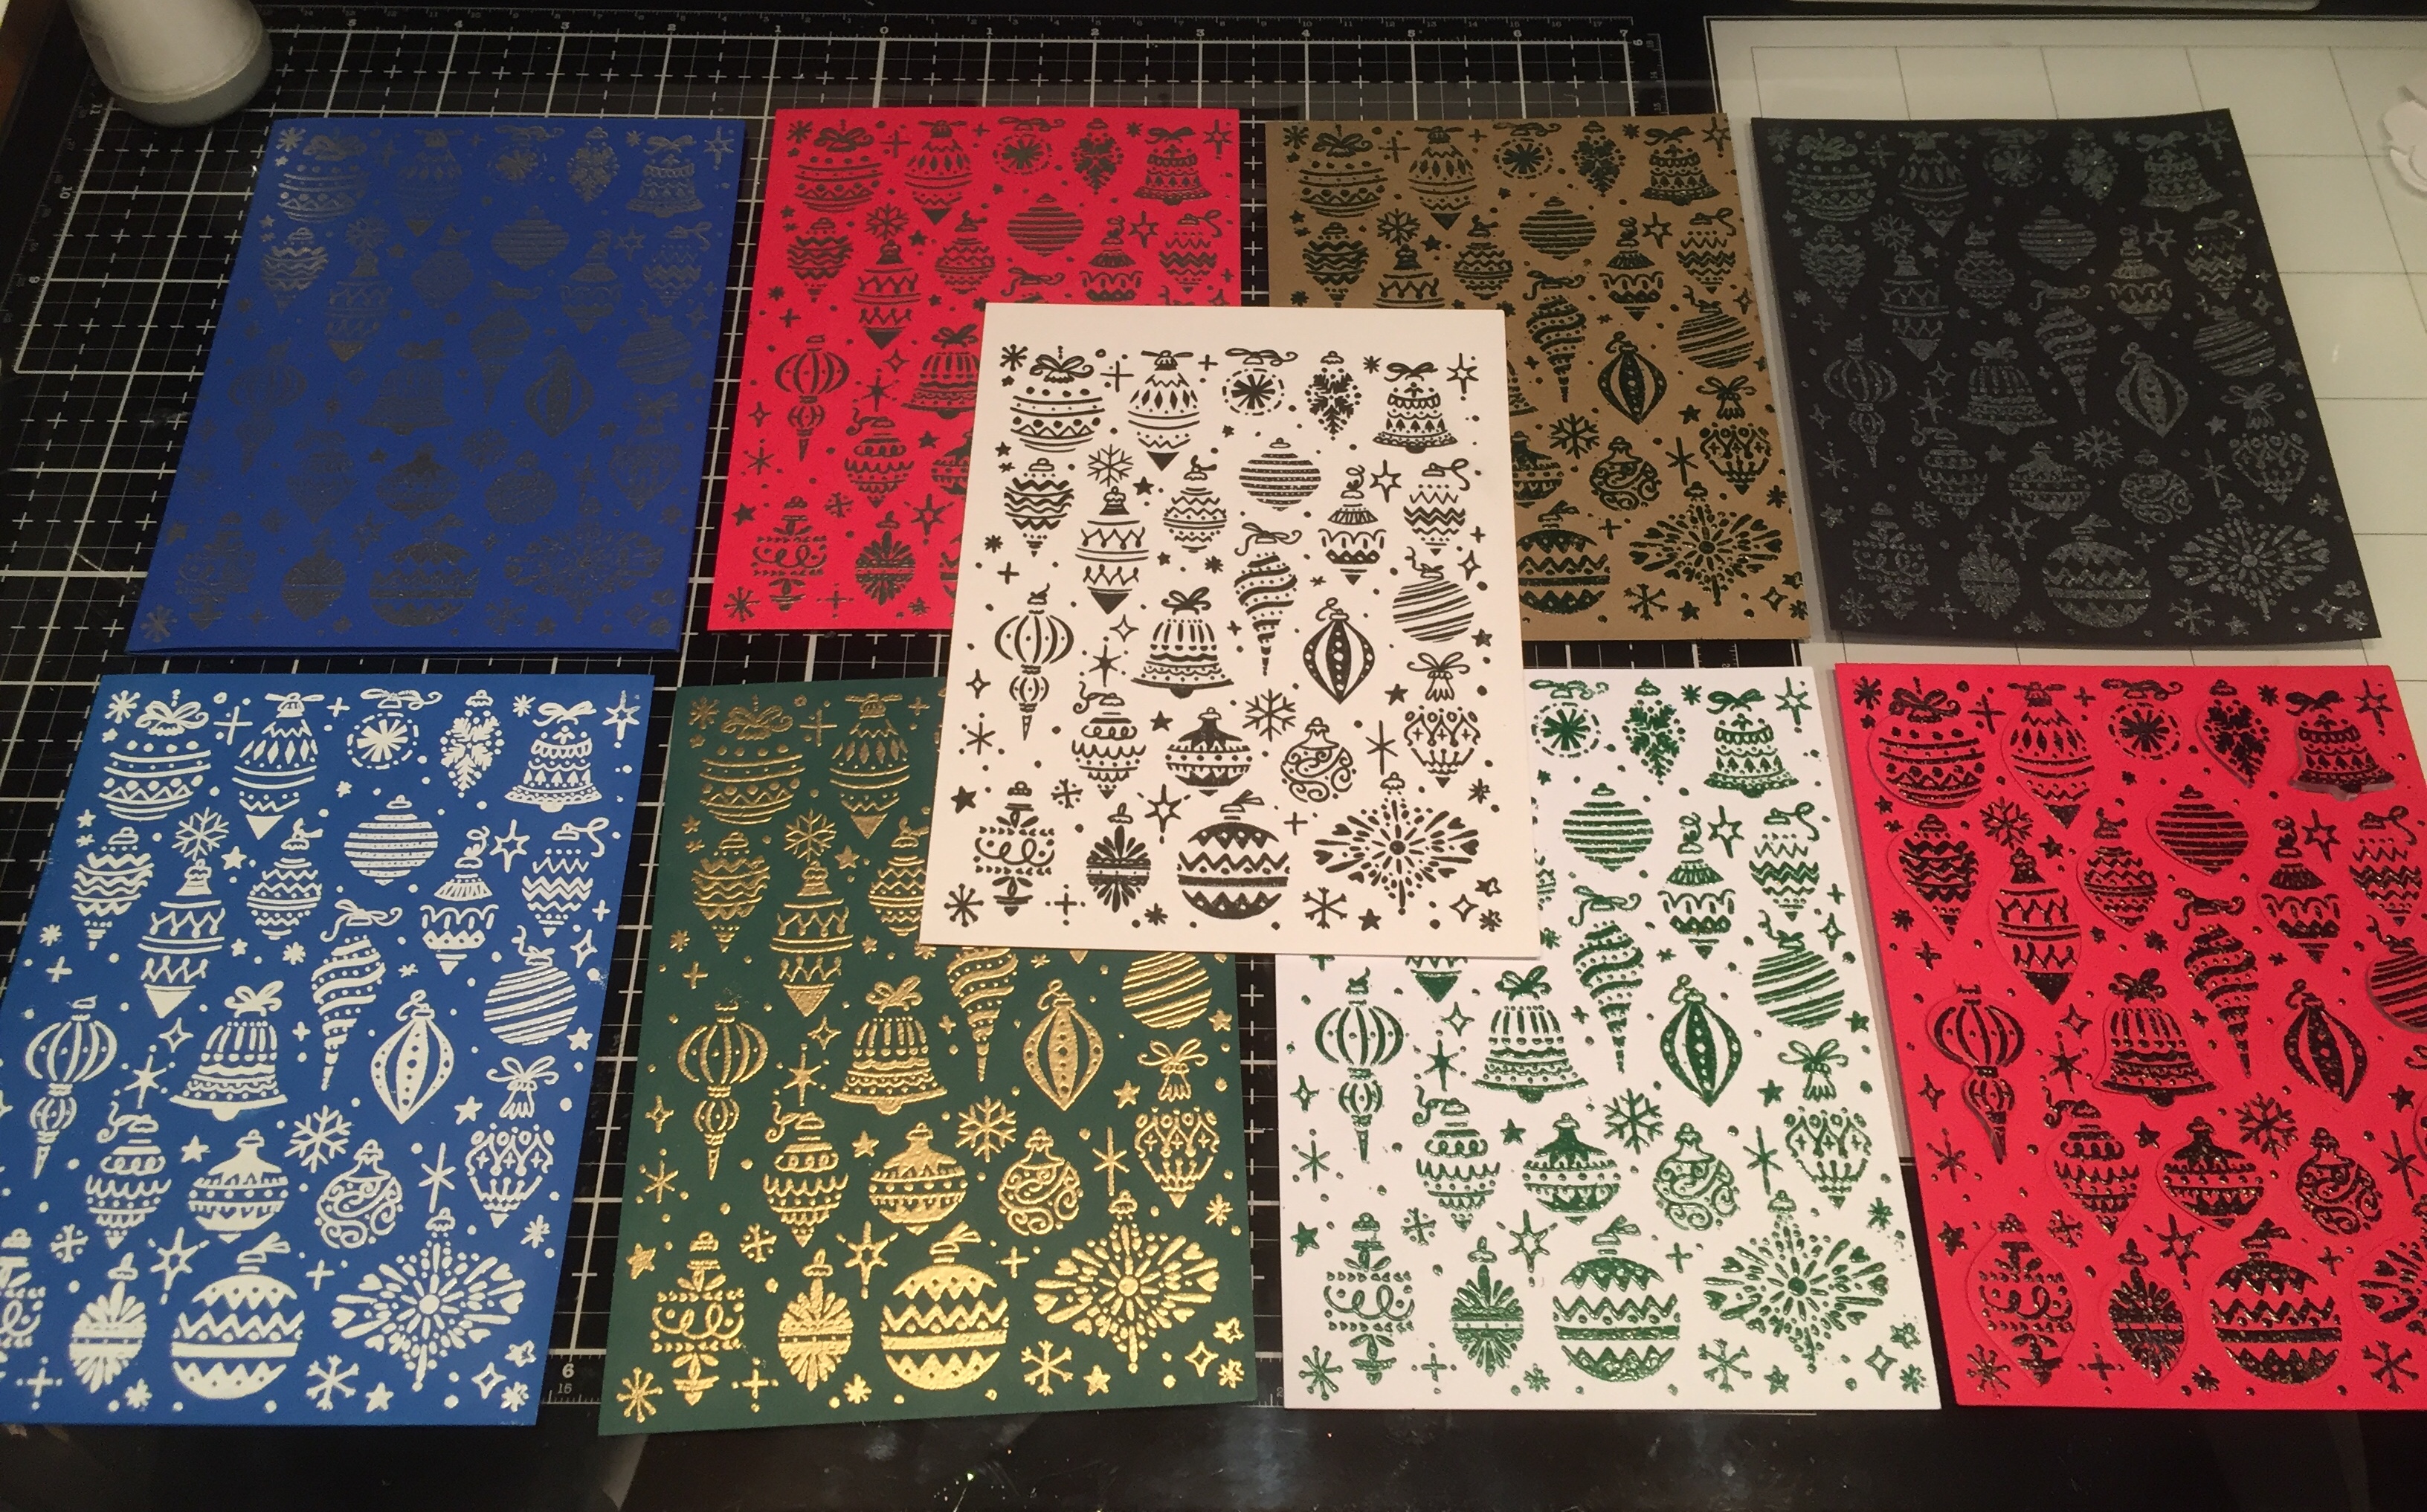
Since we received embossing powders with this kit, I started experimenting with embossing the background stamp on different card stocks. Top row, L to R: LFL Silver Dollar embossing powder on Blue card stock, LFL Emerald City embossing powder on a red card stock, and the HA Green-gold powder on Kraft card stock. It seems that HA embossing powder gets very dark on colored paper. Then I have some WOW! Cloud 9 glitter embossing powder on Black card stock. That embossing powder sheds glitter very easily – no matter how much you melt it. I though I could stop the shedding by spraying a fixative over the top but, seeing as how the fixative was matte, it pretty much destroyed that whole piece! Live and Learn!!
Second row, L to R: Ranger White embossing powder on blue card stock, the Hero Arts Gold embossing powder on a dark green card stock, the HA Green-gold embossing powder on white – the green-gold color works best on white I think – and the same powder on red card stock – very dark again. Finally, I stamped the center Bristol smooth card stock with VersaFine Onyx Black ink. I really think that background stamp is quite beautiful and enjoyed trying out different embossing colors and card stocks. Before I knew it, I had 9 different backgrounds ready to play with!
So… let’s try an Advent Calendar card to start out with!
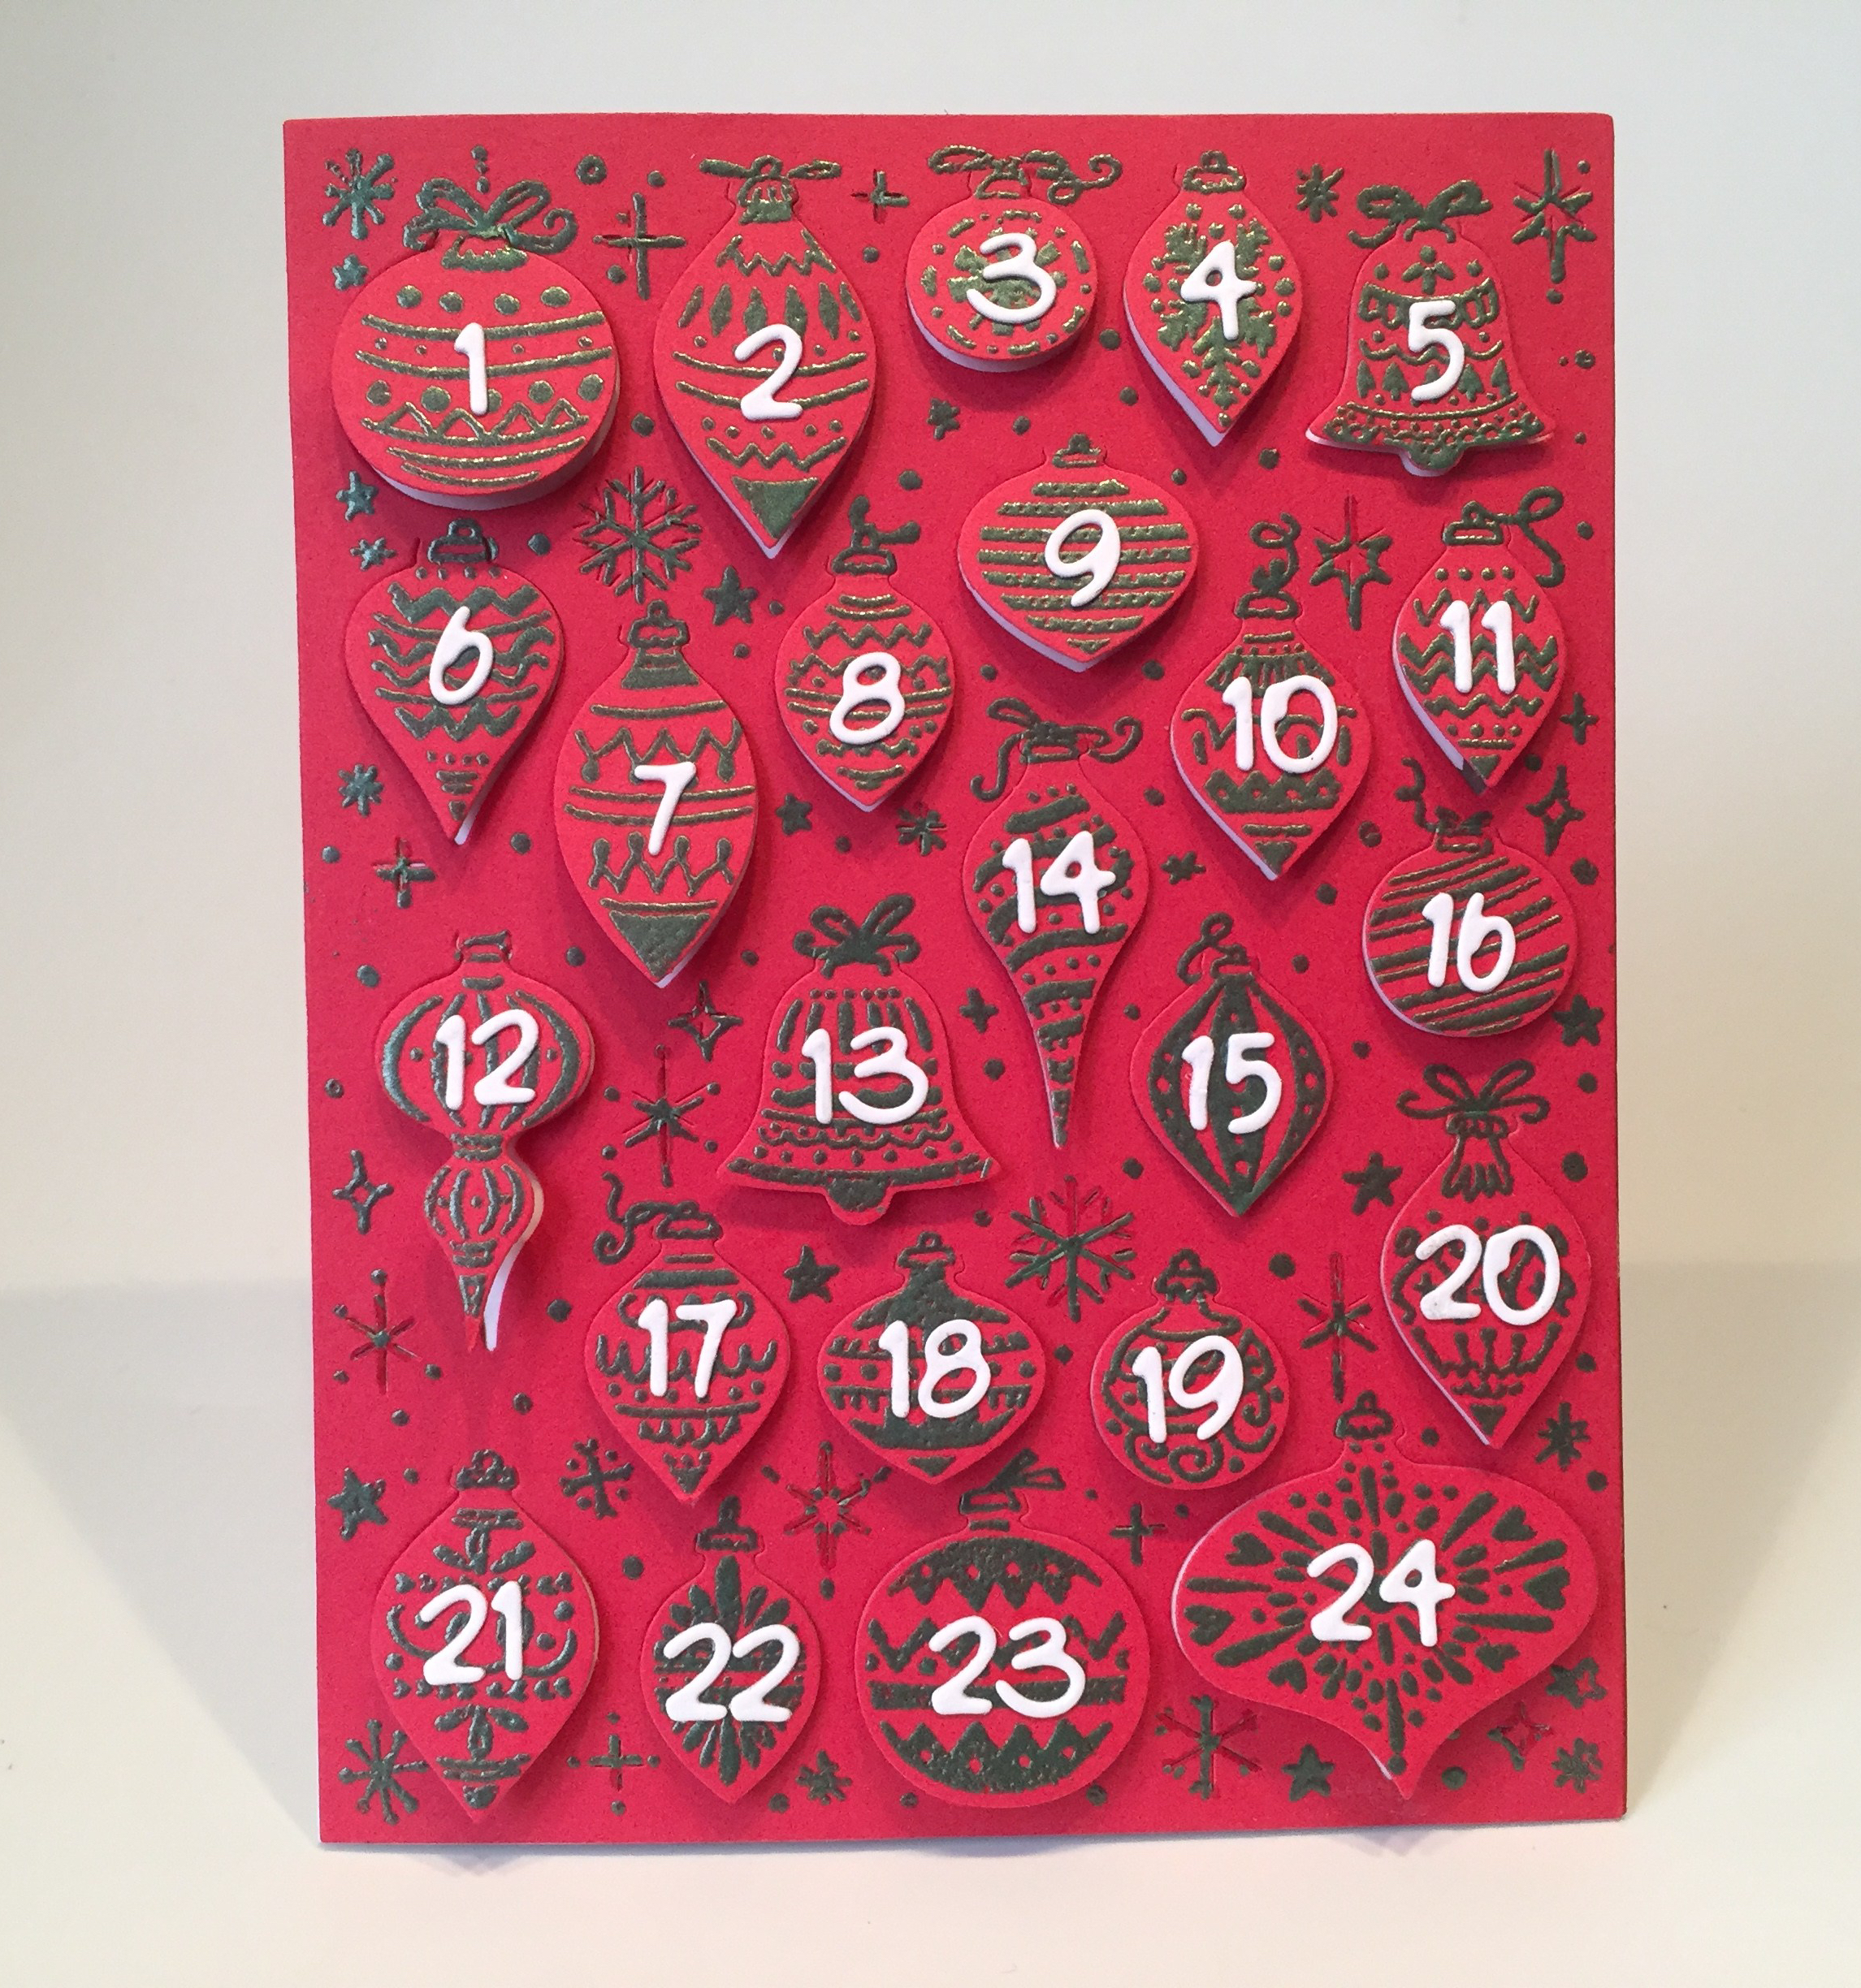
This card front is the Love From Lizi Emerald City embossing powder on red card stock die cut with the ornament fancy die. I was a little concerned with getting an accurate stamping of the numbers on top of the embossing powder, so I reached for my old “Marker Micro” Alphabet die to cut out all the numbers from white card stock. These are 3/8″ tall numbers so they were sized perfectly for these ornaments.
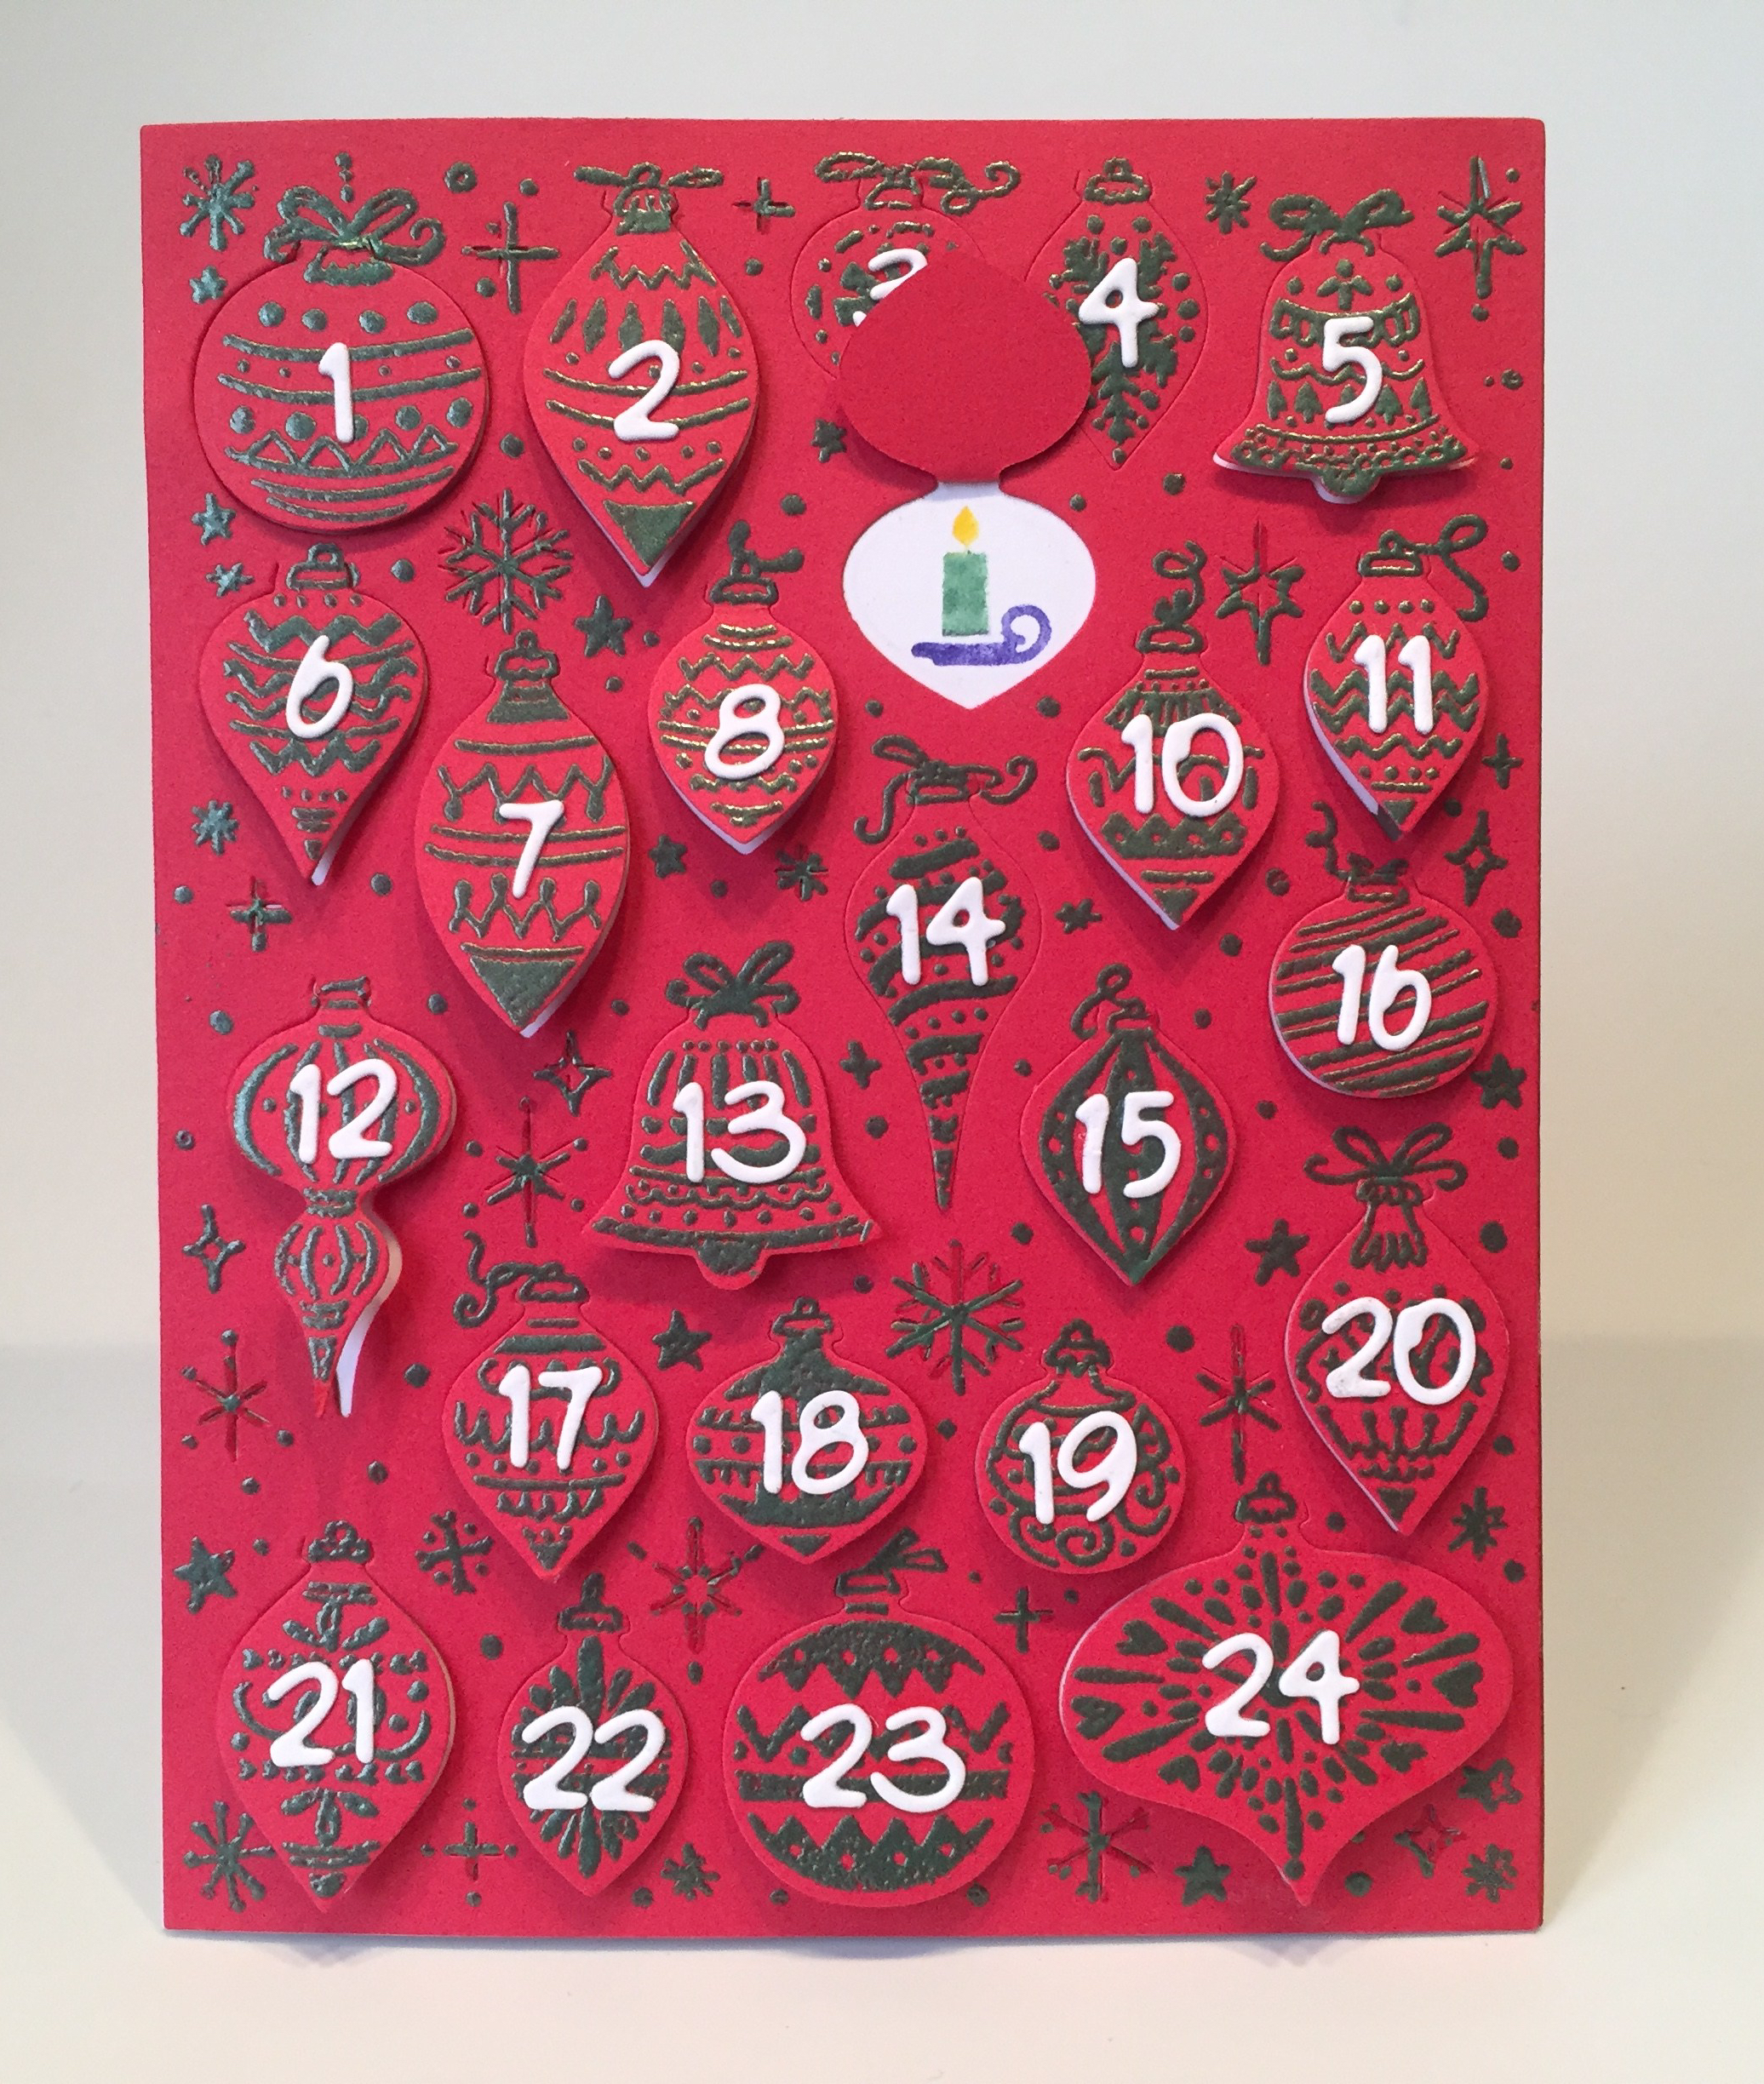
I did use the icon stamps on the front of a white card base for the images under the windows. I first cut out a blank of the ornament fancy die from a scrap of card stock and removed all the ornaments flaps to give me a template for stamping the images in the correct spaces. (You could use the windows in the die, but they are actually a little smaller than the cut windows) We could have used a few smaller icon stamps – I found it a little challenging to fill all 24 windows with properly sized unique images.  I was able to use my watercolor markers to ‘color’ some of the solid stamps like the candlestick here, so all the images weren’t just flat stamps. I did add a Merry Christmas on the inside of this card using a die from the November 2017 Love From Lizi kit cut from dark green card stock.
I LOVE this concept, but whichever way you choose to put these Advent Calendars together, it will take a firm commitment and a good amount of time – I would only spend this much time on a card for someone very special!
However, that background stamp is a lovely foundation for a variety of holiday cards!
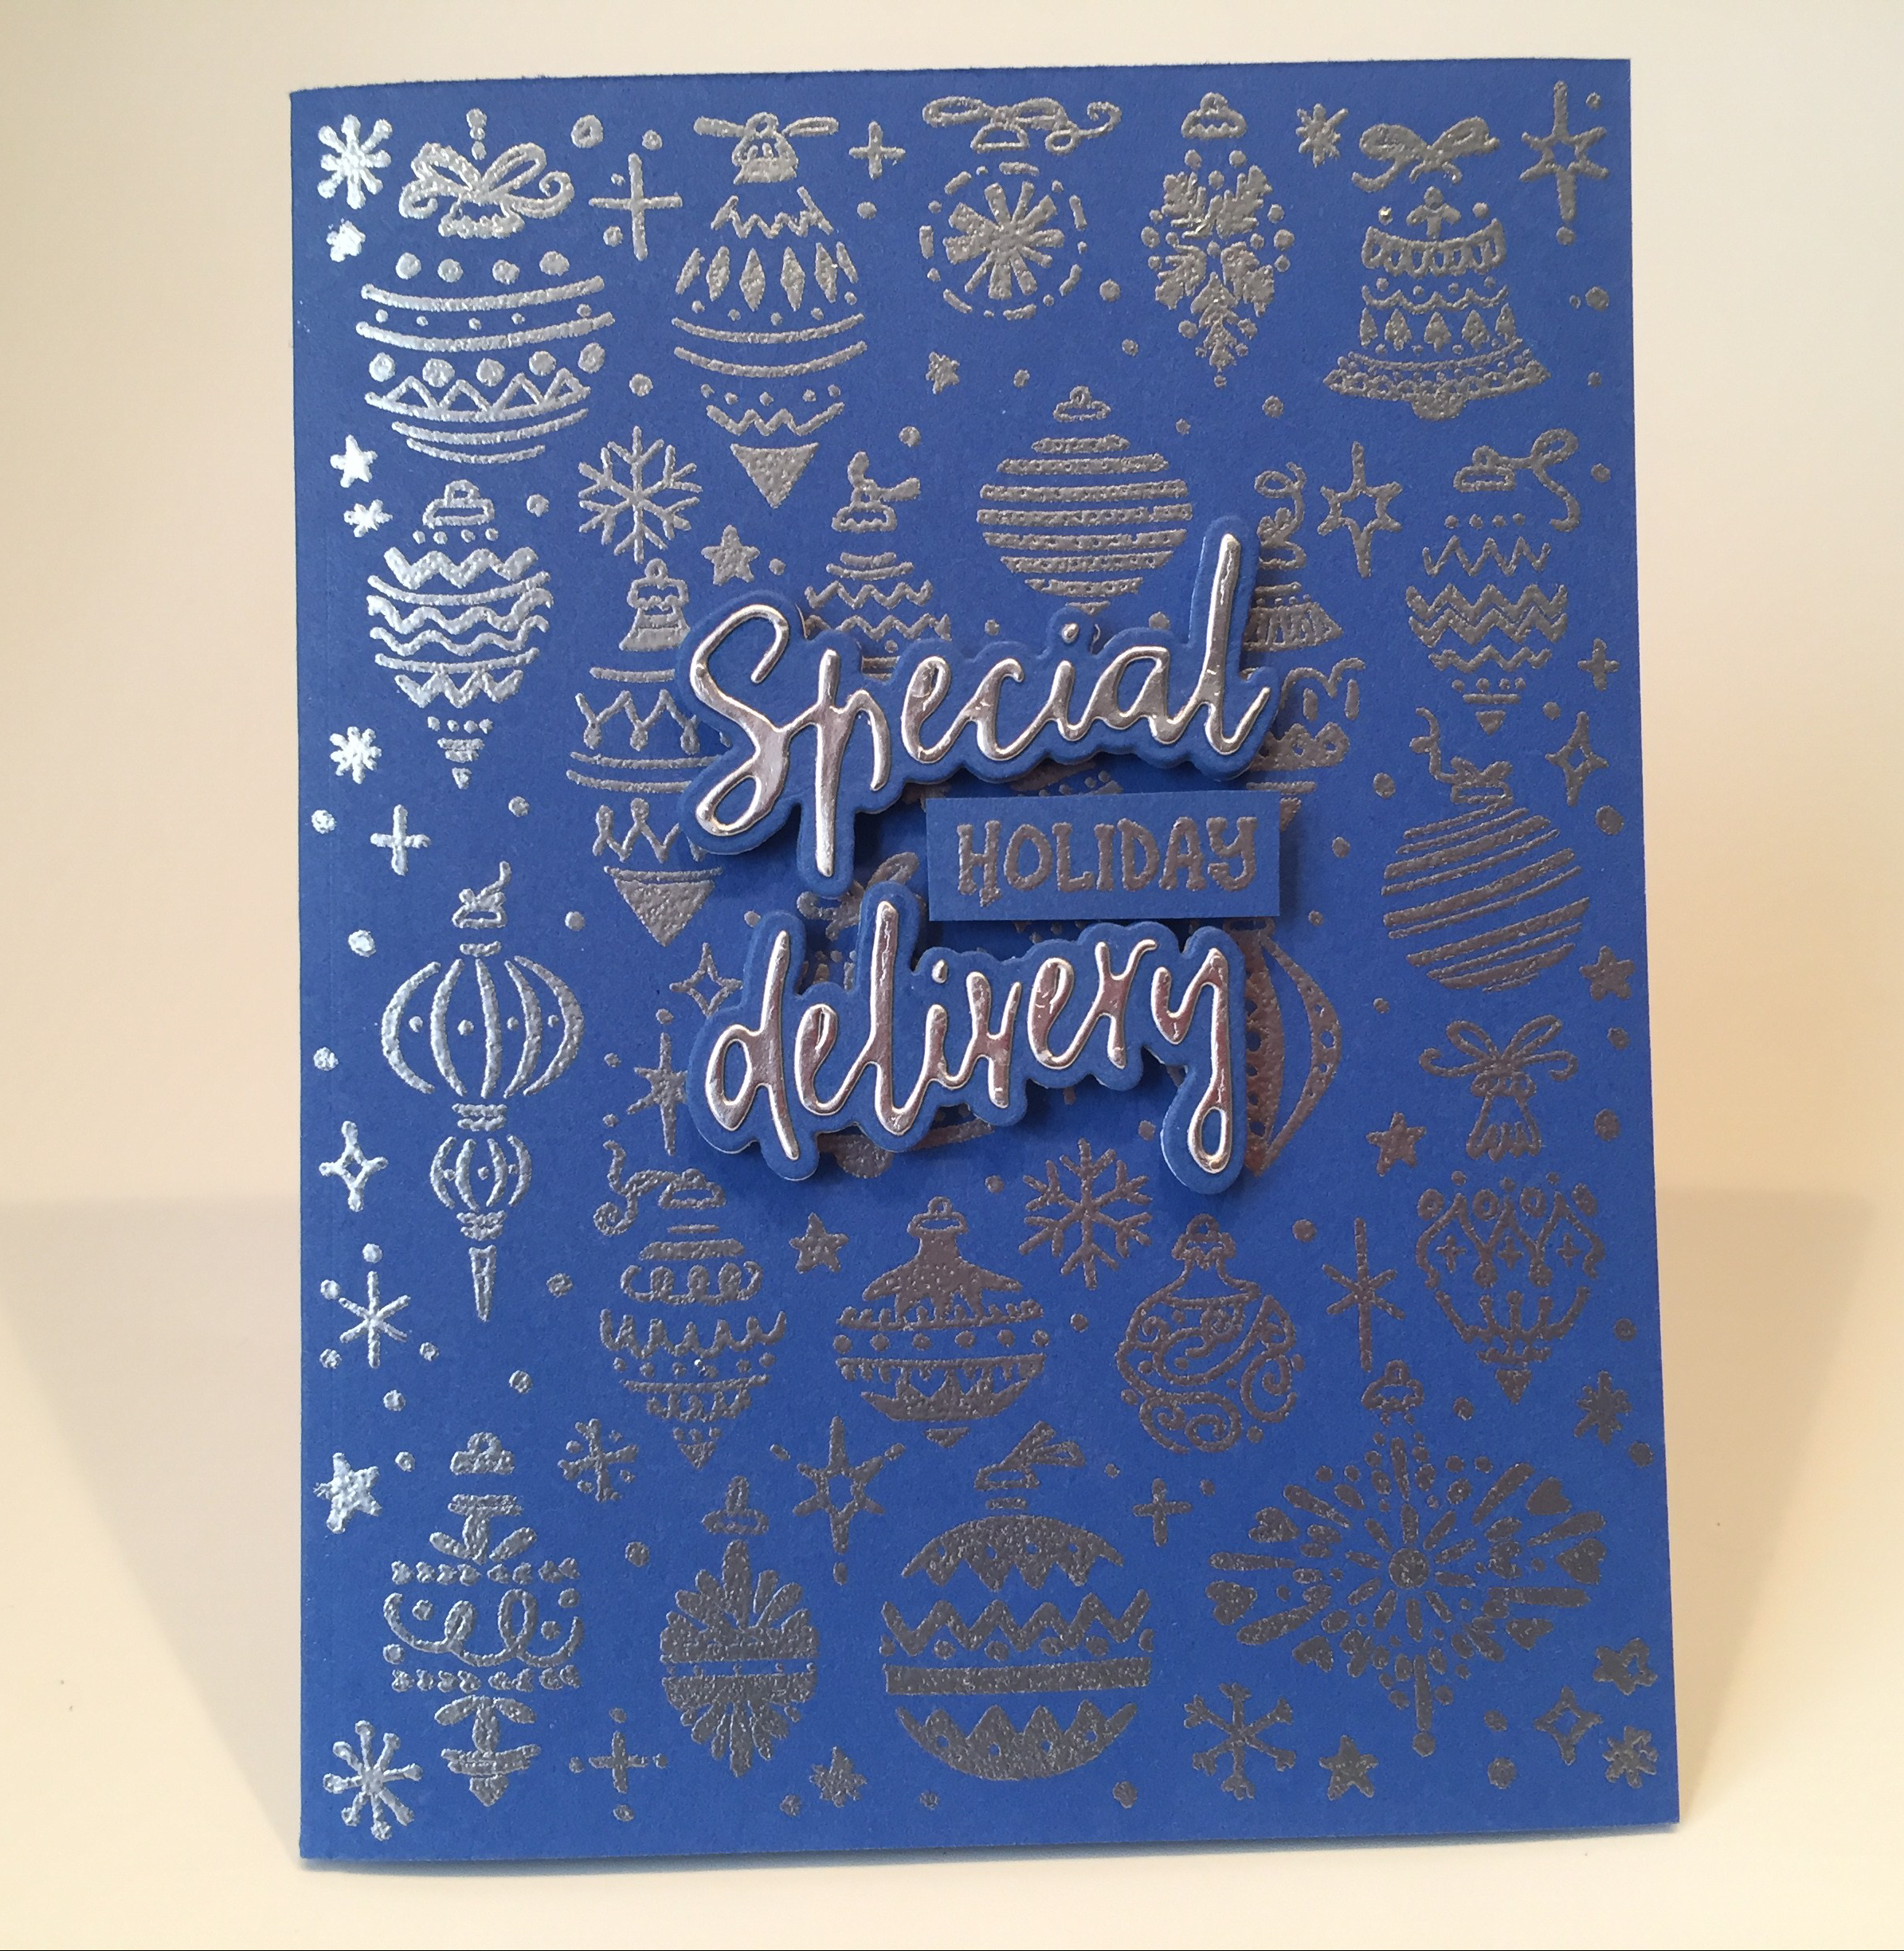
This is the LFL Silver Dollar embossing powder on blue card stock – I really like this, and it’s not quite so Hanukkah-ish as the blue and white is! LOL! For the sentiment on this card, I reached for the Sending You Sentiments stamps and dies from Honey Bee. I die-cut the “Special delivery” from some silver card stock, the shadow from the same blue card stock, and embossed the “holiday” stamp in silver on a scrap of the blue. I also cut from some of the shadow dies out of white card as well, and glued a few layers  together for a little chunky dimension. All the pieces are foam taped on top of that great background, and complimented on the inside with another Merry Christmas die cut from the silver card stock used on the front.
Well, I like that! Really a great background image for holiday cards! Lets do more!
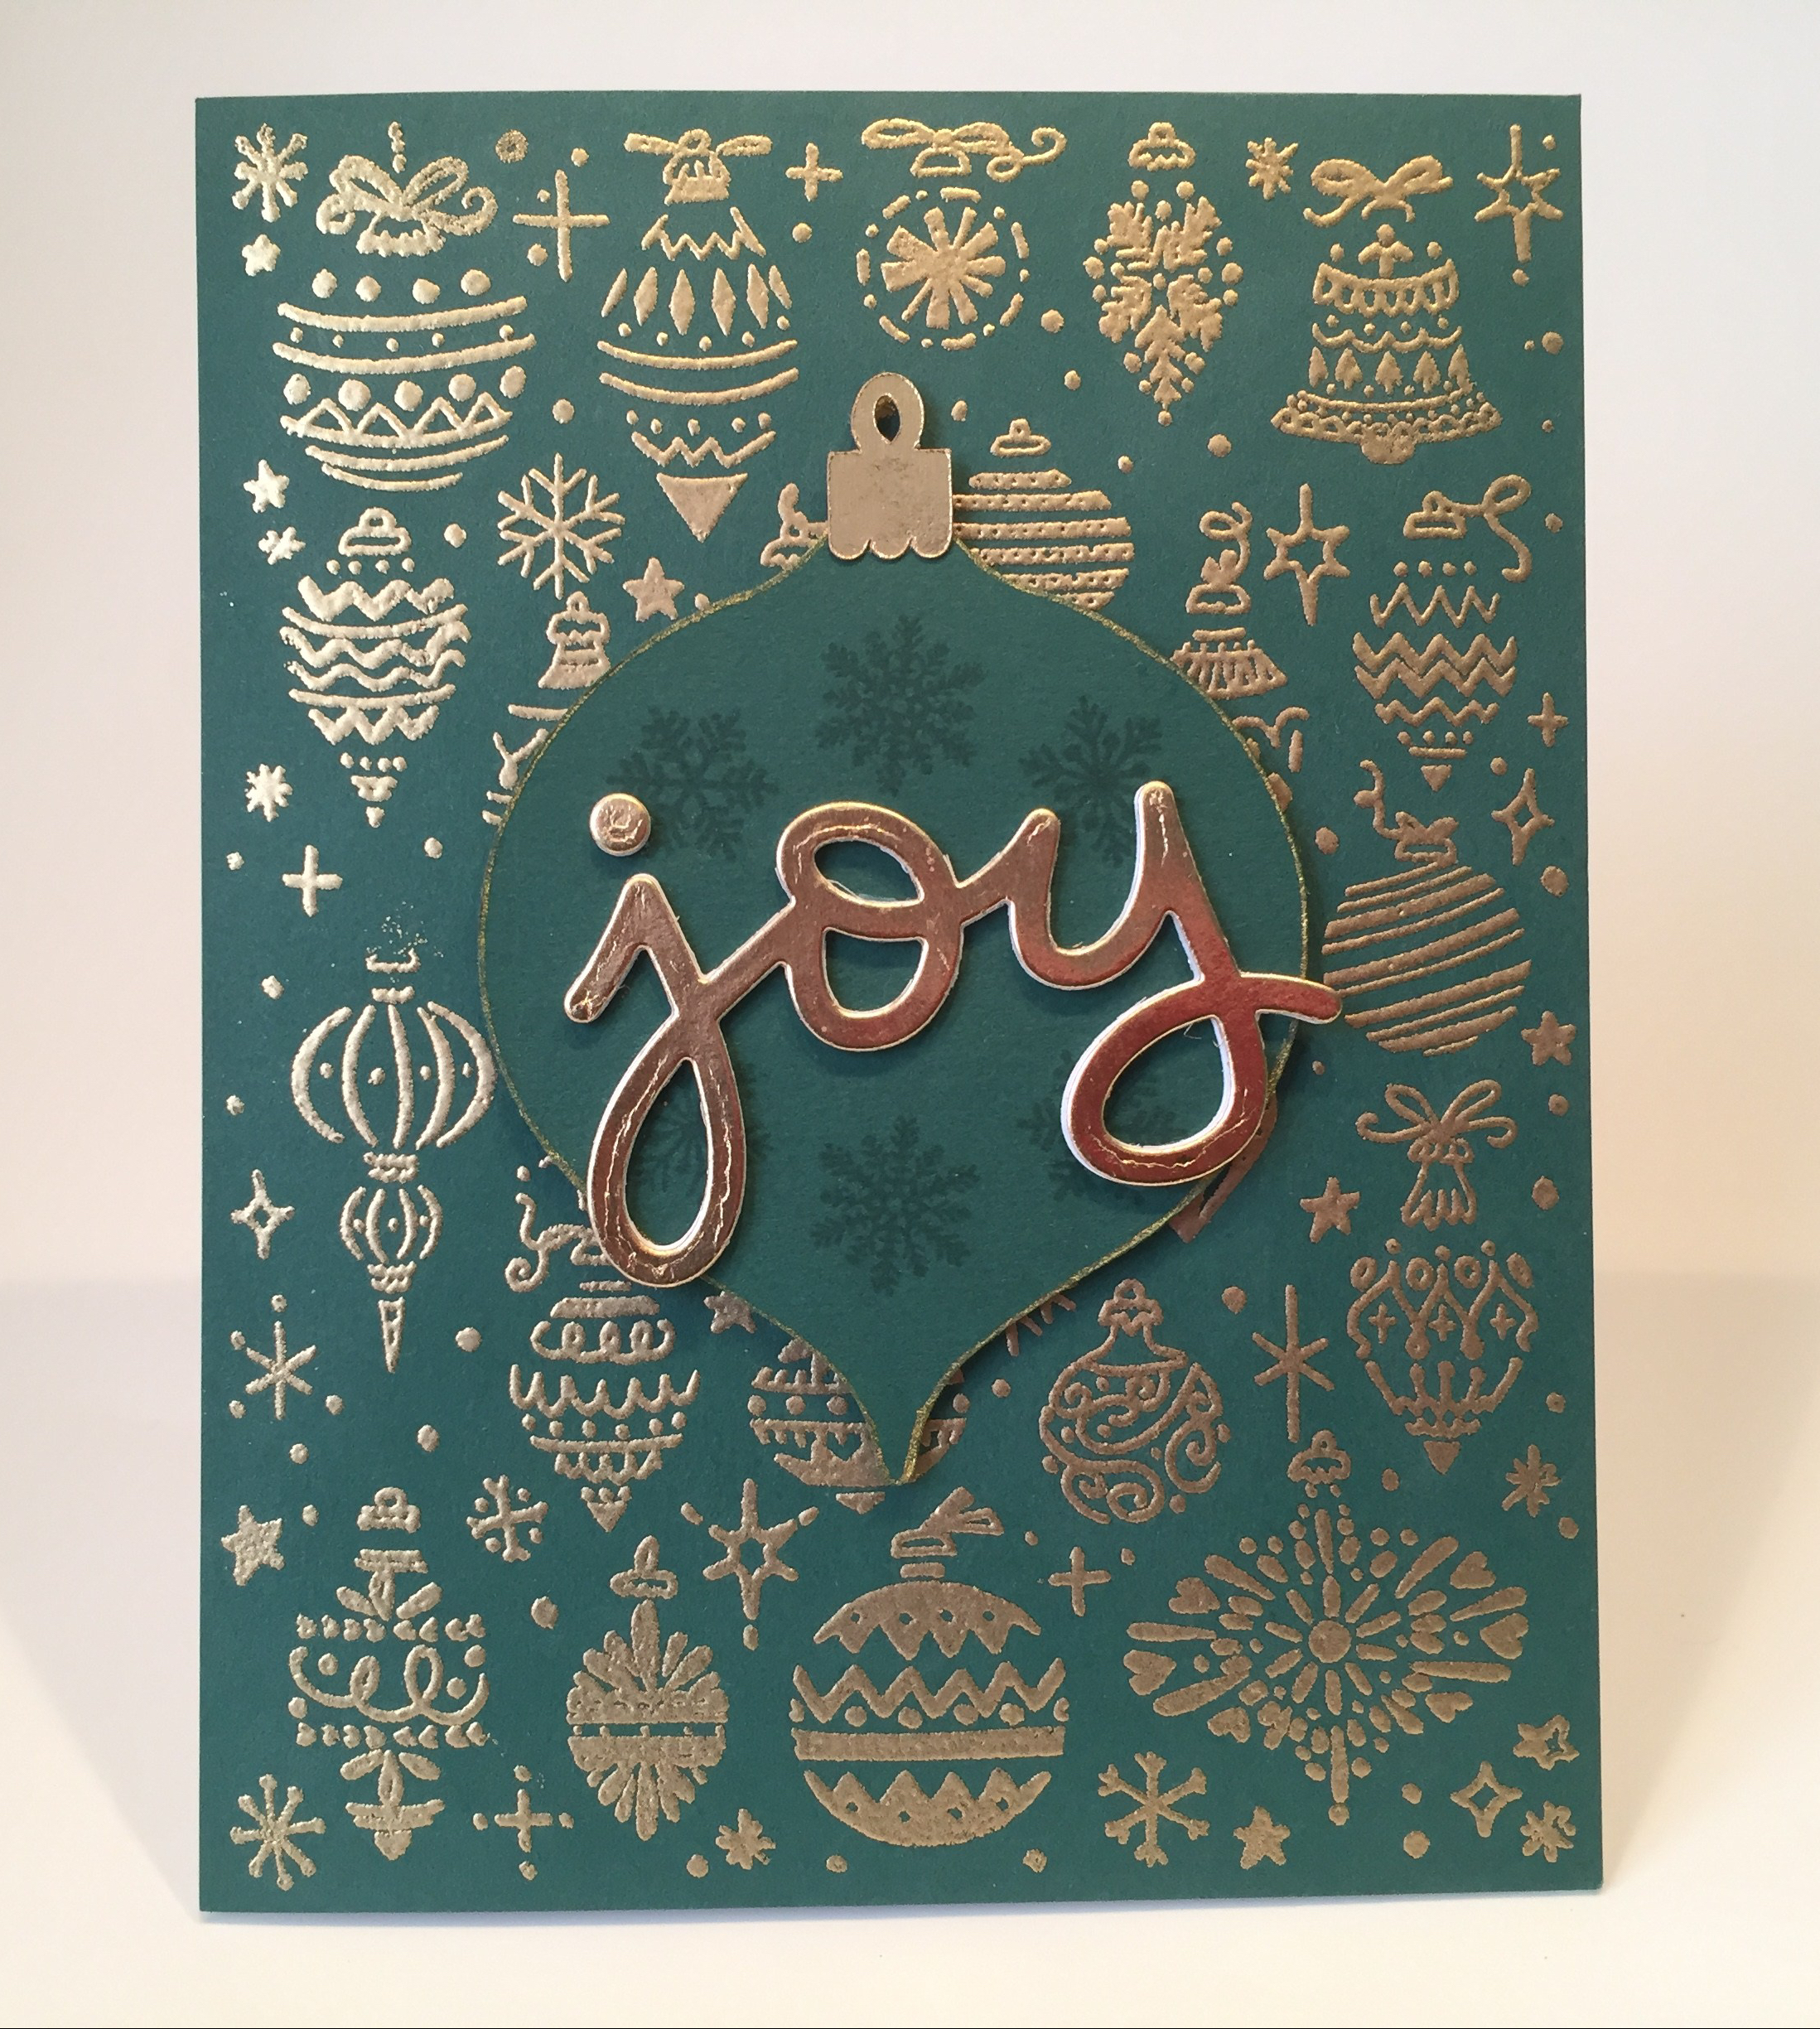
I used the included gold embossing powder on dark green card stock for this background. I wanted to use this Lawn Fawn Scripty Joy die on this card and was contemplating putting it on a circle or square die cut when I realized it should go on an ornament! I turned to my Silhouette Portrait to create this large ornament cut from the same green card stock and topped with a gold mirror card stock hanger. I cut two of the ornament shapes and glued them together for some added stiffness, and die cut the “joy” from more of the gold mirror card stock and three layers of white card and glued them together for a thick sentiment.  I did stamp the snowflake stamps from the kit in VersaMark ink for a little tone on tone pattern before I glued the sentiment on the front. I ran the edges of the ornament on a Delicata Gold ink pad and mounted that to the card front with foam tape. I did finish this card on the inside with this lovely (though small) stamp from the 12/16 My Paper Pumpkin kit. I like the variety of looks you can get using that background stamp with assorted embossing powders on various card colors.
You can also use only a portion of that cling stamp for your backgrounds.
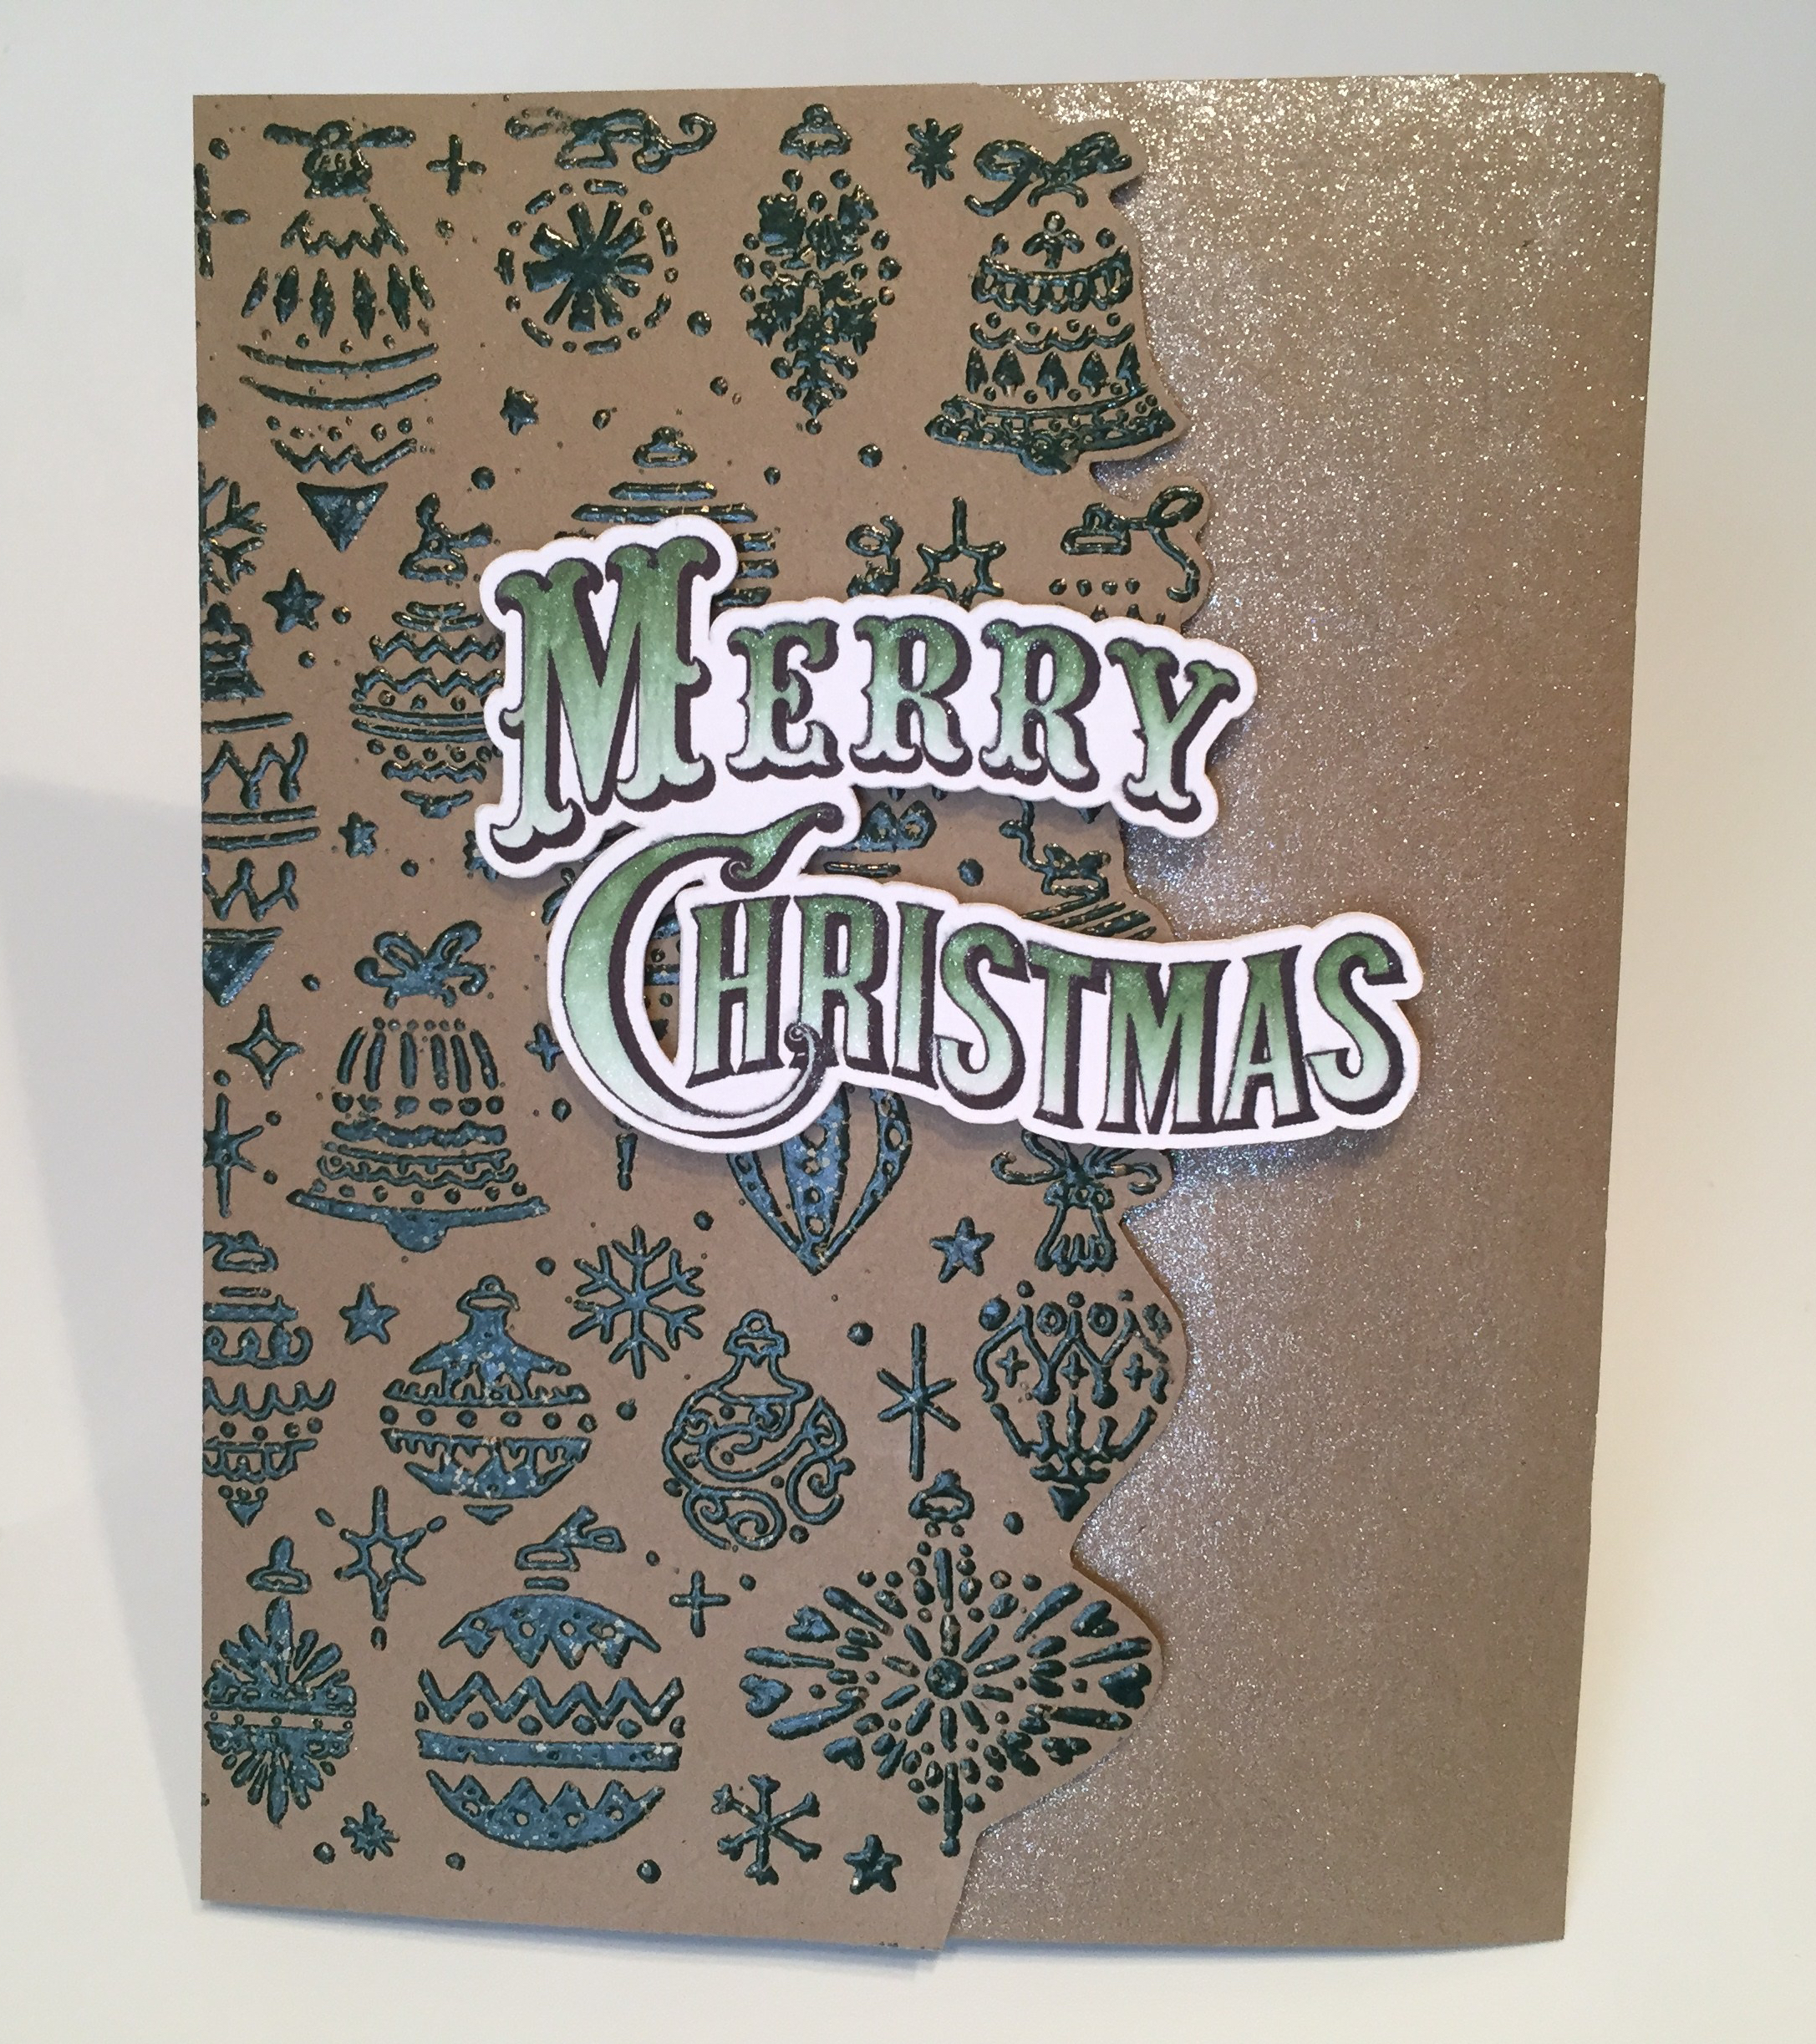
This is the Green-gold embossing powder on some Kraft card stock and I simply fussy- cut the right edge of the stamp and foam taped it to a Kraft card base for an interesting edge. The card base is covered with a Spectrum Noir clear sparkle pen and the sentiment I pulled out of my own image stash and cut three layers of that on my Silhouette Portrait to make a nice thick sentiment. A little sparkle pen on the sentiment and we get a whole different look using that same background stamp! And that Green-gold embossing powder is rather interesting!
You can also think about these stamps and fancy die as giving you 24 different (small) Christmas ornaments that you can use in a variety of ways.
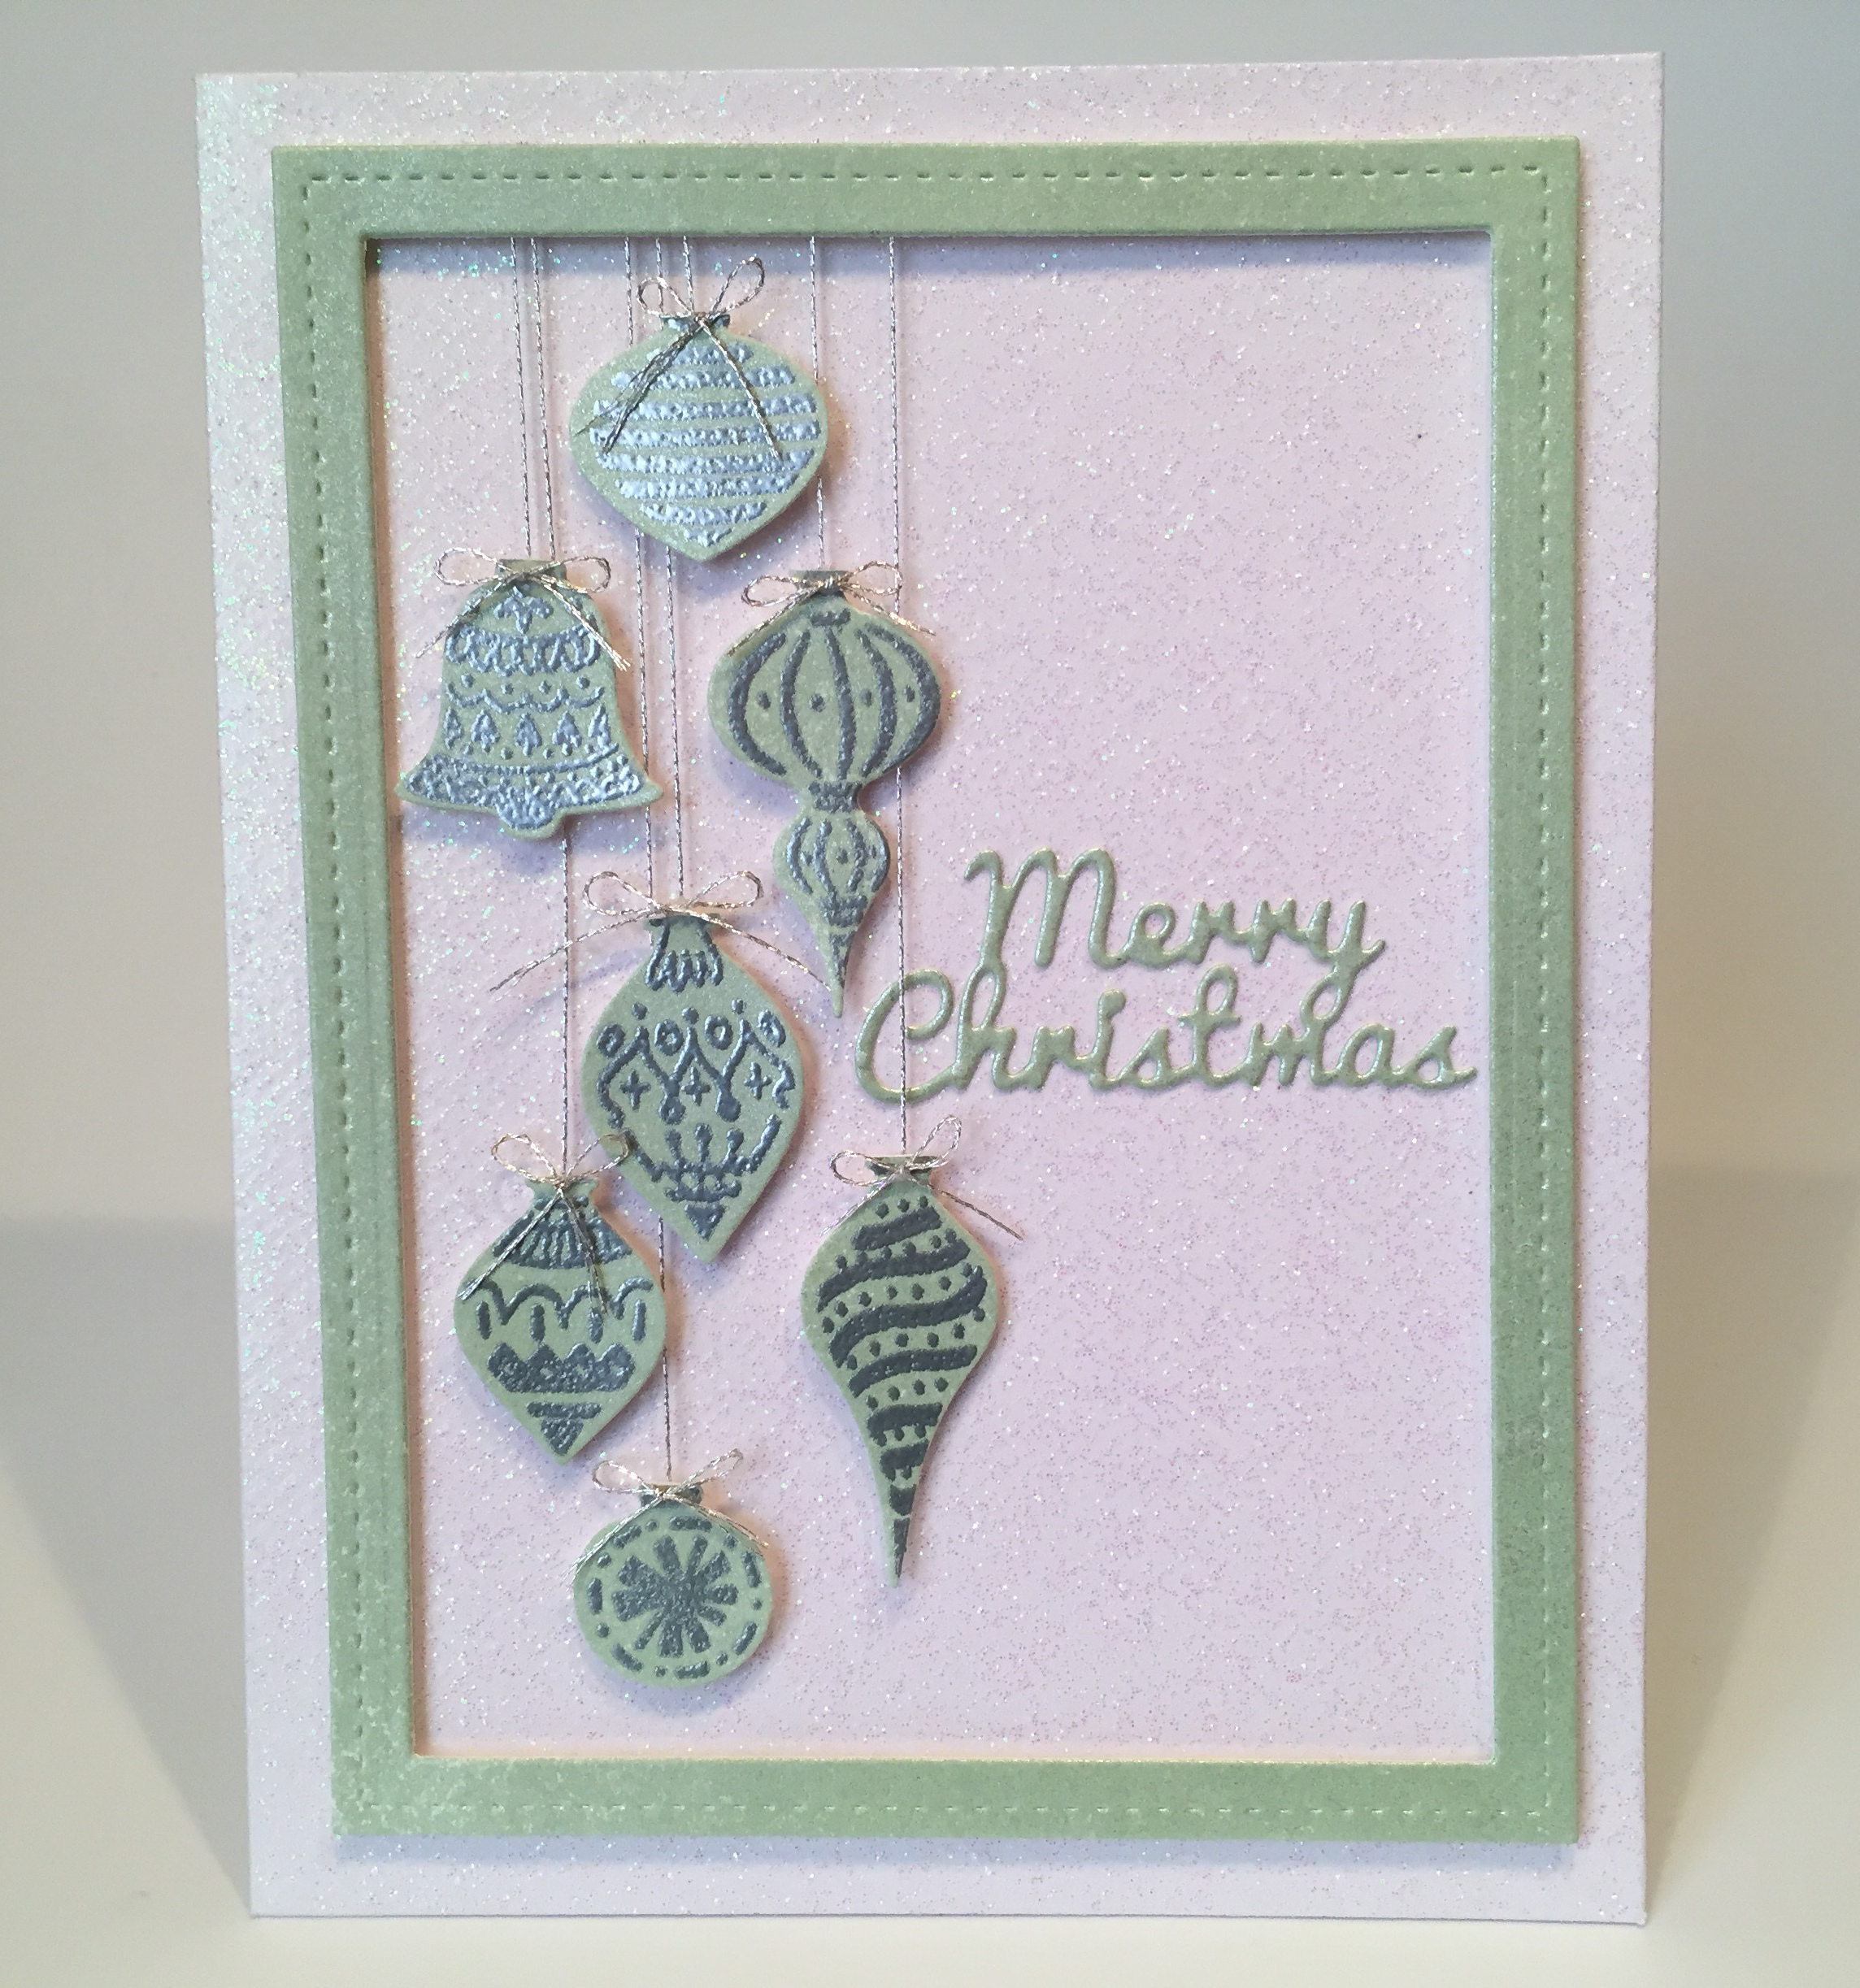
For this card I embossed the background stamp in Silver Dollar on a piece of card stock colored with the Hero Arts Sea Foam Shimmer spray that we received in our MMH June ’18 kit. I used the die cut to cut the whole panel and chose these seven ornaments to use on this card. I simply cut them off of the background at their score lines and attached silver thread to the back of each ornament. I created the frame using two Lawn Fawn Stitched Rectangle dies from another piece of Sea Foam card stock and attached the ornament threads to the back of the frame with some scor-tape. On a white glitter card base (old David Tuterra card base) I foam taped the frame to the card front and mounted all the ornaments with little pieces of foam tape as well – taking care to keep the hanging threads straight. I then added little silver bows to the top of each ornament with some Multi Media Matte glue. I die-cut the Merry Christmas from the same sea foam shimmer card to use as the sentiment. I really like the threads floating above the card base and between the embossing, the shimmer spray, the silver thread and the glitter card base, there is lots of sparkle to this card!
If you follow me on Instagram or FaceBook, I shared this colored background on social media and was eager to use it on a card. This is the cling stamp 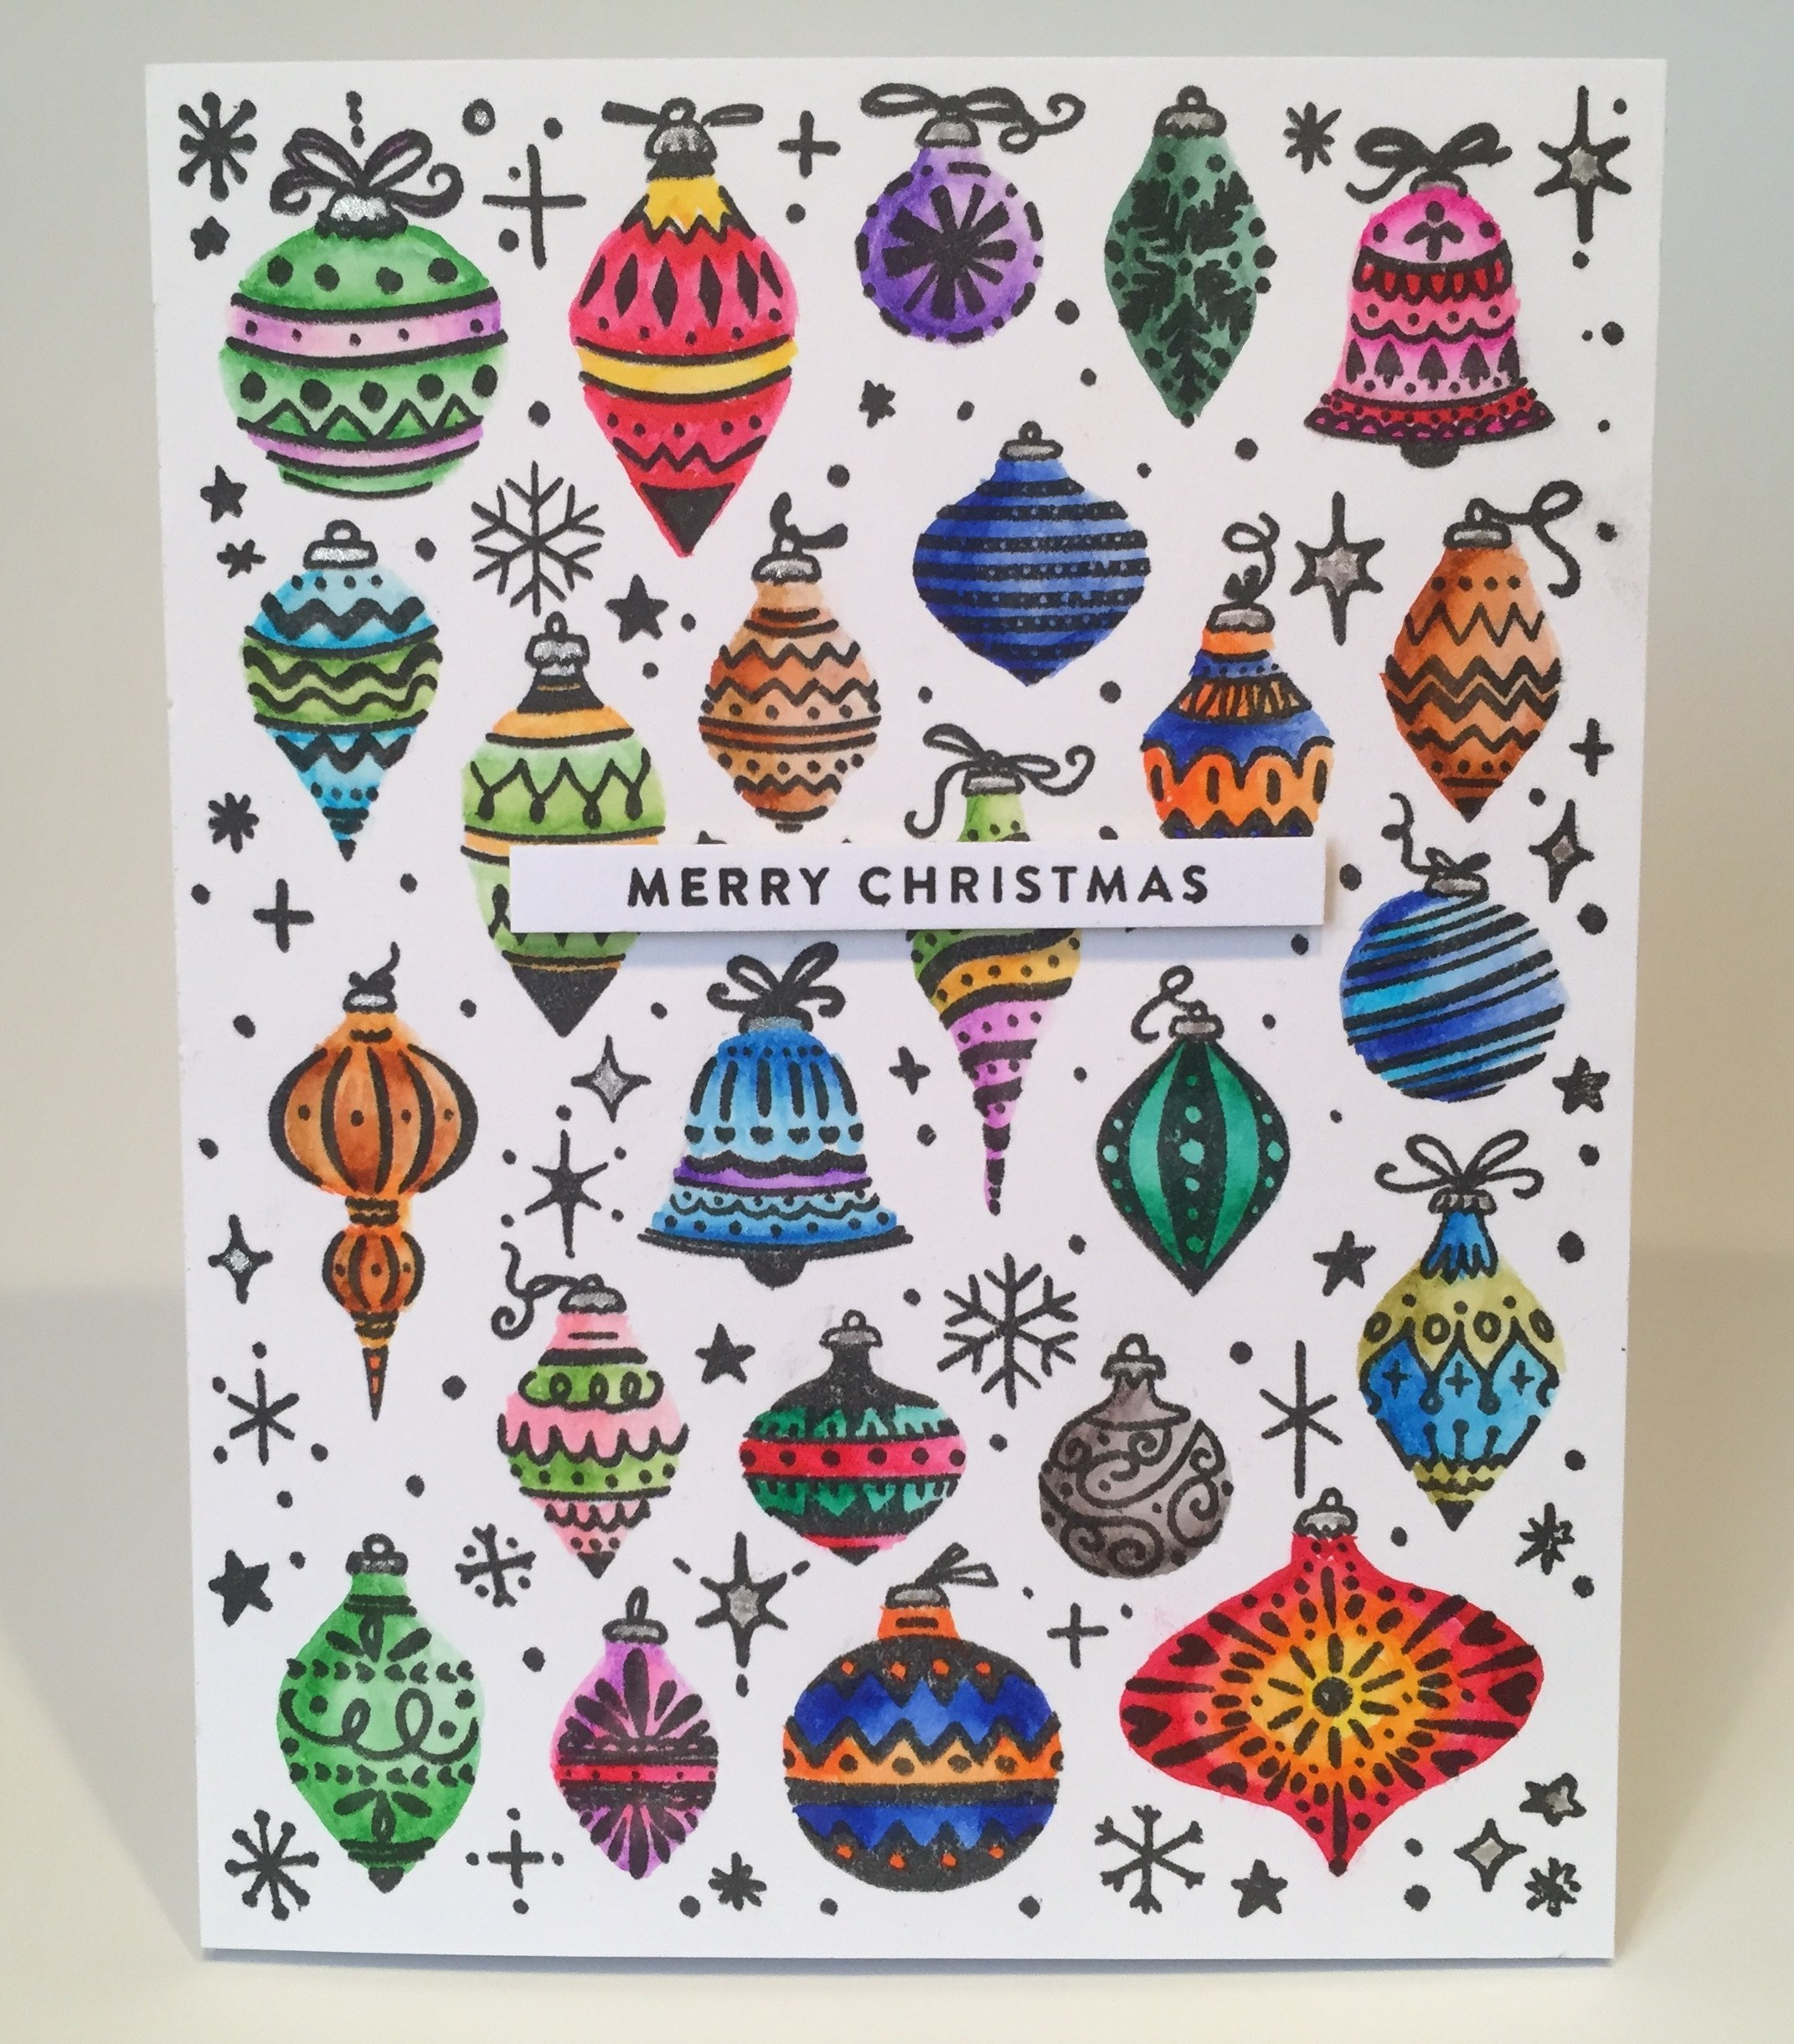
stamped with VersaFine Onyx Black ink on Bristol smooth card stock and colored with my Zigg Clean Color Real Brush Markers. A fun coloring challenge to make 24 ornaments look different, but I really like how this came out. I liked it so much, I simply added this panel to a white card base and embossed the Merry Christmas Sentiment (from the Simon Says Stamp Christmas Squad stamp set) using Onyx Black ink and clear embossing powder. I trimmed that down to a simple rectangle and mounted it to the card front with some foam tape. This background stamp is lovely all by itself and is perfect for holiday cards.
Now I turned my attention to the 4″ x 6″ clear stamp set with all those little icon images.
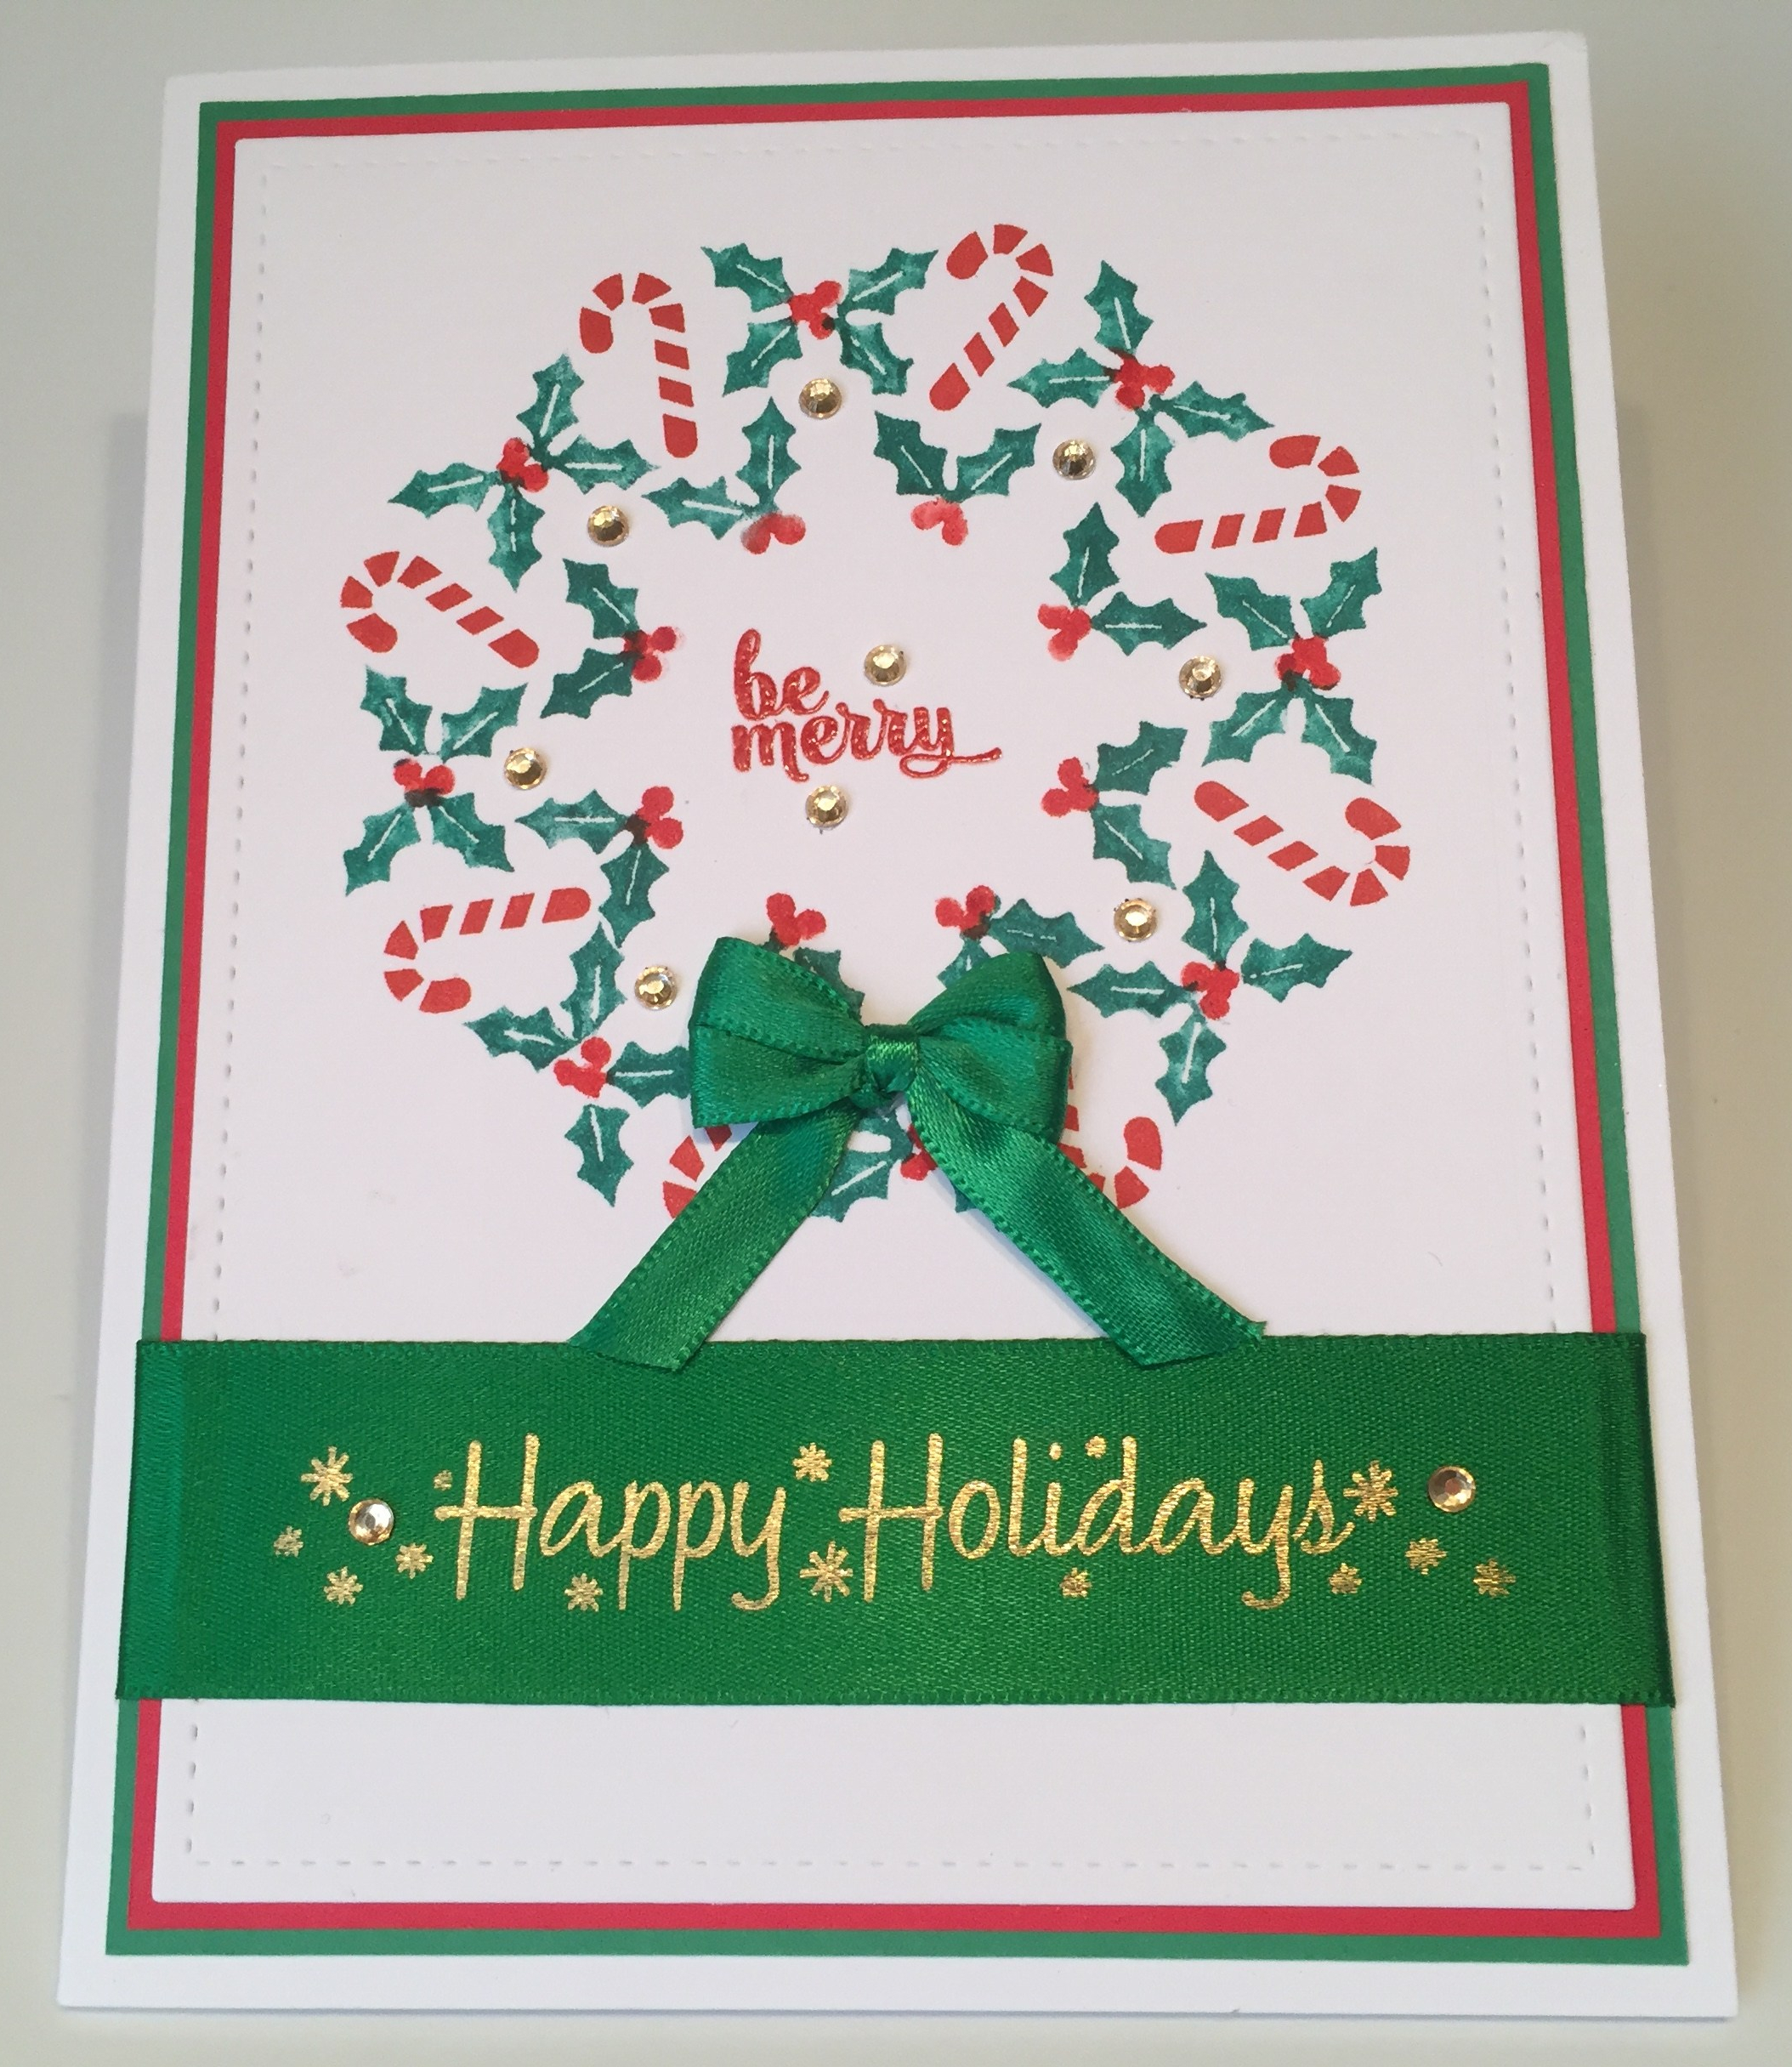
You know I just have to make a wreath! I stamped this wreath using my home-made wreath-builder template on plain white card stock and used my watercolor markers to stamp with. I stamped the “be merry” sentiment from the stamp set using the same markers and embossed that with VersaMark ink and embossed it with some clear embossing powder. I die cut the panel with a LFSRD and attached that to red and green card stock mats. I found this holiday ribbon in my stash and ran it through my Xyron sticker maker to cover the back with adhesive, and glued that to the card front and wrapped the edges around the mats before gluing all down to a plain white card base. I added a double bow using the green ribbon from the kit, and attached some gold gems from my stash for a little extra bling. I like this ‘wreath’ a lot – perfect for Christmas!
There has to be more ways we can use these little icon stamps! This idea was prompted by another sentiment stamp from the “Squad Goals” stamp set.
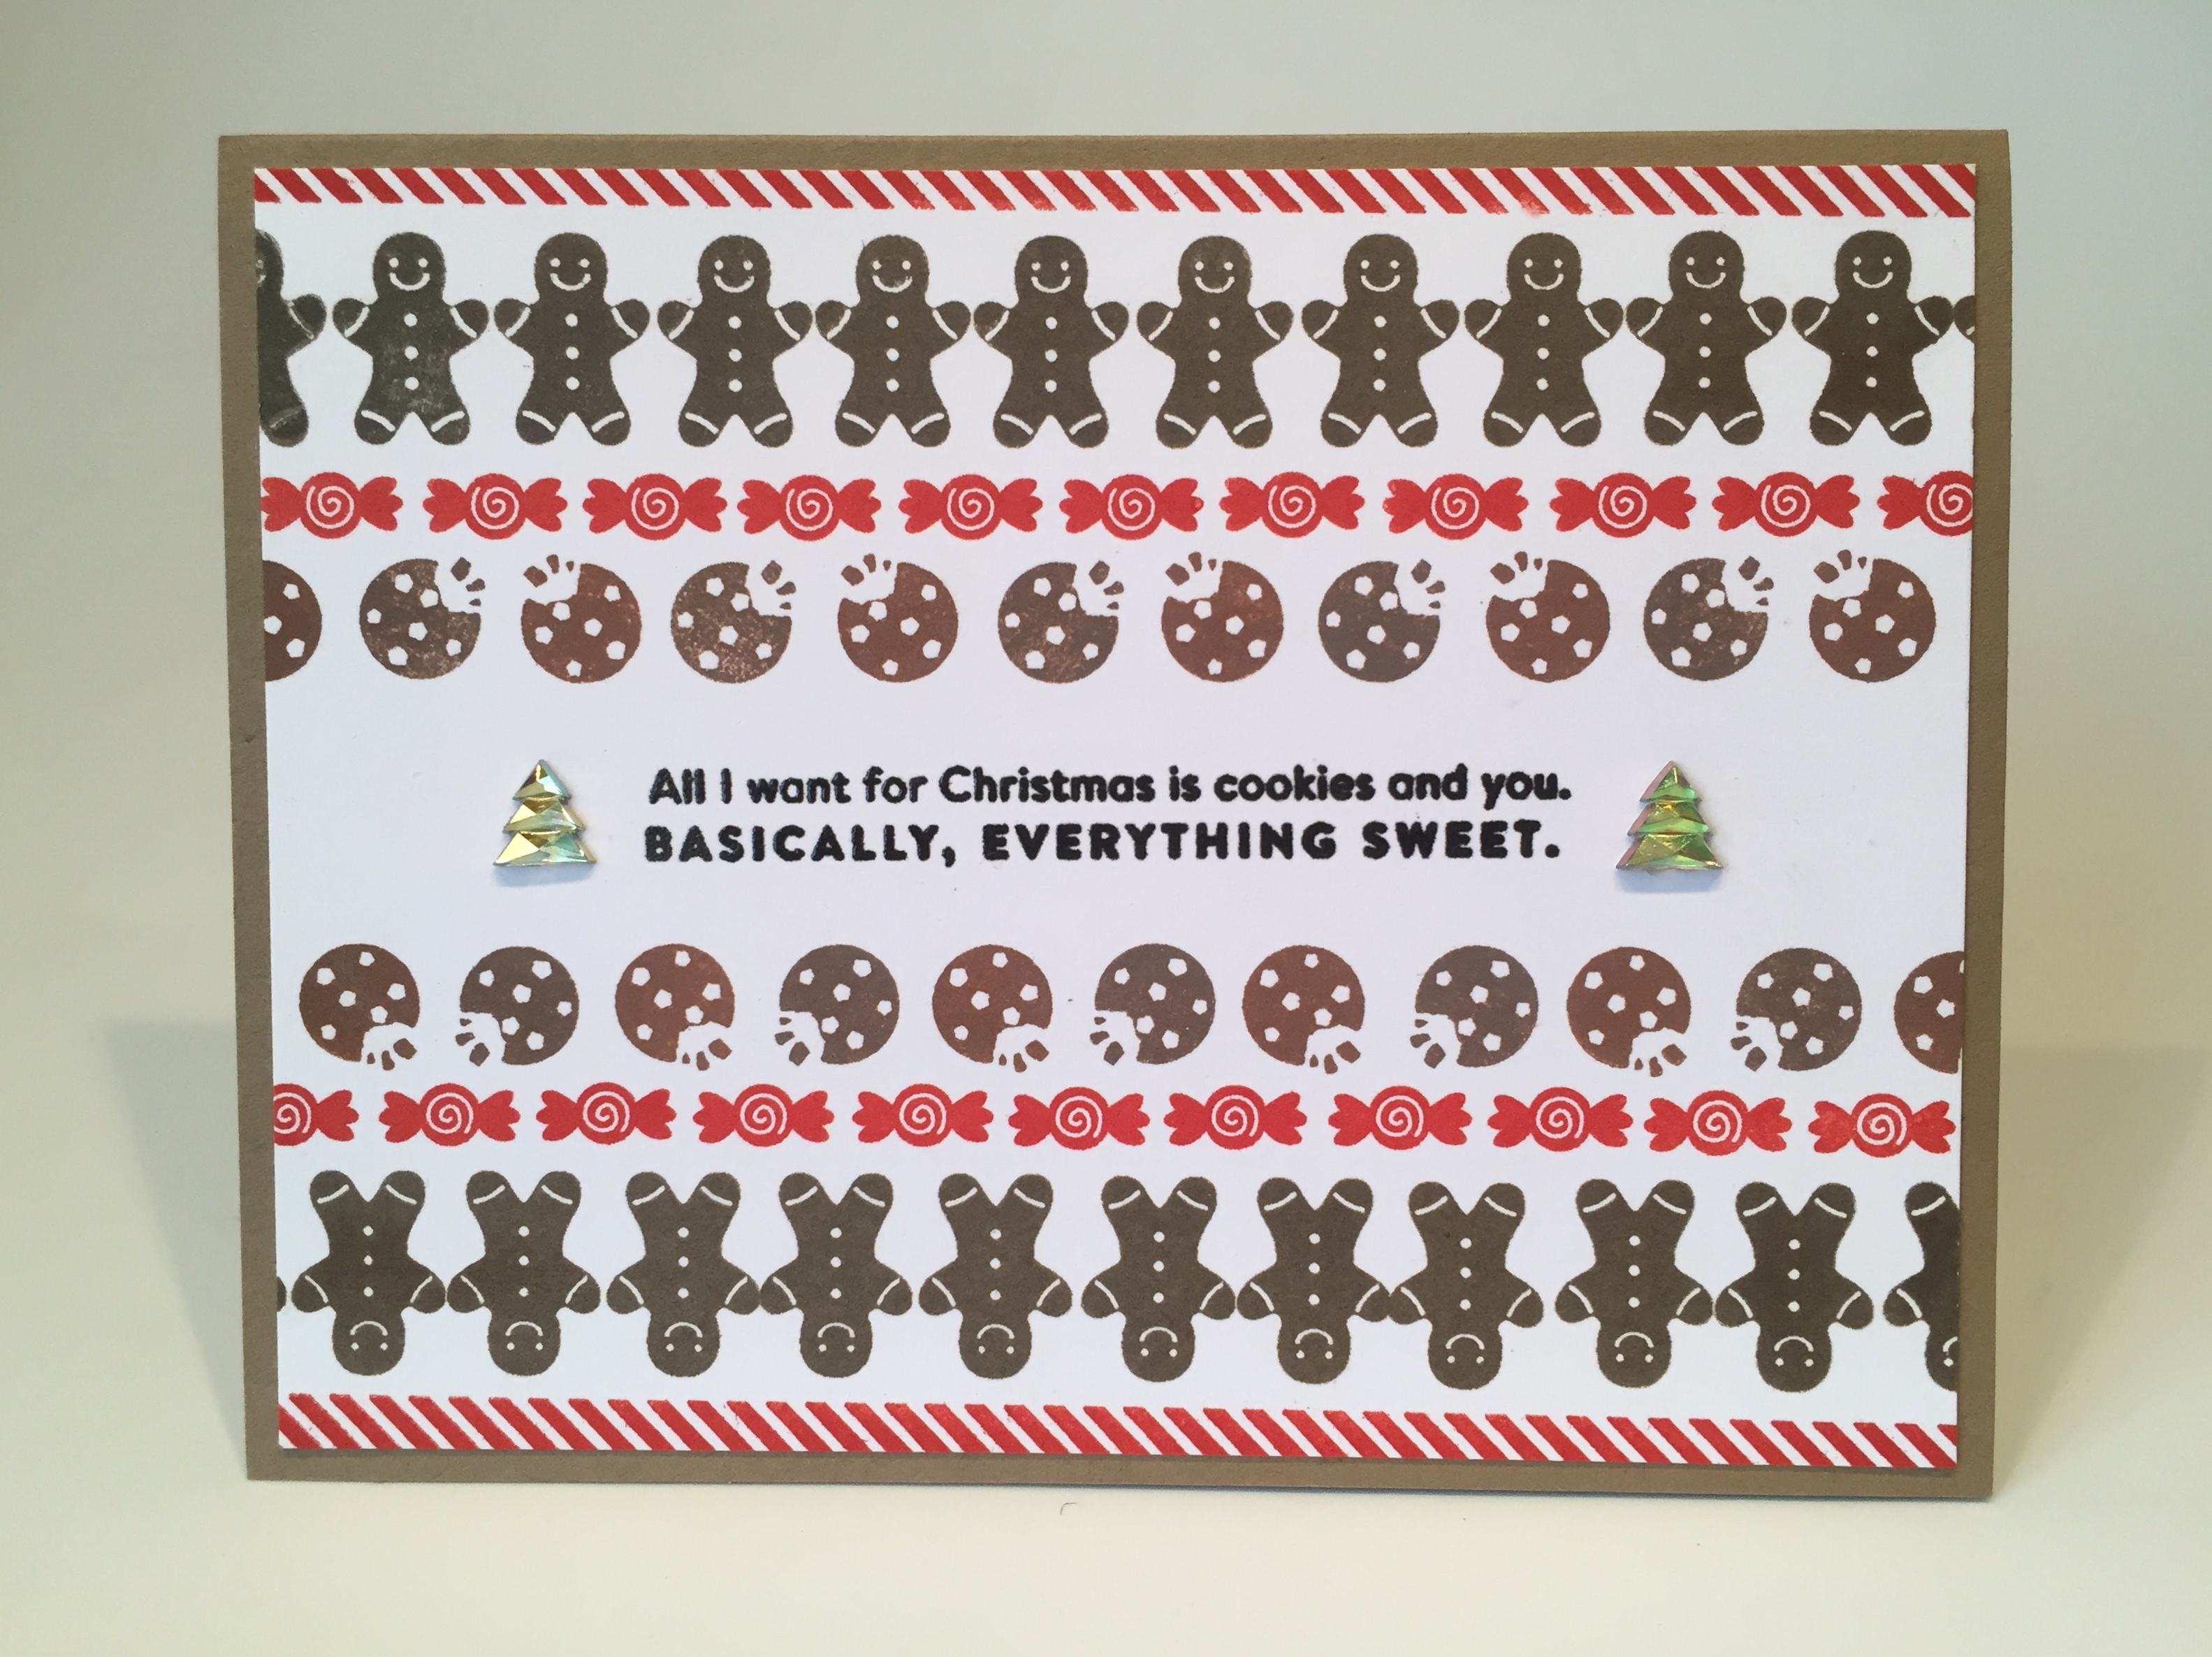
Who could resist all these gingerbread men lined up in a row? The cookie and candy stamps worked perfectly too. I used my Tim Holtz stamp platform to do all of the repetitive stamping using a variety of inks from my stash, and embossed the sentiment in the center using Onyx Black ink and clear embossing powder. I finished out the edges with a striped stamp from the Simon Says Stamp Crafty Friend Stamp set, and trimmed the panel down to mount on a Kraft card base. A couple of tree jewels from my stash help compliment the Christmas theme and add a little touch of sparkle! YUMMM!
I had one more interesting idea on how to use these little icon stamps on their own…
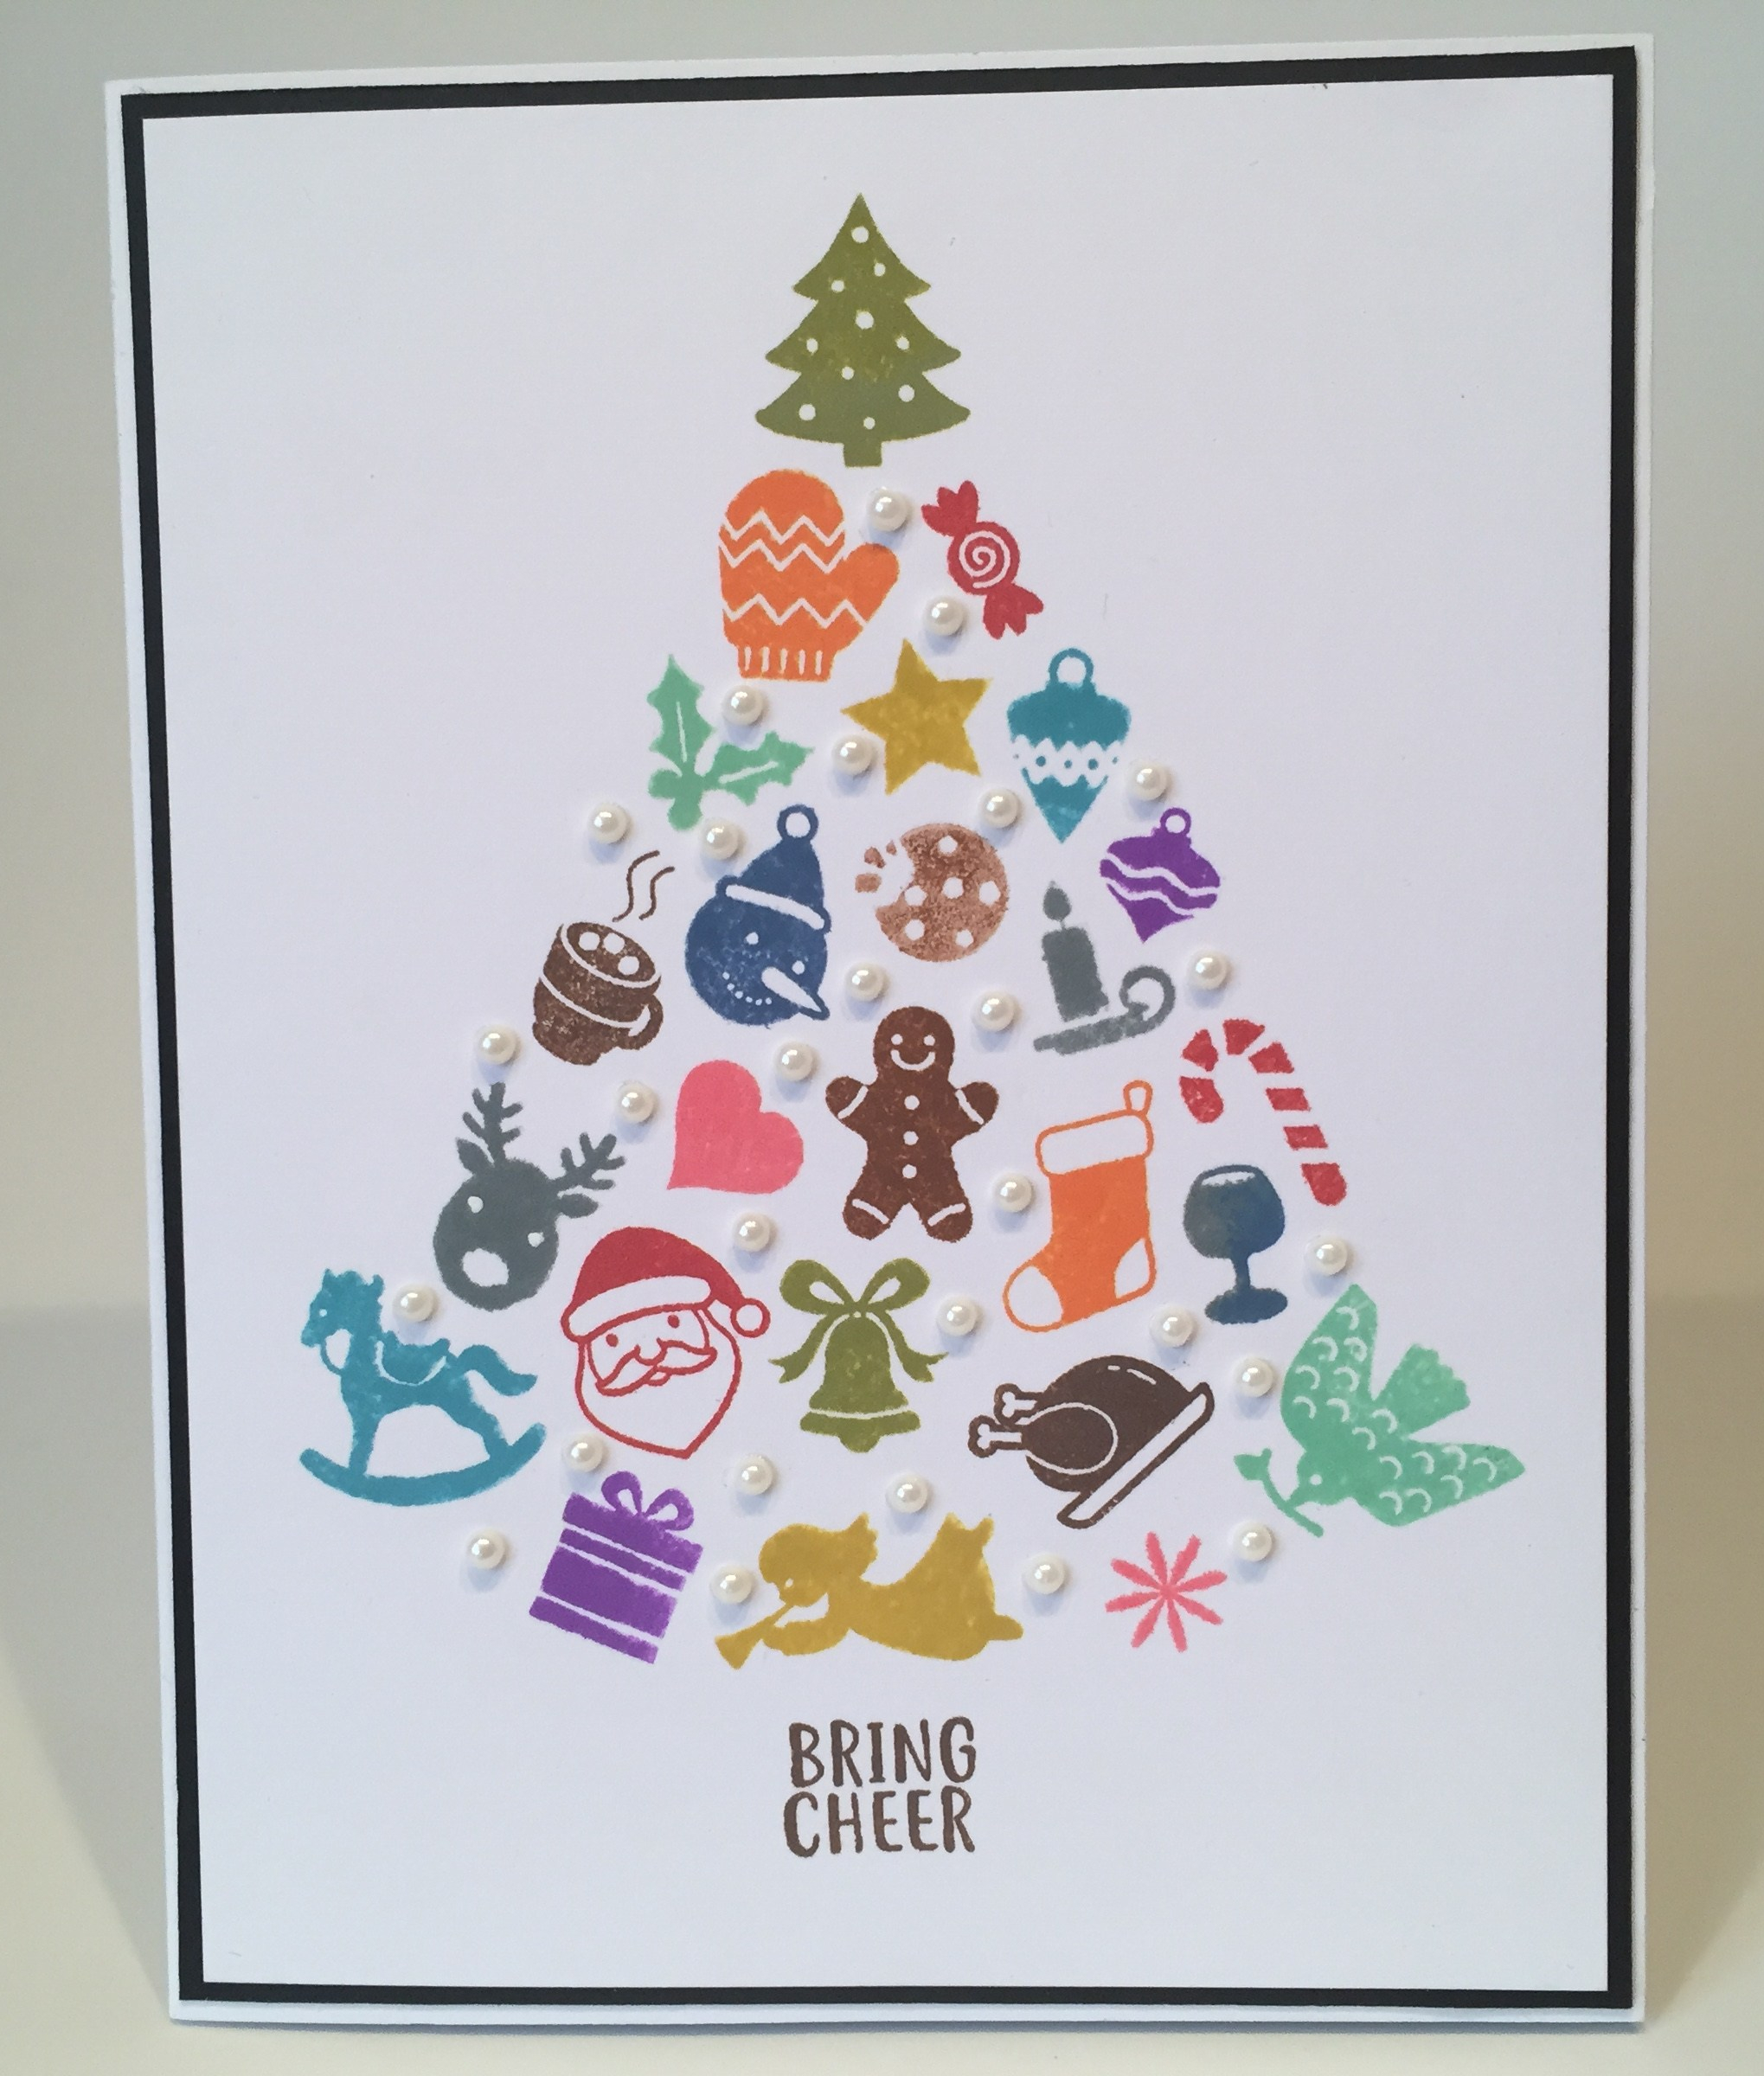
Looks like a Christmas tree to me!!! I used every image stamp from the stamp set on this tree except for the 3 snowflakes and the ‘kiss’ mistletoe. 26 stamps including the “Bring Cheer” stump!! I also limited myself to using only Distress Oxide inks (the first release) for this image and I really like the slightly subtler color palette of this card. Colorful but a big contrast to the Zig marker colored background!  Some small white pearl embellishments from my stash add just the right shine and a little dimension to our tree. A simple thin black mat glued behind the front panel, then to a white card base and we’ve got another interesting way to use this stamp set! I didn’t want the ‘kiss’ stamp to feel left out, so I used it along with the SSS “Merry Christmas” stamp (both still in the Distress Oxide inks) for our sentiment on the inside of the card. I adore this card! Feels like I can forgive the narrow focus of this kit after making this!
I still had one technique that I wanted to try with this background cling stamp and die.

Yup! I wanted to try to foil these ornaments. I recently got some of this rainbow deco foil and I thought it would make these ornaments look like those old mercury glass ornaments. My grandmother had a few of these ornaments and I remember how colorful and shiny they were. It did take me a few tries to get this to work – I thought that the die might work as a stencil, so I tried using some deco-foil transfer gel through the die and foiling the gel but I could never get a solid smooth application of the foil.
Ultimately, I stamped the ornament cling stamp using Hero Arts Unicorn White ink on a piece of black card stock and cut it out with the fancy die. I turned to my deco-foil adhesive toner sheets and foiled a 4.25″ x 5.5″ piece of toner paper, die cut it with the fancy ornament die, cut away all the ornaments along their score lines, and stuck them to the top of the original black die cut ornaments. This Worked Great!!! So Very Pretty!

I wasn’t particularly thrilled with the ‘image behind the window’ concept so I came up with something a little different to go behind the window on our Advent Calendar Card. How about activities with a holiday theme! Like this one… “Make ornaments for the tree” – a perfect activity attuned to the holidays.  I didn’t want to use any numbers on the ornament windows – you can open them in any order you choose – and who wants to cover up any of that lovely rainbow foil! But I did add that pretty Paper Pumpkin “Merry Christmas stamp on the inside of the card.

Here’s the rest of the ‘activities’ that appear behind the windows on this card. I used my Silhouette Software to create this printable file with little suggestions for fun holiday activities that show up behind all of the windows instead of simple images. After all, most Advent Calendars have a reward or a treat behind each ‘door’ and it felt like a simple image wasn’t enough to build up some anticipation for the coming of Christmas! Some of these ‘activity’ suggestions are crafty, some are charitable, and some are just plain fun! Not only is this encouraging participants into more than just ‘getting a present’, but being able to print this as a backing for the ornaments certainly beats having to stamp 24 different images! I think this idea make these stamps and dies much more useful to the average card maker. In fact, If you would like a copy of this Silhouette file for your own use, just go to the contact page and send me an email requesting the file and I’ll send it to you asap!
I did find that stamping the background cling stamp on a larger than A2 card stock to begin with, makes die cutting the image a lot siompler, and, since the die cuts the outline anyway, go ahead and make it easier on yourself!
 Well, I did it! 10 different cards from this kit! I feel quite accomplished and very excited for the holidays after working on these cards. I’m sorry this post is a little delayed… we took a little extra time off over the Thanksgiving holiday to spend with family and friends! I do think this is a pretty good variety of Holiday cards this month – I did manage to use 32 of the 41 stamps (no numbers either) and I honestly believe that the ornament cling stamp and fancy die are worth every penny and should get lots of use over the years!
Thank you so much for sharing your time with me here. I hope I was able to provide you with a little inspiration and some unique ideas on how to use this My Monthly Hero November 2018 kit. Please share this post with anyone you think might be interested, please link me and post me, and pin me and share me with all your friends… don’t run with scissors… and Happy Crafting!

I enjoy your creativity so very much , thanks for sharing your inspiration and art . Happy Holidays too
LikeLike
Thanks Alice!
All my best to you and yours!
Scott
LikeLike
Thank you, Alice!
All my best to you and yours!
Scott
LikeLike
Loved your cards. And wanted to be sure and wish you a Merry Christmas and Happy New Year. Thanks for a year of great cards and designs.
LikeLike
Thank YOU Trudie!
All my best to you and yours!
Scott
LikeLike
you show off the kit perfectly. I was going to ask for the file but I dont have a silhouette so will just say that is so nice that you offer that as well as sharing your ideas.
LikeLike
Thank you, Aileen!
The Silhouette software is free at silhouetteamerica.com/software – so you could print the file without purchasing a machine!
If you’d like to try, go to my contact page and send me a request!
Thanks so much for your encouragement and support!
Scott
LikeLike
Really great job creating different looks for this kit. I couldn’t possibly choose a favorite! Enjoy your holidays!
Joan
LikeLike
Thank you, Joan! Always appreciated! Happy Holidays!
LikeLike