
Hello Folks! Scott here with a different post for you today. If you caught my post (or video) for the Love From Lizi August ’17 card kit you may remember my ‘extra project’ I created with one of my favorite vellum images included in the kit. You can check out that full post by clicking here: 10 Cards 1 Kit Love From Lizi August 2017  Shortly after posting that LFL August Card Kit, fellow crafter Beverly Stotz contacted me and mentioned that she had come across some pattern paper from Bo Bunny (on sale!) that would work perfectly with this gift book. The BoBunny Family Recipes Collection – both their 12″x12″ Recipe Cards and the 6″x6″ Family Recipes Collection:
I was especially taken with the 12×12 recipe card pattern paper – I actually just used 4×6  index cards in the original book and it looks like there are 6 recipe cards on the 12×12 pattern paper, so that would make each card a 4×6 recipe card! PERFECT FIT! I decided then and there to get these papers and upgrade this Recipe Book for some actual Christmas presents this year. I didn’t have any more of the foiled vellum pieces that said “Let’s Cook Something Special Today” nor did I have any more of that lovely strawberry pattern paper that the vellum is mounted to, so I figured I should be able to use the 6X6 pattern papers to help me re-create that image on the cover. Unfortunately, I thought most of the pattern papers were either a little too busy or the patterns a little too large to stand in for the strawberry paper, so I turned to my Silhouette (and the laser jet printer at work!) to create the cover piece. I really liked the red polka-dots that were on the original vellum image, so I found a nice red polka-dot pattern on line and printed that on my Staples Ivory card stock
 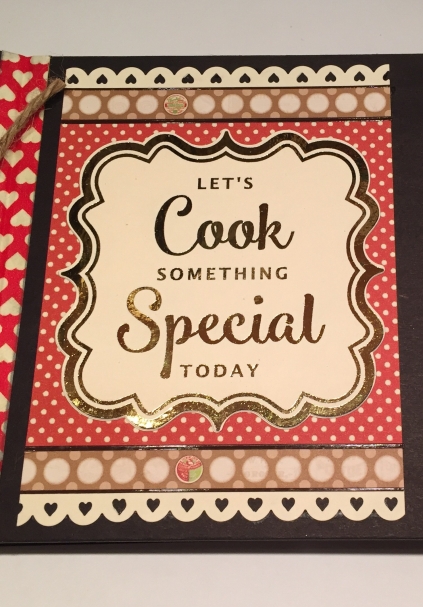 (my tried and true all purpose card stock) and cut it to size on my Silhouette. There was a fun piece of mini ‘milk bottle cap’ pattern paper in the Family Recipe Collection that matched the ivory card stock quite well so I cut strips of that paper to stand in for the strawberry pattern paper on the top and bottom of the red polka-dots. I did use the brown LFL peel off stickers from the August kit for the top and bottom of the strips, and used my American Crafts border punch on the top and bottom edges. Now for the foiled sentiment piece! I went to my Silhouette again and used curly brackets { } to make the shape, and created a sentiment that I felt echoed the original vellum piece. I laser-printed and cut the shape on
 my Silhouette and used deco-foil in gold to foil the sentiment. Ok… so I got a little ahead of myself here…! I hadn’t given much thought to personalizing the covers yet, so when I got around to doing the names, I had downloaded a few new fonts by that time, and fell in love with the Smoothie Shoppe font. That font has ‘and’ ‘the’ and ‘with’ as complete words at a saucy angle and worked perfectly for my “John and Jane’s Favorite Recipes” part of the cover. However, with the foiled ‘Let’s Cook…’ in a different font, I thought things were getting a little disjointed on the cover. Therefore, I redid the “Let’s Cook..” sentiment using the Smoothie Shoppe font – laser printed, cut and foiled – and that pulled everything together for the cover.
  I tried to find book plates that were as large as the one included with the LFL August ’17 Card Kit, but could only find metal ones in a smaller size – actually they worked quite well, and didn’t pull too much focus. I printed the ‘Favorite Recipes’ in Lucida Calligraphy font on my Ivory card stock, and cut them down to fit the book plate – I did do a light touch of ink blending (with Distress Oxide Walnut Stain ink) on the edges of the card stock before gluing them to the metal plate. I didn’t want the brads poking through the cover of my book, so I just spread the prongs open on the back and glued the whole plate to the cover with Ranger Multi Medium Matte.
 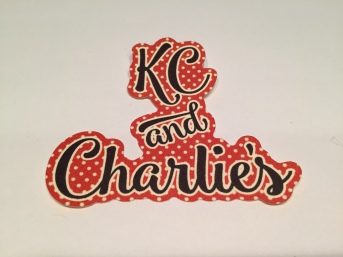 To personalize the covers, I used my Silhouette to create the pairs of names on the same red polka-dot background, and cut 4 pieces of each so I could glue them all together for a chunky, ‘chip-board’ embellishment. Okay… I think that covers all the pieces for the front cover… Let’s work on the actual ‘book’ part and the insides. I based the dimensions of this entire book on using a half-sheet of card stock for the pages – so all the pages are 8.5″ x 5.5″. For the front and back covers, I used black chip-board cut at 8″ wide by 5.75″ tall for the cover, and7/8″ wide by 5.75″ tall for the ‘spine’. I punched 1/8″ holes in the spine pieces for the twine binding, and used one as a pattern for punching holes on both of the spine pieces and all the pages. For the hinge,
  I used Tyvek from UPSP Priority Mail envelopes cut to 5/8″ wide by 6″ long – two pieces for both the front and back ‘hinge’. I did use Antique Linen Distress ink to add a little color to two of them (the front cover and the back ‘hinges’ will be covered with the red heart washi tape) and used my Spectrum Noir Dark Red 7 alcohol marker to color the inside hinges before use. I used 1/4″ scor-tape to attach the Tyvek hinges to the chip-board leaving 1/8″ in the center of each strip for folding. That Tyvek material will fold and fold and fold over and over and over again and never break, come apart or fail. Best material I ever found for making ‘paper’ hinges! Once the spines and covers were attached I added gold eyelets to the holes for some decorative reinforcement, and covered the Tyvek with some washi tape (I did add a touch of glue to the ends of the washi tape to help keep it from pulling off accidentally).
  I attached all the completed pieces to the cover and let them dry while I worked on the inside pages. Since I ended up printing the pattern for the cover, I ended up having a great deal of the 6×6 pattern paper left… what to do?? I figured the back of the pages seemed a little bare, so I decided to make a little “notes” section for the final recipient to jot down any notes they might find relevant. I actually scanned the back of one of the recipe cards into
  the computer so I could match the lines and font for my ‘notes’ section which I printed on my Ivory card stock and cut to 5.25″ wide by 2.125″ tall. Since all of the recipe cards had a little scalloped border around their edges, I decided to make a scalloped background for the ‘notes’ section. I created the scalloped rectangle on my Silhouette and sized it so I could get 2 pieces cut from the 6×6 pattern papers – That’s
 one of the things I love about working with my Silhouette Portrait – if you are careful and line things up accurately, you can cut right to the edges of most papers. Here you can see that I hardly wasted anything from the pattern papers I used and was able to get 2 ‘notes’ background pieces from each sheet of pattern paper. SWEET! As far as the recipe cards, I didn’t think slots in the page to hold them was very classy, so I found some gold photo corners and used those on opposite
 corners to hold the recipe cards. There is more room on the back of the cards for ‘directions’ so you do need to be able to remove the recipe cards, and you don’t really want to take the whole book into the kitchen when you’re cooking, so I thought this was a sensible and decorative solution. I did create a couple of templates to help in positioning both the recipe cards and the ‘notes’ pieces on the pages, so the only thing you really have to pay attention to is matching the ‘note’ papers on the back of one page to the recipe papers on the front of the next page.


Now that the pages are complete and the cover is dry, we can bind our book together. I found that some simple twine was the best option – thick enough to hold tightly, and it contributes to the very rustic, handmade quality of the whole book. The more I thought about it, the more I was intrigued by the notion of giving someone a present that they have to do something with, and then they get to re-gift it! It feels very ‘recyclable’ to me, and, besides, aren’t we getting to the age where we don’t really need Christmas presents anymore? LOL!!! I hope our friends like these as much as I do, and they don’t get irritated at me for putting something else on their ‘to-do’ lists! Who knows, I may end up getting them all returned at Christmas next year !!!! At least I’ll have a bunch of new recipes!!! Thanks for sharing some time with me here today, Your support means the world to me!
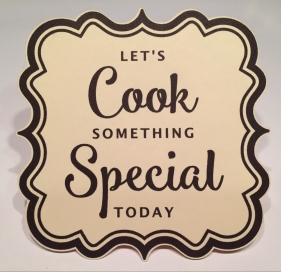 BONUS GIFT: Go to my COMMENTS page and send me a note requesting my “Let’s Cook Something Special Today” medallion for yourself! Simply specify whether you would like the file in a PDF format, or, for all the Silhouette folks out there, you can request a copy of my Silhouette file (You will need to have the Smoothie Shoppe font installed on your computer for the file to register properly). Simple enough to cut out by hand, I thought some of you might like to have this sentiment available in your own stash!
I hope you enjoyed this posting, and that you might be inspired to think about other purposefully re-gift-able presents this year! Spread the Cheer!!!

Hey Scott – I really like your recipe book!! Could you please email me the “Let’s Cook Something Special Today” medallion in PDF format? Also, could you include the measurements for the templates you used to assemble the books? I really would like to make some of these…
LikeLike
I love all your projects & ideas and keep checking to see if you’ve posted anything new. This recipe book is so darling!. I would love a copy of your “Let’s Cook Something Special Today” medallion. I have a Silhouette Portrait, but no laser printer; PDF might be better if I need to take to a copy shop. Thank you!
LikeLike